To avoid these ads, REGISTER NOW!

ZMotorsports Shop Projects 2.0

To avoid these ads, REGISTER NOW!
OP
Z

zmotorsports

ALLIANCE MEMBER
Joined
Oct 20, 2009
Messages
21,477
Location
Northern Utah
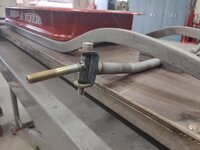
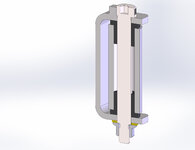
No idea if those are merely mock-up bolts or the intended final bolt, but can I suggest using shoulder bolts instead? They are made for what you're doing here. When making a similar parts system I buy them slightly long and stack AN shim washer(s) around the portion of the shoulder that sticks down below the bracket. I use a flanged self-locking nut and I set the washer stack such that I get the pre-load desired when the nut goes to zero on the end of the shoulder. I also machine or grind a flat on the head of the shoulder bolt and weld a key to the structure so that the bolt can not rotate. Maybe overkill for the application, but it's worth doing well.
Is that clear as mud, or should I make a drawing?

Yes, these are mockup bolts that I had on hand. I have shoulder bolts as well as few other supplies in my cart on McMaster Carr's website as I'm sure I'll need to add a few items before final assembly. I hate to buy onesie-twosie at a time from McMaster Carr and have to pay freight on each order individually, so I add things as needed and have a running cart up until I need them.

While I agree with your approach for the other it is way overkill for this application, actually most of what I'm doing at this point is way overkill, the bolt rotating will play no significance here. Actually, a simple bolt is all that is needed, no need for angled C's or bushings as it won't see much in terms of high speed MPH. :ROFLMAO:
 

ntsqd

Well-known member
Joined
Jan 22, 2005
Messages
997
Location
Lower left coast
oh what the heck, I made a drawing anyway. No such thing as too much overkill. There is, however, doing work for no real gain. Sometimes this is known as beating your head against the wall. I have a flat forehead.... :)

Steering Joint.JPG

I agree, McMaster shipping can be a killer and is best served on the largest order that you can wait to accumulate.
 

SilverJimmy

Well-known member
Joined
Apr 14, 2012
Messages
1,690
Location
Prescott/Flagstaff, AZ
I’m still waiting for how he’s going to engineer the nitro burning auxiliary power supply onto Mini-Z’s wild ride! Full EV, no way in this shop, semi hybrid, maybe, old fashioned gears, guts, and power to the road, definitely!
 

Scuderia-F1

Well-known member
Joined
Feb 9, 2011
Messages
1,198
Location
Stockholm, Sweden
It's a mental battle Anders. I used to flip cars many, many moons ago but then when I kept getting asked to work on stuff for other people it just made more sense to do that than outlay money that I really didn't have and tie it up for weeks or even months at a time until it sold.

However, now that I have closed my business down and seem to have more obligations than ever, I have hit and miss time in which to get side work into the shop. Then when I do, I try to get things done as quickly as possible for the owners which sometimes means juggling work on my own stuff around theirs. My thinking is that after seeing so many vehicles for sale that are less than in mint condition that if I were to pick one up here or there then I could work on them on my own time rather than being at someone else's beckon call.

Not sure if that's how it will work or not but that's the direction my mind is going. I will still work on stuff for my more loyal clientele but should keep me from getting overwhelmed with side work yet still keep my mind and hands busy.

Then there's the worry about if one of ours breaks down which is kind of what has been driving this more than anything, my son's desire to get a project car is just the push I needed to make a decision and act upon it. :unsure:
I totally understand how you are thinking, and I’d say that if follow through with it you will probably regret that you didn’t do it sooner. 👍🏼😃
 
OP
Z

zmotorsports

ALLIANCE MEMBER
Joined
Oct 20, 2009
Messages
21,477
Location
Northern Utah
As a general rule of thumb every other day the front sprinkler system is on its last zone, and it is either just finishing up or has just finished running when I'm leaving for work. The opposite days the same scenario with my back yard system which ends with the last two zones on the small side yard lawn.

However, when I left for work last Thursday morning I noted that neither my sidewalk nor gutter on zone #5 front was wet from overspray from my sprinkler system. I thought that was odd, so I made a mental note to check the timer when I arrived home from work to see if it there was an issue with my timer or a valve assembly. Upon arriving home from work I checked the timer and it seemed fine. I mowed the lawn and noted the lawn seemed a bit drier than normal as well so after completing the lawn mowing I ran through the zones quickly to ensure my valves were working properly. Everything seemed to be functioning properly.

Saturday morning while sitting on my deck enjoying my morning coffee before heading out to the shop, I noticed that the back yard seemed to have a couple of dry spots beginning to show with the grass discoloring and I usually will have a few remaining little puddles on my stepping stones and driveway near the side yard but at that time they were dry. Again, I thought this is odd and why is my sprinkler system acting so peculiar, so I pulled up my account online to see if the meter was showing water usage and if so, how much. I immediately noted an issue that over the past several days my water usage was very, very low compared to normal days of watering.

I thought I'd check the city's Facebook page and see if anyone posted anything pertaining to the city's secondary water system and sure enough, when I scrolled back to as far as about Wednesday I saw where someone had asked if anything was going on with the secondary water system and the response was that a line had been hit during digging just above us and they were working to repair it, it should be back on within the day.

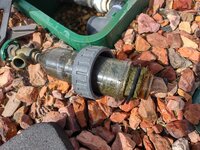
My immediate thought was that they repaired it, but not after introducing a bunch of **** into the system. Before commencing work in the shop I headed out front to inspect the secondary sprinkler system's filter and it was plugged almost solid. I generally clean my filter twice a season on most seasons. Once at the very end of the season when I am blowing it out so it is nice and clean for spring when I turn the water on and once about mid-season, which I just did the week before we left for our annual Colorado trip. It wasn't too terribly bad a couple of weeks ago but I cleaned it anyways and reinstalled it to ensure full watering ability while we were away for the week and so as to not give my son any issues while we were away.

When I removed the filter on Saturday morning, this is what I found.
secondaryfilter.jpg

It was plugged almost solid with grass, pebbles and even worms. I generally will get some small crustation type organisms in it and a bit of fine sediment, but nothing like this. I commenced cleaning it which took a bit more effort because it was so packed in there it required me to actually get a small brush and clean it whereas usually I just shake it in the garbage can, rinse it off and reinstall it.

Prior to reinstalling the filter I turned the valve back on to run some water out and blow out any foreign material before the filter went back in place. It seemed fine so I reinstalled the filter and turned everything back on. I then noticed a steady drip from one of the fittings. I removed the filter again and turned the filter head to tighten the fitting. While slowing the leak down, it didn't stop the leak so I removed the filter and for a moment I thought I'd have to dig up the entire head assembly and box that was sunken in the ground.

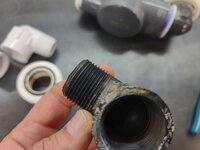
Fortunately, I was able to remove the union and fittings back to the filter head one by one and brought them to the shop to clean off and inspect. Sure enough I found one fitting with a crack deep down in the threads.
secondaryfilter1.jpg


I closed up the shop and ran to the local plumbing supply to obtain another.

After a couple hours of ******* around with the sprinkler system I finally had a clean and leak free filter head again. :rolleyes:

After returning from breakfast yesterday morning I told the wife I was going to run out and make sure there was nothing leaking. When I opened the filter box I saw nothing leaking however, the filter was nearly half plugged again. Holy ****, this was less than 24-hours later and already half plugged. 🤬

I guess I'll check it again this afternoon and each day until I see the debris subside from the repair. What a PITA.
 

OutlawDrifter

Well-known member
Joined
Jan 20, 2015
Messages
3,903
Location
KS
Always lovely when they can create more issues for ya!

Our rural water district occasionally switches pumps, and when they do we get a rash of **** down the pipes and it turns the water a pale yellow. Rather than flushing the system immediately when the do this, they wait until those of us on the end of the line call to complain...it's very frustrating.
 
OP
Z

zmotorsports

ALLIANCE MEMBER
Joined
Oct 20, 2009
Messages
21,477
Location
Northern Utah
Always lovely when they can create more issues for ya!

Our rural water district occasionally switches pumps, and when they do we get a rash of **** down the pipes and it turns the water a pale yellow. Rather than flushing the system immediately when the do this, they wait until those of us on the end of the line call to complain...it's very frustrating.

I really can't complain too much Marc. At our last home we were there for 26 years and in all those years I never had an issue with the secondary water system plugging up any part of my property's system.

In the past 6+ years now of being in this home, this is only the first issue I have had with the city's side of the secondary system and I have to admit, they had it back up and running rather quickly based on the timeline that I read online.

It is frustrating that the system got so much trash in it but at least I have a filter to catch it and it should correct itself or clean out soon enough, if it hasn't already. I don't know if there's anything they can do at this point even if I called and complained so it's a moot point from here on. I am glad I caught mine as early as I did which is probably just because I keep a close eye on my sprinklers. When going to breakfast yesterday and leaving this morning I noted a few neighbor's systems were barely ******* any water out of them so many must not have noticed the issue yet.

I thought about posting my findings on the city's Facebook page on Saturday when I discovered it, but the last time I tried to help out by posting information I was criticized by the keyboard warriors so this time I simply said "**** 'em". They can figure it out for themselves.
 
OP
Z

zmotorsports

ALLIANCE MEMBER
Joined
Oct 20, 2009
Messages
21,477
Location
Northern Utah
I've gotten more miles out of that phrase the older I get.

Ya know Marc, I really hate to be that way but lately I've gotten less and less tolerable of people in general and have been saying that more myself.


Seems like the ones who think they know everything are the first to spout off and tell me what I'm doing wrong, yet most haven't done anything to speak of themselves. I try to show my work and help others do various jobs and then get criticized for it. Just keyboard warriors with nothing better to do.
 
OP
Z

zmotorsports

ALLIANCE MEMBER
Joined
Oct 20, 2009
Messages
21,477
Location
Northern Utah
And these are the same people that would never dare utter a word if they were standing right in front of you. SOB's........ :dunno:

:beer:

Agreed.

What kills me is those of us who put our work out there to help others are criticized so much yet those doing the criticizing generally don't have any work to post or won't post their work.
 

clutchee

Well-known member
Joined
Feb 19, 2007
Messages
333
Location
TX- Near the Telephone
Agreed.

What kills me is those of us who put our work out there to help others are criticized so much yet those doing the criticizing generally don't have any work to post or won't post their work.
My wife ask me all time, things I help people with or work on why I don’t share more…..
exactly why.

Thank you though for all sharing….
 

ntsqd

Well-known member
Joined
Jan 22, 2005
Messages
997
Location
Lower left coast
As seen on a t-shirt "I used to think that I was getting more tolerant, but then I realized that I just don't give a sh__" That's me.

Gave up on Expi Portal when an "Internet Engineer" told me my Engineering Assessment of a system was wrong. When I asked what experience or education he was basing his post on I got jumped on by several others. That had become a pattern and it wasn't worth it. I know that my being in the Spectrum makes it sometimes odd for people in dealing with me, but I do try to control that and had posted what I thought was a legitimate concern on the topic. I don't need people with less experience and/or education in the topic bashing me for a legitimate concern. Bring up a valid point, but don't bash. When it fails, and the thing in question was going to fail - likely in a spectacular fashion, I guess they'll be smart enough to figure out how to make it better without me. Or they won't. Either way I won't be there.

As to sharing, I've two build threads going + one semi-dormant and a pure tech thread on a RDB conversion, but nothing going on really worth sharing here.
 
Last edited:
OP
Z

zmotorsports

ALLIANCE MEMBER
Joined
Oct 20, 2009
Messages
21,477
Location
Northern Utah
@zmotorsports - what is a secondary water system? Gray water not for potable uses?
Here in northern Utah we water our lawns and crops with what is considered "secondary water". This water is directly from our local reservoir(s) that comes in the form of winter snowpack then spring runoff and does not go through the local water treatment plants. These local reservoirs then feed several smaller secondary retaining "ponds" along the Wasatch front here in which the various cities and municipalities will pull directly from.

From these retention ponds it feeds down to smaller piping run throughout the city's infrastructure to each property where it is then metered. Our secondary water fee is paid along with our annual property taxes and based on the size of permeable square footage each residence has, for example my allocation dropped significantly once the shop and concrete was completed due to it being "impermeable landscaping". We are given an allotment based on that square footage and then metered to ensure we don't use more than allocated each year. If so, then fines are attached and/or secondary water shutoff at the residence.
 
OP
Z

zmotorsports

ALLIANCE MEMBER
Joined
Oct 20, 2009
Messages
21,477
Location
Northern Utah
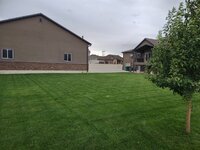
Last night after arriving home I thought I'd hurry and get the lawn mowed before the rain storm rolled in that we were expecting. The wind was terrible and I got a few raindrops during the mowing but I knew I couldn't let it go another couple of days or it would require a swather to cut.

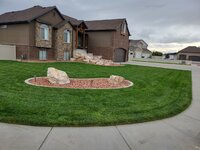
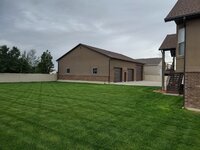
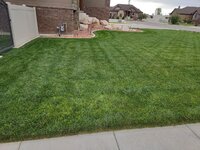
I can honestly say that I am quite pleased this year with how our yard looks. It's taken me six years now to finally get where I feel our last yard was when we moved. The lawn appears to be somewhat healthy and I don't have any dead spots or trouble areas as I have been able to address them one by one over the past several years.

I thought I would snap a few pictures that are from different angles than what I normally post of the yard.

Don't beat me up too bad, I didn't trim and edge and only ran the mowers around the yard due to the looming storm clouds. I generally give the yard the full treatment of trimming and edging later in the week so it looks exceptionally nice for the weekends then on Monday afternoons just run around the yard with the mowers.
yard1.jpg

yard2.jpg

yard3.jpg

yard4.jpg

yard5.jpg

yard6.jpg

yard7.jpg

yard8.jpg
 
To avoid these ads, REGISTER NOW!
OP
Z

zmotorsports

ALLIANCE MEMBER
Joined
Oct 20, 2009
Messages
21,477
Location
Northern Utah
Made a bit of progress on the Radio Flyer project over the past few nights in between a boatload of other things going on.

Front axle C's orientated on the axle in preparation for welding.
rf184.jpg

Front axle C's welded in place.
rf185.jpg

Mocked up under the front of the chassis. For some reason I wasn't loving the look of this and had to give it a think while I moved on to something else.
rf186.jpg

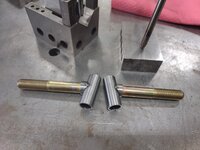
Figured I would knock out the knuckles while I mulled things over in my head.
rf187.jpg

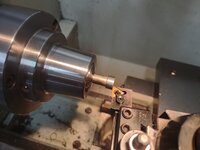
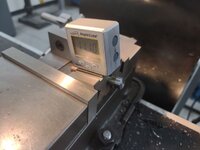
Angle of the dangle being clamped for fishmouthing the spindle.
rf188.jpg

After a couple of light cuts to ensure it was on target.
rf189.jpg

Mocked up the vertical tube once the fishmouth was to depth.
rf190.jpg

Looks like a nice tight fitment for welding. One down and one to go.
rf191.jpg

Both spindles machined and test fit.
rf192.jpg

Knuckle components wiped down with acetone in preparation for welding.
rf193.jpg

More to follow...
 
OP
Z

zmotorsports

ALLIANCE MEMBER
Joined
Oct 20, 2009
Messages
21,477
Location
Northern Utah
Moving on to the welding.

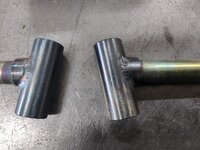
Spindle clamped in V-block and vertical tube placed on 1-2-3 block to ensure repeatability with the second one.
rf194.jpg

Blast tacked both together for a test fit.
rf195.jpg

Held in a V-block to allow accessibility for welding.
rf196.jpg

Both knuckles welded.
rf197.jpg

rf198.jpg

Once mocked up to the front axle the issue was exacerbated and I knew the course I had to take.
rf199.jpg

The front tire tracking width was outside the width of the rear tire which looked funky to me. I took a few measurements and ended up chopping a couple inches out of the front axle width. I then machined a couple of sleeves which would be pressed into the cut for Rosette welding.
rf201.jpg

Axle clamped in mill vise for cross-drilling holes for Rosette welds.
rf202.jpg

After deburring the sleeves were pressed into place in preparation for welding.
rf203.jpg

One more test fit before welding the outer C's, let cool, then press into the axle for more welding.
rf205.jpg

More to follow...
 
OP
Z

zmotorsports

ALLIANCE MEMBER
Joined
Oct 20, 2009
Messages
21,477
Location
Northern Utah
Axle welded back together.
rf206.jpg

Welds ground down and metal finished.
rf207.jpg

rf208.jpg

Axle mocked back up under the chassis. I like the width much better now but think the axle needs to be moved forward as there is too much of the frame horns protruding out in front of the tires/wheels. The track width is much more appealing to me though.
rf209.jpg

I adjusted the ride height with some V-blocks and shims to what I think is a good stance or rake. The front will be about 1/2" lower than the rear and the chassis rails should still be approx. 3 inches off the ground. This will have a nice appearance to it yet not have a lot of resistance to grass when pulling.
rf210.jpg

Front track width is nearly centered in the rear width which looks so much better. Still allows nearly a full inch of clearance to the frame rails when the tire is turned.
rf211.jpg

rf212.jpg

I like this axle placement better as I moved it forward just a bit to minimize the front frame horn protrusion. I think this looks more closely to an actual '32 Roadster where the front is barely ahead of the axle and grill shell.
rf213.jpg


The axle height is only a couple of degrees off from the front crossmember which will allow a nice point in which to weld a connecting component in between the two for a decent sized pivot point for the steering pivot.
rf215.jpg

That frame to axle position looks much more aesthetically pleasing to the eye.
rf216.jpg


Thanks for looking. That's all I've gotten accomplished in the past several nights in between other work.
 

Jeff Ivers

Well-known member
Joined
Apr 9, 2010
Messages
2,567
Location
Oklahoma
I am really impressed with your fabrication skills and vision for the RF Wagon. Your work makes my downhill racers look like they were made by a Kinder-gardener. However, I am curious as to why you have set up the front spindles to not be perpendicular to the ground with respect to the rotational axis? Although your wheels are straight up and down when pointed straight ahead, won't they lean when turned?
 

fouckhest

Well-known member
Joined
Jul 24, 2013
Messages
1,871
Location
Greer, SC
Love the wagon, I always wanted to build one for my nephew years ago, unfortunately never got around it it....I remember seeing a photo of one with go-cart wheels/tires on it, looked super cool!

Also - my wife always tells me I always approach all my projects with "my whole a$$," I can certainly say, you do the same and even more!
 
OP
Z

zmotorsports

ALLIANCE MEMBER
Joined
Oct 20, 2009
Messages
21,477
Location
Northern Utah
I am really impressed with your fabrication skills and vision for the RF Wagon. Your work makes my downhill racers look like they were made by a Kinder-gardener. However, I am curious as to why you have set up the front spindles to not be perpendicular to the ground with respect to the rotational axis? Although your wheels are straight up and down when pointed straight ahead, won't they lean when turned?

Thank you. I appreciate the comments.

I chose to include proper kingpin inclination angle in the front axle so that the actual pivot point of the tire is directly in the tire's contact patch on the ground, just like an automobile. If I would have left the kingpin angle at 90-degrees to the ground (perpendicular) then the tire would actually swing in an arc when turning.
 
OP
Z

zmotorsports

ALLIANCE MEMBER
Joined
Oct 20, 2009
Messages
21,477
Location
Northern Utah
Love the wagon, I always wanted to build one for my nephew years ago, unfortunately never got around it it....I remember seeing a photo of one with go-cart wheels/tires on it, looked super cool!

Also - my wife always tells me I always approach all my projects with "my whole a$$," I can certainly say, you do the same and even more!

Thank you. I built my son one way back in 1991 that actually used go-kart racing slicks. I mimicked a funny car where the tub(body) tilted up and revealed a chassis underneath but not quite to this detail. I had wheelie bars on it and had tubbed the body to accommodate the tucked in fat meats under the rear.

I have pictures of it earlier in my thread here back when I was heavy into building street rods but I was able to learn a few things building that first one that I am applying here to the second attempt.

I appreciate the comments and thanks for following along.
 

LXCam

ALLIANCE MEMBER
Joined
Apr 23, 2013
Messages
19,209
Location
AZ
If you look back around page 94 of this thread you will see a lot of my previous projects from the 80's, 90's and into early 2000's.

Post # 3824 actually shows the first Radio Flyer wagon I built.

Thanks.
Thanks goodness you jumped in with some guidance Mike. After 9k+ posts I can’t imagine trying to navigate back to something specific. Lol.

Great job on the wagon bud, I luv it.
 
To avoid these ads, REGISTER NOW!
Top Bottom