

You are using an out of date browser. It may not display this or other websites correctly.
You should upgrade or use an alternative browser.
You should upgrade or use an alternative browser.
What did you do "IN" your garage today?
- Thread starter mayhemman
- Start date
Old Man Roger
Well-known member
Damn!
micromind
Well-known member
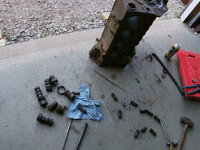
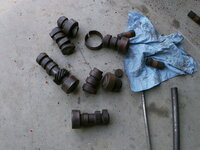
I carefully extracted a stuck camshaft from a chevy smallblock. I think after a little emery cloth polishing I can go ahead and re-use it.
You'll need a welder too.........lol.
Outlawmws
Well-known member
I think after a little emery cloth polishing
That's after the brazing, right?
kaymccampbell
Well-known member
I hope there's more letters, cause I'm pretty sure those ones only make one specific word.Painted up some wood letters for another sign I'm making for the garage/workshop. Not going to say what just yet, but I should have it done by tomorrow night. I''l post more pics then.
Also cleaned up this old oak cabinet, which I got for free last week, and put it in the new office. This will get painted to blend in with the rest of the office color scheme. Until then its been put to work holding some things.
PWC Repair
Well-known member
......soooooo, are you guys saying you shouldn't re-use a camshaft??
Bwaaaahaaaaa!!!!!!
Bwaaaahaaaaa!!!!!!
Bob Heine
ALLIANCE MEMBER
S L O T C A R ?I hope there's more letters, cause I'm pretty sure those ones only make one specific word.
Bob Heine
ALLIANCE MEMBER
If used as a camshaft they work fine. As a hammer or drumstick, not so much.......soooooo, are you guys saying you shouldn't re-use a camshaft??
Bwaaaahaaaaa!!!!!!
This guy says Ouch.I hope there's more letters, cause I'm pretty sure those ones only make one specific word.
kaymccampbell
Well-known member
That's two, mashed together.S L O T C A R ?
PhantomEB
Well-known member
Simply had to swap Orings from old lead to the new one and magically my welder works like new, longer liner even stopped it from jamming up right after the drive roller. Now from YouTube I found out I want to find two small sealed bearings from work to make a drive roller support to take the slack out of the shaft.
Finished welding up the passenger side inner fender then went to town and moved a bolt bin to the back corner. Also moved the garbage can back to where it used to be. Found I kept dumping garbage into my empties can after moving the garbage can into another wasted space. Don’t know how long before it goes back to that wasted space.
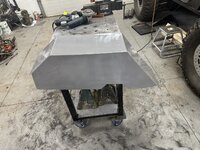
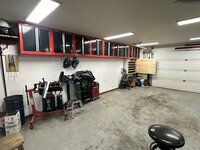
Finished welding up the passenger side inner fender then went to town and moved a bolt bin to the back corner. Also moved the garbage can back to where it used to be. Found I kept dumping garbage into my empties can after moving the garbage can into another wasted space. Don’t know how long before it goes back to that wasted space.
rayra
Well-known member
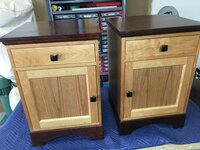
Thanks very much. I like the contrast in your nightstands. Color matching is a tough thing. Our house in the Sierras had 50yr-old Cedar shiplap inside and out and we took out an added bedroom to re-create a dining area and had a helluva time matching those old boards. We developed almost a painter's palette of so many stains and learned to start with the lighter shades and work towards the darker, until we'd built in enough color to blend with the old boards. It was a royal PITA.Nothing wrong with the stops you made for the doors, very clever.
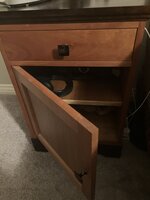
Since you are making shelves, I’ll share how I set my inset doors flush on a pair of cherry nightstands that I built. I used the interior shelf as a stop.
The nightstands
The interior shelf was adjusted to get the door flush and then screwed to the shelf pins in a couple places.
On other note: This last pic really shows how the solid cherry edge band on the plywood shelf doesn’t darken near as much as the other banding when it isn’t exposed to light.
Nice work on your hutch. You made impressively quick progress.
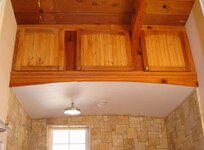
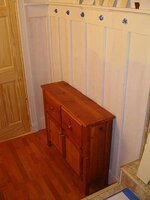
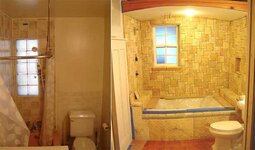
And then a few years later we made some other major alterations and wound up with a surplus of those older cedar planks. We wound up massively altering the main bath, big jacuzzi tub, golden travertine, and an arched ceiling that I built custom cabinets for and then I made a small sideboard cabinet and bi medicine chest out of more of that wood, as we'd gone to a pedestal sink and lost all the handy storage.
As for 'quick progress', like all my projects it's been very long in the thinking and note making, my earliest sheet of notes is dated 7/28/22 and I've had a blue tape outline up on the dining room wall for just over a year (lulz). Despite all that time, no full blueprint and 'final' decisions not even made now. You saw some of that at ExpeditionPortal with my Suburban projects. Sometimes I move like a glacier on things.
I've been staring at two-tone sample pics for well over a year but now as I get very close to staining I'm having 2nd thoughts. But there's so much 'all black' going on, and other dark brown wood elements that I ought to blend the two somewhere. So it's going to be the hutch and buffet.
I've got one more piece to make after this dining room stuff and that's a smaller hutch that will conceal a 5cu' chest freezer and have upper cabinets with 'bar' stuff. And then I'm effectively done with the place. And can get on with playing tourist / retiree.
Attachments
Thank you for looking, still hoping to find an actual 7.5mm 12 point though. The nuts won't work with a six point, probably on purpose. It looks like from the pic the JB one is a six point but the part number has a 12 in it so who knows. I will try to find out. I have a six point 7.5mm and it just barely won't fit over them. Only reason I know the size for sure is because I found it in some obscure Ford tech brief. And I've tried everything else. The turbo damaged nut/bolt sockets might work though, I talked to my local Mac guy about them last week and he swore they didn't really have them. I don't think I tried Omega, not sure. Called a bunch of places over the last couple weeks and everyone was out, even though they showed them on their website. Or had at least a six week "not guaranteed" lead time. I am usually pretty good at locating hard to find stuff but stumped on this one. Also they are on super tight and seem designed to strip super easy, so no luck with vise grips.
Edit- just found the turbo damaged fastener socket at SKs site, and it was 50% off, so I ordered it to try.
Last edited:
larry4406
Well-known member
@PhantomEB - I see you have the Craftsman storage cabinets. Do you like them? I looked at them and didn't like that the cabinet floor was lower than the door opening so items can't slide out.
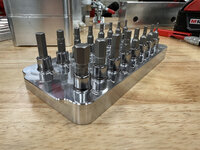
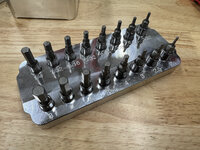
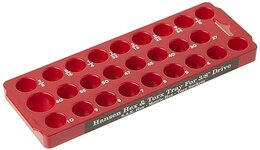
Now that's pornographically beautiful!Made a tray for my new 1/4'' drive hex bits. The provided rails were junky at best.
Interested in seeing more detail of the handle section. I see the bottom is square. What does the transition look like?Thank you!
It was a lot of fun to make.
Interested in seeing more detail of the handle section. I see the bottom is square. What does the transition look like?
I'll try and take pictures tonight, but its just a lip so you can pickup the tray. Something like 3/16'' stickout with 1/8'' thickness.
Heavily inspired by the Hanson trays for 3/8'' drive
Attachments
rzims
Well-known member
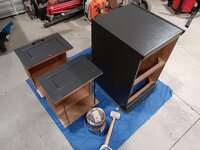
I got the file cabinet painted. Have ordered new slides and black screws for the hardware. Still not sure what I'll use it for but least now it matches the color scheme of the shop.... 
rd65
Well-known member
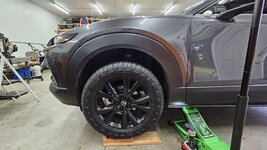
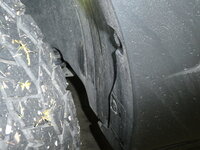
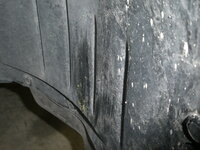
Did some clearancing work on the CX-30 for the large tires. They were rubbing at full lock in the front and back of the front inner fender liners. Heat gun and a sheet metal dolly seemed to do the trick. Will get some more miles on it and check again. I may be putting a HRG 1.5" lift on it, we'll see. The pic with the jack is what the 1.5" lift would look like. Next up, it will be getting a 2" receiver hitch for some light towing as needed.
Installed a new pick up fuel line in the Echo blower. I don't think that was its problem but I had the new line so I installed it. I have put 2 different carb and ignition coils on the thing and it still dies like it was shut off at upper RPM. I have read that ignition coil to flywheel gap is a thing on these so will play with that some vs the business card gap that I usually use.
Installed a new pick up fuel line in the Echo blower. I don't think that was its problem but I had the new line so I installed it. I have put 2 different carb and ignition coils on the thing and it still dies like it was shut off at upper RPM. I have read that ignition coil to flywheel gap is a thing on these so will play with that some vs the business card gap that I usually use.
Attachments
rzims
Well-known member
We have the HRG lift on the wife's Bronco Sport - definitely added some beefiness to the look and allowed for the larger tiresDid some clearancing work on the CX-30 for the large tires. They were rubbing at full lock in the front and back of the front inner fender liners. Heat gun and a sheet metal dolly seemed to do the trick. Will get some more miles on it and check again. I may be putting a HRG 1.5" lift on it, we'll see. The pic with the jack is what the 1.5" lift would look like. Next up, it will be getting a 2" receiver hitch for some light towing as needed.
Installed a new pick up fuel line in the Echo blower. I don't think that was its problem but I had the new line so I installed it. I have put 2 different carb and ignition coils on the thing and it still dies like it was shut off at upper RPM. I have read that ignition coil to flywheel gap is a thing on these so will play with that some vs the business card gap that I usually use.
Mike65
Well-known member
This morning when I got home from work it was sunny mid to upper 50's & a light breeze so I decided to look at my truck again. It had a rattle that sounded like a chain & that usually indicates worn stabilizer bar end links. I pulled the wheel & checked them even though they are new, they're good, I checked the strut where the 3 studs come through the frame mount, they're good & tight. I looked at the lower control arm they look good, & just for the heck of it while I am pushing up & down on the f/e to get it to make the rattle noise I put my hand on the center strut mount point & I can feel the strut mount moving. I go around to the r/s & try it, no movement. I put a socket on the bolt & my electric impact gun & tighten it as far as it will go. Road test it & the noise is gone. SUCCESS.
rayra
Well-known member
What are your olans for the smaller packs? Portable power banks or are you rearranging them into a big storage system at home?Taking apart this Ford Fusion hybrid battery pack to build smaller battery packs. Cool Panasonic square batteries. They are 3.7v 5ah each and whole deal is 280v DC, two 140v banks, little scary. Probably just explode my heart if I screw up trying to get them apart. I am much more scared of high voltage DC than AC. Came out of wrecked Fusion, whole pack is good. Uses 7.5mm 12 point nuts, anybody know where I can find that socket? Making a tweaked 5/16th work for now.
rayra
Well-known member
Dining hutch Finish sanding underway. Messy business. Worst mess of the bunch, flour-fine dust settling on everything, despite a bagged DeWalt random orbital. I dont need the noise of a shop vac droning on, my tinnitus is annoying enough. But man what a mess. I need a quieter vac and smaller hoses for connecting various woodworking tools.
Skyman
Well-known member
Try ear plugs and/or muffs.
niget2002
Well-known member
Installed a new pleated filter on the shop vac.
I noticed it wasn't sucking very well. I popped open the vac to clean it out and realized I still had a 'wet' filter in it. It was clogged to the point hardly any air would go through. I cleaned up the 'wet' filter and re-installed it and the openings were so large that dust was just flowing through it.
I had to order a new pleated filter and it came in today. The shop vac works much better now.
I noticed it wasn't sucking very well. I popped open the vac to clean it out and realized I still had a 'wet' filter in it. It was clogged to the point hardly any air would go through. I cleaned up the 'wet' filter and re-installed it and the openings were so large that dust was just flowing through it.
I had to order a new pleated filter and it came in today. The shop vac works much better now.
GrayFlattop
Well-known member
Yes - use ear plugs. I work in a very loud environment and inserting earplugs is almost reflexive to me. Also, there are always earplugs around my neck, or in the car, on the doorknob to the shop, in the laundry room, and the counter where I leave my keys / cell phone. We have annual Audiometric testing at work, so it's just a part of life for me.Dining hutch Finish sanding underway. Messy business. Worst mess of the bunch, flour-fine dust settling on everything, despite a bagged DeWalt random orbital. I dont need the noise of a shop vac droning on, my tinnitus is annoying enough. But man what a mess. I need a quieter vac and smaller hoses for connecting various woodworking tools.
Also - your shop vac. I know it's easy to spend other people's money, but get yourself a quieter shop vac. I've had Fein shop vacs for 30 years. Festool vacs are quiet too (and they better be for the $). There may be other brands out ther, but these are the ones I have direct experience with.
I am going to make a beefy 48v pack out of one 140v bank to power a 3000w electric motor package with controller, gauges, and throttle setup I got super cheap, still not sure if its going on a 60's Kawasaki Coyote mini bike, 60's Honda S90, or some sort of Honda Odyssey type contraption made out of an old four wheeler. I might use the rest of the cells for smaller packs for the various electric scooters I have, and/or maybe a couple car jump packs. Not sure.What are your plans for the smaller packs? Portable power banks or are you rearranging them into a big storage system at home?
Friend of mine has a salvage yard and is scared of batteries so I can get hybrid packs for free from his wrecked cars. He has a couple of wrecked Prius waiting for me to get the packs out of now. Thinking making a big power wall type setup for my house at some point.
GrayFlattop
Well-known member
Sunday was one of those days that didn't seem very productive. I needed to make an adapter of sorts to fit the 5 hp motor I have on to the motor base of the new (to me) compressor. Found a piece of 1/2" plate and drilled/tapped holes as required. I triple-checked the layout since the OEM motor was smaller in frame size. After that, the next task was to get the motor from workbench height to the motor bracket on the compressor. The main issue is that I'm older - and consequently have a better understanding of my limitations. Getting it off the floor to the workbench was doable, but to get it 2 feet higher - well it just wasn't happening. No handle on the motor and it weighs ~120# (newer ones are closer to 90#, but mine is 35 years old). I didn't want to break myself or drop the motor, so I spent some time plotting how to get it done. When the motor was new, I wouldn't have given it a second thought.
I figured I could use a piece of unistrut with a light duty trolley & a chain come-along, but couldn't get enough vertical clearance. Scratched my head and cursed. I decided to shift gears while thinking. Took a walk outside and filled the bird feeders - I went to turn on the hose to wash out & refill the bird baths and the frost-proof sillcock was leaking. This is the only one on the house that hasn't leaked since I installed it ages ago. Finally a project that I could start AND finish in a short period of time. I had the correct faucet washers and got that done, back to the garage.
I finally figured out a strategy to move the motor, modified a few pieces with a cut-off wheel - then called it a day as I was getting hungry. I'll finish it next weekend.
I figured I could use a piece of unistrut with a light duty trolley & a chain come-along, but couldn't get enough vertical clearance. Scratched my head and cursed. I decided to shift gears while thinking. Took a walk outside and filled the bird feeders - I went to turn on the hose to wash out & refill the bird baths and the frost-proof sillcock was leaking. This is the only one on the house that hasn't leaked since I installed it ages ago. Finally a project that I could start AND finish in a short period of time. I had the correct faucet washers and got that done, back to the garage.
I finally figured out a strategy to move the motor, modified a few pieces with a cut-off wheel - then called it a day as I was getting hungry. I'll finish it next weekend.
Wiz02
Well-known member
So what did you rig up to lift the motor? I can't believe it, but a medicine cabinet that we bought is too heavy for me to lift up and put into the rough opening in the wall by myself.Sunday was one of those days that didn't seem very productive. I needed to make an adapter of sorts to fit the 5 hp motor I have on to the motor base of the new (to me) compressor. Found a piece of 1/2" plate and drilled/tapped holes as required. I triple-checked the layout since the OEM motor was smaller in frame size. After that, the next task was to get the motor from workbench height to the motor bracket on the compressor. The main issue is that I'm older - and consequently have a better understanding of my limitations. Getting it off the floor to the workbench was doable, but to get it 2 feet higher - well it just wasn't happening. No handle on the motor and it weighs ~120# (newer ones are closer to 90#, but mine is 35 years old). I didn't want to break myself or drop the motor, so I spent some time plotting how to get it done. When the motor was new, I wouldn't have given it a second thought.
I figured I could use a piece of unistrut with a light duty trolley & a chain come-along, but couldn't get enough vertical clearance. Scratched my head and cursed. I decided to shift gears while thinking. Took a walk outside and filled the bird feeders - I went to turn on the hose to wash out & refill the bird baths and the frost-proof sillcock was leaking. This is the only one on the house that hasn't leaked since I installed it ages ago. Finally a project that I could start AND finish in a short period of time. I had the correct faucet washers and got that done, back to the garage.
I finally figured out a strategy to move the motor, modified a few pieces with a cut-off wheel - then called it a day as I was getting hungry. I'll finish it next weekend.
The cabinet is designed to be installed in one piece, not remove the glass doors and shelves and it's heavy and awkward to lift.
I am planning on asking my neighbors for help, and while I would prefer not asking for a favor, this cabinet cost a mint and I will never hear the end of it, if something that I rig up fails and the mirror glass cracks or the door hinges are bent.
GrayFlattop
Well-known member
Not quite done, but I will use a piece of Unistrut with a light- duty dolly. I'll post pictures when it's done. I have to build some sort of support for one end - and that would have taken more time than I had yesterday.So what did you rig up to lift the motor? I can't believe it, but a medicine cabinet that we bought is too heavy for me to lift up and put into the rough opening in the wall by myself.
The cabinet is designed to be installed in one piece, not remove the glass doors and shelves and it's heavy and awkward to lift.
I am planning on asking my neighbors for help, and while I would prefer not asking for a favor, this cabinet cost a mint and I will never hear the end of it, if something that I rig up fails and the mirror glass cracks or the door hinges are bent.
I could have asked one of the young strong guys from work, but I don't want to impose unless it is REALLY heavy.
Plus, I have to figure out how to do these things by myself as I age. The 50 year old version of myself would have muscled it up there. That guy is gone and not coming back.
Usually I can move heavy things around, but in this case, it's pure lifting.
Motorman55
Well-known member
Started working on the Castrol Motor Oil sign today. Not finished yet as I still have to letter the words 'motor' and 'oil' in black paint and then outline the green with a black pinstripe. Shown right now is just a basic black marker outline to see how I want the letters to look.
I originally painted the large wood CASTROL letters green but after some color sketches on paper, I went with red CASTROL letters and a green border with a white panel and black motor/oil letters which are all the colors of Castrol Oil. I'll get back to it soon sometime later this week. Meanwhile I want to paint the old wood cabinet I got for free for the office.
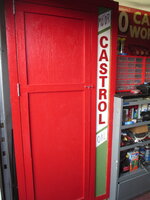
I originally painted the large wood CASTROL letters green but after some color sketches on paper, I went with red CASTROL letters and a green border with a white panel and black motor/oil letters which are all the colors of Castrol Oil. I'll get back to it soon sometime later this week. Meanwhile I want to paint the old wood cabinet I got for free for the office.
Mr. Roboto
Well-known member
Heater core flush. Success! Heat has returned.
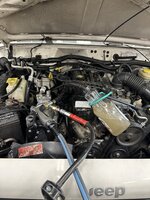

Outlawmws
Well-known member
Try ear plugs and/or muffs.
Yes - use ear plugs.
 I started my kids at a young age to wear Ear muffs for Vacuuming and oher loud tools.
the Castrol Motor Oil sign today
And we were ALL wrong!
kbeefy
Well-known member
Spring is here.
Plow and plow mount off, studded tires off and summer tires on.
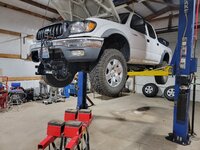
Plow and plow mount off, studded tires off and summer tires on.
kaymccampbell
Well-known member
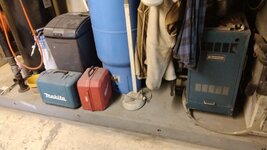
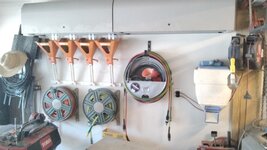
Cleaned, flung, organized, scrapped, recycled. Got under the metal bench, along the boiler pad, and along the north wall done.
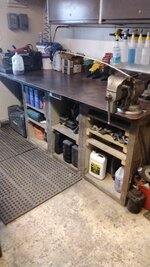
micromind
Well-known member
Sunday was one of those days that didn't seem very productive. I needed to make an adapter of sorts to fit the 5 hp motor I have on to the motor base of the new (to me) compressor. Found a piece of 1/2" plate and drilled/tapped holes as required. I triple-checked the layout since the OEM motor was smaller in frame size. After that, the next task was to get the motor from workbench height to the motor bracket on the compressor. The main issue is that I'm older - and consequently have a better understanding of my limitations. Getting it off the floor to the workbench was doable, but to get it 2 feet higher - well it just wasn't happening. No handle on the motor and it weighs ~120# (newer ones are closer to 90#, but mine is 35 years old). I didn't want to break myself or drop the motor, so I spent some time plotting how to get it done. When the motor was new, I wouldn't have given it a second thought.
I figured I could use a piece of unistrut with a light duty trolley & a chain come-along, but couldn't get enough vertical clearance. Scratched my head and cursed. I decided to shift gears while thinking. Took a walk outside and filled the bird feeders - I went to turn on the hose to wash out & refill the bird baths and the frost-proof sillcock was leaking. This is the only one on the house that hasn't leaked since I installed it ages ago. Finally a project that I could start AND finish in a short period of time. I had the correct faucet washers and got that done, back to the garage.
I finally figured out a strategy to move the motor, modified a few pieces with a cut-off wheel - then called it a day as I was getting hungry. I'll finish it next weekend.
I have been known to take a motor apart, lift the frame and stator up to where it needs to be then re-assemble it after the frame is bolted down.
micromind
Well-known member
Cleaned, flung, organized, scrapped, recycled. Got under the metal bench, along the boiler pad, and along the north wall done.
Now that everything is in its proper place, you'll never find anything you're looking for...........lol.