To avoid these ads, REGISTER NOW!

ZMotorsports Shop Projects 2.0

OP
Z

zmotorsports

ALLIANCE MEMBER
Joined
Oct 20, 2009
Messages
21,437
Location
Northern Utah
Continuing on.

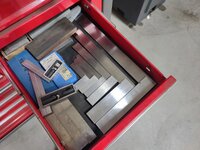
I reached for my larger machinist square.
bh31.jpg

Measured side to side and found there was quite a variance.
bh32.jpg

bh33.jpg

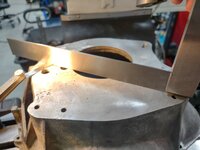
I then laid the square across the transmission mounting surface and noted a .030" difference from side to side.
bh34.jpg

bh35.jpg

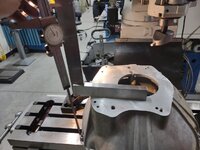
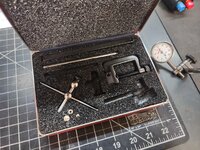
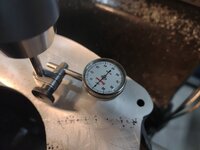
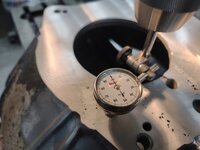
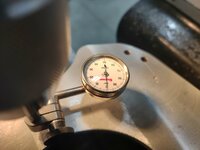
To confirm my rough measurements I grabbed my Starrett test indicator and set up in the quill.
bh36.jpg

bh37.jpg

After confirming my gut feeling about the surfaces not being parallel I made another call to the owner. I was given the go ahead to proceed being this far in.

I explained that I felt this was the reason he was continuing to have issues with cracks on this particular bell housing. With the bell housing being mated to the back of the engine it would mean that when the transmission was bolted up to the bell housing two things would happen. First that without the two machined surfaces being parallel that the transmission would be trying to pull that area up to meet it and pull the transmission down towards the low spot resulting in some extreme forces on the cast aluminum bell housing. It would also mean that it was unlikely that the transmission input shaft was parallel with the engine crankshaft and this could create some undue forces with the clutch assembly as well.

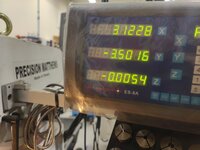
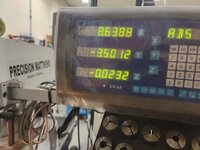
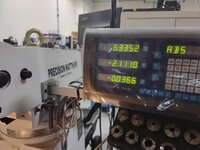
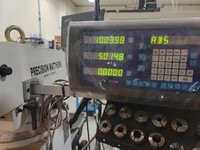
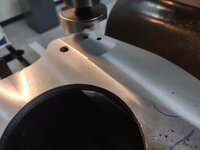
I had to turn the bell housing on the mill table to ensure I could reach across the entire surface with the flycutter, I then raised the table to touch off and zero'd the DRO on the highest point of the transmission mating surface.
bh38.jpg

bh39.jpg

I marked for reference the low area of the transmission mating surface.
bh40.jpg


Stay tuned for more.
 
Last edited:
To avoid these ads, REGISTER NOW!
OP
Z

zmotorsports

ALLIANCE MEMBER
Joined
Oct 20, 2009
Messages
21,437
Location
Northern Utah
Continuing on.

I started with a rather light cut to get my travel speed and cutter speed dialed in for a nice finish.
bh41.jpg

This is a good indicator if your mill's head is trammed in correctly. No detectable ridges between passes.
bh42.jpg

With one light pass complete and feeds and speeds dialed in it was time to proceed.
bh43.jpg

Now it was time to let the flycutter eat.
bh44.jpg

bh45.jpg

Beautiful finish being left behind.
bh46.jpg

Continuing to raise the table about .008" or so at a time. I probably could have gone .010" plus but I liked the surface finish so I just continued to move through the process conservatively.
bh47.jpg

After about 3 passes it was looking decent with .023" removed.
bh48.jpg

The area of the low spot was diminishing nicely.
bh49.jpg

Nearly complete and ready for the final pass.
bh50.jpg


More to follow.
 
Last edited:
OP
Z

zmotorsports

ALLIANCE MEMBER
Joined
Oct 20, 2009
Messages
21,437
Location
Northern Utah
On to the last of the pictures from the repair.


Last pass.
bh51.jpg

Total removed was .036" from the transmission mating surface. That small of an amount shouldn't have any effect on the distance between the engine and transmission to negatively affect clutch engagement.
bh52.jpg

Another check with the machinist square reveals a nice flat and true surface.
bh53.jpg

In all directions.
bh54.jpg

To confirm I installed my Starrett test indicator back into the quill and rotated around the machined surface.
bh55.jpg

bh56.jpg

bh57.jpg

bh58.jpg

With being very pleased with how true and parallel the two mounting surfaces are now, I can clean up the welding table and begin breaking the mill setup down.
bh59.jpg

There are a few porosity pop marks from the previously repaired area(s). I feel good about the area that I repaired but didn't want to touch the areas someone else repaired.
bh60.jpg


All in all, another repair that I feel pretty good about and am pleased with the results.

Thanks for looking.
 
Last edited:
OP
Z

zmotorsports

ALLIANCE MEMBER
Joined
Oct 20, 2009
Messages
21,437
Location
Northern Utah
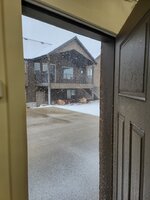
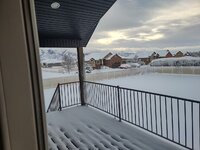
Friday night and into Saturday we had hellacious winds across the Wasatch Front. Earlier Saturday morning when I headed to the shop it had begun raining and then about the time I was finishing up the bell housing I looked out my windows to the east of the shop and saw that white **** falling.

I opened the shop door and was met with this.
bh61.jpg

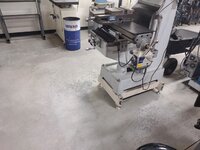
Back in the shop to clean up my mess. I started by cleaning off the mill's table, setting the vise back in place and tramming the vise in.
bh62.jpg

Then began work on the shop floor.
bh63.jpg

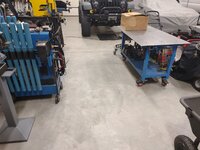
Now with everything clean I can go in and relax knowing the shop isn't a mess.
bh64.jpg

bh65.jpg

The snow stopped late afternoon Saturday but then the temperatures plummeted. Sometime overnight the snow began again and we awoke to about 4 inches of snow.
bh66.jpg

By about 8:30am the snow quit so after a few cups of coffee it was time to head outside and clear the yard of snow.
bh67.jpg

bh68.jpg

I quickly noted that when the temps dropped Saturday afternoon that it froze creating a slick layer under the snow that fell overnight. At least with the sun trying to come out I figured if I could get the top 4 inches of snow off the concrete then the rest maybe would melt off.
bh69.jpg

After a couple hours of clearing snow the melting area was catching up to me.
bh70.jpg


By mid-afternoon Sunday most of our concrete was dry. At least until it started snowing again Monday morning. :rolleyes:
 

ScepterToad

Well-known member
Joined
Nov 9, 2023
Messages
338
Sheesh! WHAT. A. THREAD!!

Saved my first post for this. Been hanging around for a while now trying to get all the way through this thread (came over from IRV).

Lots of great projects and information in this thread Mike, my hat's off to you. The level something to aspire to for sure. Thank you for sharing all that you do with such great detail and explanations. It's truly appreciated!!

Now I just have to get through all of your other threads!
 
OP
Z

zmotorsports

ALLIANCE MEMBER
Joined
Oct 20, 2009
Messages
21,437
Location
Northern Utah
Sheesh! WHAT. A. THREAD!!

Saved my first post for this. Been hanging around for a while now trying to get all the way through this thread (came over from IRV).

Lots of great projects and information in this thread Mike, my hat's off to you. The level something to aspire to for sure. Thank you for sharing all that you do with such great detail and explanations. It's truly appreciated!!

Now I just have to get through all of your other threads!

Thank you.

I appreciate you following me over here from irv2.com and thanks for taking the time to go through the entire thread. I am flattered by your comments.
 

SilverJimmy

Well-known member
Joined
Apr 14, 2012
Messages
1,643
Location
Prescott/Flagstaff, AZ
Mike, do you know if that year Jeep has any reinforcements from the engine to transmission like on the Chevy K series trucks? A common mistake a lot of shade tree mechanics commit is when replacing a transmission in those, they don’t use a K case and sometimes toss the reinforcement rods from the motor mounts to the converter cover. My transmission shop guys would laugh when a Chevy 4x4 would come in with a broken transmission case. I’m wondering if there might be something missing on that old Jeep, maybe got left off after a clutch job? I was always amazed at the junk bolt and bracket collection that some “techs” had after a few years of wrenching! You’d think they might actually wonder where those extra bolts came from!
 

LXCam

ALLIANCE MEMBER
Joined
Apr 23, 2013
Messages
19,172
Location
AZ
Mike, do you know if that year Jeep has any reinforcements from the engine to transmission like on the Chevy K series trucks? A common mistake a lot of shade tree mechanics commit is when replacing a transmission in those, they don’t use a K case and sometimes toss the reinforcement rods from the motor mounts to the converter cover. My transmission shop guys would laugh when a Chevy 4x4 would come in with a broken transmission case. I’m wondering if there might be something missing on that old Jeep, maybe got left off after a clutch job? I was always amazed at the junk bolt and bracket collection that some “techs” had after a few years of wrenching! You’d think they might actually wonder where those extra bolts came from!
I’m with SJ, there’s got to be something more going on here. Is it missing bracing or a significant miss alignment going on.
 

ntsqd

Well-known member
Joined
Jan 22, 2005
Messages
986
Location
Lower left coast
"K" case is an auto trans thing with the bolt on cast converter cover that has braces running up to plates sandwiched under the engine mounts. I don't recall seeing those engine mount to trans braces in manual trans trucks.

That said, I also agree that something external is causing the bell-housing some grief.
 
OP
Z

zmotorsports

ALLIANCE MEMBER
Joined
Oct 20, 2009
Messages
21,437
Location
Northern Utah
Mike, do you know if that year Jeep has any reinforcements from the engine to transmission like on the Chevy K series trucks? A common mistake a lot of shade tree mechanics commit is when replacing a transmission in those, they don’t use a K case and sometimes toss the reinforcement rods from the motor mounts to the converter cover. My transmission shop guys would laugh when a Chevy 4x4 would come in with a broken transmission case. I’m wondering if there might be something missing on that old Jeep, maybe got left off after a clutch job? I was always amazed at the junk bolt and bracket collection that some “techs” had after a few years of wrenching! You’d think they might actually wonder where those extra bolts came from!

I’m with SJ, there’s got to be something more going on here. Is it missing bracing or a significant miss alignment going on.

"K" case is an auto trans thing with the bolt on cast converter cover that has braces running up to plates sandwiched under the engine mounts. I don't recall seeing those engine mount to trans braces in manual trans trucks.

That said, I also agree that something external is causing the bell-housing some grief.

I don't know if anything is missing or not but as far as the GM transmission support rods, personally, I have not seen them on anything but the squarebody GM's. And yes, I've seen my share of missing ones on GM trucks as well as seen them lying in several commercial shops over the decades having failed to be reinstalled.

I don't have the Jeep from which the bell housing came from in my shop to answer any further questions. I was just asked to weld up the crack in the bell housing. I know what I found as far as the low area was at least partially to blame for the last breakage due to the forces on the bell housing trying to pull the transmission input shaft and the crankshaft into the same plain, not sure what caused the initial crack(s).
 
OP
Z

zmotorsports

ALLIANCE MEMBER
Joined
Oct 20, 2009
Messages
21,437
Location
Northern Utah
I’m not sure if you had updated those reserved post before I said something or not. But I’m glad I scrolled back up and got caught up. Looks to me like you thoroughness (as always I should add) caught and remedied the issue.

Thanks Cam. I haven't reserved any spots in the past so this was the first time trying that. I figured that would keep the flow of the repair going right on through without interruption as well as lessen the chance of me missing someone's post in the middle.

Sorry if it was confusing, but glad you went back and checked out the saved ones. Hope the content was worth revisiting them.
 

ScepterToad

Well-known member
Joined
Nov 9, 2023
Messages
338
Mike, I don't remember reading this information, but if you've already posted it, my apologies.

You go through quite a bit of coolant at times with servicing vehicles and you've also swapped out your parts washer solvent relatively recently. Do you have a service that you normally use for disposal of these types of items? Locally, I can't even get rid of antifreeze without a bunch of hoops and even then, they really don't want to take it (local auto shop). I have a lot of diluted glycol from my Aquahot sitting around and some other antifreeze that I'll need to get rid of in the next few months and it would be nice to have a "go-to" if you have some suggestions. Thanks in advance!
 
OP
Z

zmotorsports

ALLIANCE MEMBER
Joined
Oct 20, 2009
Messages
21,437
Location
Northern Utah
Mike, I don't remember reading this information, but if you've already posted it, my apologies.

You go through quite a bit of coolant at times with servicing vehicles and you've also swapped out your parts washer solvent relatively recently. Do you have a service that you normally use for disposal of these types of items? Locally, I can't even get rid of antifreeze without a bunch of hoops and even then, they really don't want to take it (local auto shop). I have a lot of diluted glycol from my Aquahot sitting around and some other antifreeze that I'll need to get rid of in the next few months and it would be nice to have a "go-to" if you have some suggestions. Thanks in advance!

Keith, my local NAPA takes fluids so I dispose of my drain oil and coolant there, which is why I also feel kind of obligated to purchase it from them as well. Years ago I was able to find oil and coolant cheaper at a different vendor but felt guilty disposing of it at NAPA but then they must have renegotiated terms because their pricing came in line with others so I just started buying all of my fluids from them.

As for the solvent from my solvent tank, I was able to dispose of that at my local landfill. They have a rather large area just inside the scale area where fluids such as thinners, paints, solvents, etc. can be disposed of in drums.

I will admit it is getting harder and harder to find places to dispose of certain things. Utah is becoming almost as bad as California in some respects. I can't even purchase my favorite Permatex Anti-seize anywhere along the Wasatch Front here for the past year or so. I was looking to buy some Eneos GL-5 gear oil from my local NAPA last week for my son's Acura RDX as it is the aftermarket version of the Honda/Acura HGO fluid but I was told they don't stock it here locally and even though they had plenty in their warehouse, they could not ship it to my local store. Ended up having to go straight to the local Honda dealer to purchase.
 

Jgaz

Well-known member
Joined
Dec 16, 2016
Messages
1,686
Location
AZ
Mike, I don't remember reading this information, but if you've already posted it, my apologies.

You go through quite a bit of coolant at times with servicing vehicles and you've also swapped out your parts washer solvent relatively recently. Do you have a service that you normally use for disposal of these types of items? Locally, I can't even get rid of antifreeze without a bunch of hoops and even then, they really don't want to take it (local auto shop). I have a lot of diluted glycol from my Aquahot sitting around and some other antifreeze that I'll need to get rid of in the next few months and it would be nice to have a "go-to" if you have some suggestions. Thanks in advance!
@ScepterToad, I don’t know where you live, but have you checked with your waste disposal company or city to see if they offer Household Hazardous Waste disposal?

I’m in Peoria, AZ and our city offer Hazardous waste pick up about three times a year.
There are a number of restrictions on what they will anccept and limits on amounts that they will take but the service works very well.
 

ntsqd

Well-known member
Joined
Jan 22, 2005
Messages
986
Location
Lower left coast
FWIW our local waste/refuse operation operates a "household haz-mat" collection service that is open on Saturdays (only!) at their main sorting building. I can drop off paint, waste oil, brake fluid, anti-freeze, etc. there free of charge. I just have to do it in containers that I don't want back. So my collection and storage methods have changed, I now use the containers that fluid came in new.

Might check with your local trash collector to see if they do something similar.

I periodically need to visit friends and relatives in a neighboring State. And while I'm there I may as well take advantage of the lower sales tax.......
 

ScepterToad

Well-known member
Joined
Nov 9, 2023
Messages
338
Keith, my local NAPA takes fluids so I dispose of my drain oil and coolant there, which is why I also feel kind of obligated to purchase it from them as well. Years ago I was able to find oil and coolant cheaper at a different vendor but felt guilty disposing of it at NAPA but then they must have renegotiated terms because their pricing came in line with others so I just started buying all of my fluids from them.

As for the solvent from my solvent tank, I was able to dispose of that at my local landfill. They have a rather large area just inside the scale area where fluids such as thinners, paints, solvents, etc. can be disposed of in drums.

I will admit it is getting harder and harder to find places to dispose of certain things. Utah is becoming almost as bad as California in some respects. I can't even purchase my favorite Permatex Anti-seize anywhere along the Wasatch Front here for the past year or so. I was looking to buy some Eneos GL-5 gear oil from my local NAPA last week for my son's Acura RDX as it is the aftermarket version of the Honda/Acura HGO fluid but I was told they don't stock it here locally and even though they had plenty in their warehouse, they could not ship it to my local store. Ended up having to go straight to the local Honda dealer to purchase.
Thanks! I'll check with the local NAPA. I did find through the local county website that there's an additional location that's approved for disposal aside from the one Monroe Muffler place (which doesn't really want it).
 
To avoid these ads, REGISTER NOW!

Finallygotit

ALLIANCE MEMBER
Joined
Jul 6, 2013
Messages
4,090
Location
Tucson, AZ
Mt BIL from California makes an annual trek out here to visit and he has me take him to our large ACE hardware. He gets whatever he cannot get in Cal, which is a lot, especially chemicals. Our ACE is supposedly the largest store west of the Mississippi? It's freaking huge.

Back to you Mike!

:beer:
 
OP
Z

zmotorsports

ALLIANCE MEMBER
Joined
Oct 20, 2009
Messages
21,437
Location
Northern Utah
Well, I finally pulled the trigger and ordered new tires for the coach. OUCH!


Got tracking # and they should be here early next week. Maybe this weekend I'll have to get the tires/wheels off the coach so I can polish the wheels and then prepare to drop them off next week for dismounting/mounting of all eight tires.
 

Mr.zippy

Well-known member
Joined
Apr 27, 2020
Messages
2,221
Location
Wyoming
Well, I finally pulled the trigger and ordered new tires for the coach. OUCH!


Got tracking # and they should be here early next week. Maybe this weekend I'll have to get the tires/wheels off the coach so I can polish the wheels and then prepare to drop them off next week for dismounting/mounting of all eight tires.

Ouch indeed……just put a set of Michelins on our family car. I guess I should feel lucky, compared to your mega purchase!
 

ScepterToad

Well-known member
Joined
Nov 9, 2023
Messages
338
Well, I finally pulled the trigger and ordered new tires for the coach. OUCH!


Got tracking # and they should be here early next week. Maybe this weekend I'll have to get the tires/wheels off the coach so I can polish the wheels and then prepare to drop them off next week for dismounting/mounting of all eight tires.
MH tires are never fun. What variety did you go with? I've been super happy with the Toyo M144s on the rear. I'll get rid of the dumb G670s on the front soon enough.
 

SilverJimmy

Well-known member
Joined
Apr 14, 2012
Messages
1,643
Location
Prescott/Flagstaff, AZ
Here in Flagstaff the local O’Reilly’s will take up to 5 gallons of used oil per day from an individual. I can get used coolant disposed of thru the county Hazardous Products Center, 40 gallons per day. The HPC also will take the used oil. You might check with your local landfill as these are all free of charge her in Coconino County, maybe for your local area too.
 
OP
Z

zmotorsports

ALLIANCE MEMBER
Joined
Oct 20, 2009
Messages
21,437
Location
Northern Utah
MH tires are never fun. What variety did you go with? I've been super happy with the Toyo M144s on the rear. I'll get rid of the dumb G670s on the front soon enough.

Keith, glad to hear you are happy with the Toyo M144's Keith as I just bought eight (8) of them.

When I bought our coach 17+ years ago the previous owner had just put new Goodyear G670's on the steer and drive axle. He had Goodyear G159's on the tag. I assume the G159's were on it from Monaco. I ran them for a few years but absolutely DESPISED the Goodyear tires and swore I'd never have them anywhere near my coach again. The rivering was horrible and ride was about the same.

In 2015 I switched to the Michelin XZA2-Energy and loved them ever since. I waffled on the Bridgestone R250 at that time because I had run them on my past two coaches and really liked them but with the FMCA's Michelin Advantage Program, I was able to get into the Michelin's at near Bridgestone prices.

I thought about replacing my Michelin's last year at eight years old but to be honest, they were in such great condition I couldn't bring myself to replace them. I know many people on the RV forums are adamant about replacing RV tires at 5 years or 7 years but also many don't really know a good tire from a bad tire nor what to look for. Personally, I don't necessarily think that a tire is good one day and not the next. It's more of a slower degradation so I just start really focusing in on them at around 6 or 7 years while I'm under the coach doing normal inspections.

I did tell myself last year that even if they didn't show any signs of weathering or degradation in early 2024 that I was going to replace them regardless as they will be 9 years old. They are still in excellent condition with zero cracking/weathering but it's time to replace them. When I started checking prices about two months ago I was dumbfounded at the prices of the Michelin's. They are just over $1k/each right now whereas I was able to source the Toyo M144's for $525/each and didn't have to pay any freight charges. I just can't see paying a 50%+ markup for the Michelins when I think the Toyo's are every bit as good a tire.
 

ScepterToad

Well-known member
Joined
Nov 9, 2023
Messages
338
Keith, glad to hear you are happy with the Toyo M144's Keith as I just bought eight (8) of them.

When I bought our coach 17+ years ago the previous owner had just put new Goodyear G670's on the steer and drive axle. He had Goodyear G159's on the tag. I assume the G159's were on it from Monaco. I ran them for a few years but absolutely DESPISED the Goodyear tires and swore I'd never have them anywhere near my coach again. The rivering was horrible and ride was about the same.

In 2015 I switched to the Michelin XZA2-Energy and loved them ever since. I waffled on the Bridgestone R250 at that time because I had run them on my past two coaches and really liked them but with the FMCA's Michelin Advantage Program, I was able to get into the Michelin's at near Bridgestone prices.

I thought about replacing my Michelin's last year at eight years old but to be honest, they were in such great condition I couldn't bring myself to replace them. I know many people on the RV forums are adamant about replacing RV tires at 5 years or 7 years but also many don't really know a good tire from a bad tire nor what to look for. Personally, I don't necessarily think that a tire is good one day and not the next. It's more of a slower degradation so I just start really focusing in on them at around 6 or 7 years while I'm under the coach doing normal inspections.

I did tell myself last year that even if they didn't show any signs of weathering or degradation in early 2024 that I was going to replace them regardless as they will be 9 years old. They are still in excellent condition with zero cracking/weathering but it's time to replace them. When I started checking prices about two months ago I was dumbfounded at the prices of the Michelin's. They are just over $1k/each right now whereas I was able to source the Toyo M144's for $525/each and didn't have to pay any freight charges. I just can't see paying a 50%+ markup for the Michelins when I think the Toyo's are every bit as good a tire.
I'm not sure I subscribe to the 5/7 year rule either, except in the case of the G670. My steer tires are I think 5 years this year and the rivering is very noticeable. I'll run them down to Destin from Cincinnati for a week trip, but no way will I run them all the way to Moab this summer.

The M144s are so smooth that I can't hardly tell that there's tires back there if that makes any sense. I do have centramatics on the rear, but they are smooth as glass. 2 years in and they feel just as good as the day they were installed.
 
OP
Z

zmotorsports

ALLIANCE MEMBER
Joined
Oct 20, 2009
Messages
21,437
Location
Northern Utah
I'm not sure I subscribe to the 5/7 year rule either, except in the case of the G670. My steer tires are I think 5 years this year and the rivering is very noticeable. I'll run them down to Destin from Cincinnati for a week trip, but no way will I run them all the way to Moab this summer.

The M144s are so smooth that I can't hardly tell that there's tires back there if that makes any sense. I do have centramatics on the rear, but they are smooth as glass. 2 years in and they feel just as good as the day they were installed.

That's good to hear about the Toyo's.

I really am not experiencing any adverse ride or handling issues from the 9-year-old Michelin's so I am not expecting a night or day difference with the new Toyo's. I'm really not expecting much at all if I'm being honest.

I have been running Balance Masters for about 25 years now as well as Crossfires. The Balance Masters I had on our previous coach (1991 Beaver Contessa) and I brought them over to our Dynasty. I did have to purchase one pair extra in 2007 due to our Dynasty having a tag axle but then about 6 years ago I had to buy another new pair as one of the older pairs that I had on the Contessa failed and I couldn't locate my original invoice for warranty purposes which forced me to have to purchase another set. I have been very happy with the Balance Masters aiding in balancing the entire rotating assemblies at each axle end.
 
Last edited:

mercracing

Well-known member
Joined
Feb 14, 2015
Messages
156
Mike,
Do you take your wheels/tires somewhere for mount and balance? Or do you do it yourself and use a bag of equal in each one? In my diesel mechanic days we would mount/dismount ourselves and toss an appropriate sized bag of equal in.
 
OP
Z

zmotorsports

ALLIANCE MEMBER
Joined
Oct 20, 2009
Messages
21,437
Location
Northern Utah
Mike,
Do you take your wheels/tires somewhere for mount and balance? Or do you do it yourself and use a bag of equal in each one? In my diesel mechanic days we would mount/dismount ourselves and toss an appropriate sized bag of equal in.

I am having my local heavy truck tire shop mount/dismount them. I don't have them balanced because I am running Balance Masters which balance the entire rotating assembly as a unit.
 

Bigblue&Goldie

Well-known member
Joined
Mar 12, 2009
Messages
10,684
Location
AZ
I am having my local heavy truck tire shop mount/dismount them. I don't have them balanced because I am running Balance Masters which balance the entire rotating assembly as a unit.

I put Centramatic's on my F-450 when it was new and the tires were factory balanced. I've heard the same thing where people run them with unbalanced tires as you do. I've always wondered if they have enough balancing ability on their own if you get a tire that's too out of whack? I'm about to rotate my fronts to one of the dually rears; now wondering if the tire shop can throw them on the balancer with an unbalanced tire and see if they are sufficient.
 
OP
Z

zmotorsports

ALLIANCE MEMBER
Joined
Oct 20, 2009
Messages
21,437
Location
Northern Utah
I put Centramatic's on my F-450 when it was new and the tires were factory balanced. I've heard the same thing where people run them with unbalanced tires as you do. I've always wondered if they have enough balancing ability on their own if you get a tire that's too out of whack? I'm about to rotate my fronts to one of the dually rears; now wondering if the tire shop can throw them on the balancer with an unbalanced tire and see if they are sufficient.

Ryan, for the first decade or so I ran the Balance Masters, the entire 7 years on our previous coach and the first several years on this coach, I was running them on balanced tires/wheels. I actually thought I was going above and beyond until I talked to a rep at one of our FMCA Rallies who informed me that they are designed to run on non-balanced tires/wheels.
 
OP
Z

zmotorsports

ALLIANCE MEMBER
Joined
Oct 20, 2009
Messages
21,437
Location
Northern Utah
Last night I replaced the couple of gas struts that aid in raising and hold the large engine hatch on our coach. I noticed last fall when I performed the LOF service on the coach that the engine hatch required a little more effort to raise and drifted downward once opened. I knew I had at least one of the two struts had failed or was failing. I ordered a couple of replacements and they've been sitting on the bench for a couple of months now.

I had used some rather inexpensive ones from my local NAPA for many years but have been disappointed in their quality as well as how long they have lasted. Several years ago I had to replace a couple on my compartment doors and spent a few bucks more on the Suspa brand gas struts as they came highly recommended. I can say the overall quality and feel was much better and they have been holding up well. I ordered Suspa brand ones rated at the OEM spec of 150 lb. and decided to finally install them last night.


I'm not sure how others install these things but I am not as young nor spry as I used to be and compressing these things without scratching any paint or worse, getting injured has become something I have given more thought to as I've gotten older. I don't heal as well as I used to and hate to be met with my wife's wrath when I do something that seems to think is a "stupid move".

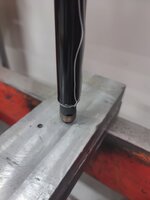
I first wrap some stainless safety wire around the cylinder end and use safety wire pliers to pull the wire tight around the end connector. I then measure the ball to ball distance and compress the strut about an inch or so more than the measured distance as the rod will extend slightly when the pressure is released and the wire is pulled taut.
strut1.jpg

Prior to commencing I wipe the rod down with a rag and some brake cleaner to remove any oily residue and prevent the clamp from slipping. With the rod now compressed into the cylinder the correct distance I use a small worm style hose clamp to secure the safety wire around the rod. I put the first clamp as close to the end connector as possible and tighten. I then fold the wire over 180-degrees and use another worm style clamp to secure the wire again to the rod. This locks the wire from slipping through the clamp(s).
strut2.jpg

Next is to slowly release the pressure until the wire is pulled taut and the strut is free from the press. It can now safely be installed onto the ball ends, then the clamps can be removed and wire cut at the cylinder end and job is complete.
strut3.jpg

I had forgotten which size wire I used last time so the first attempt was made using .032" diameter wire but it quickly failed upon releasing the tension. I grabbed my .041" diameter wire and it held perfectly and safely.
strut4.jpg


Hope this helps as it can be dangerous if these are not held firmly and securely. Even then, this task seems to make me nervous. I would never hear the end of it if the wife came home to find my lying on the shop floor with a dent in my forehead. :rolleyes:

Thanks for looking.
 
Last edited:

ntsqd

Well-known member
Joined
Jan 22, 2005
Messages
986
Location
Lower left coast
Seems like building a Special Tool is in order. One that can adjust or be adjusted for a range of different length struts. I can see it looking a bit like a McPherson Strut Spring compressor, only based on, say, some 3/8-24 A354BD or B7 all-thread.
 

CGohring

ALLIANCE MEMBER
Joined
Apr 22, 2011
Messages
57
Location
Las Vegas
I normally just loop a 1" ratchet strap around the whole thing and ratchet it down to the desired length. 1" tends to be wide enough that it doesn't slip off while handling it. - Your method does seem a bit more secure.
 
To avoid these ads, REGISTER NOW!
Top Bottom