To avoid these ads, REGISTER NOW!

What did you do "IN" your garage today?

To avoid these ads, REGISTER NOW!

rd65

Well-known member
Joined
Sep 29, 2017
Messages
2,845
Location
Granite Falls, WA
Changed out the taillights in my old 78 TracPac snowmobile trailer. The brackets were all bent to ****, stupid design, the brackets hang down lower than the back of the trailer - it is a tilt trailer. Son is moving this weekend and wanted to borrow the trailer so I figured I should get the lights in working order as he will be on the hiway with it. Tonight I will work on the marker lights. This fix is just a quick band aid repair, I just dont have time for what it really needs. Also got the new plate tabs put on.
 

GarageHobbyist

Well-known member
Joined
Feb 18, 2024
Messages
366
Location
Illinois
I started designing a bar clamp mount. Printed a one clamp section to make sure measurements were good. Now I will expand it out to a four clamp holder, add screw holes, and thicken a few spots.

There was an existing design for small clamps, so I used that as reference to design a larger one.
 

Attachments

  • IMG_4347.jpeg
    IMG_4347.jpeg
    518.9 KB · Views: 40
  • IMG_4346.jpeg
    IMG_4346.jpeg
    784.1 KB · Views: 64

imagineer

Well-known member
Joined
Dec 13, 2015
Messages
1,019
Location
Ohio
Last Sunday, I turned this... into this...

Zoom into 4 o'clock in the clutch and you can see the worst of the frame rot that I'm partially disassembling the bike to fix. Still have to remove the primary, inner primary housing, solenoid, starter and transmission.
 

Attachments

  • IMG_4797.JPG
    IMG_4797.JPG
    1.1 MB · Views: 66
  • 87 Harley 3-10-24.jpg
    87 Harley 3-10-24.jpg
    775.7 KB · Views: 59

niget2002

Well-known member
Joined
Oct 2, 2012
Messages
11,265
Location
Josephine, TX
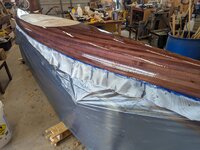
Done applying fiberglass to the deck.

Will go out and trim excess off later.

1000002334.jpg

Got the excess trimmed off. Took another picture trying to show that the 'purple' dye that I did is still there. The fiberglass and resin seems to make the color hard to photograph.


purle.png
 
Last edited:

Snip's

Well-known member
Joined
Apr 29, 2017
Messages
1,867
Location
Ohio
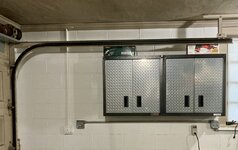
Just finished hanging two wall mount cabinets I recently purchased...
It sure is nice getting extra storage space in the garage...
There is room for one more on the left end... It'll mean dealing with that unused conduit drop...
I need to ponder this...:unsure:

IMG_3615.jpg

IMG_3614.jpg
 

southalabama

Well-known member
Joined
Jan 10, 2011
Messages
5,541
Location
Brewton AL
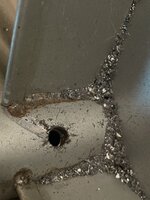
Moved a stainless steel table inside. It’s been under a covered portion of the shop. The top is stainless and the legs and bottom shelf is galvanized. Well the legs looked like **** so decided to disassemble and knock some rust off. One set screw was resistant to moving. Galvanic corrosion and rust. Allen keys wouldn’t budge it. Slot cut with angle grinder and a screwdriver still wouldn’t budge it. Drilled it out.

Just finished sanding and putting a coat of cold galvanizing spray on the legs.
 

Attachments

  • C22786EC-7569-4ED4-B97E-1161491E27E8.jpeg
    C22786EC-7569-4ED4-B97E-1161491E27E8.jpeg
    709.1 KB · Views: 45
  • 5D19C9DC-29E6-4DFA-875B-31288D684ED0.jpeg
    5D19C9DC-29E6-4DFA-875B-31288D684ED0.jpeg
    997.4 KB · Views: 51

Ben Buck

Well-known member
Joined
Dec 30, 2010
Messages
7,303
Location
S. W. Ohio
Just outside the barn today. Temperature in the 70’s !

Replaced both front rotors and pads on my 13 Edge. Bought these from AM Auto $138.00 and free shipping.
Slotted and drilled rotors, never have purchased these before !

I took this picture mid stride . Just for show.

Now I have stoppage when I go ZOOM !

Labor cost was 4 beers each side, and several more for celebration! 🍻61C4990B-8F87-46E0-A547-494CAB774953.jpeg6064CFAA-146E-419B-BB07-93A74342F257.jpeg490C385B-DF92-4168-9925-D68103828C48.jpeg
 

Krfjkm

Well-known member
Joined
May 15, 2020
Messages
278
Location
Charlotte / Mint Hill NC
Done applying fiberglass to the deck.

Will go out and trim excess off later.

1000002334.jpg

Got the excess trimmed off. Took another picture trying to show that the 'purple' dye that I did is still there. The fiberglass and resin seems to make the color hard to photograph.


purle.png
Looks amazing- I’ve enjoyed following along with your build!
 

Burt Shaver

Well-known member
Joined
Dec 7, 2023
Messages
1,288
Location
Iroquois, Ontario Canada
BD19BB5E-391E-437C-A184-E4D17312F659.jpeg68FB1625-88E6-4FB3-8146-E6C5365AD4FE.jpegC1FDCA68-1B64-444C-9A09-690C390C6AC0.jpeg75FC383D-834F-4C85-8CC2-58AA274A82B4.jpeg
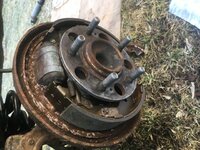
Getting my sons first car ready for him, yesterday I took the front lower control arm off and pressed in a new bushing. Today I got the left rear lateral link off, had to cut through the bolt on the frame as there was no way it was coming out, put a new sway bar link on left rear and brake shoes and drum. New lateral link bolt comes in this Friday. I’m looking forward to that so that left rear will be done
 
To avoid these ads, REGISTER NOW!

TurnipTruck

Well-known member
Joined
Aug 28, 2005
Messages
1,587
Location
Southcentral Alaska
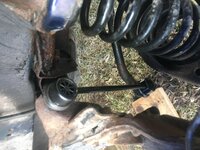
I am slowly and painfully updating/resurrecting the TurnipTruck after ignoring it for a decade while completely rebuilding a house and property.
Today’s task was to jack up the truck so I can crawl under and measure some of the battery cables for replacement.
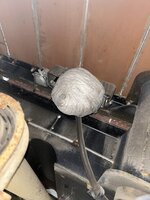
The starter end of the cable was no trouble ( yay stainless steel nuts and antiseize!), but look at the size of this wasp nest at the solenoid end!
IMG_4164.jpeg


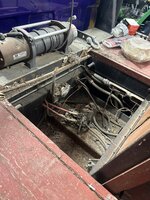
I designed and built this battery box a quarter century ago, and kinda remember what most of those cables do:
IMG_4150.jpeg
 

Mike65

Well-known member
Joined
Mar 7, 2007
Messages
3,118
Location
Horse Pasture, Va.
Fixed my A frame ladder. It had a loose "L" bracket that holds one side of the fold down tool tray. The pop rivet that holds the bracket was loose so most times when I unfold the ladder the tool tray would pop out of the "L" bracket. I drilled out the loose pop rivet & found the only large one I had to re pop rivet the bracket to the frame of the ladder & re installed the tool tray. On the molded pin on the fold down tool tray that the tray pivots on, one side had a clip retaining it to the "L" bracket the other side it was missing. I drilled a small hole in the plastic pivot pin & took the smallest cotter pin I have & unfolded it & cut it in half slipped it thru the hole I drilled & bent it over to keep the tool tray from coming loose. Problem solved.
 

kbeefy

Well-known member
Joined
Sep 14, 2013
Messages
3,473
Location
Harington, Eastern Washington
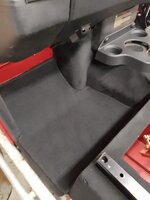
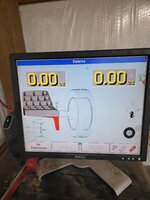
Wife mentioned the Golf Car had a high speed shimmy after swapping summer tires on.

Decided to check the balance on the tires, they were all off.

20240313_150347.jpg

20240313_150740.jpg

Noticed the worn ball joint was more worn and starting to eat my front tires, so decided I shouldn't put off changing it any longer.
Went so fast I didn't take any pictures, but heres the old one...

20240313_150122.jpg

If you have a german (or any other vehicle) that uses wheel bolts instead of studs and nuts, I highly recommend some of these.

20240313_153215.jpg

20240313_153256.jpg

They make it so much easier to line up everything.

Wheels on, on the ground, axle nut and wheel bolts torqued.

20240313_155430.jpg

Test drive felt good, we are taking a 1200 mile trip Saturday to return the grandson home after spring break, that should be a good shakedown run.
 

Ilikeike

ALLIANCE MEMBER
Joined
Jan 8, 2015
Messages
2,452
Location
Northern Ca.
Even tho I have a lift at work, figured I have something to tinker on at home,
changed oil, sent sample to blackstone labs,
checking for loose stuff.

Still going to put it on the lift this weekend and use the Hotsy on low pressure, I have a throttle on the gun so I can turn it way down, then steam clean some of the road grime off under the car.


Getting it ready for autocross season.

IMG_5839.jpgIMG_5838.jpg
 

larry4406

Well-known member
Joined
Jan 27, 2006
Messages
19,627
Location
Northern Virginia
Even tho I have a lift at work, figured I have something to tinker on at home,
changed oil, sent sample to blackstone labs,
checking for loose stuff.

Still going to put it on the lift this weekend and use the Hotsy on low pressure, I have a throttle on the gun so I can turn it way down, then steam clean some of the road grime off under the car.


Getting it ready for autocross season.

IMG_5839.jpgIMG_5838.jpg
Nice ‘68’!

What are those louvers on the hood?
 

BonzoHansen

Well-known member
Joined
Jun 24, 2005
Messages
1,742
Location
NJ
Even tho I have a lift at work, figured I have something to tinker on at home,
changed oil, sent sample to blackstone labs,
checking for loose stuff.

Still going to put it on the lift this weekend and use the Hotsy on low pressure, I have a throttle on the gun so I can turn it way down, then steam clean some of the road grime off under the car.


Getting it ready for autocross season.

IMG_5839.jpgIMG_5838.jpg
there is a 67 in my garage that is destined to be an AX car. I'll have to check out that lab
 

BonzoHansen

Well-known member
Joined
Jun 24, 2005
Messages
1,742
Location
NJ
HOOD LOUVERS

When i ever get around to taking the car apart again.. and paint it, I'll put some weld in louvers
or an Anvil carbon fiber hood with extractor vents built in..
anvil stuff ain't cheap. I really want their power bulge hood for my 77, but I cant justify the cost. Its the only aftermarket hood i like. I have seen too many cowl and L88 hoods.
 

southalabama

Well-known member
Joined
Jan 10, 2011
Messages
5,541
Location
Brewton AL
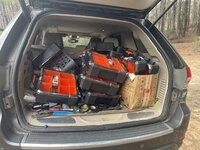
Unloaded a dozen tactix boxes bought off the HD clearance thread. The cardboard boxes they were shipped in were huge. Took them out of the shipping box to transport. If I’d known the quality of the boxes I’d bought 50. Will settle for the 12 I got.
 

Attachments

  • BD49D851-2270-45A8-B2C6-EB6486A597A0.jpeg
    BD49D851-2270-45A8-B2C6-EB6486A597A0.jpeg
    794.6 KB · Views: 74

oldmxracer

Well-known member
Joined
Jan 29, 2006
Messages
1,204
Location
Ohio
Worked on this little ripper 2014 Cobra CX50 JR. Fresh top end, rebuild front forks, centrifugal clutch inspection and adjustment.

000_0001.JPG
Amazing little 50cc race bike built here in the USA, They are no joke ! A new one will run You around $4600
000_0003.JPG
Runs great, I cannot image what a 50 pound rider must feel on this thing !
 
To avoid these ads, REGISTER NOW!
Top Bottom