To avoid these ads, REGISTER NOW!

What did you do "IN" your garage today?

To avoid these ads, REGISTER NOW!

Bessy

Well-known member
Joined
Dec 18, 2012
Messages
995
Location
Ontario, Canada
My recommendation is make sure the chisel is properly sharpened - 90% of the pre-owned chisels I've bought over the years should have been classed as blunt instruments - did they have an edge of some sort? Many, yes. Was it suitable for working in wood? God no!

Chisel Sharpening a Before.jpg


After I sharpened:

Chisel Sharpening Done Stage 1.jpg

The one on the far right is just too far gone with pitting to be more than a can opener for barrels and such.
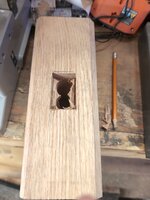
Yes, my 1" needs some cleanup, if for no other reason than the fact that I'm cutting a 3-1/2" deep mortise. I should have gone one size up on my forstner bit, but I've added that to my list of "**** I need to write down for the next time I make a mallet". I'll dig out my sharpening stones and give the chisel a cleanup tomorrow and then give it another go.
 

Attachments

  • 3ffce1e5-2061-43fa-b2bc-6eb62cf543a2.jpg
    3ffce1e5-2061-43fa-b2bc-6eb62cf543a2.jpg
    447.5 KB · Views: 40

Outlawmws

Well-known member
Joined
Aug 9, 2011
Messages
39,321
Location
The Badlands
Lots of little things: cleaned up 2 Wick kerosene lanterns one Dietz PG&E lantern is done, no refinish; The other late 30's Feurehand 175 is nearly ready to paint - I need to find the right color.

Glued a split lengthwise ladder step, Cleaned up an old BSA pocket knife, Put stuff away, including new spare parts into the T-van - that needs better organization. Some more paperback book rebinding (Gluing with special flexible, acid free, white glue)
 

Burt Shaver

Well-known member
Joined
Dec 7, 2023
Messages
1,278
Location
Iroquois, Ontario Canada
34949D93-D02B-4919-AE25-FAB4149E34E6.jpeg5C21AC7B-5F1E-4EAA-BC27-5469019CEF9E.jpegEDFF3F26-D4C1-4358-A7FF-165C00BA47D5.jpeg6C726C99-17F7-4E23-9D6F-9F61F65C1B63.jpeg
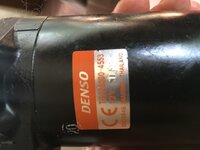
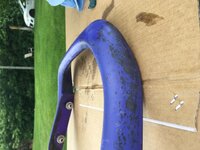
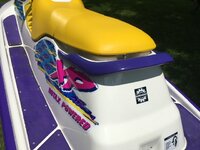
You might have seen some of my previous posts, I had stripped this 95, wet sanded it out and installed new graphics and a new seat skin, recently cleaned up the rear grab handle, then Friday put all the little items back on it, and wouldn’t you know it, Murphy’s law, it wouldn’t start. Saturday I tested the solenoid which was good, then changed the starter with a near new one I had here from another machine. Hit the start button now, and it starts instantly. Might get it back on a trailer tomorrow and out on the water.
 

Jgaz

Well-known member
Joined
Dec 16, 2016
Messages
1,705
Location
AZ
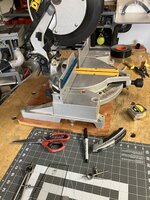
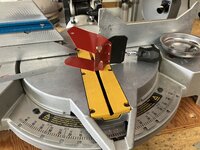
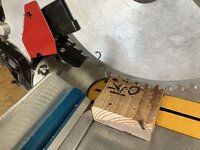
Last couple days I’ve been making a dust chute extension for my old DeWalt miter saw.
I‘m trying to get more chips and saw dust into the Vaccum hose connection.

Made a couple of patterns out of .030 acetate.
IMG_4555.jpeg
Finished (first?) version.
IMG_4556.jpeg
Installed Can be quickly removed (two bolts) to use the tilt feature.IMG_4557.jpeg
A few test cuts shows some improvement.

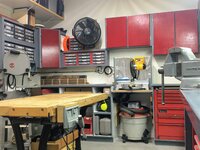
Im trying to keep as much sawdust in my catch cabinet as possible
IMG_9709_Original.jpeg
 

rcktpwrd

Well-known member
Joined
Mar 5, 2008
Messages
1,101
Location
Raleigh, NC
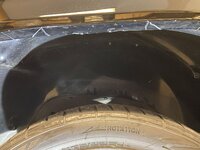
Yearly oil change for the wife's truck before our trip to Carlisle, Pa. Also adjusted the front fender wheel well edges, the front tires were occasionally catching on the inner edge. Made some cuts with the wizz wheel and bent the lip up to give more clearance.

you can see between my silver marks where the lip is a bit mangled from the tire
IMG_7137.jpg

trimmed a bit and rolled up, still have to throw some paint on the cut and chipped areas
IMG_7138.jpg
 

stioc

Well-known member
Joined
May 2, 2005
Messages
1,317
Location
SoCal
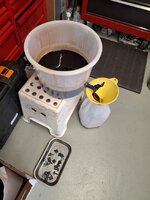
Changed the engine and transmission oil plus tire rotation. First time using this 3 gal bucket as a drain pan. I added a tap/faucet to it, which is the best part. Draining/cleanup is so much easier, I just start it and walk away to do other stuff. Don't see myself going back to using the typical drain pans from now on. Another tip I picked up a while back, for transmission refills instead of using those pesky qt-bottle pumps, I just ran a hose down from the top into the refill hole for an easier pour.
 

Attachments

  • drain bucket1.jpg
    drain bucket1.jpg
    124.4 KB · Views: 53
  • prius transmission service.jpg
    prius transmission service.jpg
    180.3 KB · Views: 52
Last edited:

stioc

Well-known member
Joined
May 2, 2005
Messages
1,317
Location
SoCal
Idea stolen! :pimpflash I can add that to my current drain pan! :thumbup:
Haha steal away, yeah I too have several drain pans myself but I was annoyed with the slow and messy draining part. So I thought if I could install a dispenser on a short and wide bucket that should work. Found these https://www.amazon.com/dp/B094CKKVRC?tag=atomicindus08-20 for a few bucks and added one to a bucket I had lying around. Worked really well so I thought I'd share. Low and behold someone does sell these oil buckets here for $50: https://www.amazon.com/dp/B0CFZ3W84F?tag=atomicindus08-20
 
To avoid these ads, REGISTER NOW!

KwikFab

Well-known member
Joined
Jul 27, 2024
Messages
1,221
Location
Central Valley, CA
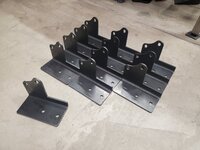
Finishing this first batch.

20240728_134838.jpg

Pile has doubled in size now.

20240728_144412.jpg

One specific customer wanted stainless steel so I did those real quick.

20240728_111228.jpg

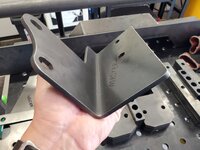
Come tomorrow just have to put bends on certain parts, tack weld some hardware, and ship them out.

Here's my master piece.
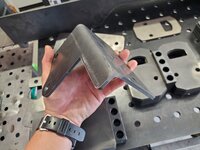
20240728_111155.jpg

20240728_111213.jpg

Since we were gone all day today, I only made it to the garage for a little bit but I bent up 34 pieces.

20240729_150156.jpg

Need to cut 2 replacements since I lost 1 due to a tip up during cutting and another 1 due to overbending, as well as bending the remaining 12 L brackets on the left corner.

20240729_164334.jpg

Lastly, I'll need to tack weld 168 nuts to many of the parts and these 12 orders will be done.

Then onto the next week to start the next 12 orders lol.

So far have over 34 orders.
 

bugnut

ALLIANCE MEMBER
Joined
Jul 14, 2012
Messages
3,995
Location
Central Ohio
Put 2 new tires and wheels on the small tilt trailer, old ones date 2014. Looked in boxes and bins for a spare tire holder. Could not find anything suitable. Found some 1/2-20 all thread and unistrut. Fabrication ideas to hold the spare, sawed and painted unistrut. Left to dry, Buttoned up the shop just as the rain started.
 

FLHCHAZ

Well-known member
Joined
Jul 31, 2023
Messages
470
Just working on giving the Silverado some 100k mile maintenance. So far plugs and wires (easiest ever). Went to change the air filter, and found a crack in the airbox, along with totally effed up screws to hold the top on. Order a K&N CAI from Summit, Shoulr be here tomorrow. Next is shocks and struts, then some minor rust repair ont he rocker snd carb corners and por 25 the frame. Suprisingly the front end is is still all very tight on this truck.
 

mikegt4

Well-known member
Joined
Sep 12, 2005
Messages
3,277
Location
sw ohio
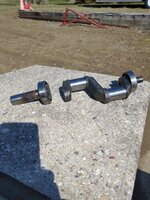
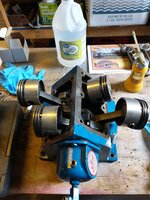
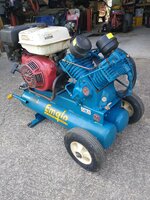
Finished rebuilding my Emglo 2 stage compressor following a crankshaft failure, just have to install the belt guard. I bought it used about 10 years ago from a duct cleaning business so it's been run hard in an earlier life. I love this compressor, no waiting for air pressure to build up just to fill a tire of blow off my mower, 0-175 psi in a timed 45 seconds. Also it's portable which comes in handy on occasion such as the time my son couldn't get the crankshaft pulley off his mother's Acura suv during a timing belt change. He had spent several days time and $ on special tools and in frustration he hooked up his impact gun to the Emglo's 175psi and the crankshaft bolt spun off like it was on ball bearings.
 

Attachments

  • IMG_20240303_131442755.jpg
    IMG_20240303_131442755.jpg
    1 MB · Views: 35
  • IMG_20240606_150854719.jpg
    IMG_20240606_150854719.jpg
    764.5 KB · Views: 36
  • IMG_20240727_183140873.jpg
    IMG_20240727_183140873.jpg
    1.5 MB · Views: 35

niget2002

Well-known member
Joined
Oct 2, 2012
Messages
11,235
Location
Josephine, TX
Glassed the outer seam on the other side of the kayak.

Sat with my daughter as she watched a baby chick take it's last breath that she was trying to nurse back to health. The other chickens had been pecking on it and I think it had an infection. We knew the odds of it making it were slim, but we do what we can.
 

kaymccampbell

Well-known member
Joined
Feb 27, 2015
Messages
29,609
Location
Upstate New York
Cleaned, flung, put away. Took the Burg n Dingo out. Brought back the Burg, Dingo, and powder coat oven. Put the PC oven on the lift. Unwrapped the pediment mold from its mold. Lectured my eldest on how to not light himself up when playing in a breaker box. Gave him some tools, recommended others. Sanded some rust off the bench, where some water got trapped under a plastic box. Set up containers for upcoming projects. Started loading them. Made a bunch of soldering gun tips.
 

KwikFab

Well-known member
Joined
Jul 27, 2024
Messages
1,221
Location
Central Valley, CA
No welding today.

Apparently the bulk order of hardware isn't even arriving today. The plan was to weld all 168 nuts in their respective locations, wipe them down, then ship several out tomorrow and the day after.

Got the two replacement pieces cut, as well as bending the remaining L brackets.

20240730_144215.jpg

These brackets get done on air.

20240730_144502.jpg

But these are done manually as it's easy to overbend.

20240730_144537.jpg

I won't bore anyone with pics for welding the hardware but that's an order of 12.

24 more to go starting next week.
 

Motorman55

Well-known member
Joined
Apr 10, 2016
Messages
2,648
Location
South Jersey
Sounds productive! I finally tackled that pile of old bike parts and organized my tool shelf. I even found that socket set I thought I’d lost. Feels great to clear out some space. Got any big projects planned n
Sounds productive! I finally tackled that pile of old bike parts and organized my tool shelf. I even found that socket set I thought I’d lost. Feels great to clear out some space. Got any big projects planned next?

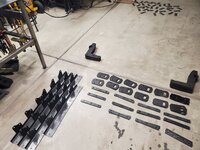
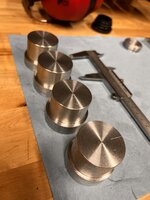
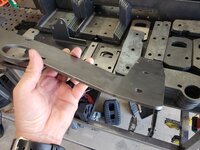
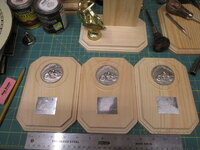
Starting to make some 'Special Catagory' trophies for our HOA's Car Show in late September. We buy new trophies for Top 10 or 20, Trustee's Award, etc which are voted on by the combined votes of the vehicle owners and spectators, but I like to make some special recognition awards like 'Oldest Stock Vehicle', 'Original Paint', 'Vintage Commercial Vehicle', basically real survivors vehicles.

So here's a couple pics of a few I just began to work on. These will be for the motorcycle catagory. I'm using real metal vintage trophy parts to create them. I'm just in the rough design/layout portion right now. For instance the round metal stamped discs will be used, but the small metal squares are just for size comparison. I will use larger square engraving panels. I used a couple different size hole saws in my drill press to make the circles.

Here's a couple pics. I will post more as i go along.1721672537104.jpeg1721672517084.jpeg
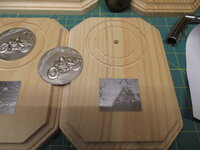
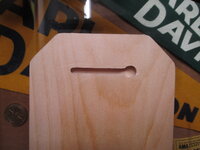
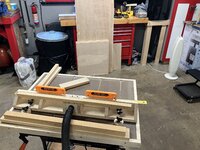
Finally got a few minutes out in the shop to route out the hanging slots on the back of the award plaques using the new router bit with the old Craftsman router and portable table. Not a big deal just another step that needed to be done before I can move on to the stain and finishing steps. 1722387534635.jpeg
 

Old Man Roger

Well-known member
Joined
Apr 6, 2017
Messages
17,817
Location
Palm Coast Florida
Pulled the intake off the Silverado and checked the spider injectors for leaks, didn’t seem to be any, but I changed them anyway since I had it apart.

I considered leaving the old set hooked up and exposed over night to see if they dripped at all, but in the heat of the moment it seemed like a waste of time. It’s either going start perfect in the morning or have the same cold start issue.

It only took about an hour and a half since I’d done it before, so if it was a waste of time, at least it wasn’t much time.

Guess I’ll know tomorrow morning if I’ll be doing a fuel pump next week.
 

mopar66

Well-known member
Joined
Feb 15, 2011
Messages
595
Location
RI
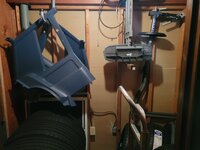
Emptied out a basement closet. Was filed with wood scraps, rug remnants, and old screens all from the previous owners. Was able to get some rims/tires, sawhorses, car parts, bike racks out of the garage.
 

Attachments

  • 20240730_205449.jpg
    20240730_205449.jpg
    451.4 KB · Views: 28

DGersic

Well-known member
Joined
Mar 12, 2017
Messages
6,374
Location
DeKalb, IL
Cleaning, sorting, organizing, and putting away the various scraps and pieces that are worth saving. Followed by flinging the various scraps that aren’t worth saving.

Then sawdust making.

IMG_5338.jpeg

Got all of the rabbet cuts made, and all but one of the hinge cuts. Tomorrow I’ll cut the last hinge, then the front edges get rounded over.
 

Jgaz

Well-known member
Joined
Dec 16, 2016
Messages
1,705
Location
AZ
Cleaning, sorting, organizing, and putting away the various scraps and pieces that are worth saving. Followed by flinging the various scraps that aren’t worth saving.

Then sawdust making.

IMG_5338.jpeg

Got all of the rabbet cuts made, and all but one of the hinge cuts. Tomorrow I’ll cut the last hinge, then the front edges get rounded over.
Would you make any changes to the design of your router table?
 
To avoid these ads, REGISTER NOW!
Top Bottom