To avoid these ads, REGISTER NOW!

ZMotorsports Shop Projects 2.0

OP
Z

zmotorsports

ALLIANCE MEMBER
Joined
Oct 20, 2009
Messages
21,478
Location
Northern Utah
What their Tech Dept just emailed to me:

03339-0 PLUNGER SUB ASSEMBLY is listed for $8.50
03343-0 PIN, .062D X .266L is listed for $5.00

I've not disassembled mine, no idea why they say that the pin should be ordered with the plunger.

Thanks @ntsqd. I just hung up with Starrett customer service and ordered my replacement plunger sub-assembly (anvil). They had it in stock and were very helpful.

Thanks again for the information.
 
To avoid these ads, REGISTER NOW!
OP
Z

zmotorsports

ALLIANCE MEMBER
Joined
Oct 20, 2009
Messages
21,478
Location
Northern Utah
Very cool that Starrett is not in the disposable item camp! I have a Last Word dial indicator I need to send them that hopefully can be rebuilt. Found it in my mentors stuff while helping him clean it out.


Agreed Sterling. Glad the parts are available. I remember when I called them 5 or so years ago when it failed last time, they never mentioned anything about having the parts available separately, they just had me send it in for repairs. Thanks to @ntsqd and his exploded view I called them today and they eagerly said the parts were in stock and available and that I should get a tracking # via email once the parts ship.
 
OP
Z

zmotorsports

ALLIANCE MEMBER
Joined
Oct 20, 2009
Messages
21,478
Location
Northern Utah
Yesterday I began the major service on the ole' Silverado.

My minor LOF services are usually just engine oil & filter, tire rotation, fluids check and a good once over for things like wiper blades, battery connections, inspect the undercarriage for leaks, exhaust isolators, bushings, etc. That usually gets done @ 5k miles on the truck, closer to 4k on everything else. Every other LOF service on the truck (10k miles), in addition to everything above, it also gets treated to new FASS fuel filters along with the spin on fuel filter in the engine bay.

Major routine service or preventive maintenance consists of much more and I generally shoot for around 30k mile intervals. GM in their FSM calls for 25k miles on things like transmission in severe service and 50k for normal service or normal driving. They also only call for transfer case fluid @ 50k which I feel is a bit conservative and like to replace it sooner seeing as how it only holds 2 quarts. I consider much of our driving in traffic and mountain passes around here leaning a bit more towards the severe side, but I don't tow as often or as much as I used to so shoot for around 30k mile intervals.

This preventive maintenance cycle will get engine oil & filter, both internal and external transmission filter along with new fluid, transfer case fluid, front and rear differential fluids, brake fluid exchange, power steering fluid (also brake booster), tire rotation and a couple of minor repairs that I have noted during the last LOF service.

I noticed that my steering stabilizer was beginning to leak so I picked up a new OE replacement and I noticed that my passenger side front axle seal was leaking earlier in the year and now the driver's side has begun as well so I picked up two new front axle seals which will get replaced. I also noticed about a week ago that I had windshield washer fluid on the garage floor. I thought maybe it was a cracked reservoir or maybe a line had cracked but turns out just to be the grommet where the pump seals.

Truck racked and checking ball joints, suspension bushings and unit bearings for any play before removing tires/wheels and moving them to the new respective corner for reinstallation after service is completed.
truck1.jpg

As I roll the tires to their new corner I always check for anything in the tires, usually I just have small pebbles. Unfortunately, this time I saw a screw head. I was ready to pick up the phone to call my son and ask him if the next day he could bring me to the local tire shop to get it replaced seeing as how it won't fit in my Jeep and I have a yard tractor still on my trailer, which I really need to get into the shop before that white **** starts falling here soon. :oops: Before calling and bothering him, I thought I would see how bad it was leaking so I grabbed the pliers and my bottle of soapy water and I was pleasantly surprised to find it as short as it was and just in the lug. Luck was on my side.
truck2.jpg

These Nitto's have right @ 30k miles now and are wearing exceptionally well.
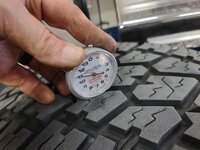
truck3.jpg

I am very pleased with how flat and square they are wearing. No feathering or scrubbing and seem to be getting some good mileage out of them on a 3/4-ton truck.
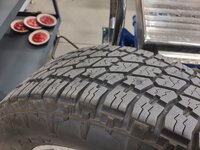
truck4.jpg

truck5.jpg

While the engine oil was draining I thought I'd investigate my washer fluid leak and sure enough, blue fluid coated the bottom of the reservoir.
truck6.jpg

Looking a little higher up, I see that it appears to be coming from the rubber grommet where the pump seals into the reservoir. I think I could replace it by just pulling the pump out and then the grommet, but the reservoir is a filthy mess so I think I'll remove the entire assembly and give it a good cleaning and remove all of the residue while I'm at it.
truck7.jpg

Oil filter is next after torquing the drain plug back in with a new washer.
truck8.jpg

Shot from the front door while fluids are draining.
truck10.jpg

Engine oil filter replaced as well as the spin on transmission filter and everything wiped down.
truck9.jpg


Stay tuned for more pictures to follow.....
 
Last edited:
OP
Z

zmotorsports

ALLIANCE MEMBER
Joined
Oct 20, 2009
Messages
21,478
Location
Northern Utah
Continuing on with the truck's major service.

Next, I moved to the front differential while it was still warm from driving and therefore fluid was less viscous for the drain. Before removing the fill and drain plugs, I gave it a good cleaning as the seal leak allowed it to get coated with oil residue.
truck11.jpg

Passengers side (long side) axle seal leak.
truck12.jpg

Front differential fluid draining. Still looks good, nice and purple. I remembered that last time I ran Royal Purple in the differentials.
truck13.jpg

With the front differential fluid drained, I turned to the rear diff while it too was still warm. It looks a bit darker but not terrible for 30k miles. I have a Mag Hytech differential cover on the rear that I installed almost 16 years ago, when we first bought the truck. It takes a little extra fluid and seems to have been working as advertise. However, with the new Banks covers released, I really like the design and especially the theory behind their cover design. I have been eyeballing the new Banks differential cover for a while and really want to swap one for my Mag Hytec, but @ $400 I just can't justify the cost to replace the one I have so for now it just gets new fluid.
truck14.jpg

Next came the transmission fluid. Pulled the drain plug and it too still looks really good. I hate pulling the plug and seeing dark, nasty and worse, "sparkly" fluids drain from components.
truck15.jpg

This tells me I'm doing my maintenance correctly; no debris and the fluid still looks good. If anything, probably a bit premature, but it's cheaper than building a new transmission.
truck16.jpg

Nothing out of the norm in the bottom of the trans.
truck17.jpg

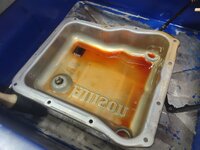
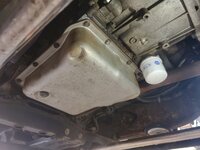
With the transmission dripping off, I cleaned the pan and prepped for reinstallation after filter replacement.
truck18.jpg

I removed the drain drum and replaced it with a drip pan so I could lower the truck for the night. I hate leaving vehicles all the way in the air on the lift overnight if I can avoid it.
truck19.jpg

About that time the wife came home from work, so I stepped outside to chat for a few minutes. My neighbor also came by while we were standing outside talking to show me his new Jeep Gladiator. Snapped this picture while we were standing outside talking.
truck20.jpg


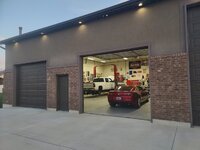
I love the view of my shop from outside.

Thanks for looking.
 

ScepterToad

Well-known member
Joined
Nov 9, 2023
Messages
340
I've seen those Banks videos vs the Mag diff covers. I had thought about getting one for the Excursion when building that because its' purpose was to be a tow pig and I figured that extra fluid would help. Then I found the videos where they built a clear replica of stock/mag/banks versions and showed how the fluid flows. That changed my mind right there.

In the end, the X is now just a run around truck since we found the coach earlier than we expected. So, stock diff covers. Though the updated super duty ones are good as well and if I see one at the local yard, I may pull it for the next service. I do love me a good junkyard.
 
OP
Z

zmotorsports

ALLIANCE MEMBER
Joined
Oct 20, 2009
Messages
21,478
Location
Northern Utah
If you ever sell your truck, I want to be first in line to make an offer


Thanks. I get that a lot, but my son has threatened me. I doubt I'll ever sell it, my son will end up with it one day anyways, but his 2002 Duramax (LB7) is almost as clean as mine and his had 300k miles on it.


I've seen those Banks videos vs the Mag diff covers. I had thought about getting one for the Excursion when building that because its' purpose was to be a tow pig and I figured that extra fluid would help. Then I found the videos where they built a clear replica of stock/mag/banks versions and showed how the fluid flows. That changed my mind right there.

In the end, the X is now just a run around truck since we found the coach earlier than we expected. So, stock diff covers. Though the updated super duty ones are good as well and if I see one at the local yard, I may pull it for the next service. I do love me a good junkyard.


Keith, I remember back when I was in high school, I swapped out my diff cover on the 10-bolt in my 1/2-ton shortbed and my auto instructor explained to me what the stamped rib's purpose was in those covers. That really changed my mind on "some" applications. While I do still think the extra capacity helps, not all covers are created equal in terms of aiding (or hindering) fluid flow out to the axle tubes.

On the Jeeps that see off-road duties, I really like the extra protection gained from a good thick cover vs. the stamped steel differential covers.
 

ntsqd

Well-known member
Joined
Jan 22, 2005
Messages
997
Location
Lower left coast
Had to go look up the Banks cover, new to me. Interesting ideas, some of which I've thought about in the past. Am considering adding a curved inside surface behind the ring gear to my RuffStuff D44 cover for the Wagon. Doubt that the front will need it, but the rear might benefit from such a mod.

I recall the D80 (?) cover under Jay Roach's (East Valley Garage for those who might know of him) old Dodge crew cab tow rig (twin Paxtons on a '440' that likely had more than a few drag/LSR race engine internals in it). They had added a box shaped section to it and the cover bolts were tunneled. It had tubes running vertically thru the box section that were bent to face forward and were flared at the top. The bottoms of the tube had a 'road draft baloney cut' on them. I was told that it added a couple of gallons more oil capacity. Apparently they'd had to do it so many times that his crew had a road-side R&P replacement down to less than a 1/2 hour before someone built that cover.
 

fouckhest

Well-known member
Joined
Jul 24, 2013
Messages
1,871
Location
Greer, SC
That front diff fluid is shockingly clean! o_O

This may be a dumb question, but w/o lock in/out hubs, aren't front axles and diff always spinning? Or is it the lack of torque from being driven that lessens the wear and keeps it clean?
 

Jgaz

Well-known member
Joined
Dec 16, 2016
Messages
1,714
Location
AZ
Yesterday I began the major service on the ole' Silverado.

My minor LOF services are usually just engine oil & filter, tire rotation, fluids check and a good once over for things like wiper blades, battery connections, inspect the undercarriage for leaks, exhaust isolators, bushings, etc. That usually gets done @ 5k miles on the truck, closer to 4k on everything else. Every other LOF service on the truck (10k miles), in addition to everything above, it also gets treated to new FASS fuel filters along with the spin on fuel filter in the engine bay.

Major routine service or preventive maintenance consists of much more and I generally shoot for around 30k mile intervals. GM in their FSM calls for 25k miles on things like transmission in severe service and 50k for normal service or normal driving. They also only call for transfer case fluid @ 50k which I feel is a bit conservative and like to replace it sooner seeing as how it only holds 2 quarts. I consider much of our driving in traffic and mountain passes around here leaning a bit more towards the severe side, but I don't tow as often or as much as I used to so shoot for around 30k mile intervals.

This preventive maintenance cycle will get engine oil & filter, both internal and external transmission filter along with new fluid, transfer case fluid, front and rear differential fluids, brake fluid exchange, power steering fluid (also brake booster), tire rotation and a couple of minor repairs that I have noted during the last LOF service.

I noticed that my steering stabilizer was beginning to leak so I picked up a new OE replacement and I noticed that my passenger side front axle seal was leaking earlier in the year and now the driver's side has begun as well so I picked up two new front axle seals which will get replaced. I also noticed about a week ago that I had windshield washer fluid on the garage floor. I thought maybe it was a cracked reservoir or maybe a line had cracked but turns out just to be the grommet where the pump seals.

Truck racked and checking ball joints, suspension bushings and unit bearings for any play before removing tires/wheels and moving them to the new respective corner for reinstallation after service is completed.
truck1.jpg

As I roll the tires to their new corner I always check for anything in the tires, usually I just have small pebbles. Unfortunately, this time I saw a screw head. I was ready to pick up the phone to call my son and ask him if the next day he could bring me to the local tire shop to get it replaced seeing as how it won't fit in my Jeep and I have a yard tractor still on my trailer, which I really need to get into the shop before that white **** starts falling here soon. :oops: Before calling and bothering him, I thought I would see how bad it was leaking so I grabbed the pliers and my bottle of soapy water and I was pleasantly surprised to find it as short as it was and just in the lug. Luck was on my side.
truck2.jpg

These Nitto's have right @ 30k miles now and are wearing exceptionally well.
truck3.jpg

I am very pleased with how flat and square they are wearing. No feathering or scrubbing and seem to be getting some good mileage out of them on a 3/4-ton truck.
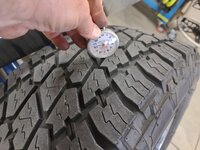
truck4.jpg

truck5.jpg

While the engine oil was draining I thought I'd investigate my washer fluid leak and sure enough, blue fluid coated the bottom of the reservoir.
truck6.jpg

Looking a little higher up, I see that it appears to be coming from the rubber grommet where the pump seals into the reservoir. I think I could replace it by just pulling the pump out and then the grommet, but the reservoir is a filthy mess so I think I'll remove the entire assembly and give it a good cleaning and remove all of the residue while I'm at it.
truck7.jpg

Oil filter is next after torquing the drain plug back in with a new washer.
truck8.jpg

Shot from the front door while fluids are draining.
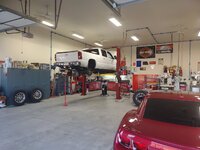
truck10.jpg

Engine oil filter replaced as well as the spin on transmission filter and everything wiped down.
truck9.jpg


Stay tuned for more pictures to follow.....
I sure like to see the tall jack stand under the trailer hitch at the rear of your truck. It scares me to see some of the larger rigs on a hoist on this site without extra support.

I was a mechanic for more than 40 years and the only hoists I completely trusted with longer vehicles without extra support was the good ole two post hoists that really don’t play well with most newer vehicles.
 
OP
Z

zmotorsports

ALLIANCE MEMBER
Joined
Oct 20, 2009
Messages
21,478
Location
Northern Utah
That front diff fluid is shockingly clean! o_O

This may be a dumb question, but w/o lock in/out hubs, aren't front axles and diff always spinning? Or is it the lack of torque from being driven that lessens the wear and keeps it clean?

Yeah, I was very pleased with how clean it looked coming out. Although, my truck really doesn't see much four-wheel drive use. Nothing like the Jeep as it never goes off-road, a little use during the winter on rare occasions.

As for the front differential turning while driving, not a dumb question at all. The front of these GM IFS's use a FAD (Front Axle Disconnect) type of system that decouples the long side (passenger side) axle from the differential. They do this to aid in fuel economy and delete that "heavy" feeling in the front ends that is common with everything engaged in the front axles. However, most everything is still spinning unloaded going down the road, just unloaded or decoupled. The axle shafts are directly connected to the front unit bearings and therefore the ring and pinion are turning by means of viscous coupling, even though they are not necessarily directly linked in 2-wheel drive and spinning in direct relation. However, they do "float" if you will by means of viscous coupling through the turning side gears and back towards the transfer case, even though the transfer case is only powering the rear output being in 2WD.

Hope that makes sense.
 
OP
Z

zmotorsports

ALLIANCE MEMBER
Joined
Oct 20, 2009
Messages
21,478
Location
Northern Utah
I sure like to see the tall jack stand under the trailer hitch at the rear of your truck. It scares me to see some of the larger rigs on a hoist on this site without extra support.

I was a mechanic for more than 40 years and the only hoists I completely trusted with longer vehicles without extra support was the good ole two post hoists that really don’t play well with most newer vehicles.

Thanks. Safety third. :bounce:

Like you, it scares me to see unsupported ends of a longer and heavier vehicle on 2-post lifts. I have drilled this into my son as well that anytime the lift is being used there are two things that must be adhered to. First, the lift cylinders are released to sit down onto a lock and secondly a pole jack in place at one or both ends of the vehicle. I generally have one front and rear on the truck, but seeing as how I'm working on the front I only have the rear in use during the work.

Another thing I see around here that bothers me when walking into local shops is the lock handle bungeed down. I see that all too often as the mechanics don't like to use the locks and prefer the speed of not having to release the locks and the ability to choose a height that is between two locks.

When I had Dustin from Tool Box Tours come to my shop to do his tool video, one of the things he commented on when my son was working on his wife's RDX was that fact that he set it down onto a lock. He said the same thing, he sees them not used and tied down out of the way.

I don't feel that is a good practice at all.
 

fouckhest

Well-known member
Joined
Jul 24, 2013
Messages
1,871
Location
Greer, SC
Thanks @zmotorsports, it does make about 90% sense, but I get the general concept and w/o load the fluid isn't seeing the heat it would while working.

Its always been intriguing to me how as technology has advanced and vehicles have become more electronic, etc., that the manufacturers have essentially made the wear and tear on components much worse. I remember reading up on certain 4x4 trucks years ago and one thing was that hubs would wear out b/c there are no more lock in/out hubs on vehicles. I get that it ***** to get out in the cold or mud to have to lock them in, but they lasted much longer.

As always, appreciate your detailed explaination!
 

fouckhest

Well-known member
Joined
Jul 24, 2013
Messages
1,871
Location
Greer, SC
Thanks. Safety third. :bounce:

Another thing I see around here that bothers me when walking into local shops is the lock handle bungeed down. I see that all too often as the mechanics don't like to use the locks and prefer the speed of not having to release the locks and the ability to choose a height that is between two locks.

That is crazy!

I know when I installed my lift I made sure the locks worked, the release was connected to both sides and the locks were "timed," and actually, as the saying goes, "sometimes its better to be lucky than good" my locks are so well timed its almost impossible to hear them "click" separately LOL
 

aka Larry

Well-known member
Joined
May 2, 2012
Messages
8,099
Location
Eastern, NC
Thanks. Safety third. :bounce:

Like you, it scares me to see unsupported ends of a longer and heavier vehicle on 2-post lifts. I have drilled this into my son as well that anytime the lift is being used there are two things that must be adhered to. First, the lift cylinders are released to sit down onto a lock and secondly a pole jack in place at one or both ends of the vehicle. I generally have one front and rear on the truck, but seeing as how I'm working on the front I only have the rear in use during the work.

I use high-lift jack stands on the ends of trucks/SUVs (longer vehicles), and I always sit mine down on the mechanical locks too. Not sure If I'm trying to be safety conscious or if just I just wanna be like Mike!...LOL.
 
OP
Z

zmotorsports

ALLIANCE MEMBER
Joined
Oct 20, 2009
Messages
21,478
Location
Northern Utah
Thanks @zmotorsports, it does make about 90% sense, but I get the general concept and w/o load the fluid isn't seeing the heat it would while working.

Its always been intriguing to me how as technology has advanced and vehicles have become more electronic, etc., that the manufacturers have essentially made the wear and tear on components much worse. I remember reading up on certain 4x4 trucks years ago and one thing was that hubs would wear out b/c there are no more lock in/out hubs on vehicles. I get that it ***** to get out in the cold or mud to have to lock them in, but they lasted much longer.

As always, appreciate your detailed explaination!

Yeah, I may get a little flack here, but I am under the opinion that newer is not always better. I do like the old technology, or way things were done on some things. Although fluid technology has come a long ways, it still doesn't compensate for fluid shear or the degradation of heat/cool cycles and just normal wear.

When I was building the new axle for my Jeep back in around 2017 or so, I looked long and hard at the upgrade kit to convert the unit bearings and CV style of axles for the locking hubs with tapered bearings. I just couldn't make the ROI work out in my head. The fuel consumption is not all that much different whether the front axle is spinning or not, so maybe that is why the manufacturers left some of them turning all the time. I also worried about it being a "custom" application that if I were out of town and needed an axle bearing, an OE style unit bearing would be much more readily available than a special order component.

I noticed that Chrysler has now gone back to a FAD (Front Axle Disconnect) in their JL and JT model of Jeeps for fuel economy. They've even gone as far as installed a less durable ball bearing in the outer pinion location vs. the traditional tapered roller bearing.


That is crazy!

I know when I installed my lift I made sure the locks worked, the release was connected to both sides and the locks were "timed," and actually, as the saying goes, "sometimes its better to be lucky than good" my locks are so well timed its almost impossible to hear them "click" separately LOL

I agree. I have had to "tweak" mine a couple times over the years as I hate hearing that "clunk-clunk" sound of uneven locks engaging or even a "cluuuuuunk" extended locking sound. 🤬 I want to hear one crisp clunk and both locks engage at the same time. :thumbup:

I use high-lift jack stands on the ends of trucks/SUVs (longer vehicles), and I always sit mine down on the mechanical locks too. Not sure If I'm trying to be safety conscious or if just I just wanna be like Mike!...LOL.

Trust me Vincent, you don't want to be like me in all things. ;)

As for the pole jacks, I think I showed here a few years ago where I purchased two additional pole jacks and cut them down for working on suspension work at mid-lift. I found that smacking a ball joint or tie rod with the axle hanging unsuspended would just create a bounce and not a solid impact. I also like to tilt one side of an axle when pulling a shaft to keep the fluid in the differential when possible and not get fluid out into the axle tube, so a couple of cut-down pole jacks work perfect for such work.
 

Jgaz

Well-known member
Joined
Dec 16, 2016
Messages
1,714
Location
AZ
As for the pole jacks, I think I showed here a few years ago where I purchased two additional pole jacks and cut them down for working on suspension work at mid-lift. I found that smacking a ball joint or tie rod with the axle hanging unsuspended would just create a bounce and not a solid impact. I also like to tilt one side of an axle when pulling a shaft to keep the fluid in the differential when possible and not get fluid out into the axle tube, so a couple of cut-down pole jacks work perfect for such work
So true Mike. We always had a couple short pole jacks in the shop.
I don’t have a lift at home but I do use an old school RV screw type leveling jack as a strong third hand when working under a vehicle especially doing suspension work on my old deep.

Ive never been accused of being very strong and I will use mechanical advantage where ever possible. Especially as I get really close to 70.
 

ntsqd

Well-known member
Joined
Jan 22, 2005
Messages
997
Location
Lower left coast
What I've noticed is that trucks with FAD's (or whatever that particular OEM calls it) tend to spin the front drive-shaft at about 50-75 rpm when at highway speed. When the FAD is connected the two drive-shafts spin at the same speed regardless of if in 2Hi or 4HI. That tells me that the spider & side gears are working with the FAD disconnected.

Any kind of continuous duty TAD ["Traction Adding Differential"] (i.e. NOT a selectable like an ARB or OX or similar) in the front axle will likely cause the two drive-shafts to spin at the same speed.
At that point I see no point in having the FAD.
 
To avoid these ads, REGISTER NOW!
OP
Z

zmotorsports

ALLIANCE MEMBER
Joined
Oct 20, 2009
Messages
21,478
Location
Northern Utah
What I've noticed is that trucks with FAD's (or whatever that particular OEM calls it) tend to spin the front drive-shaft at about 50-75 rpm when at highway speed. When the FAD is connected the two drive-shafts spin at the same speed regardless of if in 2Hi or 4HI. That tells me that the spider & side gears are working with the FAD disconnected.

Any kind of continuous duty TAD ["Traction Adding Differential"] (i.e. NOT a selectable like an ARB or OX or similar) in the front axle will likely cause the two drive-shafts to spin at the same speed.
At that point I see no point in having the FAD.

That's the point I was trying to make, but evidently didn't, in the post above. The axle shafts are turning the side gears than through inertia and some viscous coupling, the ring gear through the spiders and therefore back to the transfer case (ie. driveshaft). I've never calculated it but yes, I would guess in the 50%+ range of RPM compared to the axle shafts that are connected to the tires/wheels.

With any of the traction aids connected, either FAD or transfer case, then the front axle components would spin at same RPM as the rear output.
 

Boosted1

Well-known member
Joined
Nov 25, 2007
Messages
1,681
Location
Georgetown, KY
Great writeup ( as usual ) on the maintenance on your truck.
Good example of importance of maintenance and how everything needs maintenance even if it doesn't "look like it needs maintenance".
 
OP
Z

zmotorsports

ALLIANCE MEMBER
Joined
Oct 20, 2009
Messages
21,478
Location
Northern Utah
Great writeup ( as usual ) on the maintenance on your truck.
Good example of importance of maintenance and how everything needs maintenance even if it doesn't "look like it needs maintenance".

Thank you. At times it's those hidden items that people don't think about that can add up quickly when neglected. Most people do regular oil changes and most even transmission fluid, however, things like transfer case fluid, differential fluids and brake fluid are very often forgotten about or neglected until damage has been done.

I'd rather pay for routine service where I can decide when it's in the shop vs. a break down that makes that decision on its own.

Thanks for following along and for the comments.
 
OP
Z

zmotorsports

ALLIANCE MEMBER
Joined
Oct 20, 2009
Messages
21,478
Location
Northern Utah
I was able to get some more work done on the Silverado last night.

I pulled the transmission filter and let a little more fluid drain. While that was draining, I moved to the transfer case and drained and refilled the fluid.
truck21.jpg

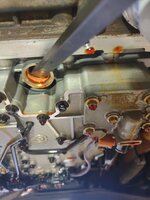
I then went back to the transmission and removed the seal for the filter. I've heard and seen this not getting replaced a lot of the times. Either because people either don't know how to get it out or time is a factor so they leave the original one in there and just pull the new one off the filter and stab the filter in place. It really doesn't take that much time and should be replaced, they do deteriorate over time and can **** air around them if they do. The important thing to remember is not to score the bore or it will **** air and cause cavitation in the pump. I like to use a prybar and grab the seal in the middle, not above it where the tool can come in contact with the bore.
truck22.jpg

Once a little pressure is applied to the middle of the seal, simply pry it downward and it slides right out.
truck23.jpg

Then a little Sil-Glyde applied to the new seal on the filter and it can be installed. Some applications require the seal to be installed in the bore first and then the filter pushed into the seal. What I've found is that if the seal is loose or separate in the filter kit, then it goes in separately, if it's on the filter it can be installed with the filter. This is just a "general" rule of thumb that I've noticed and not all inclusive. Seems like most of the Chryslers have the seal that needs to be installed prior to the filter. Removing them is similar but I will generally use a large socket and use that to drive the seal up into the bore with a few light taps of a mallet.
truck24.jpg

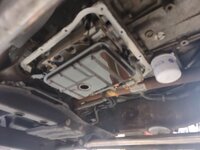
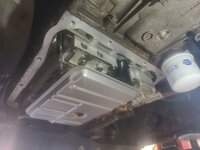
Pan rail wiped down with a rag and brake cleaner and filter installed. Ready for the pan and gasket to be installed.
truck25.jpg

A few corner bolts installed first and let the pan and gasket hang below the sealing surface. Then all the rest are started and once all have a few threads in the holes, then they are snugged up working from the middle outward.
truck26.jpg

Once fasteners are snugged, the torque wrench comes out and they all get torqued to spec.
truck27.jpg

Transmission completed and ready for fluid.
truck28.jpg

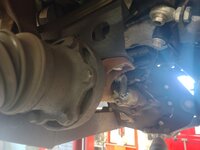
I then moved to the front axle and removed the CV shaft from the driver's side. I have a 6" RCD lift on my truck so there is a spacer located between the stub shaft and the CV shaft to make up that distance. The job of replacing seals is actually made quite a bit easier having the suspension lift because it spaces the front axle assembly down away from the frame a bit and makes access much more pleasant. It's not terrible on a stock truck, but many times the axle needs to be removed from the unit bearing in order to gain enough space to remove the stub shaft on the driver's side and the axle tube on the passenger's side.
truck29.jpg

Now a pry bar can be placed behind the stub shaft and a little pressure to pop it out of the side gear of the front differential. Don't get too rough with it and break something. If it doesn't come out with some leverage, try turning the stub shaft 90-degrees and try again. Sometimes that little retaining clip on the end of the axle stub shaft needs to be orientated just right so the ends don't catch. By turning it a bit the stub shaft will generally pop right out quite easily.
truck30.jpg


Stay tuned for more....
 
OP
Z

zmotorsports

ALLIANCE MEMBER
Joined
Oct 20, 2009
Messages
21,478
Location
Northern Utah
Continuing on with the front axle disassembly.

Mine easily came out of engagement with very little force of the pry bar.
truck31.jpg

Now it's off to the solvent tank for cleaning, along with the spacer and all of the fasteners.
truck32.jpg

There's the leaking seal that I need to replace.
truck33.jpg

Next, I moved over to the passenger's side and repeated the process. However, this side requires the removal of a few more fasteners. After the inner CV is unbolted from the drive flange, the two large bolts holding the axle tube vertically to the frame must be removed. On a stock truck, these are usually studs and can stay in the frame. However, usually the CV shaft is in the way to move it past the studs so a bit more work is involved to get the CV shaft out of the way and open up some room.
truck34.jpg

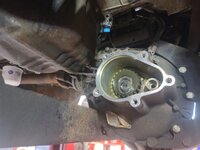
Disconnect the electrical connector and tuck the wiring up out of the way. Then remove the five bolts with 15mm heads holding the axle tube to the center section.
truck35.jpg

Once those five fasteners are removed the long side axle tube can be slid out of place. There is a spring and a thrust washer inside to make certain not to drop either and note their orientation. The spring came out with the assembly, but the thrust washer stuck to the gear just inside the opening.
truck36.jpg

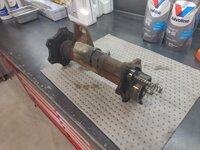
Long side axle tube assembly on the bench for disassembly.
truck37.jpg

I am also a strong proponent of hanging the CV joints/shafts as I do not like letting the weight of the shafts or the angles just hang on the joints. These brake caliper S-hooks come in handy and have multiple uses.
truck38.jpg

Both axle shafts supported.
truck39.jpg


More to follow.....
 
OP
Z

zmotorsports

ALLIANCE MEMBER
Joined
Oct 20, 2009
Messages
21,478
Location
Northern Utah
Continuing on.

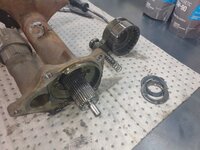
Now disassembly begins. It is pretty straightforward. Remove the shift collar and spring assembly and set aside. Then I use a pair of transmission pliers to open the retaining ring slightly, then a hook tool to slide the retaining ring out of its groove and slip it up and over the splines.
truck41.jpg

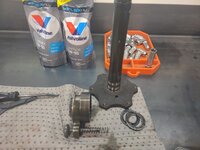
Once the retaining ring is removed the beveled washer and thrust washer can be removed. Keep track of order and orientation as the washer just under the retaining ring has a bevel on the inside that the retaining ring resides in, it needs to go back in correctly.
truck42.jpg

Then a soft faced mallet can be used to knock the axle shaft out of the housing.
truck43.jpg

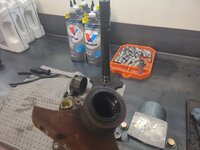
Then to avoid wrestling it on the bench, I clamp the housing in the vise to remove the seal.
truck44.jpg

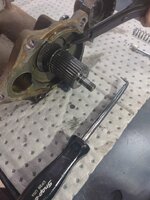
I prefer a seal removal tool, but a screwdriver or small pry bar could also be used. The key with any of these tools is to be cautious and not gouge the inside of the bore where the seal lives. That can ultimately create another source for a leak.
truck45.jpg

I install the seal tool into the seal fully engaging and then pull it back slightly. I have found this procedure to work in most situations well. I also give it a little force and if it doesn't pop right out, I move over in each direction in small increments and apply force evenly over about 90-180 degrees around the seal. This slowly walks the seal out and is less prone to damaging the bore by becoming overly eager with the tool.
truck46.jpg

Seal removed and not completely destroyed, even though it was in there quite tightly.
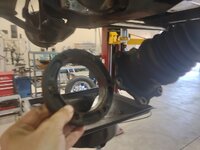
truck47.jpg

I noticed as I was removing the seal that the outer edge had some severe cracking. The truck really doesn't have that many miles on it compared to some, only 129k, but it is nearly 19 years old now. I was just kind of surprised when I saw the cracks in the seals.
truck48.jpg


That was where I stopped and closed up the shop for the night.

I had also gone to get the Camaro emissions test and registration completed as well as the Jeep so they both passed with flying colors and are registered for another year.

Thanks for looking.
 

HotRod68Camaro

Well-known member
Joined
Apr 29, 2008
Messages
201
Location
Central TX
I then moved to the front axle and removed the CV shaft from the driver's side. I have a 6" RCD lift on my truck so there is a spacer located between the stub shaft and the CV shaft to make up that distance. The job of replacing seals is actually made quite a bit easier having the suspension lift because it spaces the front axle assembly down away from the frame a bit and makes access much more pleasant. It's not terrible on a stock truck, but many times the axle needs to be removed from the unit bearing in order to gain enough space to remove the stub shaft on the driver's side and the axle tube on the passenger's side.

Now a pry bar can be placed behind the stub shaft and a little pressure to pop it out of the side gear of the front differential. Don't get too rough with it and break something. If it doesn't come out with some leverage, try turning the stub shaft 90-degrees and try again. Sometimes that little retaining clip on the end of the axle stub shaft needs to be orientated just right so the ends don't catch. By turning it a bit the stub shaft will generally pop right out quite easily.
This post couldn't have come at a better time. My driver side is leaking. Did i read that right that it takes taking the CV off the stub shaft then just using a pry bar to remove the stub shaft? There's no internal clips that have to be removed?
 
OP
Z

zmotorsports

ALLIANCE MEMBER
Joined
Oct 20, 2009
Messages
21,478
Location
Northern Utah
This post couldn't have come at a better time. My driver side is leaking. Did i read that right that it takes taking the CV off the stub shaft then just using a pry bar to remove the stub shaft? There's no internal clips that have to be removed?
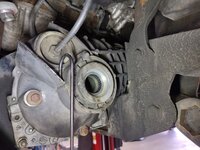
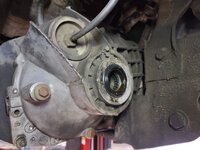
No, not like the passenger's side. Just remove the 6 fasteners securing the inner CV to the stub shaft flange and then using a pry bar between the center section and the flange to pop the stub shaft out. There is an internal clip and that is what needs to be popped free from the side gear in the differential, but it should come right out. If it doesn't come free, like I mentioned, just turn the stub shaft about 90-degrees and try again as sometimes the retainer ring ends will hang up and catch if positioned at the 6 O'clock position. By turning the stub shaft it relocates that retainer ring ends so they are less prone to catching.
 

SilverJimmy

Well-known member
Joined
Apr 14, 2012
Messages
1,692
Location
Prescott/Flagstaff, AZ
Mike, on your GMC do you have the shallow or deep pan? My 3500 Crew Cab Dually has the shallow pan. Do you think the factory deep pan is a good upgrade or should I go aftermarket for more capacity. My truck is hauling our cab over camper and flat towing our Rubicon JL 90% of the time so I’m thinking maybe more fluid might be a good idea?
 
OP
Z

zmotorsports

ALLIANCE MEMBER
Joined
Oct 20, 2009
Messages
21,478
Location
Northern Utah
Mike, on your GMC do you have the shallow or deep pan? My 3500 Crew Cab Dually has the shallow pan. Do you think the factory deep pan is a good upgrade or should I go aftermarket for more capacity. My truck is hauling our cab over camper and flat towing our Rubicon JL 90% of the time so I’m thinking maybe more fluid might be a good idea?

Personally, I like more fluid if it's needed. I would monitor transmission temperature and see what the normal operating temperature is while fully loaded and if it's warranted, then I would add the deeper pan and/or a better cooler. I'd look at cooler before deeper pan but that's just my opinion.

I'm still running the OEM standard pan, but I did upgrade the trans. cooler and replaced the rigid cooler lines with the stainless-steel braided hoses about 14 years or so ago when we were dragging our large 26' Haulmark Edge race trailer around.
 

HotRod68Camaro

Well-known member
Joined
Apr 29, 2008
Messages
201
Location
Central TX
No, not like the passenger's side. Just remove the 6 fasteners securing the inner CV to the stub shaft flange and then using a pry bar between the center section and the flange to pop the stub shaft out. There is an internal clip and that is what needs to be popped free from the side gear in the differential, but it should come right out. If it doesn't come free, like I mentioned, just turn the stub shaft about 90-degrees and try again as sometimes the retainer ring ends will hang up and catch if positioned at the 6 O'clock position. By turning the stub shaft it relocates that retainer ring ends so they are less prone to catching.
Thanks Mike. I'm gonna tackle this sooner than later. I was dreading it (fully admit i hadn't researched the process yet), until I saw your post.
 

Atlascycle

Well-known member
Joined
Aug 9, 2008
Messages
248
Location
Fremont, Ne
Mike do you care to share what torque wrench you are using on the Transmission Pan?

I just recently purchased an older Side by side and it is in need of some maintenance and I need to add a smaller Torque Wrench to my home kit to keep from dragging another tool back and forth from work.
 
OP
Z

zmotorsports

ALLIANCE MEMBER
Joined
Oct 20, 2009
Messages
21,478
Location
Northern Utah
Mike do you care to share what torque wrench you are using on the Transmission Pan?

I just recently purchased an older Side by side and it is in need of some maintenance and I need to add a smaller Torque Wrench to my home kit to keep from dragging another tool back and forth from work.

I don't mind sharing at all. That particular one that I used was my older 3/8" drive Snap-on Techwrench.
 
OP
Z

zmotorsports

ALLIANCE MEMBER
Joined
Oct 20, 2009
Messages
21,478
Location
Northern Utah
Got home a bit later last night so didn't have as much time working on the front axle as I would have liked, but still was pleased with the results.

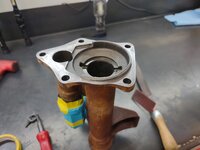
Definitely overkill as this component will barely be seen once installed, but I like to install nice and fresh looking components back in when possible. Decided to mask off the actuator and both machined ends to refinish the passenger side axle housing.
truck51.jpg

Ran a mill file over the flange to ensure no burrs, then a little emery paper to remove the last bit of sealant from the factory.
truck52.jpg

Then masked the flange. Here's a little tip that really speeds up the masking process. Don't worry about the edges and getting the tape aligned or following the edges. In fact, just get the tape to adhere and let the ends run off the edges a half inch or so on each. Then once everything is pressed down and sealed up, take a razor blade and just glide it around the perimeter of the part and it makes a nice clean cut that is fast and clean. I have also used a file to glide over the edge which works well too, but I really didn't want to create a chamfer so I used a razor blade here. I think the whole masking job took less than five minutes for the actuator and both ends. Some people think it takes too long to add the little details like this but it doesn't have to, it can be done quickly and with very little extra effort. But you will sure be pleased with the results afterwards.
truck53.jpg

Then a quick trip to the blasting cabinet.
truck54.jpg

After about 5 minutes of bead blasting, it is ready for a wipe down with Wax & Grease Remover, then paint.
truck55.jpg

A couple light coats of VHT chassis paint.
truck56.jpg

Another key is to prioritize or determine an order for working on things. I knew I wanted to paint the axle housing, so after it was prepped and painted, I shifted gears to getting the seal removed from the driver's side and then cleaning. This way I had no wasted time while the paint was drying on the housing.
truck57.jpg

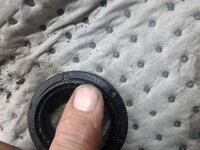
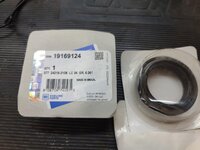
New seals ready.
truck58.jpg

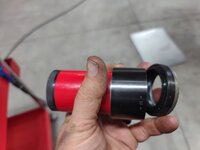
I selected the correct size driver for seal installation.
truck59.jpg

It's a bit tight quarter but with the short tube it was doable, barely.
truck60.jpg


Stay tuned for more pictures.
 
OP
Z

zmotorsports

ALLIANCE MEMBER
Joined
Oct 20, 2009
Messages
21,478
Location
Northern Utah
Continuing on.

Seal on the driver's side installed and a bit of Sil-Glyde applied to the ID. Before stabbing the stub shaft back in I will apply some gear oil to the bearing just inside the seal and coat it liberally.
truck61.jpg

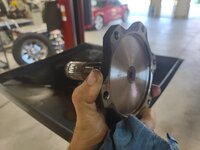
Driver's stub shaft, CV spacers and bolts all cleaned in the solvent tank and awaiting installation. I have to track down a new retaining clip for the driver's stub shaft before it can be installed. I noticed last night that it was broken.
truck62.jpg

Seal ready to go into the passenger's side housing.
truck63.jpg

Seal installed.
truck64.jpg

Cleaning of the long side axle shaft and thrust washer and retaining components.
truck65.jpg

Axle shaft reinstalled into the housing along with the retaining components, thrust washer and locking collar with plunger and spring. Some anaerobic sealant applied to the mounting flange.
truck66.jpg

Loctite 518 anaerobic sealant is a good choice for machined flanges or mating surfaces. GM used anaerobic sealant from the factory on this as well.
truck67.jpg

Axle center section cleaned and ready to accept the housing. A little brake wash on a rag after running around it with a carbide scraper and emery paper ensure a good clean sealing surface. The thrust washer was also pulled out and some assembly grease applied to hold it exactly centered in place until the axle shaft could be installed.
truck68.jpg

Passenger side housing installed and bolts torqued to 30 ft/lbs. as well as the chassis bolts secured. Lastly, the electrical connector was reconnected to the actuator and the wire loom snapped back into its retainer.
truck69.jpg

Passenger side completed and the sealant can cure overnight.
truck70.jpg


Thanks for looking.
 

HotRod68Camaro

Well-known member
Joined
Apr 29, 2008
Messages
201
Location
Central TX
I selected the correct size driver for seal installation.
truck59.jpg
Glad you got ahead of me with the part number on the seal. That's what i thought was the right one but was waiting for this post to confirm the part number. Can you tell me what size that driver is, as well as the brand? I'd like to order the right tools for the job.
 
OP
Z

zmotorsports

ALLIANCE MEMBER
Joined
Oct 20, 2009
Messages
21,478
Location
Northern Utah
Glad you got ahead of me with the part number on the seal. That's what i thought was the right one but was waiting for this post to confirm the part number. Can you tell me what size that driver is, as well as the brand? I'd like to order the right tools for the job.


Glad I was able to help with the seal part #.

The seal driver is not a specific driver to that seal, it is a component of the master kit I purchased from Arizona Transmission and Machine about 7 or so years ago. I posted this very early on in this thread when I first purchased it but will post the pictures here again so you don't need to search back. Although, I really do recommend that you go all the way back to the beginning of my projects thread and read through it, you know, just in case you missed something.... ;)
atm1.jpg

atm2.jpg


It was not an inexpensive driver set, but I had been drooling over it for several years and finally pulled the trigger back in 2017 I think. Mayhew took over marketing of it for several years but for some reason it disappeared from the market by the time I was ready to pull the trigger. I reached out and contacted Arizona Transmission and Machine and they informed me that they took it back from Mayhew and sell it exclusively through their company, so I just purchased it directly from them.

It has really sped up many repairs as I don't have to waste time searching for the correct driver for bearings or seals or machining a custom one. I can almost always find the exact size I need in this kit which to me made the purchase price a bargain.

Not sure if this helps or not, but I cannot recommend this driver set highly enough.
 
To avoid these ads, REGISTER NOW!
Top Bottom