To avoid these ads, REGISTER NOW!

ZMotorsports Shop Projects 2.0

To avoid these ads, REGISTER NOW!

Scuderia-F1

Well-known member
Joined
Feb 9, 2011
Messages
1,198
Location
Stockholm, Sweden
Mike, great to see that you are up to date with the OPE, also some nice addition of decorations on those walls. Them old Snap-on advertisements (the ones you relocated), sure hits a nostalgia feel. I must look into having some of them done.
 
OP
Z

zmotorsports

ALLIANCE MEMBER
Joined
Oct 20, 2009
Messages
21,478
Location
Northern Utah
Mike, great to see that you are up to date with the OPE, also some nice addition of decorations on those walls. Them old Snap-on advertisements (the ones you relocated), sure hits a nostalgia feel. I must look into having some of them done.

Thanks Anders. I remember when Snap-on released those promotional posters back in the mid-90's. It's funny how something like a silly ad or promo can have an impact on a person. I think at that time, even though I was only in the field about 6 or so years by then, but I was really trying to define my life and determine what I wanted my career to look like and they spoke to me. I'm now glad to have framed them and have them hanging in my shop because they were quite impactful to me 30 years ago.
 
OP
Z

zmotorsports

ALLIANCE MEMBER
Joined
Oct 20, 2009
Messages
21,478
Location
Northern Utah
Arrived home yesterday and we had a package on the doorstep vis USPS. I knew I hadn't ordered anything so I just tossed it on the kitchen counter because I assumed it was something the wife had ordered. Didn't even look at the tag on the package at that time.

After finishing up the OPE and coming in the house for the evening, I saw the package unopened on the counter and asked the wife what she had ordered. She said it wasn't addressed to her but to me. I guess I was confused because I knew I hadn't ordered anything. I looked at the return label and noticed it was from my nephew who lives in Athens, GA. I thought that's odd, I've never received anything from him, nor really had any correspondence with him other than a few family get-togethers over the years. He and his family have lived in GA for quite some time now and he has done very well for himself, has a nice family and is an all around very good guy.

Last time I spoke to him was earlier this spring when he was in town visiting and our family got together for a bar-b-que. He had mentioned the he loves watching my videos. I found that odd because he's not much of a car guy per se, but he said he enjoyed watching them and learning.

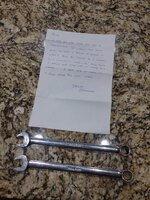
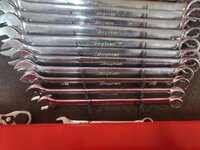
Evidently, he watched the one on Tool Box Tours and took note when I mentioned how much having that non-matching 1/2" wrench bugged me because the new one didn't match the old set. Unbeknownst to me, he had been looking for a replacement to match the older set of wrenches in my drawer. He mentions he found one but it was not in the best condition, so he kept looking and found another one showing less wear. I was floored when I opened the package.
wrench1.jpg

I couldn't wait to head back out to the shop to put it in the drawer with the others. Here is the way my wrench set has looked for the past several years. It is evident that the replacement 1/2" wrench doesn't belong with the others.
wrench2.jpg

Difference between the old version that my nephew sent me vs. the recently warranted one.
wrench3.jpg

All is right in the world again..
wrench4.jpg


Funny, the one he said showed too much wear actually matched the patina on the rest of my wrenches perfectly.


It's odd how such a small gift can mean so much. I am very grateful for this and was really touched by it.

Just thought I'd share that experience from last night.

Thanks for looking.
 
OP
Z

zmotorsports

ALLIANCE MEMBER
Joined
Oct 20, 2009
Messages
21,478
Location
Northern Utah
With the winterization of the OPE completed and all of the equipment back in the house garage, I wanted to complete the drive lever repair on the walk-behind mower.

With the lever tab repaired the night before, I turned my attention to making a new pin. A few years ago when I repaired this same lever and pin, I just welded up the hole that was ovaled out as well as the groove that was worn into the pin, then machined it down. The same wear groove was worn into the pin again so I figured I would take a different approach this time.

With the tab being a bit thicker to help ward off wear, I figured I would grab a Grade 8 bolt to turn down then case harden the outer surface to see if that would help, it surely couldn't hurt. Turned the bolt down to .250".
ope1.jpg

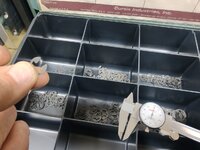
Then an e-clip was selected for the shaft size.
ope2.jpg

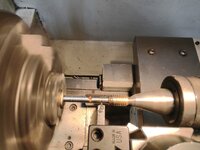
I grabbed my ground groove tool and installed on tool holder, measured where I thought the groove should be and machined a .040" deep groove.
ope3.jpg

E-clip fits perfect.
ope4.jpg

Test fit.
ope5.jpg

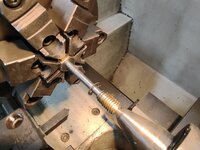
I then swapped the 6-jaw chuck out for the collet chuck and 1/4" collet to grab the pin and machine the head down. I went just a bit larger on the head of this pin vs. the OEM size. I was shooting for .400" diameter on the head.
ope6.jpg

Nailed it. I am really starting to like having the DRO on the lathe. I'm not gonna lie, I have been so used to just using dials that I have to keep reminding myself I have a DRO now as I keep looking at the dials to determine where I need to be. I don't know about others, but when using the dials, I would measure, then offset my dials the amount I needed to remove. This way when I landed on zero I was at my tarket. I don't know if that is the "preferred" method or not, like I've mentioned, I am far from a machinist, just someone who plays one on the interwebs. :bounce: For me, this was a better method as it takes interruptions out of the equation. If I get a phone call or someone walks in, I don't have to go back and try and figure out where I was or what I was shooting for, I just know I need to land on zero.
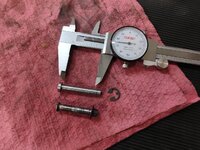
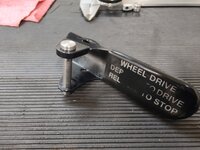
As I've been trying to get used to the DRO on the lathe, I have been using the same technique. Once I measure and know how much I need to remove, then I offset the dimension on the DRO so when I land on zero, I should be at my target dimension. So far it is working out well.
ope7.jpg

New pin next to old OEM pin.
ope8.jpg

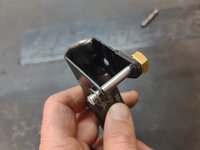
One last test fitment before going to the next step.
ope9.jpg


Stay tuned for a few more pictures.
 
OP
Z

zmotorsports

ALLIANCE MEMBER
Joined
Oct 20, 2009
Messages
21,478
Location
Northern Utah
Continuing on with the new pin.

I thought I would case harden the pin to aid in reducing the wear and try to make this repair last longer than the previous one.

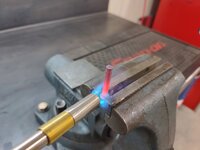
I dug through my cabinet to retrieve my Cherry Red case hardening compound but evidently, I forgot to reorder when I used the last of it. The small tub was nearly empty. This isn't quite as effective, but should still help to surface treat the pin.
ope11.jpg

Got it to cherry red color,
ope12.jpg

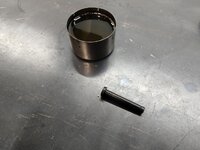
then immediately quenched in oil. For anyone who has ever installed the old Speedi-sleeves or sometimes they were called seal savers, these little cups that came with them work excellent for such tasks.
ope13.jpg

As you can see, this driver/cup has been used a lot for such projects over the years. The pin came out nice and uniform. After a quick wipe it should be ready to go. Even simply dropping the pin on the workbench the audible tone is different than previous to the heating so I think this will work, although not as ideally as I had planned.
ope14.jpg

Installed and tested.
ope15.jpg

ope16.jpg

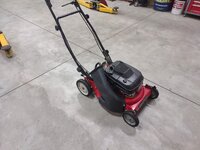
The old 21" Snapper looks and runs pretty good for a 34-year-old mower.
ope17.jpg


Thanks for looking.
 

WoodsTruck

Well-known member
Joined
Jan 12, 2013
Messages
1,028
Mike,

Side humor on your Snap-On gift.
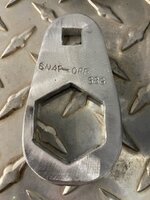
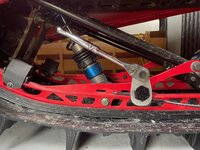
A buddy that I ride sleds with used to have a Snap-On tool truck back in the day. We were out riding in Idaho a couple years ago and one of his scratchers broke. We needed to remove it so the broken leg wouldn't hook the track and cause a bad day. Fortunately one guy in the group had a large Crescent wrench to tackle the large head on the retainer. This got me to think about a simpler/lighter option. I made a crude tool out of aluminum plate to fit the bill since we both carry a 3/8" drive ratchet. Again, crudely labeled Snap-Off for jokes sake SBG=scratcher be gone for official tool part ID.
He was pretty pleased with the new tool.
 

Attachments

  • IMG_8999.jpg
    IMG_8999.jpg
    59.9 KB · Views: 129
  • Scratcher tool.jpg
    Scratcher tool.jpg
    1.3 MB · Views: 128
OP
Z

zmotorsports

ALLIANCE MEMBER
Joined
Oct 20, 2009
Messages
21,478
Location
Northern Utah
Mike,

Side humor on your Snap-On gift.
A buddy that I ride sleds with used to have a Snap-On tool truck back in the day. We were out riding in Idaho a couple years ago and one of his scratchers broke. We needed to remove it so the broken leg wouldn't hook the track and cause a bad day. Fortunately one guy in the group had a large Crescent wrench to tackle the large head on the retainer. This got me to think about a simpler/lighter option. I made a crude tool out of aluminum plate to fit the bill since we both carry a 3/8" drive ratchet. Again, crudely labeled Snap-Off for jokes sake SBG=scratcher be gone for official tool part ID.
He was pretty pleased with the new tool.

AWESOME solution.

Homemade tools are kewl. I love seeing creative solutions to things. I'm sure this is a simple answer but how did you keep the square cut and 6 point cut corners so precise? (thinking of creating a similar tool for jam nuts on Jeep control arms)

I agree Marc, homemade/shopmade tools are cool as hell. Especially nice to see the thought process behind them.
 

WoodsTruck

Well-known member
Joined
Jan 12, 2013
Messages
1,028
Homemade tools are kewl. I love seeing creative solutions to things. I'm sure this is a simple answer but how did you keep the square cut and 6 point cut corners so precise? (thinking of creating a similar tool for jam nuts on Jeep control arms)
I drilled the holes with a 3/8" drill to remove as much material as I could, then got close to my marked line with a jig saw, double cut burr in the dremel to get closer then used a small 3 cornered file to finish them out. A bit time consuming, but not too bad.
 

mbryson

Well-known member
Joined
Jan 4, 2014
Messages
133
Location
Bountiful, UT
I drilled the holes with a 3/8" drill to remove as much material as I could, then got close to my marked line with a jig saw, double cut burr in the dremel to get closer then used a small 3 cornered file to finish them out. A bit time consuming, but not too bad.


Tools most of us have. Thanks for the info (I think files are a WAY underutilized tool in my toolbox)
 
OP
Z

zmotorsports

ALLIANCE MEMBER
Joined
Oct 20, 2009
Messages
21,478
Location
Northern Utah
Tools most of us have. Thanks for the info (I think files are a WAY underutilized tool in my toolbox)

I don't think you are alone in that Marc. I have my files hanging on the wall within easy reach and reach for them a lot. I have gotten comments that with all of the tools and equipment, why would I use a file. Simple, they just work. No muss, no fuss, they just work.
 

ntsqd

Well-known member
Joined
Jan 22, 2005
Messages
997
Location
Lower left coast
Master the use of a file and a hacksaw and there's not a lot that can't be made. It won't happen fast, and until you're a Grand Master with both it may not look store-bought, but you can make it. I didn't even know why grandad had those small constant diameter, nice, long round files for, but darned if they weren't just what I needed way too many times to count.
 
Last edited:

Jgaz

Well-known member
Joined
Dec 16, 2016
Messages
1,714
Location
AZ
Mike,

Side humor on your Snap-On gift.
A buddy that I ride sleds with used to have a Snap-On tool truck back in the day. We were out riding in Idaho a couple years ago and one of his scratchers broke. We needed to remove it so the broken leg wouldn't hook the track and cause a bad day. Fortunately one guy in the group had a large Crescent wrench to tackle the large head on the retainer. This got me to think about a simpler/lighter option. I made a crude tool out of aluminum plate to fit the bill since we both carry a 3/8" drive ratchet. Again, crudely labeled Snap-Off for jokes sake SBG=scratcher be gone for official tool part ID.
He was pretty pleased with the new tool.
@WoodsTruck
Nicely done sir! If you get a chance repost your tool over here,
 

Scuderia-F1

Well-known member
Joined
Feb 9, 2011
Messages
1,198
Location
Stockholm, Sweden
Arrived home yesterday and we had a package on the doorstep vis USPS. I knew I hadn't ordered anything so I just tossed it on the kitchen counter because I assumed it was something the wife had ordered. Didn't even look at the tag on the package at that time.

After finishing up the OPE and coming in the house for the evening, I saw the package unopened on the counter and asked the wife what she had ordered. She said it wasn't addressed to her but to me. I guess I was confused because I knew I hadn't ordered anything. I looked at the return label and noticed it was from my nephew who lives in Athens, GA. I thought that's odd, I've never received anything from him, nor really had any correspondence with him other than a few family get-togethers over the years. He and his family have lived in GA for quite some time now and he has done very well for himself, has a nice family and is an all around very good guy.

Last time I spoke to him was earlier this spring when he was in town visiting and our family got together for a bar-b-que. He had mentioned the he loves watching my videos. I found that odd because he's not much of a car guy per se, but he said he enjoyed watching them and learning.

Evidently, he watched the one on Tool Box Tours and took note when I mentioned how much having that non-matching 1/2" wrench bugged me because the new one didn't match the old set. Unbeknownst to me, he had been looking for a replacement to match the older set of wrenches in my drawer. He mentions he found one but it was not in the best condition, so he kept looking and found another one showing less wear. I was floored when I opened the package.
wrench1.jpg

I couldn't wait to head back out to the shop to put it in the drawer with the others. Here is the way my wrench set has looked for the past several years. It is evident that the replacement 1/2" wrench doesn't belong with the others.
wrench2.jpg

Difference between the old version that my nephew sent me vs. the recently warranted one.
wrench3.jpg

All is right in the world again..
wrench4.jpg


Funny, the one he said showed too much wear actually matched the patina on the rest of my wrenches perfectly.


It's odd how such a small gift can mean so much. I am very grateful for this and was really touched by it.

Just thought I'd share that experience from last night.

Thanks for looking.
This is SOOOO awesome, believe me I can relate with what you’ve been going through.
 
OP
Z

zmotorsports

ALLIANCE MEMBER
Joined
Oct 20, 2009
Messages
21,478
Location
Northern Utah
This is SOOOO awesome, believe me I can relate with what you’ve been going through.

Anders, now I have another one. About a couple of weeks ago, I broke a MAC 1/8" punch. I am a huge fan of the MAC/Proto punches, chisels and drifts and feel they are the perfect balance between brittleness and toughness in a punch. I have had my MAC punches and Proto chisels for pushing 30 years now and very seldom ever break one. I went onto the MAC tool truck yesterday to get it replaced and as he handed me the new one, I realized it was no longer that bronze color that they have been for decades. They are now a black oxide finish so of course, they don't match the rest. 🤬 So, now I get to look at that one each time I open the punch drawer. :rolleyes:
 
OP
Z

zmotorsports

ALLIANCE MEMBER
Joined
Oct 20, 2009
Messages
21,478
Location
Northern Utah
Last night as I was cleaning up the shop in preparation for the next job, I figured with chip on the lathe already, that I would run a test pass to make sure the headstock is still in alignment. I can't remember if I ran this test pass after putting the lathe on the new stand or not, I think I did, but just cannot remember.

It was a successful test pass as the headstock still appears to be in nearly perfect alignment. Only off .0006" in about 7 inches of travel, well below spec. for the machine, or really any lathe for that matter.
shop1.jpg

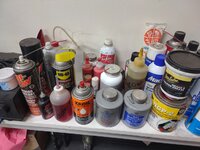
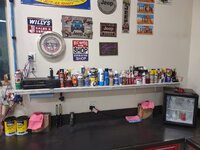
After cleaning up the lathe, I opted to tackle my chemical shelf. I have been wanting to address this for a few months now, but have also been procrastinating. I didn't end up throwing away nearly as much stuff as I intended to, or at least thought I would, but I did thin it out quite a bit. I tossed several as well as relocated some duplicates to the lubrication cabinet so they are readily available when needed. It may not look like much of a difference, but it has a totally different feeling now as there is room between various bottles and I can see pretty much everything, with the most used ones at the front.
shop2.jpg

Nice spaces between various bottles and easily reachable as needed. Granted, there are some that are not used nearly as much as they once were, such as the Lubriplate, 2-stroke needle application bottle and some of the assembly lubes, but it looks and feels so much better.
shop3.jpg


After finishing up the shelf and emptying garbage cans, I gave the shop a thorough detail sweeping behind all equipment and it's ready for the next job coming in.

Thanks for looking.
 

Scuderia-F1

Well-known member
Joined
Feb 9, 2011
Messages
1,198
Location
Stockholm, Sweden
Anders, now I have another one. About a couple of weeks ago, I broke a MAC 1/8" punch. I am a huge fan of the MAC/Proto punches, chisels and drifts and feel they are the perfect balance between brittleness and toughness in a punch. I have had my MAC punches and Proto chisels for pushing 30 years now and very seldom ever break one. I went onto the MAC tool truck yesterday to get it replaced and as he handed me the new one, I realized it was no longer that bronze color that they have been for decades. They are now a black oxide finish so of course, they don't match the rest. 🤬 So, now I get to look at that one each time I open the punch drawer. :rolleyes:
It never ends…. 🤣
 
To avoid these ads, REGISTER NOW!

ntsqd

Well-known member
Joined
Jan 22, 2005
Messages
997
Location
Lower left coast
I have not seen a MAC tools tool truck in literally decades. I didn't know that they were still in business. Oh yea! Another place to spend money on tools!
 
OP
Z

zmotorsports

ALLIANCE MEMBER
Joined
Oct 20, 2009
Messages
21,478
Location
Northern Utah
I have not seen a MAC tools tool truck in literally decades. I didn't know that they were still in business. Oh yea! Another place to spend money on tools!

Thom, we went for a few years without a MAC dealer as well as Matco and Cornwell. Snap-on has been pretty consistent over the past 15 or so years with the great dealer/rep we now have. However, we have only had a MAC and a Cornwell dealer for about the past 2+ years, still haven't had a Matco dealer in probably close to ten years though.

Mike, you should post a photo of the inharmonius punch collection in the WTF Thread. (Unless you think it would trigger a panic attack among some of our members with OCD tendencies...) 😉

I'll post a picture of said chaos here Scott, don't want to get too beat up on the WTF thread. :ROFLMAO:
 
OP
Z

zmotorsports

ALLIANCE MEMBER
Joined
Oct 20, 2009
Messages
21,478
Location
Northern Utah
Hope everyone had a great weekend as we prepare for Christmas.

I was able to get a lot of little loose ends ******* in the shop over the weekend plus a couple things I hadn't planned on.

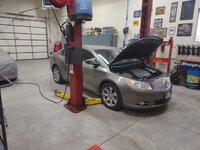
I received a call from the gentleman who owns the Buick LaCrosse that I have worked on in the past. He mentioned that he had a small puddle of coolant under his wife's car over the past few days so I told him to drop it off and I'd take a look at it. I had replaced the radiator in the car in the spring of 2023 so I knew the radiator was covered under warranty, but I have not really had any issues with these in the past. I called my local NAPA to see if they had one in stock, which they didn't, but they had one in the warehouse in Salt Lake and could have it later in the afternoon Thursday.

He and his wife dropped off the car Thursday evening, but my wife and I were on our way out the door to go to a viewing and I didn't have time to look at it right away.
buick1.jpg

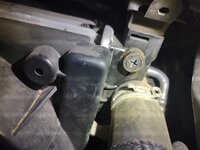
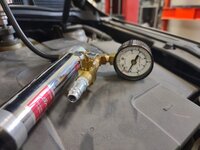
Friday we had a funeral to attend but afterwards I was able to sneak out to the shop and find the source of the coolant leak. After pumping up the cooling system to pressure I saw a pretty decent stream coming from this small plastic plug.
buick2.jpg

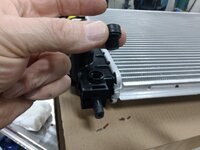
This is why I love dealing with my local NAPA store. I called the branch manager to inquire about the plastic plug and if a gasket or O-ring was available. She mentioned that the radiator I had ordered showed up and I could come and get it. I told her I hated to warranty our an entire radiator when it was just the small gasket/O-ring. She said just grab the radiator and use whatever parts I needed from it or the whole thing, either way it's a warranty issue. I was shocked because there was nothing actually wrong with the radiator, but this is why I love dealing with my local NAPA. I don't have parts issues a lot, but when I do they take care of me without question.

I ran Saturday morning and grabbed the new radiator, all for a small plastic plug.
buick3.jpg

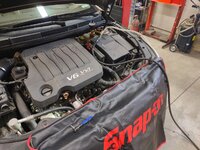
To minimize coolant loss, I pulled a vacuum on the cooling system.
buick4.jpg

Then quickly swapped out the plug and gasket.
buick5.jpg

Once the plug was replaced, I pumped the system back up to full pressure to verify the leak was repaired.
buick7.jpg

Sure enough, nice and dry now.
buick8.jpg

I called the client to come and pick up the car while I wiped up any spilled coolant from the belly pan of the car.

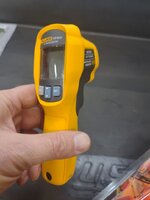
Also, while I was out getting parts I stopped by my local Grainger to see about getting a replacement IR gun. I had an older Raytek IR thermometer for probably 15 or so years and when we were working on my son's Jeep a couple of months ago, I noticed it was acting erratic. Then I grabbed it last week to check temps in the RV/storage bay and noticed it had completely quit working. I called my local Grainger branch and they mentioned they had a couple of Fluke models on promo so I stopped by and grabbed a new one. Probably overkill for my use, but it looks like a nice one.

ir1.jpg

ir2.jpg

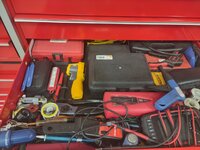
I tossed the old Raytek thermometer as well as the molded plastic case I stored it in and it freed up some space in the electrical drawer for the new one.
ir3.jpg


Thanks for looking.
 
OP
Z

zmotorsports

ALLIANCE MEMBER
Joined
Oct 20, 2009
Messages
21,478
Location
Northern Utah
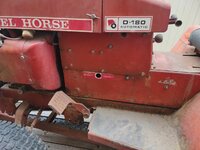
While I was waiting for the owner of the Buick to come and get it, I decided to air up the tires on the Wheel Horse yard tractor and get it off of my small utility trailer, in case I needed it over the winter for something.

I HATE storing things outside, but with the looming snowstorms we are expecting over the next few days, I figured I may as well get it off the trailer and get it tarped, at least until spring when maybe I can commence the restoration.

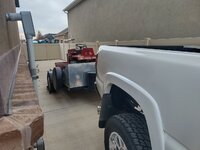
To avoid having the trailer get away from me, I hooked up the truck to the trailer.
wh8.jpg

I then aired up the tires and strapped the blade in the upward position as well as positioned the ramps.
wh9.jpg

After my son and I struggled like crazy getting this dang thing ON the trailer several months ago, he noticed this little port with the sticker that mentioned opening a valve port to allow the ability to push the tractor around. He noticed this AFTER we fought to get it on the trailer in the rain. :ROFLMAO:
wh10.jpg

We can laugh about it now. :bounce:
wh11.jpg

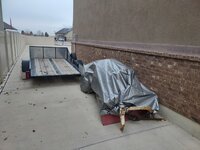
It was still heavy and awkward, but I was able to maneuver it off the trailer and alongside the shop's west wall, at least until spring when I can make time to work on it.
wh12.jpg

Tractor tarped and tire covers back on the trailer so it is available for use if needs be.
wh13.jpg

The wife is NOT happy about having a tarped project outside, but I hate to take up valuable real estate inside the shop for a project that will be a few months before I can begin on it.
wh14.jpg


Thanks for looking.
 
OP
Z

zmotorsports

ALLIANCE MEMBER
Joined
Oct 20, 2009
Messages
21,478
Location
Northern Utah
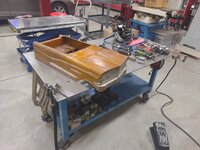
Lastly, I had a little bit of time before the owner of the Buick was able to pick it up so I knocked out a few dents on my grandson's Camaro pedal car.

My original plans for the car were to do a full-blown custom build and paint it to match our Fifth Gen Camaro. However, the wife seemed to think just leaving the patina alone and fixing it as is the maybe he would get more enjoyment out of it. That, and maybe I wouldn't be so stressed if it got a scratch or two in it. She's probably right, but don't tell her I said that. ;)
pd11.jpg

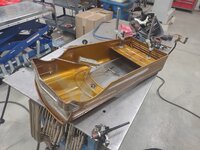
There were a couple of small cracks and tears in the sheet metal so I knocked out some dents and then closed up the cracks the tightest as I could before hitting them with a few small welds. Then metal finished off the welds. Here is the worst tear, where the steering shaft goes through the dash. It was torn about a quarter of an inch and the opening was enlarged by almost double. I hammered it back to size and welded it up, then knocked the small welds down.
pd12.jpg

There was also a split at the nose that I welded up and metal finished.
pd13.jpg

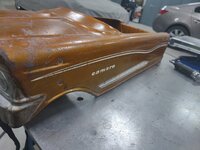
I used a wire wheel to run over the topside of the steering opening to give it that patina'd looks. I can live with this, and the steering shaft fits much better through the hole in the dash without flopping all over the place.
pd14.jpg

I proceeded to straighten the sides and address a few more dents and dings, all of which actually came out very nice. It may not look like it in the pictures, but the body looks much better and much straighter than it was originally.
pd15.jpg

pd16.jpg

pd17.jpg

I think the car is looking much better than when I bought it. I am going to replace the tires, some of the hardware with new, tighten up the steering a bit as well as add a padded seat, but otherwise I think he will have a blast with it as is and I won't be so paranoid about a few scratches or dings being added while he enjoys it.

Thanks for looking.
 

mmsheb

Well-known member
Joined
Mar 30, 2008
Messages
365
Location
Wisconsin
Mike,
Won't the Wheel Horse fit inside with the coach for the winter? Just a thought, but you have probably already considered that option.
Mike in WI
 
OP
Z

zmotorsports

ALLIANCE MEMBER
Joined
Oct 20, 2009
Messages
21,478
Location
Northern Utah
Mike,
Won't the Wheel Horse fit inside with the coach for the winter? Just a thought, but you have probably already considered that option.
Mike in WI

Yes, it "could", but it'll be tight. Much tighter than I want as I plan on going over the coach and putting a coat of polish on the coach in a couple of months and don't want to be crowded.

Also, my son obtained an older Craftsman riding mower and has been working on doing a mild restoration on it in his home garage. He's nearly completed it and I told him he could park it in the RV bay out of the weather where we used to park our Harley's as that way he can park all of his vehicles in his garage throughout the winter.

Once the Wheel Horse is restored, I will be storing it in the house garage but it will be fine outside for the next several months until I begin the restoration process. The wife just thinks it looks tacky parked outside, and while I agree with her, it really can't be seen from the street and I will NOT park it in the shop until I begin work on it.
 

ntsqd

Well-known member
Joined
Jan 22, 2005
Messages
997
Location
Lower left coast
I've been needing to build or buy a gate that would visually close off the area of our backyard where I store the ugly stuff that my wife can't bear looking at. Seems like a similar gate at the front of that slot where the trailer sits could accomplish the same thing?
 
OP
Z

zmotorsports

ALLIANCE MEMBER
Joined
Oct 20, 2009
Messages
21,478
Location
Northern Utah
I've been needing to build or buy a gate that would visually close off the area of our backyard where I store the ugly stuff that my wife can't bear looking at. Seems like a similar gate at the front of that slot where the trailer sits could accomplish the same thing?

No additional gate. I wanted an ornamental gate to the back yard for a reason, that was to show off the appearance of the shop from the street, seeing as how we dumped so much money into making the shop look like the house. The area to the side of the shop can't really be seen from the street and the intended purpose of that area between the shop and the fence separating the neighbor was for future trailer parking. I don't want to have another gate and storing projects outside is not something I am going to start, this had better be a one time deal.
 
OP
Z

zmotorsports

ALLIANCE MEMBER
Joined
Oct 20, 2009
Messages
21,478
Location
Northern Utah
Sure looks like a Wheel Horse Pat.

My plan it so set it up as a snowplow as it will be much easier to keep clean compared to being a mower. My intention is to have my grandson assist me in the restoration, then as he gets a couple years older, I can have him clear snow and he can have memories of helping me restore it. That way I can sit and enjoy a cup of coffee or three while he "plays" with it clearing snow. It will be a win/win. ;)
 
To avoid these ads, REGISTER NOW!
Top Bottom