To avoid these ads, REGISTER NOW!

ZMotorsports Shop Projects 2.0

To avoid these ads, REGISTER NOW!

Jgaz

Well-known member
Joined
Dec 16, 2016
Messages
1,713
Location
AZ
how do you like az? I’ve been there twice and don’t see the appeal, but as I get older more and more of my friends are buying second homes there
I’ve lived here twice. Six years the first time and 10 years this second time.
My son stayed out here when we moved back to Michigan 2004.

I love to hike. The canyons of the SW are my obsession, especially the Grand Canyon where I’ve been a volunteer for the past 10 years.

Really though, it ***** here. Try New Mexico, they like snow birds there. 😉
 
OP
Z

zmotorsports

ALLIANCE MEMBER
Joined
Oct 20, 2009
Messages
21,477
Location
Northern Utah
I must have missed the sending them off to get chrome finished. They do look unique and very amazing!

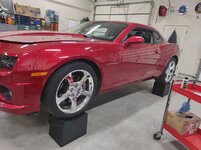
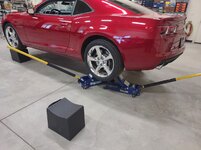
I think I have met you in person twice but I’m not sure if your guys realize how tall @zmotorsports is. I’m average size and I think Mike is in the 6’5” range? I totally understand the block idea and getting things up to a height that doesn’t mean bending at the hips.
Blocks look excellent to me.


I do think I have seen a version of those blocks that have a ramp option? Could you drive back of car onto ramps and then lift the front maybe ? Not that your process was flawed in any way just thinking through text
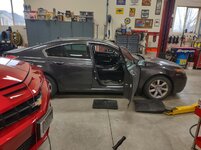
Thanks Dave. Just for the record though, I'm only 6'2", but still tall enough having the car up on some 12" blocks sure make it nice to detail and work on. I actually briefly looked at the ramp extensions that Race Ramps make and didn't really felt like they were necessary for my application and I didn't want the extra cost nor storage issues. Currently these stack nicely and store right behind my floor jacks so they don't really take up much floor space in the RV/storage bay.
 
OP
Z

zmotorsports

ALLIANCE MEMBER
Joined
Oct 20, 2009
Messages
21,477
Location
Northern Utah
I didn't get much accomplished in the shop over the weekend as the wife and I had some family matters to attend to. However, when we took her car to a viewing last week, I noticed there was a slight "chirp" and it sounded like it was coming from the passenger side, couldn't tell if it was under the seat or where it was, but it sounded like it was in the corner between the dash and door panel. The wife said she didn't hear it before so I thought I'd investigate Saturday morning. I took the car for a quick wash job and didn't hear a single peep out of it, so I thought to myself, she drives the car alone most of the time, it must be something under the passenger seat.

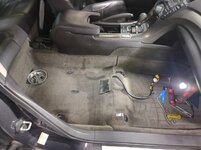
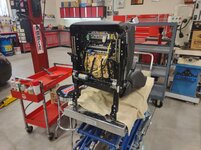
Out came the passenger seat to investigate.
tl1.jpg

tl2.jpg

tl3.jpg

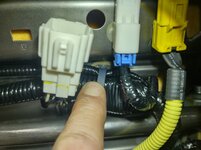
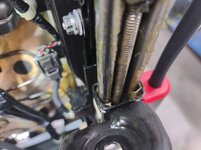
While moving wire looms and connectors around, this large bundle made an odd sound. I also noted that it was adjacent to the shaft for the height adjustment shaft so I thought maybe, just maybe that was moving in the attachment hole. I sprayed a little Fluid Film behind the connector which eliminated the noise completely. I wasn't 100% sure that was the noise, but it was "a" noise with the seat out on the bench.
tl4.jpg

With the seat out I went ahead and lubed the threaded slides and pivot points.
tl5.jpg

I put the seat back into the car and took it for a test drive and NOTHING. Quiet as a church mouse. Not a single chirp or peep out of it and I took my "bumpy" test loop making sure to hit as many bumps as I could, not a sound.

So the wife and I had a family matter to attend to Saturday afternoon and decided to take her car. We generally don't drive her car much at all on weekends but I wanted to make 100% certain the noise was gone. We didn't make it out of the neighborhood and I heard it. Very faint, but I heard it. Then again about a half dozen times in the several mile drive. To say I was pissed is an understatement. I had the wife drive home while I rode shotgun to investigate further. It was so faint but distinct and sounded like it was right behind the dash between the door and dash/glovebox area.

I generally don't work on Sundays in the shop, but it was driving me nucking futs. I went out to the shop and pulled the glove box apart, the cabin air filter and investigated the blower motor, everything seemed fine. Upon closer investigation of the door panel I noticed that at the front upper edge, the door panel was popped loosed and away from the inner door about a quarter of an inch. With that area so close between the door panel and dash I thought maybe that could be making contact during a bump. So off came the door panel.
tl6.jpg

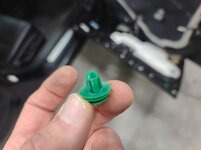
I did find this attachment barb, not holding so I swapped it one of the others that had less pressure on it and reinstalled.
tl7.jpg

Now the door panel was nice and tight in against the inner door and the gap matched the driver's side. I took the car for a test drive around my test loop and not a single chirp or noise. Again, I thought maybe, just maybe that was the issue.
tl8.jpg


We took the car to our kid's house Sunday night so I could fuel the car for the wife's weekly commutes. No sooner hit the highway and the noise was back. 🤬 By this time I was about boiling, this thing was kicking my *** and I was no closer to finding the damn noise.
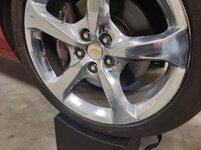
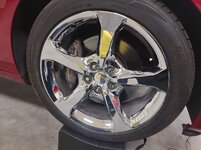
While stopped for fuel, I thought I'd pop the hood and just jounce on the front right corner and see it I could hear anything from the engine side of the firewall. It took some very hard and abrupt bounces but I did hear the chirp, and it was right at the front right corner. Holy ****, it wasn't coming from the interior. The sound was so distinct and crisp when it happened that I would have bet money it was coming from the interior. I have not fought to find a noise like this in a long, long time. I still haven't discovered the exact source of the noise, but I have a much better idea of where it is coming from.

Unfortunately, I will have to wait until this weekend to get the car back from her to further diagnose the noise, but I am suspecting either a sway bar bushing, suspension bushing but something definitely in the front right suspension system. I don't suspect anything with a bearing nor brakes because I can get it to make the noise without anything rotating. It was also odd that it took only a slight difference of having someone in the passenger seat, which is leading me towards suspecting a bushing or sway bar link. :unsure:
 
OP
Z

zmotorsports

ALLIANCE MEMBER
Joined
Oct 20, 2009
Messages
21,477
Location
Northern Utah
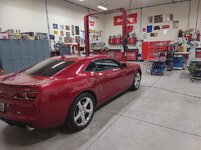
Last night I was able to get the Camaro completed before the wife arrived home from work.

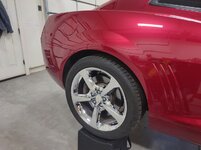
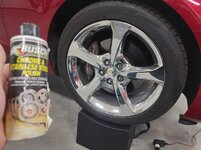
Time to break out the Busch's Chrome and Stainless Steel Polish and treat the wheels.
cam51.jpg

A little goes a long ways, so a thorough application around the wheel.
cam52.jpg

Then I polished it off using a microfiber towel.
cam53.jpg

Beautiful.
cam54.jpg

Next wheel.
cam55.jpg

And the final two received the same treatment.
cam56.jpg

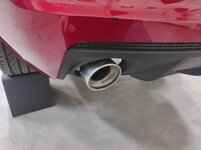
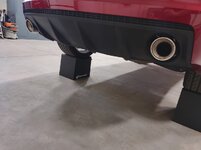
While I had the polish out and the car was up on blocks I figured I would give the polished stainless steel exhaust tips a going over with it as well. Applied a bit and worked up behind the rear valance.
cam57.jpg

Then polished it off with a microfiber towel and one down.
cam58.jpg

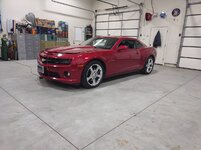
With both tips polished, the car is ready to be lowered back down to the ground.
cam59.jpg

I'm pretty pleased with the results.
cam60.jpg


More pictures to come.
 
OP
Z

zmotorsports

ALLIANCE MEMBER
Joined
Oct 20, 2009
Messages
21,477
Location
Northern Utah
I never realized the question(s) about getting the car up or down from the blocks would even be asked but I thought I would document the reverse order of putting the car back down to ground level as well as time it. I didn't time myself while putting the car up on the blocks but I know it was less than 10-minutes. That may not be worth it for a quick hour job or the like, but for a several night project it definitely makes working on the car much more comfortable having it elevated by only 12 inches.


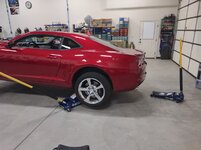
The 3-ton floor jack doesn't quite go high enough to get the tires up off the blocks when the suspension droops, so the smaller 2-ton low profile jack raises up slightly on the suspension to clear the block by about an inch which allows the blocks to be easily slid under or out from under the car.
cam61.jpg

Once the driver's side block was pulled, the passenger's side rear was lifted slightly to pull the block, then the two jacks were lowered side by side evenly until it was sitting back on the two rear tires.
cam62.jpg

Rear down. If you look at how close the rear valance is to the ground you can see that going in from in front of the rear tire makes much better sense to avoid interference issues with the jack.
cam63.jpg

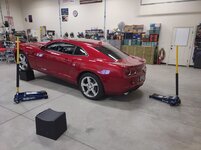
Then the process was repeated on the front. The 3-ton jack raises up the front middle, while the low profile jack lifts each front corner just enough to compress the suspension and allow the blocks to be either inserted or removed. Then the center jack lowered and it's done.
cam64.jpg

Floor jacks and blocks stored in the RV/storage bay. You can see the blocks take up very little space and they only weigh a few pounds each so they are quite easy to use then stack out of the way.
cam65.jpg

Car is now complete and ready for driving.
cam66.jpg

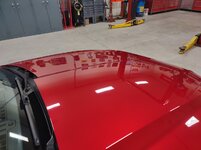
The hood looks so much better with those water spots removed. Nice clarity.
cam67.jpg

cam68.jpg

cam69.jpg

The weather has been quite nice here along the Wasatch Front the past week or so, cold but clear, so the wife and I talked about taking a drive over the weekend, but now it's looking like a storm is coming in for the weekend so time to put the cover back on as it looks like it will be a while before we're driving it.
cam70.jpg

With the cover back on the Camaro, the shop was detailed and prepped for the next projects.


Thanks for looking.
 

WoodsTruck

Well-known member
Joined
Jan 12, 2013
Messages
1,028
Mike,
Nice job on the cars.
What lube do you use on the seat moving threads? I likely need to do that on my pickup.
 
OP
Z

zmotorsports

ALLIANCE MEMBER
Joined
Oct 20, 2009
Messages
21,477
Location
Northern Utah
Thank you.

I tried something new this time. I generally use ZEP 2000 spray grease. It is an aerosol that thickens upon contact and does a good job of lubricating. We started using it at work about 30 years ago when we had a great ZEP rep and I have just continued using it ever since. However, I am about out of it, so I used some Fluid Film on the threaded seat adjusters. It states "lubricates" as well as for corrosion protection, so I thought I'd give it a try. I used Tri-Flow on the actual pivot points for the mechanisms.
 

orangeblood

Well-known member
Joined
Dec 7, 2016
Messages
299
Location
Texas
Zmotorsports - i didn't know where to put this note, so i searched for your handle and found this thread.

i just finished watching your toolbox tour video and had to comment.

I am a hack home gamer, not nearly close to the bottom of your league. I LEARNED A LOT from watching your tour.

Thanks!
 
OP
Z

zmotorsports

ALLIANCE MEMBER
Joined
Oct 20, 2009
Messages
21,477
Location
Northern Utah
Zmotorsports - i didn't know where to put this note, so i searched for your handle and found this thread.

i just finished watching your toolbox tour video and had to comment.

I am a hack home gamer, not nearly close to the bottom of your league. I LEARNED A LOT from watching your tour.

Thanks!

Thank you very much for the comment and for taking the time to watch the toolbox tour.

I'm glad it was informative and you got some good information from it.
 

Jgaz

Well-known member
Joined
Dec 16, 2016
Messages
1,713
Location
AZ
I didn't get much accomplished in the shop over the weekend as the wife and I had some family matters to attend to. However, when we took her car to a viewing last week, I noticed there was a slight "chirp" and it sounded like it was coming from the passenger side, couldn't tell if it was under the seat or where it was, but it sounded like it was in the corner between the dash and door panel. The wife said she didn't hear it before so I thought I'd investigate Saturday morning. I took the car for a quick wash job and didn't hear a single peep out of it, so I thought to myself, she drives the car alone most of the time, it must be something under the passenger seat.

Out came the passenger seat to investigate.
tl1.jpg

tl2.jpg

tl3.jpg

While moving wire looms and connectors around, this large bundle made an odd sound. I also noted that it was adjacent to the shaft for the height adjustment shaft so I thought maybe, just maybe that was moving in the attachment hole. I sprayed a little Fluid Film behind the connector which eliminated the noise completely. I wasn't 100% sure that was the noise, but it was "a" noise with the seat out on the bench.
tl4.jpg

With the seat out I went ahead and lubed the threaded slides and pivot points.
tl5.jpg

I put the seat back into the car and took it for a test drive and NOTHING. Quiet as a church mouse. Not a single chirp or peep out of it and I took my "bumpy" test loop making sure to hit as many bumps as I could, not a sound.

So the wife and I had a family matter to attend to Saturday afternoon and decided to take her car. We generally don't drive her car much at all on weekends but I wanted to make 100% certain the noise was gone. We didn't make it out of the neighborhood and I heard it. Very faint, but I heard it. Then again about a half dozen times in the several mile drive. To say I was pissed is an understatement. I had the wife drive home while I rode shotgun to investigate further. It was so faint but distinct and sounded like it was right behind the dash between the door and dash/glovebox area.

I generally don't work on Sundays in the shop, but it was driving me nucking futs. I went out to the shop and pulled the glove box apart, the cabin air filter and investigated the blower motor, everything seemed fine. Upon closer investigation of the door panel I noticed that at the front upper edge, the door panel was popped loosed and away from the inner door about a quarter of an inch. With that area so close between the door panel and dash I thought maybe that could be making contact during a bump. So off came the door panel.
tl6.jpg

I did find this attachment barb, not holding so I swapped it one of the others that had less pressure on it and reinstalled.
tl7.jpg

Now the door panel was nice and tight in against the inner door and the gap matched the driver's side. I took the car for a test drive around my test loop and not a single chirp or noise. Again, I thought maybe, just maybe that was the issue.
tl8.jpg


We took the car to our kid's house Sunday night so I could fuel the car for the wife's weekly commutes. No sooner hit the highway and the noise was back. 🤬 By this time I was about boiling, this thing was kicking my *** and I was no closer to finding the damn noise.
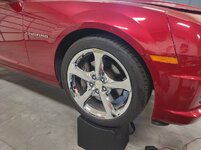

While stopped for fuel, I thought I'd pop the hood and just jounce on the front right corner and see it I could hear anything from the engine side of the firewall. It took some very hard and abrupt bounces but I did hear the chirp, and it was right at the front right corner. Holy ****, it wasn't coming from the interior. The sound was so distinct and crisp when it happened that I would have bet money it was coming from the interior. I have not fought to find a noise like this in a long, long time. I still haven't discovered the exact source of the noise, but I have a much better idea of where it is coming from.

Unfortunately, I will have to wait until this weekend to get the car back from her to further diagnose the noise, but I am suspecting either a sway bar bushing, suspension bushing but something definitely in the front right suspension system. I don't suspect anything with a bearing nor brakes because I can get it to make the noise without anything rotating. It was also odd that it took only a slight difference of having someone in the passenger seat, which is leading me towards suspecting a bushing or sway bar link. :unsure:
Mike,
You just very eloquently described many of my efforts to satisfy a new car customer with a vehicle under warranty.

This kinda complaint can be so frustrating and made even more so when you try to get paid for it under GM’s warranty pay rules and flat rate!

One of my worst was a center dash area squeak in late 70‘s Camaros. One would be positive that the squeak would located in the interior. It wasn’t.
The noise was caused by a body mounted hood bumper in the rear center of the hood!
This noise just about drove me to drink to until I found it.
 
OP
Z

zmotorsports

ALLIANCE MEMBER
Joined
Oct 20, 2009
Messages
21,477
Location
Northern Utah
Mike,
You just very eloquently described many of my efforts to satisfy a new car customer with a vehicle under warranty.

This kinda complaint can be so frustrating and made even more so when you try to get paid for it under GM’s warranty pay rules and flat rate!

One of my worst was a center dash area squeak in late 70‘s Camaros. One would be positive that the squeak would located in the interior. It wasn’t.
The noise was caused by a body mounted hood bumper in the rear center of the hood!
This noise just about drove me to drink to until I found it.


That last sentence was exactly what I said to the wife. :ROFLMAO:

She kept saying it was no big deal and not to waste any more time looking for it as it usually doesn't make the noise. I'm assuming because no one is sitting in the passenger's seat, but it still bugged me that something was not right. As good of care as she takes of me, I want to make sure she doesn't have to "live with" a noise as she has quite a lengthy commute each day, so I want it to be as comfortable and stress free as possible.

But it was about driving me to drink.....:scared: and I still haven't fully nailed it down, yet.
 

ntsqd

Well-known member
Joined
Jan 22, 2005
Messages
997
Location
Lower left coast
Years ago a friend who worked in a GM dealership unintentionally became their NVH complaints go-to guy. And he was deaf in his left ear!
Anyway, he bought a tool off of one of the trucks that was a set of small mics attached to alligator clips, a switch box, and some headphones. He said that it made tracking down where a noise was coming from a LOT easier. No idea if such a thing is still available, and worth the money.
 

Scuderia-F1

Well-known member
Joined
Feb 9, 2011
Messages
1,198
Location
Stockholm, Sweden
Years ago a friend who worked in a GM dealership unintentionally became their NVH complaints go-to guy. And he was deaf in his left ear!
Anyway, he bought a tool off of one of the trucks that was a set of small mics attached to alligator clips, a switch box, and some headphones. He said that it made tracking down where a noise was coming from a LOT easier. No idea if such a thing is still available, and worth the money.
Steelman Tools makes a good kit, it’s called ChassisEAR. It’s an essential tool for tracking down rattle, noises such as bearings or bushings etc.
 

aka Larry

Well-known member
Joined
May 2, 2012
Messages
8,099
Location
Eastern, NC
One of my worst was a center dash area squeak in late 70‘s Camaros. One would be positive that the squeak would located in the interior. It wasn’t.

I owned an '86 Camaro for 7 years. Pretty much all the interior bits squeaked, but so did the whole damn car so it was hard to tell. Still, I want a 3rd Gen IROC-Z so bad I can taste it.
 
OP
Z

zmotorsports

ALLIANCE MEMBER
Joined
Oct 20, 2009
Messages
21,477
Location
Northern Utah
Years ago a friend who worked in a GM dealership unintentionally became their NVH complaints go-to guy. And he was deaf in his left ear!
Anyway, he bought a tool off of one of the trucks that was a set of small mics attached to alligator clips, a switch box, and some headphones. He said that it made tracking down where a noise was coming from a LOT easier. No idea if such a thing is still available, and worth the money.

Steelman Tools makes a good kit, it’s called ChassisEAR. It’s an essential tool for tracking down rattle, noises such as bearings or bushings etc.


I think I've shown the Chassis Ear tool on my thread here before. I have had mine for 25+ years and it works great when all else fails. My ONLY concern when using it is the wiring that runs all over. I understand the new version is bluetooth (cordless), but can't justify upgrading to the cordless one at this time. The Chassis Ear comes out of the cabinet when nothing else has worked to locate the noise. I don't think I am to that point, yet. I have only recently discovered that the noise was NOT coming from the interior, so I just need to get the car from the wife and see if I can track it down. If I have no success with the naked ear, then I'll more than likely break out the Chassis Ear.
 
To avoid these ads, REGISTER NOW!
OP
Z

zmotorsports

ALLIANCE MEMBER
Joined
Oct 20, 2009
Messages
21,477
Location
Northern Utah
I owned an '86 Camaro for 7 years. Pretty much all the interior bits squeaked, but so did the whole damn car so it was hard to tell. Still, I want a 3rd Gen IROC-Z so bad I can taste it.

Unfortunately Vincent, it wasn't/isn't just one make or model that is plagued with squeaks and creaks. With so much plastic in cars these days, it is hard to keep them quiet. The plastic expands and contracts at different rates than the steel or aluminum that it is fastened to and temperatures play a huge roll in when and how bad these noises sound. Take a dash apart and put it back together and you've just multiplied the chances of having a squeak. This is why I hate interior work and when I do, I make sure to put all wiring and clips back in their respective locations. One of my biggest pet peeves is pulling a dash or interior component apart only to find out I am not the first person who's been in there and the person before me was less than concerned about where everything went.
 
OP
Z

zmotorsports

ALLIANCE MEMBER
Joined
Oct 20, 2009
Messages
21,477
Location
Northern Utah
Now that you mention it, I do recall previous mentioning of the Chassis Ear. I had forgotten about that and was experiencing a little deja vu with my post above. Now I know why.
If I cannot locate the source of the squeak with the naked ear, I may have to resort to digging the Chassis Ear out. Hope not. While it's a nice tool and works as advertised/designed, it's not one I like to pull out very often.
 
OP
Z

zmotorsports

ALLIANCE MEMBER
Joined
Oct 20, 2009
Messages
21,477
Location
Northern Utah
I was able to get an item marked off the coach's "to do" list last night. Serviced the fluid in the HWH hydraulic reservoir. The auxiliary hydraulic system on our coach provides the hydraulic power for the two front slides as well as the genny slide out the front where our Onan 10kw diesel generator resides. The hydraulic system is made by a company called HWH, which are well known in the RV industry for their slide and leveling jack systems, however, our coach being as heavy as it is doesn't have hydraulic leveling, only air leveling so no hydraulic leveling jacks to have to screw with. Plus, on heavy coaches they mainly like to sink into the ground and even hot asphalt, so I much prefer air leveling and one of the top priorities that was on our "must-have" list when we were looking for coaches.


Routine maintenance on the hydraulic fluid is an often overlooked maintenance item on these coaches. This is the 5th time I have replaced the fluid in the 18 years we've owned the coach now as it is quite easy to do so I perform this task about every 5 years. I don't get all of the fluid removed by just doing the reservoir and the only way to get all the fluid out would be to start disconnecting hydraulic lines to each of the cylinders for the slides and genny slide and purge the old fluid out. IF you have a very dirty/contaminated system that may be the process you need to do, however, if you stay up on the maintenance it is just a matter of siphoning out the fluid and replacing every several years, but this is very often overlooked on many coaches.

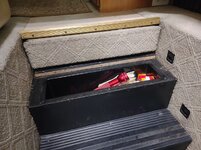
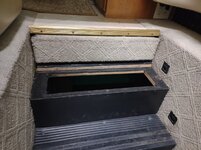
I started by removing the top step cover that is hinged in place to allow access to the storage tray beneath. Then removed the storage tray. Some of the newer model Monaco's don't require step removal and the tray is easily removed by lifting out, but our older coach requires removing the hinge and the tray is screwed in place by six fasteners.
coach1.jpg

Step tread and tray removed.
coach2.jpg

To expose the HWH hydraulic reservoir directly beneath. It's a reach down in there but this is the easiest access. When just checking the fluid, with the coach at ride height, I crawl underneath and remove the vent cap/dipstick to check, but for anything more than a quick check, taking the five minutes or so to remove the stair tread and storage cover nets the best accessability.
coach3.jpg

Then just use a 1" wrench to remove the vent cap/dipstick after spraying off the top to remove any debris so it doesn't get knocked into the reservoir.
coach4.jpg

Vent cap removed.
coach5.jpg

Then I use my vacuum system to evacuate the fluid from the reservoir. Easy Peezy.
coach6.jpg

As you can see the hydraulic fluid that I am removing is still nice and bright red. I think the key is to change it more often than not to keep up on the maintenance and not allow it to become dirty and contaminated. While it is a fairly contained system, it is still hydraulic fluid that is vented to atmosphere and needs to be replaced from time to time. Unfortunately, this is a very overlooked task on these coaches and I feel most owners don't even think about it as it is buried and out of sight/out of mind. But then they wonder why they all of a sudden begin to have hydraulic issues with this system. :unsure:
coach7.jpg

When the fluid is extracted, I grab a long narrow funnel and refill.
coach8.jpg

Then reassemble the step area and done.
coach9.jpg


I actually got busy cleaning up and putting tools away and forgot to take a picture of the finished area with the top stair tread reinstalled.

Thanks for looking.
 
OP
Z

zmotorsports

ALLIANCE MEMBER
Joined
Oct 20, 2009
Messages
21,477
Location
Northern Utah
Smart move to stay ahead of the maintenance and avoid hydraulic problems!

Thank you. I've seen this maintenance item often overlooked on these coaches, so I also posted it over on the Monacoers forum to help remind fellow Monaco owners to add this to their maintenance schedule.

Being vented to atmosphere, like any other fluid, it can over time draw moisture in and slowly contaminate and degrade the fluid, so routine maintenance wards off problems caused by neglect at least.


What type of hydraulic fluid do you use in that system Mike?

I keep a couple of different flavors in my shop for the different assorted equipment.

Good reminder on this maintenance item Mike! Thanks!

I'm also wondering what fluid you use. We have air leveling as well and I don't think I'd ever want a jack leveling system.

Thanks guys, this system just uses standard Dex III/Mercon fluid, nothing special.

Marc, like you I keep a variety of fluids on hand that fit my personal vehicles, all other vehicles that come through my shop I only buy exact type and quantities needed. Dex III is less used these days so I generally don't keep as much on hand as other fluids, but I had "just" enough on hand. I now just need to replenish my stock.

Keith, air leveling was on my "must-have" list on this coach. I had hydraulic leveling our previous coach, 38' Beaver, and I found that once a coach surpasses approx. 26~ish thousand pounds, that is where I recommend air leveling vs. hydraulic. Our 38' Beaver weighed right @ 29k pounds and when parked on hot asphalt it had a tendency to slowly sink into the surface, grass or other substrate was even worse. When we'd go to the sand dunes in Idaho, we parked on grass and I'd chase the level of our coach all weekend and then upon leaving have to dig the 14"x14" blocks out of the grass. I'm sure the campground owners were pleased. :rolleyes: However, our friends in their 34' Journey weighing in around 25k had no issues whatsoever. When we were looking for our new to us coach back in 2006 I insisted on air leveling as an option. Several I looked at had both air and hydraulic but I figured the big boys (Prevost/Newell) didn't have hydraulic and they didn't seem to miss it so I didn't even want to have hydraulics on the coach as it would be another system with lines and rams to have issues. I was pleasantly surprised when we found our 2003 Dynasty that was special ordered with air leveling only. :thumbup:

Now after 18 years with this coach I haven't missed the hydraulic levelers one bit. I love it when we pull into a rest area or scenic park for a quick lunch break to just dump the high side a bit and be level while enjoying a quick lunch, then it airs back up quickly and we're back on the road. No need to have any more contact with the ground than the tires.

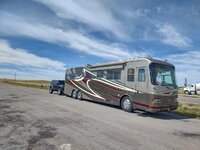
Here's an example from our last trip to South Dakota. Pulled off at a historical monument for lunch and just dumped the passenger's side to level.
sd1.jpg
 

ScepterToad

Well-known member
Joined
Nov 9, 2023
Messages
340
I love the air leveling for all the reasons above. And, the hydraulic seems to have a bit of a mind of it's own. Two examples I've seen in person are my BIL's Thor Magnitude (Super C) and a REALLY nice coach (forget the brand) at West Glacier. The Thor has always given him fits and it seems to like all the wheels of the coach off of ground. And if there's any major slant to the site, be has to put blocks under some and not others, and the electronic systems must have some sort or accelerometer in it. Everyone has to leave the coach because if a kid turns over on a bed while leveling, it sits there and goes up and down for 5 minutes before it decides to finish. I've seen it take him an hour to level his coach. He's had the system worked on several times.

The coach in West Glacier was a high end tag axle (~45' long). I came out of my door and immediately saw the passenger front tire off the ground. And this was a KOA with pretty level sites. Stupid on all accounts.

Some of that could be user error I suppose. In any case, I hit a button, the coach sinks down and levels up. I use it for short stops, fuel stops, and stays. Easy and convenient. Exactly what I expect.
 
OP
Z

zmotorsports

ALLIANCE MEMBER
Joined
Oct 20, 2009
Messages
21,477
Location
Northern Utah
I hope I don't get abused here, but let's see how this goes as I am trying to be honest with my practice and findings.

Yesterday I posted a comment on Eric's thread @NUTTSGT where he is restoring a floor model drill press. Eric has spent quite a bit of time and effort on the restoration of his drill press, and I had suggested that to keep the table looking nice that on occasion he breath over it with a DA and about 80-grit which keeps a nice metal finished appearance. @zanyad brought up a question or point I hadn't anticipated. He had mentioned the potential to distort or damage the equipment by using a DA sander and not a stone as is the recommend procedure. I commented that I agreed on high precision equipment such as a mill, where I only use a stone, but a drill press, vertical bandsaw and disc/belt sander while are precision tools, not to the same level of precision of say a milling machine. I had commented that I have been performing this practice for more than a couple of decades and have seen no adverse effects but also emphasized the importance of "breathing" over it and not focusing on one spot. Go over it uniformly and quickly not dwelling on any particular area was the key. There were other comments but that was the gist of it.

I then contemplated my response and realized I can be quite opinionated at times so below was my response:
Although, this is just my opinion based on personal experience, it did get me thinking. Unfortunately, many such opinions exist all over the internet these days, but this did get me wondering if I am correct or just "think" I'm correct. I think many of us repeat things we hear or think of them as gospel, but few are willing to actually test those theories or opinions. I realize I am quite opinionated about many things I have done over my nearly 4 decades of wrenching, but I would like to prove this to myself and confirm that there isn't any noticeable wear. I think I am going to run a precision straightedge across the tables tonight and verify. Like my favorite leader once said, "trust, but verify".

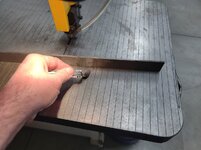
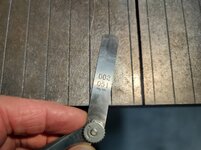
I wanted to validate my opinion on if there were any adverse effects to my equipment OR prove I was wrong to myself and change my behavior. Last night I did just that so I thought in the spirit of being honest and transparent that I would post my findings here, rather than muddy up Eric's thread with my gibberish and ramblings.

So here are my findings on all three pieces of equipment that I mentioned in Eric's thread.

Starting off with my vertical bandsaw. I purchased this piece of equipment new in 2014 so I have owned it just over 10 years and treat it to this metal finished process a few times a year while performing the same treatment to the other pieces of shop equipment.

The same precision straightedge and feeler gauge were used in all tests. Sorry, this will be very picture heavy as I went around each piece of equipment measuring different angles and areas of the tables.

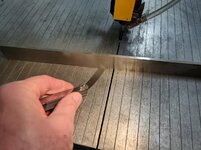
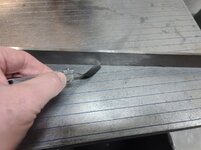
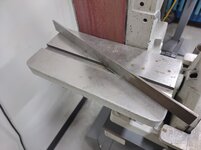
First off was a .002" feeler gauge that would not slide under the precision straightedge.
da1.jpg

In either area left or right of the blade. It did want to catch on the edge near the middle so I wanted to be sure to capture any deviation.
da2.jpg

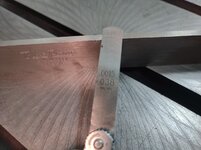
Feeler gauge used above.
da3.jpg

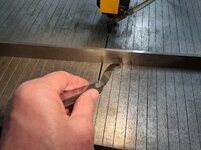
In the middle area I was able to slide a .0015" feeler gauge under the straightedge with a very slight drag. I think this was more due to the groove being right down the middle of the cast table and usage over time vs. the actual metal finishing however.
da4.jpg

To the right of center the .0015" feeler gauge would not fit.
da5.jpg

.0015" feeler gauge.
da6.jpg

Nor would the .0015" feeler gauge fit under anywhere else along the bandsaw's table.
da7.jpg

Overview.
da8.jpg

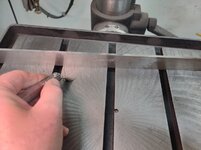
Moving on to my floor mounted 20" vertical drill press's table. I purchased this Jet drill press new in 2010 so I've performed the same routine to this for 15 years now and using a .0015" feeler gauge I found no deviation anywhere around the table in various angles or positions.
da9.jpg

da10.jpg


Stay tuned, many, many more pictures to come....
 
OP
Z

zmotorsports

ALLIANCE MEMBER
Joined
Oct 20, 2009
Messages
21,477
Location
Northern Utah
Continuing on with the drill press.


Notice the original machining marks from the large flycutter the manufacturer used. These have not changed over the 15 years I've owned the machine. They are barely detectable with a finger nail and have not disappeared or dimished over those years by hitting the table with a DA and 80-grit paper over all those years. Again, the theme is quick and keep moving uniformly, not staying in one spot.

da11.jpg

da12.jpg

da13.jpg

da14.jpg

da15.jpg


Next moving on to my combination disc/belt sander. This is probably one of THE most used pieces of equipment in my shop, if not the most used. I purchased this piece of equipment new in the late 90's, so over 25 years of seeing the same procedure as above.
da16.jpg

da17.jpg


da19.jpg

da20.jpg

This table showed absolutely zero signs of allowing a feeler gauge under the precision straightedge, even after all these years.


Stay tuned for more pictures....
 
OP
Z

zmotorsports

ALLIANCE MEMBER
Joined
Oct 20, 2009
Messages
21,477
Location
Northern Utah
Continuing on.

Moving up to the belt table. Still, no indication of a .0015" feeler gauge wanting to begin sliding under the straightedge.
da21.jpg

da22.jpg

From multiple angles and placements of the straightedge.
da23.jpg

da24.jpg


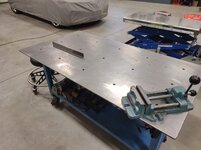
Now moving on to my fabrication table. THIS is where I was really surprised. This table is shop built back in the late 90's and had been heavily, heavily used over the past 25+ years. I did take good care during the building process to ensure the framework was flat and not tweaked as well as when putting the 1/2" plate on top to ensure it being as flat as I could make it. I fabricated quite a few ATV sand drag chassis on this table as well as numerous suspension components and although I never had an issue with fitment on any of them, I also always "assumed" the table was not perfect. In fact, I still drool over all of the certified welding/fixturing tables I see online, but just can't justify the money to add one to my shop when what I have has worked so well for so long. Am I saying it is as nearly perfect as a certified fixturing table? HELL NO! That is not what I am saying nor implying. I am merely saying that with care and attention to detail if you choose to build a welding table, you should be able to get it very, very close to flat.


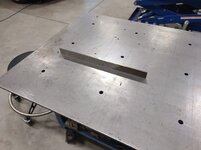
Then about 4 or 5 years ago I removed the mill scale and drilled some fixturing holes in the table. This corner where the precision straightedge is sitting seems to be the corner of the table I have a tendency to gravitate to when working. I do this subconsciously and probably due to me being left-handed is why I tend to favor this corner.
da25.jpg

da26.jpg

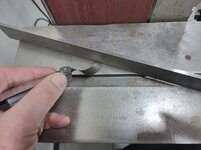
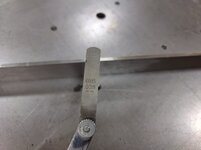
A .0015" feeler gauge fit under the precision straightedge in several locations and angles.
da28.jpg

But not in others, so pretty damn close.
da29.jpg

da30.jpg


Stay tuned for more pictures....
 
Last edited:
OP
Z

zmotorsports

ALLIANCE MEMBER
Joined
Oct 20, 2009
Messages
21,477
Location
Northern Utah
Last set of pictures, I promise.... ;)


The process I use is I'm sure quite controversial, but I can now verify that it works and does not degrade my equipment.

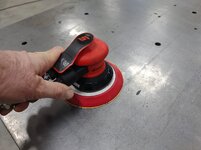
All I use is a 6" DA with 80-grit paper.
da31.jpg

I make sure to place the sander dead nuts flat on the surface and not at an angle nor do I dwell in any one area. I keep the sander moving and I always start with the fabrication table with a new sanding disc.
da32.jpg

It may be hard to tell, but the top section has not been sanded yet, whereas the lower section has been sanded. Very faint swirls are evident. The table is far from perfect, as it has dents and dings from more than two and a half decades of abuse and use, but overall still quite flat.
da33.jpg

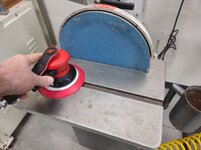
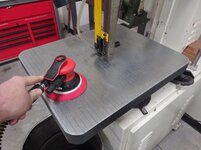
With the fabrication table sanded, I then move to the drill press with somewhat work sandpaper.
da34.jpg

Then I proceed to the vertical bandsaw and disc/belt sander with even more worn paper.
da35.jpg
da36.jpg

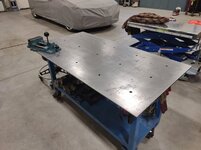
Overview of the welding/fabrication table.
da37.jpg

Overview of my older equipment where I've used this process many, many times over the years.
da38.jpg

When it comes to the milling machine, I do use a stone and the DA goes nowhere near it. I stone the table anytime the vise is off the table, before it goes back on and is trammed.
da39.jpg


Sorry for the long diatribe. I wanted to say that even though the question or comment was brought up, I didn't want to just spout off an answer without actually giving it some thought and then verifying I was accurate in my statement. I trusted my years of experience and "feel" when using my equipment as I don't abuse my equipment, but I wanted to confirm I hadn't done it any harm either.

Again, "trust, but verify".
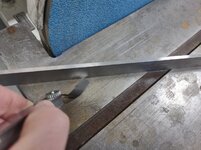

Thanks for looking and following along.
 
OP
Z

zmotorsports

ALLIANCE MEMBER
Joined
Oct 20, 2009
Messages
21,477
Location
Northern Utah
I love the air leveling for all the reasons above. And, the hydraulic seems to have a bit of a mind of it's own. Two examples I've seen in person are my BIL's Thor Magnitude (Super C) and a REALLY nice coach (forget the brand) at West Glacier. The Thor has always given him fits and it seems to like all the wheels of the coach off of ground. And if there's any major slant to the site, be has to put blocks under some and not others, and the electronic systems must have some sort or accelerometer in it. Everyone has to leave the coach because if a kid turns over on a bed while leveling, it sits there and goes up and down for 5 minutes before it decides to finish. I've seen it take him an hour to level his coach. He's had the system worked on several times.

The coach in West Glacier was a high end tag axle (~45' long). I came out of my door and immediately saw the passenger front tire off the ground. And this was a KOA with pretty level sites. Stupid on all accounts.

Some of that could be user error I suppose. In any case, I hit a button, the coach sinks down and levels up. I use it for short stops, fuel stops, and stays. Easy and convenient. Exactly what I expect.

Yeah, I've seen some of those tires in the air coaches as well Keith, and several times the ground was relatively level so didn't understand the reasoning. :unsure:

As for my air leveling, I'm only good for about 6 inches or so deviation from front/rear or side to side when leveling. I have only had a couple of issues over the past 18 years and approx. 90k miles now where the campsite was slightly more out of level than our coach's suspension could accommodate for, but those have been a rarity.
 

Jgaz

Well-known member
Joined
Dec 16, 2016
Messages
1,713
Location
AZ
I for one did not think your original reply was at all condescending.
Your work and experience speak for themselves IMHO.

If I could make one suggestion though, you posted this above,

“sander dead nuts flat”

Don't say “dead nuts” around old people😂
 

zanyad

ALLIANCE MEMBER
Joined
Apr 26, 2018
Messages
2,842
Location
NE Ohio
Sorry for the long diatribe. I wanted to say that even though the question or comment was brought up, I didn't want to just spout off an answer without actually giving it some thought and then verifying I was accurate in my statement. I trusted my years of experience and "feel" when using my equipment as I don't abuse my equipment, but I wanted to confirm I hadn't done it any harm either.

Again, "trust, but verify".
Mike, thank you for the detailed response. I did not expect such a thoroughly documented reply.
 
OP
Z

zmotorsports

ALLIANCE MEMBER
Joined
Oct 20, 2009
Messages
21,477
Location
Northern Utah
I for one did not think your original reply was at all condescending.
Your work and experience speak for themselves IMHO.

If I could make one suggestion though, you posted this above,

“sander dead nuts flat”

Don't say “dead nuts” around old people😂

:ROFLMAO::ROFLMAO: Sorry about that. I hadn't thought about it in such terms.

I'm glad the comment didn't come across as condescending, but I do realize I can come across quite opinionated at times and I'm trying to work on that. I just wanted to make sure for myself that I was not spewing erroneous information so I had better check myself.


Mike, thank you for the detailed response. I did not expect such a thoroughly documented reply.

You're welcome. To be honest, I have been doing this for so long, I just immediately replied to your original comment. Then, and only then, did I really give it some thought and ask myself "can I actually make that statement with 100% certainty there is not an adverse effect?"


Just think Mike, if you had found any degraded surfaces you could have finally justified that surface grinder you want! 😝

There is that point to make to the wife Sterling. It would have been easier to justify. :bounce:
 
To avoid these ads, REGISTER NOW!
Top Bottom