To avoid these ads, REGISTER NOW!

What did you do "IN" your garage today?

CoogarXR

Well-known member
Joined
Jan 11, 2016
Messages
6,869
Location
Ohio
At the new place, cut kitchen backsplashes out in the garage all morning.

Then cleaned up, and measured the garage interior in comparison to the garage at my current house. Starting to mentally plan on how I am going to shoehorn all my **** into this tiny garage, lol. I'm going from a 24x24 down to a 17x23. Once I get moved and get some cash from my current house sale, I plan on building something new. Hopefully something around 30x50. But it's gonna be cramped for a while. Probably at least a year. Oh well, I've lived at several places with no garage at all, so 17x23 isn't too terrible.

The new place has a 30x30 barn with a goat pen and chicken coop too, but it's all in terrible shape. I plan on having it all torn down, and building the 30x50 in it's location. Then the existing 17x23 attached garage will become my wife's garage.
 
To avoid these ads, REGISTER NOW!

PassnThru

Well-known member
Joined
Jan 5, 2010
Messages
6,512
Location
Bowling Green KY
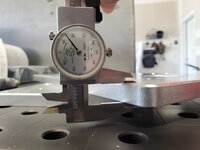
Since the Saturday replacement of the rear brakes on the kids CRV didn't fix the issue I went for the fronts today. I actually bought a clamp dial caliper from HF yesterday so I could diagnose first instead of just throwing brakes at it.
The thing is very hard to use - takes some practice I guess. I ended up getting a run out of the front rotors of 4 to 5 thousands. I thought that's not much - but after a little research Honda wants no more than 1 or 2. You could actually turn the rotor and it would hang in one spot on both rotors - the brakes on that car hang a little tight even when relaxed.
That did fix it so no hub issues - just the standard warped rotors.
 

bornbadbob

Well-known member
Joined
Jan 3, 2025
Messages
216
Since the Saturday replacement of the rear brakes on the kids CRV didn't fix the issue I went for the fronts today. I actually bought a clamp dial caliper from HF yesterday so I could diagnose first instead of just throwing brakes at it.
The thing is very hard to use - takes some practice I guess. I ended up getting a run out of the front rotors of 4 to 5 thousands. I thought that's not much - but after a little research Honda wants no more than 1 or 2. You could actually turn the rotor and it would hang in one spot on both rotors - the brakes on that car hang a little tight even when relaxed.
That did fix it so no hub issues - just the standard warped rotors.
I would spring for new rotors and pads.
 

southalabama

Well-known member
Joined
Jan 10, 2011
Messages
5,541
Location
Brewton AL
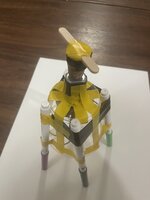
I was late to fatherhood. Now I have a five year old daughter or almost six as she tells me. She came home with a STEM project from the Girl Scouts. It’s a drawing robot. Five years old. We built it. The instructions show google eyes. She said helicopters don’t have eyes so hers doesn’t have them.

Silly me. I thought Girl Scouts Made Smores.
 

Attachments

  • IMG_9872.jpeg
    IMG_9872.jpeg
    530.1 KB · Views: 77
  • IMG_9866.jpeg
    IMG_9866.jpeg
    496.7 KB · Views: 63
  • IMG_9867.jpeg
    IMG_9867.jpeg
    823.3 KB · Views: 60

KwikFab

Well-known member
Joined
Jul 27, 2024
Messages
1,224
Location
Central Valley, CA
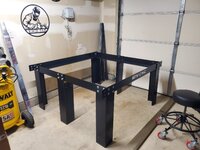
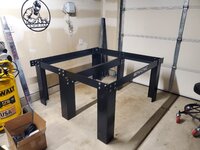
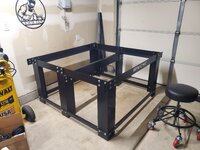
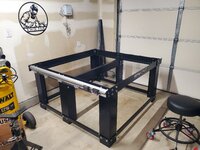
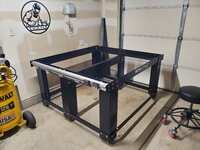
Just a bit of assembly.

Missing some hardware so this is where I have to stop.

20250506_084133.jpg

20250506_094029.jpg

20250506_120307.jpg

20250506_174622.jpg

20250507_085622.jpg

I'd expedite assembly and just buy the hardware locally but they just shipped out a complete hardware set so I'll just wait for that to arrive.

After that arrives, I can install the supports and leveling feet then move forward with leveling and squaring up the frame.

At the moment every bolt is "hand tight".

Just a tad more progress.

Apparently a revision is required for the assembly manual as the leveling feet don't need washers.

Anyway, a little progress.

20250507_145002.jpg

Before putting on the gantry plates, I had to stop and admire how beefy they are.

20250508_153812.jpg

20250508_154040.jpg

Plates installed, frame fully square.

20250508_170440.jpg

Gantry was a lot more awkward than I had hoped. Fortunately my pipe jack can sit really high so it helped to support the gantry.

Downside was with how tight the tolerances are for every bolt hole, it was a ***** and a half being able to thread everything evenly while ensuring the plate was flush with the gantry.

20250509_141406.jpg

Z-axis assembly is significantly beefier than the Z was on my last table.

20250509_141149.jpg

Magnetic break-away is standard too!

20250509_141208.jpg

Have to call it quits until Monday possibly.

Mother's Day weekend ahead of us, getting concrete done in the backyard tomorrow, and errands to run, it'll all give me time to see about getting a helping hand and getting the gantry properly squared up.

Super tough when you've got a bad back.
 

rzims

Well-known member
Joined
Oct 25, 2006
Messages
461
Location
Grass Valley, CA
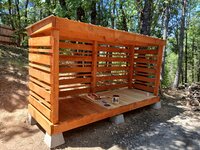
Over the last few days I've been in and out of the shop cutting lumber for a woodshed.
A neighbor mills it and although it's pine, I've sealed the heck out of it so it should last longer than I do...now to bring in a bunch of baserock to finish the area so its not a muddy mess in the winter
20250509_133851.jpg
 

PhantomEB

Well-known member
Joined
Feb 6, 2006
Messages
6,817
Location
Medicine Hat, AB, Canuckistan
Weekend away at the inlaws.

gonna simplify plans on the bronco and just run vacuum booster for the brakes but with the bigger bore MC for the one ton sized brakes.

got the linkage into the newly painted angle bracket before we took off down the highway.

FF30EF2D-6189-45A6-91E3-2FA313A39126.jpeg
Not gonna complain about hanging out with dad on his birthday out here.
 

rerod

Well-known member
Joined
Jan 30, 2015
Messages
376
Location
North English Iowa
I got the soon to be garage staked out and realized the old barn I tore down was the same width, so that's right where the new garage will sit. Then one of my X's came over on the premise she will remove stuff she left behind from last year. Took things I didn't agree with, only bc she got me #ucked up. She even asked if she could move back, real awkward. Didn't get nothing done after that.
 

alinc100

Well-known member
Joined
May 26, 2013
Messages
3,042
Location
Dearborn,MI
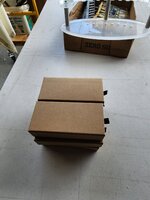
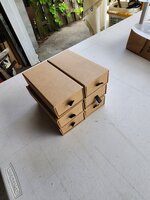
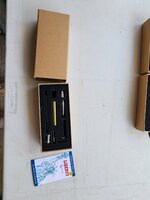
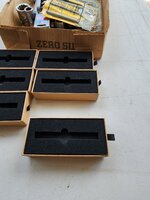
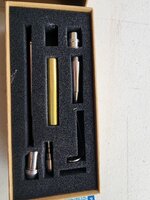
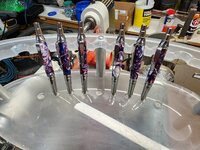
Following up on my Pen thread Here are the boxes/kits from McKenzie Pen Works in their "new, gonna cost a couple bucks more boxes". I really think the concept is great, the foam inserts get swapped around and the container goes from part carrier to pen carrier. From a marketing/sales standpoint I really think these are great. The kits are smooth, finely finished, include a Schmidt refill and an(I believe Schmidt click mechanism) . The pens below will be a gift to my nephew and his office staff on a new business that he celebrated a Grand Opening/ribbon cutting on a couple weeks back.
 

Attachments

  • 20250510_145723.jpg
    20250510_145723.jpg
    748.6 KB · Views: 20
  • 20250510_145725.jpg
    20250510_145725.jpg
    728.2 KB · Views: 21
  • 20250510_145448.jpg
    20250510_145448.jpg
    638.5 KB · Views: 24
  • FB_IMG_1745544248719.jpg
    FB_IMG_1745544248719.jpg
    112.4 KB · Views: 25
  • 20250510_145631.jpg
    20250510_145631.jpg
    932.9 KB · Views: 24
  • 20250510_145520.jpg
    20250510_145520.jpg
    788 KB · Views: 22
  • 20250510_145512.jpg
    20250510_145512.jpg
    681.1 KB · Views: 18
  • 20250510_145451.jpg
    20250510_145451.jpg
    1.1 MB · Views: 25
  • 20250510_145415.jpg
    20250510_145415.jpg
    730.5 KB · Views: 26
  • 20250510_145411.jpg
    20250510_145411.jpg
    846.4 KB · Views: 29

KFBR392

Well-known member
Joined
Feb 4, 2025
Messages
142
The weather has been incredible, so I spent the whole day in the garage. I'm in the process of doing some routine maintenance on my stereo receiver--some old plastics had deformed with age, causing some binding on the front buttons when you pushed them. Very annoying. I designed and 3D printed some replacements. I'm also replacing a bunch of old original electrolytic capacitors and a voltage regulator which has been running extremely hot and burning up its spot on the PCB, which requires some repair. I've been inside this unit a few times over the past 5ish years that I've owned it, doing some preventative maintenance and fixing minor problems. These have gone up in value pretty significantly over that time, so I think I'll be moving it along soon and replacing it with something a little less precious.
IMG_0621.JPG
 

PWC Repair

Well-known member
Joined
Dec 27, 2012
Messages
3,189
Location
Arkansas
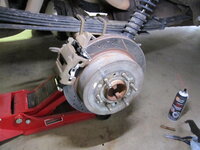
A girl friend of my wife's needed brakes done on her 2011 Chevy Equinox. Brakes were grinding & the rotors were badly scored. I replaced the rotors, pads, caliper slides & new dust boots for the slides. Three hours later good to go.
I did brakes today too!! My wife's F150 neded rears and I replaced the parking brake shoes while I was at it. Found out the shoes were actually still pretty decent but the lever that spreads them was froze up on both sides. All fixed now, even wire brushed and painted the hardware.
 

Attachments

  • IMG_3729.JPG
    IMG_3729.JPG
    655.3 KB · Views: 40
  • IMG_3732.JPG
    IMG_3732.JPG
    737.1 KB · Views: 30

cody1325

Well-known member
Joined
Apr 17, 2024
Messages
1,112
Location
Southwest Virginia
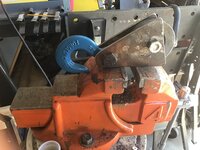
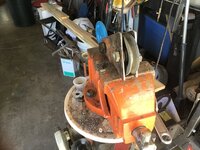
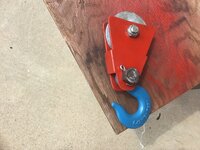
IMG_5704.jpegIMG_5707.jpegIMG_5708.jpegIMG_5717.jpegIMG_5718.jpegIMG_5719.jpegJust a small project.
Neighbors girl is headed to vet school out of state. Kansas State @ Manhattan Kansas. She has a jeep, but no winch. Scored a $5.00 come a-long at a garage sale, but it didn't have the doubler sheaved pulley. Tried to buy one, but all were low rated. Example: at tractor supply for $65.00 you get a rating of 800#. So using scrap I knocked one out that should easily exceed the come along rating of 4000#. .
Without the doubler sheaved pulley your power is only half the rating. Sheaved pulley ups it to 36 # to 1 # force.


That pulley looks great, even better than the (pricey) one on my old More Power Puller (I just checked new ones--they're double what the 5K UTV winch is at Harbor Freight!) comes with. Hand winches/power pullers are surprisingly decent for pulling, lifting, getting yourself un-stuck, etc--plus, generally, they cost less than a decent winch. And given they don't need to be permanently attached to the vehicle or need batteries--they'll always work and are portable. It's why I'm still mulling putting the 5K UTV winch on my RTV-900 (mainly, the wiring is what's gonna give me headaches). The winch may not work in 5 years, but if I take the money out of what I'm saving up for it to buy a new cable for the More Power Puller (old is completely shot and unsafe), I'm sure the More Power Puller easily has another 50+ years left in it (I think Granddad bought it new in the '70s). I'm thinking going with the Amsteel Blue synthetic upgrade for safety reasons.

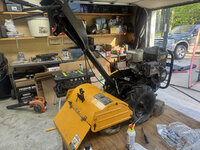
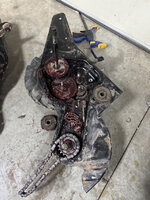
My 72 year old dad came over yesterday and we turned my disassembled tiller transmission (broken chain) back into a functional tiller.

IMG-8063.jpg

I put the tine shroud on today. Changed oil, plug, and air filter. Should be back in business.

IMG-8592.jpg

Starting to migrate tools into my new box.

IMG-8584.jpg

I can remember doing tons of stuff like that with my Granddad.

Honestly, from a serviceablity standpoint, I'm glad the worn-out Roto-Hoe that's soon-to-be Predator-swapped (old motor is tired, missing parts, and last time I remember it running 20 years ago, it didn't run well) is all belt drive. Sure, those belts are pricey (which seems to be a past few years kinda thing), but it's easier than massive work should one fail.
 
To avoid these ads, REGISTER NOW!

Jay__Dub

Well-known member
Joined
Nov 19, 2024
Messages
1,256
Location
Cold Country, Canada
Finally got time to get back to my satanic F250 starter. Got 2 bolts out, but that 3rd one on top argued with me for about 90 minutes. I said uncle.

Every starter I've ever replaced is 2 bolts. What a pain in the ***.

Got to get a 4" wobbly next week. Maybe that will be the magic trigger. 3" is too short, and the knuckle does too much moving around. We'll see.
 
Last edited:

Miss the Pontiacs

Well-known member
Joined
Nov 7, 2016
Messages
16,526
Location
Saskatchewan Canada
Swapped out the winter tires on my wife’s DD.
What I really wanted to do was work on my butcher block bench for my wood lathe. Didn’t work out that way.
The other day I tried my sunroof on my pickup and it didn’t work.
First thing was check the fuse and it tested fine. So did a little surfing on how to further test or repair.
That was a rabbit hole I didn’t need.
One scenario was the sunroof motor could be OD. Checked the rear window and it also was inoperable.
Due to having a topper I find the rear window opener is pretty well useless. May have tried it once when new and likely only once.
The sunroof I also find next to useless and probably last used it 6 years ago when the vehicle was around 2 years old. Just for info I’m dealing with a 2016 GMC Sierra.
One possible solution was the console wiring maybe an issue. I thought I was on to something as I started getting a little green arrow on the screen coming and going. Found if I opened and closed the console I could clear the icon. IMG_2965.jpeg
Opened up the console and found 2 broken wires and by the time I finished fooling around with it I had all 3 broken. Likely the cause of the green ground icon and hopefully the sunroof as well.
Didn’t fix the operation of the sunroof or rear window.
Did a little more digging and found there is a fuse link that feeds the sunroof and rear window. I’d had enough and thought I would finish tomorrow.
It is a little frustrating there is no info in the book telling you one 10 (red) fuse (poorly designated) can feed 2 others which the larger and at least the sunroof is labelled as a 30. Doesn’t make sense to me but I guess we will find out tomorrow.
Didn’t even get around to the powered door on my wife’s DD. Hoping just a fuse but that vehicle is ancient so who knows. 😉
 

Miss the Pontiacs

Well-known member
Joined
Nov 7, 2016
Messages
16,526
Location
Saskatchewan Canada
Oh yea and my GPS quite working probably 3 years ago. I did manage to get a map on it today but showed me I was somewhere around Edmonton Alberta. This is where it went off the rails and I just use my phone now. Maybe the above will fix that but I doubt it. Or I could drive out to Edmonton and start it up where it died and it could be correct while I’m there. 😂
 

Wrench97

Well-known member
Joined
Jun 23, 2018
Messages
12,156
Location
Southeastern Pa
Swapped out the winter tires on my wife’s DD.
What I really wanted to do was work on my butcher block bench for my wood lathe. Didn’t work out that way.
The other day I tried my sunroof on my pickup and it didn’t work.
First thing was check the fuse and it tested fine. So did a little surfing on how to further test or repair.
That was a rabbit hole I didn’t need.
One scenario was the sunroof motor could be OD. Checked the rear window and it also was inoperable.
Due to having a topper I find the rear window opener is pretty well useless. May have tried it once when new and likely only once.
The sunroof I also find next to useless and probably last used it 6 years ago when the vehicle was around 2 years old. Just for info I’m dealing with a 2016 GMC Sierra.
One possible solution was the console wiring maybe an issue. I thought I was on to something as I started getting a little green arrow on the screen coming and going. Found if I opened and closed the console I could clear the icon. IMG_2965.jpeg
Opened up the console and found 2 broken wires and by the time I finished fooling around with it I had all 3 broken. Likely the cause of the green ground icon and hopefully the sunroof as well.
Didn’t fix the operation of the sunroof or rear window.
Did a little more digging and found there is a fuse link that feeds the sunroof and rear window. I’d had enough and thought I would finish tomorrow.
It is a little frustrating there is no info in the book telling you one 10 (red) fuse (poorly designated) can feed 2 others which the larger and at least the sunroof is labelled as a 30. Doesn’t make sense to me but I guess we will find out tomorrow.
Didn’t even get around to the powered door on my wife’s DD. Hoping just a fuse but that vehicle is ancient so who knows. 😉
A 10 amp fuse won't be feeding a larger one, but it may be powering the control side of one or more relays that energize higher amperage circuits.
 

Mike65

Well-known member
Joined
Mar 7, 2007
Messages
3,108
Location
Horse Pasture, Va.
I did brakes today too!! My wife's F150 neded rears and I replaced the parking brake shoes while I was at it. Found out the shoes were actually still pretty decent but the lever that spreads them was froze up on both sides. All fixed now, even wire brushed and painted the hardware.
I always use my parking brake in my 05 F150. I have had late 96 & a 2000 Ranger that always had problems with the parking brake rusting up because I did not use it. It was also when we lived in NJ & they sated the heck out of the roads in the winter which did not help either.
 

glider

Well-known member
Joined
Mar 31, 2007
Messages
2,426
Location
Flint Michigan
IMG_8122.jpeg
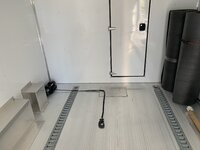
Putting some thought of mounting trailer winch off to the side. Could get another piece of aluminum to mount on. Then using a ****** block hooked to a D ring in the center of the trailer. Sure would be out of the way. If it had a shelf over it , wouldn’t take up any floor space, 😆.
 

Miss the Pontiacs

Well-known member
Joined
Nov 7, 2016
Messages
16,526
Location
Saskatchewan Canada
👍
A 10 amp fuse won't be feeding a larger one, but it may be powering the control side of one or more relays that energize higher amperage circuits.
That is a much better way of describing what is taking place than on the video. But the video guy got a 👍 for finding me an additional plan of attack.
 

KwikFab

Well-known member
Joined
Jul 27, 2024
Messages
1,224
Location
Central Valley, CA
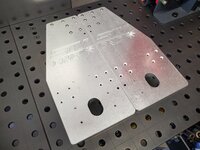
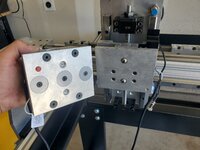
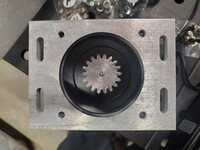
Nothing, the three motor plates for my table are the slightest bit offset which further delays assembly. :mad:

20250510_183856.jpg

Clocking the motor in different directions makes no difference because the bolt holes are perfect on both the plate and motor.

It's hard to see but you can see some the face exposed on the left/lower left side of the motor, and the plate overlapping the painted face on the right.

The motor has a raised surface that is supposed to sit within the motor plate opening. I can go caveman style and hand file the plate opening a bit since it's aluminum but that's cheesy as **** to do on a brand new $8k table. I also don't want to drill out the holes in the motor itself either cause again, everything is brand new.

20250510_184208.jpg
 

CoogarXR

Well-known member
Joined
Jan 11, 2016
Messages
6,869
Location
Ohio
The rear springs and perches I ordered for the wife's VW arrived yesterday, so I put them on today. Finally, after months of chasing suspension noises and ordering parts, it FINALLY rides quiet! All it took was front springs, struts, strut mounts, ball joints, a CV axle, rear springs and spring perches.
 
Last edited:
To avoid these ads, REGISTER NOW!
Top Bottom