To avoid these ads, REGISTER NOW!

What did you do "IN" your garage today?

larry4406

Well-known member
Joined
Jan 27, 2006
Messages
19,565
Location
Northern Virginia
  • Removed a prototype engine/transmission combo
  • Removed a used Element transmission
  • Reorganized with engine and transmission gone
  • Mopped floor
  • Preparing to move Korrado onto lift
So do you follow the shop manual to a tee, then fire the editors and the engineers as the process and design is for ****?
 
To avoid these ads, REGISTER NOW!

Metallitubby

Well-known member
Joined
Aug 12, 2019
Messages
26,028
Location
ATL OTP North
So do you follow the shop manual to a tee, then fire the editors and the engineers as the process and design is for ****?

I laughed. My original comments were actually for two loose (non-installed) engines and transmissions that were taking up space in my shop. Both are going to either scrap metal or to a guy who trades for various stuff.
 

jimkinney

Well-known member
Joined
Jan 3, 2009
Messages
303
Location
Florida's Space Coast
In the driveway - Changed the oil/filter, spark plugs, air filter and rotated the tires on the Xrunner.

Wife complaining the starter on the 17 Tahoe was sounding slow intermittently. It's a new rebuild, along with a new AGM battery. I sat in the driveway and started it 6-8 times and it worked fine for me.

Anybody have a similar experience with Tahoe/suburban?
 

69charged

Well-known member
Joined
Sep 20, 2007
Messages
469
Location
carberry, manitoba
Dropped truck off at Canadian Tire for the new XTrails ATs to go on. seeing how I have 300km more than most of my buds before I see camping gravel we leaned towards an aggressive All-terrain. Me happy, and took the truck home, I don’t trust big box stores to do anything more than tire work. Verified I do need brake pads up front and need to look at the ball joints this weekend.
C48291B0-8F0E-432F-AB7C-2E3EBA65A531.jpeg

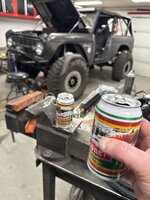
had a beer for my buddy who gave up his fight against cancer and the drugs screwing up his head/body so much he said enough was enough. God speed, Robbie.53A1A28E-8FF7-49F4-9B83-A83E0C5784DA.jpeg

got home from work Thursday to find a leaky NEW tire. No wonder I don’t trust them to do mechanic work! Took it off and dropped off at lunch Friday. 4:30 Friday it was good to go, service advisor said been holding 75 psi for over an hour, she kept tabs on it.

now it’s a busy weekend of this and that while watering the lawn.
Sorry for the loss.

I put those tires on my F150. Loved them. They were great in the winter as well. Everyone thought I was crazy buying non mainstream tires. But they went on sale and I couldn’t go wrong.
 

cody1325

Well-known member
Joined
Apr 17, 2024
Messages
1,112
Location
Southwest Virginia
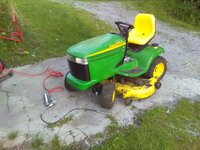
Greased the mower. I don't think the dealer did it during those few years they serviced the mower, and Granddad and I were probably the last to do it a few years back. I may have done it last year, but couldn't reach many of the fittings for some reason (probably the new, stiff grease hose at the time).

All ten or so fittings got grease, and any moving parts without a fitting got spray lithium PB Blaster grease on them (which was never done outside of grease fittings). The steering is MUCH smoother as a result.

I use an old '90s Harbor Freight pneumatic grease gun. I found it last year (hidden deep behind some junk in the shop, but robbed of its grease connector and hose/pipe) crammed full of some terrible, cheap grease that had hardened. Soaked it in degreaser for probably a week to get what I couldn't scoop out dissolved. I then attached a two-foot grease hose from Harbor Freight on it. It is MUCH easier than doing it with the old Alemite and standard grease guns.


Need to find my Lock 'N Lube. I seem to recall buying it for Granddad as a Father's Day gift, and I seem to recall that on the relatively short hose of the standard cheap grease gun, it just wouldn't fit. I think it's in a drawer somewhere. I found the repair kit that came with it, but not the Lock 'N Lube itself. Luckily, they haven't gone up much in ten years.

Next month, I'll get new deck wheels on order. The rubber on these has fell off.

Also, I'll need to see if I can find LX277AWS decals. Looks like the new hood put on it in 2023 didn't come with them, only the stock Deere stickers.

KIMG1996.JPG
 

KwikFab

Well-known member
Joined
Jul 27, 2024
Messages
1,222
Location
Central Valley, CA
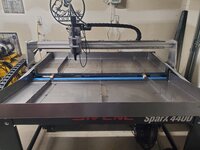
Not much in the garage, just wiped down both water pans with acetone and lined the center support with painter's tape.

20250517_103822.jpg

I did this because I'm using 3M Marine 5200 silicone which is both strong and permanent. In the event that I ever have to remove the water bed, it won't be stuck to the support.

20250517_103806.jpg

Since I have a tiny garage, I decided the best way to set up my mini PC is by mounting it on the wall above my wood top bench.

From there I'll place my disposable monitor that just came in from Amazon, on an adjustable wall mount.

Had to test it and make sure it works properly first.

20250517_110614.jpg

Anyway, air dryer is under the table and connected to my air compressor. Had to buy 90 degree fittings for the air dryer as it was too tall underneath my table.

Unfortunately I've got the wrong gun for running the silicone cartridge so I've a new one coming tomorrow. Gave me time to tidy up all the wiring at least.

20250517_174830.jpg

Best case scenario, I'll get it sealed up tomorrow and by Tuesday (48 hour curing time), I should be able to coat the water bed with flex seal.

Adding another 48 hours to that I should be able to cut by Friday!
 
Last edited:

mikegt4

Well-known member
Joined
Sep 12, 2005
Messages
3,277
Location
sw ohio
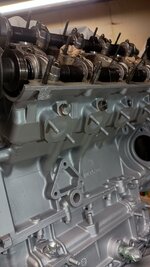
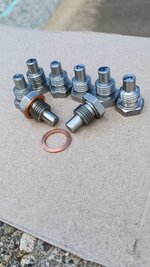
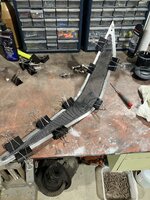
I finished making a set of air injection port plugs for my Ferrari 308GT4. The smog pumps were deleted long ago by a previous owner but the air manifolds and nozzles remained as they are near impossible to access without pulling the engine. Since I have my engine out for a reseal and some other mods I took the opportunity to remove the remaining smog parts and plug the ports in the heads.
 

Attachments

  • IMG_20250517_162235767_HDR.jpg
    IMG_20250517_162235767_HDR.jpg
    453.3 KB · Views: 44
  • IMG_20250517_163012610.jpg
    IMG_20250517_163012610.jpg
    611.3 KB · Views: 40

KFBR392

Well-known member
Joined
Feb 4, 2025
Messages
142
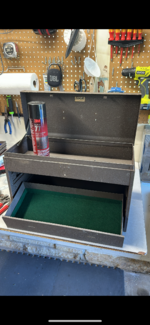
Doing a quick and dirty resto of this old Kennedy box I got at a garage sale for $50. It had some nice Starrett punches in it along with a few other odds and ends that I sold to cover the initial $50 outlay (I kept the Starrett punches). It is filthy and rusty but salvageable.

DO NOT USE SPRAY ADHESIVE to put new lining in these toolboxes. This advice is spread like gospel online and it is a horrible choice for the task. It makes a huge mess, ruins your workspace, and makes it impossible to do a good clean job of fitting the liner material. I ended up scrapping hours of work and redoing all the drawers with adhesive-backed cork, which installed beautifully (of course I forgot to take a pic of the finished job).

The hardware was all removed, ultrasonically cleaned, and shined up on the wire wheel. It was then reinstalled with new rivets. I tried getting away with machine screws and keps nuts, but clearance issues made them a no-go, hence the rivets.

Rails were removed, ultrasonically cleaned, and installed with a nice even coating of Super Lube on all the friction surfaces.

The main box itself was thoroughly cleaned with Simple Green and a nylon brush. The rusty areas on the inner bottoms were sprayed with rust converter. It really needs to be sanded down to bare steel and repainted, but I don’t want to get rid of the cool Kennedy script logo on the lid so the original paint stays. If I repaint it, I’ll probably do it in an unorthodox color like white or yellow just to make the internet mad. Or just spray a clear coat over the bare metal.
IMG_0717.pngIMG_0708.jpeg
 

Model A Fan

Well-known member
Joined
Dec 1, 2011
Messages
1,223
Location
NW Washington
I've been working toward rewiring my garage and getting rid of all the old wiring now that I have a new sub-panel and feeder I installed.

I cut out a bunch of 14/2 and 14/3 that is blue in color (how old the 14/2 has to be in order to be blue I don't know). Small bits of progress a little bit at a time.
 

niget2002

Well-known member
Joined
Oct 2, 2012
Messages
11,237
Location
Josephine, TX
cleaned, flung, fixed.

moved stuff from the garage to the shop.
moved stuff from the shop to the garage.

finally have the area by the man door on the shop clean enough to walk through without tripping on something.

Also finally moved a bunch of camping gear out of the shop and into a storage box. I should probably get rid of most of this stuff.
 
To avoid these ads, REGISTER NOW!

dwasifar

Well-known member
Joined
May 28, 2017
Messages
2,101
Made and installed the cord management this cheap little shop vac should have been designed with:

1000002824.jpg


1000002825.jpg

Used it today to clear out a bird nest from my dryer vent, and it reminded me just how annoying the cord is, so while the filter is drying from washing off the scrambled eggs, I decided to fix that.
 

Jgaz

Well-known member
Joined
Dec 16, 2016
Messages
1,705
Location
AZ
Worked more on my dog kennel. Got almost everything stained and it’s ready for final assembly when the stain dries.
IMG_5411.jpeg
I’ve been beating the drum a lot lately about Big Gator Tools drill guide, but here we go again.
No, I don’t get a commission.

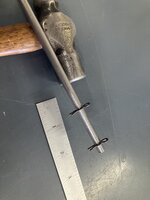
I needed to cross drill this 1/4” round stock that will support the top of the sliding door on the dog kennel.
This is the set up I used to drill a couple holes.
IMG_5409.jpeg
This honestly took about 5 minutes to set up and drill (2) 3/32” holes.
I know it would take me longer to set up and drill this on the drill press.

Perfect results, I know I could never achieve even by dumb luck
You need a few of these guides.
IMG_5412.jpeg
 
Last edited:

Magnum440d100

Well-known member
Joined
Dec 2, 2018
Messages
3,581
Location
Indiana
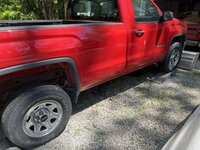
Decided to jack the truck up to get more height. Put the front on rampsIMG_6384.jpeg


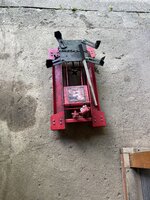
Needed height to fit the transmission and transmission jack under it IMG_6385.jpeg

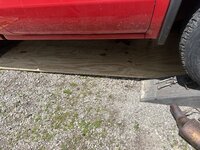
Slid a piece of 3/4” plywood under there for the jack to roll on IMG_6386.jpeg


Neighbor came over and we got the transmission up in there. I initially only wanted to stab it in there with only a few bell housing bolts and the rear crossmember, but I did just a bit more.


Hoping to have this back on the road next week (waiting on parts as well as supposed to rain next week T-W-T) I’m hoping that it rains lightly while I’m at work and is done and dry by the time I get off and get home LMAO
 

LeonardY

Well-known member
Joined
Apr 16, 2011
Messages
5,100
Location
Southern California
I actually did more than get out and put tools away.

Broke down the setup for the miter lock bit. Cleaned up my router bits and found my plywood dado bit. It's 1/32 under 3/4. Makes for a really nice fit. Took the PC router and set it up for some dados.

Got the car out so I could do a little cleaning. Hung the ladder back up. Blew out the shop. Could do much more since there is a lot of stuff from the shed strewn around.
 

Outlawmws

Well-known member
Joined
Aug 9, 2011
Messages
39,322
Location
The Badlands
Yesterday got the basic polishing to a lantern reflector I'm planing to nickel plate

Today I went to a thrift store to get a small Pyrex dish for the nickel plating job.

Started a larger batch of Nickel Acetate for the plating job

Power washed 4 vehicles, Vacuumed one.

Put stuff away - probably at least tomorrow before the NA is ready
 

bulletpruf

Well-known member
Joined
Nov 28, 2013
Messages
11,132
Location
San Antonio
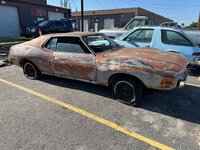
So I was working on my '72 Javelin 24 Hours of Lemons race car this weekend, and I also have a '71 Javelin road race project, so I've got a fair bit of parts for the '71 - '74 cars. I was working on the '71 in earnest until we left for Korea in 2013, and it's been on the back burner since then, so I've kind of forgotten what I had for it on the shelves.

Did some digging today, and found a 4 speed shifter, 4 speed pedals and clutch linkage, a set of custom upper control arms that I thought were MIA, and several other items that I had bought for the '71 that will be repurposed for the '72.

Kind of cool being forgetful and disorganized sometimes because today was like Christmas in May.

IMG_3438.jpg
 

XJSuperman

Well-known member
Joined
Jan 26, 2018
Messages
3,088
Location
Central Iowa
Lots of puttering around, but outside I cleaned the massive amount of maple seedlings out of the gutters and blew off the sidewalks...again. Hung and tested a set of patio lights where the future patio will go. Mowed, but not until after I had hooked up and tested out the Brinly rear blade using my new 3pt trailer mover. Some adjustments were needed. Also tore apart the spike aerator and started prepping pieces to reinforce it for its conversion to work with the 3pt via the trailer mover as well. Should be just like the blade. It will be great to be able to pick it up over sidewalks/driveway/etc.
 

BlakeTheCarGuy

ALLIANCE MEMBER
Joined
Oct 10, 2018
Messages
9,384
Location
Roanoke Virginia
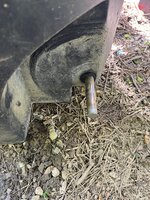
Forgot to take an after picture but I fixed our trashcan today. The wheel came off of it because it’s worn out. Trash can is original from when we moved in 23 years ago but we don’t want a new one as they are smaller. So I reattached the wheel with some big washers and a new cotter pin. Good as new now. The washers were 7/8 washers and cotter pin was just a medium sized cotter pin. Rolls like a champion again. I couldn’t find any information on our trashcan or any replacement parts so I just fixed it myself. It’s a Heil trash can. I could find tons of information for Toter trash cans but nothing on Heil. Hopefully this holds well and if not then I’ll figure something else out.
IMG_1979.jpegIMG_1978.jpeg
 

bugnut

ALLIANCE MEMBER
Joined
Jul 14, 2012
Messages
3,998
Location
Central Ohio
Sunday, Put a new replacement tire on the blue beetle. Then modified a 3d headlight trim ring for the baja and started it to printing. While printing was underway I cut two rear side kick panels for the baja project, clamped then together and was edge sanding them. The 1" wide sanding belt broke and got replaced 4 times, was getting frustrated, but got them done. Then got out the battery mower and did the close work on the lawn, next was the rider and a couple hours getting the grass cut. Sopping wet lawn in places left ruts and threw mud on the mower, will clean up on the next outing. Came in and started laundry.
 

69charged

Well-known member
Joined
Sep 20, 2007
Messages
469
Location
carberry, manitoba
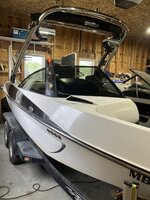
Worked away slowly on different boat projects.
Got the sub box carpeted and installed.
IMG_5242.jpeg

Then moved on to epoxying the fresh air vents that were falling apart. Talk about finicky!! I polished them and gave the screens a fresh coat of paint.
IMG_5241.jpeg

Then I installed a 4” seat riser I made. What a nice change. I won’t be sitting on the floor anymore!! 😂
I painted it in a wrinkle finish. Looks good I think. I have plastic caps for the ends of the rectangle tubing to put on yet.
I sandblasted the tubing, put the decal on, then painted and peeled the decal off.

IMG_5248.jpeg

Then to finish off the sub install I had to trim my drivers cup holder. I had to cut 2” off cause I moved the sub box back to fit.
I don’t do upholstery. I repeat, I don’t do upholstery!! But, I cut it and stapled it back on. Hopefully no one looks there!
IMG_5238.jpeg

Overall, it was a nice coolish day to be in the garage all day. Tunes playing, and just me and my musings.
Happy long weekend all!! (In Canada!!)
 

Old Man Roger

Well-known member
Joined
Apr 6, 2017
Messages
17,825
Location
Palm Coast Florida
So I was working on my '72 Javelin 24 Hours of Lemons race car this weekend, and I also have a '71 Javelin road race project, so I've got a fair bit of parts for the '71 - '74 cars. I was working on the '71 in earnest until we left for Korea in 2013, and it's been on the back burner since then, so I've kind of forgotten what I had for it on the shelves.

Did some digging today, and found a 4 speed shifter, 4 speed pedals and clutch linkage, a set of custom upper control arms that I thought were MIA, and several other items that I had bought for the '71 that will be repurposed for the '72.

Kind of cool being forgetful and disorganized sometimes because today was like Christmas in May.

IMG_3438.jpg
Not a lot of aftermarket parts around for those, you're not trashing a good one are you?
 

niget2002

Well-known member
Joined
Oct 2, 2012
Messages
11,237
Location
Josephine, TX
Inside and just outside the garage...

I was looking at buying a zero turn lift so I could get to the blades and scrape the underside of the new mower. Those lifts are kinda price for what they are, so I said, "self, let's see if we can use what we got". 2 seconds later I had the front of the mower up on 3 ton jack stands. I had to use my DIY 2x6 drive on ramps to get the deck high enough to get my 3 ton jack under it. My jack had just enough lift to get the front end high enough to put the jack stands under each end of the deck. And the jack stands were just tall enough to reach the deck at that height. It felt more secure than I thought it would. Threw some chocks behind the wheels so that the brake wasn't the only thing keeping it from rolling and then proceeded to go ahead and scrape the underside of the deck.

Took longer to spray all the crud off of the patio and back into the grass than it did to clean the deck.

My only concern is if the deck to frame components are OK for supporting the weight of the machine. It didn't look like the deck flexed or anything when I was lowering the weight ono the jack stands or when I was lifting with the jack. I know there's at least a few lifts I was looking at that looked like they grabbed onto the deck to lift, which is where I got the idea to just try using my jack at the same lift point. The rest all look to use the front wheels to lift from.

I'm probably over thinking things for the once a month I'll need to do this.
 

bulletpruf

Well-known member
Joined
Nov 28, 2013
Messages
11,132
Location
San Antonio
Last edited:

PhantomEB

Well-known member
Joined
Feb 6, 2006
Messages
6,817
Location
Medicine Hat, AB, Canuckistan
Sorry for the loss.

I put those tires on my F150. Loved them. They were great in the winter as well. Everyone thought I was crazy buying non mainstream tires. But they went on sale and I couldn’t go wrong.
glad to hear you like them. Well 4 285/70R18s for 1275, 25x CT Money on that exact tire that day, 10x that week on all Motormaster tires, had a spend 250 get 40$ CT offer and a spend 60 get 5$ back offers activated on my card.

made enough crappy tire money that day I was able to use it all and then some for another good cooler as I head out camping a week Wednesday.
 

PhantomEB

Well-known member
Joined
Feb 6, 2006
Messages
6,817
Location
Medicine Hat, AB, Canuckistan
It’s been a weekend of vehicle maintenance and beers. Had a fire Saturday night with the wife then she dropped me off at our machinist‘ block party.

got to do her brakes and an oil change but during I got to find that oil leak on the back side of the motor. I think I should bust out the pressure washer and degreaser first.

then some beers with my brother over FaceTime discussing next weeks camping trip as well a special celebration For Robbie. He’s specified his ashes to be spread out at Margaret Lake. A small lake not easily accessible unless you got at least a capable truck or quad. My brother has mentioned the use of tannerite but I don’t think Robbies mother would like that.

besides leaving cardboard around in a mountain lake is not our speed.
 

rd65

Well-known member
Joined
Sep 29, 2017
Messages
2,833
Location
Granite Falls, WA
Yesterday - Grabbed a screwdriver and mounted the coat rack in the stairway.

20250517_082001.jpg

Then pulled the riding mower around and adjusted the valve lash. The 20 HP Kohler is sometimes is hard to start and the service manual suggests the automatic compression release mechanism can be affected by valve lash too loose. I found the valve lash a little loose and set it to specs, but still a little hard to start. I found that bumping the starter eventually releases compression and it fires right up. I'm going to have to do some reading on the automatic compression release and see how to test/adjust it.
If it is anything like the Briggs on my Craftsman mower, you may be in for a cam replacement.
 
To avoid these ads, REGISTER NOW!
Top Bottom