To avoid these ads, REGISTER NOW!

Above 1200 Sq/FT The Action Sports Garage

Wokspaces above 1200 squarefeet.
OP
G

Grant Gunderson

Well-known member
Joined
May 17, 2013
Messages
2,331
Location
Bellingham, WA
IMG_4691.jpeg
The bearings for the Shimano EP8 bike motor came today as well. It uses four 608 bearings, A 6808 and a 6805, plus the needle collar bearing. Plus a 25x29x13mm Needle bearing.
IMG_4683.jpeg

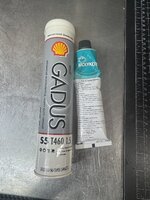
From my research, Gadus S5 T460 is what's used in most E-bike motor sprang bearings, along with Molykote 11 for the gears that are near electronics. So thats what I am using, its different than what Shimano uses, but couldn't find what they used anywhere.
IMG_4684.jpeg
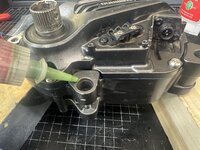
I lubed the main drive shaft sprang bearing.
IMG_4685.jpeg
and reinstalled its large retaining ring. You can just press the retaining ring back on by hand.
IMG_4696.jpeg
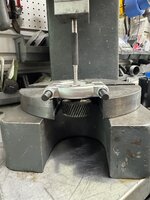
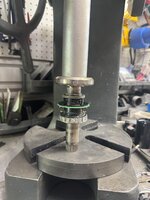
The 6805 bearing gets pressed onto the Left hand side of main drive shaft. I used a large bushing and a bearing installer tube to push it on with the arbor press.
IMG_4698.jpeg
IMG_4699.jpeg
I then needed to press the large 6808 bearing off of the Right Hand side axle drive gear that goes on the the RH side of the drive shaft. I used a Park bearing drift to protect the end of the drive axle.
IMG_4700.jpeg
IMG_4701.jpeg
That bearing along with the needle bearing were totally fried. Makes sense as they are the closest to end of the shaft where water can get past the small shaft seals.
IMG_4703.jpeg
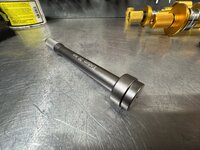
A hope hub drift was perfect to press the new bearing on, as it rested just on the inner race.
 
To avoid these ads, REGISTER NOW!
OP
G

Grant Gunderson

Well-known member
Joined
May 17, 2013
Messages
2,331
Location
Bellingham, WA
Dang Grant, it’d been a while since I got into your thread. You’ve been busy :eek2:

If we do get a chance to get together on one of your trips down here make sure to remind to grab you some lista dividers, I’ve got a bunch of brand new ones that I have no use for.
Thanks! Not sure when the next trip down to Sedona will be, still waiting on the footing engineering to come back so we can get the final bid for the project, but at least we are in underwriting with financing, so we are getting closer!
IMG_4704.jpeg
I lubed the **** out of the Right Hand side axle drive gear bore and then the needle bearing just slides in.IMG_4705.jpeg
Followed by the two seals. These are not a standard size seal and I had ZERO luck sourcing them anywhere as they only have a 3mm difference between the ID and OD.
IMG_4706.jpeg
I cleaned out the RH side of the motor clam shell and degreased it. I then pushed the Right Hand side axle drive gear into it.
IMG_4707.jpeg
The main drive Axle then slides in. I tested to make sure the axle spins freely with the gear CW and that if you hold the gear, you can still spin the axle CW freely by its self. So the clutch is working.
 
OP
G

Grant Gunderson

Well-known member
Joined
May 17, 2013
Messages
2,331
Location
Bellingham, WA
Back to the Ebike motor
IMG_4708.jpeg
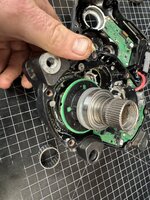
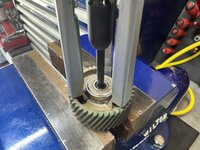
I used a bearing separator to press the bearing off of the gear shaft that resides next to the motor drive shaft.
IMG_4709.jpeg
and then pressed new ones on using a drift
IMG_4710.jpeg
This gear resides here, and is powdered directly off of the motors drive shaft. underneath it is a wave spring. I cant install it here yet, as I just wanted to test the fit for now.
IMG_4711.jpeg
The board that picks up the information from the main shaft sensors needs to get installed next. It has a small push connector to link it to the main motor board.
IMG_4713.jpeg
It fits around the main shaft. Here its important to note the tolerance on the clearance for the board and the electronics on the main shaft is very tight, so its important that the main shaft is fully seated into its bore so nothing rubs on the electronics. It gets secured with two JIS screws.
IMG_4715.jpeg
The drive train gears can then be installed. Both sets have to be installed simultaneously so they properly mesh, there is a wave spring under both shafts to account for axial play.
IMG_4716.jpeg
Now to test the assembly, if its all assembled correctly and both sprang clutches are working, I should be able to rotate the main shaft CW and just it and the sprocket mount should rotate together and the rest of the drive train gears do not move.
IMG_4720.jpeg
Now if I rotate the gears in the drive train, they should all move along with the motor shaft and the main shaft and sprocket mount. So this proves everything is working smoothly and both sprang clutches are working.
IMG_4722.jpeg
I can now reassembly the motor clamshell. Since it's sealed, it needs to have a way to vent. You can see the vent here where I am pointing the screwdriver at.
IMG_4723.jpeg
I applied a thin bead of sensor safe Silicone RTV sealant to the motor clam shell.
 
OP
G

Grant Gunderson

Well-known member
Joined
May 17, 2013
Messages
2,331
Location
Bellingham, WA
IMG_4721.jpeg
The motor halves can then be pressed together by hand, seating the gear shafts into the LH side. It then gets bolted together with 6 M6x.75 thread X16mm bolts. Note this is not a standard metric thread pitch!IMG_4725.jpegI applied some retaining compound and then pressed the LH side mounting bushing back into the motor's frame. These had worked loose on mine.
IMG_4726.jpeg
I then reinstalled the motor and torqued it to the factory specs. Its worth noting that in addition to the main power cable connection, the 3 smaller control wires are a bus system, so it doesn't matter which of the 3 ports you connect the 3 wires too, one is for the battery managment, one is for the wheel speed sensor and the last goes to the head unit.
IMG_4728.jpeg
I then applied some Viz-Torque to all of the mounting bolts and wen t for a test ride. Rode one of my favorite trails that has a punchy 3K climb, and a super fun decent to test it. The motor is finally quiet and is super smooth now!

Of note, the gearing in these is pretty skookum, but there is no mechanical shifting of gears between the various motor modes, thats all handled electronically by changing the motor's actually output power.

The bearings and seals are the weak link here. I need to find a good source for replacement seals.

The bearings are a bit undersized In my option as the non drive side main shaft bearing is quite a bit smaller than a typical bottom bracket bearing, as is the needle bearing on the drive side. All 3 bearings on my main drive shaft were toast. The 4 bearings on the gear shafts all felt excellent, but I replaced them anyways since I was already in there.
IMG_4729.jpeg
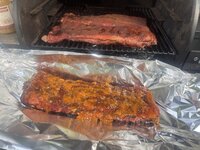
Finally I smoked some ribs for dinner. I put a dry rub on them, smoked for 3 hours at 180, than I cover them in Apricot or Orange marmalade, add a bunch of apple juice and wrap them in foil and cook another 2 hours at 225. They taste amazing! I also like to use a hot pepper jam instead, but the lady friend doesn't like the spice. I'd call that a damn good and productive day having fixed both the boring head and the e-bike motor!
 
OP
G

Grant Gunderson

Well-known member
Joined
May 17, 2013
Messages
2,331
Location
Bellingham, WA
Very nice job on the boring head, e-bike motor and the ribs look very tasty as well.
Thanks for sharing & explaining the processes, very interesting.

Nice work on the e bike motor!
Thanks guys! I posted the e-bike motor rebuild to my Fb and already had a bunch of people hit me up. So I think there will be a lot of demand for that service here. What I’ve learned from having it apart, is that the tolerance for the Hall effect sensor board is so close to the torque sensor on the main drive shaft if you get significant bearing wear that causes lateral play in the shaft it can damage those PCBs / sensors. Problem with that is there is Zero parts support from Shimano as there position is these are non- repairable. Additionally some of the shaft seals are proprietary to Shimano, however one of my suppliers for the suspension seals may be interested in making those for me.
 

Dig Doug

Well-known member
Joined
Apr 16, 2018
Messages
1,128
Grant,

Been reading your thread for a week and a half ! I love it!! I feel that I have definitely learned a few things reading & following along !

Thank you for taking to time to document and explain - Very Much appreciated.

Your organization Skills are Excellent & your tools of choice are nothing but exceptional !!

I have a good friend building in Sedona, They are framed and dried in, & hoping to spend christmas in their new house!
 
OP
G

Grant Gunderson

Well-known member
Joined
May 17, 2013
Messages
2,331
Location
Bellingham, WA
Grant,

Been reading your thread for a week and a half ! I love it!! I feel that I have definitely learned a few things reading & following along !

Thank you for taking to time to document and explain - Very Much appreciated.

Your organization Skills are Excellent & your tools of choice are nothing but exceptional !!

I have a good friend building in Sedona, They are framed and dried in, & hoping to spend christmas in their new house!
Thanks. A big part of the documentation is so that I can go back and use it if I need to again. A lot of these projects such as the E-bike motor are a learn as I go project, so I’ve found I learn best how things work by slowly taking them apart and asking why each piece does what it does.

We finally got the engineering back for our Sedona project, so just waiting on the contractors bid so we can get going! Jamie would love to be in the house my Christmas of Next year. Our plan is to use it mostly during rain season here in the PNW.

IMG_4752.jpeg
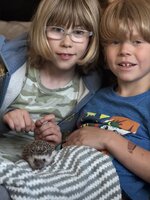
My son has been obsessed with Hedgehogs his whole life so for his birthday Jamie and I decided to get him a baby hedgehog for his 8th birthday. Evelina and him love it! They are interesting creatures to say the least and I’ve learned a lot about them from him as he’s a walking encyclopedia on anything hedge hogs.
IMG_4738.jpeg
It’s been a very busy week for suspension work. Had a few interesting projects this week. Including this very high mileage Push 11.6 these are very similar to a Fox DHX with the main difference being a much larger shim stack for the base valves and the pop it valves they use for the compression settings.
IMG_4739.jpegIMG_4740.jpeg
Speaking of valve shims those had a ton of wear on them!

I put some big vert climbs on the rebuilt e-bike motor this week but the real test will be taking the kid out for a Father’s Day ride today and towing him on the bigger hills.
 
Last edited:
OP
G

Grant Gunderson

Well-known member
Joined
May 17, 2013
Messages
2,331
Location
Bellingham, WA
IMG_4816.jpeg
Had a nice trip over to see my dad last weekend for Father’s Day. It’s a bit hard to think it might be my last Father’s Day with him as his body is just quitting on him. I can’t help but think his health issues are directly related to his work, but no way to ever prove that hypothesis, and even if I could it wouldn’t change a thing. My dad was head of engineering and planning at Hanford’s B-plant and was there during the height of Cold War plutonium production and well into the change over to the cleanup phase. He designed a lot do the equipment they used / are using to cleanup the plutonium processing cells. Obviously he was a brilliant engineer and at times I think it frustrates him I never used my engineering degree and followed his footsteps, but he has also told me he’s amazed I’ve been able to follow my dreams and not have a typical 9 to 5. I’ve only started to learn in the last couple years the extent of what he did as most of it was classified and as a family we just understood he didn’t and couldn’t talk about work. I only recently learned that prior to Hanford he worked at the Navy Nuclear propulsion laboratory designing the valves / cooling systems for Nuclear subs.
IMG_3468.jpegIMG_4953.jpeg
Sold my cabinet saw as I rarely used it. My festool track saw does 95% of what I’d use the cabinet saw for. As much as I don’t like to get rid of tools it’s really nice to have some space back. IMG_4955.jpegI then removed what’s left of the 9 bike vertical rack.
IMG_4967.jpeg
And the move the monarch 10ee to where the bikes were. I can finally wire it up.
IMG_4961.jpeg
It’s really nice being able to walk around and not have the cabinet saw raking up most of the space.IMG_4927.jpegbeen riding a ton with Jamie and the kids too. It’s really amazing to see the passion we have for biking get transferred to them.IMG_4792.jpeg
There is nothing we can’t take them on with their 24” bikes. They are lucky to grow up in an age where bikes are so capable!
IMG_4963.jpegIMG_4965.jpeg
The baby hedgehog also seems to be surviving despite the kids enthusiasm for him.
 
OP
G

Grant Gunderson

Well-known member
Joined
May 17, 2013
Messages
2,331
Location
Bellingham, WA
IMG_5086.jpeg
Parts finally arrived for the guys really old Vivid air. Had to get the rebound adjuster out of Europe as they no longer have parts available in the N.A. that tampered design is very prone to snapping off.
IMG_5090.jpeg
I put the Bridgeport into back gear, low-speed high torque and went really slow with a RH drill bit, to unthread the broken part of the adjuster. Instead of using a LH bit from the front, I used the RH bit from the back to prevent chips from scratching the bore.
IMG_5101.jpeg
Then as luck would have it my 35mm Abbey bike tools seal driver snapped during a fork install.
IMG_5104.jpeg
So we will see how good their warranty is. This is by far the most used one I own as it does 99% of all of the Rockshocks forks I tend to see with the exception of the Zeb that uses the same seal driver as the Fox 38.
IMG_5148.jpeg
These Abbey Seal drivers are the best out there, but they have a few minor issues, one is the heads dont stay snug on the bodies, this is because most shops just use one Driver body and swap the heads. I use them far too often for that, so decided to lock tight them on. If the Red locktight doesn't hold the Delrin to the steel, I'll try retaining compound next.
IMG_5151.jpeg
I really wish there was a color coded option out there for the handles. Being 1" OD colored heat shrink that I sue on my other tools wont work, and tape isn't a good option with these constantly being in oil and getting cleaned with OH. So I decided to Stamp the sizes into them. Not the best job, as its kinda hard to stamp a curved surface, but good enough so I can see the sizes at a glance.
IMG_5155.jpeg
Ive been getting a lot of bearing replacement jobs in, so decided to upgrade my bearing tools. These Enduro BB bearing tools are extremely high quality! Too bad their gold anodization isn't consistent.
IMG_5156.jpeg
I also picked up their DT Swiss hub tool set. These are way nicer than the actually DT Swiss tools!
IMG_5158.jpeg
Unlike the DT Swiss 3 Pawl ratchet remover on the Left, the Enduro version allows you to put an Impact gun on them. I find I usually need to do this with DT Swiss star ratchets as they tighten as you ride. Sure wish Enduro would do a version of the 3 pawl too.
IMG_5157.jpeg

The Park bearing tool set I have has served me well, and there are times only their system will fit, but the marking and quality of the Enduro ones is just night and day better. The laser engraving is actually large enough to be legible unlike the Park option. Unfortunately the full set of Enduro tools is out of stock, but once they come in, I'm going to get the full range to complement the Park tool set.
 
OP
G

Grant Gunderson

Well-known member
Joined
May 17, 2013
Messages
2,331
Location
Bellingham, WA
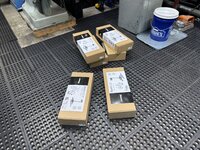
My bike stand order came in today. IMG_5160.jpeg
I ordered 5 of the Feedback sports 2.0 stands and one of the 2.0 e-bike stand. You can always upgrade the standard stands to the ebike version latter
IMG_5161.jpeg
Ever since I removed the wall rack it’s been a case of playing Jinga stacking the bikes so they don’t fall
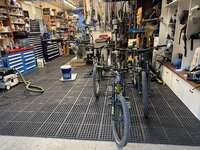
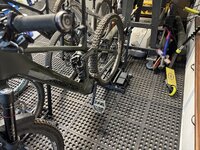
IMG_5163.jpeg
That’s way better! My dirt jumper / pump track bike is behind the kids as I only ride it when I take the kid to the pump track.
IMG_5164.jpeg
The only difference with the e-bike version is it comes with a spot to store the charger. It’s like $15 extra but worth it to me. Might order a few more of the charger holders if I start getting more motor jobs in.
 

Xti04

Well-known member
Joined
Nov 11, 2016
Messages
2,363
I had a couple of those before and ended up giving them away as I didnt really have floor space that worked with them at the time. Great stands though. Wish I had kept one of them at least.
 
OP
G

Grant Gunderson

Well-known member
Joined
May 17, 2013
Messages
2,331
Location
Bellingham, WA
I had a couple of those before and ended up giving them away as I didnt really have floor space that worked with them at the time. Great stands though. Wish I had kept one of them at least.
I used to put a premium on floor space over wall space, but have shifted to where wall space is currently a premium. So we will see how it goes with the flexible floor storage.
 
OP
G

Grant Gunderson

Well-known member
Joined
May 17, 2013
Messages
2,331
Location
Bellingham, WA
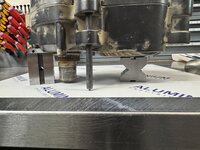
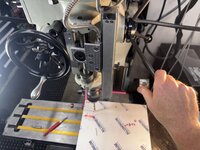
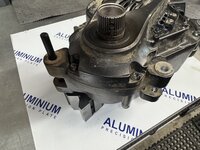
Had a guy drop off an EP8 motor for me to take a look at. Before I tear into it, I’m going to make a fixture to make working on these easier. I started with a 12x12x1/2” plate of Aluminum. First I need to drill holes to mount some sort of stand off that the motors frame mount can attach too.
IMG_5168.jpeg
Here you can see why it needs to be elevated as the base isn’t level and I need working room to press the drive shaft in.
IMG_5169.jpeg
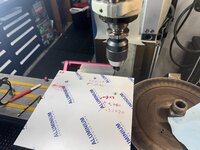
While I’m certain there is a CAD drawing out there with the mount locations for frame builders, I couldn’t find one that was fully dimensioned. So I am using a transfer punch to accurately locate the three holes.
IMG_5171.jpeg
I then wrote down the locations found by using the mills DRO and the spot drilled with a center drill.
IMG_5180.jpeg
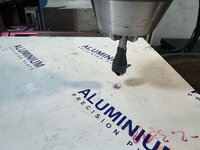
Followed by an 8mm drill
IMG_5185.jpeg
Followed by a Weldon countersink to chamfer the holes. I really prefer this stile over the flutter style as they cut way cleaner.
IMG_5186.jpeg
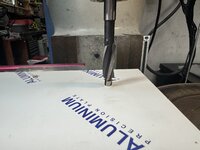
Then flipped the plate over and used an edge finder and the DRO to center on each holes location. I need to counter bore these for socket head cap screws. I could use an end mill to do this, but I have a set of SHCS counterbores that also ream the screws bore as well. This will give me about .5mm of additional clearance in case I was off with the transfer punches.
IMG_5189.jpeg
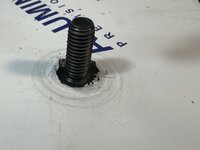
To set the depth with the tool tip on the plate, I stick the SHCS in the quills depth stop, then increase it by just a hair so it sits slightly bellow Flush.
IMG_5190.jpeg
Test fit prior to chamfering.
IMG_5192.jpeg
I can then use a larger transfer punch to find the center of the bore for the drive shaft. More to come…
 

Attachments

  • IMG_5166.jpeg
    IMG_5166.jpeg
    627.2 KB · Views: 5
Last edited:
To avoid these ads, REGISTER NOW!
OP
G

Grant Gunderson

Well-known member
Joined
May 17, 2013
Messages
2,331
Location
Bellingham, WA
Started work on the other half of the clam shell.

IMG_5251.jpeg
To locate the holes I used some 6mm all thread and a few coupling nuts to create the stand off height and then transfer screws in the tips. A good tap with the hammer then located each of the holes.
IMG_5252.jpeg
I put the Albright chuck back into the mill for drilling / chamfering/ taping operations it’s way faster to change out the bits then the Jacobs chucks.
IMG_5256.jpeg
I like to keep the nozzle of my festool dust extractor near the bit as it really cuts down on post milling clean up. Someday I’ll make a bracket for this.
IMG_5253.jpeg
Chamfered

IMG_5262.jpeg

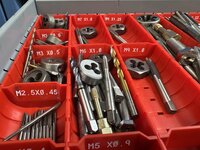
Keeping the correct tap drill with each sized tap saves a ton of time not having to look it up each time. I don’t do this for the rolled form taps as they are different sized drills and I seldom use those
IMG_5254.jpeg
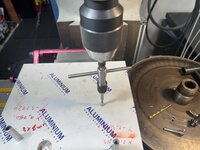
And tapped. Less than a minute per hole. Using the spindle brake on the Bridgeport to stop it as soon as you turn off the spindle power saves a ton of time! After tapping I leave the tap guide in as it helps me line up on the center punch for the next hole more accurately.
IMG_5258.jpeg
In order to have enough working distance to machine the edge of the plate I need to move the vise to the forward most slots in the table. I typically keep it in the center slots, and then move the ram all the way forward.
IMG_5260.jpeg
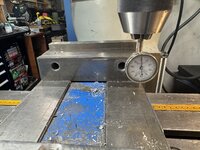
Got the vise trammed back in. Reads zero on a .001” starrett indicator across 6”. Good enough for me. These back dial indicators make this way easier than the test indicators I was using before for this task.

That’s all I got done between shock jobs yesterday. Hopefully more to come today.
 
OP
G

Grant Gunderson

Well-known member
Joined
May 17, 2013
Messages
2,331
Location
Bellingham, WA
IMG_5265.jpeg
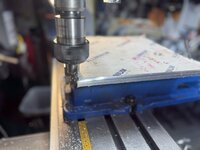
I used a .2520 radius tool to knock the top edges down. Setting the mill up to do this on the back of the vise's static jaw, meant I could dial in my settings, and leave it, just flipping the work piece to do each edge.
IMG_5267.jpeg
I then cleaned up each edge with a 3 flute end mill.
IMG_5269.jpeg
I deburred all of the edges and pilled the plastic from the plate. Here is the bottom side.
IMG_5270.jpeg
And the top. I stamped it with the model of the motor, and the year. Used a black lacquer stick to fill in the stamp.
IMG_5278.jpeg
All assembled. The 3 main motor mounts are 8mm coupling nuts attached to the plate with SHCS. I then used long 8mm set screws that I turn CCW to feed into the motors mounts. This is super secure as it uses the same mounts the motor uses in the bike frame.
IMG_5273.jpeg
IMG_5272.jpeg
All done! Since these motors do not have a single flat spot on them, this is going to make working on them a hell of a lot easier.
IMG_5275.jpeg
Speaking of done this guys motor may be too... He was getting W10000 error codes - motor over heating and E01020 codes with is an abnormally with the Torque / Hall sensor unit on the main drive shaft.
IMG_5276.jpeg
I'm pretty sure the Sensor error code is all of the metal stuck to the Hall sensors magnet. The temp error is defiantly from the grease/ gunk binding the up the gears. So the question is where did all of the metal come from and can I salvage it.
 
OP
G

Grant Gunderson

Well-known member
Joined
May 17, 2013
Messages
2,331
Location
Bellingham, WA
Started to clean up the motor and see what I am working with.
IMG_5280.jpeg

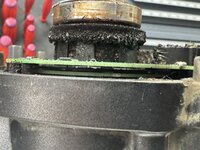
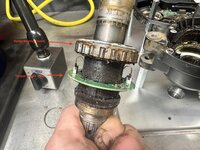
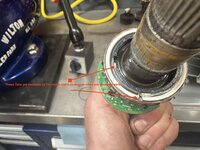
Here you can see the Hall sensor magnet is covered in metal filings. Thats going to throw off any readings it has. Also worth noting is the top PCB picks up the sensors from the main drive shaft's PCB located bellow it. There is VERY little clearance between the too. If the main drive shaft bearings develop excessive play, it either wont prolly pick up the sensors signals, or it will damage one of the two boards.
IMG_5286.jpeg
This motor had .070" of play in the RH drive axle bearing!
IMG_5288.jpeg
Here is the drive axle removed. It's worth noting that the Bearing on the non-drive side of the main drive axle is SMALLER than a typical analog BB bearing. So no wonder they go out!
IMG_5289.jpeg
Here you can see the Retaining ring that holds the Sprag clutch on, and the two tabs that are switches to trigger the motor to engage when you pedal forward.
IMG_4385.jpeg
Here is a view after I pulled the retaining ring and cleaned it up and greased it. The Sprag clutches require a special dedicated friction grease to properly work. You can not use a standard lubricating grease on these.
IMG_5300.jpeg
This is the sprocket drive gear. Inside of that recess is where the Drive Axle's Spraug clutch resides.
IMG_5301.jpeg
The Needle bearing goes inside of it, and the main drive axle actually rides in it, the Larger bearing goes on the outside. Both of these were toast. You can often feel if they are bad if you drop the chain on your bike and spin the cranks. Better yet remove cranks and turn it by hand. The small V-seal is all that seals that needle bearing, its half the thickness of a standard sized seal for that size of shaft.
 
OP
G

Grant Gunderson

Well-known member
Joined
May 17, 2013
Messages
2,331
Location
Bellingham, WA
IMG_5287.jpeg
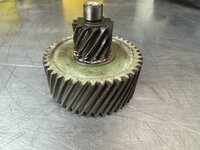
This is the reduction gear that steps the motor's high speed rotation down to something more reasonable.
IMG_5302.jpeg
The larger gear is a phenolic plastic. typically you would expect it to be the one that wears. Here you can see some minimal wear on it.
IMG_5303.jpeg
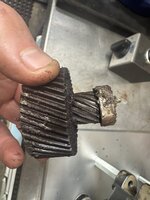
The smaller, metal gear on it is toast. The bearings that are pressed onto either side of this gear shaft were completely toast, so it allowed the gear shaft to wobble, thus create the excessive wear on the metal gear. This motor went way to long before being rebuilt, so its going to require gears from a donor motor to properly fix.
IMG_4335.jpeg
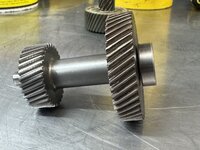
This photo is from my personal motor that I rebuilt, and here you can see how the reduction gear interacts with the Larger spray clutch gear on the left.
IMG_5304.jpeg
At first glance the Sprag clutch gear assembly looks ok.
IMG_5305.jpeg
However all of the lower edges of it are chipped. Between this and the reduction gear wear, I now know where are of the metal I found on the motors Hall magnet came from.
IMG_4366.jpeg
A small snap ring holds the Sprag Clutch gear on to the shaft, bellow its bearing.
IMG_4357.jpeg
Removing the Spag Clutch gear, you can see the internal Sprag clutch. This clutch combined with the one on the drive axle allows the motor to supplement your power, but also allows you to pedal forward without motor assistance, and also pedal backwards.
IMG_4365.jpeg
The Sprag Clutch consists of 4 bearing rollers, and sixteen cam rollers, each of the cams must have their long edge face to the left, or it wont work. This requires special Sprag Clutch grease. Normal lubricating grease will not work. This part is specific to Shimano. Thankfully its very well made.
IMG_5306.jpeg
Here is the motor case after I cleaned all of the **** out of it. You can see the motor control board for the drive unit, the case vent and the Bus control board. It's worth noting that both of the drive shaft seals are ½ the thickness of standard dimensioned seals for that size of shaft. I contacted the MFG, NOK and they confirmed these are specially made for Shimano, and they are not allowed to sell them. Thicker seals may work, but there is not enough clearance for standard thickness seals.
 

ericm

Well-known member
Joined
Apr 17, 2016
Messages
1,963
Location
Southern Oregon
What can a normal rider do to stay on top of the bearings? They don't look all that serviceable. With regular analog bike bottom brackets I can replace the bearings as needed.

I put a lot of miles on bikes in the past when I was racing. I've worn out my share of bottom brackets. I no longer ride as much or have the same fitness. I'm thinking of buying an e bike or two and have ridden a few. I still pedal like I'm on an analog bike, just go faster and farther. Should I worry about quickly wearing out those sub standard BB bearings and seals?

BTW I really appreciate your taking the time to show us the innards and explain the construction.
 
OP
G

Grant Gunderson

Well-known member
Joined
May 17, 2013
Messages
2,331
Location
Bellingham, WA
What can a normal rider do to stay on top of the bearings? They don't look all that serviceable. With regular analog bike bottom brackets I can replace the bearings as needed.

I put a lot of miles on bikes in the past when I was racing. I've worn out my share of bottom brackets. I no longer ride as much or have the same fitness. I'm thinking of buying an e bike or two and have ridden a few. I still pedal like I'm on an analog bike, just go faster and farther. Should I worry about quickly wearing out those sub standard BB bearings and seals?

BTW I really appreciate your taking the time to show us the innards and explain the construction.
So the bearings in the shimano motor are smaller than a standard BB but they use 3 of them including a needle bearing. These bearings are shielded instead of sealed so they are relying on the outer shaft seals (3 of them to protect the bearings). This does a decent job, but it’s obviously not perfect. On a mountain bike the only time I’ve had a BB last more than 3K miles is my ceramic Chris King bottom brackets but I religiously use their too to regularly inject fresh grease.

On these motors I’d probably recommend opening them up once the warranty is over and after 2K miles or so to change grease / bearings.
 
OP
G

Grant Gunderson

Well-known member
Joined
May 17, 2013
Messages
2,331
Location
Bellingham, WA
Its been busy as hell around here, I just had the kid for two weeks straight and now he's off to his moms for two weeks so time to get caught up on work.

IMG_5226.jpeg
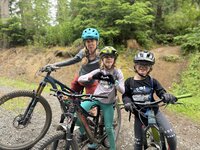
This summer Stian has really caught the bike bug, before It was like pulling teeth to get him to go on a ride, but once we were out riding he wouldn't want to stop. Now he's asking me constantly to go riding and often wants to ride twice a day! Makes me a damn happy dad. He got glasses a few weeks ago and that seems to have made all of the difference in the world as he says he can now see where he's going! I took him down Devils Cross on Galby and that trail used to kick my *** on a 26" bike and its still quite challenging on a 29er as lots of roots and tire catching holes, but Stian is riding it clean on his 24. He's going to be a much better biker than me and I think thats going to happen sooner than latter.
IMG_5323.jpeg
Every 4th our neighborhood does a kids 4th of July parade where they follow a fire truck down the hill to a waiting Ice Cream truck. This year Stian decided to do the entire parade on his Pogo Stick.
IMG_5338.jpeg
At least there was medic's on hand incase the one handed tricks went sideways. Haha!
Screenshot 2025-07-19 at 8.20.57 AM.png
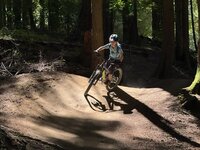
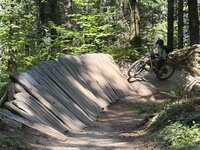
This last weekend I took him over to see Granddad and decided to break the drive up with a day at the Snoqualmie Pass bike park. He was stoked! it was 84 out, so I let him wear the half shell instead of the full face. After a few warm up laps, he spotted this massive rock roll feature that wasn't yet opened when we were there last year. It's way steeper than it looks and it drops about 40 feet or so. Not small. In fact its big enough most adults would stop look at it and then do the ride around. Stian was keen to ride it, so we scoped it and discussed his line. We talked about how he needs to hug the left side as the big compression in the middle is probably too much for his litte 24" bike. He ended up dropping too far right hitting the compression and then getting bucked into the berm at the bottom. ****! That was a big crash.
IMG_5481.jpeg
Broke the helmet, but it did its job. This had MIPS in it, which is supposed to help reduce concussions too. As much as I think helmets are crazy expensive these days, I have no problem dropping $200+ o na new one each time one beaks.
IMG_5479.jpeg
Ended up with a nice bump on his head and a broken thumbnail, but he was keen to keep riding. I made him stop for lunch and we briefly talked about grabbing his full face, but in the end I told him after that big of a crash we should bail. He was showing zero signs of a concussion, but in my experience anytime you break a helmet you have at least a mild one. I'm glad we quit for the day as after 45 minutes on the road he started to get really dizzy and tired and was complaining about the back of his head hurting too. Ended up taking him to the ER to get checked out and after a CT scan they confirmed a mild concussion so a few days off the bike at moms wont be the worse thing for him. Thankfully he's still keen to get back out riding and we had a good visit with Grandpa, even thou Grandpa is mostly just sleeping these days and his short term memory is gone. I'm slowly starting to realize that mentally the man I know as my dad isn't really there anymore. Its sad to see him suffer.
IMG_5499.JPG
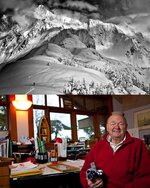
On the day job front I signed a book deal with Artisan books this week to create a photo book on "The Soul of Skiing". it's going to be a big project, but I'm looking forward to doing it as it will be a nice cap to a 25 year career shooting skiing full time (And yes that is Warren Miller from a shoot. Idid with him at his house). I've been lucky enough to meet some of the most influential characters in skiing, so looking forward to sharing some of those stories. I'm not ready for that chapter of my life to be done, but the current market wont support high-level photograph any more. I'm grateful for all of the experiences it provided me with. Maybe it will come. back some day, but I'm not holding my breath. At least I was fortunate enough to experience the pinnacle of the industry flying me around the world to ski with friends.
IMG_5497.JPG
 
Last edited:
OP
G

Grant Gunderson

Well-known member
Joined
May 17, 2013
Messages
2,331
Location
Bellingham, WA
Back to the work shop. I'm moving full steam ahead with offering rebuilds for the Shimano E-bike motors as no-one is doing it on the west coast.

One of the challenges with that is finding a better way of removing some of the bearings.
IMG_5529.jpeg
This Laser brand puller is very well made, but the jaw design isn't good for flush mounted bearings.
IMG_5528.jpeg
I ended up settling on modifying a 3 jaw puller to do it. First I needed to mill the ends of the puller thin enough to fit under the bearings.
IMG_5532.jpeg
Testing to see if they will fit under a bearing now. That worked well. I wont use the puller for this application, I'm going to modify a bearing splitter for this.
IMG_5534.jpeg
I then notched the back side of the jaws on the mill to provide clearing so I can use the puller specially for these recessed bearings. We will see how it holds up. If it doesn't last there is a solution for these out of Europe, but thats a $400 tool.
IMG_5536.jpeg
Success!
IMG_5538.jpeg
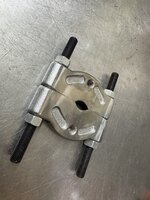
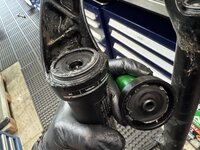
The bearing splitter I had didnt have a flat backside, so it had a really hard time on these bearings that only have a mm or so of clearence. So I decided to improve my cheap UREAH splitter by milling it dead flat.
IMG_5539.jpeg
Thats way better! Had to take .100" off to get it flat. Next o note list is to build a bench testing fixture for the motors, but got to wait on some parts to arrive for that.
IMG_5548.jpeg
I own a pretty large selection of bike specific bearing drifts from Park Tool, and an Abbey bearing press I modified to use a 8MM trapezoid thread. It works really well for most situations as the cup design allows you to press the bearings out of most pivots, etc but it's still not ideal for all situations.
 
OP
G

Grant Gunderson

Well-known member
Joined
May 17, 2013
Messages
2,331
Location
Bellingham, WA
Screenshot 2025-07-19 at 9.06.09 AM.png
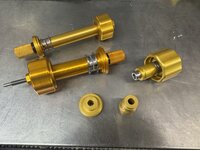
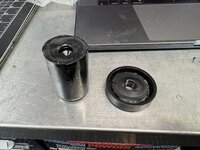
So I ended up splurging on the full set of bearing tools fromEnduro bearings. This set is by far the nicest on the market, and in hindsight what I should have bought originally, but there are still a few instances were the Park Tool version has advantages. Enduro's press system with its locking speed nut's makes the Abbey version look and feel cheap. Plus you have the option of using a standard 15mm wrench of a 8mm hex on them too if you need more leverage or clearance. Very well made with a thirst bearing too. The bottom bracket specific presses are also fully compatible with the pivot bearing press parts, so you can use a combination of them for doing hub bearings too were you need to access of the axle bearings.
IMG_5551.jpeg
The pivot specific removal cups are notched to work on many of the frames with not flat pivots, IE Evil, Specialized, etc. They are double signed and very well made, the non-notched Park cups are still ideal for pivots with flush mounts.
IMG_5553.jpeg
I also picked up a full lest f their bearing punches. I hate using a hammer to remove bearings and would never do it to install them. I bought these to specifically use in the arbor press for pressing bearings out. Eat hot the heads is machined to exactly fit the inner race for each bearing size. Enduro has clearly put a lot of thought into their tools and the quality is the best I've seen.
 

LXCam

ALLIANCE MEMBER
Joined
Apr 23, 2013
Messages
19,204
Location
AZ
Grant, why does it look like the outer shell of the bearing was bonded to the gear? Or is that just debris sticking to oil residue?

Glad your boy wasn’t hurt. Having been thru a few football related concussions with mine, it’s always a bit scary. The week before last mine got hit on his bike on the freeway and took out the left tibia and fibula. At some point he also took a tire shot from the car that caused it to the back of his lid..

Fn county hospital they ran him to didn’t even consider checking him for a concussion 🤨
 

Cruzan80

Well-known member
Joined
Jul 22, 2015
Messages
4,316
Location
Denver, CO
While I fully agree with waiting for safety, the fact he wanted to "get back on the bull" is encouraging. I completely understand split families, but would encourage you to help him tackle something (even if very small) before too long, so he can keep his confidence up. Good on you for modeling safety and showing him what responsible medical is, re getting checked out afterwards (he will hopefully remember and do the same when he is older, because of the habits you showed him now).

As an aside, I feel like we start out when young being made of rubber, and slowly turn more brittle as we age. I see my son doing things (and I remember doing some) that I look at now and think "That would be a minimum of an ice pack, two Advil and at least a beer to recover from".
 
OP
G

Grant Gunderson

Well-known member
Joined
May 17, 2013
Messages
2,331
Location
Bellingham, WA
Grant, why does it look like the outer shell of the bearing was bonded to the gear? Or is that just debris sticking to oil residue?

Glad your boy wasn’t hurt. Having been thru a few football related concussions with mine, it’s always a bit scary. The week before last mine got hit on his bike on the freeway and took out the left tibia and fibula. At some point he also took a tire shot from the car that caused it to the back of his lid..

Fn county hospital they ran him to didn’t even consider checking him for a concussion 🤨
There was a lot of old dried up grease / crud under the bearing. Which is most likely why it wouldn’t spin, but then spun free once I removed it. I’m thinking that plastic gear is ultrasonic welded to the metal shaft of the metal gear on the other side.

Hopefully he’s okay other than the Tib fib. As a dad that snot the kind of call you want to get! I’ve had a few times where I put may dad through hell calling him after a ski accident etc, so it seems like I’m due to be on the receiving end now, but that doesn’t make it easier. So just trying really hard to teach him how to safely pick a line etc, as I know I can keep him from doing it, so best to reach him how to do it properly and safely.

Bikes of any sorts on roads scare me. Too many ****** drivers to worry about. Jamie was on the National cycle team back in college for both road and mountain and rode and trained with a lot of the US postal service race team and others. Since then ½ of the girls on the national road team with her have passed away after being hit on their bikes so she no longer rides road.
While I fully agree with waiting for safety, the fact he wanted to "get back on the bull" is encouraging. I completely understand split families, but would encourage you to help him tackle something (even if very small) before too long, so he can keep his confidence up. Good on you for modeling safety and showing him what responsible medical is, re getting checked out afterwards (he will hopefully remember and do the same when he is older, because of the habits you showed him now).

As an aside, I feel like we start out when young being made of rubber, and slowly turn more brittle as we age. I see my son doing things (and I remember doing some) that I look at now and think "That would be a minimum of an ice pack, two Advil and at least a beer to recover from".
I miss the days of being made of rubber. I learned my lesson after my avalanche where I had a massive concussion despite not being knocked out and they didn’t do a CT scan. Then 6 months later I had another one on the bike and I was knocked out cold that time. Those back to back ones cost me 2 years of my life. Crazy thing about sever concussions is you know Soni’s off but it’s really hard to process exactly what it is or to think normally or in my case even do simple math. I still remember the day I finally felt normal again and only then I realized I was living a brain fog for 2 years.

With Stian I wasn’t going to take him in, until he got dizzy and was complaining about the back of his head hurting and getting really drowsy. Fortunately Jamie is a MD so I gave her a call for advice and she insisted I go get a CT scan just to be safe.

Worst part of the whole scenario was telling his mom. She of course went ape ****, but being divorced it felt really good to just be able to hang up the phone and not deal with the crazy. Had Stian FaceTime her to put her at ease.

I will say the one thing I’ve learned is staying active seems to be the key. Soon as you slow down time catches up and we become more brittle. I’ve also noticed that things take way longer to heal with age too. However with age comes wisdom and experience so you are more capable.
I like to say I’m now old enough to know better but still young enough not to care.
 
OP
G

Grant Gunderson

Well-known member
Joined
May 17, 2013
Messages
2,331
Location
Bellingham, WA
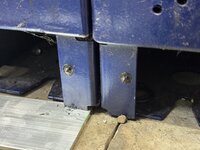
My only complaint about the Vidmar cabinets under my main workbench is the feet are welded on. I’ve been unsuccessful in the past of trying to drill out the spot welds. Every other Vidmar / lista I have they bolt on so I’ve removed all of them so nothing can roll under. Seems like every time I drop something, especially if it’s important it’s pulled under the cabinets by some unknown force. I got fed up with fishing parts from the abyss so finally decided to do something about it. IMG_5606.jpeg
Each leg has a hole in it that just so happens to a to be the perfect size to tap for a 5/16” screw.
IMG_5607.jpeg
I then installed transfer screws to mark the location for the holes in some 2” tall ⅛” aluminum bar. IMG_5608.jpeg
Only took me 5 years of dealing with it to solve the problem in 5 minutes. Can’t help but think I’m an idiot for not doing it sooner especially when I think about how much time I’ve waisted over the years searching for parts that ended up under there.IMG_5612.jpeg
IMG_5625.jpeg
After two weeks at moms to recover from his concussion I got Stian back in the bike with a new helmet. plan was to start off mellow and work back up to it, but that lasted all of 30 seconds and he was back at it. Didn’t get any more pics as he was too stoked to ride vs stop to let dad shoot.
 
OP
G

Grant Gunderson

Well-known member
Joined
May 17, 2013
Messages
2,331
Location
Bellingham, WA
Grant, thanks for sharing some of your skiing photos. Make sure you post a link or at least let us know where we can find the book once it is out. Those are beyond great photos.
IMG_5498.jpeg
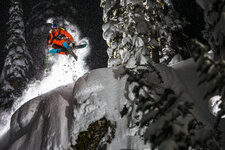
Here is a few more from the archive. Dana Flahr hitting the baker road gap at night.

Josh Daiek201203066185.jpeg
Josh Diake in Pemberton
Mattias Evangelista2016122422177.jpeg
My buddy Mattias at Baker
Dave Treadway201312299712.jpeg
The late Dave Treadway
Adam Ü2017011325107.jpeg
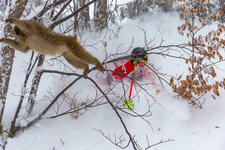
Skiing with Monkeys in Japan
James HeimDrumScan02JamesHeim.jpeg
James Heim at Baker shot way back in the film days.
KC Deane GG2015011119078.jpeg
KC Deane in Revelstoke
Zack Giffin201008238552.jpeg
Zack Giffin in Chilie
Bryce Philips20080306.jpeg
Bryce Phillips in Alta.

Lots of good memories and adventures over the years. I miss that lifestyle it feel very fortunate I got to experience it and share those moments with others.
 

gba2331

Well-known member
Joined
Sep 22, 2021
Messages
784
Those are great shots but looking at them from an older perspective (also old enough to know better but starting to care) some seem terrifying where I’m more worried about the skier than awed by the photo. How do you / they balance awesome vs risk? I know they’re experts, but still….
 
To avoid these ads, REGISTER NOW!
Top Bottom