To avoid these ads, REGISTER NOW!

Above 1200 Sq/FT Garage build in South West B.C

Wokspaces above 1200 squarefeet.
OP
D

dmittz

Well-known member
Joined
Dec 2, 2016
Messages
1,298
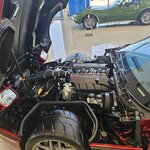
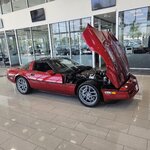
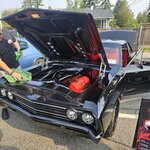
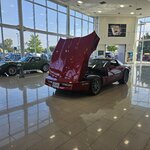
Well guys. I was asked by a local dealership is if they could borrow my Corvette for a Corvette promotional display over the weekend that concludes with a big corvette show at the dealership on labor day (monday).

So I got the car as cleaned up and polished as I could this week and took the car down and dropped it off at the dealership this morning and will be there until the end of the show on monday when I get it back.
20250829_110122.jpg20250829_105706.jpg20250829_105700.jpg
20250829_105625.jpg
20250829_105539.jpg
 
To avoid these ads, REGISTER NOW!

Xti04

Well-known member
Joined
Nov 11, 2016
Messages
2,339
Vette looks great. I did my lift install by myself with an 8 year old for help. Stood both columns up with an engine hoist. Friends and other help was non existent. Took my a couple solid days of work to get it done but theres nothing hard about it. Also more likely it ends up precisely where you want it than the flaky dude who says good enough and sends it with a hammer drill
 

cccoltsicehockey

Well-known member
Joined
Apr 3, 2014
Messages
1,416
Location
Charlotte, NC
Vette looks great. I did my lift install by myself with an 8 year old for help. Stood both columns up with an engine hoist. Friends and other help was non existent. Took my a couple solid days of work to get it done but theres nothing hard about it. Also more likely it ends up precisely where you want it than the flaky dude who says good enough and sends it with a hammer drill
This is true. Spend $1200 on an install only for it to be 3in out of square to my row of cabinets at the front of the bay.
 
OP
D

dmittz

Well-known member
Joined
Dec 2, 2016
Messages
1,298
Ok Guys, Big update!

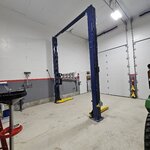
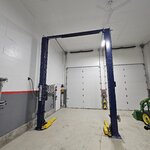
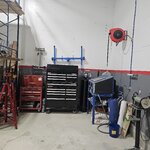
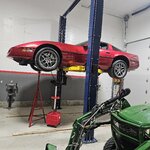
The challenger 10K extended height lift is installed!
20250902_180658.jpg20250902_180638.jpg20250902_180624.jpg20250902_180553.jpg
I supervised the install pretty closely, went over the placement, double checked measurements and made sure it was all level and plumb. I also wired up the lift as the lift company doesn't do electrical hookups.

I marked out the thicked slad area ahead of time. Apprently my thickened slab area was 18in thick (not 12)! so all of the 3/4in wedge anchors are driven 16inches into the concrete. The lift Should be pretty secure! Also it doesn't look like it in the pictures but the bottom plate of the lift is 16in from the edge of the slab at the nearest point. Which they said was 'totally safe' with an 18in thick slab, when I asked.

I also got and assemballed a couple spin up jacks and a oil drain tank.

20250901_211741.jpg
So I'm all set and excited to start using this lift!
 
Last edited:
OP
D

dmittz

Well-known member
Joined
Dec 2, 2016
Messages
1,298
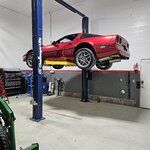
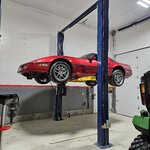
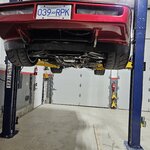
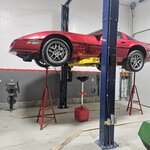
I finally got a little bit of free time tonight and was able to give the car lift a trial run tonight. It worked great, this is for sure going to make my life much better!
20250905_204025.jpg
20250905_204042.jpg
20250905_204054.jpg
It might not look it in the pictures because its an extended height lift but the car was 6'2 off the ground in the pictures, I was able to walk under the tires! So Even with taller vehicles like my truck there will be no issue lifting them high enough to stand underneath.

20250905_212227.jpg
I had decided to put the lift on the south bay against the wall because I felt it made the rest of the shop layout work best, but I did have a nagging concern that it might not be as much room between the car and the wall as would be ideal. However, happily that ended up being a non-issue as there was 4ft from the side of the car to the wall so that work just fine for me.
 

Xti04

Well-known member
Joined
Nov 11, 2016
Messages
2,339
Whats the space between the lift post and the wall? Mine is at about 24 inches, but power unit cuts that to about 18 inches space. Makes it a bit more of a challenge to rotate tires. Otherwise as long as you can squeeze thru the gap its good enough
 
OP
D

dmittz

Well-known member
Joined
Dec 2, 2016
Messages
1,298
Whats the space between the lift post and the wall? Mine is at about 24 inches, but power unit cuts that to about 18 inches space. Makes it a bit more of a challenge to rotate tires. Otherwise as long as you can squeeze thru the gap its good enough
from the post to the wall is about 18in. My power unit is facing back rather than out the side. I can squeeze past if needed, but probbly would just raise the vehicle up walk under in most cases.

There ended up being about 4 ft from the side of my Corvette to the wall when its on the lift which works fine for me, there might be a few inches less with my truck, but either way its enough room for me to work comfortably.
 
OP
D

dmittz

Well-known member
Joined
Dec 2, 2016
Messages
1,298
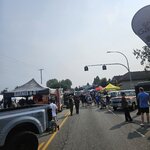
Well guy's today was the biggest local car show of the season. The langley good times cruise-in. Miles of cool cars, tons of food trucks, venders and people.

I didn't enter my corvette this time but did attend the show with my son.

LS swapped 84' camaro
20250906_112408.jpg
Gen 5 LT4 swapped 69' camaro
20250906_111401.jpg
Elvis inpersonator complete with the pink cadillac
20250906_110043.jpg20250906_105701.jpg20250906_103855.jpg20250906_103200.jpg20250906_103216.jpg

I also found a short that I thought suits me pretty well:
20250906_115552.jpg

As the fall rains and cooler weather draws near the Show is always a fitting send off to summer and the car show season.
 

cccoltsicehockey

Well-known member
Joined
Apr 3, 2014
Messages
1,416
Location
Charlotte, NC
I finally got a little bit of free time tonight and was able to give the car lift a trial run tonight. It worked great, this is for sure going to make my life much better!
20250905_204025.jpg
20250905_204042.jpg
20250905_204054.jpg
It might not look it in the pictures because its an extended height lift but the car was 6'2 off the ground in the pictures, I was able to walk under the tires! So Even with taller vehicles like my truck there will be no issue lifting them high enough to stand underneath.

20250905_212227.jpg
I had decided to put the lift on the south bay against the wall because I felt it made the rest of the shop layout work best, but I did have a nagging concern that it might not be as much room between the car and the wall as would be ideal. However, happily that ended up being a non-issue as there was 4ft from the side of the car to the wall so that work just fine for me.
Looking good.

I ended up being so concerned about the space along the wall that I gave it too much space and wish I had put it closer and left myself a little more freedom on the other side of the garage bay. Glad you worked out well.
 

jollygreengiant

Well-known member
Joined
Nov 10, 2013
Messages
2,365
Location
Ontario, Canada
That was my first thought when you posted those pics of the lift, was that you where going to have enough space between your car and the wall. Good to hear that's not an issue. :thumbup:

The lift looks great!
 
OP
D

dmittz

Well-known member
Joined
Dec 2, 2016
Messages
1,298
Well guys, a couple things I thought i'd share.

I had to do some yard work and needed a hedge trimmer. I got the articulating hedge trimmer attachment for my milwaukee quick-loc and I have to say this thing is awesome!

20250909_165923.jpg
The only complaint I had was the first one was a dud but the tool store I got it from exhanged it for another one so no big deal and this one works great.

Also I have been pondering what to do with my drywall lift. I could sell it but I could see myself using it again. Its pretty large and heavy and not easy to store. I finally had the idea to take it apart and hang the pieces on the wall behind my tool box. That seems to work well.

20250912_103319.jpg
 
OP
D

dmittz

Well-known member
Joined
Dec 2, 2016
Messages
1,298
Well guys, I took the corvette for the last drive of the year yesterday and my son and I had fun but now its time to put the Corvette into storage and I have lots of little projects I plan to do on it this winter.

The first thing is I did and engine oil and filter change last night so it will have fresh and clean oil in the engine while its stored, and I also made sure to fill it up with gas when I was out yesterday.

20250913_195731.jpg
The lift sure makes those fluid changes easy!

Its also been 4 driving seasons since the brakes were done so I'm figuring its time to do a full refresh on them and I have parts ordered and on the way.

I've been thinking my calipers were starting to look a bit tired so When I take them apart to rebuild them i'm also going to powder coat them (myself).

I plan to change the caliper color from silver to red, I wanted to try and get some metallic flake powder that would be similar color to the paint. I ordered some 2 stage 'tint-coat' powder called 'lollipop red' and did a test on a scrap piece of steel. 20250913_102810.jpg
The powder isn't a 100% match to the paint but its about as close as I think i'm going to get with a powder coat.

And it has a deep rich look and nice metallic flake in the daylight. So I'm thinking this is the color i'll use.
 
Last edited:
OP
D

dmittz

Well-known member
Joined
Dec 2, 2016
Messages
1,298
Why are you taking it off the road already? I would have thought it would be another few weeks yet until they started with the winter road treatments out there.
The weather varies a bit year to year some years the rains start 3rd week of sept other years its not until late in oct. You never know. But the insurance was expiring so I decided not to renew it. Also now that I have the lift I have a few projets on it that i'm looking forward to doing.
 
OP
D

dmittz

Well-known member
Joined
Dec 2, 2016
Messages
1,298
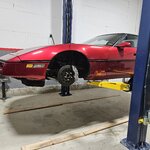
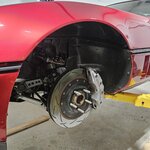
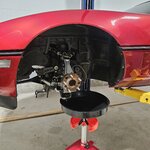
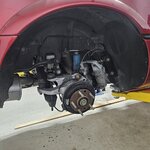
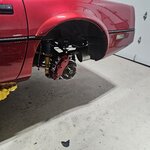
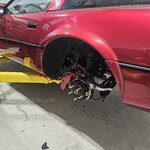
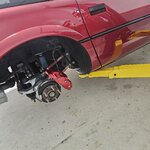
So friends, I'm moving forward with the brake refresh on the Corvette.

As I might have mentioned before I have An upgraded version of C6 Z06 brakes on my car. I did that swap about 4 years ago so figured it was time to do a refresh.

20250915_091738.jpg20250915_091752.jpg

It took less than an hour to take the brakes apart, The only hold up is waiting for all the brake fluid to slowly drip out of the lines.

The brake pads had about 30% remaining so I might be a bit over zelious but given its a perfomance car I don't like to run the pads all the way down before changing them.

Fronts:
20250915_101422.jpg
Rears:
20250915_101434.jpg
Once the front brake lines have stopped dripping i'll remove and drain the rear ones. I didn't have 4 buckets!

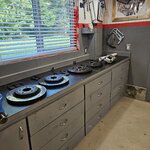
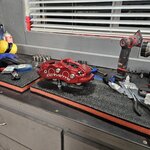
Parts on the bench:
20250915_101552.jpg
Going to see if the rotors can be remachined, as they look decent but we shall see.

Stay tuned...
 
To avoid these ads, REGISTER NOW!
OP
D

dmittz

Well-known member
Joined
Dec 2, 2016
Messages
1,298
Did you source the C6Z06 brakes locally or online (USA) and ship? Approximately how much did the setup cost (mainly just calipers+rotors)..?

Cheers,
Joe
I found all 4 calipers locally, the S/S caliper piston upgrade for them was from DRM, the rotors are DBA (Australia) Vansteel adapter brackets for the front, I had to buy a C4 to C6 Z06 conversion hub from street shop inc for the rear so I could have a parking brake and longer briaded brake hoses. Oh and I had hawk 1 pce pads...I may do different pads this time.

Prices have gone way, way up since I pieced this setup togther. Back in 2020-2021 when I bought all the parts I think I spent less than $2,500Cdn for the compete front and rear setup. I suspect it would cost around $4K cdn to replicate it today, a bit less if it was going on different vehicle that didn't need a rear 'conversion hub' to have parking brake.
 

frojoe

Well-known member
Joined
Oct 1, 2015
Messages
102
Location
Vancouver, BC, Canada
I found all 4 calipers locally, the S/S caliper piston upgrade for them was from DRM, the rotors are DBA (Australia) Vansteel adapter brackets for the front, I had to buy a C4 to C6 Z06 conversion hub from street shop inc for the rear so I could have a parking brake and longer briaded brake hoses. Oh and I had hawk 1 pce pads...I may do different pads this time.

Prices have gone way, way up since I pieced this setup togther. Back in 2020-2021 when I bought all the parts I think I spent less than $2,500Cdn for the compete front and rear setup. I suspect it would cost around $4K cdn to replicate it today, a bit less if it was going on different vehicle that didn't need a rear 'conversion hub' to have parking brake.

That's hugely informative, thank you!
 
OP
D

dmittz

Well-known member
Joined
Dec 2, 2016
Messages
1,298
So the work on the corvette's brake refresh is continuing...

20250917_204613.jpg20250918_103924.jpg20250918_103933.jpg
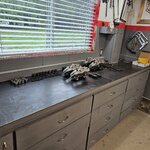
I've now dismantled all four calipers. Which included removing all the bleeder screws (x8), all the pad bolts/pins (×28), pad brackets (x8), all 20 caliper pistons and their boots and seals.

I've done this once before but forgot how big of a job rebuilding these calipers is!

Some new parts have started to arrive such as the new seals, boots and bleeders.
20250918_103944.jpg
Other parts are still being shipped.

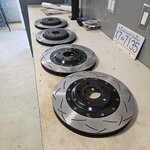
I also dropped all 4 rotors off at a friends shop the otherday as he has a brake lathe and is going to turn them for me. I told him there is no rush, so I'll proabbly be a few weeks before I get them back.

One thing I noticed while workimg at my bench was un-like my last workshop where I had a set of wrenches hanging on the wall, in this shop all my wrenches are over in the tool.boxes by the lift. I missed having a set hanging on the wall as I found myself walking across the shop to get wrenches. I have a wall mounted set on my attached garage that seldom is used so I may relocate those to the wall above this bench.

What is working very well about this setup, is having all the screw drivers, plyers etc... in the drawers under the bench. super handy!
 
Last edited:
OP
D

dmittz

Well-known member
Joined
Dec 2, 2016
Messages
1,298
Got the Corvette's brake calipers all sand blasted in my blast cabinet.
20250919_214642.jpg
They were powder coated before so it took a lot of work to get them stripped back to bare metal but I got it done.

My air compressor got quite the workout but did a great job as I never noticed a drop in air pressure in the 1.5 hours I was blasting.
20250919_214931.jpg
 
OP
D

dmittz

Well-known member
Joined
Dec 2, 2016
Messages
1,298
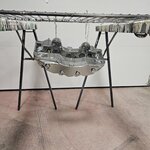
I powder coated the first rear caliper with the base 'mirror chrome' powder. I'd say it lives up to its name and does look very much like chrome.

20250925_090906.jpg
20250925_090915.jpg

This is of course the base coat and the metallic red tinted clear is applied as the top coat. I've never done 2 stage tint coat powder before so we'll see how it turns out.
 
OP
D

dmittz

Well-known member
Joined
Dec 2, 2016
Messages
1,298
Thank you guys I haven't done much powder coating in a few years and never used tint coat 2 stage powder before. But I have to say the calipers are turning out nicely! I'm pleased.
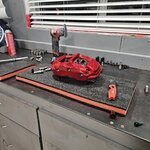
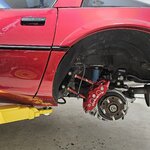
I still need to add the 'corvette' decals and of course reassembal them, but I couldn't help but try a real quick 'test fitting' of the coated rear calipers on the car to see what they would look like.
20250926_112615.jpg20250926_112625.jpg20250926_112937.jpg20250926_112216.jpg
 
Last edited:

jollygreengiant

Well-known member
Joined
Nov 10, 2013
Messages
2,365
Location
Ontario, Canada
So question for you guys with lifts.

What do you do for under lift lighting?

Did you not remember which site you are on?? This is the Garage Journal, where the only acceptable answer is a 48 light in ground, dimmable, wireless zone controlled, multi-spectrum, LED system.

I guess you better get to hammering out your floor. :lol_hitti


I honestly have no idea lol, I'm still over here jealous of your lift.
 

cccoltsicehockey

Well-known member
Joined
Apr 3, 2014
Messages
1,416
Location
Charlotte, NC
So question for you guys with lifts.

What do you do for under lift lighting?
These are what I use. https://www.harborfreight.com/2100-...lack-59170.html?hftm_sc=369&utm_source=google

I have three of them I love them so much. Means I always have one that is charged and they are extremely bright. I rarely use them on the highest output unless I an trying to light up a room to work on without power or outside. I used two on max power when rebuilding my fence to work past sunset outside with no issues.

You can also buy this awesome bar for working under the hood and in the interior of your car. https://www.harborfreight.com/2100-...in-extendable-underhood-floodlight-58990.html
 
To avoid these ads, REGISTER NOW!
Top Bottom