To avoid these ads, REGISTER NOW!

What did you do "IN" your garage today?

To avoid these ads, REGISTER NOW!

KwikFab

Well-known member
Joined
Jul 27, 2024
Messages
1,213
Location
Central Valley, CA
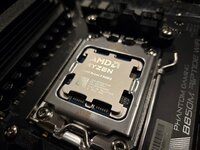
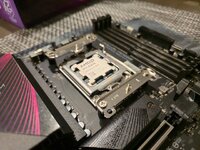
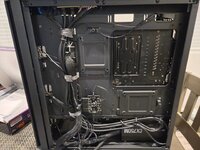
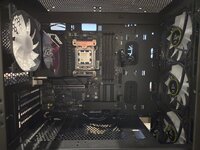
Just went to grab some screw drivers and my ground strap - partially assembled a PC for someone in the east coast

80de264194d6c2529bda3af4c311ebdb4943443d.jpeg

467a1428f407fdec9752d0afd6797f111877fa3d.jpeg

ab7a3d2c91f9afc00d468cf0b46d5e02d7cc3aca.jpeg

3a6f5b74b326f0129f6d78adefb28888a2286607.jpeg

103d8aefe4883bb1f51b73d22506da49c5efb4b2.jpeg

913ad90a6ca95b39e48bef93c47ed0e7f0d79392.jpeg

Since he doesn't care about aesthetics, I'll revisit the rear wiring and rip out all of the RGB daisy chain wiring that came with the case along with the controller

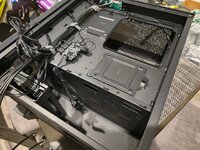
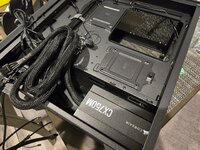
I'll also have to remove the HDD/SSD cage that takes up space and adds weight in the PSU section
 

Fly Fishing Rick

Well-known member
Joined
Oct 29, 2024
Messages
237
Location
Upstate NY
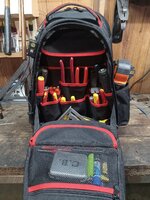
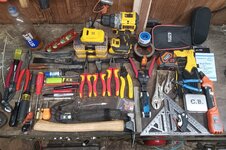
I have a new, smaller tool bag arriving tomorrow so tonight I decided to empty my current bag and lay everything out so I can decide if I'm going to try to keep carrying it all or not. There's a few items I'll almost definitely start carrying in a small overflow bag for those occasional jobs I may need them for. Didn't really realize how much **** I had in there till I got it all laid out haha. I also thought it may come in useful if/when I decide to sell the bag. I don't know about y'all, but one of the hardest parts of buying something like this for me is knowing if it'll hold everything I need and am used to having. At least this will provide some kind of an idea, hopefully.
20251119_231233.jpg
20251120_233943.jpg
 

SMOKEYBEAR

Well-known member
Joined
Jan 3, 2016
Messages
461
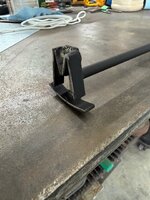
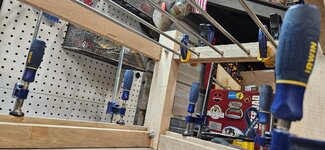
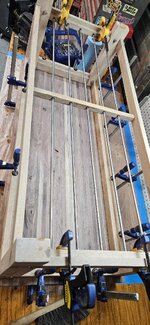
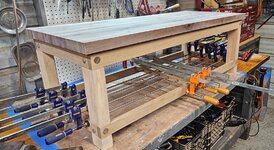
Some bench work. Final fitting the 3 pieces and SS rod for the shoe rack, finish that this eve after some more sanding. 24 - 3/8" dowels to finalize the connection between the seat and frame. There are 4 - 1" dowels in dual blind holes in each corner too. Pics no order..
 

Attachments

  • HB9.jpg
    HB9.jpg
    137.6 KB · Views: 37
  • HB8.jpg
    HB8.jpg
    101.3 KB · Views: 33
  • HB7.jpg
    HB7.jpg
    131.2 KB · Views: 28
  • HB10.jpg
    HB10.jpg
    137.1 KB · Views: 27
  • HB11.jpg
    HB11.jpg
    110.6 KB · Views: 29

welder4956

Well-known member
Joined
Apr 8, 2010
Messages
3,072
Location
Birmingham, AL USA
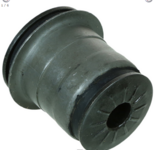
A few weeks back I put new front lower control arms on the Taurus. I used the loaded arms so it was a fairly easy process. I had the old arms laying around so today I decided to see how hard it would be to change the front bushing. I don't have any experience with that so a great way to learn instead of being under the gun. I managed to remove the old one in about 3 hours and I had to destroy the rubber portion of the bushing so I could get a hacksaw in to cut a slot in the outer metal piece - it was rusted in solid. Made enough of a slot in it to use the air hammer to peel it back enough to loosen it up. I'm not going to put a new bushing in it but I imagine it would be easier than removing the old one. A useless exercise on the face of it but lessons learned and experience gained.
The victim and what a good bushing looks likeBushing.JPG:

1763674145746.png

This is much quicker:
1763731399559.png
 

PassnThru

Well-known member
Joined
Jan 5, 2010
Messages
6,512
Location
Bowling Green KY
This is much quicker:
1763731399559.png
Honestly I don't think that would have helped. The bushing has a metal sleeve on the outside and a metal core with metal ends attached to the core. So you can't push just the bushing through the outer sleeve as it curls inward making the hole smaller than the end. It's not until you knock those metal ends off that you can push the bushing through leaving the outer metal in the hole. That's metal on metal and rusted in pretty good. It's not just going to simply 'push' out like a rubber bushing normally would.
 

DGersic

Well-known member
Joined
Mar 12, 2017
Messages
6,357
Location
DeKalb, IL
Honestly I don't think that would have helped. The bushing has a metal sleeve on the outside and a metal core with metal ends attached to the core. So you can't push just the bushing through the outer sleeve as it curls inward making the hole smaller than the end. It's not until you knock those metal ends off that you can push the bushing through leaving the outer metal in the hole. That's metal on metal and rusted in pretty good. It's not just going to simply 'push' out like a rubber bushing normally would.

With enough pressure, the whole bushing assembly will push out of the arm. Or the arm will be destroyed in the attempt.

Use a hole saw on the rubber part to remove it. Or a torch to burn it out, but have LOTS of ventilation, because burning rubber smells awful.
 

gearhead1960

ALLIANCE MEMBER
Joined
Mar 21, 2019
Messages
1,862
Location
Manassas, VA, a small blot in history
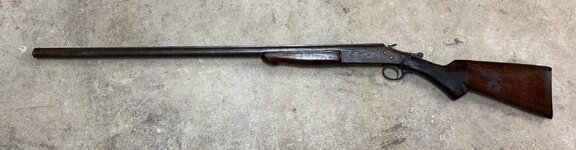
Inspected, cleaned, and lubed (free to me) antique/vintage Western Field break action, single-shot shotgun. Don't have much info on this gun. Western Field was a Wards brand among others and might have been made by Savage or Mossberg. More research is needed....not sure I'll ever shoot it. Might end up being a display piece....
IMG_2269.JPEG
IMG_2270.JPEG
IMG_2271.JPEG
 

Attachments

  • IMG_2271.JPEG
    IMG_2271.JPEG
    594.4 KB · Views: 5

Outlawmws

Well-known member
Joined
Aug 9, 2011
Messages
39,302
Location
The Badlands
Inspected, cleaned, and lubed (free to me) antique/vintage Western Field break action, single-shot shotgun. Don't have much info on this gun. Western Field was a Wards brand among others and might have been made by Savage or Mossberg. More research is needed....not sure I'll ever shoot it. Might end up being a display piece....
IMG_2269.JPEG
IMG_2270.JPEG
IMG_2271.JPEG

Nice acquisition! Is it a 12 ga.?
 
To avoid these ads, REGISTER NOW!

Beerhippie

Well-known member
Joined
Oct 13, 2023
Messages
9,940
Location
Far NE Oregon
It's not marked. At least I haven't found a mark that tells me the gauge. Unfortunately, my knowledge of shotguns is lacking. I'm open to suggestions on figuring out the gauge....
Measure the ID of the chamber--the part the shell goes into. You should be able to find the measurements for various shotgun gauges online.
 

Beerhippie

Well-known member
Joined
Oct 13, 2023
Messages
9,940
Location
Far NE Oregon
So stuffing the biggest shell you can in there and seeing if it works wouldn’t be a good idea? :badteeth:
In theory, that would work. Knowing what the barrel was made for, propellant- and load-wise, might be nice if you don't want to see what a barrel explosion looks like from close-up. I don't know if that's old enough to be a black-powder gun, but, if so, high-pressure smokeless powder would be a very bad idea.

There are also different lengths of shell with differing amounts of powder to consider.

There really should be some stamping on the barrel near the breech (usually) to identify the gauge, at least.

Wall-hanger is always the safest call.
 

KwikFab

Well-known member
Joined
Jul 27, 2024
Messages
1,213
Location
Central Valley, CA
Just went to grab some screw drivers and my ground strap - partially assembled a PC for someone in the east coast

80de264194d6c2529bda3af4c311ebdb4943443d.jpeg

467a1428f407fdec9752d0afd6797f111877fa3d.jpeg

ab7a3d2c91f9afc00d468cf0b46d5e02d7cc3aca.jpeg

3a6f5b74b326f0129f6d78adefb28888a2286607.jpeg

103d8aefe4883bb1f51b73d22506da49c5efb4b2.jpeg

913ad90a6ca95b39e48bef93c47ed0e7f0d79392.jpeg

Since he doesn't care about aesthetics, I'll revisit the rear wiring and rip out all of the RGB daisy chain wiring that came with the case along with the controller

I'll also have to remove the HDD/SSD cage that takes up space and adds weight in the PSU section

I hate case fans that come with cases. Anyway, controller is staying in but won't be plugged in.

HDD/SSD cage removed.

Wires routed.

Ram and cooler installed.

Unfortunately, the air cooler doesn't provide much ram clearance so I'll be running only one fan

20251121_100507.jpg

I'll fire it up later today before buttoning it up, followed by installing the OS and getting it going.

20251121_100315.jpg

20251121_094804.jpg
 

gearhead1960

ALLIANCE MEMBER
Joined
Mar 21, 2019
Messages
1,862
Location
Manassas, VA, a small blot in history
In theory, that would work. Knowing what the barrel was made for, propellant- and load-wise, might be nice if you don't want to see what a barrel explosion looks like from close-up. I don't know if that's old enough to be a black-powder gun, but, if so, high-pressure smokeless powder would be a very bad idea.

There are also different lengths of shell with differing amounts of powder to consider.

There really should be some stamping on the barrel near the breech (usually) to identify the gauge, at least.

Wall-hanger is always the safest call.
Yeah, I'll poke around and do some measurements and look again for markings. This piece is low on the priority list. I also recently acquired a Stevens 620a Trench gun (12 gauge) dating pre WWII that needs to be shot. I don't know it's history, but it has all the U.S. markings on it, so know it's authentic. I'm looking for what the right loads might be best. I'm sure it's robust enough to take some abuse, but since it's got some value, don't want to abuse it too much. I acquire 'em to shoot, not live in a safe....:beer:
 

gearhead1960

ALLIANCE MEMBER
Joined
Mar 21, 2019
Messages
1,862
Location
Manassas, VA, a small blot in history
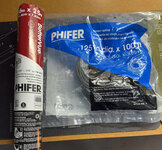
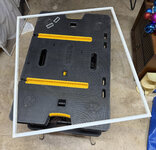
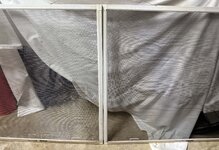
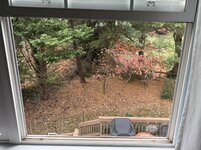
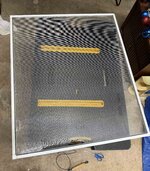
After playing with the firearms, the less fun stuff commenced....window screen replacement. The house is nearing 30 years old and the screens are all original. I like to watch the wildlife (squirrels and birds) in the backyard. It was getting annoying to look out and all you saw was reflective screen. Did the research and ordered this:
IMG_2274r.jpg
...already had this...
IMG_2275r.jpg
I have a total of 22 screens to replace...all 3'x2'. I originally ordered 100' of screen, but have fallen short. I don't remember if I even tried calculating how much I need or just F'd up...:lol_hitti. New batched showed yesterday, so I commenced with doing 2 more as that's my limit per day. I just hate doing these, so 2 a day is it. 1st up...
IMG_2278r.jpg
...spline removed and screen getting removed...
IMG_2279r.jpg
....old screen completely removed and discarded....
IMG_2280r.jpg
....sizing the new screen....
IMG_2282r.jpg
...in position to install....
IMG_2283r.jpg
...new screen on right and old screen on the left....
IMG_2285r.jpg
....and the clear view...
IMG_2286r.jpg
...next...
IMG_2287r.jpg
...only 11 more to do......:beer:
 

bmwrd0

Well-known member
Joined
Nov 7, 2010
Messages
5,499
Location
Beaver Fever Oregon
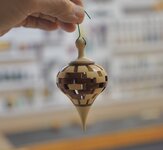
I wandered down to the shop, fired up the compressor, and blew the dust off some of my Dad's wood turnings.

Walnut Puzzle Ball.jpeg
Five layer puzzle ball turned from a pruning from his backyard walnut tree.

Open segment ornament.JPG

Open segmented Christmas ornament Dad made from his holly & walnut prunings.

An old friend of my passed father sent me a few of his wood turnings that he did, oh, 40-50 years ago. He had given them as gifts, and she felt it was time to bring them back to the family, so to speak. Most of the wood used came from his teaching orchards, as he was an ag professor.
54938766276_4b79417d1c_b.jpg
 

SMOKEYBEAR

Well-known member
Joined
Jan 3, 2016
Messages
461
Last bit of bench work. Last glue up, the 3 pieces plus the SS rod. I'm glad I dry fit it and marked everything.. quite a bit to manage with glue, 3 wood blocks and 5 SS rods. Good bit of sanding ahead of me, then pick a finish. Pics no order..
 

Attachments

  • HB12.jpg
    HB12.jpg
    154.1 KB · Views: 27
  • HB13.jpg
    HB13.jpg
    168 KB · Views: 29

cody1325

Well-known member
Joined
Apr 17, 2024
Messages
1,104
Location
Southwest Virginia
Just went to grab some screw drivers and my ground strap - partially assembled a PC for someone in the east coast

80de264194d6c2529bda3af4c311ebdb4943443d.jpeg

467a1428f407fdec9752d0afd6797f111877fa3d.jpeg

ab7a3d2c91f9afc00d468cf0b46d5e02d7cc3aca.jpeg

3a6f5b74b326f0129f6d78adefb28888a2286607.jpeg

103d8aefe4883bb1f51b73d22506da49c5efb4b2.jpeg

913ad90a6ca95b39e48bef93c47ed0e7f0d79392.jpeg

Since he doesn't care about aesthetics, I'll revisit the rear wiring and rip out all of the RGB daisy chain wiring that came with the case along with the controller

I'll also have to remove the HDD/SSD cage that takes up space and adds weight in the PSU section

That reminds me; I've got some updating and modding to do with all three of my PCs.

The Dell Latitude 5290 needs a new battery--it was toast when I got it secondhand. It's kind of useless constantly tied to a charger--especially as I like it with the 2-in-1 tablet feature (it also replaced a low-end freebie from T-Mobile tablet).

My old 2021-ish Lenovo Ideacentre 5i Creator Edition (lives in the basement for sims and for 3D printer control) is getting an SSD upgrade (from a 1TB HDD to a 1TB SSD), and possibly a 2060 (old was only a 1660 Super). I upgraded RAM to 16GB (from 12) about a year ago.

And this one (an iBuyPower prebuilt with a 14th gen i5, 16GB RAM, and a 3050)--another 1 (possibly 2) TB SSD just for Microsoft Flight Simulator 2020 since it's so huge (possibly external) with add-ons. It eats a huge chunk of a 1TB SSD with just the base game (just shy of 200GB) I'm upgrading RAM while the case is open to 32GB from 16.

Speaking about RGB, it's something I want to get rid of as well. It's glaringly bright, and partly why I moved the PC to the floor from an adjoining bookcase. The RAM sticks stay on even with the PC is in sleep mode--that will go with the RAM upgrade. Still unsure how to remove it from the fans--I hear you can disable RGB in the BIOS menu, however.

I would've built my current PC had it not been for a healthy discount ($520 from $900) at my local Sam's Club this spring as it was a floor model from the Christmas season they were getting rid of.
 

Hal

Well-known member
Joined
Mar 8, 2008
Messages
671
Location
Vermont
Reassembled my waste oil furnace today. It had a bad crack in the combustion chamber. Last week we set up staging and removed enough of the sheet metal to see the crack. Friday my friend came and welded the cracks, and welded a patch over the worst hole. I was busy this week, and today was the first chance I got to work on it. Opened the heat exchanger and shoveled out half a bucket of ashes, resealed it, replaced all the sheet metal and gave it the smoke test.
 

GrayFlattop

Well-known member
Joined
Jan 18, 2018
Messages
1,051
Location
Chicago
More of the same,,, straightened up some more. Threw stuff away, cleaned off shelves, filled up shelves. Made the mess that is part and parcel of the cleaning process. Gave away stuff to a neighbor and the boxes of stuff I put in the alley were gone within a couple of hours. Urban recycling is great.

Then I cluttered up the garage with a new 12” Bosch miter saw. Extravagant? A bit, but in my defense, my 41 year old (70#} makita chop saw was dusty. The Bosch was on sale at Menards, so there is the 11 % rebate… I really had no choice.
 
Last edited:

bugnut

ALLIANCE MEMBER
Joined
Jul 14, 2012
Messages
3,974
Location
Central Ohio
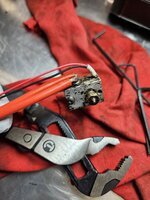
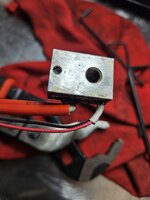
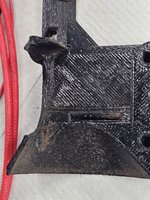
Had a few minutes was able to completely disassemble Prusa hotend, learned more than I wanted to know. Placed bits in boiling water let soften and then set to scraping and cleaning. Reassembled on the bench. Then reviewed and ordered parts from Prusa. Ordered the hotend also, even though I checked parts with meter and they say they are working I thought for a C note it was worth having a backup in case of failure.
 

Attachments

  • 20251121_131944.jpg
    20251121_131944.jpg
    671.5 KB · Views: 11
  • 20251121_131946.jpg
    20251121_131946.jpg
    611.1 KB · Views: 11
  • 20251121_143241.jpg
    20251121_143241.jpg
    829.8 KB · Views: 10
  • 20251121_143249.jpg
    20251121_143249.jpg
    801.9 KB · Views: 10
  • 20251121_143302.jpg
    20251121_143302.jpg
    1 MB · Views: 10
  • 20251121_143304.jpg
    20251121_143304.jpg
    783.7 KB · Views: 9
  • 20251121_143315.jpg
    20251121_143315.jpg
    844.5 KB · Views: 10

Hal

Well-known member
Joined
Mar 8, 2008
Messages
671
Location
Vermont
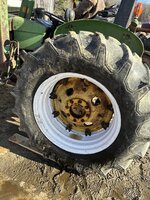
Two day project, due to interruption, and waiting for the pump. Tractor tires can be filled with various liquids to add weight for better traction. Water and calcium chloride has been standard for a long time, but is slowly being replaced with non-corrosive, more environmentally friendly materials. One of the worst problems with chloride comes from ignoring minor leaks, and just adding air to keep the tire up. Eventually the rim develops severe corrosion and fails. On the other hand, chloride is cheap, works, and doesn’t give problems if you keep the tires in good shape.
My friend brought his tractor over, and we pumped out the fluid, removed and replaced this rotting rim. I’m sure the only thing holding one bead on was the rust. There was not enough flange left for the bead breaker to bear against, so we had to go caveman, and get out the old tire hammer. Fortunately the inner flange was intact, and the bead breaker worked, but not easily. The tire came off easily, because there was no flange to pry it over. The tube was rusted to the wheel, and required some poking and prying to remove.
Surprisingly, the wheel bolts gave no trouble. Bolted the new wheel up, installed the tire with a new tube, and inflated it. It took five tries to seat the bead.
Because I don’t do this for a living, I use a cheap rubber impeller pump to remove and replace fluids. The impeller gave up and had to be replaced before we could refill the tire. It took ten gallons more to refill than was pumped out. IMG_4344.jpegIMG_4343.jpeg
 

ObnoxiousFumes

Well-known member
Joined
May 22, 2023
Messages
1,509
Location
Southwest Sask
Two day project, due to interruption, and waiting for the pump. Tractor tires can be filled with various liquids to add weight for better traction. Water and calcium chloride has been standard for a long time, but is slowly being replaced with non-corrosive, more environmentally friendly materials. One of the worst problems with chloride comes from ignoring minor leaks, and just adding air to keep the tire up. Eventually the rim develops severe corrosion and fails. On the other hand, chloride is cheap, works, and doesn’t give problems if you keep the tires in good shape.
My friend brought his tractor over, and we pumped out the fluid, removed and replaced this rotting rim. I’m sure the only thing holding one bead on was the rust. There was not enough flange left for the bead breaker to bear against, so we had to go caveman, and get out the old tire hammer. Fortunately the inner flange was intact, and the bead breaker worked, but not easily. The tire came off easily, because there was no flange to pry it over. The tube was rusted to the wheel, and required some poking and prying to remove.
Surprisingly, the wheel bolts gave no trouble. Bolted the new wheel up, installed the tire with a new tube, and inflated it. It took five tries to seat the bead.
Because I don’t do this for a living, I use a cheap rubber impeller pump to remove and replace fluids. The impeller gave up and had to be replaced before we could refill the tire. It took ten gallons more to refill than was pumped out. IMG_4344.jpegIMG_4343.jpeg
Ugh, I did that to my dad’s D14 Allis a couple years ago. What a messy, smelly task that was!
 

Prospecter

Well-known member
Joined
May 16, 2015
Messages
2,437
Location
Maine
After playing with the firearms, the less fun stuff commenced....window screen replacement. The house is nearing 30 years old and the screens are all original. I like to watch the wildlife (squirrels and birds) in the backyard. It was getting annoying to look out and all you saw was reflective screen. Did the research and ordered this:
IMG_2274r.jpg
...already had this...
IMG_2275r.jpg
I have a total of 22 screens to replace...all 3'x2'. I originally ordered 100' of screen, but have fallen short. I don't remember if I even tried calculating how much I need or just F'd up...:lol_hitti. New batched showed yesterday, so I commenced with doing 2 more as that's my limit per day. I just hate doing these, so 2 a day is it. 1st up...
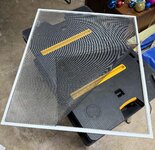
IMG_2278r.jpg
...spline removed and screen getting removed...
IMG_2279r.jpg
....old screen completely removed and discarded....
IMG_2280r.jpg
....sizing the new screen....
IMG_2282r.jpg
...in position to install....
IMG_2283r.jpg
...new screen on right and old screen on the left....
IMG_2285r.jpg
....and the clear view...
IMG_2286r.jpg
...next...
IMG_2287r.jpg
...only 11 more to do......:beer:
A larger table so you can work standing up would make your life a lot easier. Add some tunes and zone out.
 
To avoid these ads, REGISTER NOW!
Top Bottom