

You are using an out of date browser. It may not display this or other websites correctly.
You should upgrade or use an alternative browser.
You should upgrade or use an alternative browser.
What did you do "IN" your garage today?
- Thread starter mayhemman
- Start date


stonesfan68
Well-known member
Make sure that you have a disconnect out there in the shed in case something goes wonky and you need to shut it down.Fair enough! Here's a few of the compressor pad/project.
Here it is, inside the new shed. Going to pop a hole through the back with black iron and main panel is about 10ft away on the interior garage wall.


kaymccampbell
Well-known member
FIFYMake sure that you have a disconnect out there ON the shed in case something goes wonky and you need to shut it down.
kaymccampbell
Well-known member
Make your feet bigger, or you'll ruin your pretty slab.Built an anvil stand for general fabrication. Will likely pick up a small propane forge and dip my toe in the blacksmith world as well.
Yeah, I have a stall matt I will use to protect concrete if forging. Legs are full of sand and top is 1/2 inch plate. The anvil, top and legs do a great job absorbing vibration and sound. Pretty rock solid. Not going to be doing any heavy forging on this setup. Floor has seen worse the last 20 years.Make your feet bigger, or you'll ruin your pretty slab.
Beerhippie
Well-known member

Well, that's done for now.
kaymccampbell
Well-known member
Pulled the plinth print off the Ender. Had my speech therapy session.

Last edited:
bornbadbob
Well-known member
- Joined
- Jan 3, 2025
- Messages
- 216
Good for you! Congrats. Back in the day I would have attempted doing it myself but I am past the point where I am capable. As Dirty Harry said, A man has got to know his limitations.You are absolutely correct.
I just find myself low on funds and high on time right now. Got it done, took me about 65 hours to complete. I'm at zero risk of being recruited by local drywall companies, but it's good enough.
![20260103_134320[1].jpg](https://www.garagejournal.com/forum/data/attachments/2313/2313436-50a702c32ab5156197c8f4f859ccca16.jpg "20260103_134320[1].jpg")
DGersic
Well-known member
Made a wire hose clamp tool. YouTube served up a video of a guy making one of these, and it looked interesting. I think his video isn’t showing some tools used off camera, and it would probably be cheaper to buy one than to make it, but what fun is that?
A piece of 1/2” steel tubing forms the body. A 1/2” bolt with the head and threads cut off for,s the nose. A 3/8” bolt, head cut off. And a wingnut make the draw. And a couple tension pins completes the assembly.

I welded the bolt nose to the pipe body. Grinding not perfect, but it’ll hold. I’ll throw some red paint in it in the spring when it warms up enough to paint.

Supposed to use safety wire. I don’t have any. But I do have a spool of .023 stainless MIG welding wire.
Wrap twice around, stick the nose of the tool in the loop, wrap the wire around the upper tension pin, and crank it tight with the wingnut. Fold over the wire to lock in the tension. Cut the ends.

The ends are pushed down. Probably ok, but I hate catching skin on pointy things. So a bit of heat shrink protects the user from the cut ends.

Tool probably cost more than the air hose I fixed with it, but now I have it ready for the next time.
A piece of 1/2” steel tubing forms the body. A 1/2” bolt with the head and threads cut off for,s the nose. A 3/8” bolt, head cut off. And a wingnut make the draw. And a couple tension pins completes the assembly.
I welded the bolt nose to the pipe body. Grinding not perfect, but it’ll hold. I’ll throw some red paint in it in the spring when it warms up enough to paint.
Supposed to use safety wire. I don’t have any. But I do have a spool of .023 stainless MIG welding wire.
Wrap twice around, stick the nose of the tool in the loop, wrap the wire around the upper tension pin, and crank it tight with the wingnut. Fold over the wire to lock in the tension. Cut the ends.
The ends are pushed down. Probably ok, but I hate catching skin on pointy things. So a bit of heat shrink protects the user from the cut ends.
Tool probably cost more than the air hose I fixed with it, but now I have it ready for the next time.
Beerhippie
Well-known member
Damn! I saw that on YT a while back and have been meaning to make one. Thanks for the reminder!Made a wire hose clamp tool. YouTube served up a video of a guy making one of these, and it looked interesting. I think his video isn’t showing some tools used off camera, and it would probably be cheaper to buy one than to make it, but what fun is that?
A piece of 1/2” steel tubing forms the body. A 1/2” bolt with the head and threads cut off for,s the nose. A 3/8” bolt, head cut off. And a wingnut make the draw. And a couple tension pins completes the assembly.
I welded the bolt nose to the pipe body. Grinding not perfect, but it’ll hold. I’ll throw some red paint in it in the spring when it warms up enough to paint.
Supposed to use safety wire. I don’t have any. But I do have a spool of .023 stainless MIG welding wire.
Wrap twice around, stick the nose of the tool in the loop, wrap the wire around the upper tension pin, and crank it tight with the wingnut. Fold over the wire to lock in the tension. Cut the ends.
The ends are pushed down. Probably ok, but I hate catching skin on pointy things. So a bit of heat shrink protects the user from the cut ends.
Tool probably cost more than the air hose I fixed with it, but now I have it ready for the next time.
DGersic
Well-known member
Damn! I saw that on YT a while back and have been meaning to make one. Thanks for the reminder!
Drill the hole for the tension pins completes before shaping the front cone. Trying to drill it after shaping cost me two 1/8” drill bits and a second bolt to do it again.
It‘s not as easy as he makes it look. If you have tools like a lathe and a mill, use them. Doing it with just a drill and an angle grinder works, but it’s not as easy and neat as his looks. I suspect he has proper tooling off camera.
Beerhippie
Well-known member
Exactly the lathe I have and use.Drill the hole for the tension pins completes before shaping the front cone. Trying to drill it after shaping cost me two 1/8” drill bits and a second bolt to do it again.
It‘s not as easy as he makes it look. If you have tools like a lathe and a mill, use them. Doing it with just a drill and an angle grinder works, but it’s not as easy and neat as his looks. I suspect he has proper tooling off camera.
Outlawmws
Well-known member
Damn! I saw that on YT a while back and have been meaning to make one. Thanks for the reminder!
Same here!

rd65
Well-known member
That probably gives a much better result than this mess I found at work.Made a wire hose clamp tool. YouTube served up a video of a guy making one of these, and it looked interesting. I think his video isn’t showing some tools used off camera, and it would probably be cheaper to buy one than to make it, but what fun is that?
A piece of 1/2” steel tubing forms the body. A 1/2” bolt with the head and threads cut off for,s the nose. A 3/8” bolt, head cut off. And a wingnut make the draw. And a couple tension pins completes the assembly.
I welded the bolt nose to the pipe body. Grinding not perfect, but it’ll hold. I’ll throw some red paint in it in the spring when it warms up enough to paint.
Supposed to use safety wire. I don’t have any. But I do have a spool of .023 stainless MIG welding wire.
Wrap twice around, stick the nose of the tool in the loop, wrap the wire around the upper tension pin, and crank it tight with the wingnut. Fold over the wire to lock in the tension. Cut the ends.
The ends are pushed down. Probably ok, but I hate catching skin on pointy things. So a bit of heat shrink protects the user from the cut ends.
Tool probably cost more than the air hose I fixed with it, but now I have it ready for the next time.
Attachments


Not all Today...
But welder finally went on cart after a week of paint curing. Still can't get myself to put the clamps and supplies back in it.
Had to play musical welding carts because the new to me PrimeWeld 225 Tig was too darn big to fit where the cheepo Tig was, $50 HFT cart.
This is the cart I got with my fist Mig some 30yrs ago. Big surface and excellent quality.
But something pretty corrosive sat on top shelf, ran down back wall and all the shelves. Didn't realize how bad till it was emptied out.
Ended up dismantling it, blasting all that fit in the cabinet.
Paint is the hammered copper I bought for an engine stand last summer. Had it... use it.
Turned out pretty nice and uniform after figuring out a few methods on second coat.


Hmm, never had a welding table.
But I have this lift table with metal top.
Now a makeshift welding table after stripping top surface and burnished.

But welder finally went on cart after a week of paint curing. Still can't get myself to put the clamps and supplies back in it.
Had to play musical welding carts because the new to me PrimeWeld 225 Tig was too darn big to fit where the cheepo Tig was, $50 HFT cart.
This is the cart I got with my fist Mig some 30yrs ago. Big surface and excellent quality.
But something pretty corrosive sat on top shelf, ran down back wall and all the shelves. Didn't realize how bad till it was emptied out.
Ended up dismantling it, blasting all that fit in the cabinet.
Paint is the hammered copper I bought for an engine stand last summer. Had it... use it.
Turned out pretty nice and uniform after figuring out a few methods on second coat.
Hmm, never had a welding table.
But I have this lift table with metal top.
Now a makeshift welding table after stripping top surface and burnished.
Beerhippie
Well-known member
Welding slag sticks to stainless like nobody's business!
Just sayin'--from experience.
Just sayin'--from experience.
OK, but nothing stainless on the Horrible Freight lift cart.Welding slag sticks to stainless like nobody's business!
Just sayin'--from experience.
I changed for about the fourth time since owning it the blend door actuator on my 2011 Impala. It has three but the one farthest right behind the glove box is always the culprit. I changed it about three weeks ago thinking I was good to go, but when I installed it, the knocking was present with the new one. I took the one I replaced apart and saw one tooth was missing from the gear. I bench tested it and it seemed to work fine with the missing tooth (it may have just jammed up the gear) Then I did some research and found that the new ones are ****. It's not the gears but the electronics. The cheap ones are defective right out the box. I had one with broken teeth shelved about ten years old. I swapped out the broken gear with a good one. I bench tested it and it worked. I installed it and no more tapping. Some were saying it may have needed to be re-calibrated. I tried it before removing the actuator but it was still tapping.
Last edited:
SMOKEYBEAR
Well-known member
- Joined
- Jan 3, 2016
- Messages
- 457
A little progress on the drill press. Motor bells are in color and motor brackets and covers are in primer. Power cord arrived. Nothing picture worthy.Brackets and covers for the motor may get color tomorrow if the temp and time cooperates.
Made a wire hose clamp tool. YouTube served up a video of a guy making one of these, and it looked interesting. I think his video isn’t showing some tools used off camera, and it would probably be cheaper to buy one than to make it, but what fun is that?
A piece of 1/2” steel tubing forms the body. A 1/2” bolt with the head and threads cut off for,s the nose. A 3/8” bolt, head cut off. And a wingnut make the draw. And a couple tension pins completes the assembly.
I welded the bolt nose to the pipe body. Grinding not perfect, but it’ll hold. I’ll throw some red paint in it in the spring when it warms up enough to paint.
Supposed to use safety wire. I don’t have any. But I do have a spool of .023 stainless MIG welding wire.
Wrap twice around, stick the nose of the tool in the loop, wrap the wire around the upper tension pin, and crank it tight with the wingnut. Fold over the wire to lock in the tension. Cut the ends.
The ends are pushed down. Probably ok, but I hate catching skin on pointy things. So a bit of heat shrink protects the user from the cut ends.
Tool probably cost more than the air hose I fixed with it, but now I have it ready for the next time.
Damn! I saw that on YT a while back and have been meaning to make one. Thanks for the reminder!
I saw one of those at a home show probably 30-35 years ago. I thought that looks really useful but did not buy it. To this day, I've never said "Wish I would have bought that". Now, 50 years ago, I probably would have used the bejeebers out of one.
bmwrd0
Well-known member
Spent time cleaning and organizing, which is how I tend to think my way around problems, the current one being on how to wire a Furnas drum switch to the instant reverse motor. You need five wires, but doing that you cannot run ground in the same cord, at least I cannot, as I don't have any six conductor. So, external ground, or wire it without the I-R function? Also, the only diagram I can find for the Furnas to do this is blurry at the level I need, so I am still searching for the right document. SB makes one, but no one seems to have a clean scan. If I wire it with out that, it would be easy and I would have this all wrapped up, and ready for the next stage, but it seems a waste, even though I do not really need that function.
Option paralysis, so much fun.
Option paralysis, so much fun.
Last edited:
Hooked
Well-known member
Daughter had the same problem with new actuator in her Expedition. I was 'observing' the replacement but both my daughters aren't afraid of doing these kinda things.I changed for about the fourth time since owning it the blend door actuator on my 2011 Impala. It has three but the one farthest right behind the glove box is always the culprit. I changed it about three weeks ago thinking I was good to go, but when I installed it, the knocking was present with the new one. I took the one I replaced apart and saw one tooth was missing from the gear. I bench tested it and it seemed to work fine with the missing tooth (it may have just jammed up the gear) Then I did some research and found that the new ones are ****. It's not the gears but the electronics. The cheap ones are defective right out the box. I had one with broken teeth shelved about ten years old. I swapped out the broken gear with a good one. I bench tested it and it worked. I installed it and no more tapping. Some were saying it may have needed to be re-calibrated. I tried it before moving the actuator but it was still tapping.
The tapping seemed worse after the swap but we haven't messed with it yet to figure out the problem.
Thisistimm
Well-known member
- Joined
- Jun 3, 2021
- Messages
- 59
Awesome! I’ve wanted to make one of those for a while!Made a wire hose clamp tool. YouTube served up a video of a guy making one of these, and it looked interesting. I think his video isn’t showing some tools used off camera, and it would probably be cheaper to buy one than to make it, but what fun is that?
A piece of 1/2” steel tubing forms the body. A 1/2” bolt with the head and threads cut off for,s the nose. A 3/8” bolt, head cut off. And a wingnut make the draw. And a couple tension pins completes the assembly.
I welded the bolt nose to the pipe body. Grinding not perfect, but it’ll hold. I’ll throw some red paint in it in the spring when it warms up enough to paint.
Supposed to use safety wire. I don’t have any. But I do have a spool of .023 stainless MIG welding wire.
Wrap twice around, stick the nose of the tool in the loop, wrap the wire around the upper tension pin, and crank it tight with the wingnut. Fold over the wire to lock in the tension. Cut the ends.
The ends are pushed down. Probably ok, but I hate catching skin on pointy things. So a bit of heat shrink protects the user from the cut ends.
Tool probably cost more than the air hose I fixed with it, but now I have it ready for the next time.
And @Beerhippie you are the only other Timm with two m’s I’ve ever come across, and we both like our knives sharp sharp! Love it
")
Someone mentioned after going through the cheaper ones, they bought a more expensive one and the tapping stopped. They were tapping right after they installed a few of them. It wasn't like there was a period of time that passed. I have another one I saved. It was tapping. I opened it and saw the teeth were broken. That's the one I swapped out the broken teeth and used it. I believe the cheaper ones don't know how to go back to the rest position and keep hunting till it finds it. The cheap one I bought and installed would tap then stop then start tapping again if I opened the door, trunk, turn on or off the heat/ac or start the car. I was concerned the blend door would stay closed preventing the front defroster from working. In my case, once the tapping ceased, it worked fine. This is a picture of the actuator I removed. The red mark shows where the tooth is missing. I removed the broken tooth and it spins fine. My guess is that the broken tooth jammed the gears and made it tap.Daughter had the same problem with new actuator in her Expedition. I was 'observing' the replacement but both my daughters aren't afraid of doing these kinda things.
The tapping seemed worse after the swap but we haven't messed with it yet to figure out the problem.

Last edited:
micromind
Well-known member
You need five wires, but doing that you cannot run ground in the same cord, at least I cannot, as I don't have any six conductor.
wireandcableyourway.com sells 14/6 by the foot.
bmwrd0
Well-known member
Yeah, I just ordered some, along with a fresh supply of solder only connectors, which I prefer. Now I just need to figure out were I need to put the jumper one the drum switch. Back to the books!wireandcableyourway.com sells 14/6 by the foot.
Beautiful day today! I pulled the truck up, patched my exhaust holes that I drilled the other day to be able to drive it home with a plugged catalytic. Then, pulled the blower motor and resistor, cleaned the burned leaves out of the blower box, put a new resistor in. Then pulled the broken factory radio and put in the old alpine CD player I took from my van*.
So now the truck has quiet exhaust, all blower speeds, and a CD player.
Oh yeah, and I washed it and my wife's VW before I called it a day.
Pretty good morning/afternoon.
*Funny thing on the CD player- I hooked it up, and had no sound. I didn't connect the power amp remote line because I wasn't running an amp, but I noticed the factory harness had the power amp remote. So I connected it, and now I have sound. The truck has a factory amp (and it works!). Nice.
Last edited:
kaymccampbell
Well-known member
Absolute jack.
Beerhippie
Well-known member
Pushed snow. Descaled a Rinnai, again. Otherwise, not ****.
Wrench97
Well-known member
With any of those motors make sure the door it's attached to moves freely by hand before installing the new one.I changed for about the fourth time since owning it the blend door actuator on my 2011 Impala. It has three but the one farthest right behind the glove box is always the culprit. I changed it about three weeks ago thinking I was good to go, but when I installed it, the knocking was present with the new one. I took the one I replaced apart and saw one tooth was missing from the gear. I bench tested it and it seemed to work fine with the missing tooth (it may have just jammed up the gear) Then I did some research and found that the new ones are ****. It's not the gears but the electronics. The cheap ones are defective right out the box. I had one with broken teeth shelved about ten years old. I swapped out the broken gear with a good one. I bench tested it and it worked. I installed it and no more tapping. Some were saying it may have needed to be re-calibrated. I tried it before moving the actuator but it was still tapping.
I've seen doors break, fod stuck in them, and even cracked heater boxes jamming the door.
The teeth can also break because motor reaches the end of the doors travel but the position/load sensing circuits no longer function.
mrb1
Well-known member
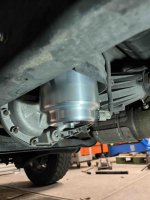
Darlin' has been picking up a co-worker the last couple nights because her 2007 Cobalt rear brakes are making a terrible grinding noise. Young, single mom can't be without a ride, and dreading the bill. I rode along last night to her place and drove it back here. I ordered new shoes and drums the other day for $110. Pure metal on metal. Nothing left of the shoes. Mileage is 175K, so guessing original.
Newer style with the one big horseshoe spring. Have owned a Cavalier, Monte Carlo and a Cobalt with the same setup. Much better than the old style with ten springs jumping out at ya and puncturing a finger or catching a flyaway spring in the face. Front discs looked fairly new. All fluids checked OK. Raised the front and rotated the tires. She drove it home this morning. She asked how much she owed me. I said to just fill up Darlin's tank and we're good. And to save for some rear shocks. I want no part of those


Newer style with the one big horseshoe spring. Have owned a Cavalier, Monte Carlo and a Cobalt with the same setup. Much better than the old style with ten springs jumping out at ya and puncturing a finger or catching a flyaway spring in the face. Front discs looked fairly new. All fluids checked OK. Raised the front and rotated the tires. She drove it home this morning. She asked how much she owed me. I said to just fill up Darlin's tank and we're good. And to save for some rear shocks. I want no part of those
Last edited:
GrayFlattop
Well-known member
Just run a length of 3/4 sealtite and you can wire it as you wish. And while sealtite typically has a continuous bonding conductor, we always ran an additional ground wire because, well... people driving forklifts.Spent time cleaning and organizing, which is how I tend to think my way around problems, the current one being on how to wire a Furnas drum switch to the instant reverse motor. You need five wires, but doing that you cannot run ground in the same cord, at least I cannot, as I don't have any six conductor. So, external ground, or wire it without the I-R function? Also, the only diagram I can find for the Furnas to do this is blurry at the level I need, so I am still searching for the right document. SB makes one, but no one seems to have a clean scan. If I wire it with out that, it would be easy and I would have this all wrapped up, and ready for the next stage, but it seems a waste, even though I do not really need that function.
Option paralysis, so much fun.
Good point. I checked it by hand turning it back and forth. They are pricey to replace.With any of those motors make sure the door it's attached to moves freely by hand before installing the new one.
I've seen doors break, fod stuck in them, and even cracked heater boxes jamming the door.
The teeth can also break because motor reaches the end of the doors travel but the position/load sensing circuits no longer function.
Last edited:

2001ZR2
Well-known member
Grab tools from the garage and went out in the rain because I had light today to pull abandoned cable boxes hanging on wires.
Not reinstalled on new siding so now to figure how to cap the wires and not have them look like ***.
Not reinstalled on new siding so now to figure how to cap the wires and not have them look like ***.
Beerhippie
Well-known member
I just want to know who the genius was that moved the adjuster/Ebrake to the top of the brake shoes from the bottom, where it had been very sensibly located since the advent of drum brakes? Last time I changed rear brakes on a Vanagon with that stupid design, the top third of the shoes were gone and the rest untouched. Old school drums with the adjuster/Ebrake in the proper location would actually have nearly all of the shoes in contact with the drums.
Metallitubby
Well-known member
Removed the Braille battery from the new race car to put it on a trickle charger, along with removing any loose, spare parts that traveled with the car. The car came with at least 20 sets of spare brake pads, various springs, a couple used rotors, and a giant carbon fiber wing that was used at Pikes Peak (which will likely be hung up for show in the shop).
Wrench97
Well-known member
More like went back to having them on the top....
I just want to know who the genius was that moved the adjuster/Ebrake to the top of the brake shoes from the bottom, where it had been very sensibly located since the advent of drum brakes? Last time I changed rear brakes on a Vanagon with that stupid design, the top third of the shoes were gone and the rest untouched. Old school drums with the adjuster/Ebrake in the proper location would actually have nearly all of the shoes in contact with the drums.

mrb1
Well-known member
Bottom, with the all the springs and clips and little push style springs with pins and the "special" tool needed was not an improvement.
Last edited: