niget2002
Well-known member
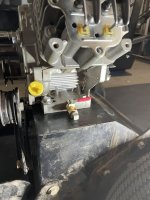
Clear coated. Not perfect, but I can live with it.


finally got around to mounting the handle and was looking back at your comment about tinning and @Outlawmws suggestion on those blocksYou do need to tin it for authenticity. Some tinning paste would do the job.
Yep. I'd still look into a tub of tinning paste--it's cheap and you just heat the tip up and dip it in. The paste is flux and tin in one.finally got around to mounting the handle and was looking back at your comment ab out tinning and @Outlawmws suggestion on those blocks
you would just tin the angled tip correct ?
thanks mate, I'll get onto thatYep. I'd still look into a tub of tinning paste--it's cheap and you just heat the tip up and dip it in. The paste is flux and tin in one.

A joint decision. I was upfront and told her I needed to pick her brain for tools. She gave me those tools. There's been an improvement, and I expect for there to be some more as time goes on. I've documented what we did, so the next time this crops up I can try these things first, and then decide what and if I need further.Was it the therapists decision or yours? Seems pretty quick considering.
Really? No one is going to tell me how full of it I am for making up this explanation?
Ooh--does that make me an influencer? Can I get paid to say random **** I just made up? Maybe a cabinet position?This is the Internet, all posts are assumed to be true.
")

Glued and clamped the linoleum cover sheet back onto the drafting board.
Once the glue sets. It'll be a couple days.You need pics of this one. most of these kids have never seen one! (Kinda like records...)
Every "junque shoppe" around here has at least a half-dozen drafting machines (arms) at RIDICULOUS prices. They never sell--hell, anyone much younger than I has no idea what they are and even real draftsmen rarely use them these days. None of them seem to be complete with square, etc.You need pics of this one. most of these kids have never seen one! (Kinda like records...)
This one is older school, with the cables and pulleys type of parallel rule. The fellow I got it from just acquired a Hamilton Auto Shift, fully intact, with the drafting machine. I think the biggest part of it weighs over 300 lbs. We took it down to his basement office in pieces.Every "junque shoppe" around here has at least a half-dozen drafting machines (arms) at RIDICULOUS prices. They never sell--hell, anyone much younger than I has no idea what they are and even real draftsmen rarely use them these days. None of them seem to be complete with square, etc.
If I could find one cheap (reasonable), I've thought of re-purposing one as a parallelogram light stand.
I do have a drafting table I used to use for product photography. Haven't used it in years.
This one is older school, with the cables and pulleys type of parallel rule. The fellow I got it from just acquired a Hamilton Auto Shift, fully intact, with the drafting machine. I think the biggest part of it weighs over 300 lbs. We took it down to his basement office in pieces.


Found some wheels for my No. 1 tool the trash can. Everything in my small garage is on wheels so I can quickly and easily rearrange space.
The trash can dollys were too expensive. So I recycled the bottom of my old office chair that got replaced today. The shape of the trash can's allows it to sit over the bump where the seat piston rested. Heavy tie wraps keeps things centered. Another Shady Rest DIY.


Very cool!Not happy with the clear (PETG) protector I made yesterday, I started over this morning. Fortunately, I have a bunch of scraps of PETG from some vacuum forming projects.
Traced the artwork plastic on to PETG with a Sharpie. Made a round part at the front edge, where the artwork plastic is missing a piece.
Rough cut it out with shears and nibbler, then final sanded the edges with a small drum on my Dremel. Mounted:
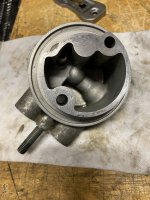
Disassembled the main flippers for cleaning.
Replaced the coil sleeves, filed the chamfers on the plunger and end stop.
Last night, I started the hunt for a replacement artwork plastic. Parts for a 1980s Italian pinball machine are not common, and I’m generally the guy that everyone else comes to looking for parts. I checked my boxes of spares, and didn’t have this particular plastic in it. eBay has a guy selling one that’s broken in half, and missing one half, and he still wants $30 for it.
While servicing the flippers, I checked the coin box, and found the plastic I need. I guess I must have noticed the broken tip a while ago, and pulled the replacement out of my box of spares. Forgot I did that.
Now that I have the correct profile for the tip, I started over on the protector again. Traced, cut, sanded, and flame polished the edges.
Installed the new protector and artwork plastic, reinstalled the upper playfield again.
Should be good for a few years now.
Farfalla was my first game, back in college, the one that started it all. I’m looking forward to playing it again, probably tomorrow.
Then spent the evening with tcpdump. That’s a lot less fun.
That's a thankless job. Are you reading the results raw, or using a tool?Then spent the evening with tcpdump. That’s a lot less fun.
My girl had to go through it after radiation treatment. I understand your thinking, we all know you’re a busy woman, but as you progress the therapist might see/hear something that would change your approach. From my limited experience, they do know what they’re doing, at least the therapist my girl was seeing did.A joint decision. I was upfront and told her I needed to pick her brain for tools. She gave me those tools. There's been an improvement, and I expect for there to be some more as time goes on. I've documented what we did, so the next time this crops up I can try these things first, and then decide what and if I need further.
My therapist was very pleased with my results over the 4 weeks.My girl had to go through it after radiation treatment. I understand your thinking, we all know you’re a busy woman, but as you progress the therapist might see/hear something that would change your approach. From my limited experience, they do know what they’re doing, at least the therapist my girl was seeing did.


Very cool!
What is "flame polishing" of the edges?
That's a thankless job. Are you reading the results raw, or using a tool?
....and Paul McCartney was in another band before Wings......most of these kids have never seen one! (Kinda like records...)
follow up question from kids: who are wings?....and Paul McCartney was in another band before Wings...

follow up question from kids: who are wings?