To avoid these ads, REGISTER NOW!

Mark's Monster Garage....3800 sq ft

1991Syclone

Well-known member
Joined
Jul 19, 2007
Messages
278
Location
Englewood, FL
Cool you don't live very far from me.

I live down in Etown, but work in Downtown Sarasota so I commute the 40 miles each way every day. My wife and her brother run a general contracting company down here, so if you need anything let me know. It looks like you've got it all covered though. I love the place and hope the housing market turns around so I can build a decent garage soon. Keep up the good work and keep posting pictures!

I like the foam insulation on the under side of the roof. Not only does it provide a conditioned space, but it's considered a secondary water intrusion system. That should be another insurance discount. Make sure you take pictures of EVERYTHING so you can show it to your agent.
 
To avoid these ads, REGISTER NOW!

mike_s

Well-known member
Joined
Nov 22, 2010
Messages
132
Cool you don't live very far from me. Yep, The fountain runs about 16 hours a day. We really like it at night when the fountain lights turn on.....pretty cool feature. I wanted to keep the water moving but more important create aeration for the fish. There is a ton of fish in there!!

Yes, all windows, doors, garage doors, etc are impact rated. We used icing technology for our roof insulation. It is pretty incredible. Also, about every 5th block cell is poored solid, the rest are filled with insulation. This place is built like a brick **** house!

Picture of the foam insulation below. It is pretty amazing to watch them with a spray guy spray a thin layer of foam on the underside of the roof decking and see expand to 6 to 8 inches thick. Eliminates the need for vented soffits. The attic becomes "conditioned space" and normally temperatures are no more than 10 degrees above the garage temperature.

100_2001.jpg


does this cause any issues with moisture forming because of the heat difference of outside verses inside?

are you installing a ceiling on the rafters? (I assume you are since you said it was only 10 degrees above garage temp. )

or does the fact that the temp difference is so small reduce the moisture forming and dripping and the need for vented soffits?

I know if you do this and have a huge temp difference, you can expect moisture if not vented properly...
 

Wingnut65

Well-known member
Joined
Apr 21, 2010
Messages
3,170
Location
Tampa Bay, FL
mike s, I believe that they have the installed thickness worked out so that there is no moisture buildup on the inside. In fact the foam is impermeable and will not allow any roof leaks to pass through the foam. This spray foam also adds to the impact resistance for the roof assembly, which is a great benefit for homes near the coast.

BTW, Mark, I've been seriously considering the spray foam for my existing house, do you recall the approx. cost per square foot they charged you? I know an existing building would be slightly higher install cost.
 
OP
I

IGO2XS

Well-known member
Joined
Apr 24, 2012
Messages
1,415
Location
Sarasota, FL
mike s, I believe that they have the installed thickness worked out so that there is no moisture buildup on the inside. In fact the foam is impermeable and will not allow any roof leaks to pass through the foam.
BTW, Mark, I've been seriously considering the spray foam for my existing house, do you recall the approx. cost per square foot they charged you? I know an existing building would be slightly higher install cost.

Jeff-Mike, There is not an issue with moisture buildup between the foam and the plywood or ceiling joists. I have attached a picture showing the guy spraying the foam on and it covers like nobodies business. Can you imagine if you had a roof leak and trying to find where the water was coming through your roof with this foam.:wtf: It is bad enough trying to find a leaky roof that has tar paper. I had to track down a wire in the attic once and man was it a job digging the wire out of the foam.

Jeff, I am going to have to look at the cost as I don't remember. I have all my files at the office and I will check it out.

I do remember when these guys did the garage they had blocked off the overhangs with 1/2 foam board. The building inspector made them poke holes in the foam board to fill the overhangs full of foam.

100_1995.jpg
 
OP
I

IGO2XS

Well-known member
Joined
Apr 24, 2012
Messages
1,415
Location
Sarasota, FL
Here is a close up of the fountain on the garage. I saw a fountain on a few model homes we looked at early on and thought it would be a cool feature. There is a pretty large parking area in front of the garage and this fountain would also be visible from the house. We plumbing 2" and 1 1/2" pvc lines to the back of the garage. This fountain has a main drain, skimmer, and return lines to keep it clean.

From this photo you can get an idea of the size of the cast concrete molding above the brick. It is massive and looks great on the garage.

100_2034.jpg


This is a picture of the fountain with the bowl. The idea was the water comes out of the lions mouth, into the bowl, and overflows into the fountain. It sounded like a great idea. After firing up the fountain I found the bowl created too much splash so I ended up removing the bowl so the water goes directly into the basin.
100_2123.jpg


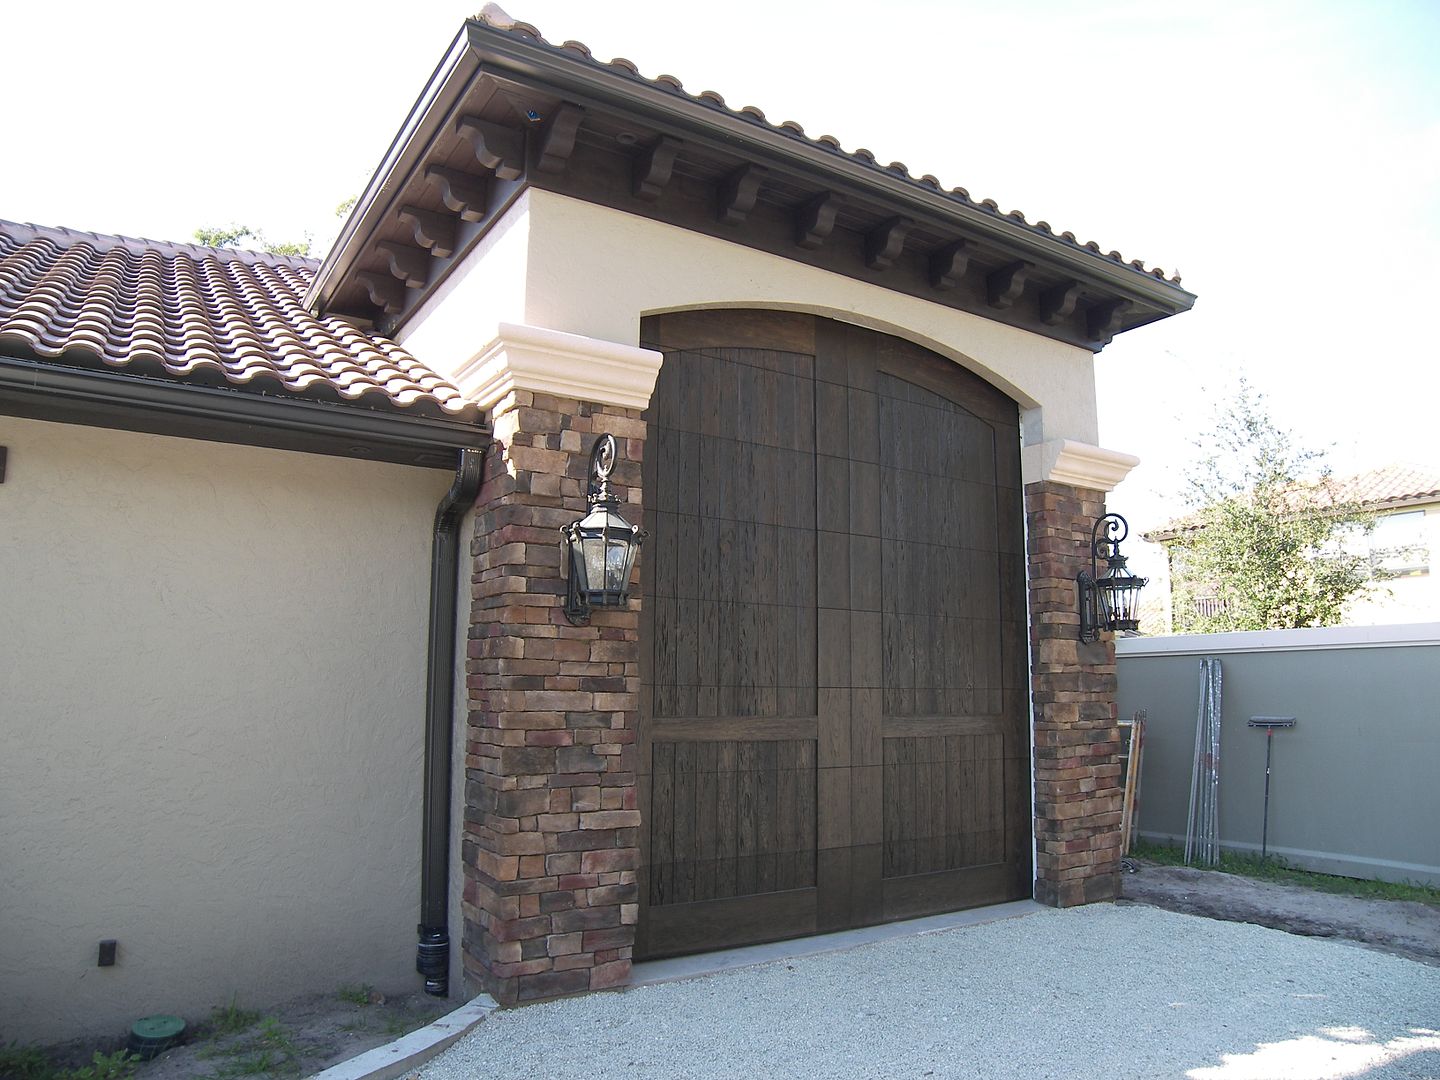
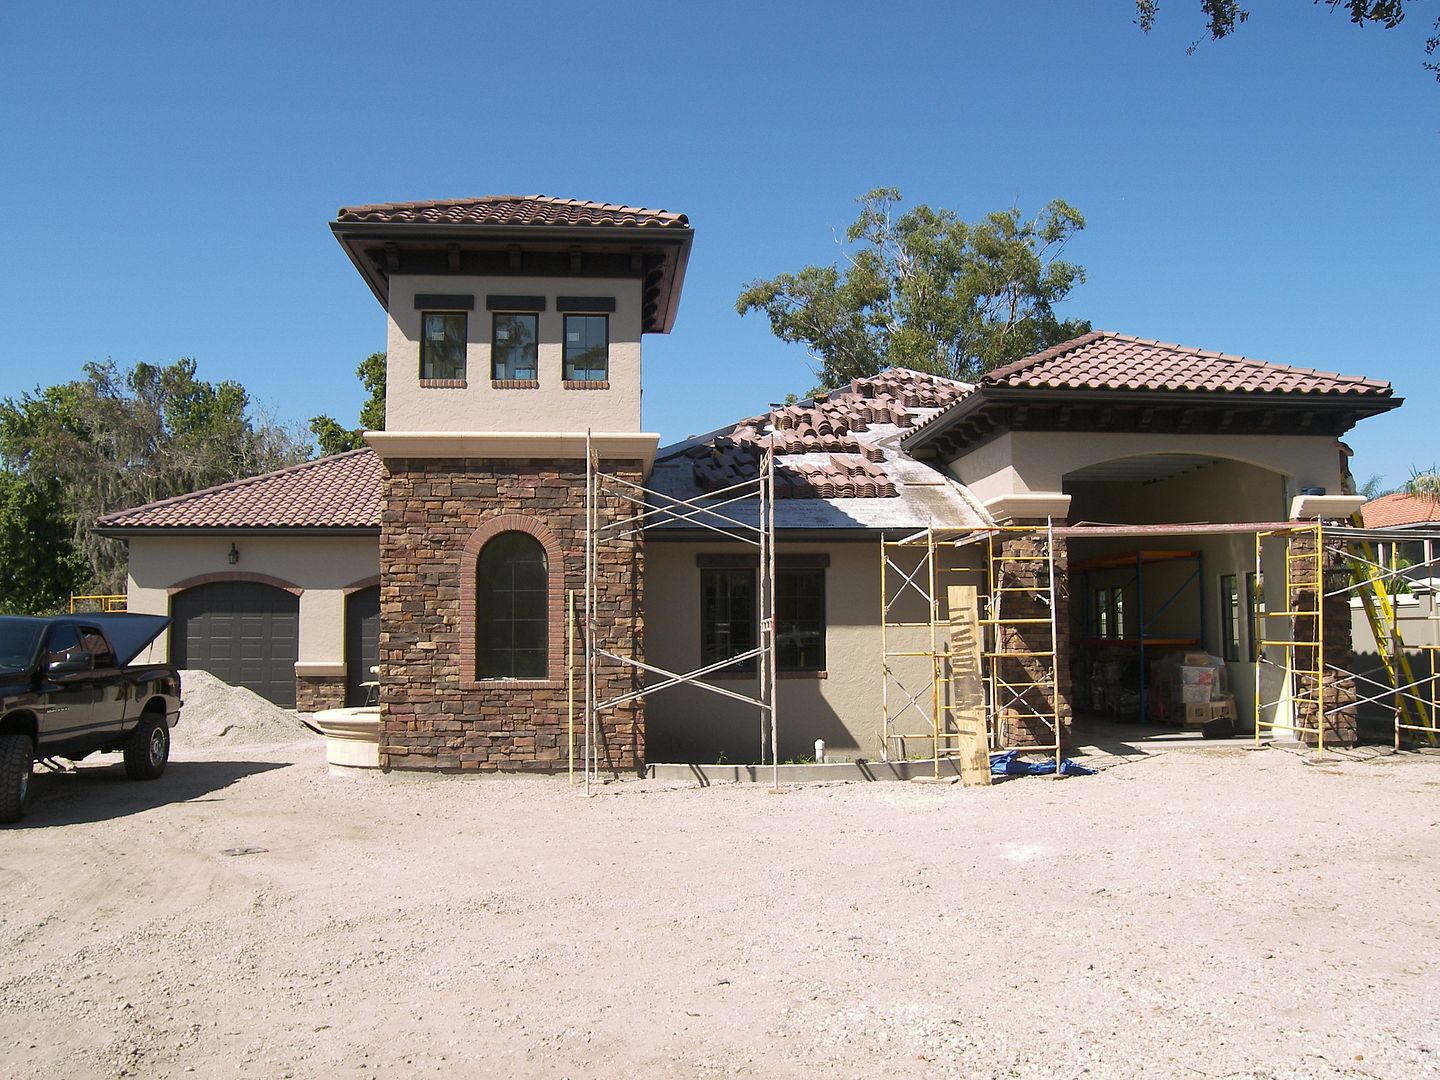
During this time of construction there was a lot of things happening. In this photo you will notice the roofing crew is installing the tile roof, the framers are wrapping the beam and posts across the front of the porch with cypress, stone guys are working, and garage door guys are there. I am most proud of my 12 x 14 front RV door. This is a big door and my concern was the beautiful architecture next to this huge aluminum garage door. You may notice they are installing some of the RV door panels. These panels are covered with a faux pecky cypress tongue and grove board. You might say to yourself, damn, this Mark is certainly using a lot of Faux :headscrat, what is he some kind of cheap *** builder?? Remember when I talked earlier about wood and how much I do not like it? Imagine not only the weight but the effects of the Florida sun on real pecky cypress wood. This product is a mixture of resin and fiberglass, lightweight, and is resistant to sunlight and water damage when properly cared for. It is stained with gel stain and then sealed. One would never know the difference between this and real wood.
100_2025.jpg


i have added this last picture as it has a partial view of the driveway back out to the road. You can catch a glimse of the large oak trees with an opening in the canopy where the driveway passes through. As you pull in the main entrance the first thing you see is the garage tower and it really, for a garage guy such a beautiful view.
100_2033.jpg
 

Wingnut65

Well-known member
Joined
Apr 21, 2010
Messages
3,170
Location
Tampa Bay, FL
Thanks for the added info on the spray foam.

From this photo you can get an idea of the size of the cast concrete molding above the brick. It is massive and looks great on the garage.
100_2034.jpg

That cast concrete is huge because the whole garage is H U G E ! ! ! ! A standard 6" stone tim just would not work on this project.

Thanks for posting this photo, showing the entrance drive, focal point of the tower, and the amount of detail work you have put into the project.
100_2033.jpg
 
OP
I

IGO2XS

Well-known member
Joined
Apr 24, 2012
Messages
1,415
Location
Sarasota, FL
Jeff, I got a rough idea at $1.50 a square foot on spray foam....new construction. I would imagine coming in after a house is done would be petty expensive but I am sure there are loads of insulation companies in Tampa that could get you an estimate. I would be curious on that one.
 

Wingnut65

Well-known member
Joined
Apr 21, 2010
Messages
3,170
Location
Tampa Bay, FL
Jeff, I got a rough idea at $1.50 a square foot on spray foam....new construction. I would imagine coming in after a house is done would be petty expensive but I am sure there are loads of insulation companies in Tampa that could get you an estimate. I would be curious on that one.

Thanks Mark. I've heard from product reps, it may be between $2.50-3.00/sf for existing construction, not from actual companies to install. I really need to call for a couple quotes. It will be an expensive project, but the savings on A/C will start to add up.
 

GatorFan

New member
Joined
Apr 20, 2012
Messages
2
Location
Bradenton, FL
This build has some serious swagger. Nice work Mark!

We used Icynene spray foam on our house in and it is ridiculously efficient. Our electric bill is the same as our previous house and new house is double the footage. However Icynene is an open celled foam so it will not act as a moisture barrier the water flows right through. Before our drywall was up we had a leak in the metal boot on the fart fan and the water poured right through the foam in the exact spot.
 
OP
I

IGO2XS

Well-known member
Joined
Apr 24, 2012
Messages
1,415
Location
Sarasota, FL
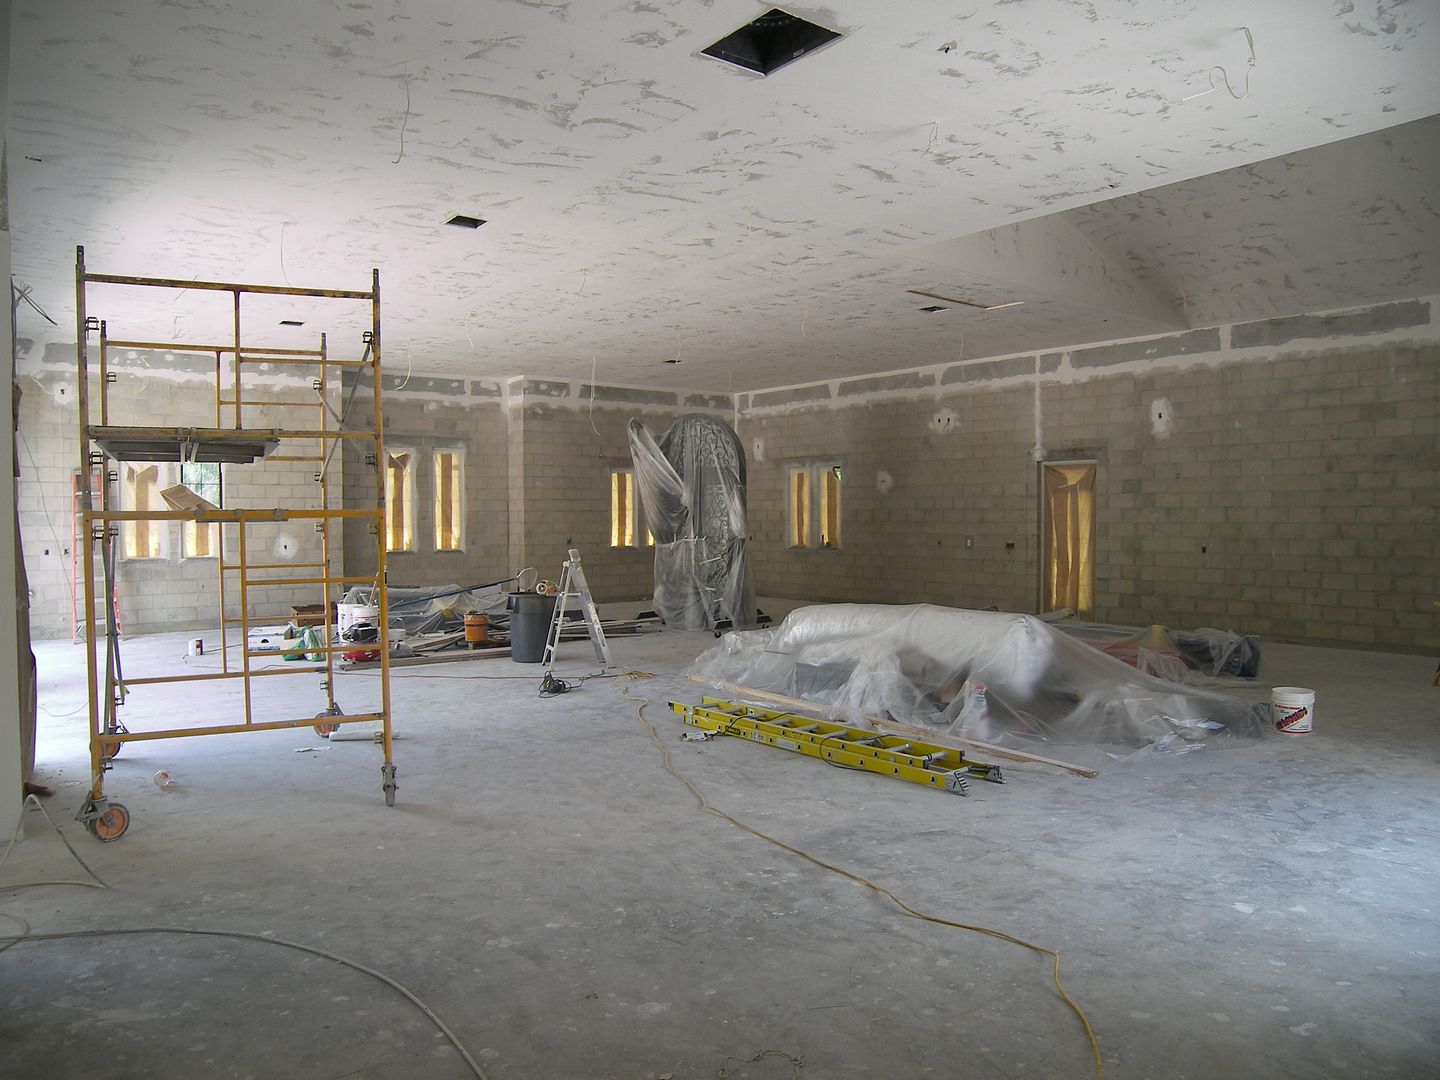
Here are a few pictures of the drywall getting underway. A few notes. My last garage was concrete block as well and i had the metal conduit on the outside of the wall for all of the outlets. I decided this time I wanted clean walls with no wall acne. It is one thing if you have drywall on the walls to allow you to run wires between the drywall furring strips. My walls are bare concrete block because I wanted a durable finish....I like to work in my garage and not be afraid of damaging drywall. The way my garage is constructed there is a 18 inch tall "tie beam" around the top. This ties all of the walls together for strength. We ran all of our conduit before the tie beam was poured. So, all outlets are flush mounted on the block walls as you would find on a drywall constructed building. I dedicated 4 locations with a 8 foot high outlet with a light switch at the bottom for future high velocity wall mounted fans. Yes I have A/C but if you are making dust you want the doors open and the fans on. I added additional conduit for electric reels, speaker locations (I have a 4 speaker set up in the garage plus two subwoofers), 1 " metal pipe for all of the air supply locations for the air hose reels.

I like to detail cars so one of my first considerations was a central vacuum system which we also ran through the concrete walls. A central vacuum is NOT to be confused with a shop vac:lol: They are great for sucking up small things but not for general purpose clean up. I got sick and tired of dragging out a shop vac every time I wash a car. Now I just get out a vacuum hose and plug it in at any one of 5 locations. Washing the cars was another consideration of mine. What I started using several years ago was an electric pressure cleaner with a pressure switch for car detailing. They are great because 1. you just plug them in and there ready to work and 2. When you let off on the trigger the unit shuts off...........no turning on and off or pull starting a gas model. During construction I determined where I would wash the car and luckily I had a big tree within 40 feet of the garage. I then identified a good location in the garage where I could permanently mount the pressure cleaner. I installed a dedicated 20 amp outlet at this location and also provided a water supply right there. I had a gas tankless water heater installed and ran my water supply from this to the pressure cleaner so I had a hot water supply to my pressure cleaner. I then ran 1/2 inch steel pipe from the pressure cleaner underground to the location where i pressure clean and installed a shut of valve and a male pressure cleaner fitting. Now, when I wash a car I take my pressure cleaner hose and gun out,hook it up, and have instant hot water without have to set anything up.

Most important is the security system installed which no garage should be without complete with ip camera's. With my Elk security system and using my iPhone, I can set my alarm, view inside and outside camera's, and turn on, off, or adjust the heating and air conditioning, and open or close garage doors.:rocker::rocker:

100_2020.jpg


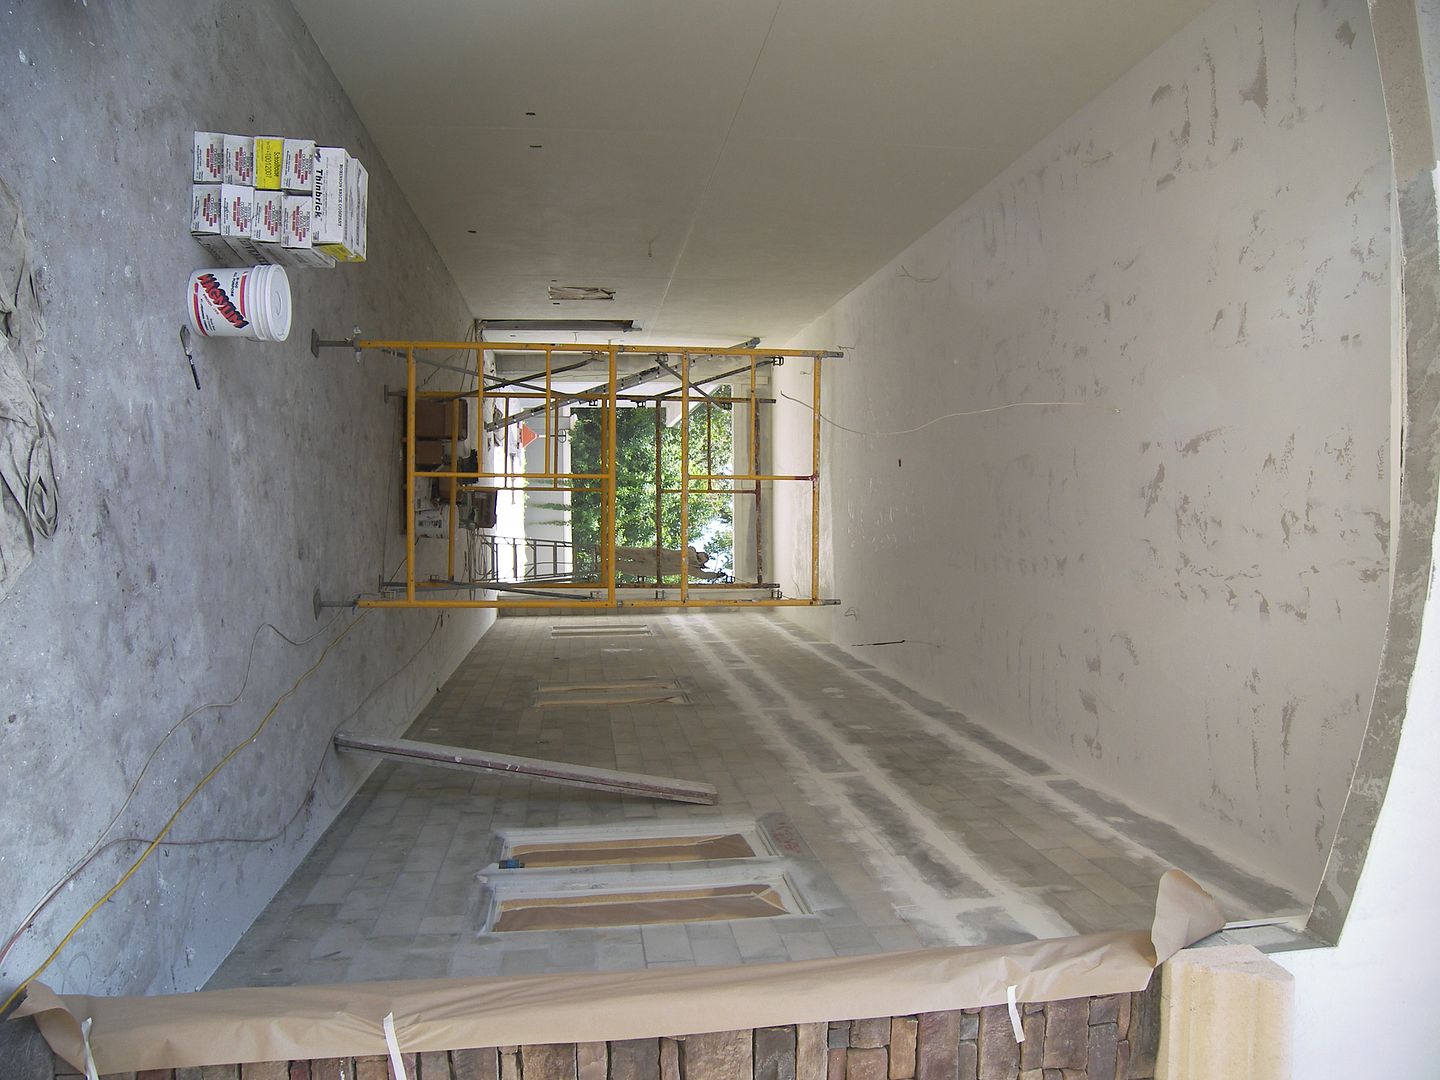
There is not too much to say about the RV bay other than it is a long tall room!
100_2019.jpg


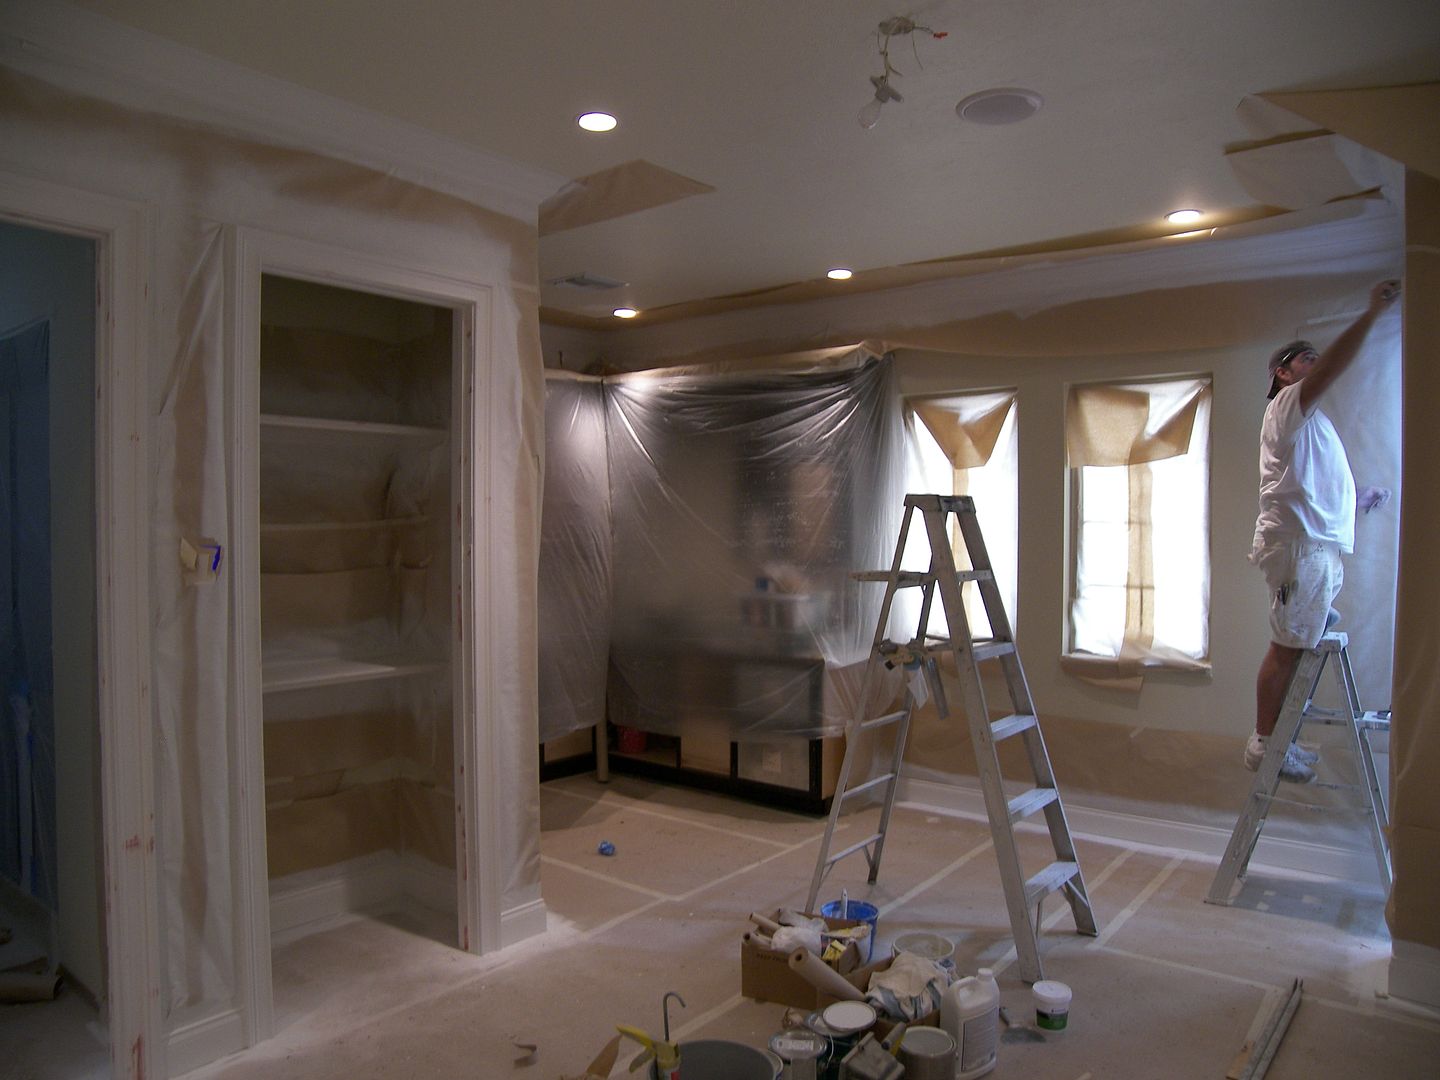
This is the painting stage in the kitchen. You can see the beginning of the kitchen cabinets. The closet on the left is the equipment room. I did get a little carried away with the lighting control and installed a Lutron lighting system as i mentioned earlier. I love gadgets and I can turn on or off any light in the garage I want with my iPhone. Why, well it shoulder good in the beginner to be able to do this. The best part is a single gang wall plate can control 7 different lights and each button is programable. Instead of having a large face plate in many areas I have these single gang switches. Just a lot cleaner and I have a lot of accent lighting, the fountain, landscape lights, and other stuff and it all gets turned on and off automatically.
100_2132.jpg


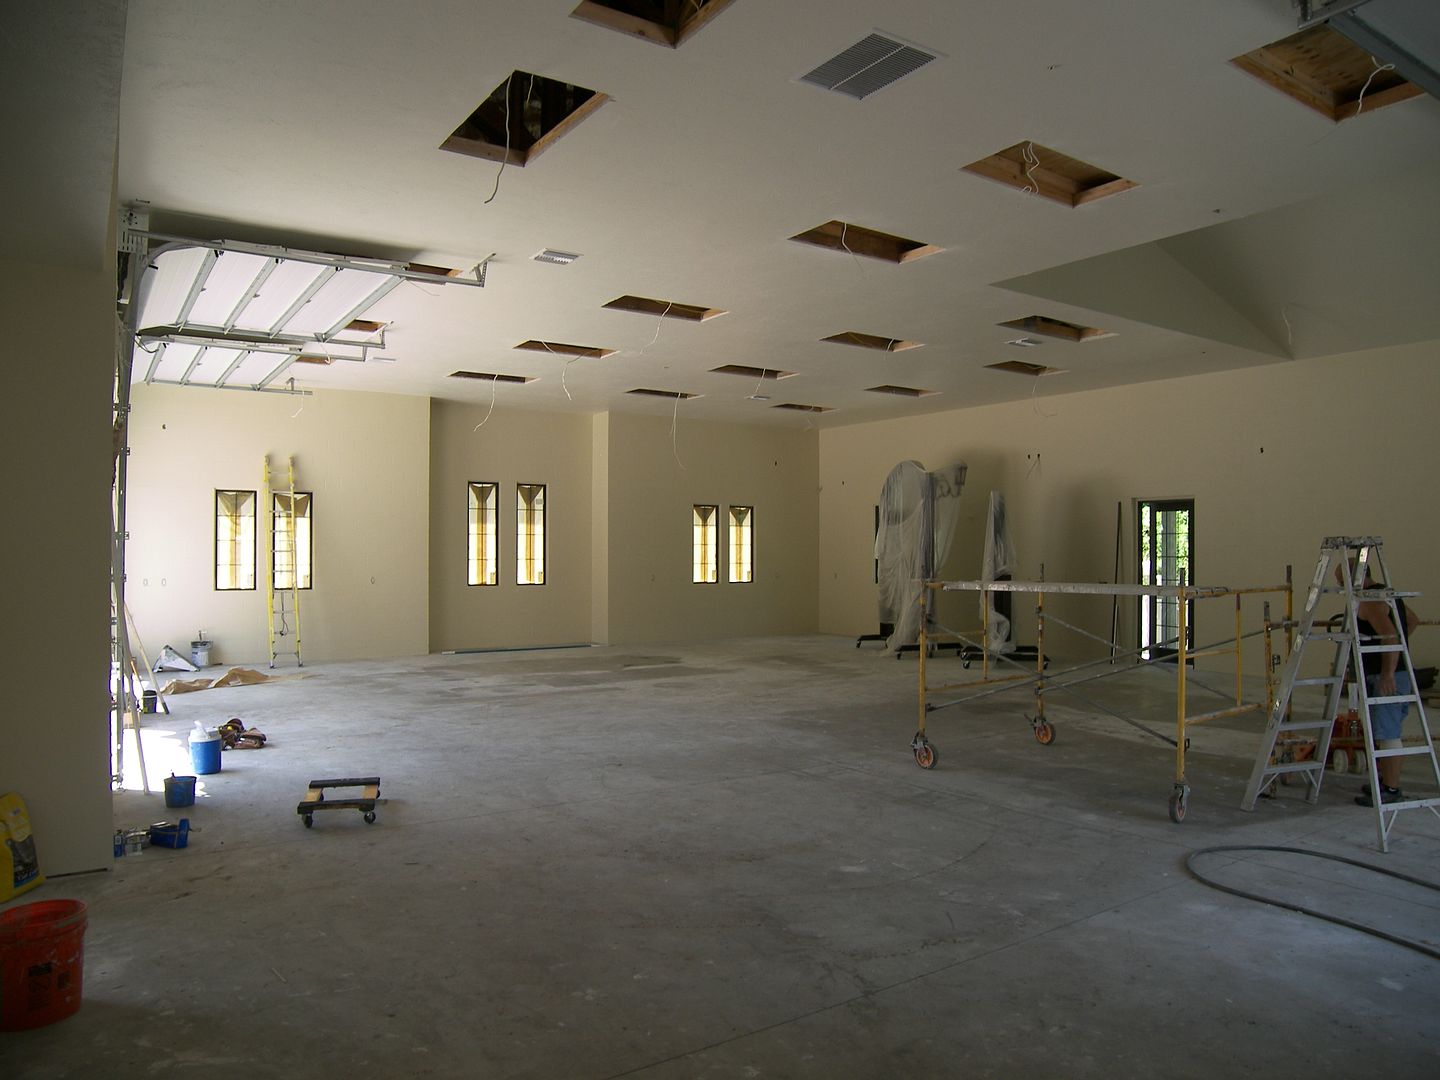
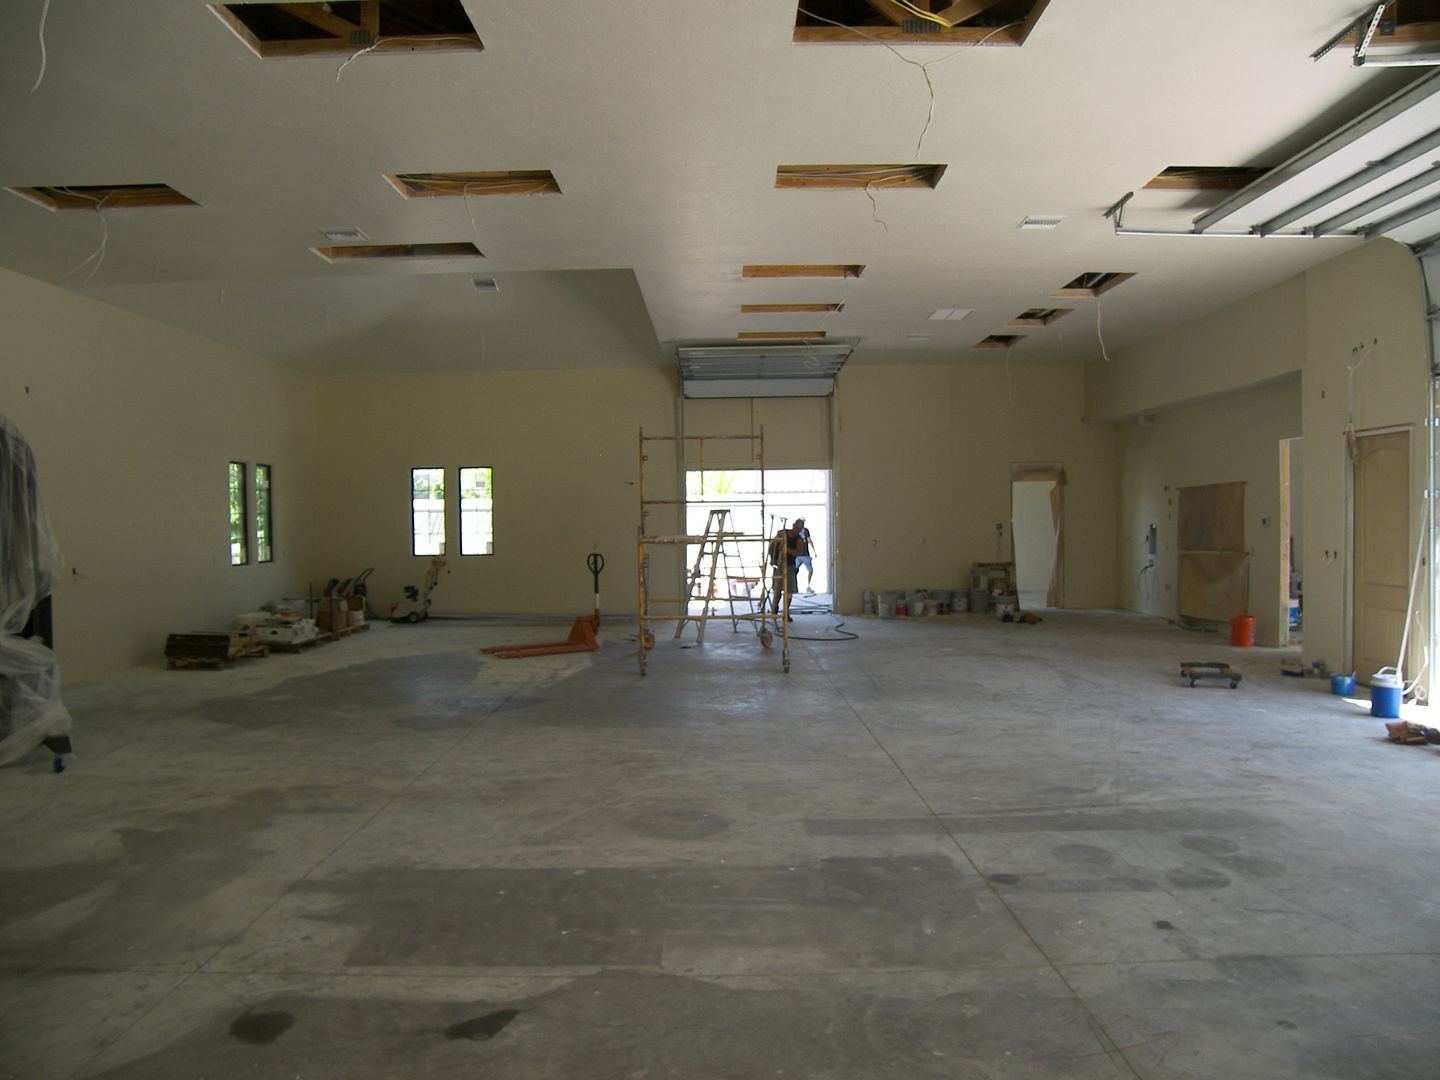
We did get some paint on the garage walls in these pictures. My last garage had white painted walls and I would never do that again. Shows too much dirt and scuff marks. We installed as many lights as possible. I have 3 zones of lighting which lets me light up whichever area in the garage I am working In the next two pictures you will notice a vaulted ceiling in the corner of the garage. The trusses were built so I could build a future loft for storage. I will be starting the loft project in a few weeks so I will be detailing this modification in future posts.
100_2027.jpg
100_2032.jpg
 
Last edited:

Wingnut65

Well-known member
Joined
Apr 21, 2010
Messages
3,170
Location
Tampa Bay, FL
Awesome progress.

Grear idea on the outlets. I wish I had thought more about my garage when we had our house build 10 years ago. So, I have to live with the wall acne to get what I want on the CMU.
 
OP
I

IGO2XS

Well-known member
Joined
Apr 24, 2012
Messages
1,415
Location
Sarasota, FL
Are you planning to work in this castle or park finished projects in this place

wow what a project Its beautiful

This will be a working garage!! I love building things..garage's.....cars.... I have taken apart perfectly good cars because they weren't my way. I hope to enclose a work room with proper ventilation for the real dirty stuff but we'll have projects going on.

Awesome progress.

Grear idea on the outlets. I wish I had thought more about my garage when we had our house build 10 years ago. So, I have to live with the wall acne to get what I want on the CMU.

Each time I have built a garage I have learned something. I hope though this is my last because I can't build a bigger garage than this unless I plan on living in it!!
 
OP
I

IGO2XS

Well-known member
Joined
Apr 24, 2012
Messages
1,415
Location
Sarasota, FL
So when do we see the floor colour????

Pretty soon on the floor. My last garage I did a acrylic two part epoxy floor with the colored chips. Boy that was a mistake. The floor was durable but if you dropped a small nut or screw on the floor it was hard to find. I am going with a solid grey this time around........no colored chips.
 
OP
I

IGO2XS

Well-known member
Joined
Apr 24, 2012
Messages
1,415
Location
Sarasota, FL
Getting close to completion on the exterior. I am particular proud of my RV door. After coating with a gel stain and a sealer it really looks great with the garage. I will be getting around to making some very large strap hinges to apply to the door to make it look more authentic. The corbels on top are out of cypress. I had a local lumber company cut them out as they were pretty good sized and I did not want to mess with them on my band saw. We stained everything twice on the ground and then touched up as needed.......sometimes applying a 3rd coat.

We really worked hard finding our outdoor fixtures. We did all of our shopping online and got some killer bargains. I like large fixtures and with the size of the door these 44" tall sconces look great in the daytime and gorgeous at night.


100_2167.jpg
 
To avoid these ads, REGISTER NOW!

NickTheNut

Active member
Joined
Jul 29, 2010
Messages
26
This is a truly amazing build!!!

I haven't been able to keep up with the thread; did you say multiple families and homes will be at the same site? How many? And will you be sharing this space with them?

It looks seriously jaw on the floor amazing!
 

ToolHog

New member
Joined
Aug 12, 2007
Messages
4
Bruce, the only other forum you might have seen it on is the AVS Forum while I was doing my home theater build. I am also on 67-72 Chevy truck forum as I am building a 69 Chevy p/u. I like building stuff! These forums ate a great way to get ideas.

Fantastic garage build. Do you have a link to your home theater build thread on AVS Forum? Thanks.
 

Wingnut65

Well-known member
Joined
Apr 21, 2010
Messages
3,170
Location
Tampa Bay, FL
I forgot to mention the great ideas you have for the central vac system and pressure washer. Those will definitely go on my Wish List for adding to my next place.

When you get them all installed, can you post pix of the vac and pressure washer so we can see what you are writing about?
 

BHR4CE1

Well-known member
Joined
Sep 13, 2010
Messages
952
Location
Long Beach, CA
Great project. I am interested to see the finished product. Nice to hear that I am not the only one who included a urinal in his garage build!
 
OP
I

IGO2XS

Well-known member
Joined
Apr 24, 2012
Messages
1,415
Location
Sarasota, FL
This is a truly amazing build!!!

I haven't been able to keep up with the thread; did you say multiple families and homes will be at the same site? How many? And will you be sharing this space with them?

It looks seriously jaw on the floor amazing!

Yes, my mother and brother are on the property as well on the same piece of property. We have a little over 4 acres here in Sarasota. Funny we come originally from Indiana where our front yard was 9 acres. We have plenty of room here and happy with the size. My wife and I did not have kids......evidence of the garage size. However, we have nieces and nephews with kids and we have 7 kids under 8 years old out here all the time and it is plenty of space for them to play.

Fantastic garage build. Do you have a link to your home theater build thread on AVS Forum? Thanks.

I will share it soon......sorry there are some pictures of the house on there and I want to finish with the garage first.......by the end of the week I will have all of my pictures posted. We had a professional photographer out here and i have lots of really awesome "glamour shots" of the garage, house, plus theater I will share. I know I got the inspiration for a lot of my ideas by looking at what others did.
 

Aaron P.

Well-known member
Joined
Nov 27, 2007
Messages
96
thats no garage man......thats a bleeding man palace....:lol::lol:....each build on this site is so fecking cool, it must be great to be able to ave the funds n space to do these things...i can only dream :sad:
 
OP
I

IGO2XS

Well-known member
Joined
Apr 24, 2012
Messages
1,415
Location
Sarasota, FL
The urinal is great for the beer drinking friends who hang out that my wife does not want in the house:beer: It really is handy to have it in the garage. I highly recommend it. I just checked out the you tube video of your garage. Your garage is awesome!! I love your lift too.

Great project. I am interested to see the finished product. Nice to hear that I am not the only one who included a urinal in his garage build!
 
Last edited:
OP
I

IGO2XS

Well-known member
Joined
Apr 24, 2012
Messages
1,415
Location
Sarasota, FL
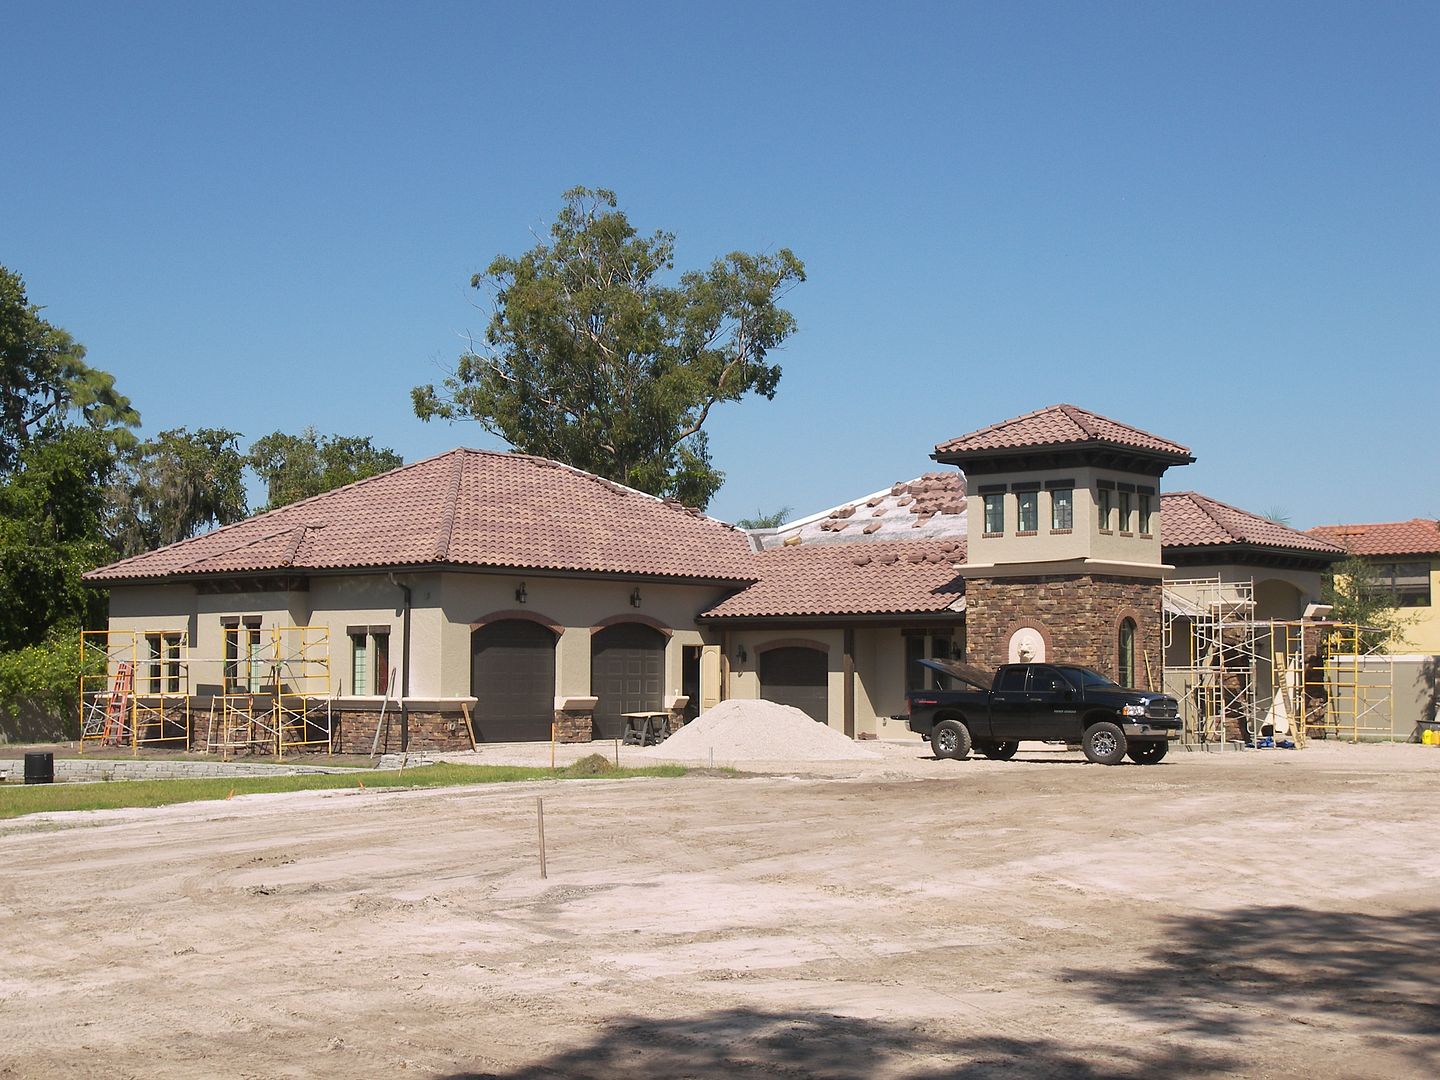
By this point we had finally decided on the exterior color. I bet we looked at 25 or 30 colors. I would go to Sherwin Williams and have them mix up a pint of this or that and we would apply 5 different colors at a time on the exterior stucco. For some reason we brought out a can of the primer we used to paint the wall around our property and painted it as a sample as we were quickly running out of options. The primer was mixed at 50% of the color of the wall. All of the area you see out in front of the garage is going to be driveway area. I will have about 8000 feet of pavers around the garage for parking. The material I have used for my base is called crushed concrete. It is very popular in my area as a excellent compacted base made by crushing up concrete. There is a lot of concrete demo around and they take the concrete for free in order to make this material. I have about a 8 inch base.

At this point in the construction the wealthy neighbor on the other side of my wall is not to happy. Our property used to be a 4 acre area for them to enjoy. When the wall went up they were very unhappy to say the least because they no longer had a view. By the time the garage was up they were moving.:lol: They really called us rednecks because of the garage!

100_2121.jpg

100_2119.jpg


This photo is being taken from the future inside of our home. The garage from the house opens up to the side of the garage so all garage doors face each other. We will be living in the guest apartment of the garage while our home is being built. It was really an exciting time to be right in the middle of all of the construction.
100_2118.jpg
 

1991Syclone

Well-known member
Joined
Jul 19, 2007
Messages
278
Location
Englewood, FL
When the wall went up they were very unhappy to say the least because they no longer had a view. By the time the garage was up they were moving.:lol: They really called us rednecks because of the garage!

Just be happy you don't live out on any of the local Keys. I love reading the reports about how people complain on Siesta Key about yard work being done before 10am on Sunday. They call the cops for that kinda stuff!

The garage looks awesome, can't wait to see the rest of it. Maybe all the locals should get together for an inspection party. :lol_hitti
 

SuperSocket

Well-known member
Joined
Nov 2, 2010
Messages
2,683
Location
Michigan
At this point in the construction the wealthy neighbor on the other side of my wall is not to happy. Our property used to be a 4 acre area for them to enjoy. When the wall went up they were very unhappy to say the least because they no longer had a view. By the time the garage was up they were moving.:lol: They really called us rednecks because of the garage!


I hate how people feel like they have some sort of entitlement over their neighbors property (talking about the neighbors who were upset with your structure).

I'm glad they moved, I wish all the cranky people who feel entitled to their neighbors view moves.


You see these things all the time, the guy buys a cheaper lot because he can view over his neighbor... but then all of a sudden is pissed when his neighbor wants to build a house or structure. I've heard of people who had to drop their entire mansion 6" because the neighbors bitched.
 

hdridinas1

Well-known member
Joined
Mar 30, 2012
Messages
140
By this point we had finally decided on the exterior color. I bet we looked at 25 or 30 colors. I would go to Sherwin Williams and have them mix up a pint of this or that and we would apply 5 different colors at a time on the exterior stucco. For some reason we brought out a can of the primer we used to paint the wall around our property and painted it as a sample as we were quickly running out of options. The primer was mixed at 50% of the color of the wall. All of the area you see out in front of the garage is going to be driveway area. I will have about 8000 feet of pavers around the garage for parking. The material I have used for my base is called crushed concrete. It is very popular in my area as a excellent compacted base made by crushing up concrete. There is a lot of concrete demo around and they take the concrete for free in order to make this material. I have about a 8 inch base.

At this point in the construction the wealthy neighbor on the other side of my wall is not to happy. Our property used to be a 4 acre area for them to enjoy. When the wall went up they were very unhappy to say the least because they no longer had a view. By the time the garage was up they were moving.:lol: They really called us rednecks because of the garage!

100_2121.jpg

100_2119.jpg


This photo is being taken from the future inside of our home. The garage from the house opens up to the side of the garage so all garage doors face each other. We will be living in the guest apartment of the garage while our home is being built. It was really an exciting time to be right in the middle of all of the construction.
100_2118.jpg


This place is awesome. Love the design. Loving the fact that you built the garage first too, :beer:
 
OP
I

IGO2XS

Well-known member
Joined
Apr 24, 2012
Messages
1,415
Location
Sarasota, FL
Just be happy you don't live out on any of the local Keys. I love reading the reports about how people complain on Siesta Key about yard work being done before 10am on Sunday. They call the cops for that kinda stuff!

The garage looks awesome, can't wait to see the rest of it. Maybe all the locals should get together for an inspection party. :lol_hitti

I have said it before anyone is welcome to stop by. I slip out of my office about 2:00 to head to the garage.

I hate how people feel like they have some sort of entitlement over their neighbors property (talking about the neighbors who were upset with your structure).

I'm glad they moved, I wish all the cranky people who feel entitled to their neighbors view moves.

I thought my garage architecture was a lot better looking than his house:rocker:


Yeah, he definitely has his priorities in order!

Not only that the wife approved. We did need a place to store things so it just seemed the right thing to do.
 
OP
I

IGO2XS

Well-known member
Joined
Apr 24, 2012
Messages
1,415
Location
Sarasota, FL
Well guys, I am down to posting some finished pictures of the garage. There was no question my new garage would have a guest apartment. Living in Florida you get a few more visitors from out of town than lets say if you lived in Alaska.:lol: At our last home I ended up building a guest apartment over a 2 1/2 car garage. It was great because we could have guests come and stay with us and they would have their own space and more important my wife and I could keep our privacy.
To give perspective to the photo those two windows look directly out the front of the garage.


100_2031.jpg


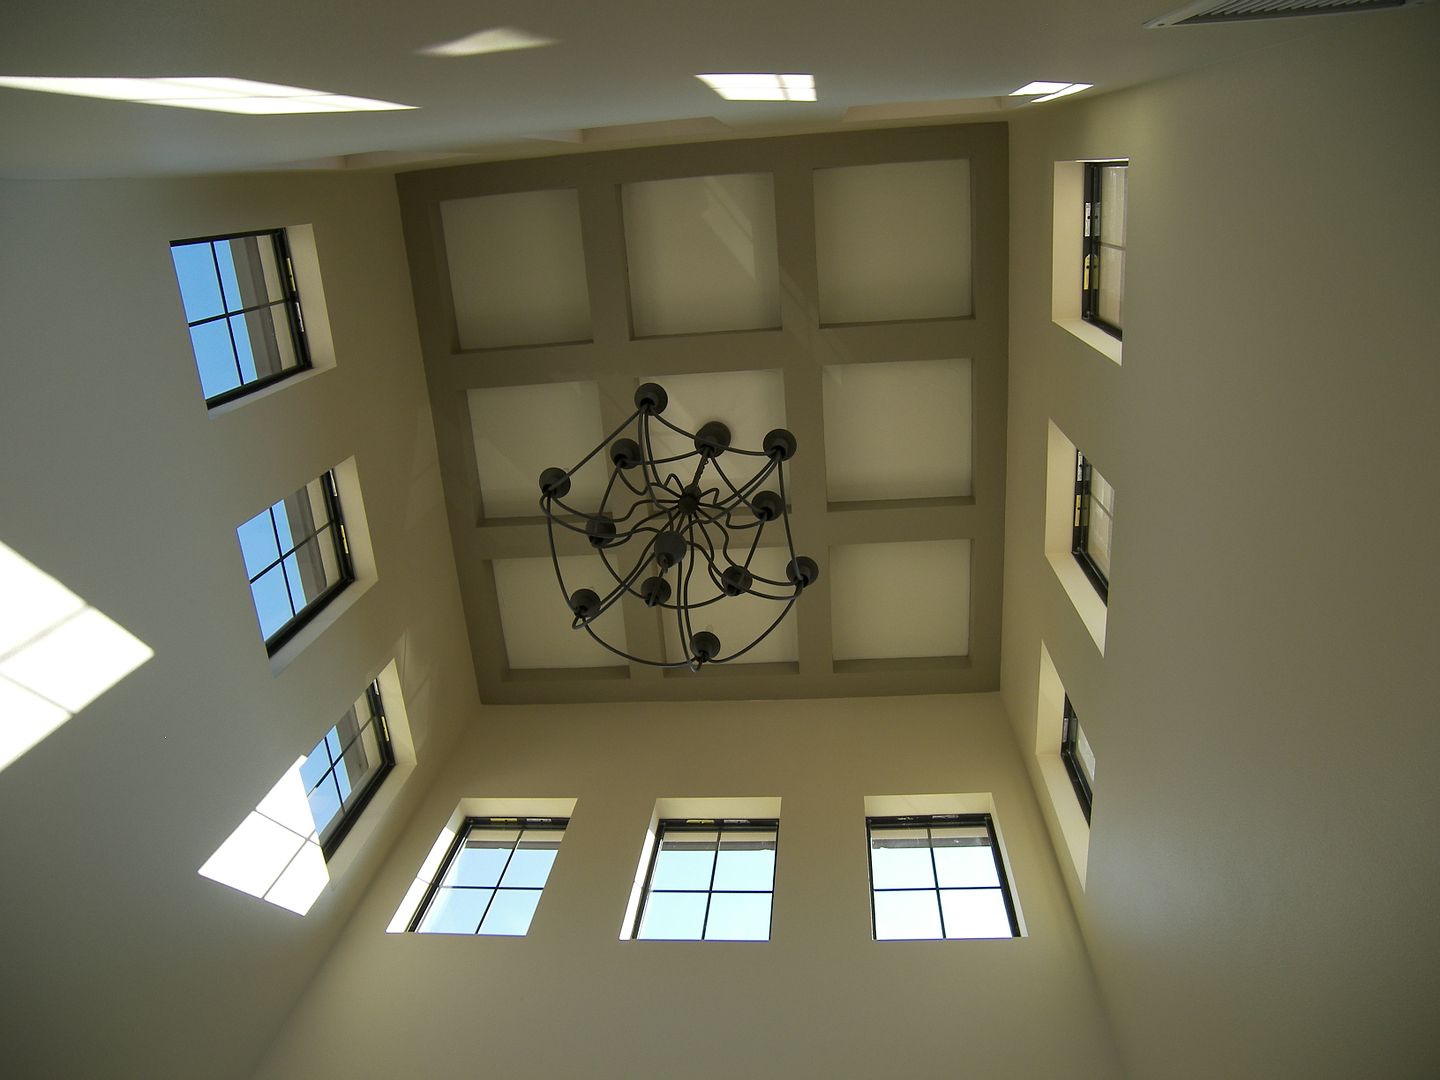
This photo was taken flat footed looking straight up in the tower. As it was destined to be a staircase to the second floor is was redesigned to be the bedroom. Small in footprint it makes up in character. There are 3 windows on each side of the tower making a total of 12 windows at the top. We wanted something different on the ceiling so we did some special framing which we drywalled and painted to appear like beams. The antique chandelier is quite large and heavy. In the first few months of living there I had hoped that I had it properly attached as it is right over the bed. The beauty of the chandelier is at night when it is visible from the outside through the upper tower windows.

100_2179.jpg


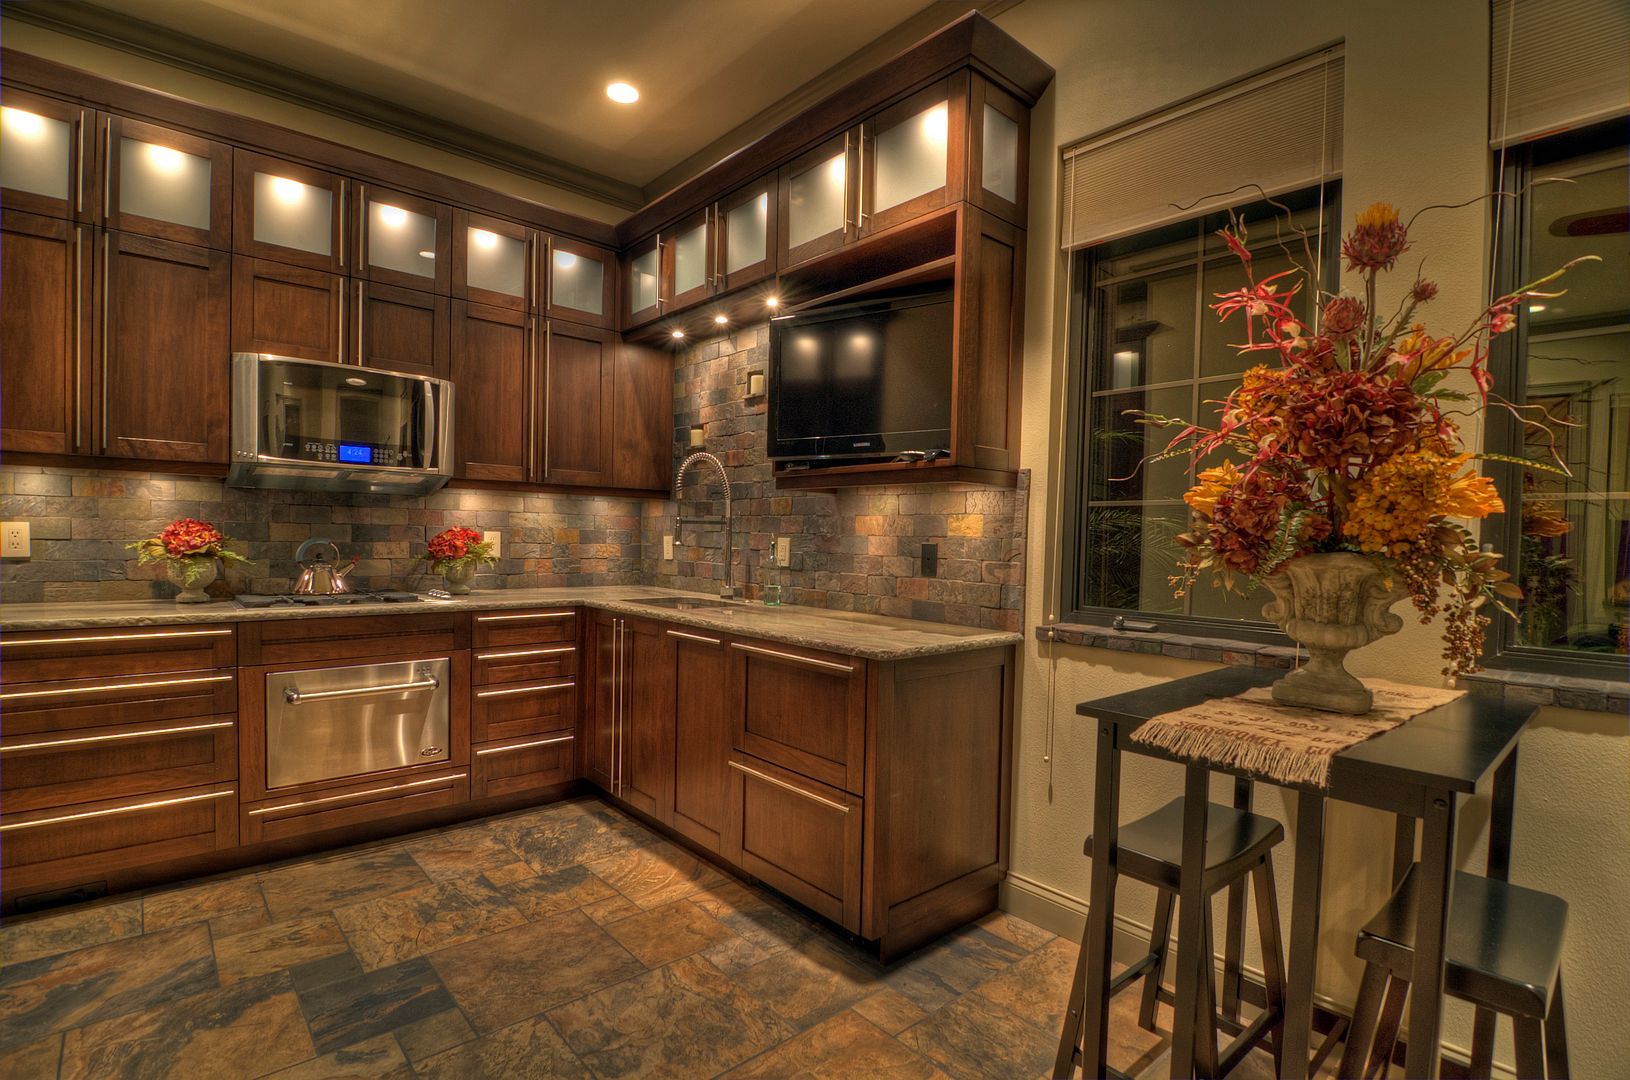
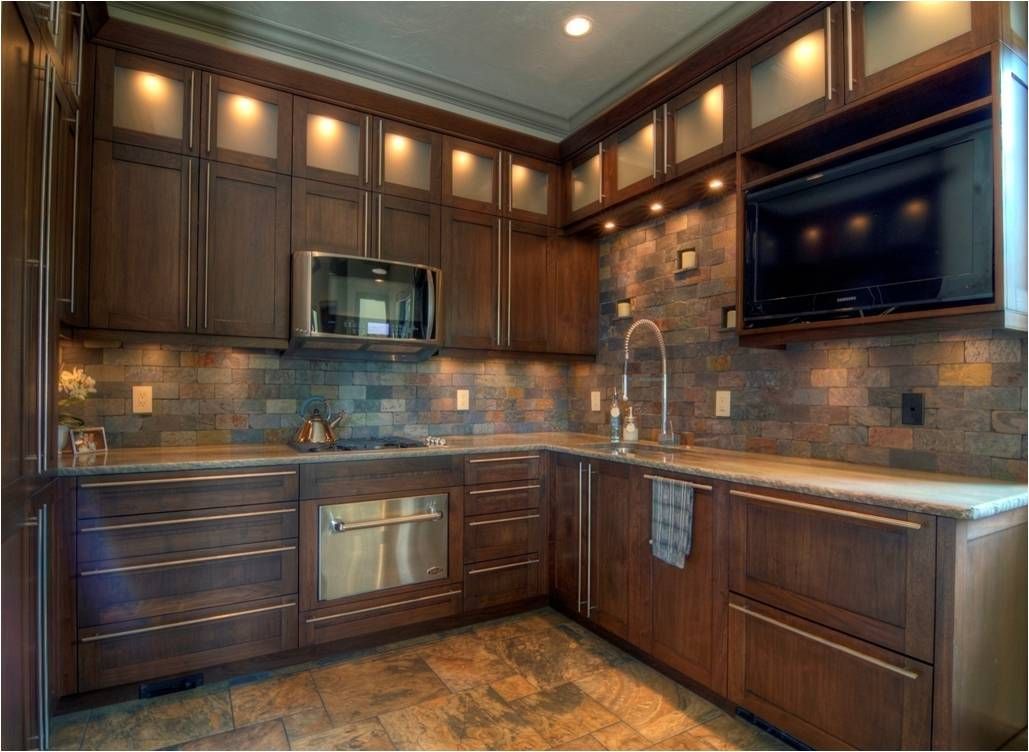
A tremendous amount of work went into the design of the garage kitchen. It is a relatively small space but we had quite a few needs and fortunately a good friend of mine is a custom cabinet builder. Our last home we owned was ultra modern/contemporary and we had enough of it. This garage/house would have some touches of contemporary but be of a more traditional look.

I love the look of the shaker doors. Yep, we went with a contemporary style cabinet pull. My wife looked at 100's of door pulls!! On the right side of the lower cabinets there is a undercounter refrigerator/ freezer with ice maker. I could have bought a 24 cu ft full size refrigerator cheaper than this piece. We were pretty conscious about the look and a big refrigerator looked out of place. With the matching cabinet fronts one would never know it was a undercounter unit. (important to note we had a large freezer in the garage along with a beverage cooler) Right next to it is a pull out trash bin. The kitchen sink is a single bowl sink and my wife hated it!! To the left is a mini built in dishwasher and above is a 4 burner gas range. Above it a convention microwave which quite frankly impressed me with its versatility. Frozen pizza's are my weakness and it did just great making them just right. On the left and barely visible is a floor to ceiling pantry. Only 12 inches deep it was great storage. My wife as a type A person had this kitchen organized.

monstergaragekitchen.jpg


The countertops are granite, the backsplash is 3 x 6 slate, and the floor is porcelain. We originally planned on a slate floor........as we continued shopping we found this awesome slate pattern porcelain tile. It doesn't need sealed, doesn't chip or peel, and is easy to clean. The ceilings in the kitchen, living, and bath area are all 10 feet and do ad spaciousness to the area.


GarageKitchen.jpg


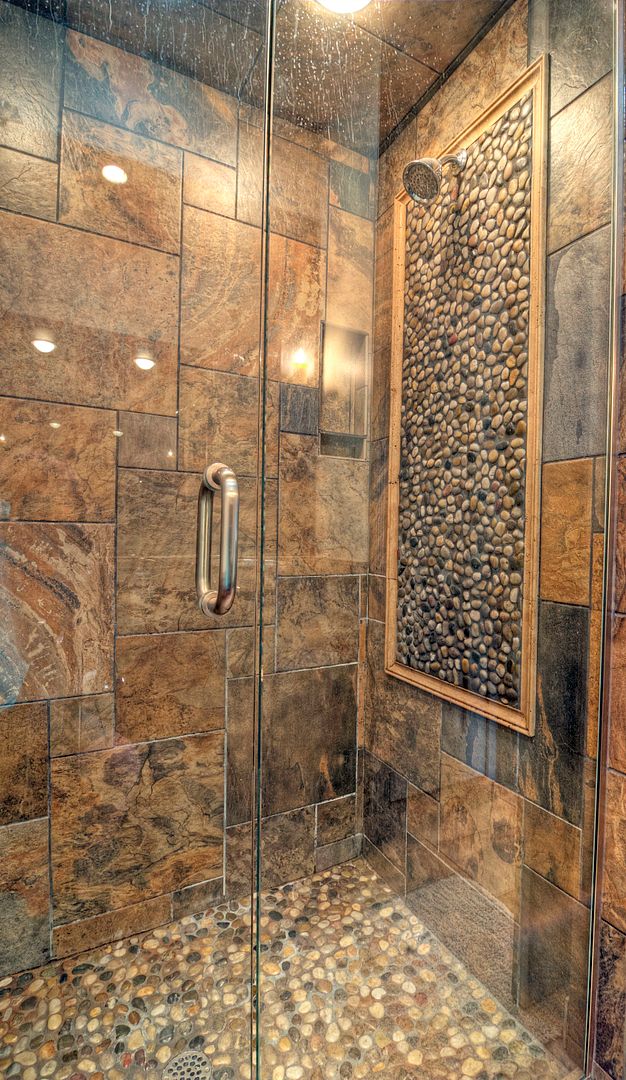
We carried the slate right into the bathroom and right up the wall in the shower. There is a frameless glass shower door and we used the rocks on the wall and on the floor.


039_40_41Enhancer.jpg


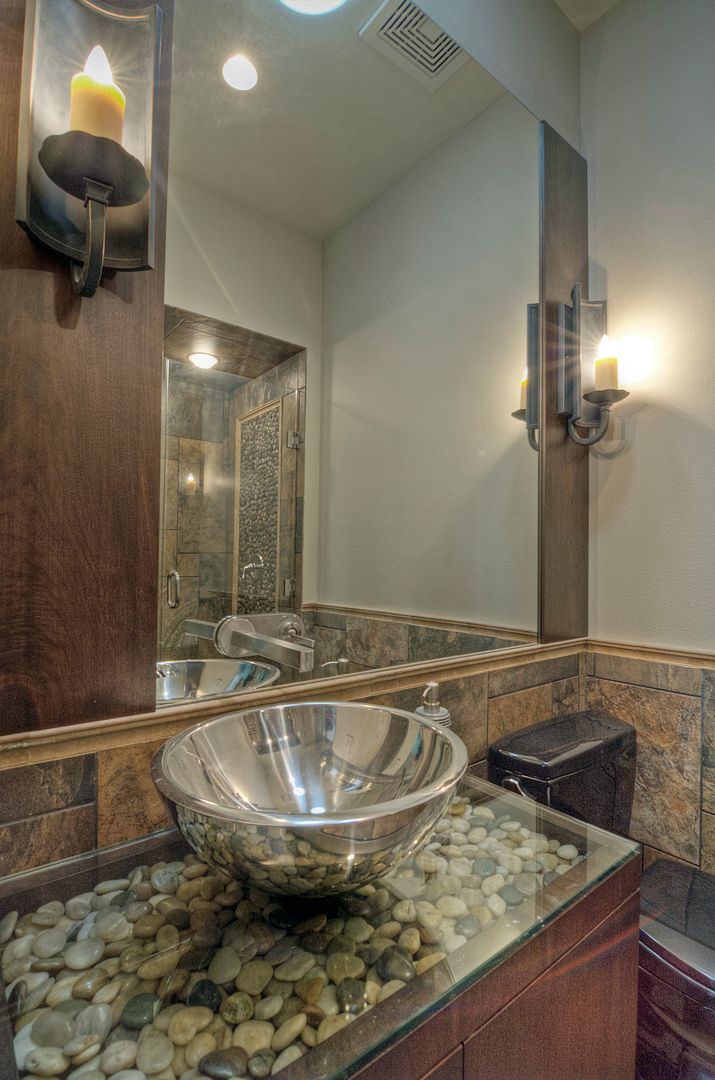
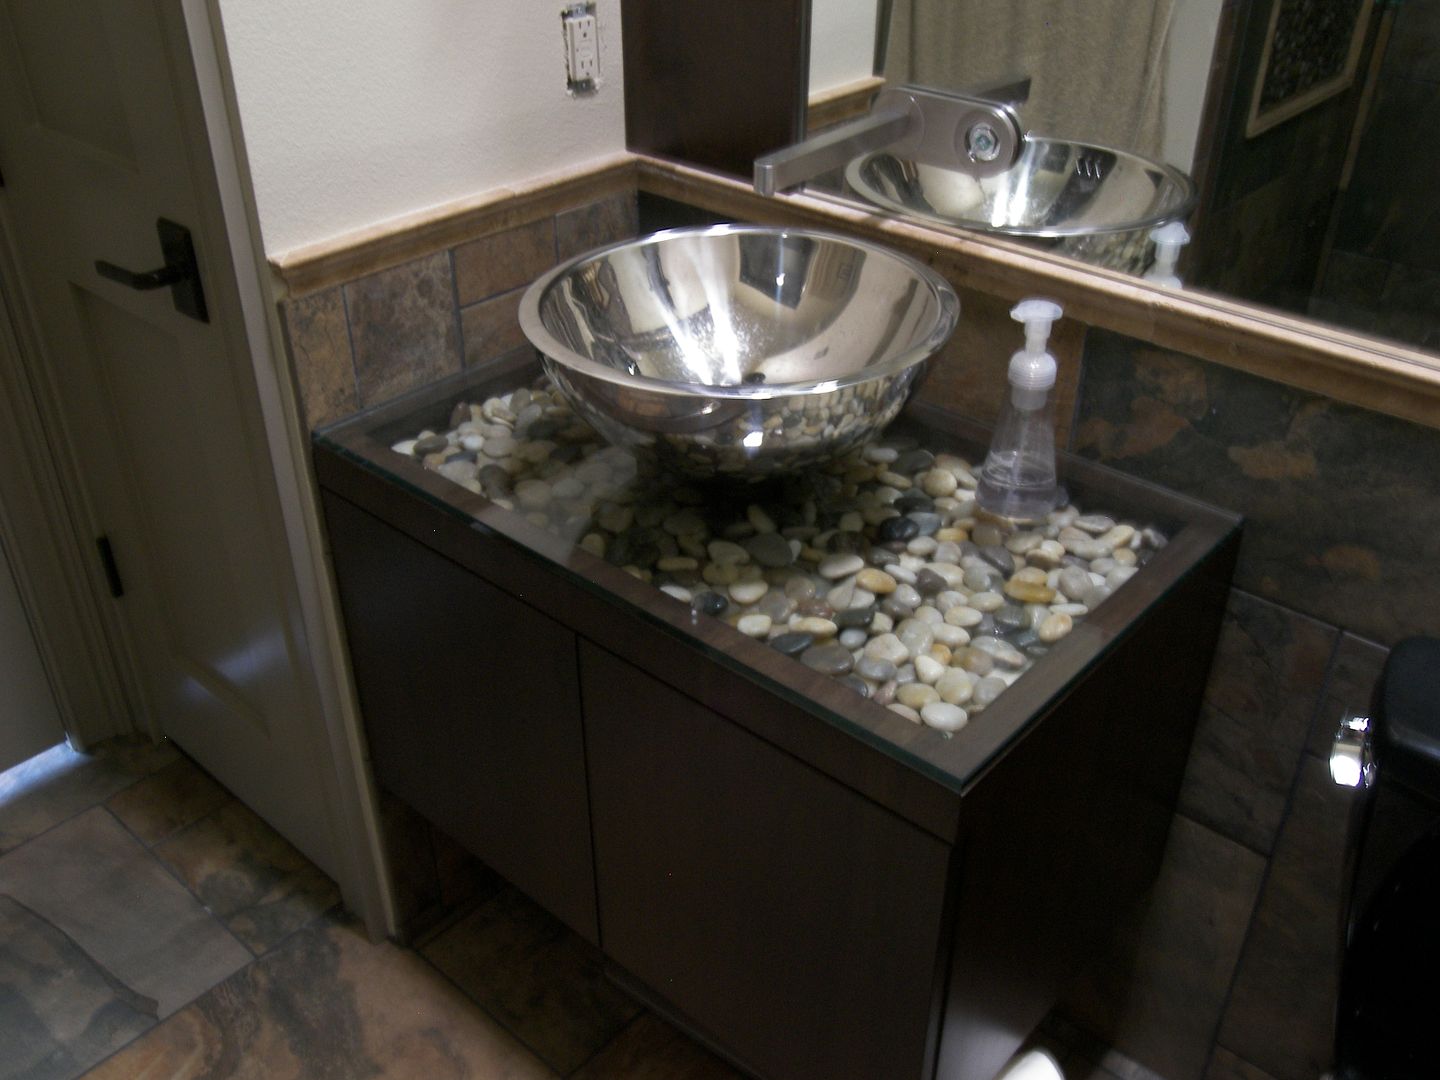
The stone idea also was brought over to the vanity which I custom made. I build a tray on the vanity and filled it with the stone we used in the shower. A nice 1/2 piece of glass was drilled and then I mounted the stainless steel sink to the glass. Topped off with a faucet that mounted through the vanity mirror. I have to tell you guys this bathroom was a tremendous amount of work. Everything about this room was time but the wife is happy. I am in my element when I can custom build one off features. I guess you noticed the contemporary faucet and sink.


036_7_8Enhancer.jpg


100_2171.jpg


I need to make perfectly clear our build was a husband and wife project. I am the builder and designer but my wife is the decorator. As I get to possibly sharing some pictures of our home you will see the decorating is spectacular and there was magic in our working together.
 

Thedoc14

Well-known member
Joined
Mar 4, 2012
Messages
259
Location
Melb, Australia
That Bathroom , is way cool. Love the pebbles they add a great touch, is the frame on the shower wall stone or timber?

I like the black toilet................
 
To avoid these ads, REGISTER NOW!
Top Bottom