To avoid these ads, REGISTER NOW!

Start to Finish Home Body and Paint Thread.

KCarGuy

Well-known member
Joined
Feb 5, 2009
Messages
2,075
Location
50 miles outside Chicago, illinois
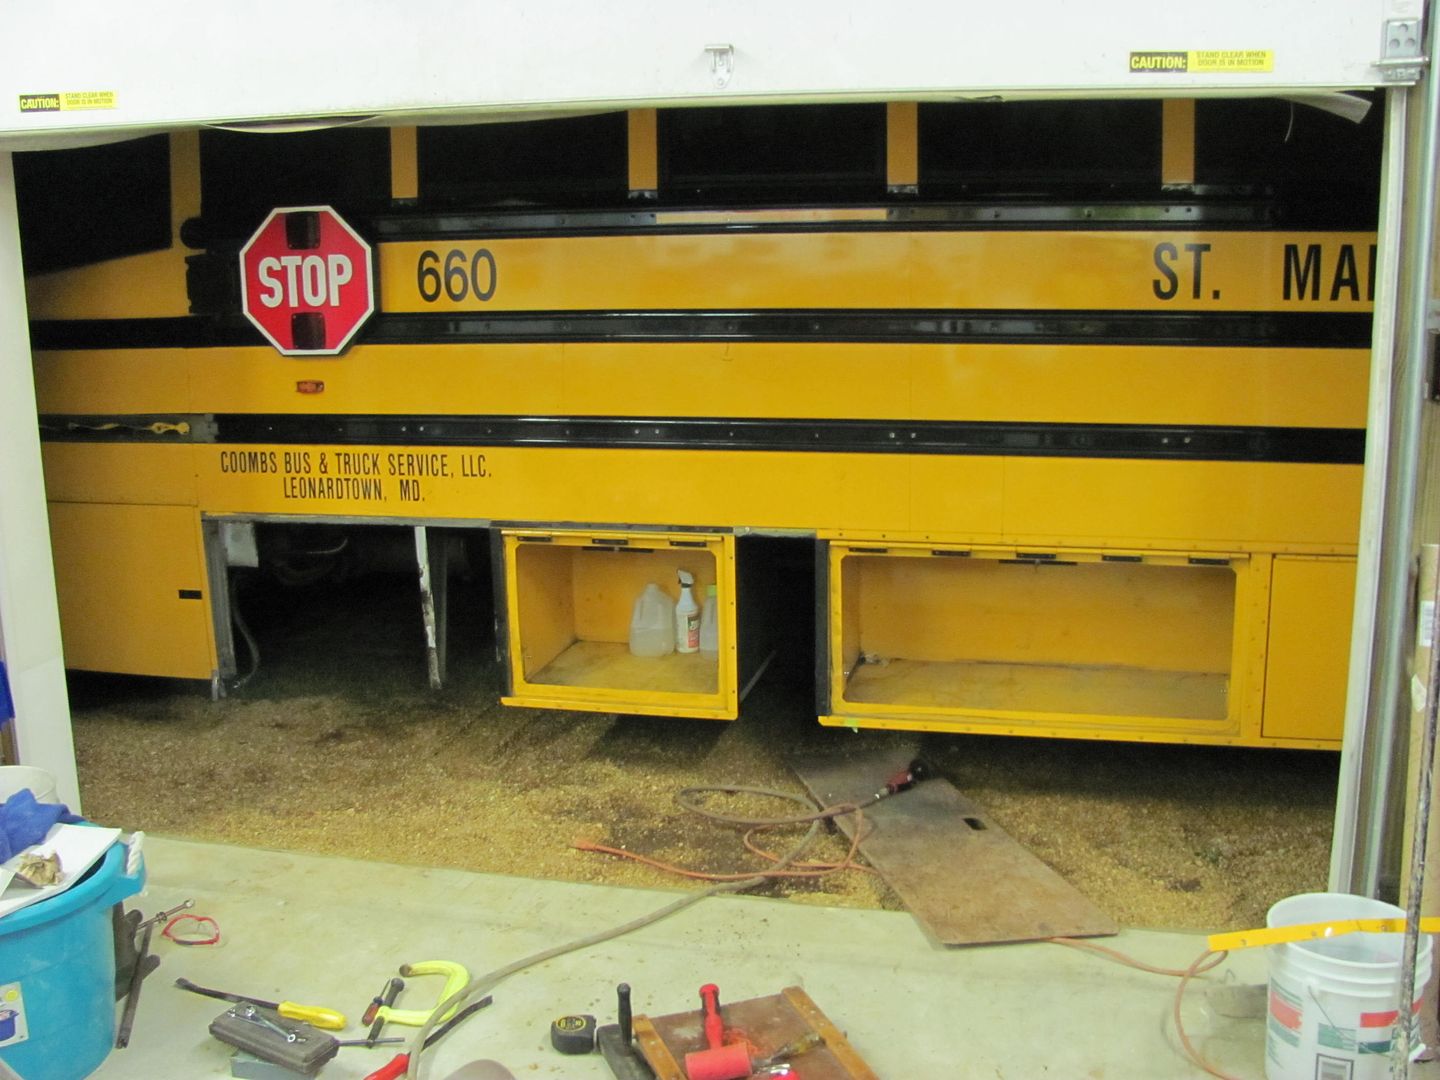
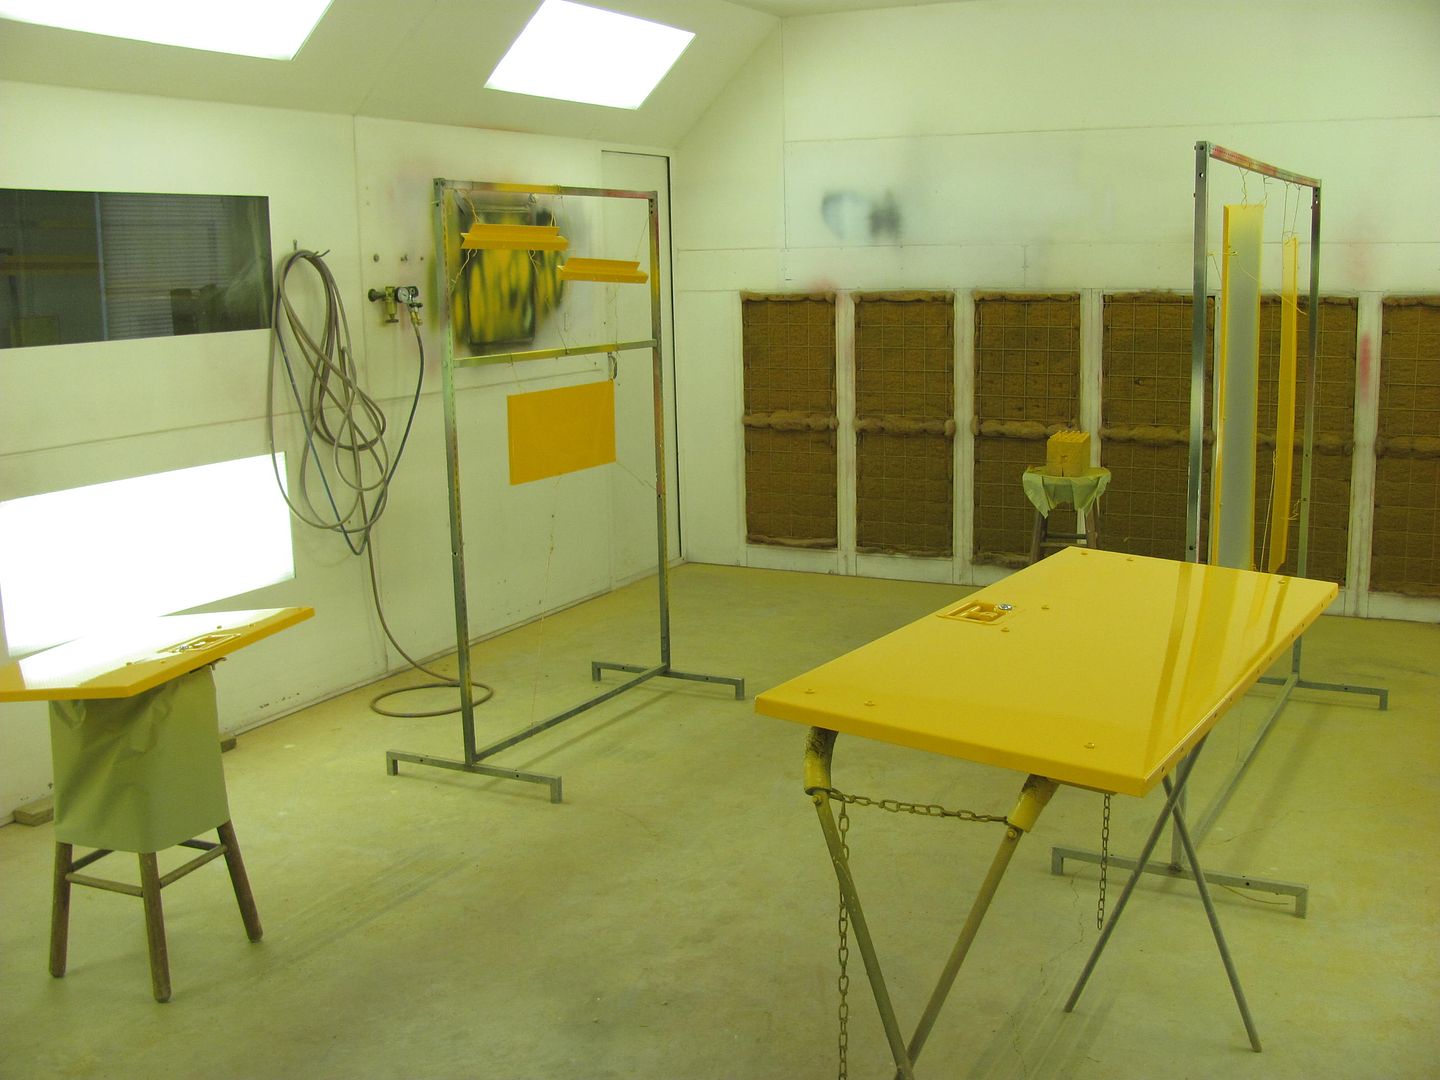
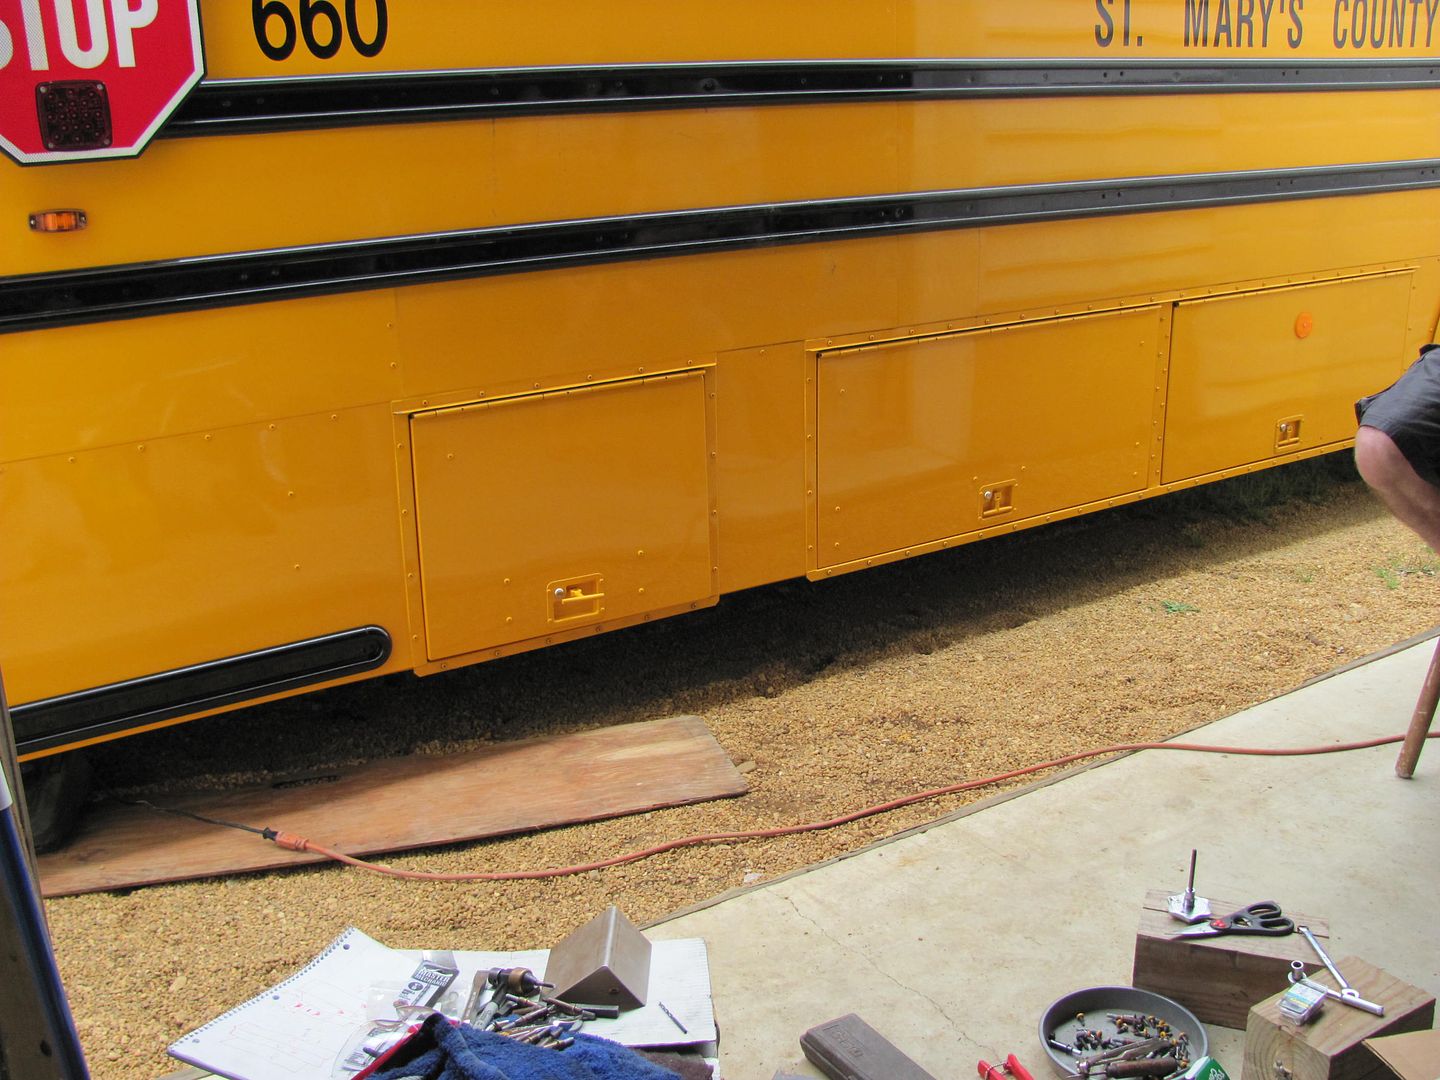
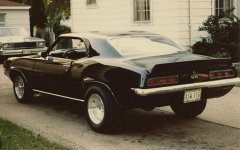
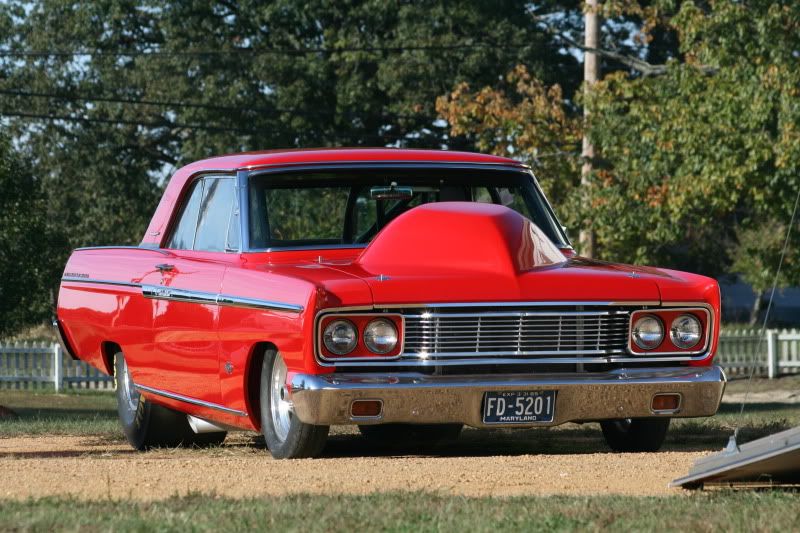
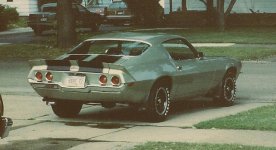
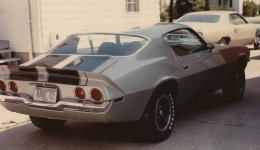
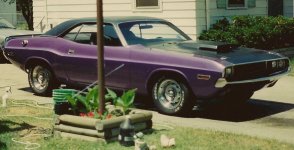
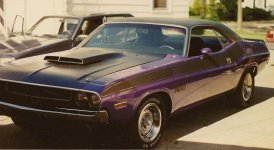
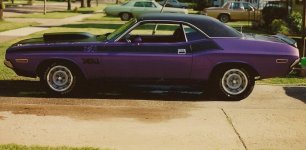
I wanted to start a Thread that everyone can show off their "At Home" Restorations or Paint Skills.
I know that there are some "Big Dollar" Professional Jobs that have been done on some Great looking Rides.
But this is for the "Do it yourself" Group.
Some are Quick Jobs and Some are as Good as the Pro Jobs done right out of your Driveway or in your Garage.
There will be some Old Paint Jobs as well as New Ones.
We all get Better and Learn from each Job that we do.

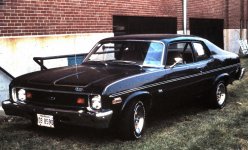
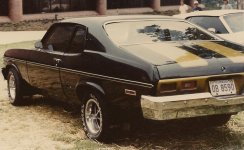
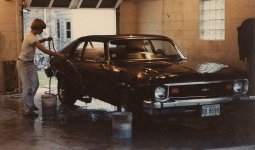
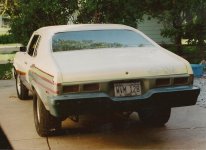
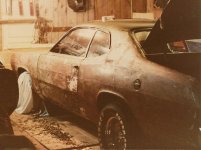
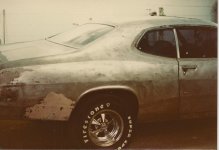
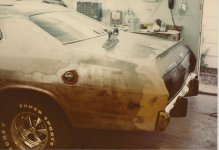
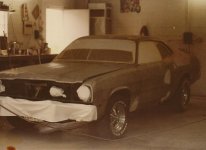
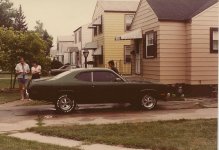
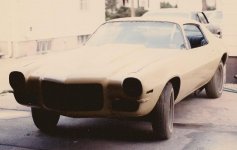
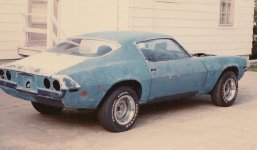
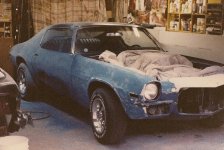
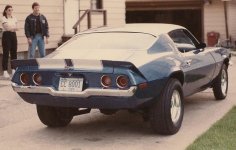
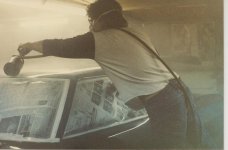
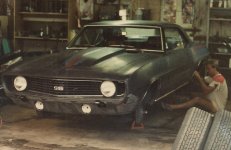
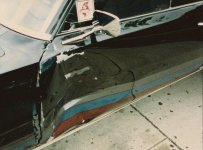
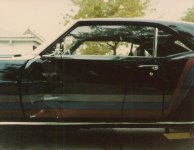
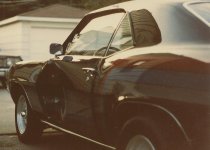
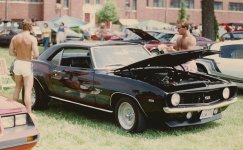
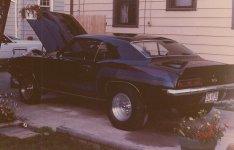
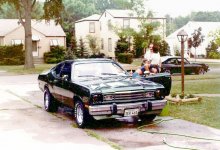
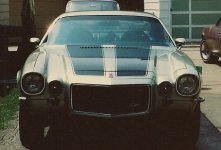
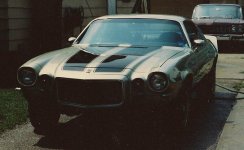
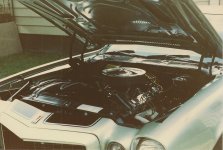
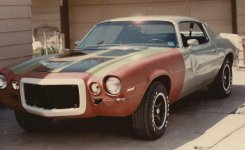
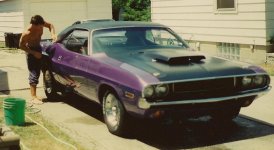
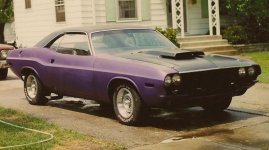
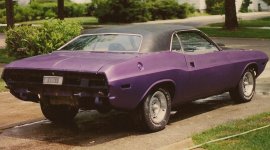
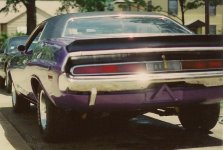
I will start with the First Full Paint Job that I did on a Friends Duster.
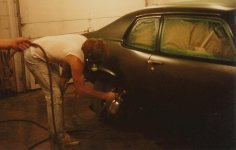
I used DuPont Lucite Acrylic Lacquer Paint back then (32 years ago).
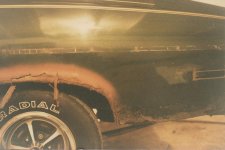
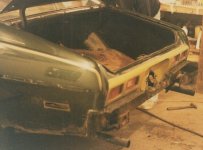
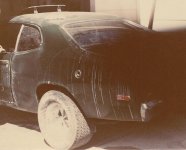
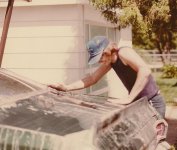
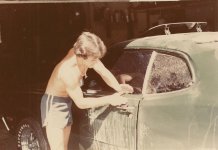
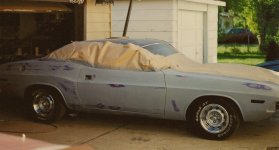
We started by Stripping most of the Paint off with Paint stripper.
Then Sanded it down to the Metal, or Previous Bodywork.
 

Attachments

  • MDuster-1.jpg
    MDuster-1.jpg
    115.4 KB · Views: 167
  • MDuster-2.jpg
    MDuster-2.jpg
    112.2 KB · Views: 143
  • MDuster-3.jpg
    MDuster-3.jpg
    105.4 KB · Views: 147
  • MDuster-4.jpg
    MDuster-4.jpg
    85.3 KB · Views: 140
  • MDuster-5.jpg
    MDuster-5.jpg
    95 KB · Views: 137
  • MDuster-6.jpg
    MDuster-6.jpg
    77.4 KB · Views: 140
To avoid these ads, REGISTER NOW!
OP
K

KCarGuy

Well-known member
Joined
Feb 5, 2009
Messages
2,075
Location
50 miles outside Chicago, illinois
We found out that the Drivers side Quarter Panel had been replaced already once before.
My Buddy also wanted a Custom spoiler Molded onto the Trunk.
We did that, cleaned up all the bodywork and repainted it the same color Green.
 

Attachments

  • MDuster-9.jpg
    MDuster-9.jpg
    96.3 KB · Views: 114
  • MDuster-8.jpg
    MDuster-8.jpg
    95.9 KB · Views: 113
  • MDuster-7.jpg
    MDuster-7.jpg
    68 KB · Views: 121
  • MDuster-10.jpg
    MDuster-10.jpg
    95 KB · Views: 107
  • MDuster-11.jpg
    MDuster-11.jpg
    112.3 KB · Views: 111
  • MDuster-12.jpg
    MDuster-12.jpg
    98.9 KB · Views: 126
OP
K

KCarGuy

Well-known member
Joined
Feb 5, 2009
Messages
2,075
Location
50 miles outside Chicago, illinois
After Drying a few days, we started wet sanding the Acrylic Lacquer Clearcoat with 600, then 1000, then Buffed it all out.
 

Attachments

  • SCAN2412.jpg
    SCAN2412.jpg
    147.8 KB · Views: 166
  • SCAN2411.jpg
    SCAN2411.jpg
    148.3 KB · Views: 202
  • MDuster-17.jpg
    MDuster-17.jpg
    122.4 KB · Views: 238
  • MDuster-16.jpg
    MDuster-16.jpg
    94.9 KB · Views: 181
  • MDuster-15.jpg
    MDuster-15.jpg
    109.4 KB · Views: 140
  • MDuster-14.jpg
    MDuster-14.jpg
    95.1 KB · Views: 165
  • MDuster-13.jpg
    MDuster-13.jpg
    87.4 KB · Views: 181
OP
K

KCarGuy

Well-known member
Joined
Feb 5, 2009
Messages
2,075
Location
50 miles outside Chicago, illinois
Another Garage Job was a 1971 Z/28 for a Co-worker.
It had a Horrible "Thick" Paint Job that was cracking, 1/2 Pinstriped, a Non-Painted Fiberglass Cowl Hood and Lettering that screamed for the Local Police to Pull it over.

Plus a Leaky Intake Manifold and NOS system that was faulty.
Fixed all that too.
 

Attachments

  • SCAN2442.jpg
    SCAN2442.jpg
    128 KB · Views: 137
  • SCAN2441.jpg
    SCAN2441.jpg
    126.6 KB · Views: 143
  • SCAN2432.jpg
    SCAN2432.jpg
    137.9 KB · Views: 225
  • SCAN2431.jpg
    SCAN2431.jpg
    114.7 KB · Views: 139
  • SCAN2430.jpg
    SCAN2430.jpg
    110 KB · Views: 145
  • SCAN2429.jpg
    SCAN2429.jpg
    118.1 KB · Views: 150
OP
K

KCarGuy

Well-known member
Joined
Feb 5, 2009
Messages
2,075
Location
50 miles outside Chicago, illinois
As I was sanding it down, I found out that it was painted white first, then Blue over that.
After Repairs, Primed it, Blocked it...
Sealed it with Velvaseal...
Painted it the Blue Metalic...
Wet Sanded it, Layed out the stripes and Painted White...
Wet Sanded again and Clear Coated with a Pearl added into that.
 

Attachments

  • SCAN2439.jpg
    SCAN2439.jpg
    100.9 KB · Views: 86
  • SCAN2438.jpg
    SCAN2438.jpg
    106 KB · Views: 79
  • SCAN2437.jpg
    SCAN2437.jpg
    94.6 KB · Views: 79
  • SCAN2436.jpg
    SCAN2436.jpg
    84 KB · Views: 76
  • SCAN2435.jpg
    SCAN2435.jpg
    83 KB · Views: 76
  • SCAN2434.jpg
    SCAN2434.jpg
    96.8 KB · Views: 79
  • SCAN2433.jpg
    SCAN2433.jpg
    146.9 KB · Views: 78
OP
K

KCarGuy

Well-known member
Joined
Feb 5, 2009
Messages
2,075
Location
50 miles outside Chicago, illinois
My Co-Worker took it home for several weeks, then came back for final Wet sanding and buffing.
But came back with different wheels and tires that rode better.
You can see the Pearl in the Blue...Kinda a Purple look!
 

Attachments

  • SCAN2446.jpg
    SCAN2446.jpg
    134.1 KB · Views: 174
  • SCAN2445.jpg
    SCAN2445.jpg
    110.4 KB · Views: 131
  • SCAN2444.jpg
    SCAN2444.jpg
    111.3 KB · Views: 136
  • SCAN2443.jpg
    SCAN2443.jpg
    123.2 KB · Views: 141
  • SCAN2440.jpg
    SCAN2440.jpg
    96.1 KB · Views: 122
OP
K

KCarGuy

Well-known member
Joined
Feb 5, 2009
Messages
2,075
Location
50 miles outside Chicago, illinois
Another "At Home" Job was on a Friends 1969 Camaro.
It started out as a Yellow Straight 6, Plain Jane Camaro. (I have no before photos)
Only Original Part left on it at this point was the roof and floor Panels.
after it sat like this for his college years, we thought it was time to wet sand and polish it finally.
 

Attachments

  • Dave69-7.jpg
    Dave69-7.jpg
    91 KB · Views: 87
  • Dave69-6.jpg
    Dave69-6.jpg
    90 KB · Views: 90
  • Dave69-5.jpg
    Dave69-5.jpg
    92.6 KB · Views: 110
  • Dave69-4.jpg
    Dave69-4.jpg
    111.1 KB · Views: 84
  • Dave69-3.jpg
    Dave69-3.jpg
    109.4 KB · Views: 86
  • Dave69-2.jpg
    Dave69-2.jpg
    127.8 KB · Views: 77
  • Dave69-1.jpg
    Dave69-1.jpg
    93.1 KB · Views: 92
OP
K

KCarGuy

Well-known member
Joined
Feb 5, 2009
Messages
2,075
Location
50 miles outside Chicago, illinois
Then at the last Minute, my Buddy Dave wanted to throw some graphics on it...nothing too overpowering, but simple.
I used 3 colors that I had left over...
A Deep Red Metalic from my Dads Buick.
A Blue from a Friends Turbo Mustang.
and a Gun Metal Gray from another Mustang.
We went the "Cheap and Easy" Route by using Newspaper!
 

Attachments

  • Dave69-14.jpg
    Dave69-14.jpg
    93.5 KB · Views: 89
  • Dave69-13.jpg
    Dave69-13.jpg
    114.5 KB · Views: 89
  • Dave69-12.jpg
    Dave69-12.jpg
    106 KB · Views: 91
  • Dave69-11.jpg
    Dave69-11.jpg
    91.6 KB · Views: 113
  • Dave69-10.jpg
    Dave69-10.jpg
    84.9 KB · Views: 106
  • Dave69-9.jpg
    Dave69-9.jpg
    88.1 KB · Views: 90
  • Dave69-8.jpg
    Dave69-8.jpg
    85.3 KB · Views: 84
OP
K

KCarGuy

Well-known member
Joined
Feb 5, 2009
Messages
2,075
Location
50 miles outside Chicago, illinois
After letting the Clearcoat dry, we wet sanded it and polished it out.
 

Attachments

  • Dave69-19.jpg
    Dave69-19.jpg
    55.5 KB · Views: 110
  • Dave69-18.jpg
    Dave69-18.jpg
    115.2 KB · Views: 148
  • Dave69-17.jpg
    Dave69-17.jpg
    96 KB · Views: 87
  • Dave69-16.jpg
    Dave69-16.jpg
    125.7 KB · Views: 89
  • Dave69-15.jpg
    Dave69-15.jpg
    122.5 KB · Views: 96
OP
K

KCarGuy

Well-known member
Joined
Feb 5, 2009
Messages
2,075
Location
50 miles outside Chicago, illinois
He showed the Car and Raced it Hard for a few Years.
It now had a 396 Big Block Motor, a Turbo 400 with a Chevy Vega Convertor.
(he went through several)
and a 373 posi 12 bolt rearend.
Then it got hit square in the Drivers Door!
 

Attachments

  • Dave69-26.jpg
    Dave69-26.jpg
    82 KB · Views: 88
  • Dave69-25.jpg
    Dave69-25.jpg
    115.8 KB · Views: 97
  • Dave69-24.jpg
    Dave69-24.jpg
    126.4 KB · Views: 115
  • Dave69-23.jpg
    Dave69-23.jpg
    106.9 KB · Views: 86
  • Dave69-22.jpg
    Dave69-22.jpg
    90.2 KB · Views: 93
  • Dave69-21.jpg
    Dave69-21.jpg
    108.3 KB · Views: 103
  • Dave69-20.jpg
    Dave69-20.jpg
    139.7 KB · Views: 113
OP
K

KCarGuy

Well-known member
Joined
Feb 5, 2009
Messages
2,075
Location
50 miles outside Chicago, illinois
After Fixing the Door and fender, The Engine Took a ****!
Ripped it out, Completely went through it and rebuilt it.
And Back on the Road!
 

Attachments

  • Dave69-32.jpg
    Dave69-32.jpg
    127.2 KB · Views: 81
  • Dave69-31.jpg
    Dave69-31.jpg
    99.2 KB · Views: 74
  • Dave69-30.jpg
    Dave69-30.jpg
    94.1 KB · Views: 62
  • Dave69-29.jpg
    Dave69-29.jpg
    108.2 KB · Views: 55
  • Dave69-28.jpg
    Dave69-28.jpg
    104.7 KB · Views: 57
  • Dave69-27.jpg
    Dave69-27.jpg
    109.5 KB · Views: 56

drewski

Well-known member
Joined
Apr 13, 2008
Messages
419
Location
Mid-Tn
My daily driver. Drove it for 2 yrs. with a primered left front fender. Had some fascia damage, lots of walmart dents and chips in the sides, crease in the hood.

miata002.jpg


P1010138.jpg


P1010145.jpg


P1010149.jpg


P1010151.jpg


P1010165.jpg


P1010158.jpg


P1010159-1.jpg


P1010155-1.jpg


IMG_4378.jpg


IMG_4387.jpg


IMG_4384.jpg


P1010170.jpg


P1010171.jpg


P1010172.jpg


P1010180.jpg


P1010188.jpg


P1010219.jpg


And ready for the road again.

March2011088.jpg
 
OP
K

KCarGuy

Well-known member
Joined
Feb 5, 2009
Messages
2,075
Location
50 miles outside Chicago, illinois
POLYDAN...Yes. Old' School. My First "Fat" Tires were Bias Belted Goodyears that I had to Color in the Letters with a Tire Pen.
They were on my 1962 Ford Fairlane.

DREWSKI...Nice Job on Cleaning up and Giving your Ride some Personal Touches!
Its a lot of work and time, but well worth it!
 

Joe69

Well-known member
Joined
Sep 6, 2009
Messages
2,371
Location
Muncie, Indiana
Here's the best I can do. I don't have any pics of when I first got it because they were all film pics. You remember film don't ya? No scanner either. I bought it in '89, and started shortly after. I had already done the mechanicals, and replaced the floors and repaired the inner fenders before I got a digital camera. These pics are body work, start to finish.

67inprimer.jpg


Sideview-67.jpg


doorshell.jpg


partspainted.jpg


paintedmasked.jpg


partiallyassembled.jpg


partiallyassembled.jpg


MVC-007F-1.jpg


MVC-001F-2.jpg


MVC-005F-1.jpg


MVC-006F-1.jpg
 
OP
K

KCarGuy

Well-known member
Joined
Feb 5, 2009
Messages
2,075
Location
50 miles outside Chicago, illinois
JUSTIN C...Can you post your Pics? I usually dont click on any Links (keeps my computer alive that way).

JOE69...Sweet Mustang! Love that Color! Painting in your garage sure makes a Mess doesnt it? My floor in my old garage would just bead the water right up!
 

KenS

Well-known member
Joined
Oct 21, 2007
Messages
726
Hope it's not presumptuous, but KCarGuy's work needed a little better showcasing than faded snapshots.
 

Attachments

  • mopar.jpg
    mopar.jpg
    154.8 KB · Views: 92
  • ss.jpg
    ss.jpg
    135 KB · Views: 89
  • z.jpg
    z.jpg
    155.6 KB · Views: 89

dwright406

Well-known member
Joined
Nov 2, 2010
Messages
172
Location
77566
I've done a lot of paint work out of my small garage.

Here's my '70 Camaro, it started out like this:

LF1.jpg


RR1.jpg


Laying down the clear here:

HPIM1702.jpg


HPIM1703.jpg


Finished up and on the road.

100_7424.jpg


100_7428.jpg
 

MP&C

Well-known member
Joined
Oct 21, 2009
Messages
4,403
Location
Leonardtown, MD
Here's what I started with, the gold paint was hiding quite a bit of rust in need of repairs....

S6300082.jpg


Fabricating/replacing rusted trunk weatherstrip channel....

Picture188.jpg


Fabricated quarter panel patch panel....

Picture242.jpg


Drip rail fabrication....

Picture151.jpg


....and installed

Picture164.jpg


rear window channel repair...

Picture255.jpg


Picture266.jpg


Finished project....

IMG_1954-1.jpg


Complete build thread.....

http://www.garagejournal.com/forum/showthread.php?t=86935
 
Last edited:
To avoid these ads, REGISTER NOW!

dwright406

Well-known member
Joined
Nov 2, 2010
Messages
172
Location
77566
My current project, I'm building this one for a friend.

Wes72004.jpg


Wes72011.jpg


I installed new quarter panels, inner wheel wells, trunk drop off panels, new front fenders and hood.

006-1.jpg


Jambs painted, we're going back to the original midnight bronze.

002_zps64ce8c85.jpg


Fenders, header panel and valence panel painted:

003-7.jpg


It's still a work in progress, but it's coming along.
 
OP
K

KCarGuy

Well-known member
Joined
Feb 5, 2009
Messages
2,075
Location
50 miles outside Chicago, illinois
KENS...Thanks. I have lots more old photos to scan.

DWRIGHT406...Love the Transformation from Plain Jane to Muscle Car, and the Road Track Camaro to what looks to become a Muscle Car again. Nice Work!

MP&C...I love your work...Great time and detail to the Bodywork, and Great Looking Drag Car! I copied some of your ideas on your Build, on the Last Chevelle that I did.
(Door Holder for the Floor Jack).
 
OP
K

KCarGuy

Well-known member
Joined
Feb 5, 2009
Messages
2,075
Location
50 miles outside Chicago, illinois
Another Second Gen Camaro that I did...
An Original 1972 Z/28
I was going to just replace the Drivers Door Skin, and Paint from the Doors Forward, since the owner had already replaced the fenders, Nose and Installed a Used Hood.
But the Original Pewter Paint was thin, So I Repainted the entire Car, Laid out new stripes and Clearcoated it...
 

Attachments

  • Z28-7.jpg
    Z28-7.jpg
    141.8 KB · Views: 33
  • Z28-6.jpg
    Z28-6.jpg
    71.4 KB · Views: 33
  • Z28-5.jpg
    Z28-5.jpg
    137.2 KB · Views: 33
  • Z28-4.jpg
    Z28-4.jpg
    144.8 KB · Views: 34
  • Z28-3.jpg
    Z28-3.jpg
    102.3 KB · Views: 33
  • Z28-2.jpg
    Z28-2.jpg
    108.6 KB · Views: 35
  • Z28-1.jpg
    Z28-1.jpg
    81.7 KB · Views: 34
OP
K

KCarGuy

Well-known member
Joined
Feb 5, 2009
Messages
2,075
Location
50 miles outside Chicago, illinois
How about a Plum Crazy Purple T/A 340 Challenger?
Repaired some Dings, Dents, Chips in an Original TA.
Repainted it, Cleared, Wet Sanded and Buffed...
 

Attachments

  • TA340-6.jpg
    TA340-6.jpg
    97.7 KB · Views: 48
  • TA340-5.jpg
    TA340-5.jpg
    83.8 KB · Views: 41
  • TA340-4.jpg
    TA340-4.jpg
    107.6 KB · Views: 36
  • TA340-3.jpg
    TA340-3.jpg
    112.9 KB · Views: 37
  • TA340-2.jpg
    TA340-2.jpg
    89.8 KB · Views: 33
  • TA340-1.jpg
    TA340-1.jpg
    72.8 KB · Views: 34
OP
K

KCarGuy

Well-known member
Joined
Feb 5, 2009
Messages
2,075
Location
50 miles outside Chicago, illinois
After it was all Buffed and Cleaned.
We then Laid out the Original Decals (Ordered by a Catalog)
Thats my Buddy Mike from the Duster helping out.
This Car was in Mopar Magazine and the Owner owned 2 Dodge Dealerships and asked me to run his Body Shop.
(Which I did for 2 years...Big Mistake on my Part)
 

Attachments

  • TA340-11.jpg
    TA340-11.jpg
    89.5 KB · Views: 48
  • TA340-10.jpg
    TA340-10.jpg
    102.1 KB · Views: 42
  • TA340-9.jpg
    TA340-9.jpg
    94 KB · Views: 48
  • TA340-8.jpg
    TA340-8.jpg
    104.1 KB · Views: 39
  • TA340-7.jpg
    TA340-7.jpg
    91.7 KB · Views: 48

Firefyter-Emt

Well-known member
Joined
Sep 29, 2005
Messages
171
Location
CT
Can anyone play?? My Jeep that suffered from the "Ugly headlight syndrome" and needed to get back to her roots. I paid $1000 for her back about 2003 and still have her today (granted... her age is showing!)

progress-1.jpg


So we add some real Jeep CJ parts to fix that!
hood-2.jpg


With little bracing, CJ hoods get ugly chasing damage!
hood-7.jpg


fender-2.jpg


fender-7.jpg


Then a little work to fix the rot on the sides (no before photos sadly, but patches were welded in place)

progress-11.jpg


progress-12.jpg


Now, with a fair bit of tweaks and mods... she looks like a real Jeep!
All sanded down and washed awaiting paint.

progress-15.jpg


True to the home shop paint... I made a mess in the shop with this one!

progress-27.jpg


progress-23.jpg


And all painted up in a nice red!

progress-31.jpg


progress-33.jpg


combo-jeep.jpg
 
Last edited:

drewski

Well-known member
Joined
Apr 13, 2008
Messages
419
Location
Mid-Tn
Picked up this 77 Trans Am back in the late 80's with a crushed 1/4 panel,damaged rear fascia, and a 400 with a dead miss. With the help of my wife we replaced a bad cam in the engine, repaired and repainted the body and were on our way to a street machine event in Pigeon Forge, Tn 2 wks. after we got it.

transamprep3.jpg


transamprep2.jpg


transamprep.jpg


transamprep4.jpg
 

Firefyter-Emt

Well-known member
Joined
Sep 29, 2005
Messages
171
Location
CT
Thanks... I wish she still looked that good! The conversion is pretty straight forward, there is a little cutting on the grille shell that has to be done to clear the steering box and the narrower frame at the grille. Plus the mound needs to be moved, but not hard at all. A 1" body lift may make everything clear. Other than that, the rear flares were swapped to the CJ style "rounded" flares and the extra holes welded.

A couple years back after hitting a tree in a snow storm I had to replace a 3/4 nose and decided to swap over the tailgate to a CJ gate too. More welding on the hinge holes, and adding some hinge mount plates for the new hinges, but also pretty straight forward.

half-cab-2.jpg


Right now, she is sporting a flat camo green paint job. :)
It's about ready to be retired, the frame and body are getting a bit soft, and I am looking for a late 90's early 2000 Jeep Sahara TJ to replace her.

camo-jeep.bmp
 
Last edited:
OP
K

KCarGuy

Well-known member
Joined
Feb 5, 2009
Messages
2,075
Location
50 miles outside Chicago, illinois
Here is My Wife's 1974 Nova.
(Her Very First Brand New Car)
It Came with little Mini Hubcaps, a 350 Automatic. I added my 1968 Impala Hubcaps.
First Photo was going to HS Prom, later I added Custom Dual Exhaust and Ralley Wheels.
Then Pinstripped it.
But by 1982 it had seen better days.
It was a daily driver that had never been Garaged.
So I tackled it with a Friend (on a Very tight Budget).
 

Attachments

  • KNova-52.jpg
    KNova-52.jpg
    123.7 KB · Views: 71
  • KNova-51.jpg
    KNova-51.jpg
    115.4 KB · Views: 66
  • KNova50.jpg
    KNova50.jpg
    104.2 KB · Views: 67
  • KNova-44.jpg
    KNova-44.jpg
    148.4 KB · Views: 72
  • KNova-43.jpg
    KNova-43.jpg
    154.9 KB · Views: 79
  • KNova-10.jpg
    KNova-10.jpg
    141.9 KB · Views: 78
  • KNova-09.jpg
    KNova-09.jpg
    74.5 KB · Views: 151
OP
K

KCarGuy

Well-known member
Joined
Feb 5, 2009
Messages
2,075
Location
50 miles outside Chicago, illinois
Bodywork being done and removing every dent.
It was Primed, Wet Sanded.
Painted, Wet Sanded.
Stripes Painted, Wet Sanded.
Clearcoated, Wet Sanded. and Buffed.
 

Attachments

  • KNova-94.jpg
    KNova-94.jpg
    132.5 KB · Views: 58
  • KNova-87.jpg
    KNova-87.jpg
    106.8 KB · Views: 47
  • KNova-82.jpg
    KNova-82.jpg
    91.1 KB · Views: 51
  • KNova-80.jpg
    KNova-80.jpg
    120.8 KB · Views: 57
  • KNova-71.jpg
    KNova-71.jpg
    109.7 KB · Views: 63
  • KNova-63.jpg
    KNova-63.jpg
    100.3 KB · Views: 45
  • KNova-54.jpg
    KNova-54.jpg
    78.5 KB · Views: 48

Joe69

Well-known member
Joined
Sep 6, 2009
Messages
2,371
Location
Muncie, Indiana
[QUOTE
JOE69...Sweet Mustang! Love that Color! Painting in your garage sure makes a Mess doesnt it? My floor in my old garage would just bead the water right up![/QUOTE]

Thanks for the compliment! Yeah, it made a mess, but it gave a me a good excuse to give the garage a thorough cleaning. It hasn't been that clean since:)

Joe
 

MP&C

Well-known member
Joined
Oct 21, 2009
Messages
4,403
Location
Leonardtown, MD
Quite a bit of this one was done in the driveway ;)

Amazing how someone can pull out of a side street and right into the side of something this big and YELLOW....

Picture047.jpg


Stripping off the bent pieces...

Picture057-1.jpg


Making new ones...

Picture064-1.jpg


Test fit...

Picture072.jpg


Picture074.jpg


Picture075.jpg


Ready for school...

Picture079-1.jpg


Picture080-1.jpg


Picture082-1.jpg
 
Last edited:
OP
K

KCarGuy

Well-known member
Joined
Feb 5, 2009
Messages
2,075
Location
50 miles outside Chicago, illinois
I am going to continue with My Wife's 1974 Nova Transformation...
It went from a some what Stock Daily Driver...
To a 335 4 bolt main, 3200 Fairbanks Stall, B&M Turbo 350, 12 bolt 4:10 Posi Daily Driver.
 

Attachments

  • KNova-100.jpg
    KNova-100.jpg
    129.4 KB · Views: 36
  • KNova-106.jpg
    KNova-106.jpg
    113.1 KB · Views: 34
  • KNova-104.jpg
    KNova-104.jpg
    64.9 KB · Views: 30
  • KNova-103.jpg
    KNova-103.jpg
    77.4 KB · Views: 31
OP
K

KCarGuy

Well-known member
Joined
Feb 5, 2009
Messages
2,075
Location
50 miles outside Chicago, illinois
To Getting the Bodywork done all over again...
And wound up a Street Strip car with a 406, NOS.
Running 10.88
 

Attachments

  • KNova-110.jpg
    KNova-110.jpg
    79.4 KB · Views: 31
  • KNova-121.jpg
    KNova-121.jpg
    97.6 KB · Views: 29
  • KNova-145.jpg
    KNova-145.jpg
    67.9 KB · Views: 30
  • KNova-161.jpg
    KNova-161.jpg
    123.1 KB · Views: 31
  • KNova-163.jpg
    KNova-163.jpg
    139.1 KB · Views: 32
  • KNova-165.jpg
    KNova-165.jpg
    118.6 KB · Views: 48

Scottsdale10

Well-known member
Joined
Nov 28, 2011
Messages
167
Hey i have a quick body work question if you guys don't mind.. I don't understand block sanding i mean i get why you do it but every video i have ever seen talks about using a guide coat to show highs and lows... None of the videos ever say what to do about the highs and lows i mean if it's high do you tap it down with a body hammer? If it's low do you add more filler and re prime? Thanks
 
OP
K

KCarGuy

Well-known member
Joined
Feb 5, 2009
Messages
2,075
Location
50 miles outside Chicago, illinois
It depends On How High and How Low.
The Best thing to do is work the Sheetmetal as close to Straight as Possible.
There are ways to shrink sheetmetal if its too high, including a shrinking Hammer.
Too Low can be as simple as another Coat of Epoxy Primer and another Guide Coat.
Most Guys have there own special way of dealing with it.
Like anything else, there is the Down and Dirty, and the Slow and Steady.
 
To avoid these ads, REGISTER NOW!
Top Bottom