To avoid these ads, REGISTER NOW!

Multi-machine welding cart

MP&C

Well-known member
Joined
Oct 21, 2009
Messages
4,403
Location
Leonardtown, MD
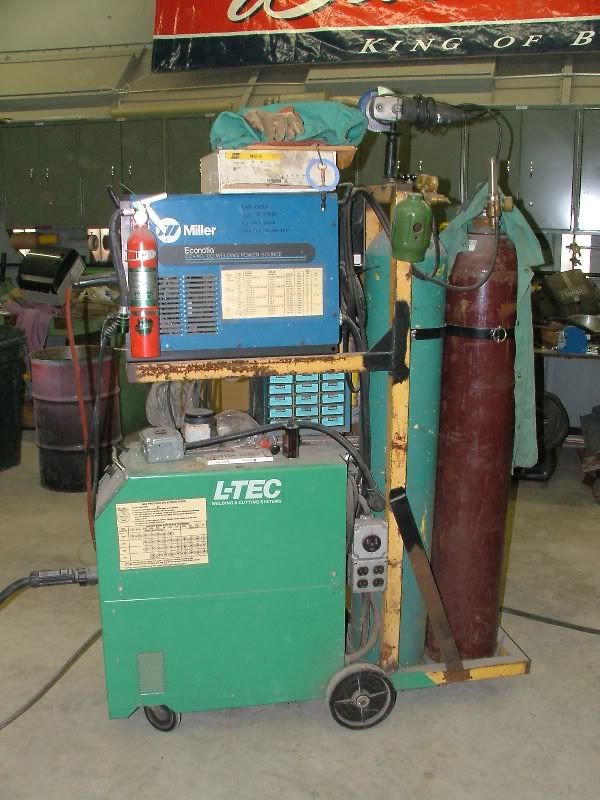
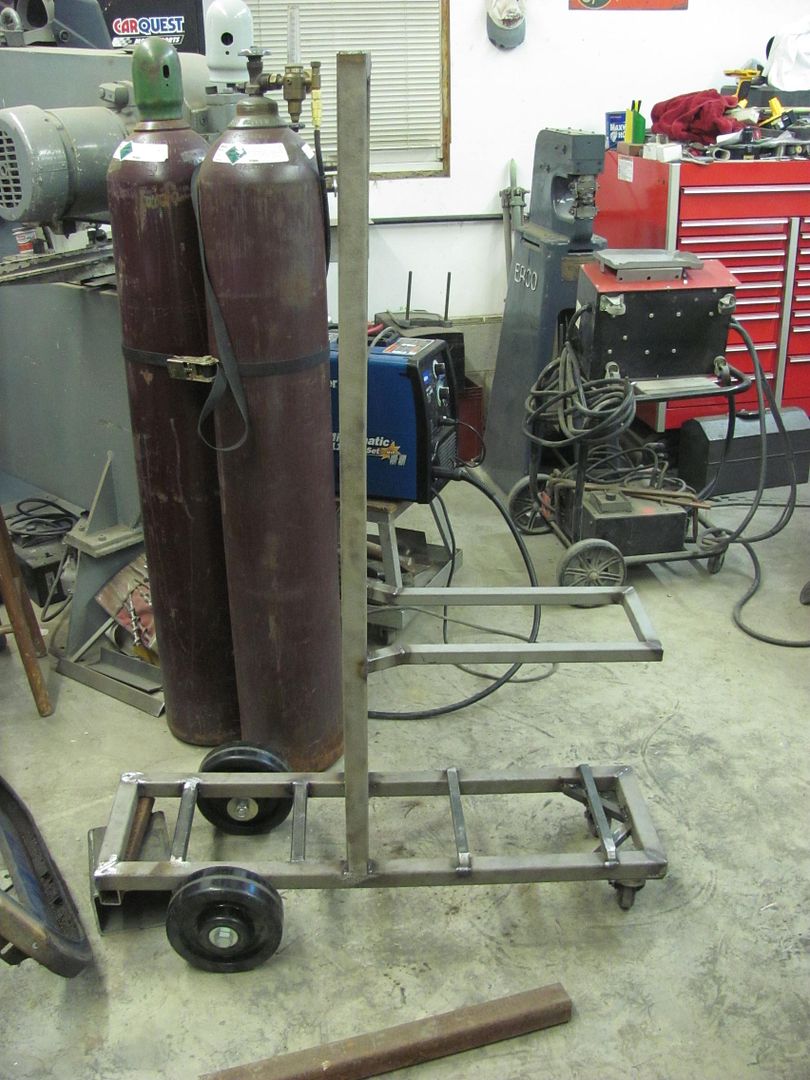
I recently sold my Dinosaur Mig, after owning since '91 I thought it was time for a new one..

Picture179.jpg


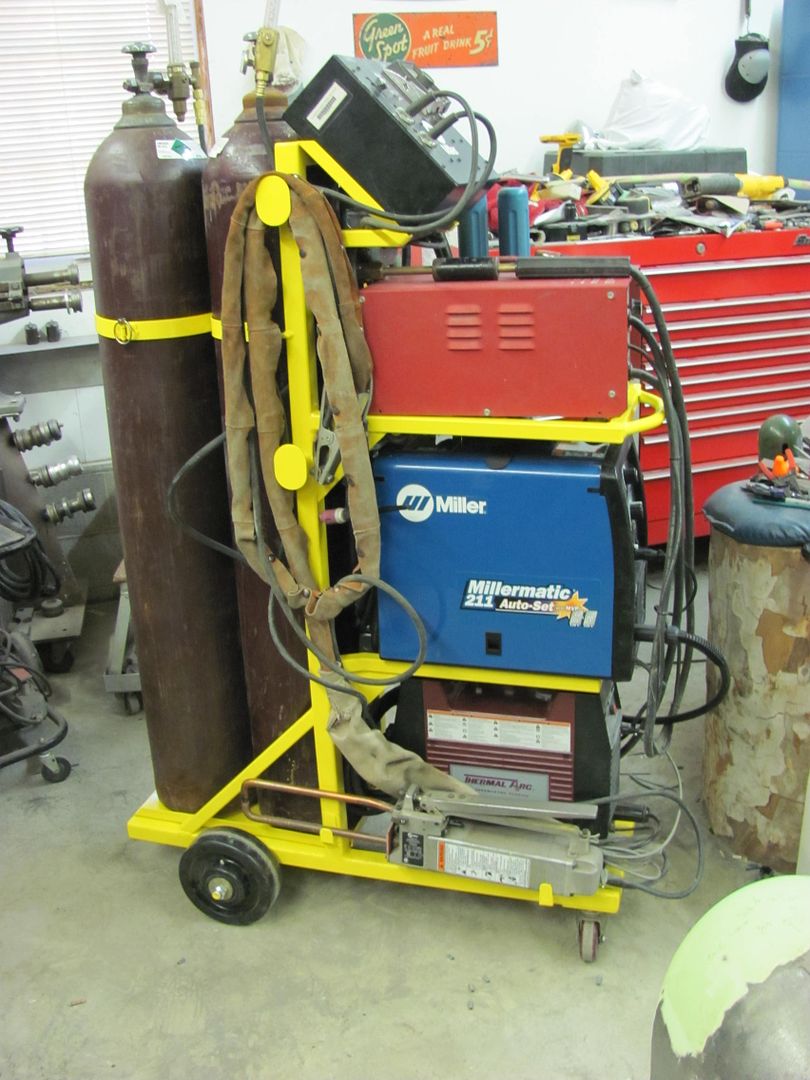
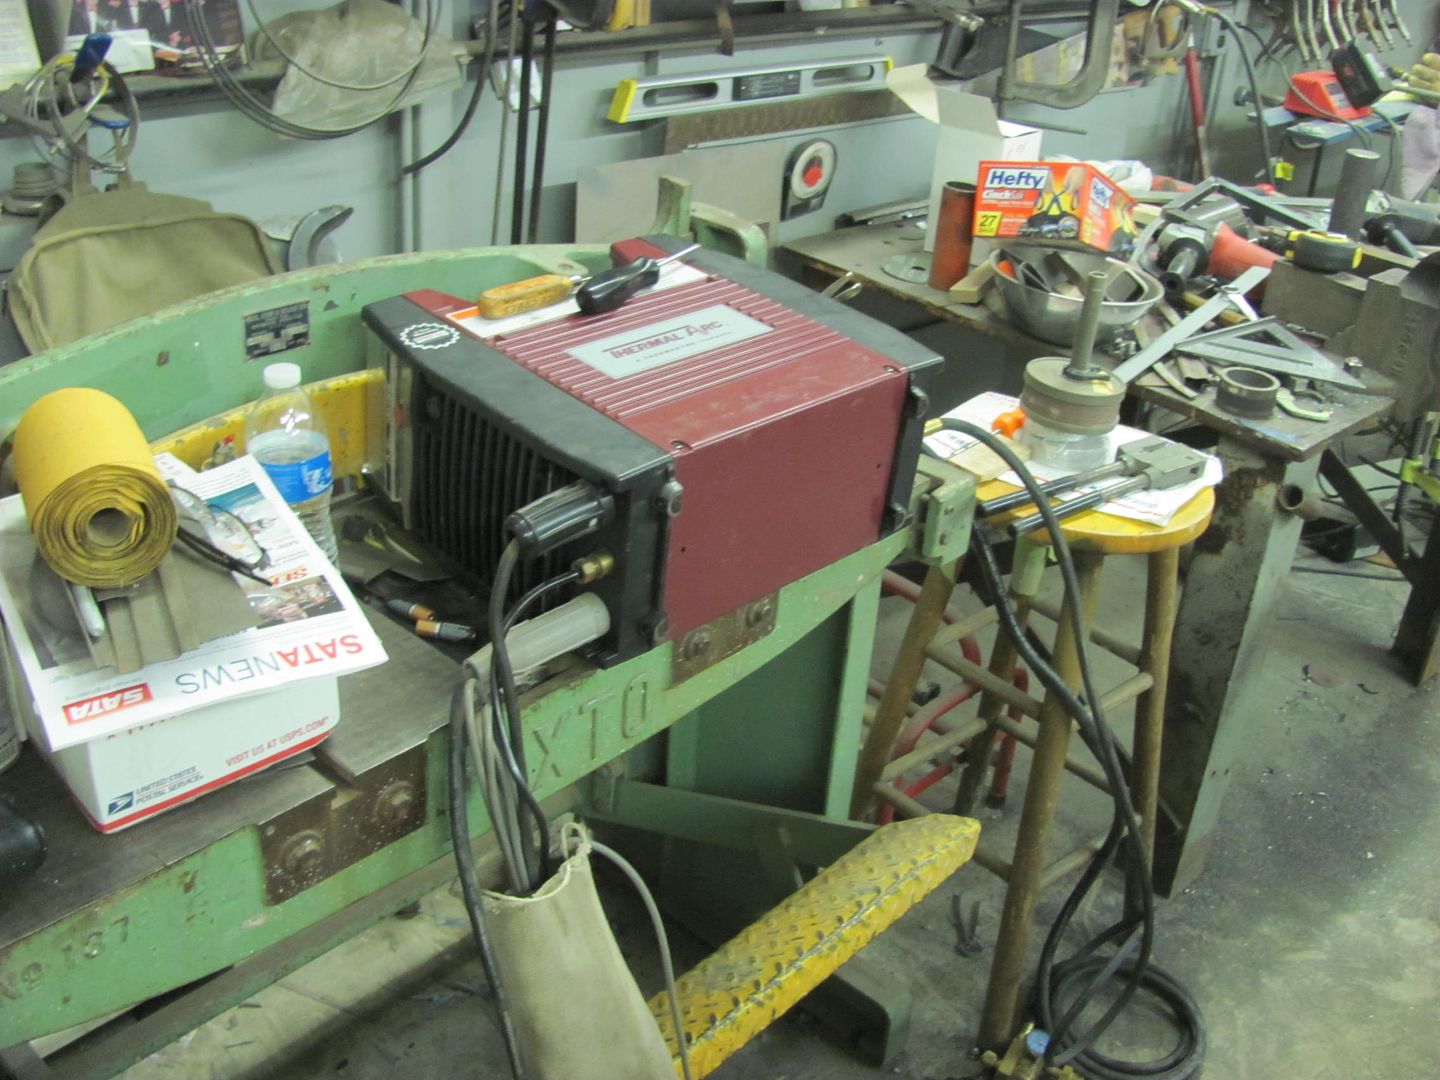
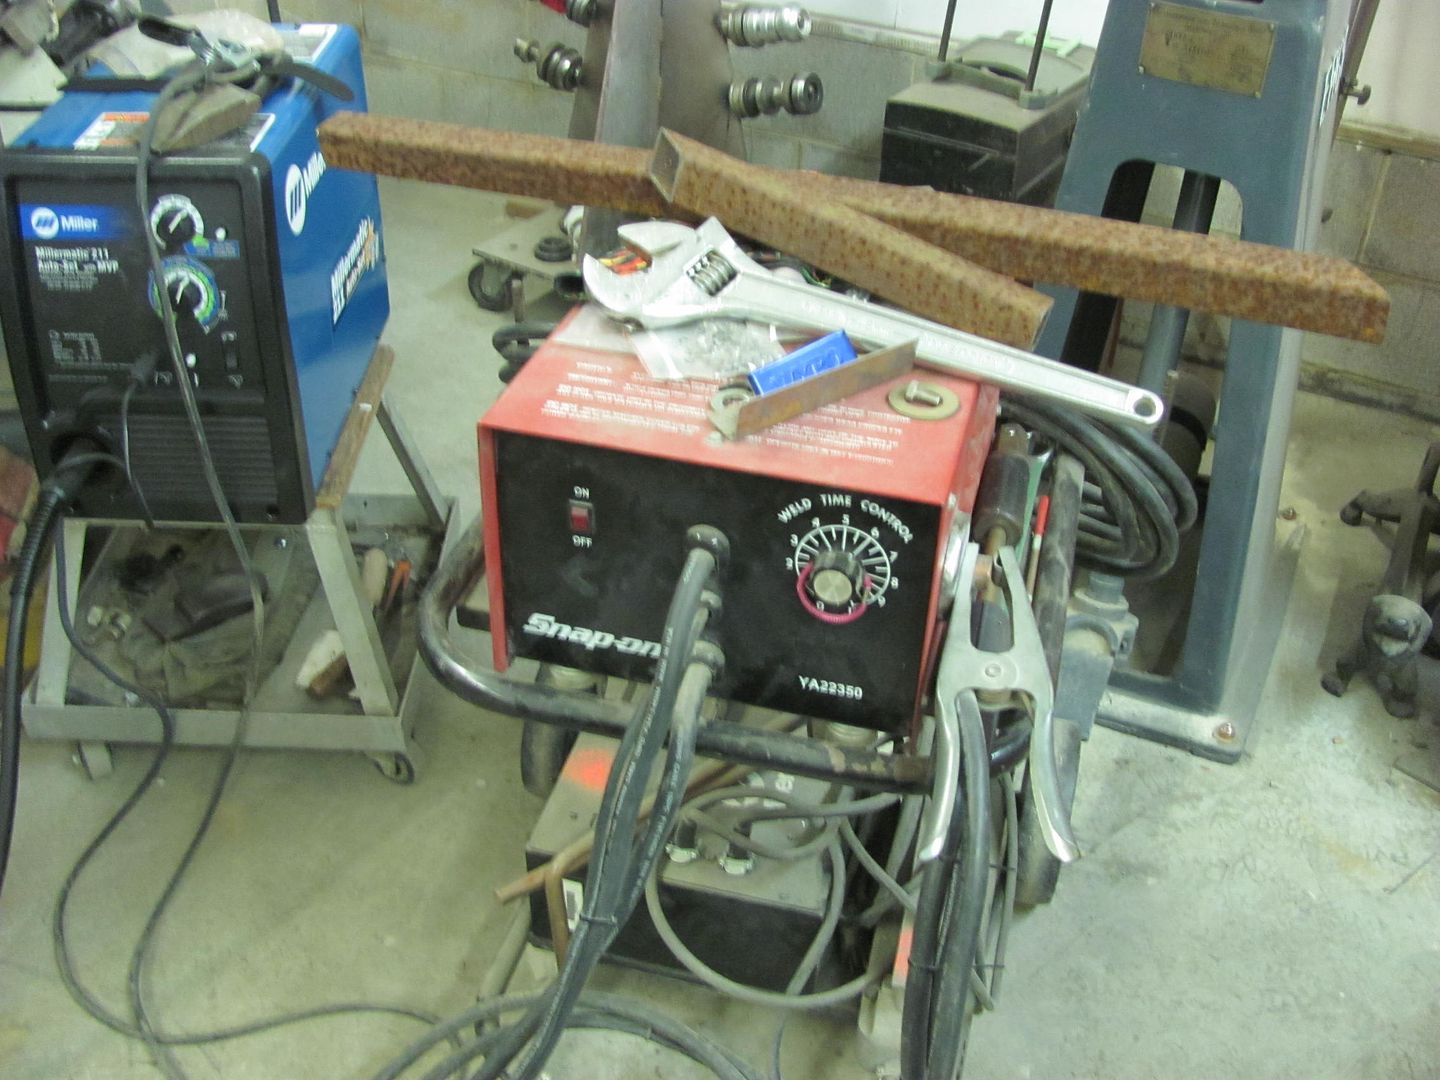
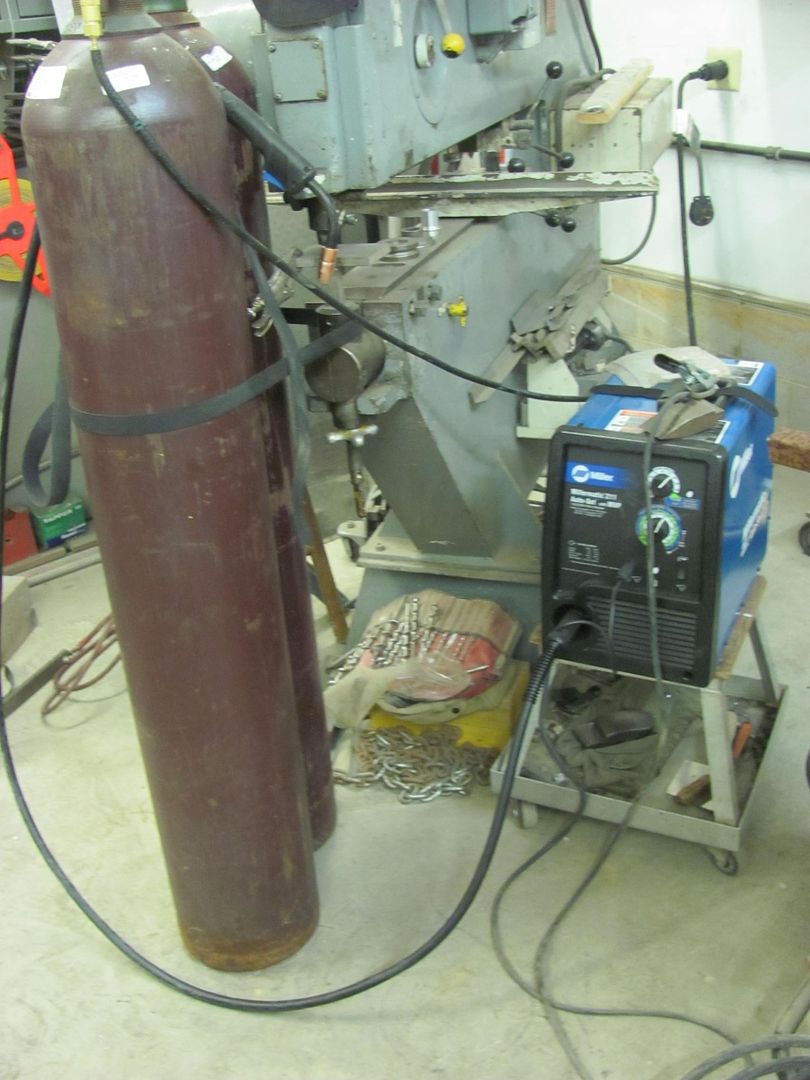
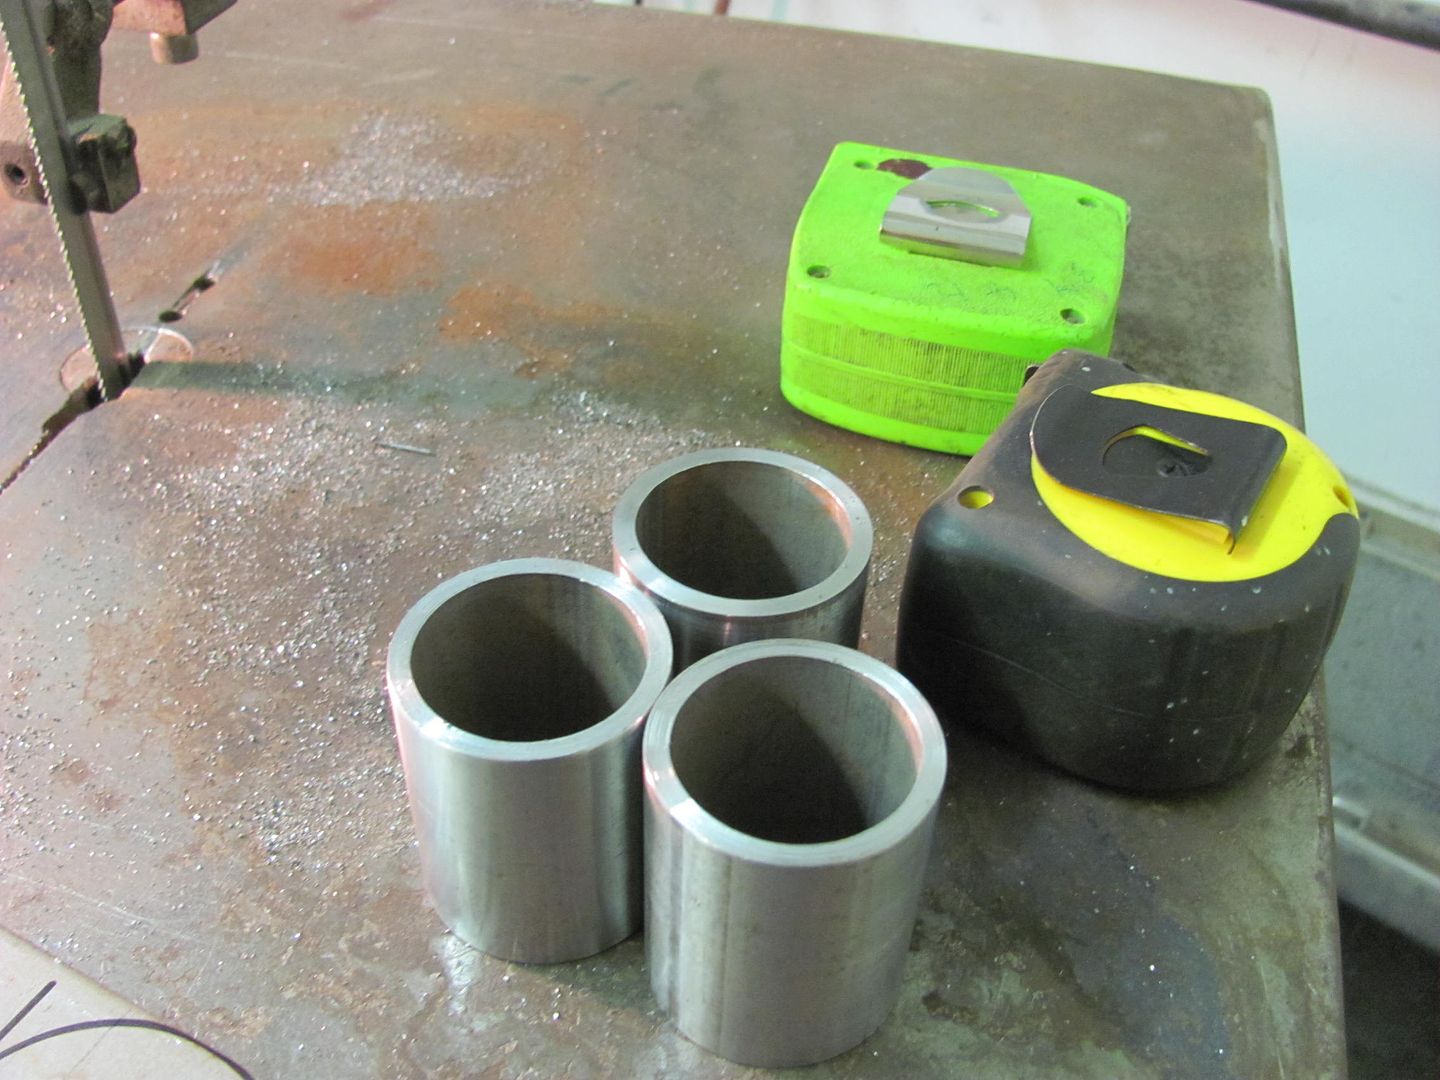
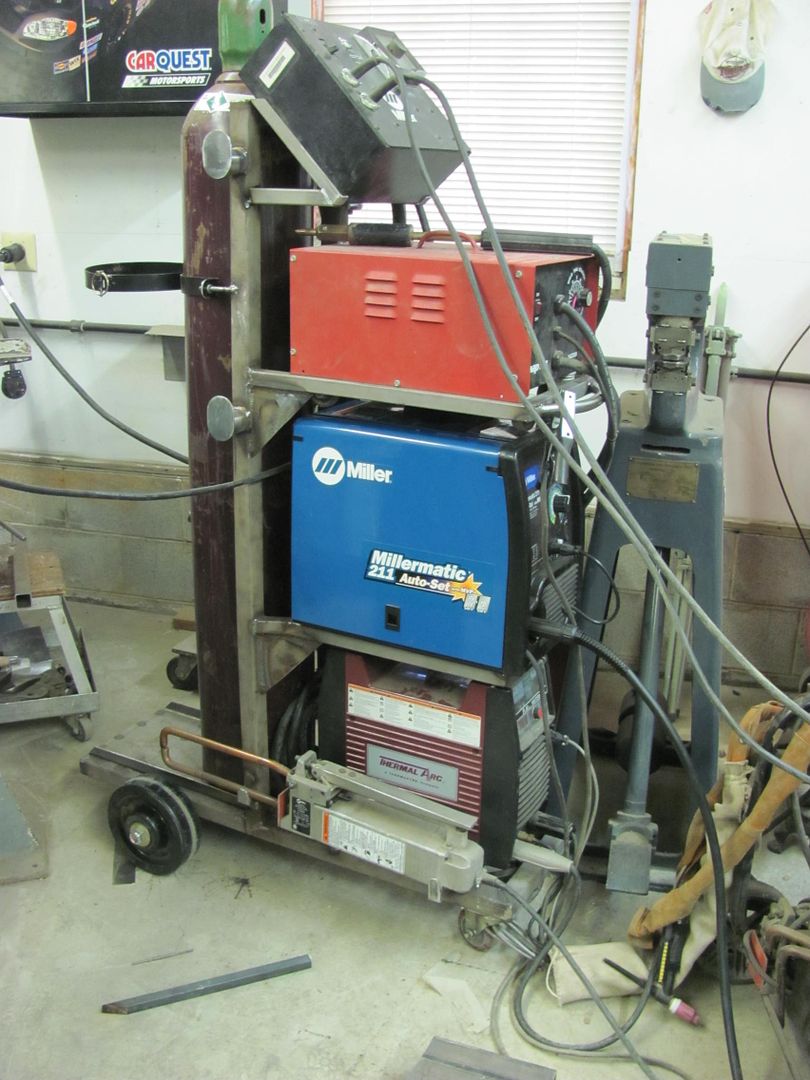
Sold it on CL, time now to consolidate. My shop space is limited, and I need to incorporate the new Miller 211, the Hypertherm Tig, and the Snap On dent puller, and two bottles:

Picture1499.jpg


Picture1500.jpg


Picture1501.jpg


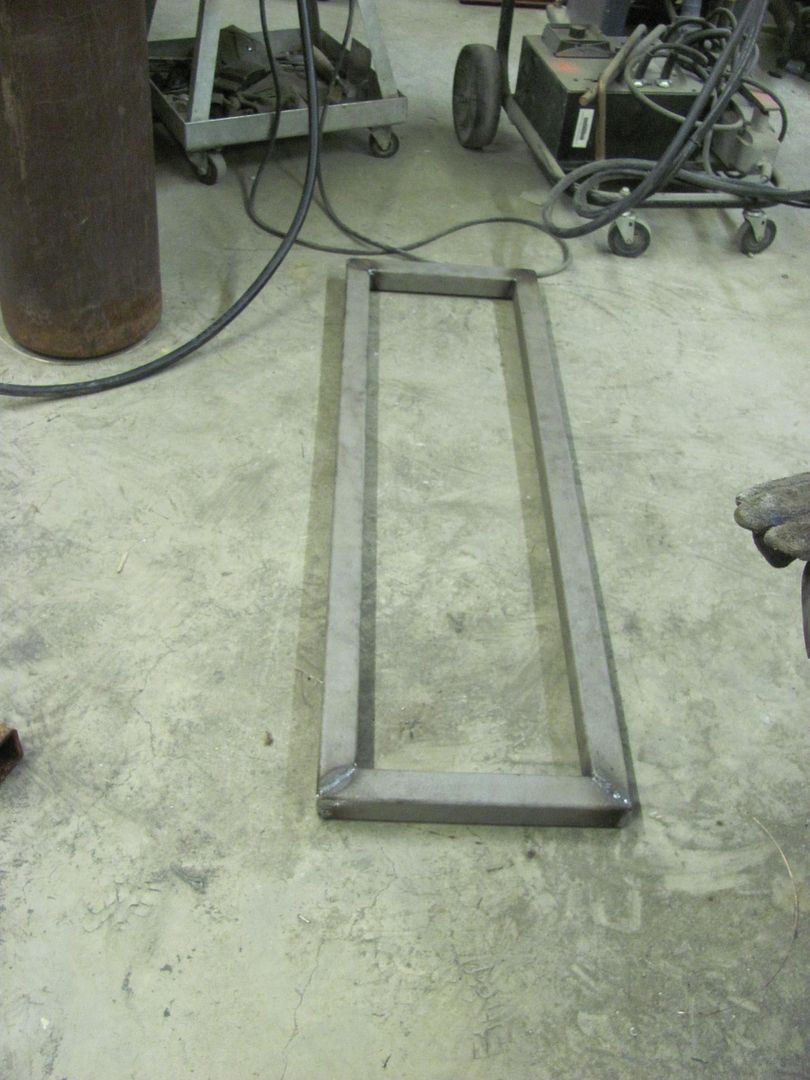
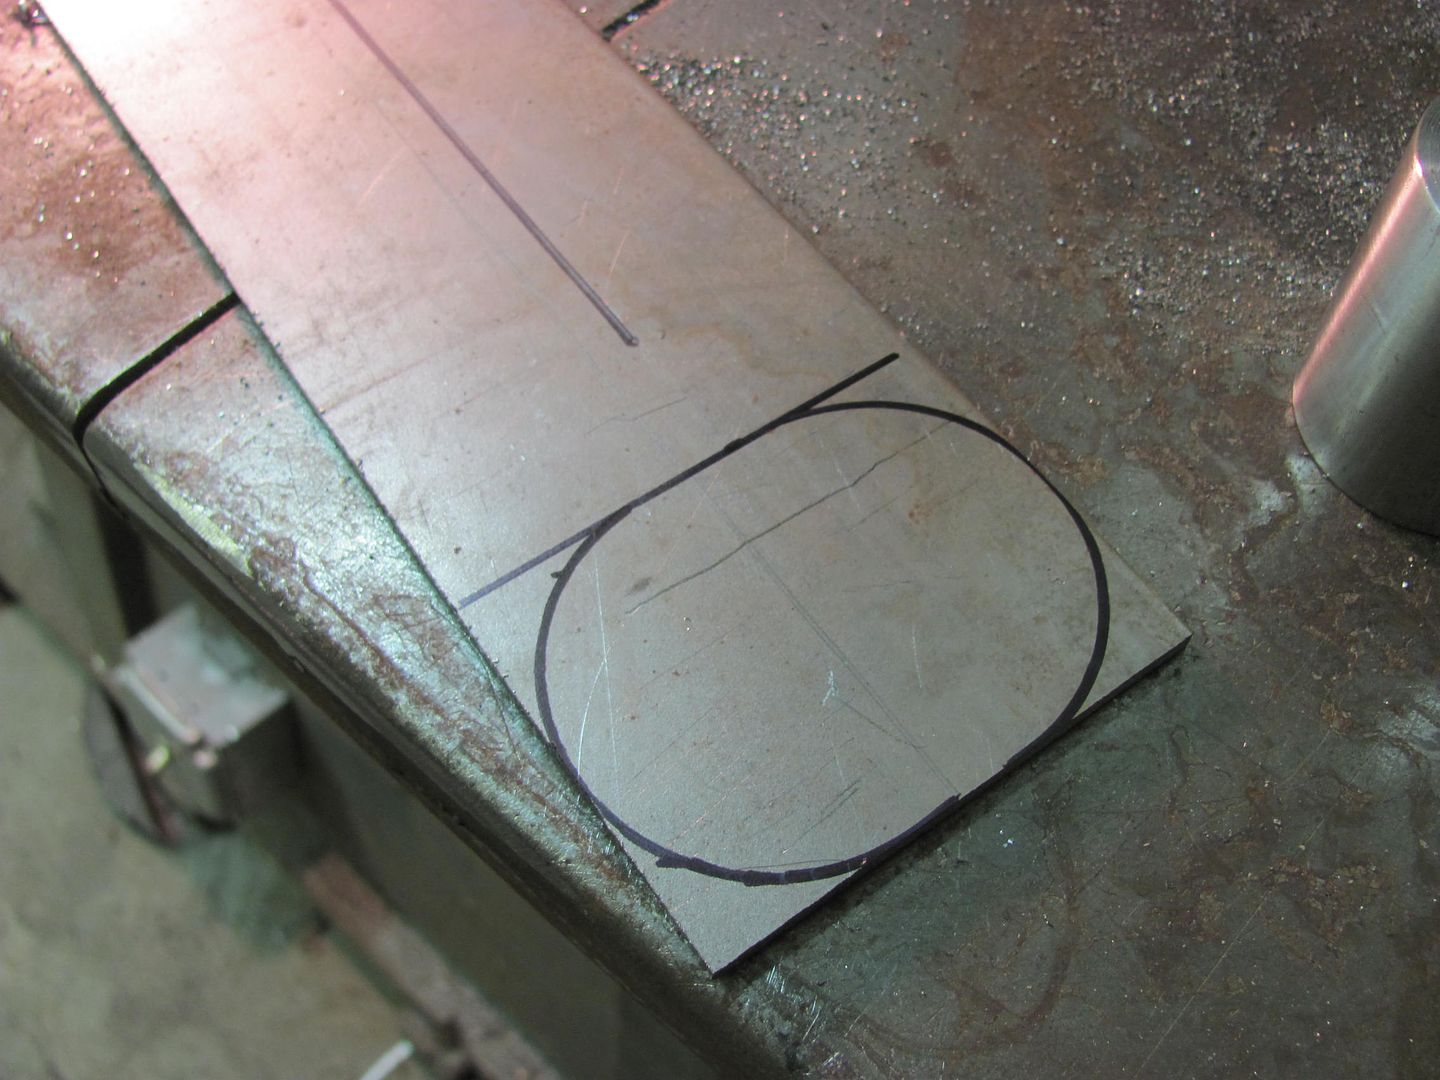
Starting with the base, some 1-1/2 square tubing makes up the frame. This stuff was free, and as with most free stuff, it isn't, as Kyle spent quite a bit of time media blasting rusty square tubing that has been sitting outdoors for a number of years.

Picture1502.jpg


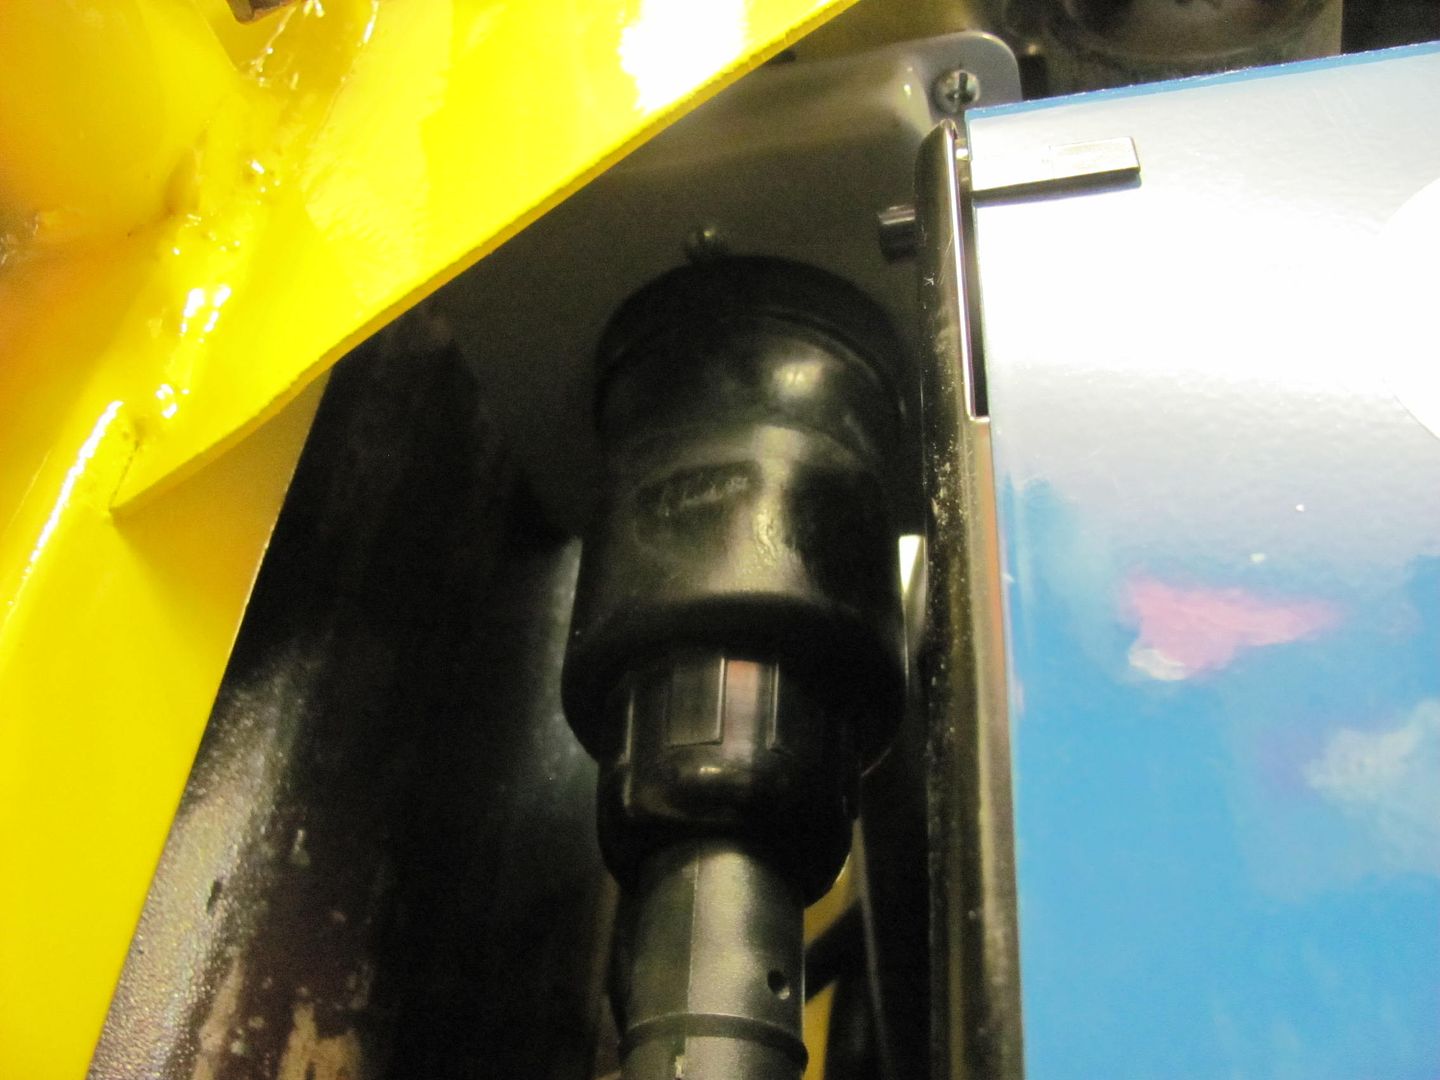
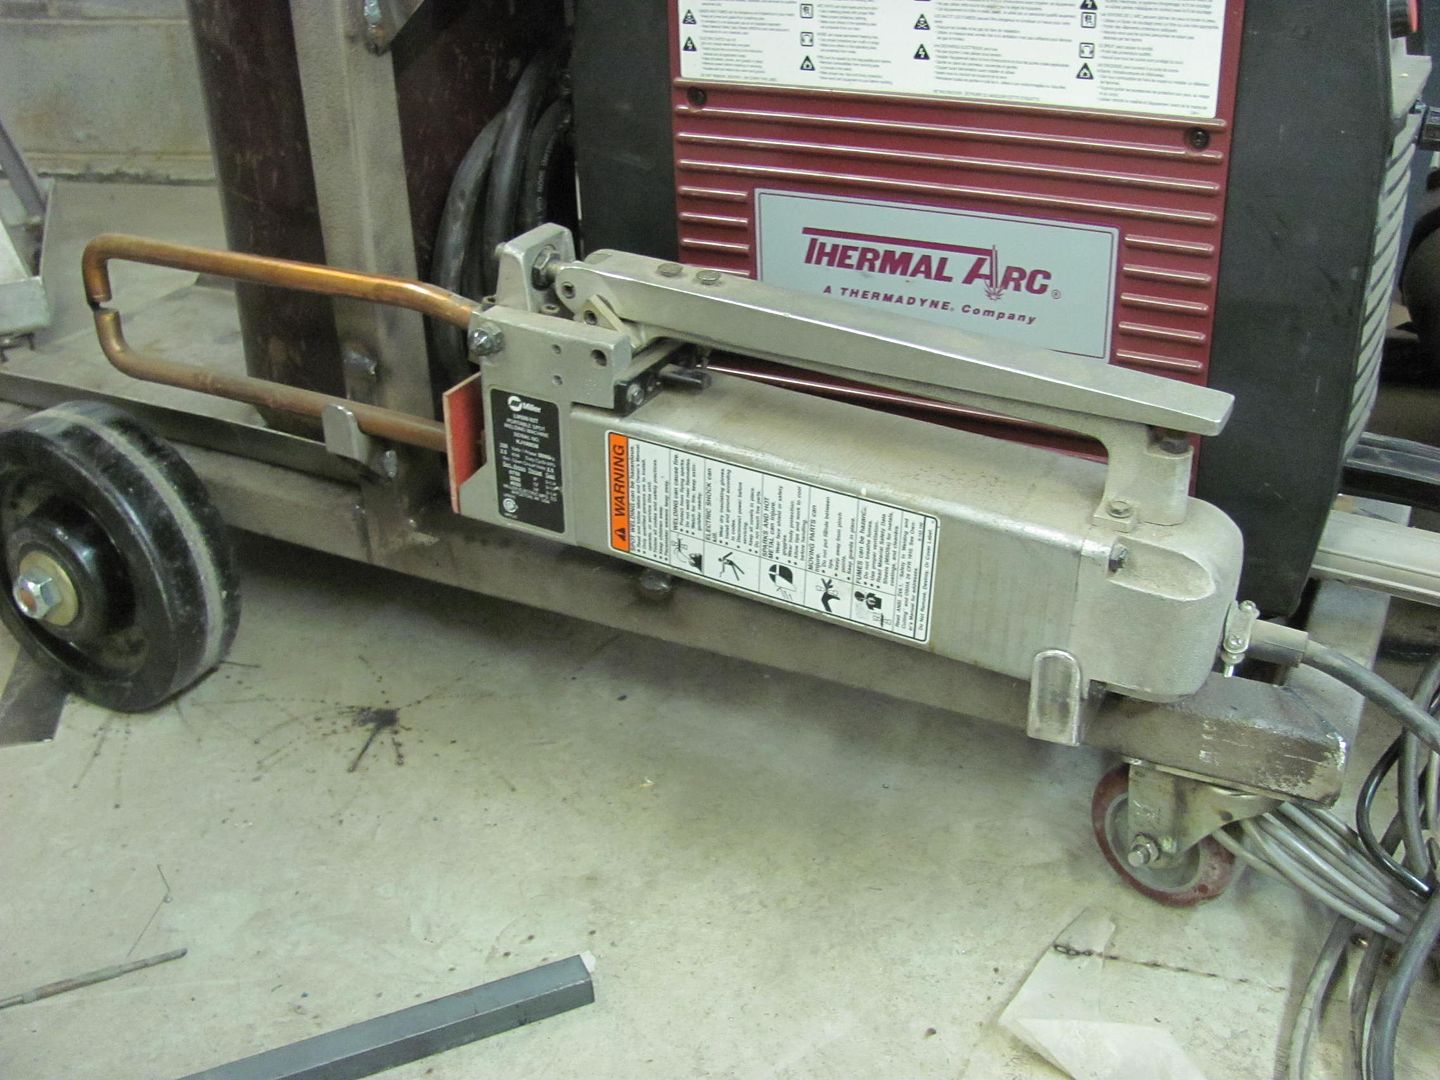
The Tig will go on the bottom, and it has some mounting holes on the bottom side...

Picture1503.jpg


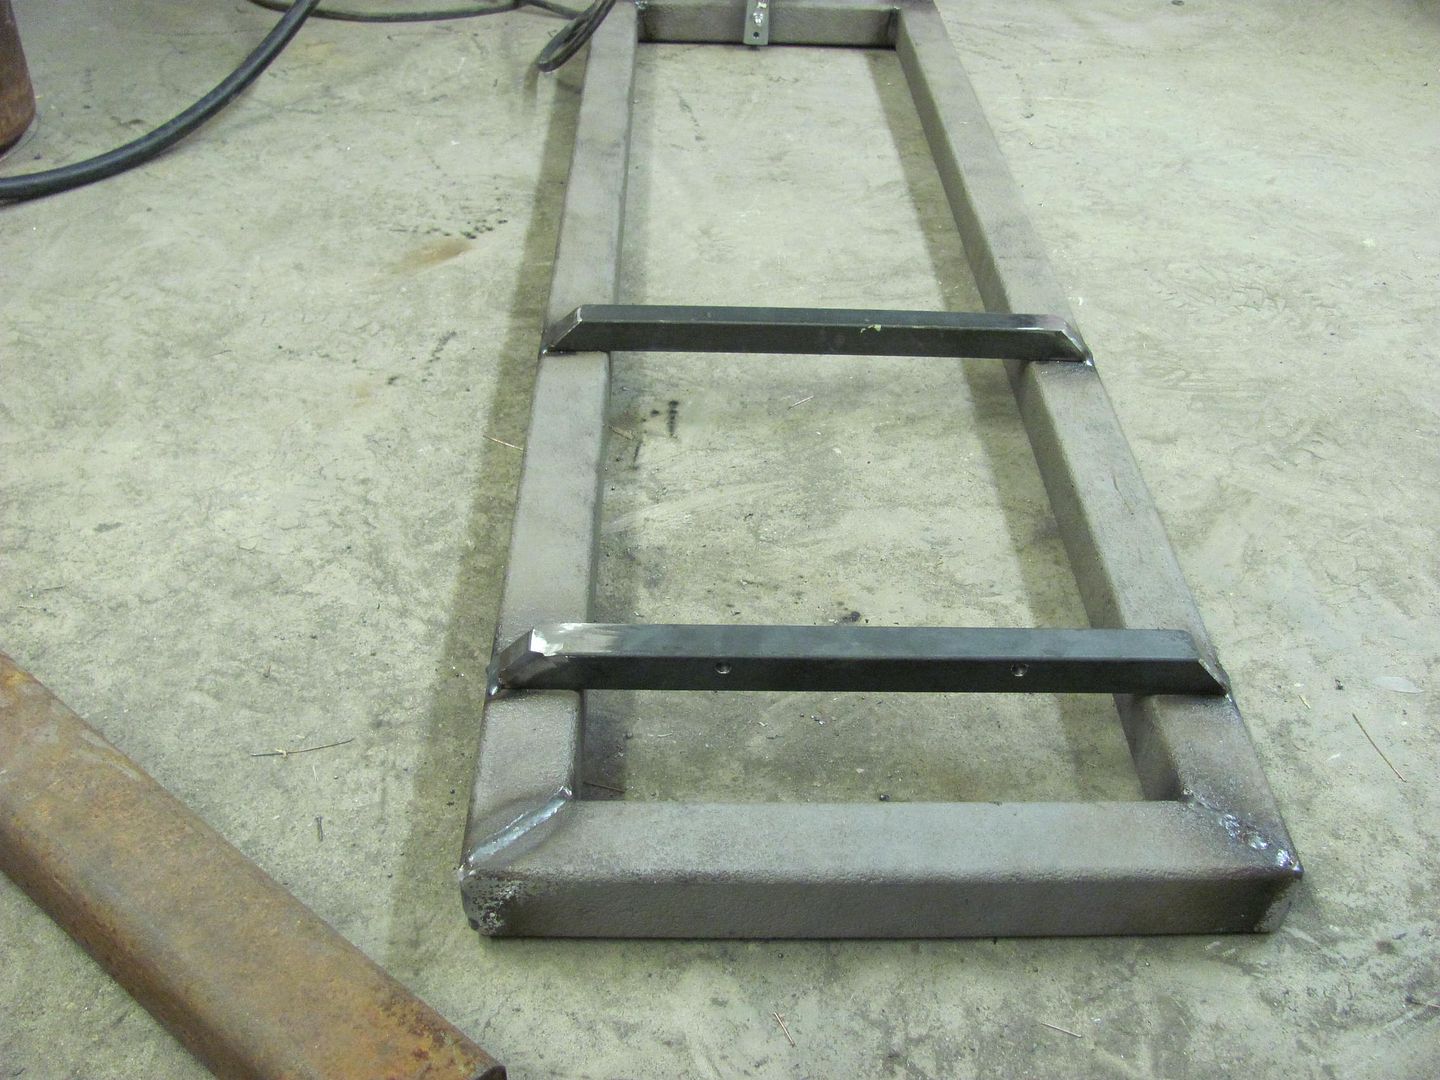
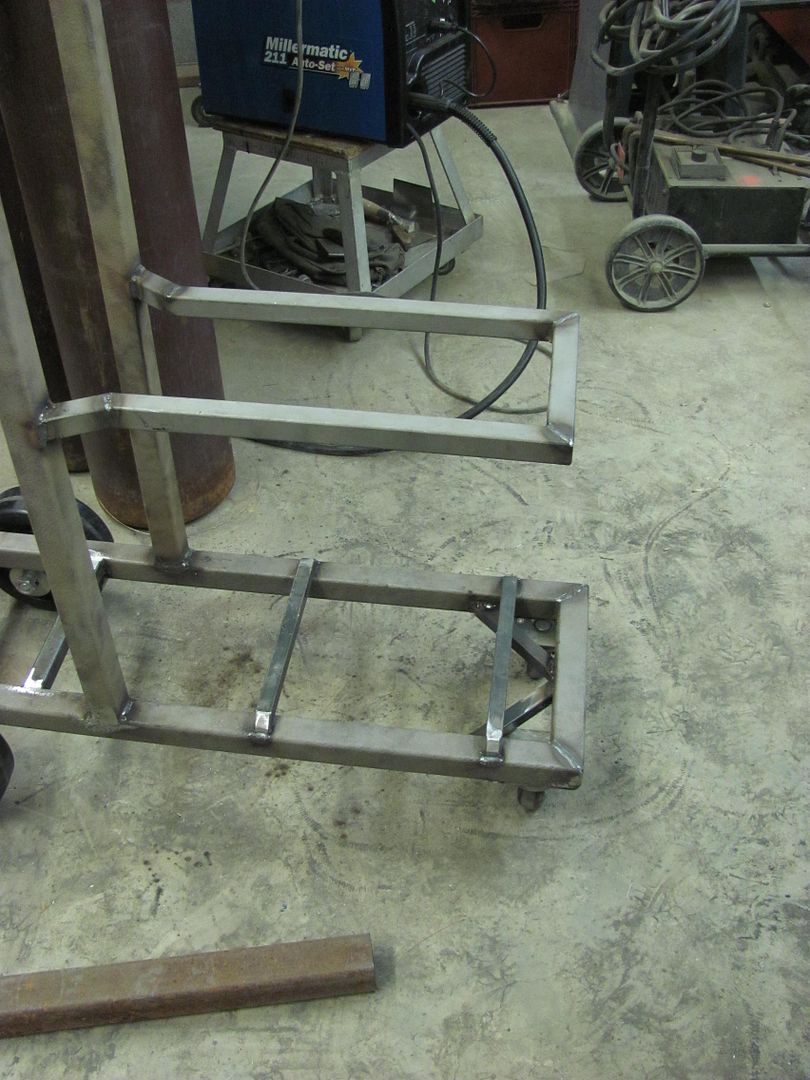
So some 3/4 square stock was used to make some rails for the Tig, along with some holes to tie in the front end..

Picture1504.jpg


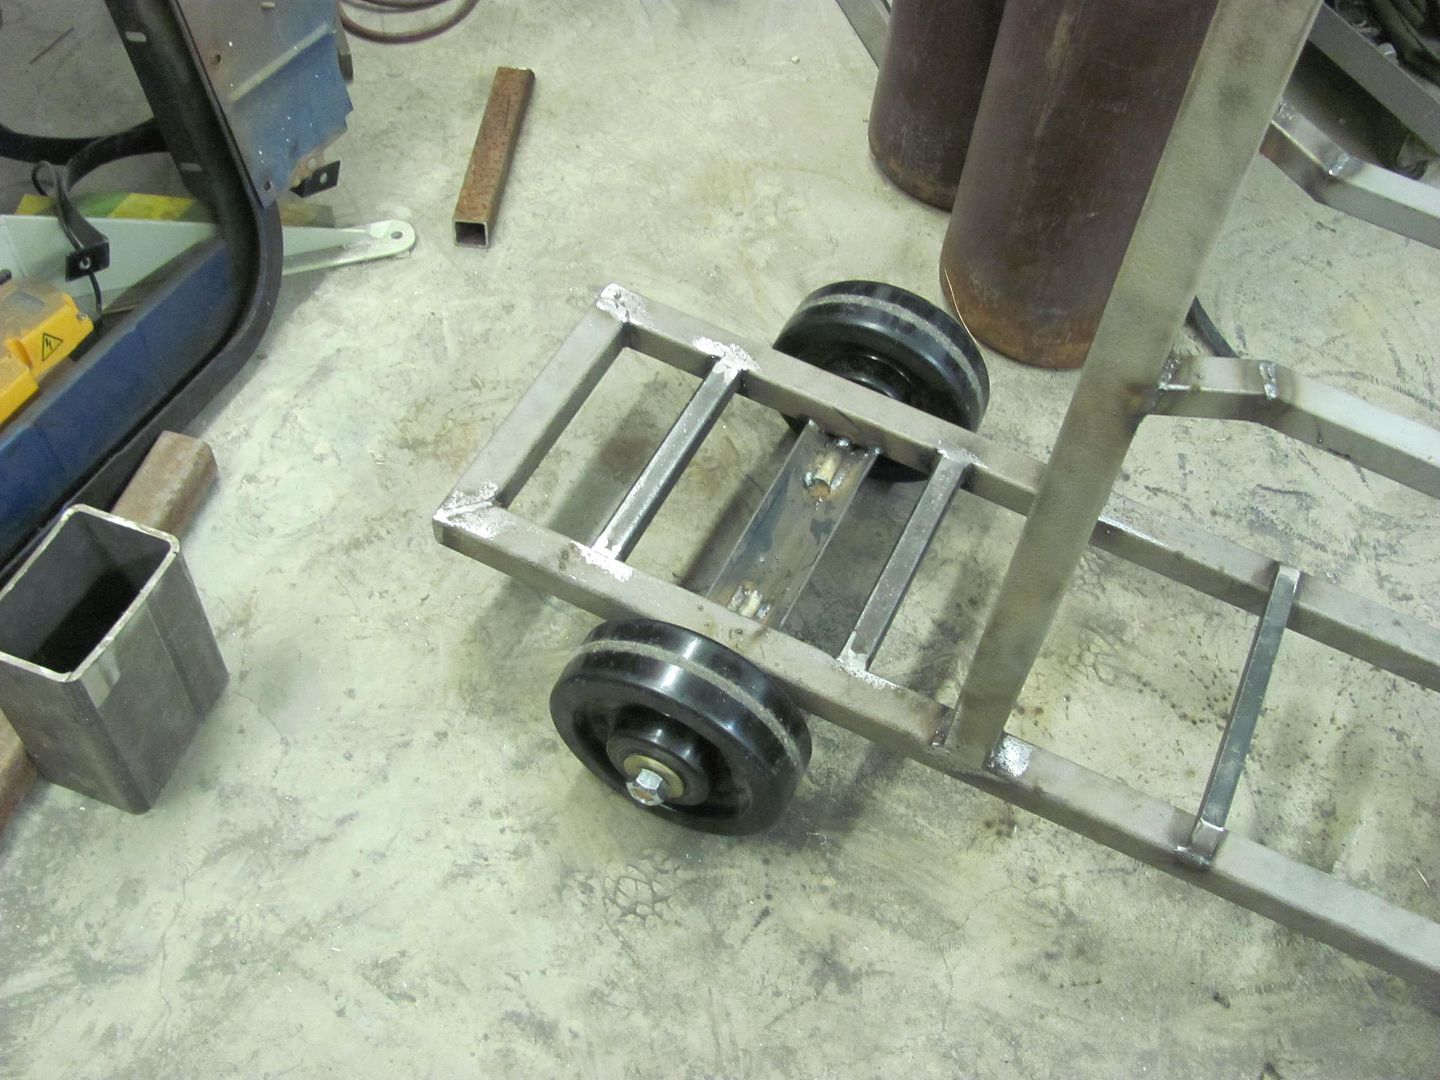
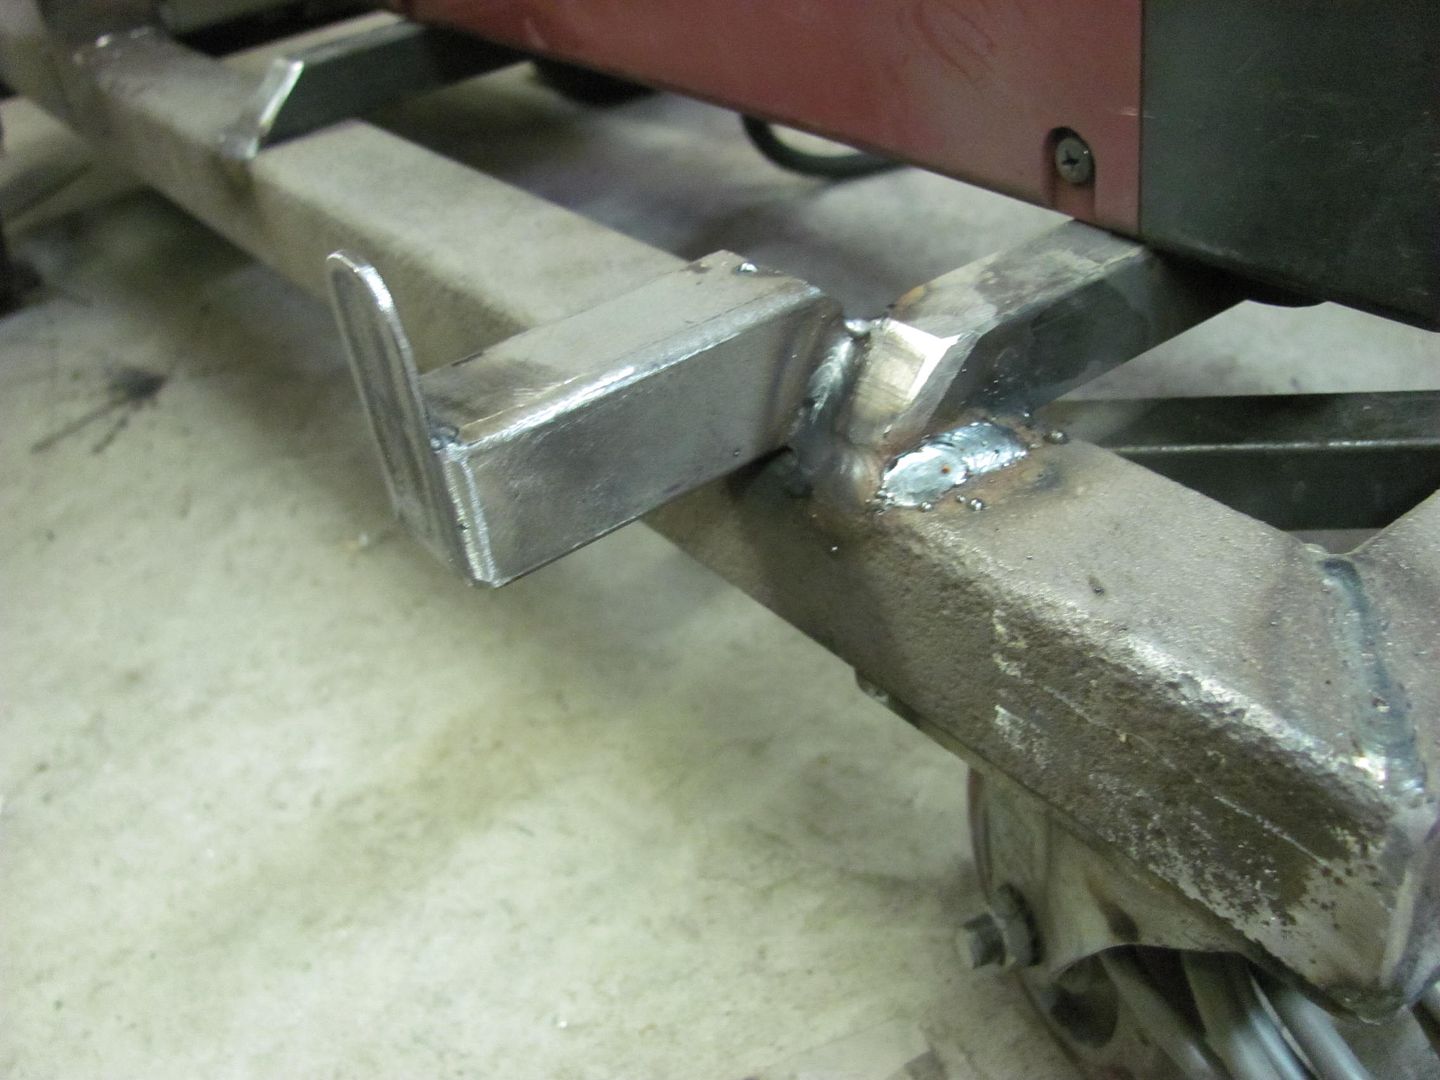
adding the front casters.....

Picture1509.jpg


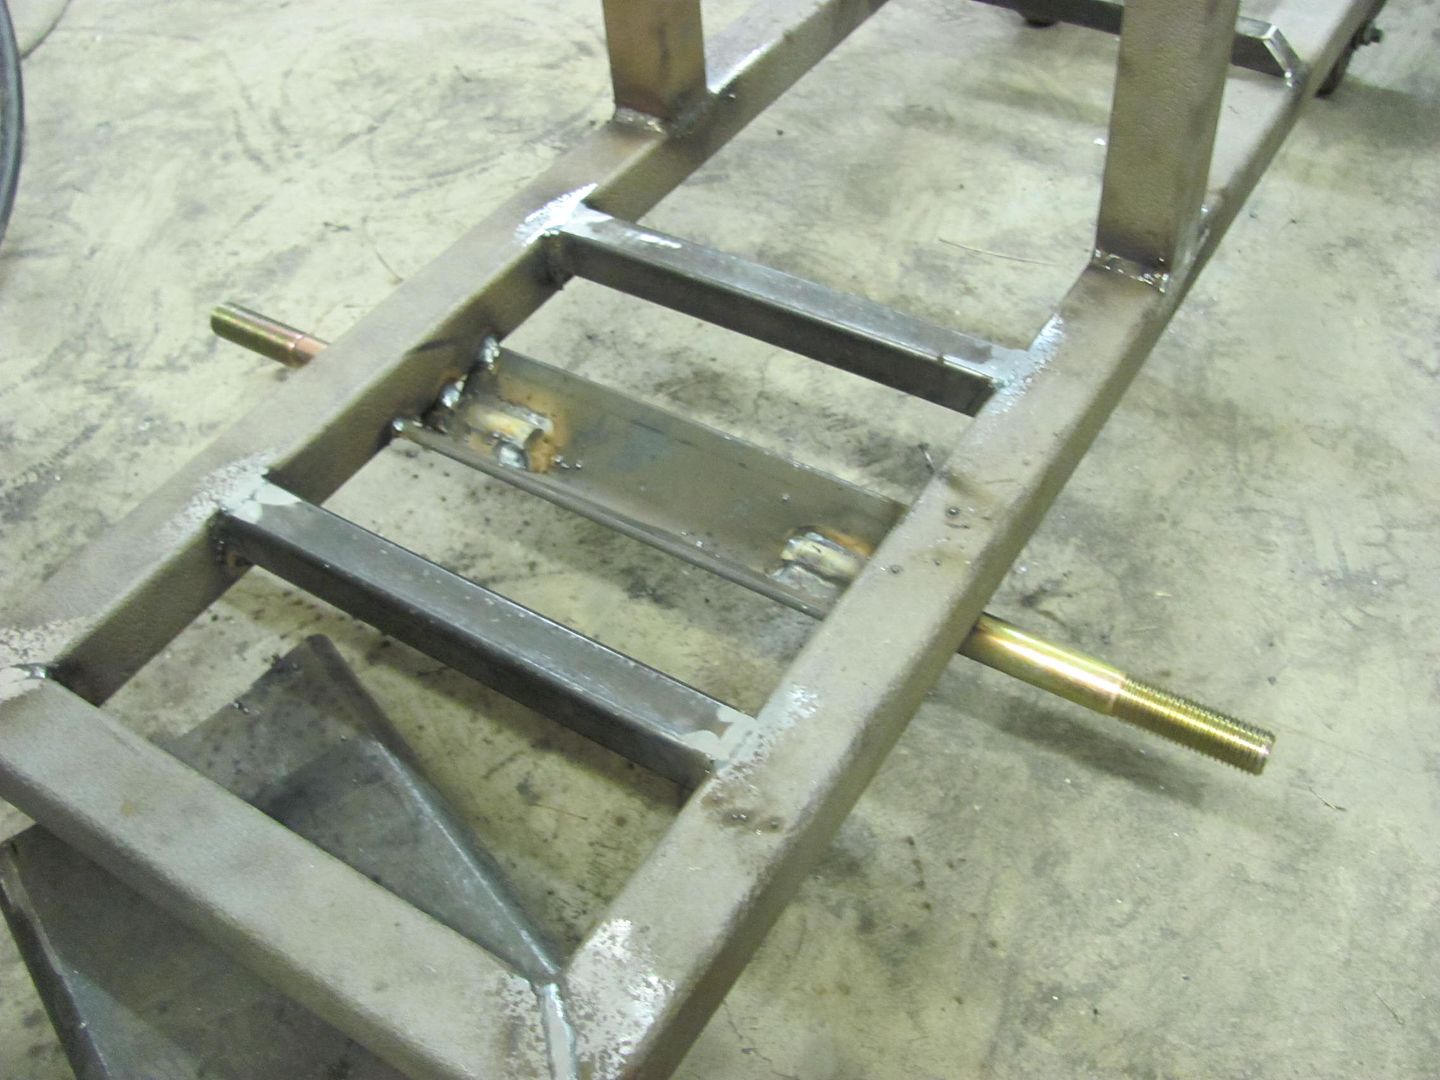
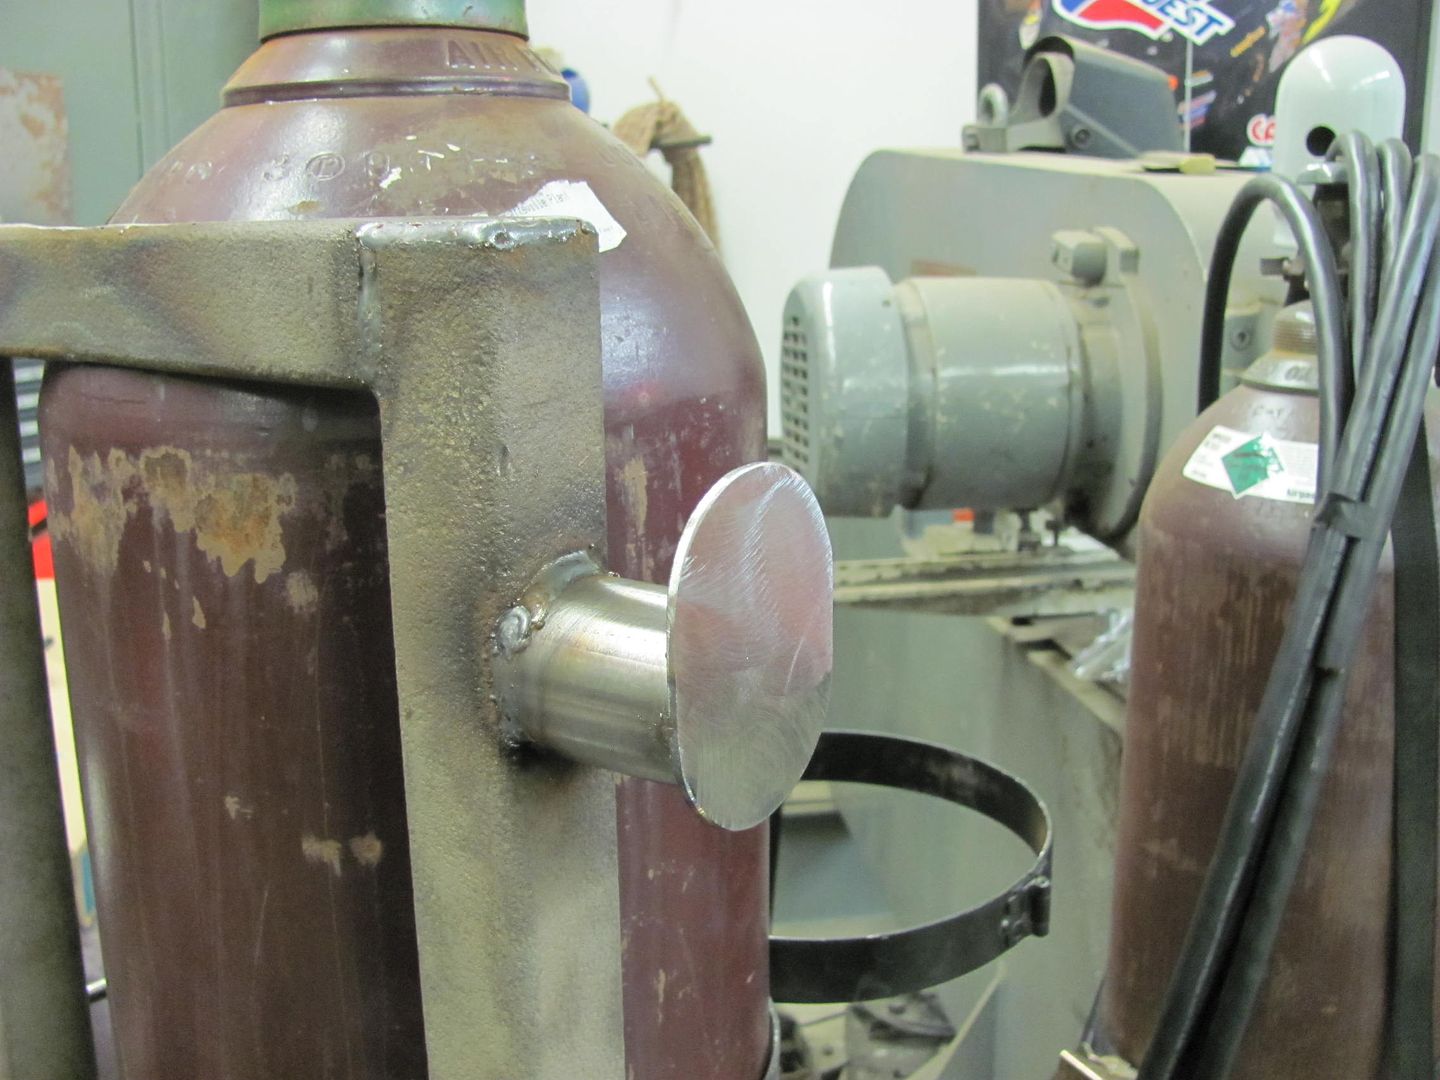
A cross brace was added under the center line of the 2 bottles...

Picture1512.jpg


12 gauge will be used to form a tray under the bottles...

Picture1513.jpg


Support bracket added for Mig welder:

Picture1510.jpg


Picture1511.jpg


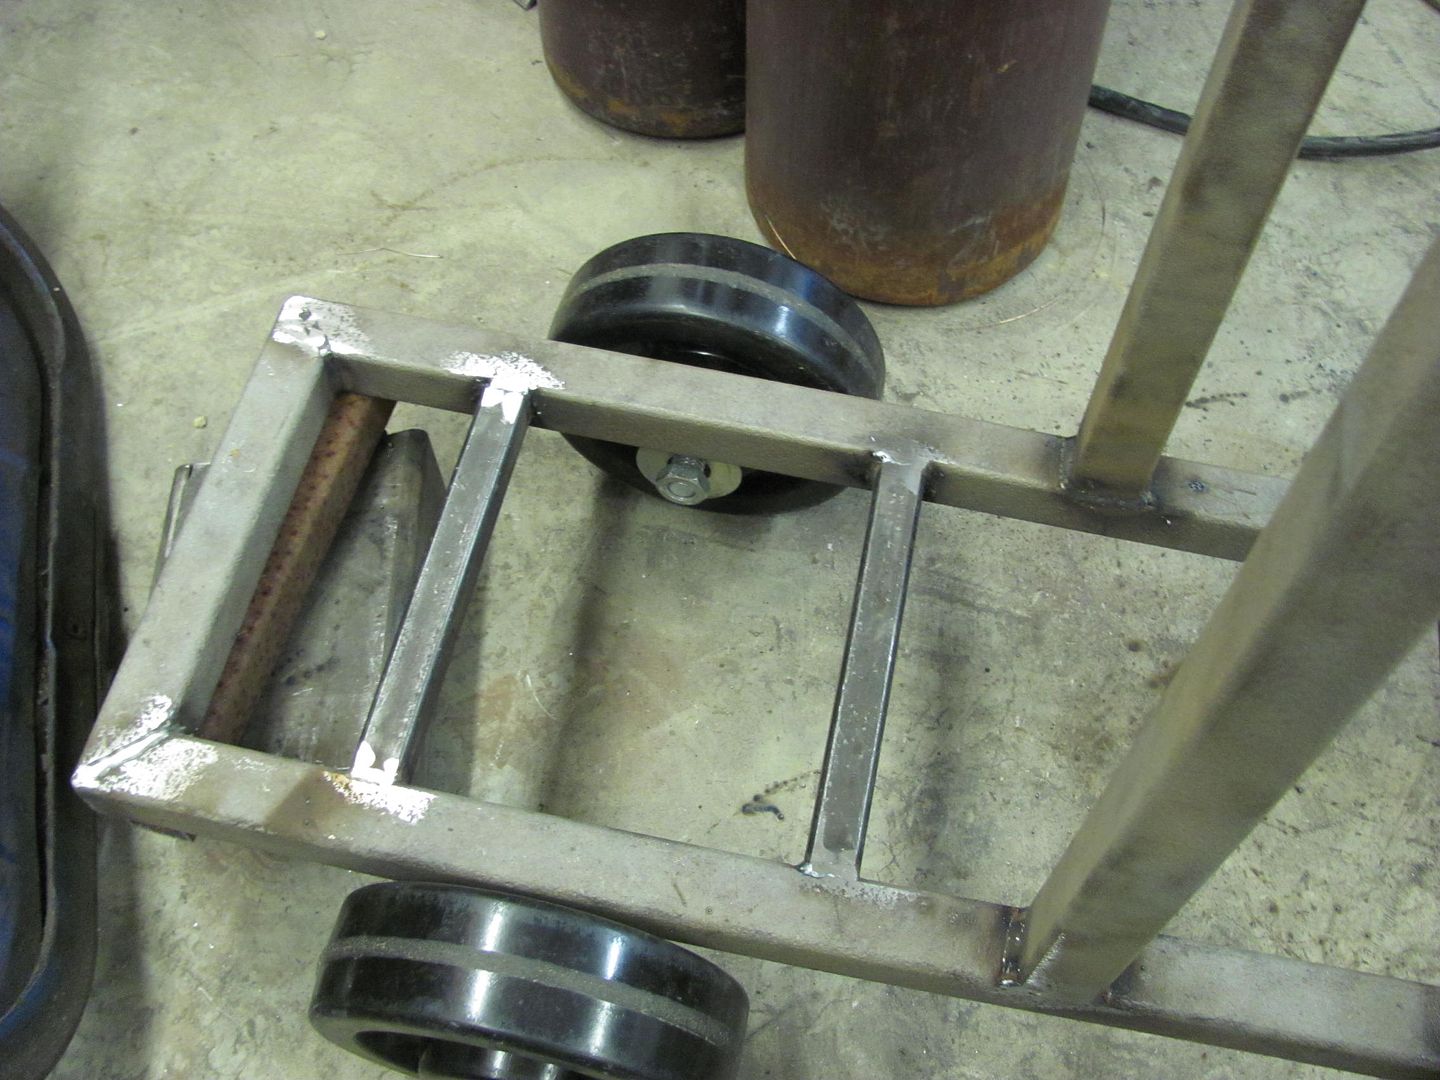
the rear axle was made from a piece of angle and two 3/4-10 bolts..

Picture1521.jpg


Picture1523.jpg


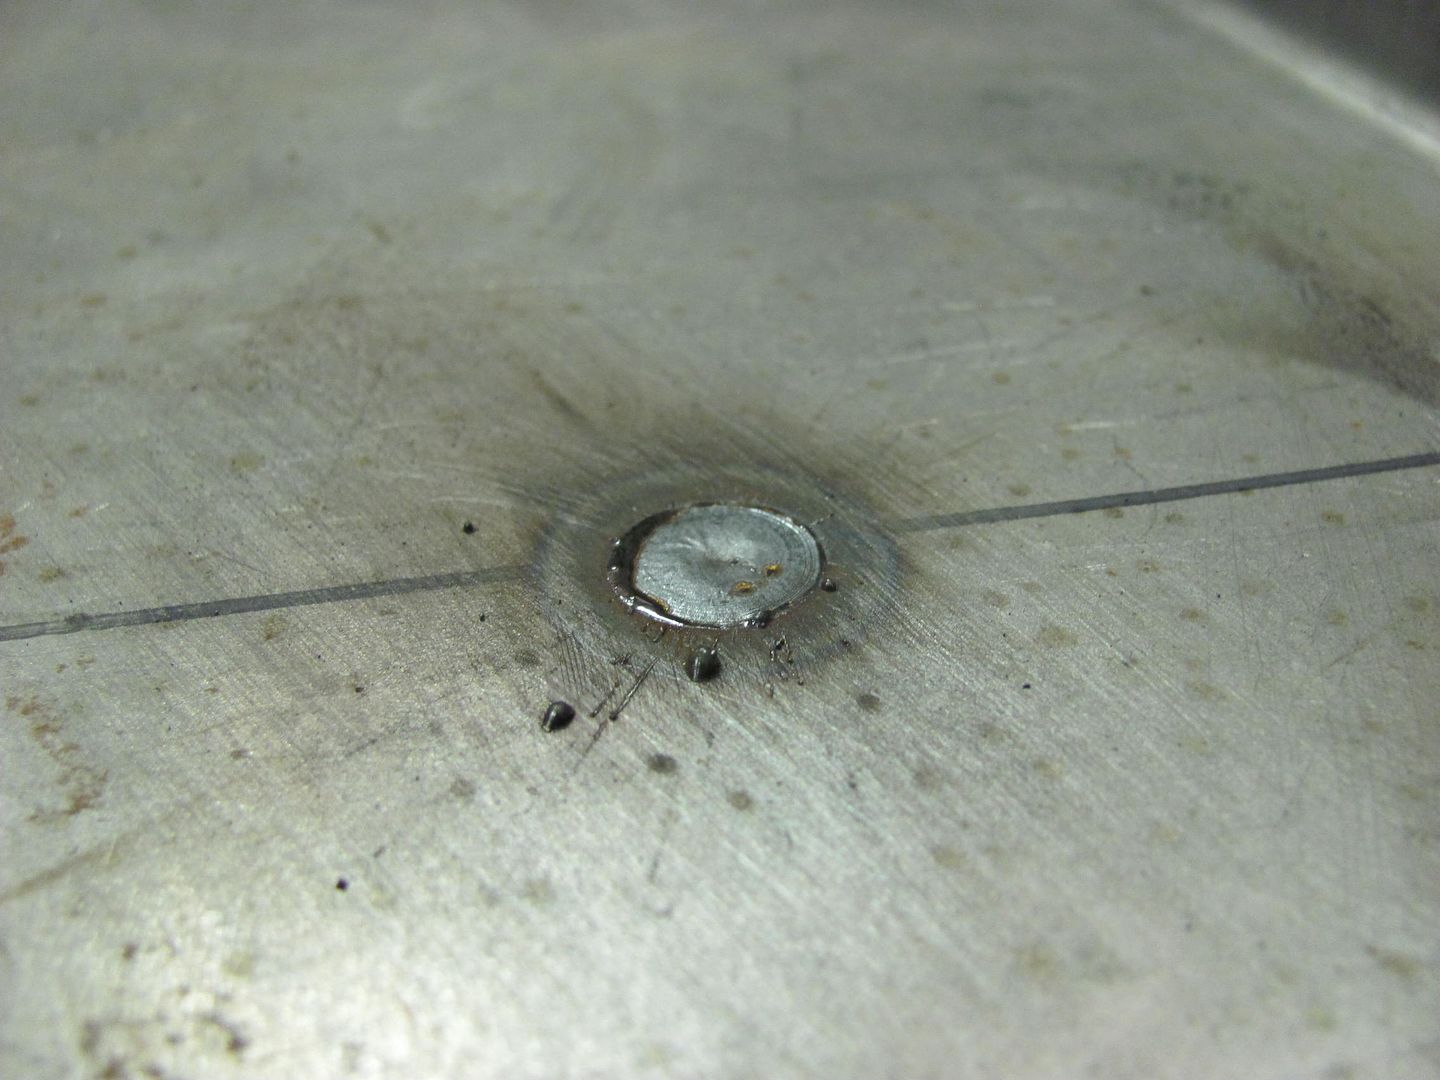
Rear bottle tray made from some 12 gauge, and welded on using about 3/8 diameter plug welds..

Picture1528.jpg


Picture1530.jpg


Top shelf added along with some gussets made of 12 gauge..

Picture1533.jpg


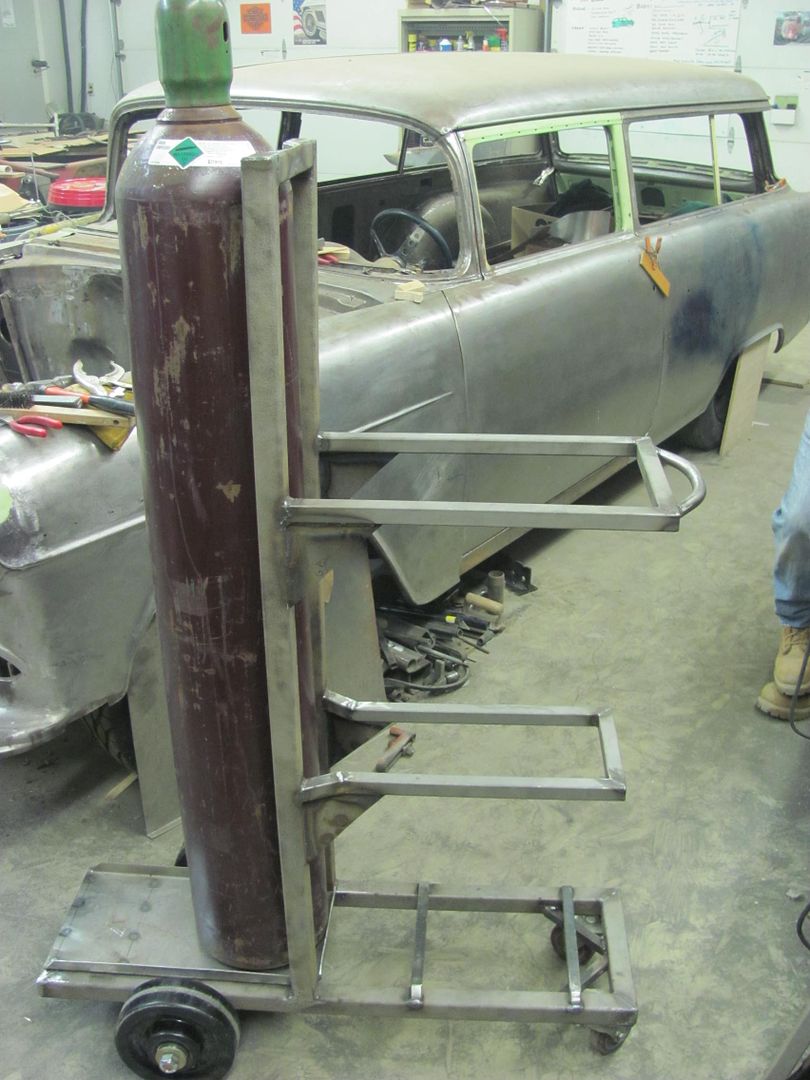
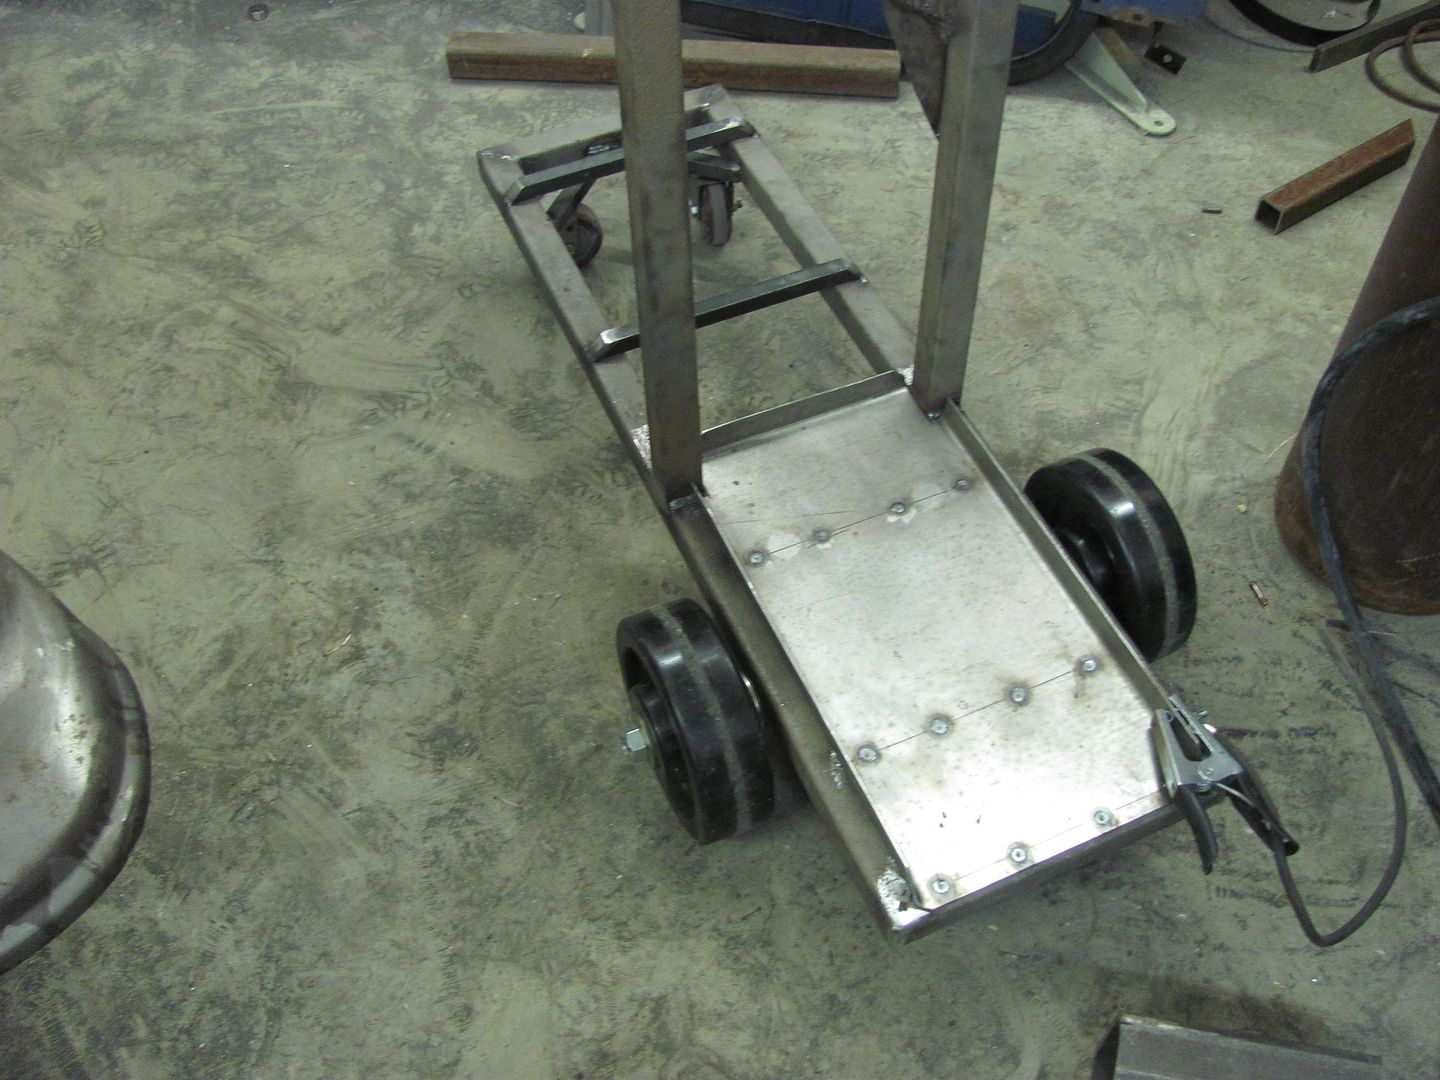
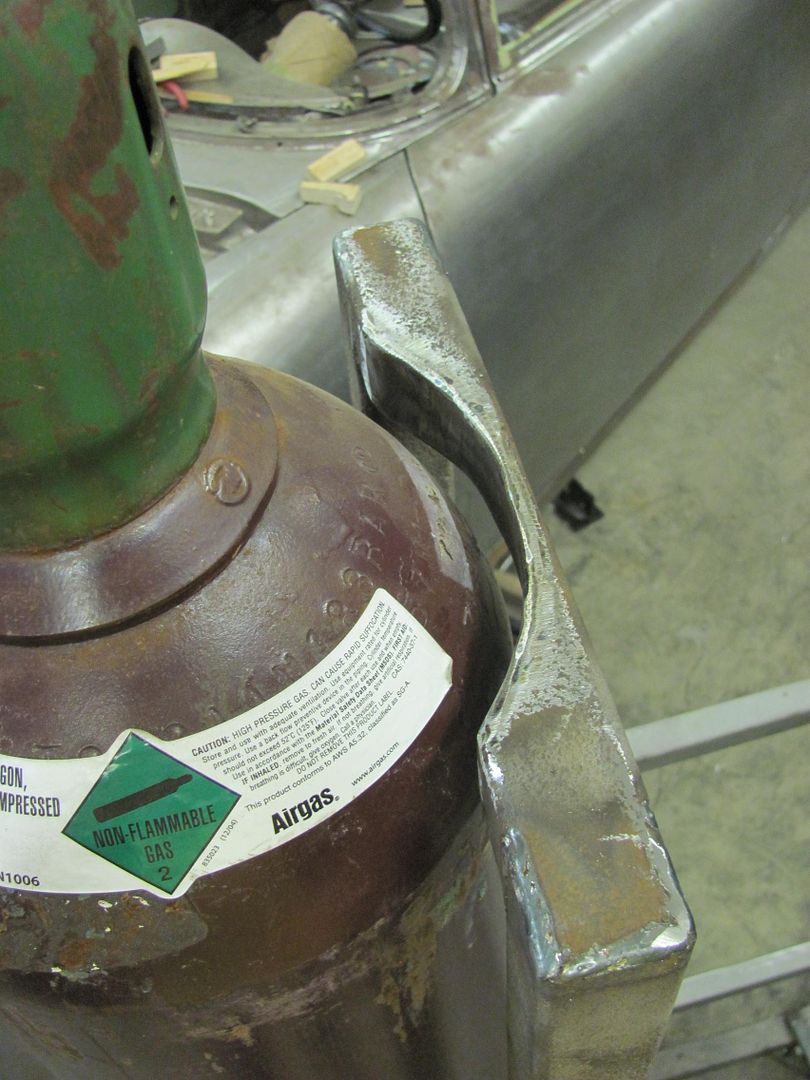
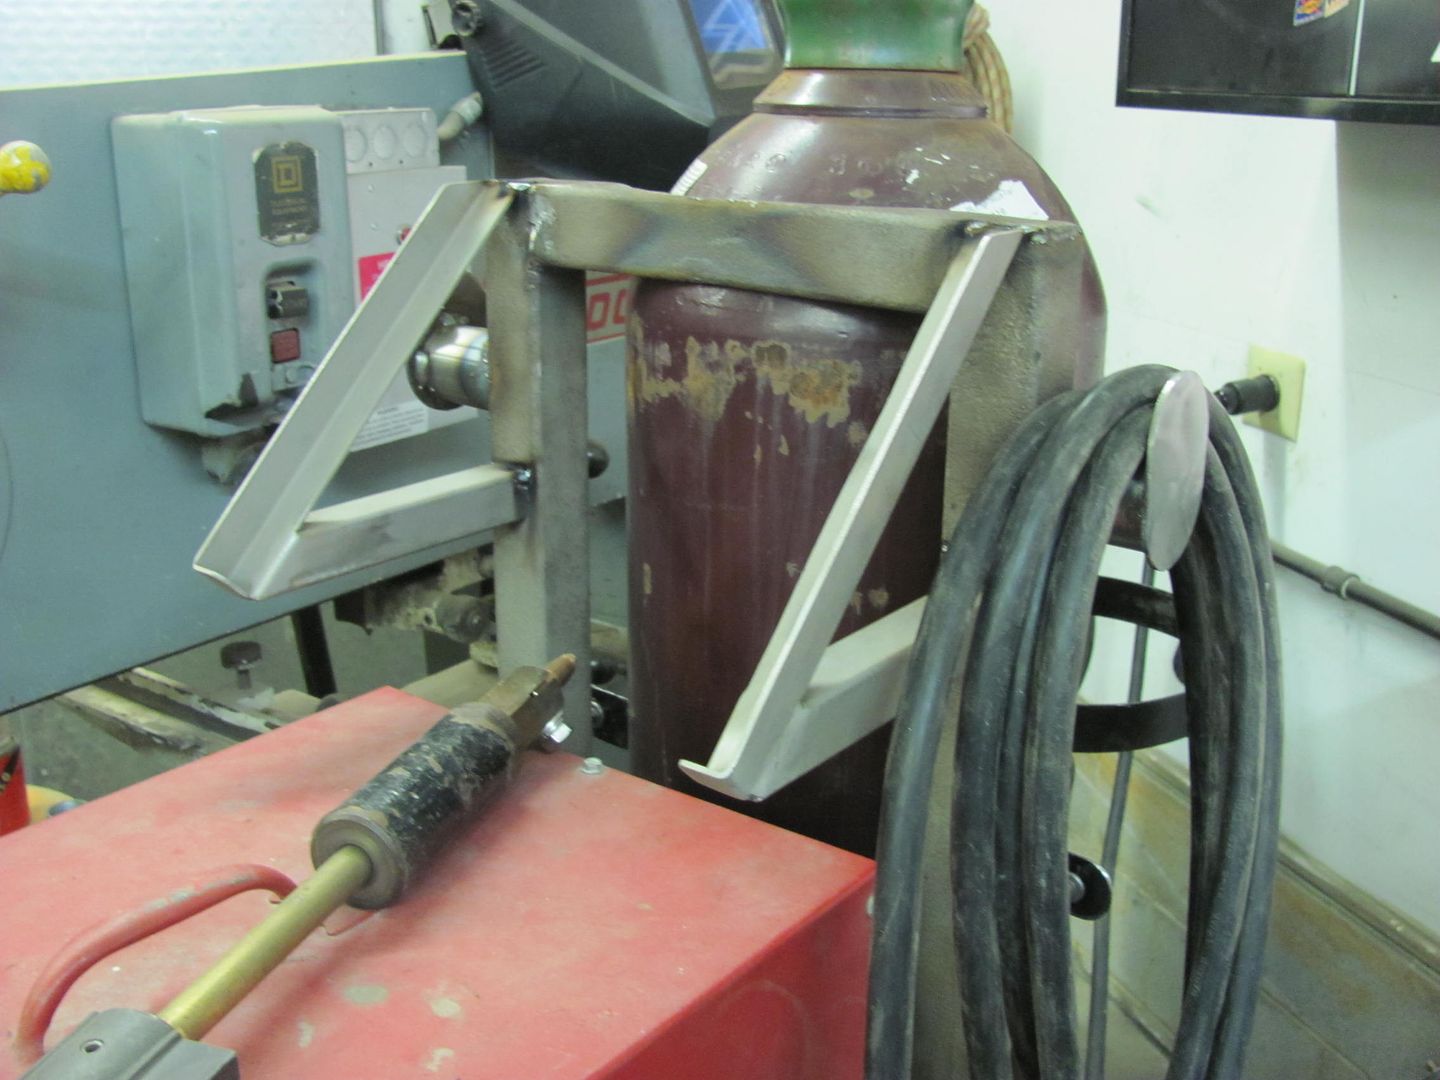
Bottle relief and pull handle added....

Picture1532.jpg


Picture1534.jpg


Picture1536.jpg


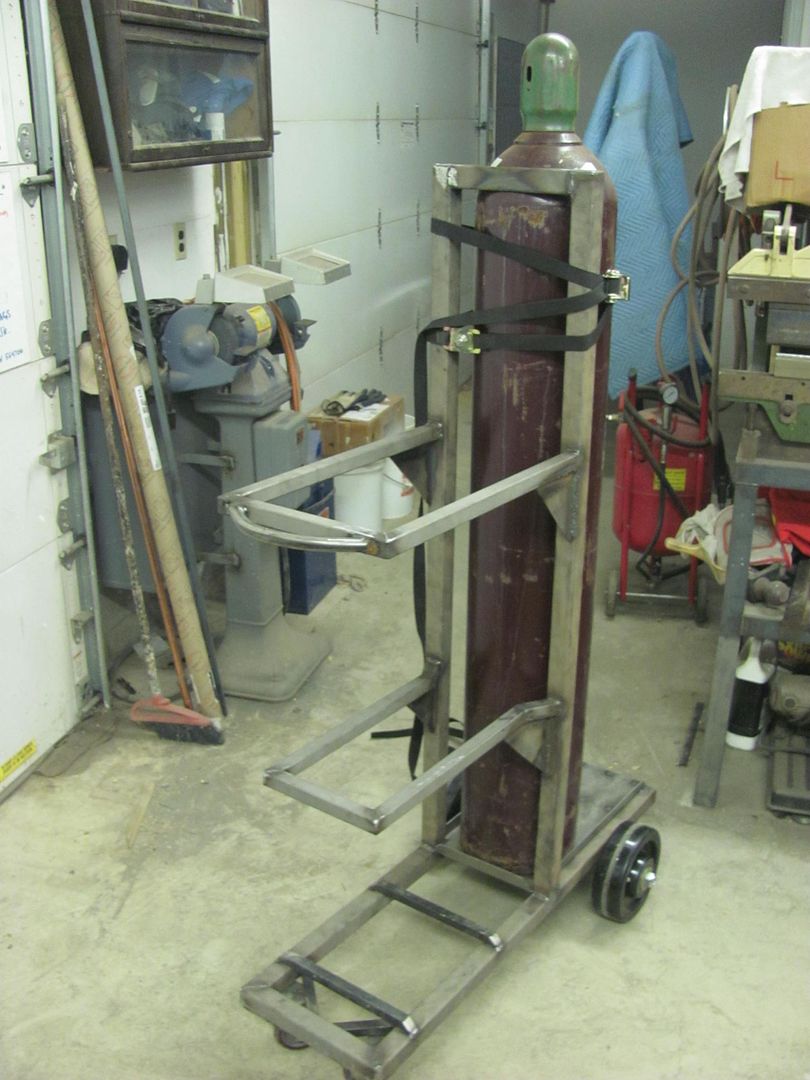
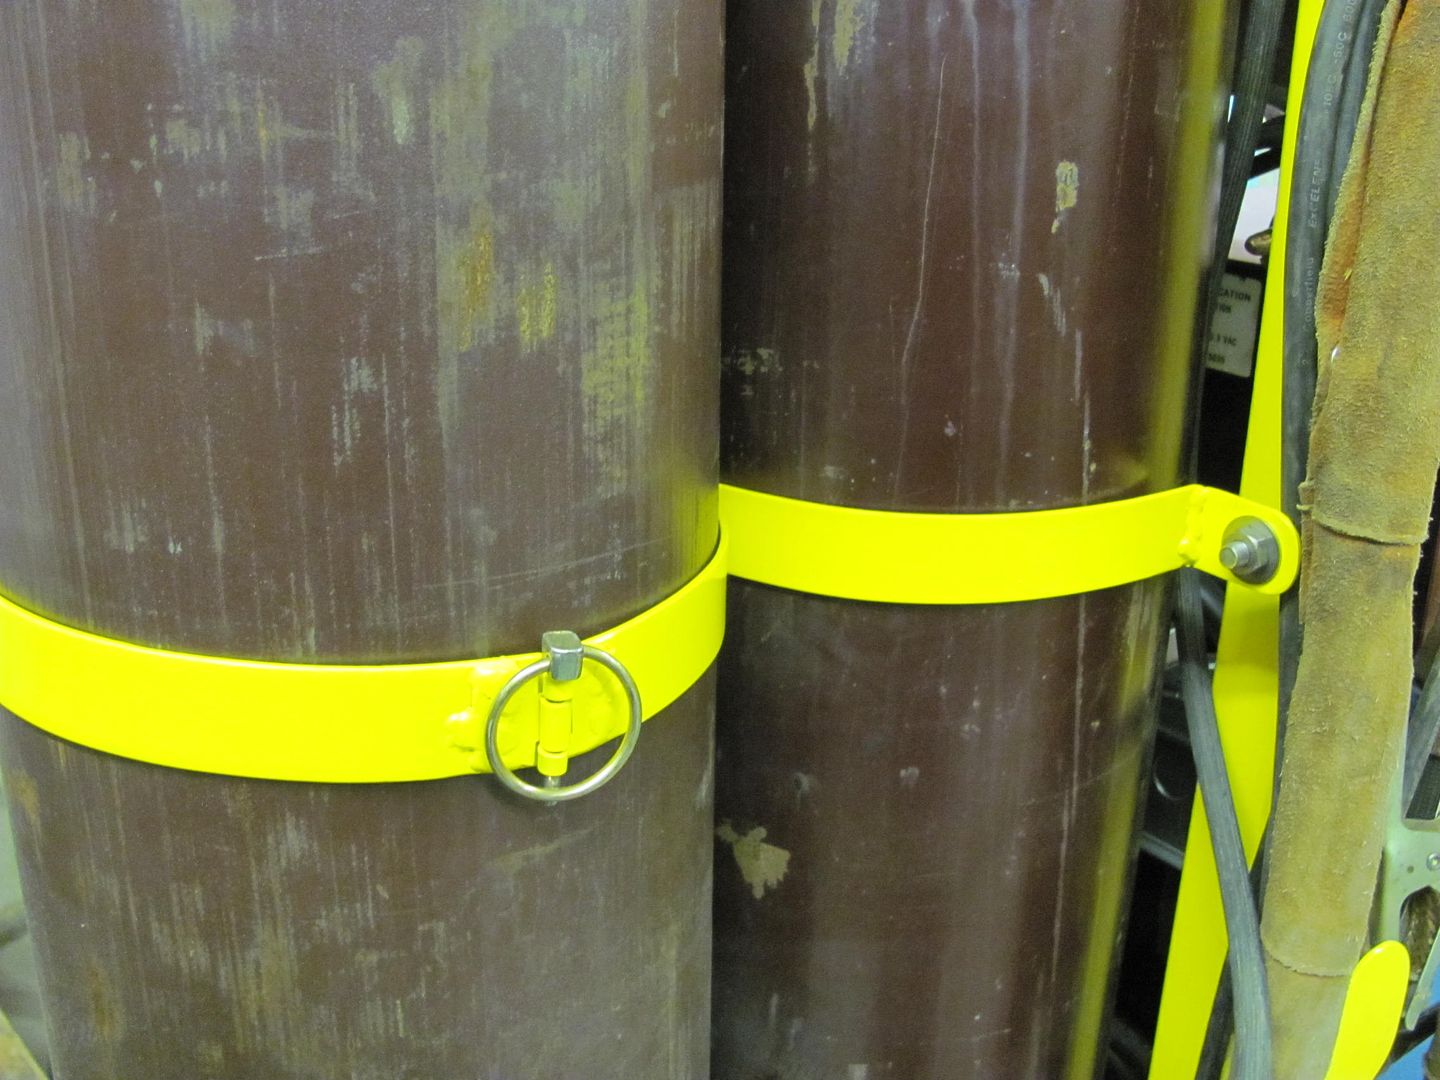
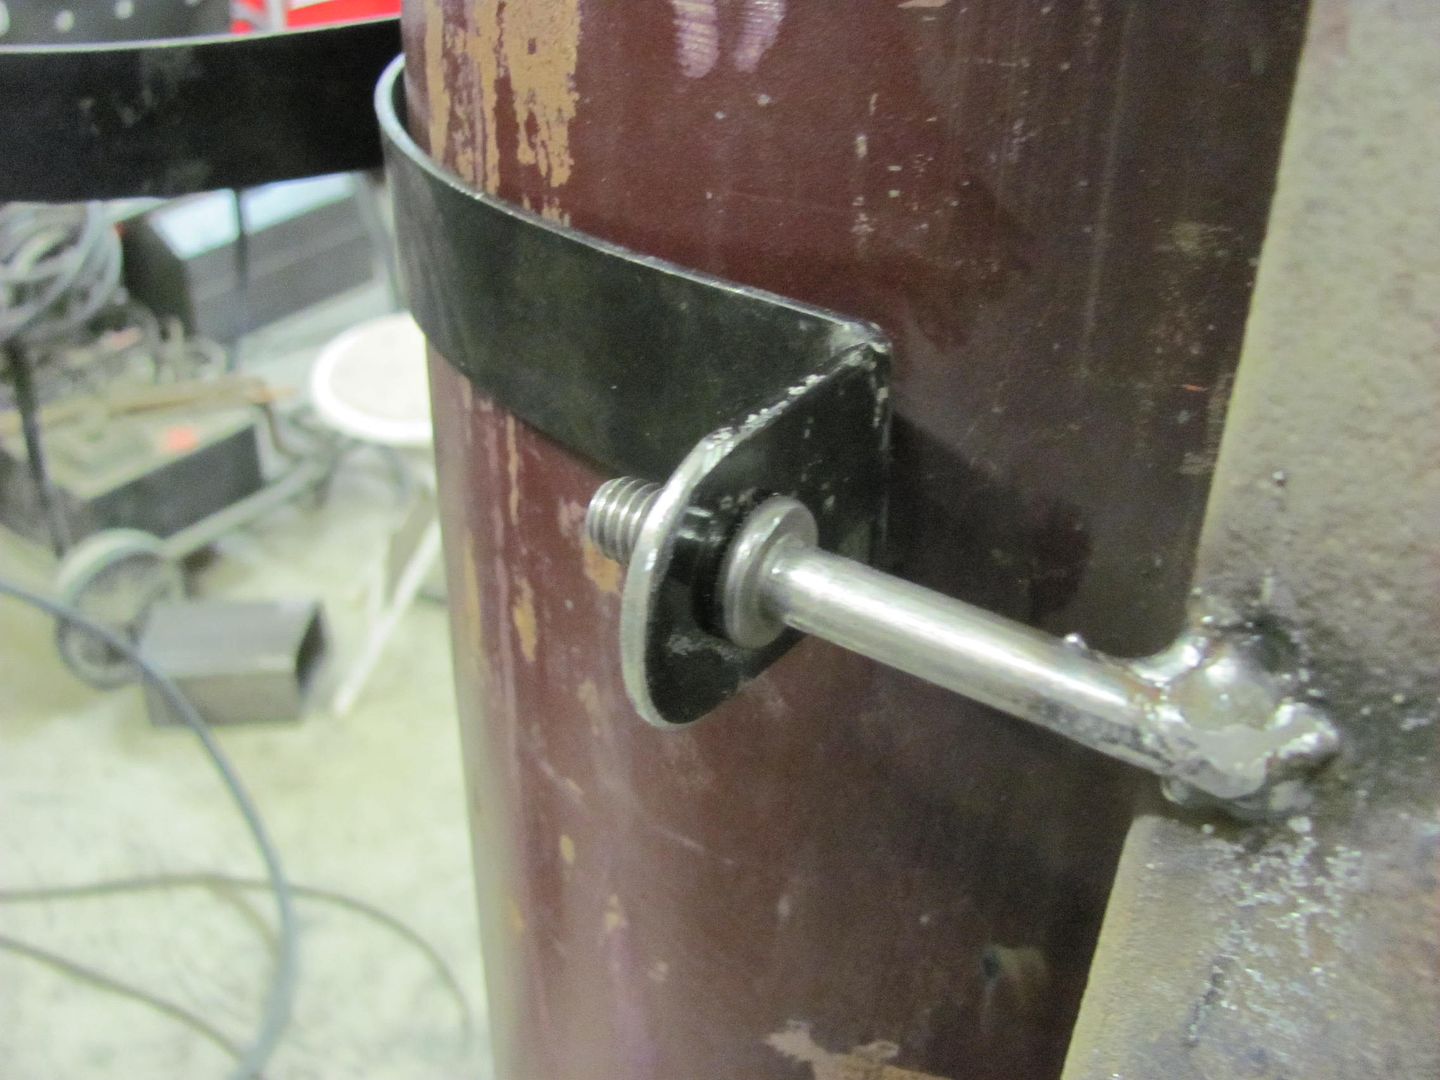
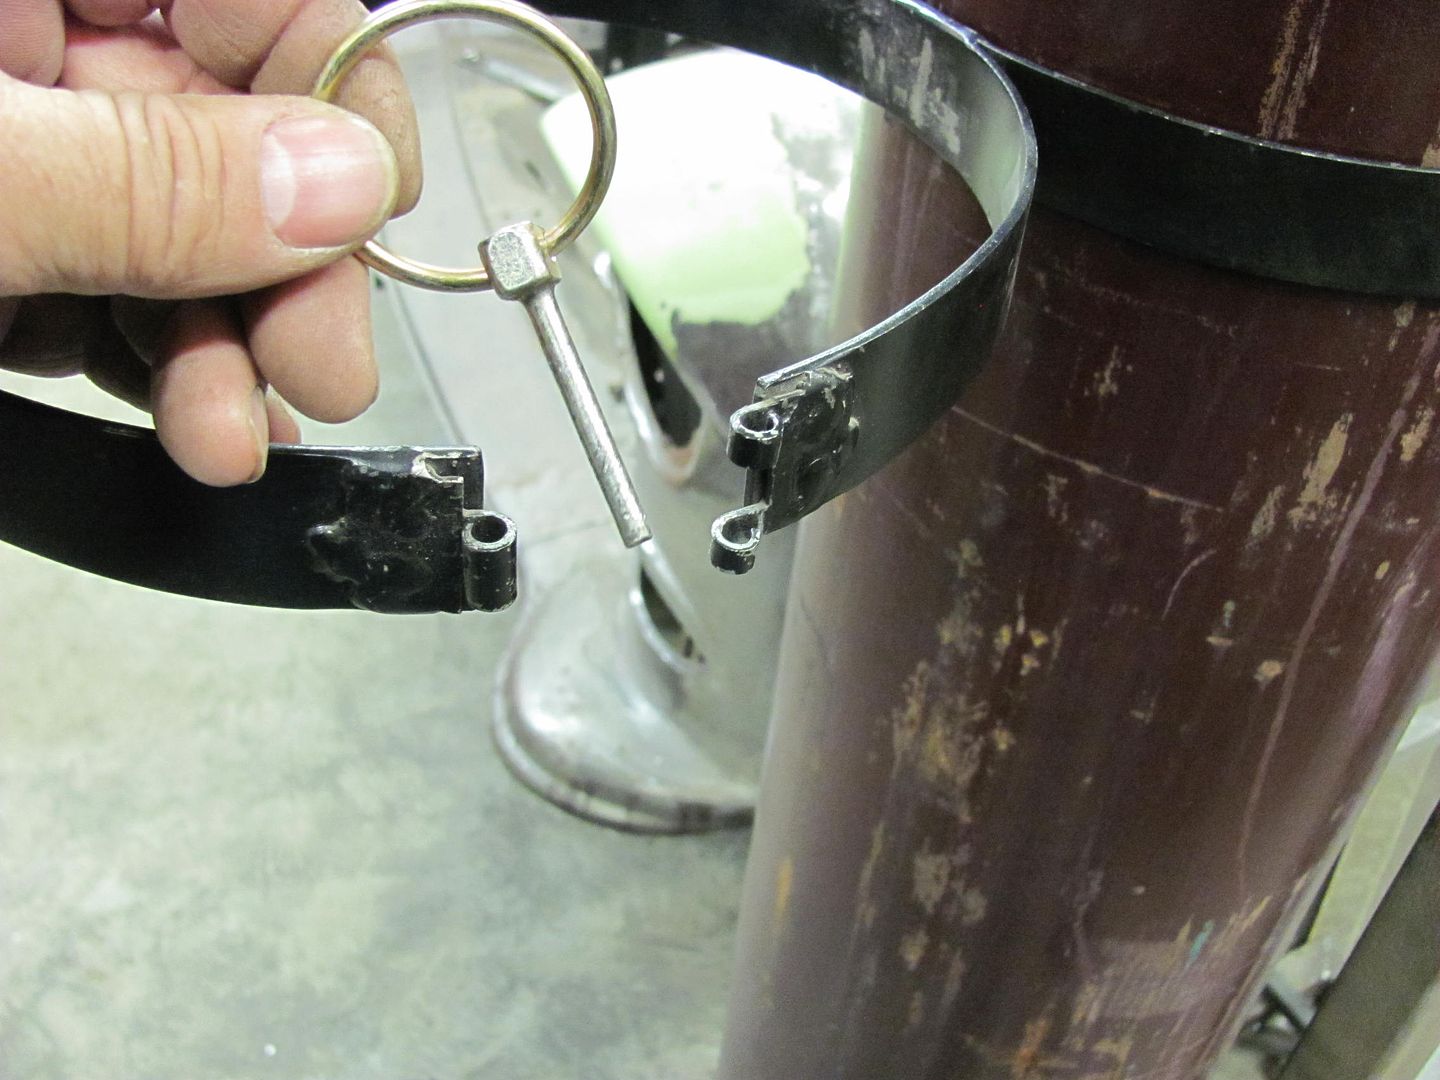
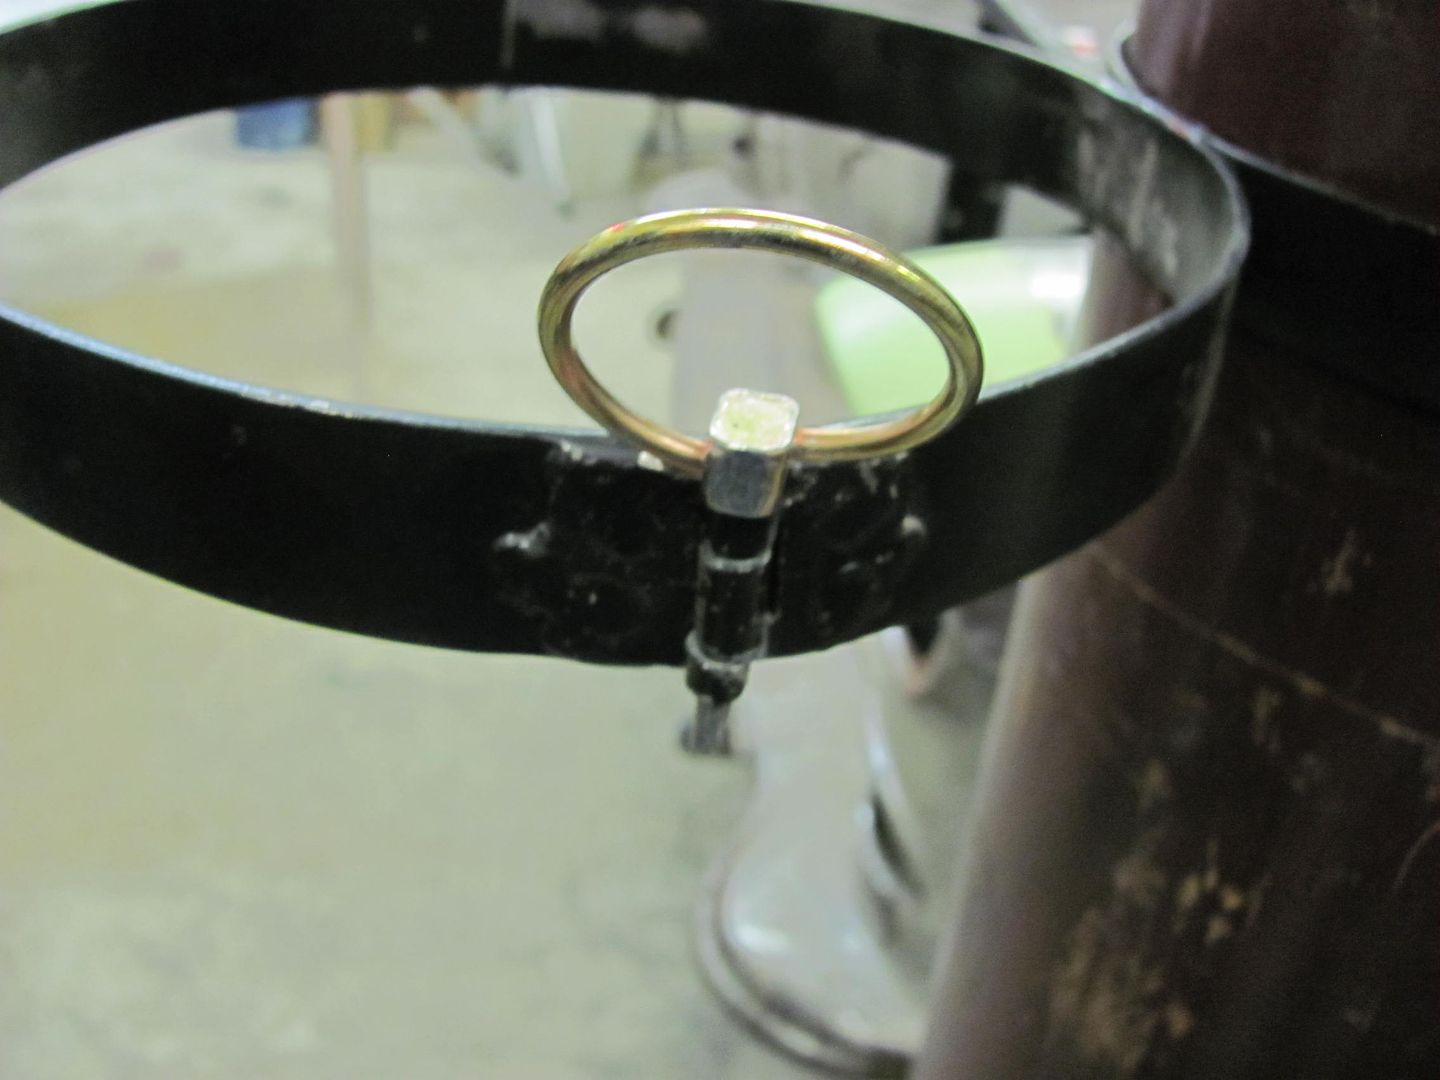
these studs are added to make use of the bottle bracket that came off the old welder. My brother in law had borrowed it at one time, and it came back with the fancy bracket. He retired the ratchet strap I had around the two bottles. This worked pretty well, so rather than reinvent the wheel.... Reminds me, I have some other things needing finishing I should lend him...

Picture1537.jpg


Picture1539.jpg


Picture1540.jpg


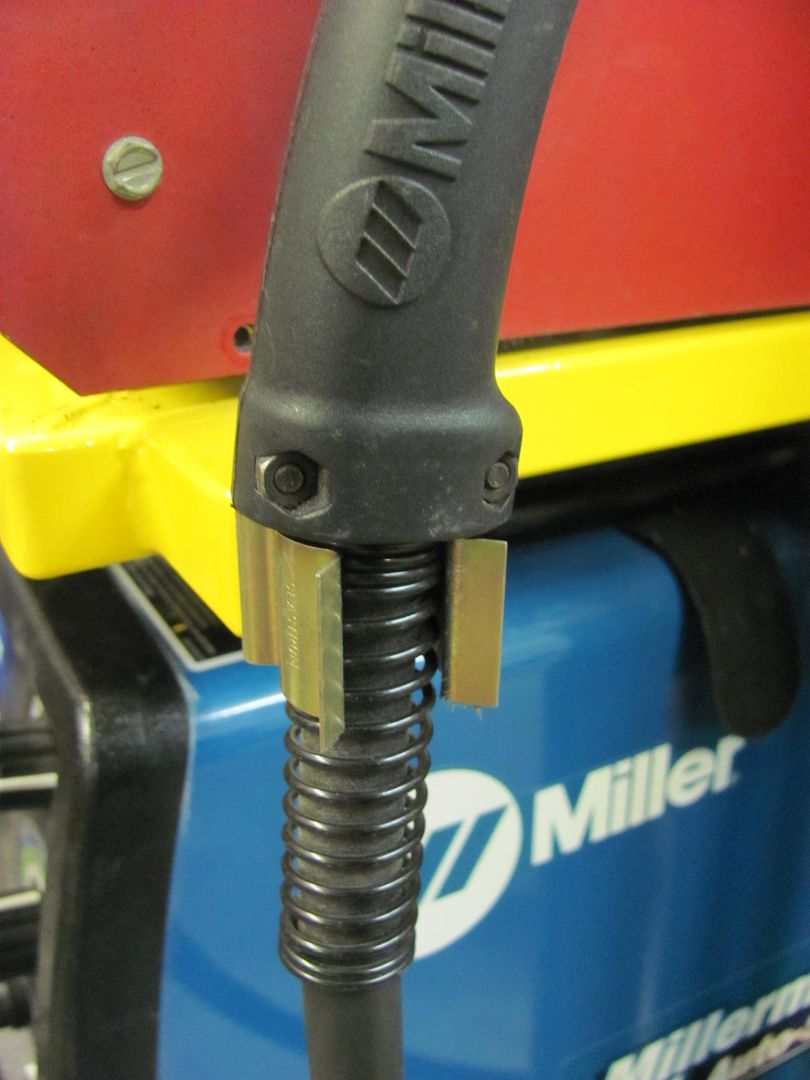
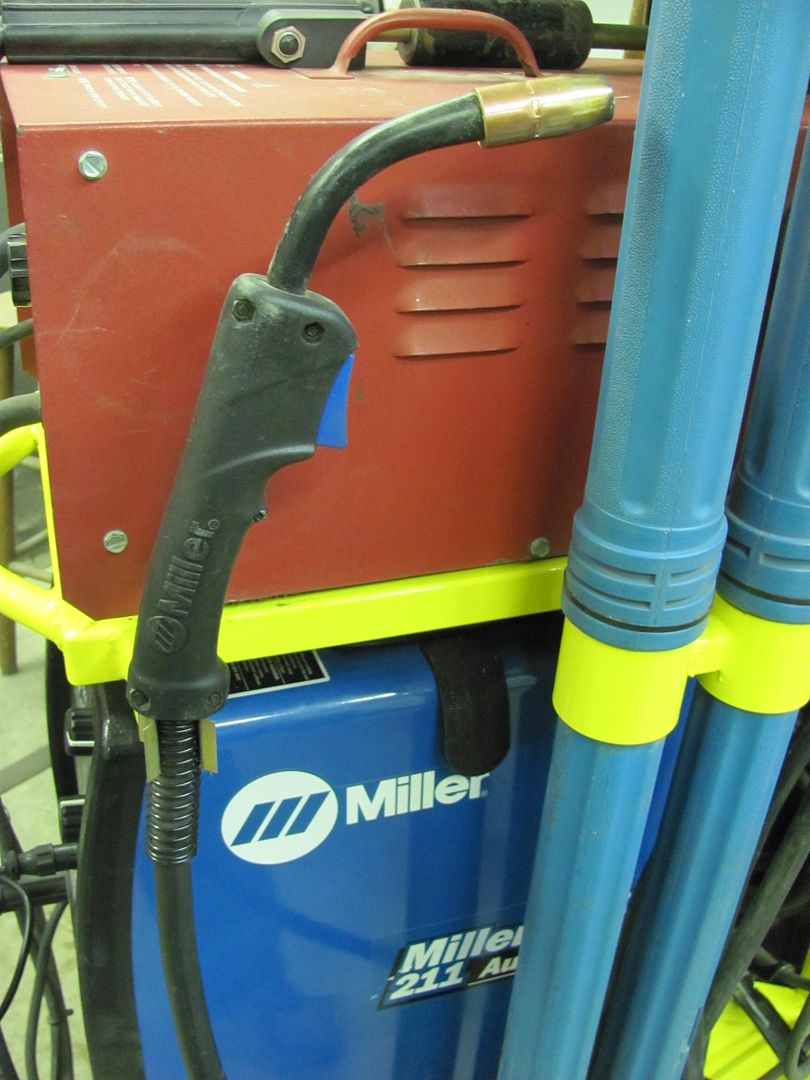
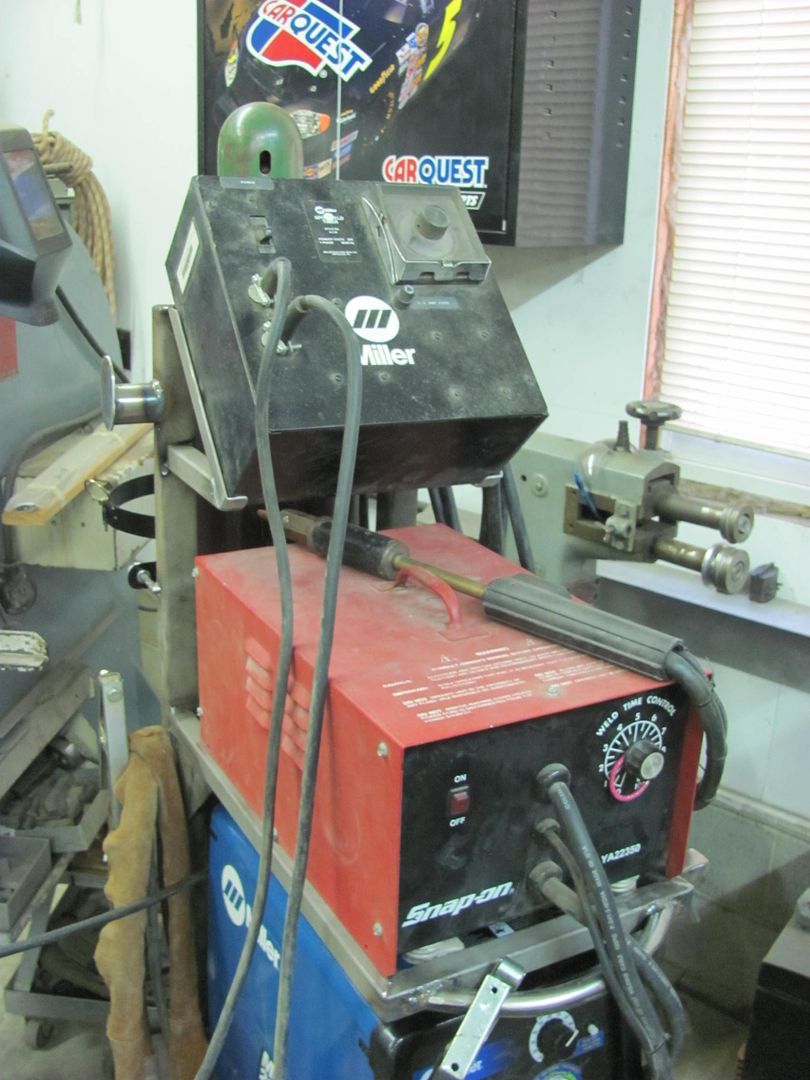
Then a bracket for the clip is added to hold the Mig torch..

Picture1542.jpg


Picture1543.jpg


Picture1544.jpg


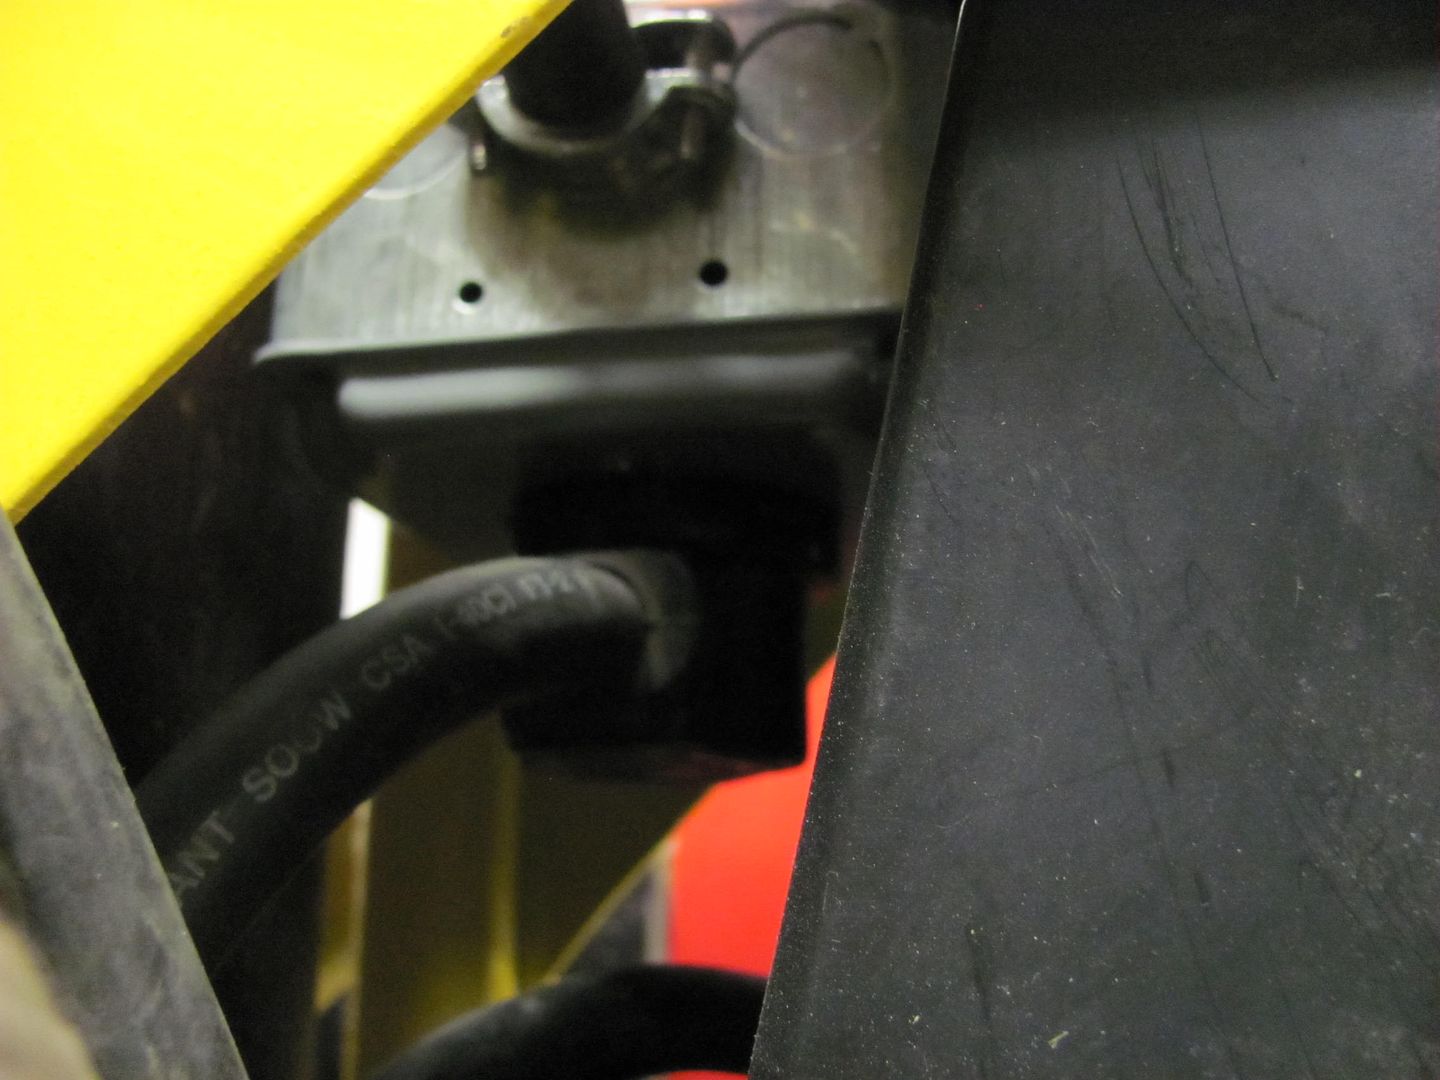
Holders for the various cables....

Picture1548.jpg


Picture1549.jpg


Picture1545.jpg


Picture1546.jpg


Picture1551.jpg


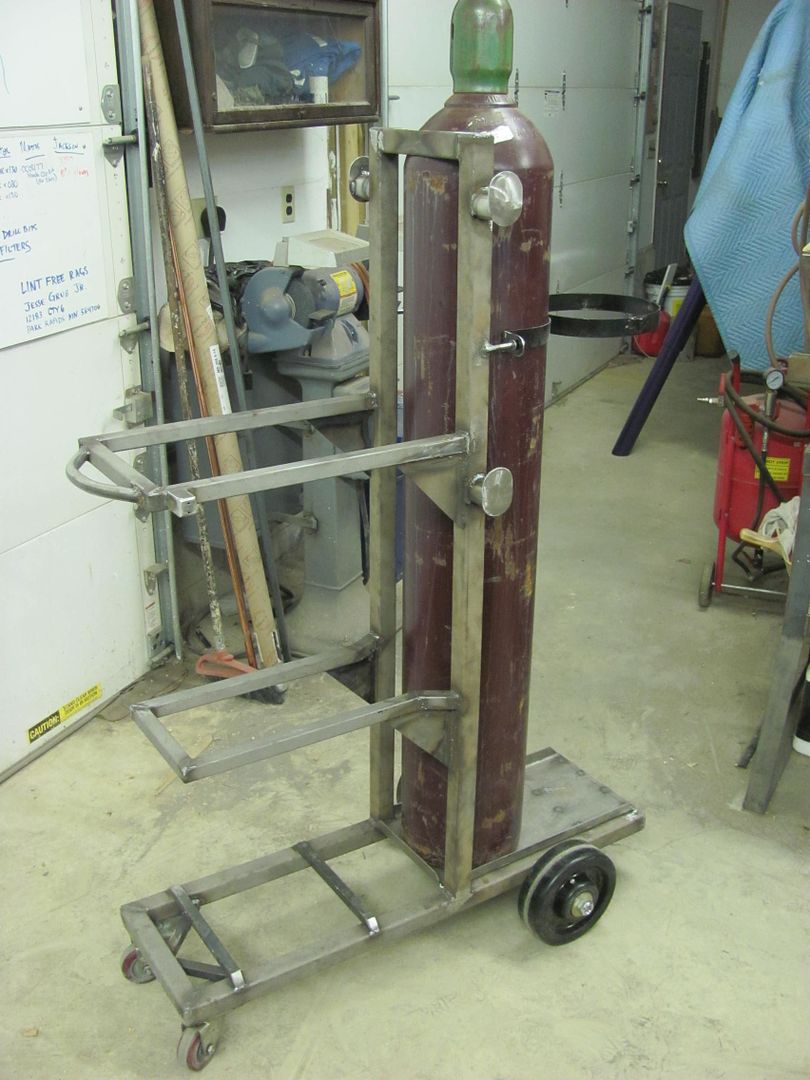
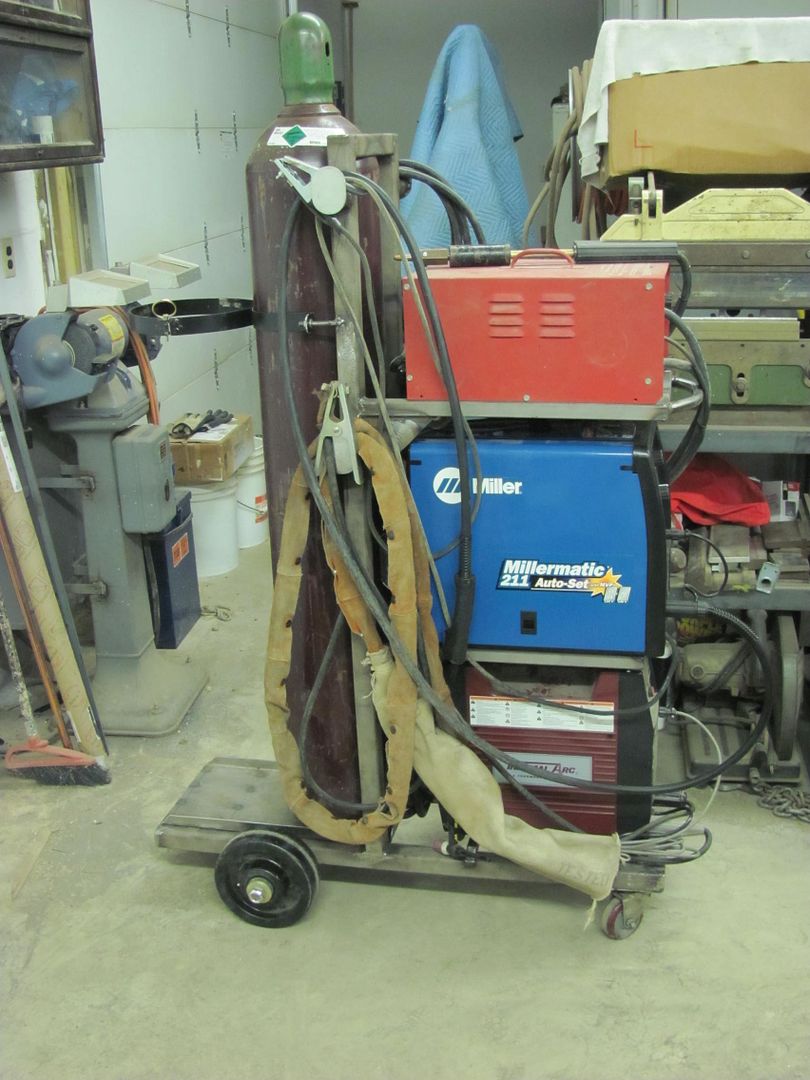
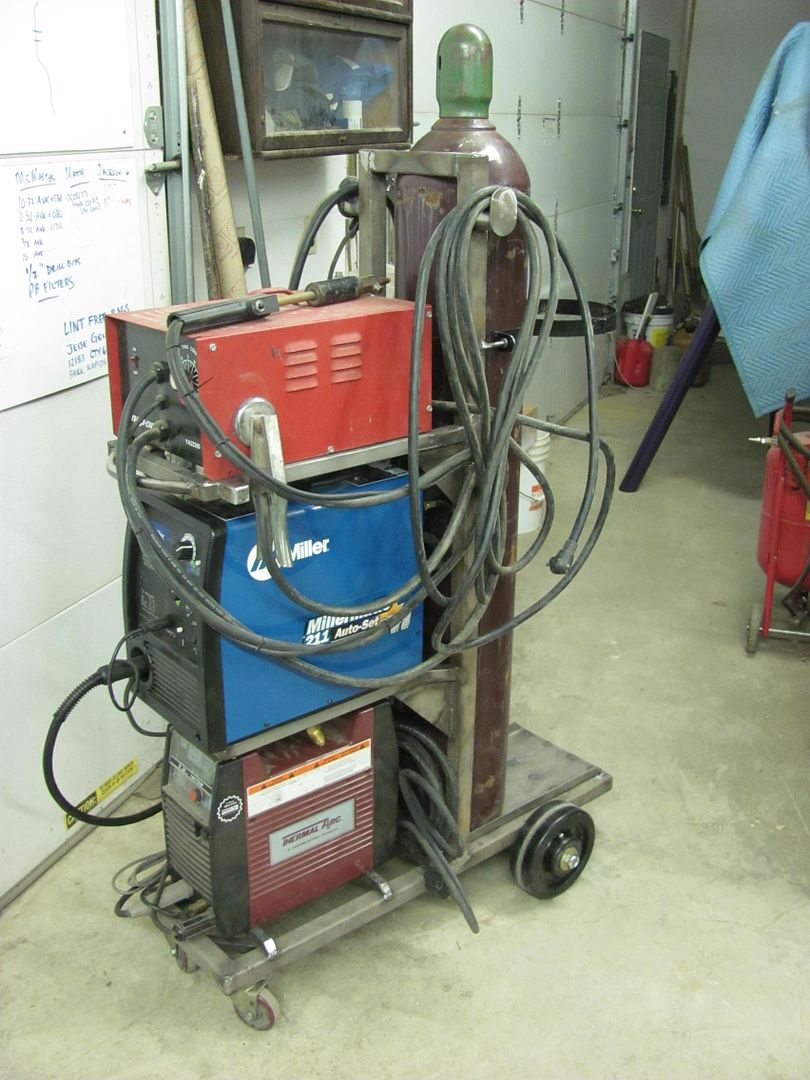
.....and a test fit before we throw some paint on it...

Picture1554.jpg


Picture1552.jpg


Looks like I have some room left, may have to add one more....

Picture1555.jpg


Picture1556.jpg


Picture1558.jpg


Picture1559.jpg


Picture1560.jpg


Picture1561.jpg


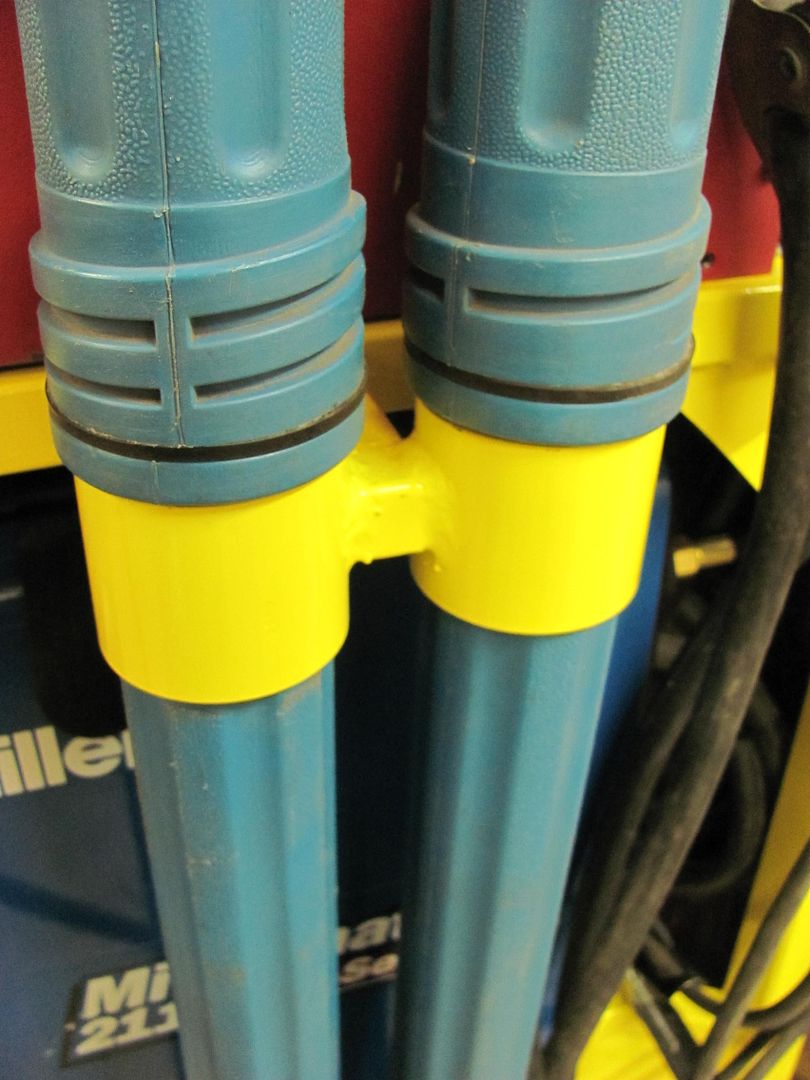
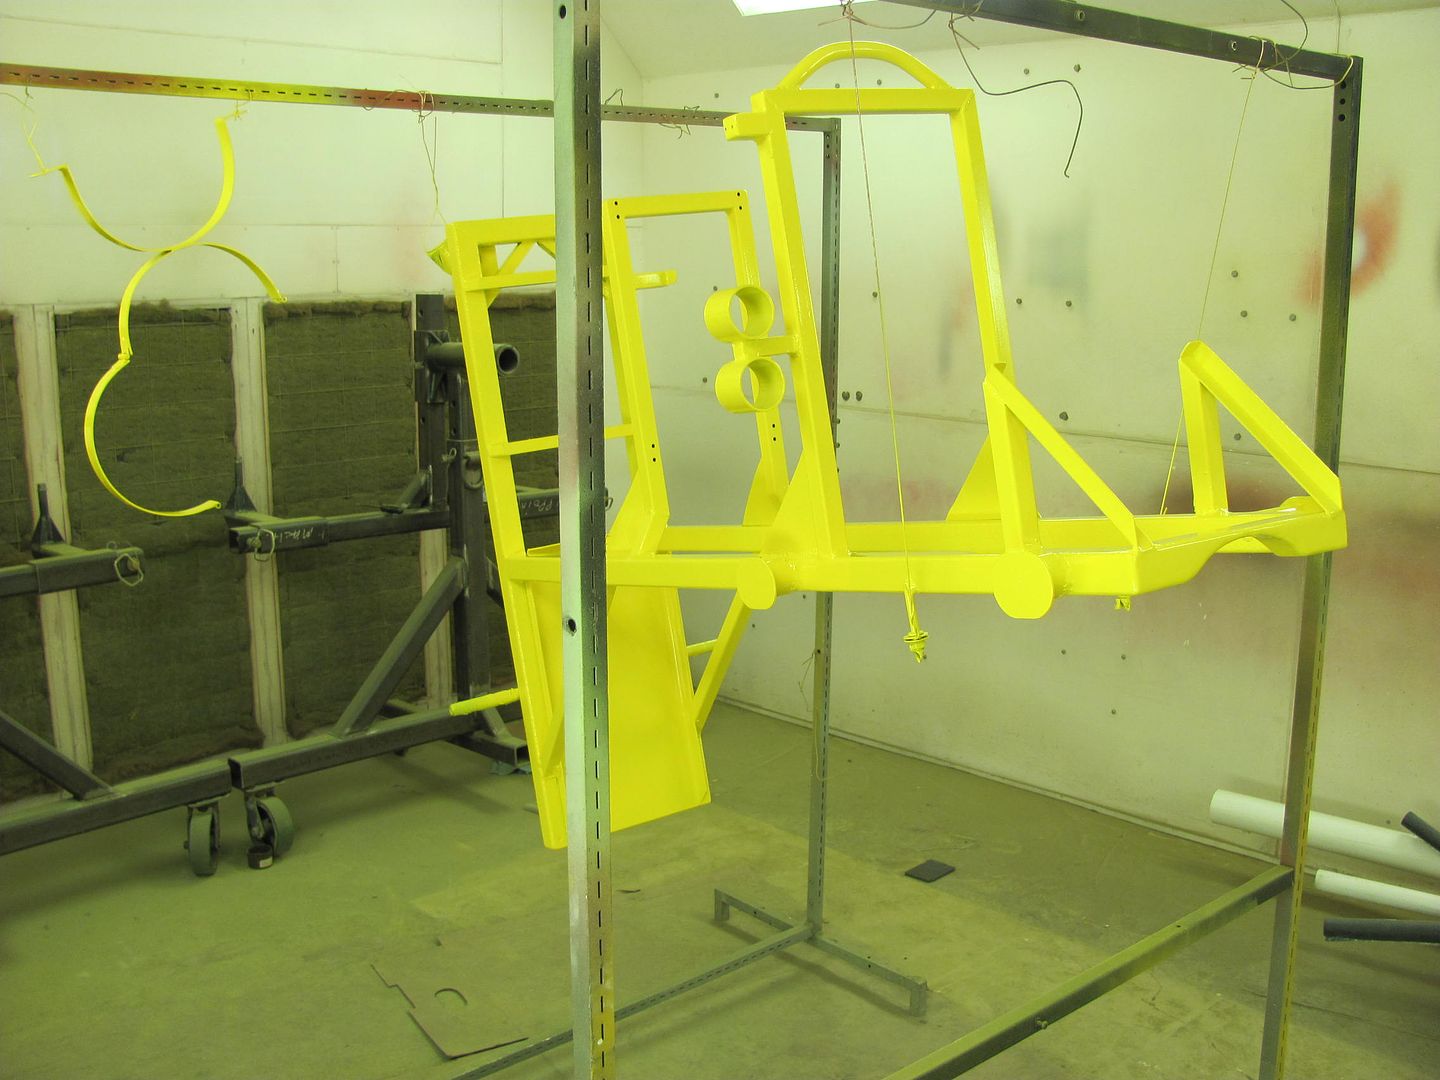
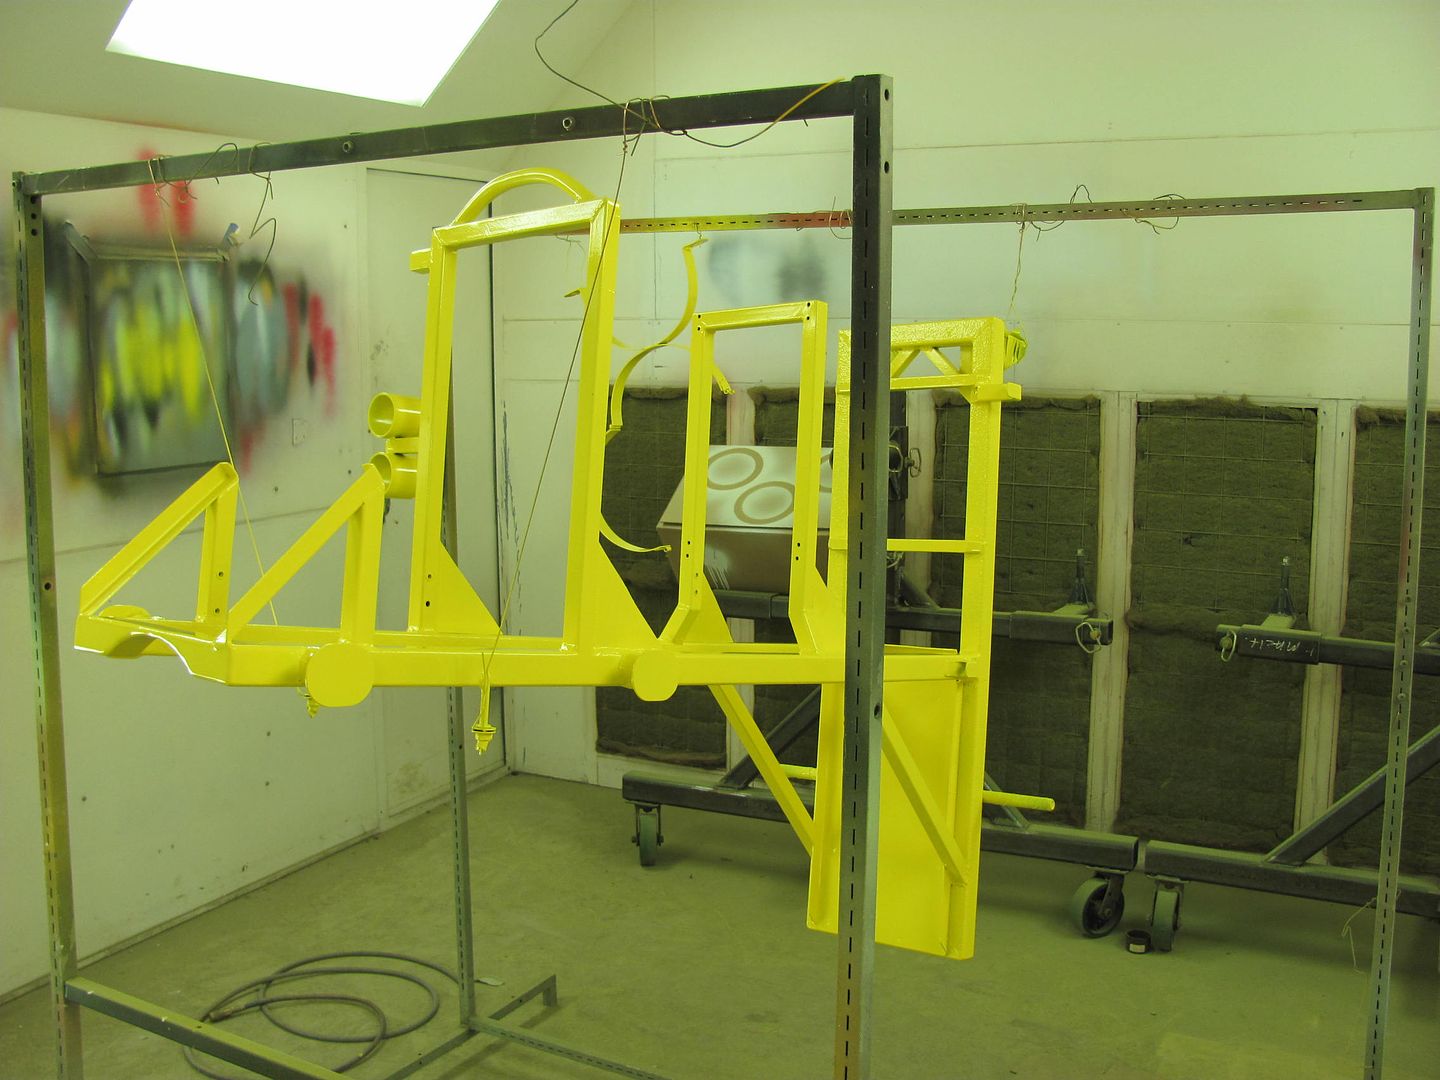
Now to disassemble and paint it... It was a toss up between some bright red (HD color) which was acrylic lacquer, or a bright yellow (H/K Lemon Yellow basecoat). As I didn't have any lacquer thinner in stock for the red, yellow it is...followed by clearcoat. Note ring holders for Tig filler rod tubes..

Picture1567.jpg


Picture1569.jpg


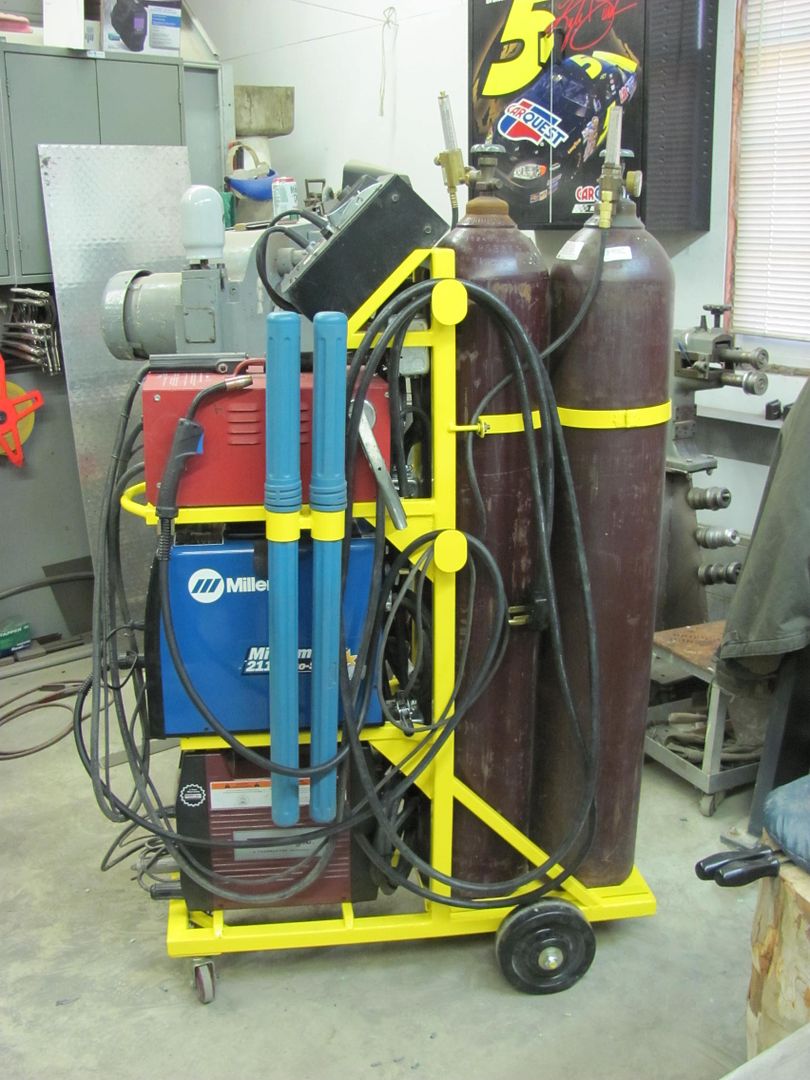
This should help to brighten up the shop!
 
Last edited:
To avoid these ads, REGISTER NOW!
OP
M

MP&C

Well-known member
Joined
Oct 21, 2009
Messages
4,403
Location
Leonardtown, MD
Waiting for the paint to dry.... Already bought the supplies and 30' of 8/3 SO cable. It will have a 220 outlet box behind both the mig and tig, and a single box at top with 120 and 220 20a outlets for the dent puller and spot welder.. :thumbup:
 

Eriehunter

Well-known member
Joined
Mar 14, 2014
Messages
189
Sweet, thinking about making a welding cart of my own soon. Some great ideas there!!
 

aggierailroad

Well-known member
Joined
Jan 8, 2012
Messages
581
Location
Houston, TX
Waiting for the paint to dry.... Already bought the supplies and 30' of 8/3 SO cable. It will have a 220 outlet box behind both the mig and tig, and a single box at top with 120 and 220 20a outlets for the dent puller and spot welder.. :thumbup:

I should have known better. I knew you were slick.... I knew it... :doh:

:thumbup:
 

signcrafter

Well-known member
Joined
May 9, 2012
Messages
12,359
Waiting for the paint to dry.... Already bought the supplies and 30' of 8/3 SO cable. It will have a 220 outlet box behind both the mig and tig, and a single box at top with 120 and 220 20a outlets for the dent puller and spot welder.. :thumbup:

Are you pulling the 120 off the 220 supply?
 

sberry

Banned
Joined
Jun 18, 2005
Messages
35,747
Location
Brethren, Michigan
This isn't right for a couple of reasons. You need 4 conductor cord and additional over current protection for the 120 recepts. I have done this a lot of ways to and the best I find is to have another cord.
 

sberry

Banned
Joined
Jun 18, 2005
Messages
35,747
Location
Brethren, Michigan
To do it correct would mean 4 wire feed and additional breakers for the 120V circuits. The machines you have are small and will run from 30A, you could possibly do something with that in regards to dedicated circuit to a welding machine but still not for general use with power tools, 20A. max.
I think the best we can do is make it as easy as it can be to run a cord for a grinder.
It would be nice to have one cord for the 240 and it makes it easy to wire up a good home port. The cord is so big in this case might hang it up on the wall all connected, move machine if needed but I find after a bit it has a home. Once in a while I move machine to another spot in the shop but I pull the work to it if I can. I made a cord and machine placement change recently that was a no brainer but really extends the floor range and don't need to add cord etc.
 
Last edited:

sberry

Banned
Joined
Jun 18, 2005
Messages
35,747
Location
Brethren, Michigan
Did the Econotig come with a factory cord? The green one probably came fac 50A and while those machines needed 50 the 211 works on half that. If you have sturdy service one of the advantages you gain by new machines is cheaper wiring. You can wire them all together and use at the same time with the 8 on 50A but a 12 cord will serve a 211, same thing that comes on it and one size bigger than its minimum wire size.
If you not welding and grinding at the same time it might even stay with a 20A breaker?
Back n the day in a different building had a 10 cord on a cart about 70 ft long, had it in big loops off the back and that was really super easy. My new scheme places the hanger on the wall instead of the cart
 
Last edited:

fnieto

Well-known member
Joined
Aug 27, 2013
Messages
1,401
Location
Tucson,Arizona
Ok computer experts. Why can't I view the OP's photos? All I have are little blue boxes with a ? mark in them. sherry's photos came up.
 
To avoid these ads, REGISTER NOW!
OP
M

MP&C

Well-known member
Joined
Oct 21, 2009
Messages
4,403
Location
Leonardtown, MD
The Econotig has been sold for over a year now, so the Thermodyne took it's place. The Econotig is lacking in low amperage control, and with the majority of my work sheet metal, I was looking for something else when the Thermodyne came along. But the Ltec, Econotig, and Thermodyne all came with 50A plugs. The 211, as I'm sure you're aware, has the 50A plug as an option, which is how it will be wired. On the above picture, I had the quad outlets wired to one leg of the 220 and just used a ground. It was only used for grinders, and never had any issue with wiring it that way. Most grinders today aren't using a grounded cable, so I didn't see the issue.

I frequently take the welder to the work, as in around the perimeter of the project car. So I do make use of such an "extension cord". I have a 50A wall outlet at both front and rear walls of the shop, so if one doesn't reach the other will. I agree that none of the machines will require the 50A, and it is very unlikely that I would have more than one turned on at a time.. That's why I wasn't worried about tying them all to the 8 gauge.. (which is already bought)
 
Last edited:
OP
M

MP&C

Well-known member
Joined
Oct 21, 2009
Messages
4,403
Location
Leonardtown, MD
Ok computer experts. Why can't I view the OP's photos? All I have are little blue boxes with a ? mark in them. sherry's photos came up.


Hit refresh and look again? Either that or your place of work/business has a block on Photobucket pictures. I have a premium account with them so it shouldn't be a bandwidth issue....
 

fnieto

Well-known member
Joined
Aug 27, 2013
Messages
1,401
Location
Tucson,Arizona
unable to view OP's photos

Im at the fire house so thats probably the problem. I'll look at them tomorrow as I'm always interested in ideas.
 

sberry

Banned
Joined
Jun 18, 2005
Messages
35,747
Location
Brethren, Michigan
You can tie them all to the 8 on a 50A. In theory you can take 2 number 12 and add a second outlet, think of splitting the number 8 with 2 12's and connecting 2 machines with the same demand as the 211.
Each machine has a 30% duty cycle, in reality could put 3 or more on this circuit but,,,, for the sake of principle 2. The 12 wire is good for 50A short circuit and the machine cant overload it without burning up or tripping its own thermal.
What I guess I was getting at is if you were running only one thing at a time you could use a 12 cord for quite a ways, 50 ft from a shop service panel wouldn't bother it a bit. Could still plug it in to a 50A welder outlet.
The ready made 8 cords you buy are rated for the heaviest factory 50A machines which is a 250A feeder. I use a 10 cause I use it for all my machines where I would use a cord but on a new setup wouldn't have a real issue with a little light cord on it to make it easy to get around. One of the benefits of a new machine.
 

zkling

Well-known member
Joined
Jan 23, 2007
Messages
16,939
Great job. I like the bright yellow personally. I've wanted to do something similar to save space but have been a little hesitiant due to the weight involved.
 

sberry

Banned
Joined
Jun 18, 2005
Messages
35,747
Location
Brethren, Michigan
You could turn them all on with a 12 but use only one at a time.
I like those colors for shop equipment. A few things yellow, a few red, a few blue.
I did an all in 1 kind of thing by removing 2 carts and setting a couple machines on top of the tig. The argon isn't on the cart but to the building. I can move this if I need to but don't. I like my mig stand alone mainly because they do get moved and don't want it all to ride for free especially when I really use one process on the move etc.
 
Last edited:

BigMike782

Well-known member
Joined
Dec 19, 2008
Messages
1,863
Location
49120
Robert, nice looking cart.
How do you like the Thermal Arc machine? Does it have a foot control or fingertip? What is the black Miller box on the very top?
 
OP
M

MP&C

Well-known member
Joined
Oct 21, 2009
Messages
4,403
Location
Leonardtown, MD
Mike, the thermal arc has both foot control and the add-on finger control. Nice machine, still getting used to it.. The black Miller box is the timer control for the spot welder. Useful for getting consistent spot welds..
 
OP
M

MP&C

Well-known member
Joined
Oct 21, 2009
Messages
4,403
Location
Leonardtown, MD
With two bottles over the rear wheels it's very stable. It shouldn't be leaving the concrete floor in the shop, so that should help :thumbup:
 

Daveo

Well-known member
Joined
Nov 24, 2012
Messages
146
Very cool!!! I want to do the same, I have a mig, tig and plasma to put on one cart.... The only thing that was stopping me is, two bottles and all those damn cords!!
 
OP
M

MP&C

Well-known member
Joined
Oct 21, 2009
Messages
4,403
Location
Leonardtown, MD
Okay, got things together today. Here's the total conglomeration...


Picture1577.jpg


Welded rings to hold the Tig rod tubes......


Picture1578.jpg


Retaining clip so the Mig torch doesn't have to lay on the floor...


Picture1580.jpg


Picture1579.jpg


As you can see, not much for wasted space. Here's the outlet box for the Mig....


Picture1587.jpg


and Tig.....


Picture1588.jpg


Bottle bracket.....


Picture1582.jpg


I did give it a good shove to see how top heavy it was, and with the two bottles directly over the rear wheels it's very stable. Don't think I'll need worry about any accidental turnovers...


Picture1581.jpg
 
To avoid these ads, REGISTER NOW!
Top Bottom