

You are using an out of date browser. It may not display this or other websites correctly.
You should upgrade or use an alternative browser.
You should upgrade or use an alternative browser.
What did you do "IN" your garage today?
- Thread starter mayhemman
- Start date


kaymccampbell
Well-known member
Framed in the last of the ducts and pipes with steel studs this morning. Will screw up drywall and corner bead this afternoon. Maybe get a jump on taping. Cross fingers.
Kevin54
MEMBER EMERITUS

Cut the back off of that stand, flatten the top a little, then make a nice little pulley for the front, and you'll have a miniature blower.
BTW......very nice job on the darts.

Surreal001
Well-known member
- Joined
- Feb 25, 2014
- Messages
- 105
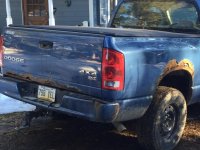
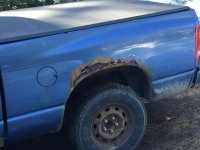
Nice!Well, begun yesterday but finished the rear fenders on this Dodge. took me 11h totals. It was my first time doing a complete body/panel replacement. Here's all the steps (did 3 layers of Bondo/sanding/bondo/sanding/morebondo/moresanding) My friend paid me 280$ labors to do em both and paid all the shop supplies. Plus I learned how to weld sheet metal.

Sent from my iPhone using Tapatalk
Surreal001
Well-known member
- Joined
- Feb 25, 2014
- Messages
- 105
Sounds like you have your work cut out for you! My shop cat helps just as much.Replaced 4 seized bearing sets on the closer wheels for a JD 752 planter today along with other maintenance and greasing. 110 acres down, many more to go.
Maxi Max the shop cat was helping out again, keeping the chair safe[emoji38]
Surreal001
Well-known member
- Joined
- Feb 25, 2014
- Messages
- 105
I have got to get me a tool cart like that.Got some socket organizers and redid my tool cart.
Before:

Not too bad, but hard to keep organized.
After:


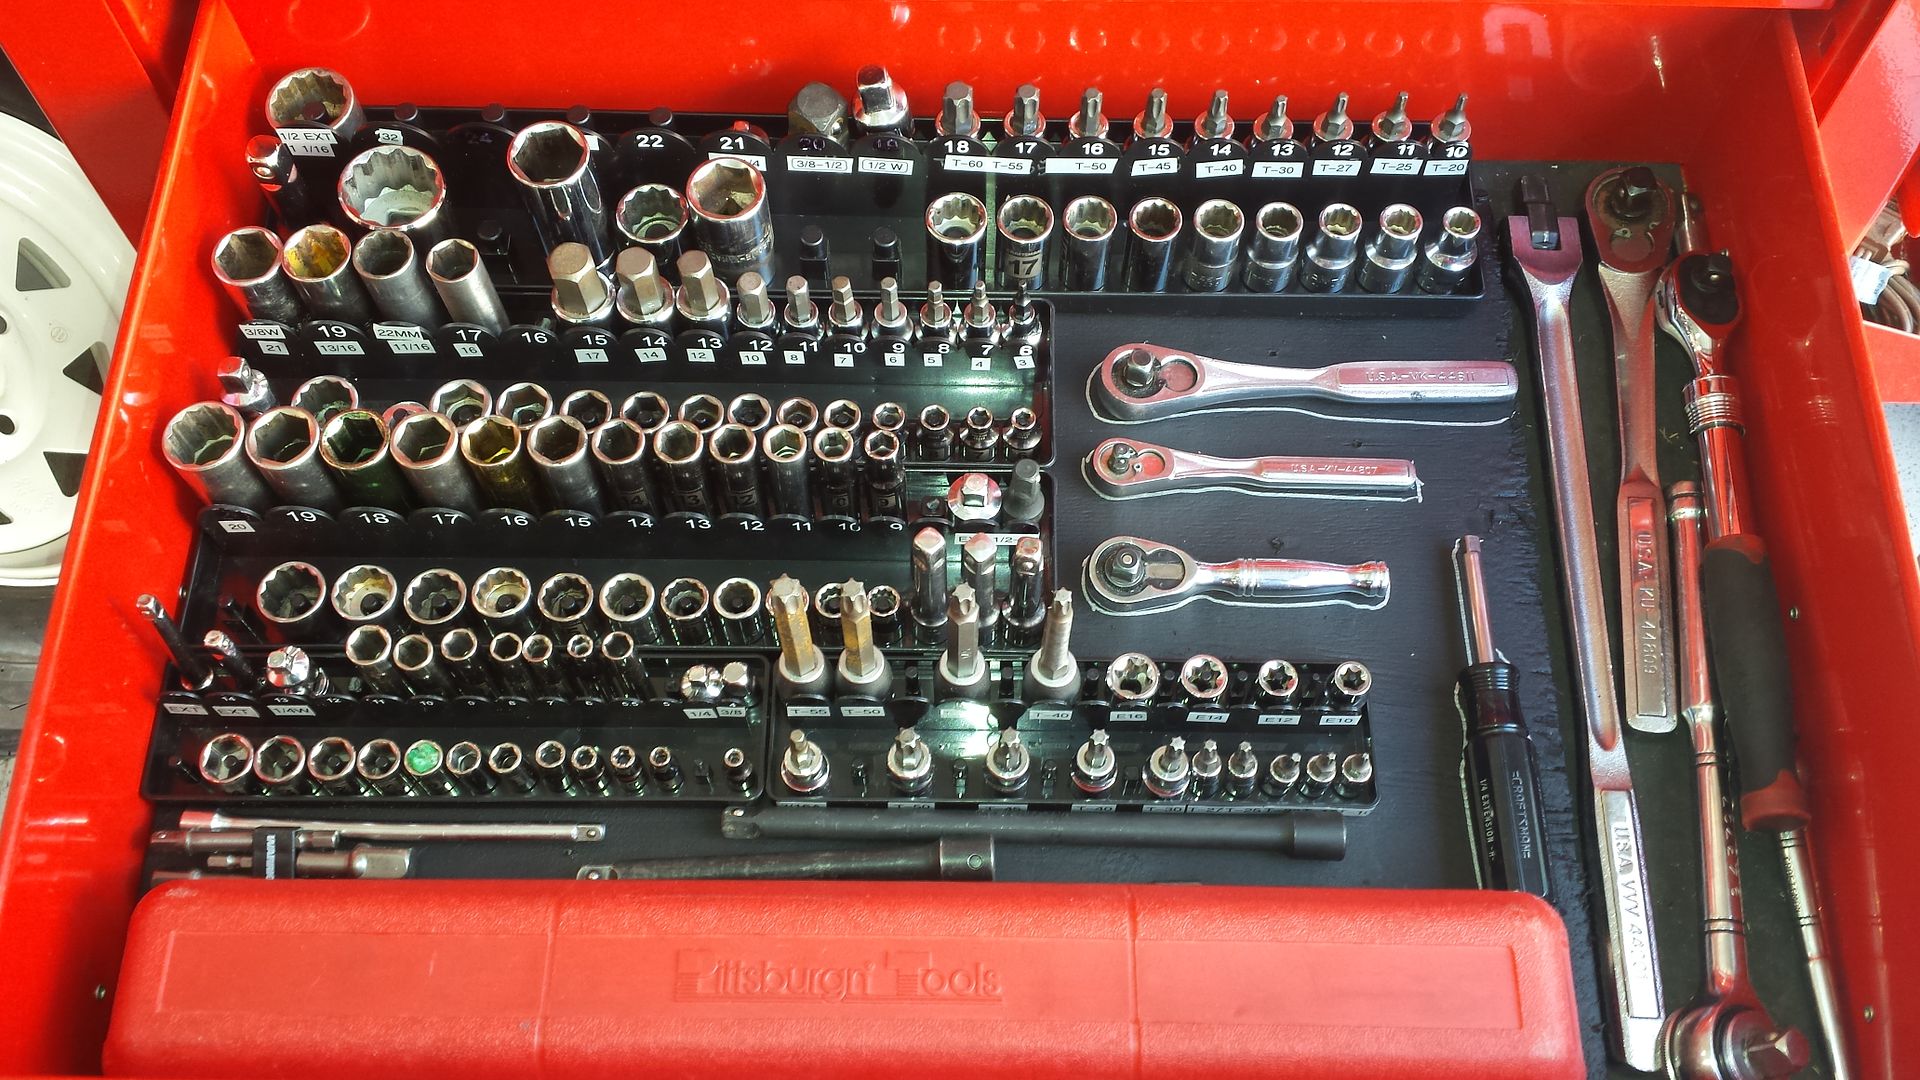
Also picked up this shelf. Very handy.

Bronson
Well-known member
Finished working on the free MOWER FROM HELL.
All new belts, new starter, solenoid, blades, 3 tires, plugs,oilchange, air filter and on and on and on.
Now I call the mower LEGBA'S LIMO.

All new belts, new starter, solenoid, blades, 3 tires, plugs,oilchange, air filter and on and on and on.
Now I call the mower LEGBA'S LIMO.
Outlander
Well-known member
Well, begun yesterday but finished the rear fenders on this Dodge. took me 11h totals. It was my first time doing a complete body/panel replacement. Here's all the steps (did 3 layers of Bondo/sanding/bondo/sanding/morebondo/moresanding) My friend paid me 280$ labors to do em both and paid all the shop supplies. Plus I learned how to weld sheet metal.
Sent from my iPhone using Tapatalk
You be like, my hero. Holey smokes, just realized you were around the corner
Attachments
Last edited:
Kevin54
MEMBER EMERITUS
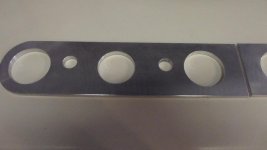
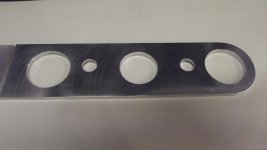
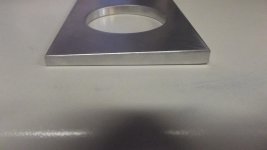
I finished up making an angled spacer for the manifold for a 1936 Massey Harris General Purpose tractor. The owner wanted to do away with the diesel side of the manifold and had a person braze the inlet open. The person that did it, then belt sanded the mounting surface, rendering it useless. I had to clean up the manifold somewhat, then had to make a spacer so that the carburetor could be properly spaced out to the airbox. The size of the parts are 2 1/2" x 9 1/16" each, with holes nowhere in line with each other. Then I had to cut a 1.4 degree angle on the parts from top to bottom.
Attachments
bodyguy16
Well-known member
Took advantage of the bad weather to replace both front speakers in my g-f's car. Happy camper as usual!
MrAperture
Well-known member
Swapped my 20T manual bottle jack for a 20T air operated bottle joack for my Press. [emoji41]
before

after

and then I went for a walk with my spaceship

Sent from my iPhone using Tapatalk
before
after
and then I went for a walk with my spaceship
Sent from my iPhone using Tapatalk
1507dennis
Well-known member
Finished restoring my National A38 gas pump......

WarrenJ
Well-known member
Dennis
Nice rehab job.
Nice rehab job.
Jagmandave
Well-known member
Got my old Mini started again today......I last drove it on about a 500 mile run with the local Mini club a couple weeks ago, and on the way home we drove thru one hell of a storm - swirling winds, rain pelting down in buckets, visibility next to nothing (and of course people passing me like it was a clear summer day) anyway, I was getting low on gas but given the weather I just wanted to get home, and made it into my garage.
A few days later I put a gallon of gas in that I had in the garage to make sure I could get to the gas station just down the street and tried to start it - fired right up and while it sat idling warming up in the driveway I went in the house for a bottle of water to drink on my drive that day. A minute or so later it died and would not restart.....
I checked and the fuel filter was drier than popcorn fart, so I went down and got 4 gallons of gas and added that - still nothing at the carb. The little electric fuel pump was buzzing away, but nothing......so I blew out the line back to the tank, it was clear. Checked the filter on the pump inlet - clear. So I got a length of hose and a one gallon can with some gas in it, hooked that to the inlet of the pump and turned it on - it took a while but it finally pulled the gas into the pump - when it did it took off and pumped like mad!
I hooked the car's fuel line to the pump, turned it on and it immediately filled the carb, cranked her over and boom - purring like a kitten. I'd never had an electric pump lose it's prime like that before, but there you go....
Right now the pump is mounted on the firewall, I'm going to move it back near the tank where it should be, and no way I'm gonna run the tank that low again - lesson learned!
A few days later I put a gallon of gas in that I had in the garage to make sure I could get to the gas station just down the street and tried to start it - fired right up and while it sat idling warming up in the driveway I went in the house for a bottle of water to drink on my drive that day. A minute or so later it died and would not restart.....
I checked and the fuel filter was drier than popcorn fart, so I went down and got 4 gallons of gas and added that - still nothing at the carb. The little electric fuel pump was buzzing away, but nothing......so I blew out the line back to the tank, it was clear. Checked the filter on the pump inlet - clear. So I got a length of hose and a one gallon can with some gas in it, hooked that to the inlet of the pump and turned it on - it took a while but it finally pulled the gas into the pump - when it did it took off and pumped like mad!
I hooked the car's fuel line to the pump, turned it on and it immediately filled the carb, cranked her over and boom - purring like a kitten. I'd never had an electric pump lose it's prime like that before, but there you go....
Right now the pump is mounted on the firewall, I'm going to move it back near the tank where it should be, and no way I'm gonna run the tank that low again - lesson learned!
welder4956
Well-known member
Welded new track bar bracket and sway bar bracket on a Jeep Wrangler, helped/watched son-in-law change timing belt on a 02 Civic.
devoncoolman
Well-known member
<a href="http://s1292.photobucket.com/user/devoncoolman/media/6D6D9563-3CA2-4192-BE73-0D1615FFBBB6_zpsuion44ru.jpg.html" target="_blank"><img src="http://i1292.photobucket.com/albums/b576/devoncoolman/6D6D9563-3CA2-4192-BE73-0D1615FFBBB6_zpsuion44ru.jpg" border="0" alt=" photo 6D6D9563-3CA2-4192-BE73-0D1615FFBBB6_zpsuion44ru.jpg"/></a>
<a href="http://s1292.photobucket.com/user/devoncoolman/media/A210D92B-E7ED-48EF-9887-758B151BD66E_zpsjoo6daeg.jpg.html" target="_blank"><img src="http://i1292.photobucket.com/albums/b576/devoncoolman/A210D92B-E7ED-48EF-9887-758B151BD66E_zpsjoo6daeg.jpg" border="0" alt=" photo A210D92B-E7ED-48EF-9887-758B151BD66E_zpsjoo6daeg.jpg"/></a>
<a href="http://s1292.photobucket.com/user/devoncoolman/media/AFDC7F9C-47D1-462D-8AB8-0FB30CE92E5C_zpsibrixybi.jpg.html" target="_blank"><img src="http://i1292.photobucket.com/albums/b576/devoncoolman/AFDC7F9C-47D1-462D-8AB8-0FB30CE92E5C_zpsibrixybi.jpg" border="0" alt=" photo AFDC7F9C-47D1-462D-8AB8-0FB30CE92E5C_zpsibrixybi.jpg"/></a>
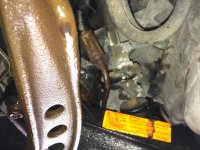
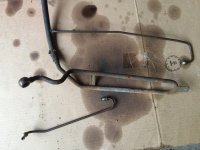
Replaced the High Pressure Oil Rail gasket on my Snap-on guys DT466E International.
<a href="http://s1292.photobucket.com/user/devoncoolman/media/A210D92B-E7ED-48EF-9887-758B151BD66E_zpsjoo6daeg.jpg.html" target="_blank"><img src="http://i1292.photobucket.com/albums/b576/devoncoolman/A210D92B-E7ED-48EF-9887-758B151BD66E_zpsjoo6daeg.jpg" border="0" alt=" photo A210D92B-E7ED-48EF-9887-758B151BD66E_zpsjoo6daeg.jpg"/></a>
<a href="http://s1292.photobucket.com/user/devoncoolman/media/AFDC7F9C-47D1-462D-8AB8-0FB30CE92E5C_zpsibrixybi.jpg.html" target="_blank"><img src="http://i1292.photobucket.com/albums/b576/devoncoolman/AFDC7F9C-47D1-462D-8AB8-0FB30CE92E5C_zpsibrixybi.jpg" border="0" alt=" photo AFDC7F9C-47D1-462D-8AB8-0FB30CE92E5C_zpsibrixybi.jpg"/></a>
Replaced the High Pressure Oil Rail gasket on my Snap-on guys DT466E International.
dcmus
Well-known member
While at work, self-employed, I wired receptacles for new shop. Checked with my Sparky buddy who approved so will connect them tomorrow.

Crazy_Pilot
Active member
Not so much in the garage, but in front of it. Oil change day for the Legacy:

stonesfan68
Well-known member
I rotated the tires, changed the oil, cabin air filter and brake fluid in the BMW. It's starting to get hot and humid here!
kaymccampbell
Well-known member
Totally forgot about the air lines I had cut off to clear some new cabinets I'm going to be hanging. So the drywall only got on the ceiling and the soffit. Rest of my time was spent recycling the old air lines into the new configuration. I used L copper.
mygarageone
Well-known member
After installing new master cyl , I bleed the front brakes .
colt zantop
Well-known member
Finished restoring my National A38 gas pump......
You ****!!! Nice job!
bobcatdan
Well-known member
I put points in the old Lawn Boy. Points were $25 and the condenser is discontinued. Who would have though you couldn't get parts for a '69 lawn mower. I hacked it and used it over as it is kinda a odd little fella. Guess on the point gap and set to.012" based on the burnt ones being about 15. Fired up second pull and mowed my ditch perfect. It got a workout too. I could of mower as early as Wednesday, but let go as the yard has been growing very uneven. It don't look bad like it is too long, but I will be able to bale the clippings.
<a href="http://s1292.photobucket.com/user/devoncoolman/media/6D6D9563-3CA2-4192-BE73-0D1615FFBBB6_zpsuion44ru.jpg.html" target="_blank"><img src="http://i1292.photobucket.com/albums/b576/devoncoolman/6D6D9563-3CA2-4192-BE73-0D1615FFBBB6_zpsuion44ru.jpg" border="0" alt=" photo 6D6D9563-3CA2-4192-BE73-0D1615FFBBB6_zpsuion44ru.jpg"/></a>
Replaced the High Pressure Oil Rail gasket on my Snap-on guys DT466E International.
He pay you cash or tools ?
Hung a few more sheets.


Unloaded and began assembling the Rockler steel router cabinet that will have a cast iron Bench Dog router table and a Triton router mounted to. Plan to finish it up tomorrow as I didn't start this until late. Seems like a nice cabinet.
Strouty
Well-known member
I plan on cleaning things up so I can make a mess.
My snap-on guy just pays down on my tool bill and he buys all the parts. Works for me<a href="http://s1292.photobucket.com/user/devoncoolman/media/6D6D9563-3CA2-4192-BE73-0D1615FFBBB6_zpsuion44ru.jpg.html" target="_blank"><img src="http://i1292.photobucket.com/albums/b576/devoncoolman/6D6D9563-3CA2-4192-BE73-0D1615FFBBB6_zpsuion44ru.jpg" border="0" alt=" photo 6D6D9563-3CA2-4192-BE73-0D1615FFBBB6_zpsuion44ru.jpg"/></a>
<a href="http://s1292.photobucket.com/user/devoncoolman/media/A210D92B-E7ED-48EF-9887-758B151BD66E_zpsjoo6daeg.jpg.html" target="_blank"><img src="http://i1292.photobucket.com/albums/b576/devoncoolman/A210D92B-E7ED-48EF-9887-758B151BD66E_zpsjoo6daeg.jpg" border="0" alt=" photo A210D92B-E7ED-48EF-9887-758B151BD66E_zpsjoo6daeg.jpg"/></a>
<a href="http://s1292.photobucket.com/user/devoncoolman/media/AFDC7F9C-47D1-462D-8AB8-0FB30CE92E5C_zpsibrixybi.jpg.html" target="_blank"><img src="http://i1292.photobucket.com/albums/b576/devoncoolman/AFDC7F9C-47D1-462D-8AB8-0FB30CE92E5C_zpsibrixybi.jpg" border="0" alt=" photo AFDC7F9C-47D1-462D-8AB8-0FB30CE92E5C_zpsibrixybi.jpg"/></a>
Replaced the High Pressure Oil Rail gasket on my Snap-on guys DT466E International.
James
A34
Well-known member
LS6 Tommy
Well-known member
Caulked between the floor and drywall. Next week, cove base install.
Now that's what I call attention to detail. Most of the time around here, the sheetrock doesn't even reach the floor when there's going to be cove base moulding.
Tommy
RivennHewn
Well-known member
Now that's what I call attention to detail. Most of the time around here, the sheetrock doesn't even reach the floor when there's going to be cove base moulding.
Tommy
We caulk, then run a 3" high barrier of Cat 5 water barrier under the rubber base.
Virtually eliminates water going under your walls, or rotting your sheetrock.
http://www.prosoco.com/products/r-guard-cat-5
A34
Well-known member
Thanks Tommy! I am very sore after doing that!
I wish I'd known about the Cat 5 stuff when building the garage. I could have used it. Looks like good stuff!
I think I'm going to run a 6" cove base in black.
I wish I'd known about the Cat 5 stuff when building the garage. I could have used it. Looks like good stuff!
I think I'm going to run a 6" cove base in black.
dcmus
Well-known member
Conncected all the outlets, 10 quads, four circuits. Verified each leg at the final box. They all work and no tripped breakers. Next step study how to wire the sub panel. An extra bonus I came to possess a NIB RAB78 LED! 250 watt metal halide equivalent and it draws about .3 amp with 5217 color spectrum. I'm thinking this will work well over the mill/lathe area but your opinions are always welcome. Thanks for reading!
Streetbu
Well-known member
Removed my transfer case from my '04 Silverado. Had the typical oil pump rub. Used the Doorman rear case half. My buddy used to work at New Process gear. He happened to have a few spare parts laying around his garage Like new retaining rings, case half bolts, every seal, & an oil pump. Only things he didn't have were the case half and a chain. Rebuilt mine and spent the afternoon bench pressing it back into place in my garage. Wish I had a lift!

Like new retaining rings, case half bolts, every seal, & an oil pump. Only things he didn't have were the case half and a chain. Rebuilt mine and spent the afternoon bench pressing it back into place in my garage. Wish I had a lift!
Strouty
Well-known member
Removed my transfer case from my '04 Silverado. Had the typical oil pump rub. Used the Doorman rear case half. My buddy used to work at New Process gear. He happened to have a few spare parts laying around his garage
I think I am about due for the same treatment on my 97 suburban. I have three transfer cases, but two are the auto 4x4 and one is just push button. Not sure if they are different and of course the bad one is the odd ball.
kaymccampbell
Well-known member
Got the last of this Spring's drywall up. Put on the corner bead. Need to clean up a bit before the taping. It's amazing how much slower and tireder I get as I get older. Couple more minutes in the tub and then off to cut asparagus.
patrickn
Well-known member
Finished restoring my National A38 gas pump......
Awesome job!
patrickn
Well-known member
Started on restoring my SnapOn Battery Charger (YA167B). It had some rust and all scratched up etc... tore it down and removed all the paint and grime.
I will post up pics etc... when done.
Does anyone know where to get new decals for it? I am really only concerned with the control pannel one but would like them all. I can fabricate my own but like the idea of the original one.
Not sure if I am going to paint it like it was or do a custom paint job.
I will post up pics etc... when done.
Does anyone know where to get new decals for it? I am really only concerned with the control pannel one but would like them all. I can fabricate my own but like the idea of the original one.
Not sure if I am going to paint it like it was or do a custom paint job.
mik386
Well-known member
Everything is fun and games until someone ends up in a cone!