To avoid these ads, REGISTER NOW!

1966 F100 EcoBoost Engine Swap (EcoBoosted)

Status
Not open for further replies.
OP
T

TimeWarpF100

Well-known member
Joined
Aug 21, 2010
Messages
6,784
Location
not here
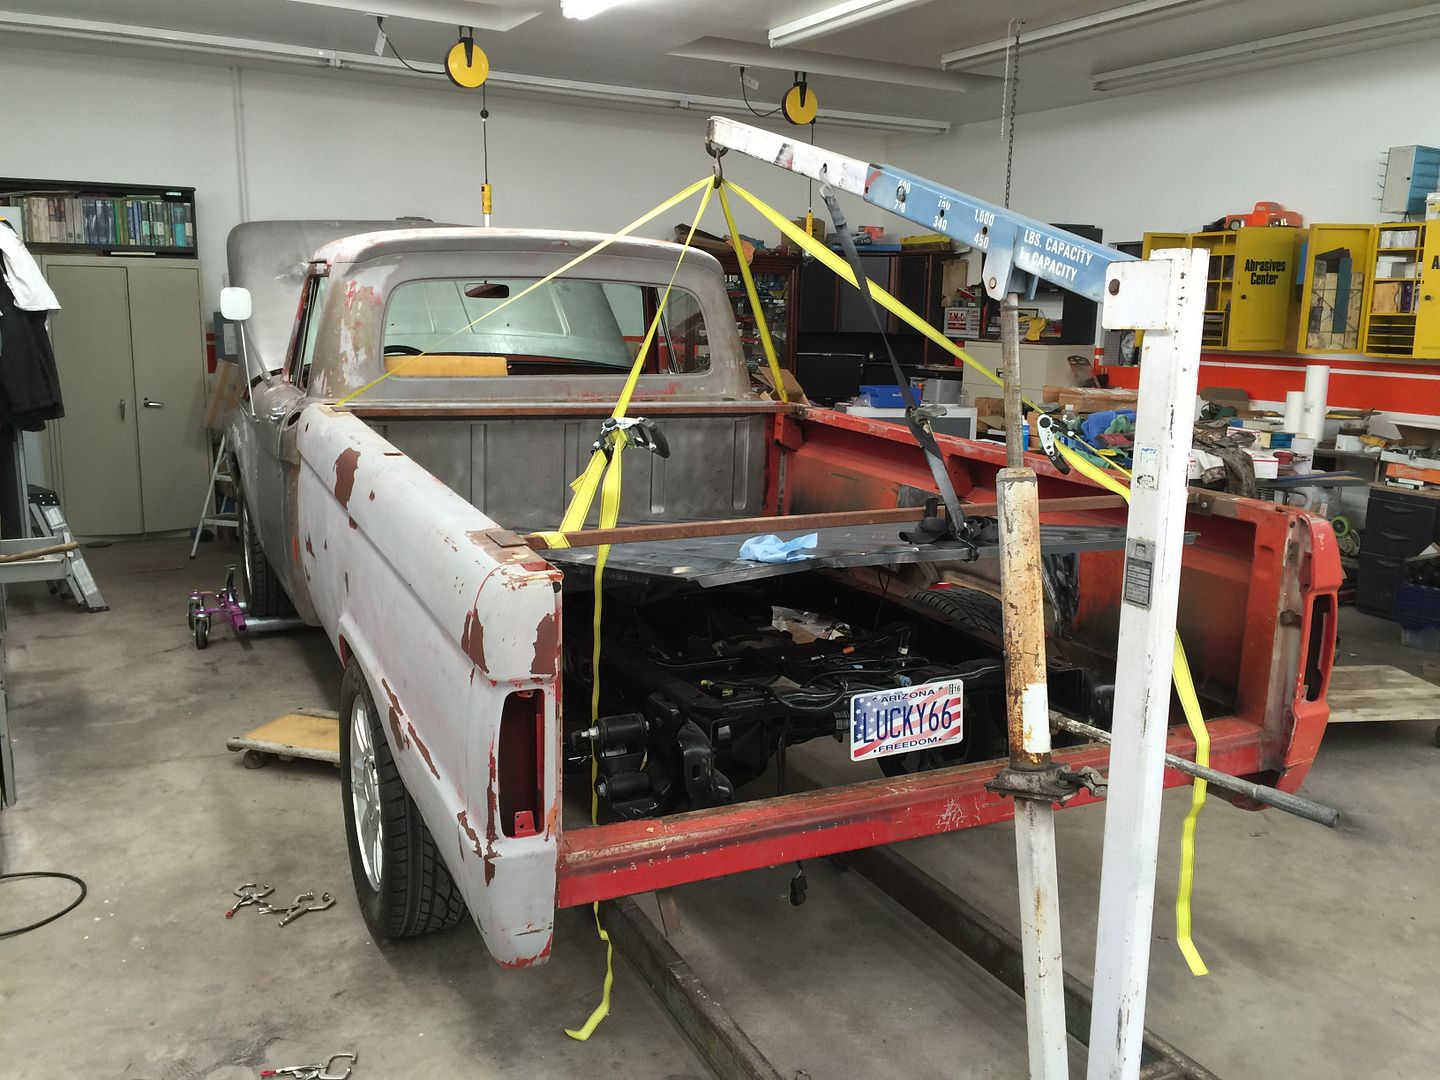
Moving the box up and down and around would be a pretty hard task by myself.

FAC7CB84-1CED-4084-B514-28EAFBF657C7.jpg


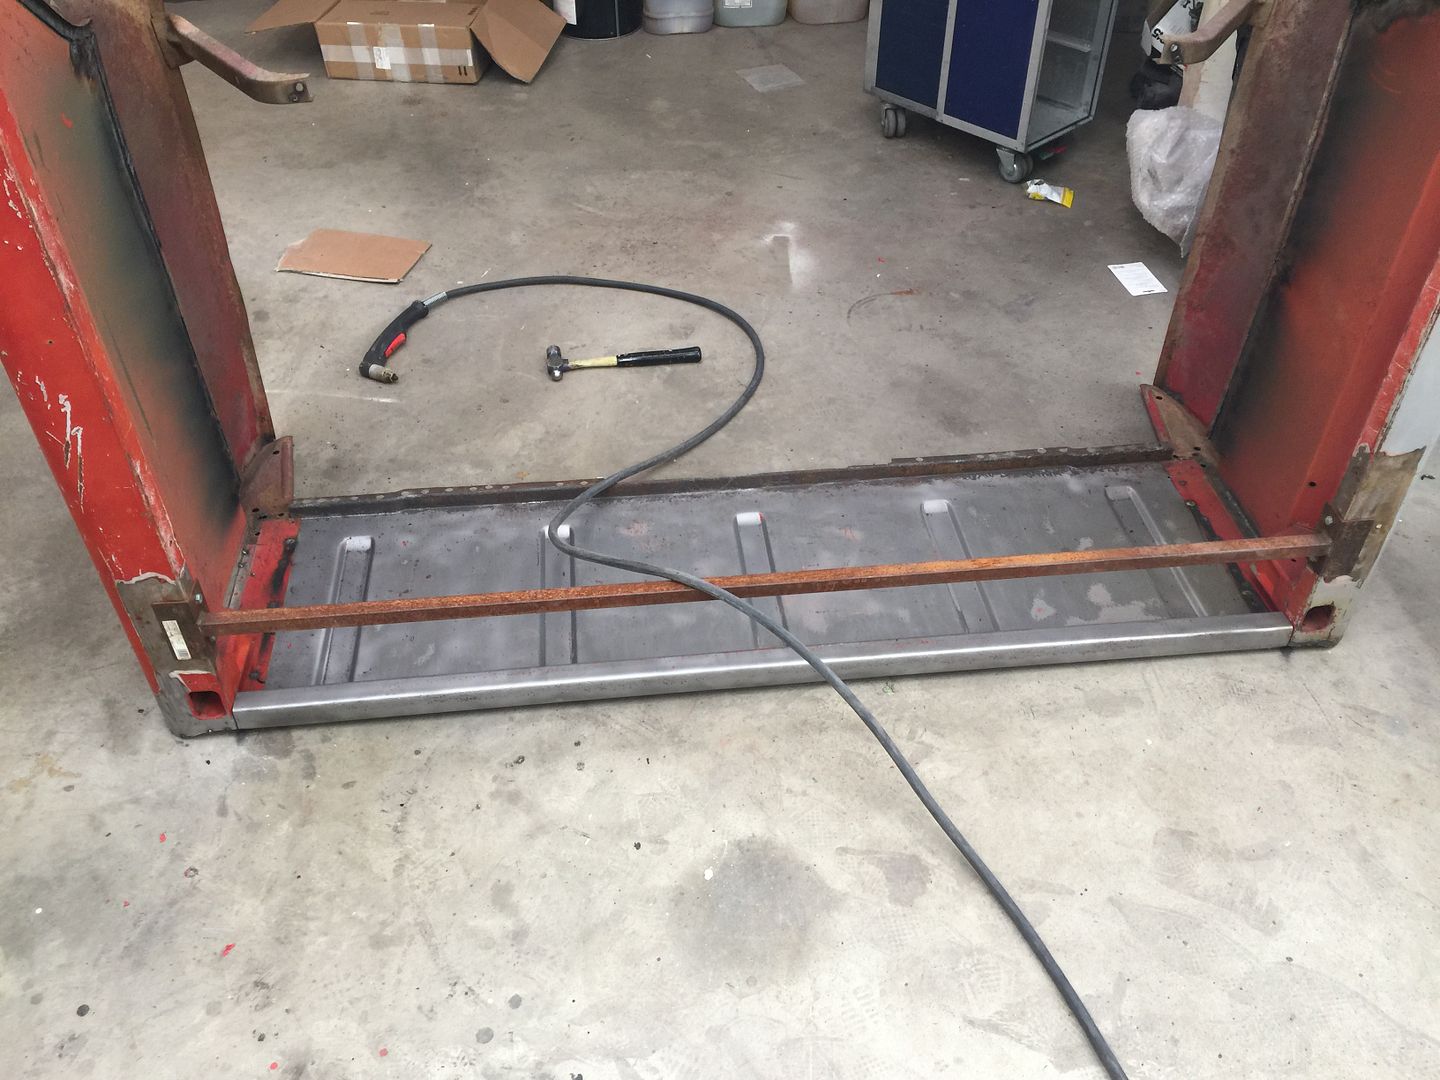
Since I purchased new fender tubs decided to just cut out the old floor completely. The plasma cutter made that cake walk. Except for the part when box was like above when I decided to make a cut from under as the bottom side had lip that made it difficult at best to get the plasma cutter in there.

And, Thats when with brain fade it happened in the first few seconds of cutting, a HUGE hot spark went down in ear with a fair amount of pain. A time I surely wish I would have had the ear muffs or ear plugs in place. A very quick reminder of the safety portion. That was one of those "Yahooooo Mountain dewwww moments" I am sure my ear will keep reminding me for the next few days. Get on a roll and one forgets the proper . . .

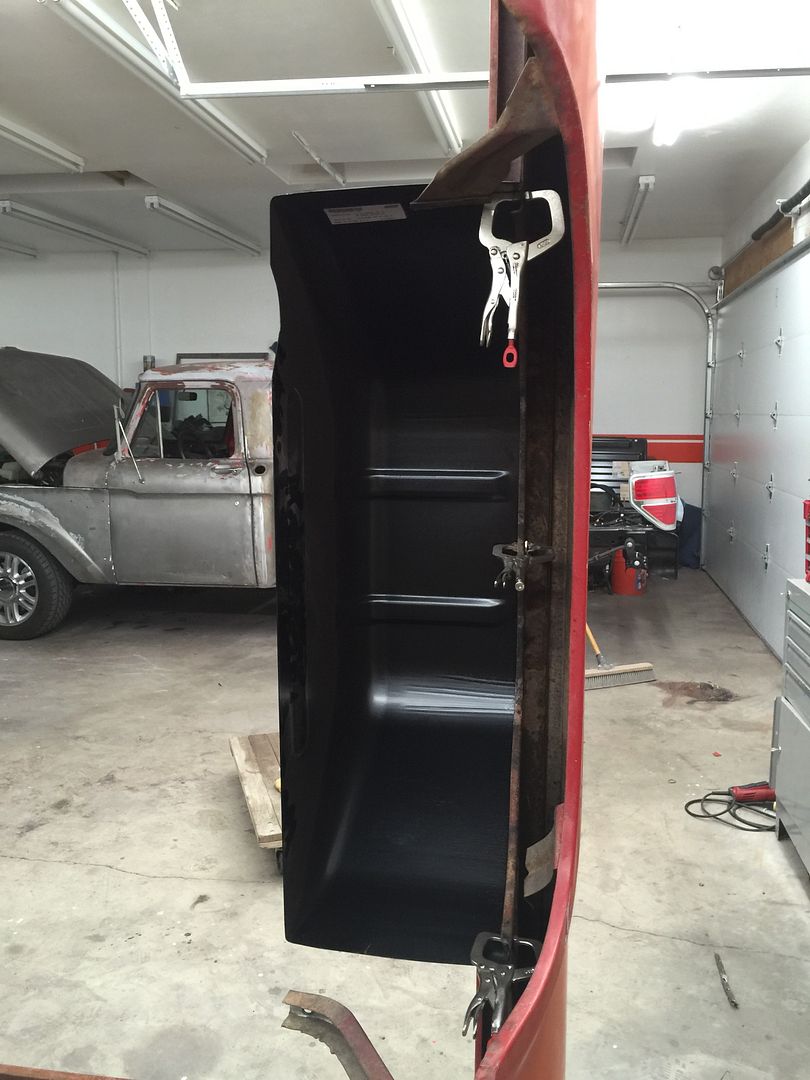
We then stood up the box to cut from opposite direction.

65F6F72E-96BF-425F-9042-C452C9C8A98B.jpg


AF50BEA1-1497-4F01-9BDC-13EAAE69EE12.jpg


Wheel tubs n floors now out

522CD8F9-1498-4359-B95C-8ED3B566F9E2.jpg


Now the dreadful part of drilling a bunch of spot welds.

Of course had to get one with EcoProject in view.

68B10ED8-2F47-46D9-AFBC-82FF16D826EA.jpg
 
To avoid these ads, REGISTER NOW!
OP
T

TimeWarpF100

Well-known member
Joined
Aug 21, 2010
Messages
6,784
Location
not here
Wheel tub

E40ABE20-0CAC-45C1-95EA-A79AD96A5505.jpg


Flange removed and spot welds ground down.

B37814D4-E86D-4239-ACE1-AD93C2C7BAFF.jpg


Test fit. Fits pretty decent.

8CC13EDA-BAC4-4677-814D-1EC00C891E7D.jpg


42B40C9C-AB19-49A0-9429-84004F611AE7.jpg


A sneak peak at dropping box in place

F5FBC940-6478-4AD2-93FF-1EDF362A9F92.jpg


Time for a treatment/appt to keep me going. That should kill nearly 4 hours. Long drive.
 

Skyline

Well-known member
Joined
Nov 11, 2008
Messages
3,586
couple more LOL

flip up floor

8689BD42-9102-472F-ABAB-09DADE5855DC.jpg

Looks like the bed is lining up with the body contours of the cab now. I was wondering why, given your crazy attention to detail, it was so far off in the previous photo with the bed sitting in position. I figured you'd fix that.
This is such a great thread to watch, and we all anxiously await every future development.
 

cspcrx

Well-known member
Joined
May 2, 2014
Messages
608
Location
Phoenix, AZ
Looking good! Cant wait to see it finished and on the street.

Got some hail at work today around 430pm in the sw valley. Came down pretty good.
 

rmalkow2

Well-known member
Joined
Jun 26, 2009
Messages
4,087
Location
Brighton, MI
Wheel Choices.

TW,
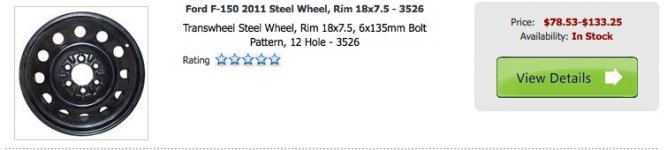
Maybe you've seen this before but I did not remember you discussing this option specifically. I personally like the wheels you have on the truck now but you had mentioned liking the more original look with steel wheels and the old original style hub caps. And that you needed 18" wheels to clear the 2011 brakes.
Well, Ford does make standard steel wheels in that diameter for the XL series trucks. I Googled 2011 F150 steel wheels and this is one example that popped up. Roughly $80-$100 each new but I bet you could find them used for much less or sell your aluminum ones to fund the change if you really want to go that way. These would be seen on many base model trucks with XL trim level like many companies use for service trucks.
They will probably require some modification to secure the old hub caps but your skills would make short work of that task.

Just a thought.
attachment.php
 

Attachments

  • wheel.jpg
    wheel.jpg
    38.7 KB · Views: 962
OP
T

TimeWarpF100

Well-known member
Joined
Aug 21, 2010
Messages
6,784
Location
not here
Looks like the bed is lining up with the body contours of the cab now. I was wondering why, given your crazy attention to detail, it was so far off in the previous photo with the bed sitting in position. I figured you'd fix that.

This is such a great thread to watch, and we all anxiously await every future development.

The pic I just posted yesterday showing box up was taken early on in build, used it for comparison to where I am at now. Box is like the cab, not quite a bolt on . . LOL

Looks great! Are you considering narrowing the rear axle?

I did very early on when I was building the rear. At the time I could not get someone willing to build me shorter axles. Shortening the tubes would have to have been outside the springs, Not a lot of room there. Also The outer portion where bearing is were not avail. Did not really want to start cutting up a brand new housing.

Another reason was I would also have to change the front suspension, the list went on and on. Just not feasable. Not a lot of aftermarket parts for the 9 3/4" rear at the time.

Thats why I thought just getting a different wheel offset would be a easier way. I also thought of modding the wheel openings/widen them out but trying to keep the exterior as stock looking as I can.


Wheel Choices.

TW,
Maybe you've seen this before but I did not remember you discussing this option specifically. I personally like the wheels you have on the truck now but you had mentioned liking the more original look with steel wheels and the old original style hub caps. And that you needed 18" wheels to clear the 2011 brakes.
Well, Ford does make standard steel wheels in that diameter for the XL series trucks. I Googled 2011 F150 steel wheels and this is one example that popped up. Roughly $80-$100 each new but I bet you could find them used for much less or sell your aluminum ones to fund the change if you really want to go that way. These would be seen on many base model trucks with XL trim level like many companies use for service trucks.
They will probably require some modification to secure the old hub caps but your skills would make short work of that task.

Just a thought.
attachment.php

I do like the Lariat wheels that's why I picked them up. None of the original chrome clad wheels were any good. Picked up the lariat wheels hoping they would fit and at least to use to measure from and also so I could move the chassis around and get a bit of test driving in. OUtside to outside of tires is 77" the exact same as outside of box.

I was thinking if I rolled the lips on box and moved the panels out a touch once bracing was out It would clear. Looks like it would but do not care for the look of being so far out.

It would be interesting to see what kind of offset on wheels you showed a pic of. Think i have seen that wheel on a Police expedition and a spare for like a Lincoln.

Only reason I was wanting to do the custom aluminum wheel was for proper offset. I have a place that says they can make them and at a reasonable price where I could just pop my NOS OEM hubcaps on. With a powdercoated center and a polished lip with a stock hub cap thought it would look cool too. I have things in back of my mind knowing I will have to deal with it. On the wheels I really have not had box close enough in place to figure out exact offsets needed.
.

Again badass project, and awesome your in Arizona, only about 60 miles away.. Its going to be nasty when done! :)

Thanks Mike! I do have a few HP tricks up my sleeve as a matter of fact I just got a Custom base Tune no WOT in my email this evening to get some data with. Mostly because of upgrades I made during install. 4x larger cooler, larger up pipes etc. Could be as much as 100 HP when dialed in

 
OP
T

TimeWarpF100

Well-known member
Joined
Aug 21, 2010
Messages
6,784
Location
not here
How box sits now. This pic the box is tight up to cab so will need to go back properamount.

8E1D4EA1-A931-4B40-B4BD-D6E310425012.jpg


This is the approx amount the box floor will need to be raised to make it all work.

DF220A73-8610-4F2E-B135-02312F3FA374.jpg


028C8C22-16DF-4DEE-8CDC-076FA00B1E57.jpg


I will also need to build a pocket for the fuel fill. Just not enough room to put it in the floor because of the capless fill system.

I ended up shortening the box 1 7/8". I also removed 1 3/4" from the new floor in front and 3/4" from new floor in rear. I was really worried about how difficult it would be to properly mount the 8' floor on a 6.5' box frame.

Another large bonus on moving things around is now the wheel houses will completely hid the upper shock mounts.

9840DD33-A928-4641-8CDB-A1AE29FBE398.jpg


D6E538D0-529D-4D39-98A5-B3193CC622E7.jpg


6206B868-7848-45A9-B8AC-C29FBABF932F.jpg


Here the box is teetering on the tire. needs up in front and down in rear . .


9EE6810A-3110-487A-B8EA-4D17FB6EB47A.jpg
 
OP
T

TimeWarpF100

Well-known member
Joined
Aug 21, 2010
Messages
6,784
Location
not here
Did not get started today until mid afternoon.

Spent most of that time doing other repairs like fixing my 41 yr old floor jack.

Then it was using the Go-Jacks in front to raise it, remove rear tire wheel and setting it on jackstands to get frame perfect level. Same with rocker panel, perfect level at this time. No clue how I had frame and cab level to each other after all the work mounting cab.

Once level placed the box floor onto frame. Realized that if it were shortened proper amount both ends it would be a very simple install. The front floor holes will be on inside of frame and the rear holes on outside of frame. perfect spot to put in a easy to make bracket. All I will have to do to get floor level is to raise front of floor 1/4" then proper shims for middle two cross members.

D0A60956-3F4B-4D3C-8A83-92E2F1919739.jpg


The last floor I bought for my other '66 project was perfect width. The new floor for EcoProject is 2" too narrow so will need some fill. Going to prob farm out the pieces on sides front and back of wheel houses. My brake is not tough enough to do that length in 16 ga. Actually thinking of just making a bit of frame work out of 1" tubing and plug welding just flat pieces of 16 Ga to that. (no spot welder)
 
Last edited:
OP
T

TimeWarpF100

Well-known member
Joined
Aug 21, 2010
Messages
6,784
Location
not here
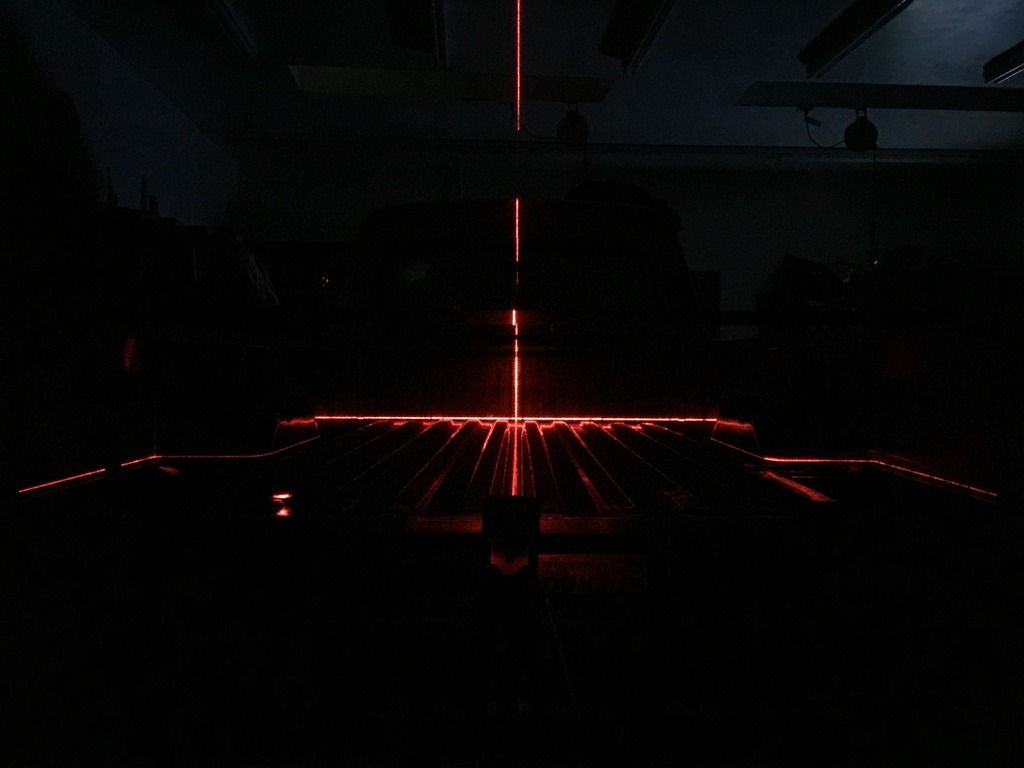
Once I get the floor fitted & box in place will just use the laser to shoot proper place to cut/mark.

Here I was experimenting with cab floor vs box. I wanted the cab 1" lower than where it is but getting box and core support to fit made that not possible.

DSC01573.jpg
 

Rodney Schultz

Active member
Joined
Mar 20, 2014
Messages
28
Location
Leduc, Alberta, CANADA
Over the last couple of days I went back and re-read this thread from the beginning. I was looking for a link that I knew was posted somewhere in the mix. (The one about the guy fabricating a "Grand Willys"). In the process, I just had to give you props for how far you have come. With so much stacked against you, so many times, you have perservered and come out on top! I lost count of how many times you were ready to pack it in, sell it all, walk away... And here you still are, with all of us cheering you on. For sure there are still obstacles ahead, more problems waiting to be sorted, but sorted they WILL be! I had to laugh out loud when I read any number of times that you said that you are not an engineer or a fabricator. Yes, sir, you are. Most of us couldn't fabricate our way out of a wet paper bag, you have shown us what is possible with a dream and determination. Hats off to you! If (when?) you next get down on this project or your health, take the time to review what you have shared here with us. No doubt you will be reminded of all the things you have conquered that you didn't even think to post here! Improved health and blessings to you in this new year. May it be the best yet!

Rodney
 
Last edited:
OP
T

TimeWarpF100

Well-known member
Joined
Aug 21, 2010
Messages
6,784
Location
not here
Over the last couple of days I went back and re-read this thread from the beginning. I was looking for a link that I knew was posted somewhere in the mix. (The one about the guy fabricating a "Grand Willys"). In the process, I just had to give you props for how far you have come. With so much stacked against you, so many times, you have perservered and come out on top! I lost count of how many times you were ready to pack it in, sell it all, walk away... And here you still are, with all of us cheering you on. For sure there are still obstacles ahead, more problems waiting to be sorted, but sorted they WILL be! I had to laugh out loud when I read any number of times that you said that you are not an engineer or a fabricator. Yes, sir, you are. Most of us couldn't fabricate our way out of a wet paper bag, you have shown us what is possible with a dream and determination. Hats off to you! If (when?) you next get down on this project or your health, take the time to review what you have shared here with us. No doubt you will be reminded of all the things you have conquered that you didn't even think to post here! Improved health and blessings to you in this new year. May it be the best yet!

Rodney

Well said Rodney, I truly enjoy looking forward to all of your updates TW! I wish I lived closer to help out and learn a thing or two!

Steve

All I can say to that is Thank You!
 

bulletpruf

Well-known member
Joined
Nov 28, 2013
Messages
11,140
Location
San Antonio
TW -

Looks like you're gathering some momentum here. I'm really excited to see the bed bolted down and hear more about how it drives.

Keep up with the updates and pictures and hope your health holds out.

Scott
 
OP
T

TimeWarpF100

Well-known member
Joined
Aug 21, 2010
Messages
6,784
Location
not here
TW -

Looks like you're gathering some momentum here. I'm really excited to see the bed bolted down and hear more about how it drives.

Keep up with the updates and pictures and hope your health holds out.

Scott

Thanks Scott!

Yeah, when help shows up during this heavy lifting portion and bulky stuff in makes a huge difference. Just to have someone grab a clamp or hold something or a second set of eyes.

Was just too tired to post pics last night.

Where we are at now.

I really wanted to use stock '11 hardware to mount the box.

C0D95D0B-541C-4FA6-A738-0CC9570D0E6C.jpg


I found a simple cheap n easy way to make the box mounts using stock hardware.

I needed to raise the front of bed floor exactly 1/2"

I just took a 1 x 2 piece of tubing, drilled a 3/4 hole in center then cut it in chop~band saw.

C70A2949-E25C-454E-8C6D-2AE7BCEECD70.jpg


Hole was placed where it fit the clip very nice. This will allow me aprox 1/4" of movement to adjust bed plus the extra in box floor hole. From center approx 1/2" movement in any direction.

40346790-842A-4122-B2B2-40727924692A.jpg


FFC7174C-6108-4843-9680-864221E0BBDD.jpg


Took the belt sander with a scotch brite and shined up the frame.

D42C6825-6DAE-4E39-AF68-C9422FED07B9.jpg


In place

24509FFC-648B-495F-AFD7-AFE809229C53.jpg


using a straight edge to keep the pieces square, measuring from points in frame and cab.

FA054C52-C330-4E7F-8251-2057A46FF62D.jpg
 
OP
T

TimeWarpF100

Well-known member
Joined
Aug 21, 2010
Messages
6,784
Location
not here
Getting pretty close to having all aligned. At least I can say now a bit more confident I can get the box to work. (except for tire fitment/clearance) Few idea's but. .

075346BE-11A1-4D50-88AE-A435EB5EDA5C_1.jpg


357C9D56-1A50-4A45-BCAC-1CCC6FA7817F_1.jpg


1D8FA545-CA82-47A8-BE38-8DE6AD4EE88D.jpg

FF484D2B-C951-4633-91AF-9DCE9762A5FF.jpg
 

rmalkow2

Well-known member
Joined
Jun 26, 2009
Messages
4,087
Location
Brighton, MI
TW,
Tire clearance idea for you. I was this idea somewhere on another customized '66 and thought of you. The application I saw was a very exaggerated wheel opening extension to fit dually wheels under the truck but in your case you only need a little extension to clear wider tires.

attachment.php


Where I've drawn the line in your rear box fender the idea would be to leave and extend outward the original flair and angle of wheel opening styling feature that came with the truck. You would cut along that line on the vertical part of the wheel lip and then add a little metal 1/2 to 1" (depending on what you need for clearance) and taper this down to a point as you round the front of the wheel opening so it blends back into the original body.
I'm thinking if you keep this extension subtle it may give you the clearance you need and retain the original design. One of those bodywork changes that after painted, people scratch their heads and can't really figure out what's different.
 

WoodsTruck

Well-known member
Joined
Jan 12, 2013
Messages
1,028
Would a fuel filler set up from an early Bronco do you any good? A lot of Broncos had dual tanks so they could be an option for either in front or behind the drivers side wheel well tub. 1976 and 1977 Broncos had actual fuel doors covering the cap if you wanted a cleaner look too.
 

Attachments

  • Bronco Fuel Filler 3.jpg
    Bronco Fuel Filler 3.jpg
    57.6 KB · Views: 131
  • Bronco Fuel Filler 2.jpg
    Bronco Fuel Filler 2.jpg
    61.9 KB · Views: 140
To avoid these ads, REGISTER NOW!
OP
T

TimeWarpF100

Well-known member
Joined
Aug 21, 2010
Messages
6,784
Location
not here
TW,
Tire clearance idea for you. I was this idea somewhere on another customized '66 and thought of you. The application I saw was a very exaggerated wheel opening extension to fit dually wheels under the truck but in your case you only need a little extension to clear wider tires.

attachment.php


Where I've drawn the line in your rear box fender the idea would be to leave and extend outward the original flair and angle of wheel opening styling feature that came with the truck. You would cut along that line on the vertical part of the wheel lip and then add a little metal 1/2 to 1" (depending on what you need for clearance) and taper this down to a point as you round the front of the wheel opening so it blends back into the original body.
I'm thinking if you keep this extension subtle it may give you the clearance you need and retain the original design. One of those bodywork changes that after painted, people scratch their heads and can't really figure out what's different.


Cannot see your pic
 
OP
T

TimeWarpF100

Well-known member
Joined
Aug 21, 2010
Messages
6,784
Location
not here
Would a fuel filler set up from an early Bronco do you any good? A lot of Broncos had dual tanks so they could be an option for either in front or behind the drivers side wheel well tub. 1976 and 1977 Broncos had actual fuel doors covering the cap if you wanted a cleaner look too.

Plan is to build something to hide filler inside of box.

I have worked on early Bronco's but had forgotten about what was done inside.

Outside I have the '11-'14 fuel door and pocket.

This truck has a no fuel cap system and its tied into the electronics so need to stick with it so I do not get a check engine light.

Have it figured out now. Thought about doing it in floor but just not enough height.

 
OP
T

TimeWarpF100

Well-known member
Joined
Aug 21, 2010
Messages
6,784
Location
not here
Box, cab, frame, wheel houses, box floor all now perfectly level. +/- 1/16"

Just hung 4 tape measures from box and used a laser to get it all near perfect.

FEF807E3-F8B3-495C-B0DC-55894EB9881E.jpg


A bit bright in shop for laser to show on black but its there.

229E793C-58B6-46D8-AD00-A4780AD2C7E3.jpg


6FF02DEB-00AE-4A8B-8811-EB866657D329.jpg


Found the mirror is perfectly centered too! LOL

3C4920A0-DEE0-4A67-A3A5-7F89372C6E3E.jpg


966C0664-18B1-45F4-A04F-F59540A0B465.jpg


577AB404-D596-4D27-AE1D-6D0EB40F9CF5.jpg


2D0C97B7-ED89-4B17-96F5-E13824DCA432.jpg


Just need box mounting hardware and then start building the framework to keep it all in place. Be nice to have a sheet metal brake that would handle 30" Pieces in 16 ga

I was thinking I may end up with floor raised 8-9" but turns out its exactly 6"
 
Last edited:
OP
T

TimeWarpF100

Well-known member
Joined
Aug 21, 2010
Messages
6,784
Location
not here
Can't see how to do it in a PM. I'll attached here again and try another method as a thumbnail.

66 Ford Wheel Opening.jpg

I can see the thumbnail.

Here is what I get on others. Just a little icon that will not allow me to click on it.

7006788C-9DEC-4E11-8913-016E021BE4B3.jpg

828C5EA5-C15E-42D6-A2D9-CC1D0ACA909E.jpg


Somewhere in this long thread I mentioned about doing just that. I was worried about keeping the panel straight. Not only that but I could move that out 4" and it will still not allow the tire to clear the box panel.

If the ride height was as such and all I needed was a inch or so in height it would be ok.

Only real option I have is keep it looking like a 4x4 or go with a different offset wheel. I still need to check up on the steel wheel you posted to find what the backspacing is.

I could also go with a much narrower tire but that means buying different tires. At this point I am moving along with other things that need doing.

Hoping to find a way to get the $$ for custom wheel or finding a wheel with proper offset that will work. I do need a larger wheel size to clear the large brakes.
 
OP
T

TimeWarpF100

Well-known member
Joined
Aug 21, 2010
Messages
6,784
Location
not here
Not an engineer, he says.
Not a fabricator, he says.

D-yaaaam, man! Ford better hire you quick like. They would LOVE tolerances that close! :willy_nil

Rodney

Now that you mention it I am complete opposite of a engineer.

https://en.wikipedia.org/wiki/Engineer

See, Even wikipedia agrees with me.

If a real engineer had this job they could take a few measurements and tell me where and how things needed to fit. They would know what to make it out of to be strong enough without overkill.

Not me I gotta see it up close then say, nope that will not work either and hope I find a solution. 3 steps forward 8 steps back . . . LOL

My math skills are 6th grade level, scientific knowledge -13.

When I look up the word Engineer on google/wiki I cannot pronounce most of the words much rather than have a clue what they are talking about.

I have about a dozen tape measures and they all read different. As a matter of fact just bought 2 more today. I just use em all and take the average!


Actually it took years for me to understand what a tape measure did. You can verify this with my daughters. When they would talk on the phone I would always wonder how long it was. I would run to the shop and grab a tape measure. Then they would ask:
"dad what are you doing with the tape measure?" And I would tell them trying to see how long you been on the phone . . Took years before I finally caught on . .

so what the purpose of getting that level?

Opposite of a engineer! LOL

Only way I could figure out exactly where bed floor had to be was mock it up in place. By getting the truck perfectly level then the box floor level along with the box hung over the chassis being level I could then mark and measure where the floor needed to be.

I just did not have the brain power to figure it out any way. I did not visualize how to go about installing floor until it was there in front of me.

Now that I can visualize it I can go get busy . . .

My brain is just wired wrong, some wires are burnt out and some are just plain missing multiple wires are crossed causing a miss-fire others are intermittent.

At this point I look around the shop to see what I have on hand to make it work. I have to pretty much trip over it before the light bulb comes on. Usually pretty dim at first, sometimes it turns on too bright and blinds me and I simply have to start over. Ha~ha


See, All that and I have no clue if I answered your question?
 
Last edited:

rmalkow2

Well-known member
Joined
Jun 26, 2009
Messages
4,087
Location
Brighton, MI
TW,
I laugh when you claim you are not an engineer. If you could only see some of the college graduate "engineers" we get in the industry today. I'm not sure many of them have ever even seen a tape measure.
engineering-flowchart-does-it-move-wd-40-duct-tape.jpg

Keep up the great work!
 

bcos

Well-known member
Joined
Aug 12, 2013
Messages
69
Awesome build. Please continue to post your progress. Your approach to problem solving is again awesome.
Thank You for sharing.
 
OP
T

TimeWarpF100

Well-known member
Joined
Aug 21, 2010
Messages
6,784
Location
not here
For the opposite of an engineer, you sure are doing a great job! :bowdown:

TW,
I laugh when you claim you are not an engineer. If you could only see some of the college graduate "engineers" we get in the industry today. I'm not sure many of them have ever even seen a tape measure.
engineering-flowchart-does-it-move-wd-40-duct-tape.jpg

Keep up the great work!

The layout of the tapes with the laser level was a stroke of genius. I'm with you, seeing is believing!

Awesome build. Please continue to post your progress. Your approach to problem solving is again awesome.
Thank You for sharing.

I was on a little road trip . . .


I would call this a engineer . .

http://www.garagejournal.com/forum/showthread.php?t=132812
 
OP
T

TimeWarpF100

Well-known member
Joined
Aug 21, 2010
Messages
6,784
Location
not here
Made a bit of progress on Eco.

**** dragging not sleeping well. Just got another year older too! LOL

Not much computer time but a few pics . .

1D62E738-D5BE-479E-83D8-AF81AA4F34DC.jpg

97A049DD-1AA1-465F-AB16-D8A98F30AEC8.jpg

13207B1D-0422-4630-B309-6EA457FF8846.jpg

14D85835-F881-4227-91CB-98126D872E46.jpg

B48EAB86-89F4-4B01-A936-59B89E062C98.jpg
 
OP
T

TimeWarpF100

Well-known member
Joined
Aug 21, 2010
Messages
6,784
Location
not here
Happy Birthday. Loving the progress on the bed. It looks even cooler than I thought it would.

Thanks!

Yesterday was birthday. Next year will turn the big 60!

Lots of pics n video but too busy to post much.

When help shows it's easier to stay focused.
 

Riley

Well-known member
Joined
Feb 18, 2007
Messages
398
Happy belated birthday!

I've been following this thread through the trails and tribulations and am so pleased for you to be nearing a finish!!

Absolutely amazing!!
 

Todd.Brock

Well-known member
Joined
Jul 15, 2008
Messages
4,250
Location
Cincinnati
Re: 1966 F100 EcoBoost Engine Swap & 1966 427 Project

Looks awesome! Glad to hear you are fighting through your health issues. I love this build and celebrate with you -as many do- as you post up progress pics and video.

What type of laser set up are you using for your truck bed?
 
Status
Not open for further replies.
To avoid these ads, REGISTER NOW!
Top Bottom