To avoid these ads, REGISTER NOW!

Between 485 & 705 SQ/FT Bob Heine's Auto Emporium

Workspaces between 485 and 705 squarefeet.

Craptain

Well-known member
Joined
Apr 18, 2013
Messages
4,032
Location
Tampa Bay FL
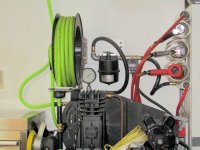
My 5,500 watt generator has a 220V output that uses a lockable 4-conductor plug. I have it wired through the A/C compressor fuse block so I can disconnect the compressor and back-feed power to the house next time a hurricane leaves us without power. Funny how since buying a generator we haven't had a power outage last more than a few hours. The longest lasted just long enough to air up the tires, drag the generator out, switch off the main breaker and most of the circuits in the house. As I was connecting the cable the street lights came back on....

I also have a similar generator and noticed the same weather related phenomenon. How does it know?


Sent from my SM-G900T using Tapatalk
 
To avoid these ads, REGISTER NOW!

walt111

Well-known member
Joined
Nov 25, 2006
Messages
305
Location
TN
I to have a generator which causes the same problem. as soon as you get everything set up with the gen the power comes back on.
walt
 

oldironfarmer

Well-known member
Joined
Jun 25, 2016
Messages
6,664
Location
Terlton, Oklahoma
We used to have power outages all the time. I fixed mine with an extension cord. East of my house the power line deviates from following the road and cuts cross country across my farm and the next one west. So it goes right behind my house and shop. I used to notice during power outages that my neighbor to the west still had power. The pole behind my shop has a sign "Two Way Feed". What the sign does not say is that there is no jumper across the pole. It is the end of two separate systems. So when I upgraded my shop and added a separate meter I had them hook it to the west (neighbor's) side. Then I made up a 150 ft extension cord out of my old #6-3 welding cable. I used it twice to power the house, once was for almost two weeks. It could have been shorter but the power company would drive by and see I had lights and couldn't hear a generator running. I had the main breaker at the pol shut off with a warning sign to not energize it without disconnecting the cord (I had no way to phase check it until the power was on).

The electric line must have learned of my trick because we haven't had a power failure of more than an hour for twenty years. (don't let on, but I have cut up that cord and used it for other things but the system doesn't know)
 

jbmatth

Well-known member
Joined
Jun 3, 2013
Messages
5,695
Location
Northern Ok.
I thought I lived in the middle of nowhere because I live at the end of our electrical run but as it turns out I live at the end of the earth. Andy lives in the middle of nowhere because he is at the end of two electrical runs. Now we know where we stand at least.

Bob thanks for the tip on the cord, I've got that book marked for when I set up my 22v welding outlet.
JB
 
OP
B

Bob Heine

ALLIANCE MEMBER
Joined
Oct 24, 2009
Messages
10,713
Location
Boca Raton, Florida
I'll be praying for you when you get down to the 60s, this winter! :lol:

Thanks for the compliment, I appreciate it!
Brent, thank you! It's a rare event but there are days in the winter when I have to switch the thermostat from cool to heat. The average low for the year is 61*F.
My cousin from out of state called me last year for my electrician's information as she was trying to wrap up her parent's estate. My uncle was a retired electrician who made things work in a similar fashion. The buyers' inspector found a 240 volt line run with 10 gauge wire to a 40 amp rated receptacle which matched the plug on his equipment. The inspector's recommendation was to upgrade the wiring. Somehow the inspector missed that the breaker was a 30 amp. I suggested they replace the receptacle with a dryer receptacle (30 amp) and call it a day. Since they had not signed off on the repair addendum that was the $8 answer and their counter proposal was accepted.
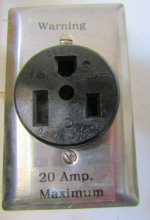
Kenny, I like that solution. I don't have the NEC book yet but I've given the problem my "Technical Writer" solution: labeled the outlet cover so it covers my ***.
attachment.php


Of course you would have to find this Waldo outlet and unplug the compressor before the label is visible.
attachment.php


For the lawyer who may someday represent me or my estate, perhaps I should put the warning in Red. Nah, I'm gonna live on the edge and let my heirs sort it out.
I also have a similar generator and noticed the same weather related phenomenon. How does it know?


Sent from my SM-G900T using Tapatalk

I to have a generator which causes the same problem. as soon as you get everything set up with the gen the power comes back on.
walt
Andrew and Walt, I am doubly surprised that my generator repels hurricanes. My electric chainsaw and rechargeable polesaw were useless after hurricane Wilma in 2005 so I joined the crowds at Home deport and bought a gas chainsaw, gas polesaw and the generator. I learned my situation qualified for assistance from FEMA. I filed the pile of required paperwork after the power was restored. Rather than ask for receipts, FEMA came out to the house and verified that I had a generator and chainsaw. FEMA paid a standard amount, which was more than I actually spent on the two items and it was enough to pay for the polesaw as well.
We used to have power outages all the time. I fixed mine with an extension cord. East of my house the power line deviates from following the road and cuts cross country across my farm and the next one west. So it goes right behind my house and shop. I used to notice during power outages that my neighbor to the west still had power. The pole behind my shop has a sign "Two Way Feed". What the sign does not say is that there is no jumper across the pole. It is the end of two separate systems. So when I upgraded my shop and added a separate meter I had them hook it to the west (neighbor's) side. Then I made up a 150 ft extension cord out of my old #6-3 welding cable. I used it twice to power the house, once was for almost two weeks. It could have been shorter but the power company would drive by and see I had lights and couldn't hear a generator running. I had the main breaker at the pol shut off with a warning sign to not energize it without disconnecting the cord (I had no way to phase check it until the power was on).

The electric line must have learned of my trick because we haven't had a power failure of more than an hour for twenty years. (don't let on, but I have cut up that cord and used it for other things but the system doesn't know)
Andy, I love the story but being superstitious I wouldn't have cut the cord.

In the weeks after Wilma, power was gradually restored. My good friend, who lived across the street, worked for Florida Power and Light and oddly his power was restored within two weeks. He actually talked his crew into restoring mine just a few weeks later, well before schedule. To be fair, he did offer to string an extension cord across the street from his house to mine but I would have had to erect my own power pole (I had cut up the one in my back yard that fell down).
I thought I lived in the middle of nowhere because I live at the end of our electrical run but as it turns out I live at the end of the earth. Andy lives in the middle of nowhere because he is at the end of two electrical runs. Now we know where we stand at least.

Bob thanks for the tip on the cord, I've got that book marked for when I set up my 22v welding outlet.
JB
JB, sometimes it's good to live at the end of the earth. My grandparents house in Vermont was 4 miles from town on a dirt road. Foster kids at the farm down the road were my playmates; a lake, hay field and abandoned slate quarry were my playgrounds. We may have had power outages but you couldn't tell. We went to bed when the sun went down and got up when the sun came up. No need to turn on the lights and no idea what a TV was.
 

Attachments

  • 220V Outlet 1.jpg
    220V Outlet 1.jpg
    77.5 KB · Views: 460
  • 220V Outlet 2.jpg
    220V Outlet 2.jpg
    89.9 KB · Views: 460

oldironfarmer

Well-known member
Joined
Jun 25, 2016
Messages
6,664
Location
Terlton, Oklahoma
I long for your grandparents life in Vermont, by the way.

Interesting stories about Wilma. And proof FEMA took care of our tax dollars.:thumbup:

I love your warning label. I'm pretty sure the new occupants will see a garage with the compressor already removed. Who needs a compressor?
 
OP
B

Bob Heine

ALLIANCE MEMBER
Joined
Oct 24, 2009
Messages
10,713
Location
Boca Raton, Florida
Wild Bob, living on the edge. Shocking.


Sent from my iPhone using Tapatalk
Stewart, it would be lonely living on the edge if it weren't for the Garage Journal, which has attracted a good size mob of like-minded people.
I long for your grandparents life in Vermont, by the way.

Interesting stories about Wilma. And proof FEMA took care of our tax dollars.:thumbup:

I love your warning label. I'm pretty sure the new occupants will see a garage with the compressor already removed. Who needs a compressor?
Andy, the new occupants won't use the garage for anything garage-related. Like the majority of Florida garages it will be a dumping ground for "stuff."
 
OP
B

Bob Heine

ALLIANCE MEMBER
Joined
Oct 24, 2009
Messages
10,713
Location
Boca Raton, Florida
I venture out of the house on occasion in the summer. Usually happens shortly after my wife ventures out. She finds something to worry about, comes in the house and does her best to get me to worry about it too.

Last week a potted plant in the garden appeared to be suffering from sunburn and dry soil. Blame for the sunburn is the sun, over which I have no control. Blame for the dry soil is the sprinkler head in the garden, over which I have control and must therefore worry.

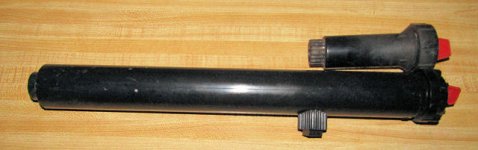
There are a number of places where plants can block my standard sprinkler heads, which pop up four inches. The solution is to replace the head with one that pops up higher. I have some six-inch pop-up heads but that might not be enough in this spot. I decided to install a 12-inch pop-up head. Here are the two heads for comparison.
attachment.php


The 12-inch head can be connected to the plumbing through the bottom or side port and I chose to use the side port. The first time I installed one of these I used a small trowel to dig the hole for the sprinkler head. I found a better way, using a rather large drill bit. This photo also shows the size of the pop-up section in its fully extended position.
attachment.php


Most of this 100-foot long garden is watered by sprinklers attached to 3-foot sections of PVC pipe but this spot in the garden has a bunch of tall plants at the back that would block the water. That's why this head is located at the front of the garden.
attachment.php


The day and I were shot by the time I finished the sprinkler head. Most of the land in this part of Florida is sand but our property sits on a coral ridge. The spot where I wanted to install the sprinkler head was coral rock rather than sand so the drilling got more involved and took quite a while to complete. The umbrella kept me from bursting into flame, as did my sweat-soaked clothing.

I'm looking forward to learning what I should be worrying about next.
 

Attachments

  • Sprinkler Head 4.jpg
    Sprinkler Head 4.jpg
    46.3 KB · Views: 346
  • Sprinkler Head 2.jpg
    Sprinkler Head 2.jpg
    43.5 KB · Views: 346
  • Sprinkler Head 3.jpg
    Sprinkler Head 3.jpg
    75.8 KB · Views: 347
Last edited:
OP
B

Bob Heine

ALLIANCE MEMBER
Joined
Oct 24, 2009
Messages
10,713
Location
Boca Raton, Florida
While I was doing the sprinkler swap, my wife found some branches on a maple tree that were at eye level and might poke an eye out. Having made one attempt to poke my eye out, this got my attention and I was on-board with this new worry.

The trees I needed to worry about are near the large Ficus in the corner of our back yard. The Ficus was attacked by white flies the past few years and I hoped it would die but no such luck. From the high part of our yard, you can see the top of the tree beyond the screen enclosure and palm trees. It has completely recovered from the white flies and is growing like the weed it is once again.
attachment.php


The Maple pruning took only a few minutes but I noticed the lower branches of the Ficus were covering the top of the Maple trees. A few minutes turned into a few hours but I eventually cut the five branches causing the problem. Holding my 17-foot pole saw by the bottom and reaching as high as I could without getting out the ladder, I was just able to get the blade started on the branches. Once the branches were down I used the electric chainsaw to cut them up into 6-foot pieces. I had a momentary "Ah $hit" when the chainsaw took forever to cut through a 6-inch diameter branch on the ground.

Thanks to Andy (Oldironfarmer) my frustration with the performance of my chainsaw was an easy fix. Fifteen minutes with a chainsaw file (OK, ten minutes to find the file and five minutes to sharpen) the chainsaw was working great. The view from the Ficus back toward the spot in the first picture shows the expanded opening with the Maple trees on either side of the Magnolia.
attachment.php


Because it was the middle of the week, I piled up all the cuttings to the right of that last view. The cuttings go out Sunday evening for the Monday bulk pickup. I normally do the yard work on Sunday and this process reminded me why. The Ficus leaves start falling off the branches very soon after the branch is cut. This reduces the bulk of the branch pile but creates a pile of leaves that need to be raked up and removed. I can stack a fair number of branches in the wagon and keep it from falling out with a 4-foot bungee.
attachment.php


Leaf raking is not my favorite job but I no longer try to gather all the leaves with my arm. I push the pile on my leaf rake with my left foot and lift the pile into the lined trash can. By the end of the day my back is only whining rather than screaming so loud I can't think. I don't yet have a "bad back" so I'm trying to keep it that way. Oh, I almost forgot -- headbands look stupid but they keep a lot of sweat out of my eyes and sunglasses.
attachment.php
 

Attachments

  • Pruning Festival 4.jpg
    Pruning Festival 4.jpg
    139.2 KB · Views: 350
  • Pruning Festival 3.jpg
    Pruning Festival 3.jpg
    81.4 KB · Views: 342
  • Pruning Festival 2.jpg
    Pruning Festival 2.jpg
    141.1 KB · Views: 346
  • Pruning Festival 1.jpg
    Pruning Festival 1.jpg
    111.3 KB · Views: 344
OP
B

Bob Heine

ALLIANCE MEMBER
Joined
Oct 24, 2009
Messages
10,713
Location
Boca Raton, Florida
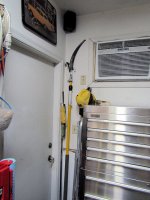
While I was using the 17-foot pole saw and sharpening the chainsaw, I had one of those moments. My two big pole saws are a bit more than nine-feet long in their un-extended position. The free trash-pile pole saw from my neighbor is much shorter (11-foot extended and 7-foot 7-inch compressed) and would be perfect to store in the garage. Many times I need to cut a fallen palm frond or branch that's only 10-feet off the ground.

An hour or so with some Crazy glue to fix the collet, another hour fixing the pull rope on the pruner and a half-hour de-rusting and sharpening the saw blade and I have a free-ish polesaw handy at the back door of the garage. It's turning into the yellow corner of the garage.
attachment.php
 

Attachments

  • Pole Saw Restored.jpg
    Pole Saw Restored.jpg
    81.9 KB · Views: 344

shortykorte

Well-known member
Joined
Sep 1, 2014
Messages
8,039
Location
Tallahassee, Fl
Bob you lucky dog. You get to dig in coral rock. I got the please when I first started with DOT. I helped the field crew place monuments along turnpike.


Sent from my iPhone using Tapatalk
 

oldironfarmer

Well-known member
Joined
Jun 25, 2016
Messages
6,664
Location
Terlton, Oklahoma
He is a lucky dog. Or at least a dog. No, he's lucky dog, he does not have to worry about going out in the heat and finding problems. His subservient intrepid wife does that for him out of respect. Once she has identified potential issues Bob carefully weighs each issue then does all of them. That encourages his lovely wife to continue her quest to uncover all trouble and failure and save lucky Bob that lowly effort. And as a bonus, Bob staves of the inevitable fear of all retirees, boredom.:bowdown::bowdown:
 

Guster

Well-known member
Joined
Mar 11, 2012
Messages
1,543
Location
Auckland, New Zealand
An hour or so with some Crazy glue to fix the collet, another hour fixing the pull rope on the pruner and a half-hour de-rusting and sharpening the saw blade and I have a free-ish polesaw handy at the back door of the garage. It's turning into the yellow corner of the garage.
attachment.php

:headscrat For a second there I thought I was on Shopnuts' thread! Love the stainless tool cabinet Bob. :thumbup:

And as a bonus, Bob staves of the inevitable fear of all retirees, boredom.:bowdown::bowdown:

Not to mention saving him having to fork out for callisthenics or Zumba or whatever it is that kids do these days to stay fit! :)
 

dlcwent

Member Emeritus
Joined
Feb 24, 2014
Messages
8,427
Location
coastal maine
He is a lucky dog. Or at least a dog. No, he's lucky dog, he does not have to worry about going out in the heat and finding problems. His subservient intrepid wife does that for him out of respect. Once she has identified potential issues Bob carefully weighs each issue then does all of them. That encourages his lovely wife to continue her quest to uncover all trouble and failure and save lucky Bob that lowly effort. And as a bonus, Bob staves of the inevitable fear of all retirees, boredom.:bowdown::bowdown:

:lol_hitti:lol_hitti:lol_hitti


Great job as usual Bob. I couldn't agree with you more about the headbands, maybe not highly fashionable but very practical at keeping your eyes from burning and blurry with sweat.
 

oldironfarmer

Well-known member
Joined
Jun 25, 2016
Messages
6,664
Location
Terlton, Oklahoma
Bob, when I saw the corner of your garage it made me think "old yeller" tribute, looking good there. You've been studying at the School of Innovative Repair by Vladimir.:bowdown:
 
OP
B

Bob Heine

ALLIANCE MEMBER
Joined
Oct 24, 2009
Messages
10,713
Location
Boca Raton, Florida
Bob, that's one fantastic effort in the garden:bowdown:
Steve, thanks for that. If I were doing the lawn mowing, edging, trimming and pruning you do (two plots no less) it would be a lot more impressive. I only have to do it once in a while.
:lol_hitti:lol_hitti:lol_hitti


Great job as usual Bob. I couldn't agree with you more about the headbands, maybe not highly fashionable but very practical at keeping your eyes from burning and blurry with sweat.
Dan, I was buying headbands at sporting goods stores and kept using them until the elastic was gone. When it became a blindfold I would replace it but I hated paying the outrageous prices just to have some macho label. I ended up buying 20 headbands on the Internet for about the same price as one Nike headband.
Bob, when I saw the corner of your garage it made me think "old yeller" tribute, looking good there. You've been studying at the School of Innovative Repair by Vladimir.:bowdown:
Andy, I'm trying to emulate Vladimir but he is the master -- I hope to graduate to Grasshopper belt some day.
 
OP
B

Bob Heine

ALLIANCE MEMBER
Joined
Oct 24, 2009
Messages
10,713
Location
Boca Raton, Florida
I have actually been busy in the garage and shop. I came across two hand planes in the shop. The rabbet plane (did not know that's what it was) belonged to my father and was among his tiny collection of tools. The other plane belonged to my father-in-law and it was one of his even smaller collection of tools (before I came on the scene he called a handyman to change a light bulb in a ceiling fixture). They are obviously rarely used.
attachment.php


The planes are rarely used for two reasons. First, I had no idea how to sharpen or set them up so they worked properly and second, I have the power planer. Sorry about the sideways picture but after fixing it twice I give up.
attachment.php


I began disassembling the FIL plane and as you can see above it's pretty rusty. I have a gallon jug of white vinegar in the kitchen but that seemed too simple. Another enabler on the GJ purchased an ultrasonic cleaner, filled it with most of a gallon of Evapo-Rust. It turned the clear liquid to a swamp-like appearance in very little time and the rusty parts of the plane were no longer orange. I wanted to buy an ultrasonic cleaner but the one at Harbor Freight seemed awful small for $80. On the other hand the big ones started in the thousands. The one I bought is a good size (big enough for the whole plane body), has a heater and was $140 delivered.
https://www.amazon.com/gp/product/B00Y83YCK4/?tag=atomicindus08-20
attachment.php


I think the electrolysis process would be better but this was good enough for me and I didn't have to wait (OK, 2-day shipping is waiting but my vinegar experiments have not gone well). Here are the parts after a wipe-down and coat of WD-40.
attachment.php


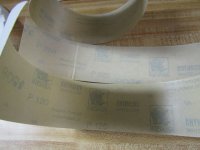
Once I had the heavy rust taken care of, I wanted to clean up the shoe of the plane. I have rolls of PSA (Pressure Sensitive Adhesive) sandpaper in 120-, 220- and 400-grit. Cut a foot or so off the roll, peel off the backing and stick it down on a clean, perfectly flat granite surface (or a clean Formica counter) and start sanding. I think I changed the paper three times but both shoes came out pretty good.
attachment.php


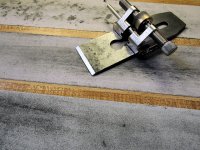
After some time spent watching experts sharpen some plane irons, I acquired a roller guide and set the iron for a 25-degree edge. I don't recall doing it but it looked like I tried putting an edge on the iron by holding it to the side of a grinding wheel (lots of curved scratches on the 22..68469-degree edge). Anyway, with three fresh strips of sandpaper and lots of strokes I had a decent 25-degree edge on the iron.
attachment.php


I've run out of photos for this post so "To Be Continued" in the next post.
 

Attachments

  • Planes 2.jpg
    Planes 2.jpg
    97.3 KB · Views: 206
  • Planes 4.jpg
    Planes 4.jpg
    101.9 KB · Views: 205
  • Planes 5.jpg
    Planes 5.jpg
    105.4 KB · Views: 206
  • Planes 7.jpg
    Planes 7.jpg
    61.6 KB · Views: 4
  • Planes 8.jpg
    Planes 8.jpg
    91.6 KB · Views: 206
  • Planes 9.jpg
    Planes 9.jpg
    129.2 KB · Views: 205
  • Planes 3.jpg
    Planes 3.jpg
    105 KB · Views: 205
OP
B

Bob Heine

ALLIANCE MEMBER
Joined
Oct 24, 2009
Messages
10,713
Location
Boca Raton, Florida
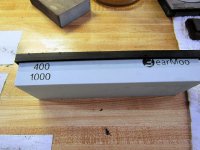
I discovered that 400-grit sandpaper wasn't the ultimate edge for a plane iron so I bought two stones at the same time I ordered the Chisel/Plane Iron guide. The first stone is 400/1000-grit so it's a bit redundant.
attachment.php


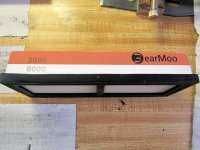
The second stone is almost silly, with 3000/8000-grit surfaces.
attachment.php


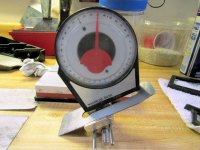
I didn't follow instructions setting the plane iron angle. I used a magnetic angle finder typically used to set pinion angles in automotive drivelines. I did check the countertop to be sure it was level (0-degrees).
attachment.php


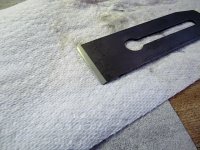
I was pleased with the results of the second sharpening but I don't think I got the perfect burr on the edge. This is my first time sharpening anything with this much precision so future attempts may be better. The 25- and 30-degree edges are pretty obvious.
attachment.php


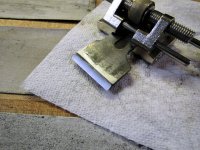
I was a little worried about the rabbet plane because the blade is an odd shape and much narrower. I used the chisel holder position on the guide and it worked just fine. This is the 25-degree edge and the rest of the process was just a repeat performance.
attachment.php


I re-assembled the planes and tested them on a piece from a split 1"x6". They both performed better than I expected and I was able to get almost transparent curls of wood shavings.
attachment.php


I gave the wooden handles a couple of coats of Tung Oil but it wasn't quite dry when I was ready to test the plane. The Waltham plane is a crude version of a Stanley plane, with stamped steel rather than cast iron parts and the sides of the plane are rough cast and coarse ground (I did a little sanding but didn't try to make it look machined). I have the depth stop for the Stanley Rabbet plane but I can't find the side guide. I found a new one on Amazon for around $20 so that will almost finish it off. I may yet find the knurled knob or thumbscrew for the depth stop but if not, I can make one from a 10-32 screw. I think the Made in England Stanley planes use a different thread. I did find some thumbscrews for a Stanley No. 78 on eBay but the sellers seem to think they are worth $25 or more.
attachment.php


I don't plan to paint the planes because the wear and tear is OK with me. I don't want them too fancy to use. Here's the Waltham with knob and handle installed.
 

Attachments

  • Planes 10.jpg
    Planes 10.jpg
    94.8 KB · Views: 464
  • Planes 11.jpg
    Planes 11.jpg
    110.4 KB · Views: 458
  • Planes 12.jpg
    Planes 12.jpg
    96 KB · Views: 458
  • Planes 13.jpg
    Planes 13.jpg
    101.8 KB · Views: 457
  • Planes 14.jpg
    Planes 14.jpg
    102.8 KB · Views: 456
  • Planes 15.jpg
    Planes 15.jpg
    96.8 KB · Views: 454
  • Planes 16.jpg
    Planes 16.jpg
    96.4 KB · Views: 454
To avoid these ads, REGISTER NOW!

oldironfarmer

Well-known member
Joined
Jun 25, 2016
Messages
6,664
Location
Terlton, Oklahoma
Isn't it great fun to sharpen a tool and have it work better than expected. I'm glad to see them on their sides, as I was taught. I know there are two schools of thought, but I just can't stand to set them down on a sharp blade.
 

shortykorte

Well-known member
Joined
Sep 1, 2014
Messages
8,039
Location
Tallahassee, Fl
Bob, looks like you've been frequenting Jim Reed's thread. He offers a lot of great info, but a guy can get easily hooked.


Yes Jim does. I'm glad he lives right around the corner and he got two of my planes cuttin' like budda
Bob, you might check with Jim on the screw.


Sent from my iPhone using Tapatalk
 

Lyndon

Well-known member
Joined
Aug 11, 2014
Messages
2,535
Location
Sydney, Australia
Bob

Excellent work, and three weeks quicker (up to now) than I've taken on mine.... But then again, you get 6 Saturdays a week...... :rocker: ;)

I've now got 4 planes in very stages of dis-assembly on the bench. Must get back to them. And you're right about some of the prices for the parts. Sheesh.

Anyway, at least I just received, yesterday, the missing parts for the No 5.

Keep it up

Lyndon
POETS Day here. :hellobye:
 

dchance

Well-known member
Joined
Oct 3, 2016
Messages
614
Location
OKC
Bob, you planes are looking great to me and I liked you explanation on sharpening. I think I need more planes.

Dwight
 

bolensboneyard

Well-known member
Joined
Nov 22, 2013
Messages
3,074
Location
South East
I discovered that 400-grit sandpaper wasn't the ultimate edge for a plane iron so I bought two stones at the same time I ordered the Chisel/Plane Iron guide. The first stone is 400/1000-grit so it's a bit redundant.
attachment.php


The second stone is almost silly, with 3000/8000-grit surfaces.
attachment.php


I didn't follow instructions setting the plane iron angle. I used a magnetic angle finder typically used to set pinion angles in automotive drivelines. I did check the countertop to be sure it was level (0-degrees).
attachment.php


I was pleased with the results of the second sharpening but I don't think I got the perfect burr on the edge. This is my first time sharpening anything with this much precision so future attempts may be better. The 25- and 30-degree edges are pretty obvious.
attachment.php


I was a little worried about the rabbet plane because the blade is an odd shape and much narrower. I used the chisel holder position on the guide and it worked just fine. This is the 25-degree edge and the rest of the process was just a repeat performance.
attachment.php


I re-assembled the planes and tested them on a piece from a split 1"x6". They both performed better than I expected and I was able to get almost transparent curls of wood shavings.
attachment.php


I gave the wooden handles a couple of coats of Tung Oil but it wasn't quite dry when I was ready to test the plane. The Waltham plane is a crude version of a Stanley plane, with stamped steel rather than cast iron parts and the sides of the plane are rough cast and coarse ground (I did a little sanding but didn't try to make it look machined). I have the depth stop for the Stanley Rabbet plane but I can't find the side guide. I found a new one on Amazon for around $20 so that will almost finish it off. I may yet find the knurled knob or thumbscrew for the depth stop but if not, I can make one from a 10-32 screw. I think the Made in England Stanley planes use a different thread. I did find some thumbscrews for a Stanley No. 78 on eBay but the sellers seem to think they are worth $25 or more.
attachment.php


I don't plan to paint the planes because the wear and tear is OK with me. I don't want them too fancy to use. Here's the Waltham with knob and handle installed.

Bob this is great. I bought one of those tools before I broke my ankle and by the time I get to playing with it you will have doped out the pitfalls and can be my Sensi. :bowdown:
 
OP
B

Bob Heine

ALLIANCE MEMBER
Joined
Oct 24, 2009
Messages
10,713
Location
Boca Raton, Florida
Isn't it great fun to sharpen a tool and have it work better than expected. I'm glad to see them on their sides, as I was taught. I know there are two schools of thought, but I just can't stand to set them down on a sharp blade.
Hi Andy! I love the whole tool sharpening thing. My real thanks should go to the kind people who spend hours making videos showing the proper processes. I am pretty sure my previous attempts just made the tools dull. I have not been real careful up to this point setting the planes down but I'm going to get better -- this is not a quick process for me. I normally store the planes on a pegboard with hooks far away from the blades.
And, ho ware you coming on PB eradication? I'm up to page 76 on mine. So I'm almost halfway.
Oh dear, I'm at page 10 and 90. I started from the beginning and then got distracted with the later posts. Problem is my short attention sp
Bob, looks like you've been frequenting Jim Reed's thread. He offers a lot of great info, but a guy can get easily hooked.
John, I haven't but I certainly will. I found Paul Sellers' videos when I was looking for tips on saw sharpening and then I found his plane iron episode.
Yes Jim does. I'm glad he lives right around the corner and he got two of my planes cuttin' like budda
Bob, you might check with Jim on the screw.


Sent from my iPhone using Tapatalk
Thanks for the heads-up Stewart.
Bob

Excellent work, and three weeks quicker (up to now) than I've taken on mine.... But then again, you get 6 Saturdays a week...... :rocker: ;)

I've now got 4 planes in very stages of dis-assembly on the bench. Must get back to them. And you're right about some of the prices for the parts. Sheesh.

Anyway, at least I just received, yesterday, the missing parts for the No 5.

Keep it up

Lyndon
POETS Day here. :hellobye:
Lyndon, I haven't had many distractions and my health has been pretty good recently. The extra Saturdays are the real secret.
Bob, you planes are looking great to me and I liked you explanation on sharpening. I think I need more planes.

Dwight
Dwight, I really enjoyed the process and I think I need some more planes as well. My wife is happy(?) with these two but knows too well that I won't actually put them to much use. I may take my sharpened tools to my son's house to show my grandchildren how things were done in Ancient Times (my era).
Bob this is great. I bought one of those tools before I broke my ankle and by the time I get to playing with it you will have doped out the pitfalls and can be my Sensi. :bowdown:
Bobby, if by Sensi you mean Junior Grasshopper, I agree. I'm sure you have an angle gauge so you don't have to calculate the length of the hypotenuse of 25- and 30-degree triangles. That was my biggest AHA moment.
 
OP
B

Bob Heine

ALLIANCE MEMBER
Joined
Oct 24, 2009
Messages
10,713
Location
Boca Raton, Florida
I stopped by City Hall this week and they directed me to the new location of the Building Department (former Downtown Library across the street). They have this high-tech sign-in process with big-screen TVs showing where you are on the list and when your name reaches the top displays the station you need to go to. I was pleased that I only had to wait 20 minutes to be called.

The person at the counter didn't know for sure if I could put up a canvas carport and the knowledgeable code officer was in a meeting. I was a little disappointed but the clerk gave me the code officer's card and suggested I call.

I hate phones and apparently so does my code officer. Her voicemail suggested I e-mail her so that's what I did. Less than an hour later I had a response.

I am allowed to erect a canvas carport for the day but it can't be a permanent or semi-permanent installation. Oddly, that's what my wife told me as well when I told her I was going to spend $88 for it.

I printed out the e-mail and will file it with my important papers. I may laminate and mount it in the garage.
 

stillp

Well-known member
Joined
May 5, 2015
Messages
428
Location
Midlands, UK
I know there are two schools of thought, but I just can't stand to set them down on a sharp blade.
Thanks for that, I thought I was the only one!
I occasionally visit a really nice tool shop that has Lie-Neilsen planes on display, all on wooden shelves, blade downwards. I always turn them on their sides, than browse around to see how long it takes before the shop staff set them 'upright' again.

Pete
 

oldironfarmer

Well-known member
Joined
Jun 25, 2016
Messages
6,664
Location
Terlton, Oklahoma
Bob: I suggest you laminate the email then attach it to your canopy, kind of like a show pass :)

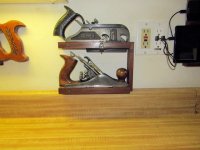
stillp: I made a little shelf for my two most used planes, right above my work bench for quick access. I put little supports at one end to hold the plane irons off the shelf. It's eerie.

attachment.php
 

Attachments

  • Planes.jpg
    Planes.jpg
    36.9 KB · Views: 384

Craptain

Well-known member
Joined
Apr 18, 2013
Messages
4,032
Location
Tampa Bay FL
Bob: I suggest you laminate the email then attach it to your canopy, kind of like a show pass :)

stillp: I made a little shelf for my two most used planes, right above my work bench for quick access. I put little supports at one end to hold the plane irons off the shelf. It's eerie.

attachment.php
I did the same thing with my plane shelves. Only I didn't make enough shelves. Or big enough for my jointer planes.

Sent from my SM-G900T using Tapatalk
 

shortykorte

Well-known member
Joined
Sep 1, 2014
Messages
8,039
Location
Tallahassee, Fl
Bob, I'm thinking Ms. Code Lady call Mrs. Heine and asked how long was Bob allowed to have carport then sent you the email.


Sent from my iPhone using Tapatalk
 

jimreed2160

Well-known member
Joined
Aug 7, 2016
Messages
3,589
Location
Tallahassee FL
Bob, you did a great job on those planes. I admire you for rehabbing the rabbet plane. Those things have almost 20 separate parts and most planes found in the wild are missing something important like the depth stop or the center guide. As with most Stanley planes, the screws have oddball threads.

I have found the rabbet plane works best when you make a groove for the corner. That also means that you can carefully make your rabbet without the center guide.

Good luck using your planes.
 

bj383ss

Well-known member
Joined
Sep 29, 2011
Messages
3,166
Location
TX
Bob I look forward to some carport picks and great job on the hand planes. I can offer some insight to how to store them. Most of the hand tool cabinets that you see have homes for hand planes have the slots lined with leather or cork.

In my case its cork.

20170806_112436 by bjohnson388, on Flickr

20170806_112441 by bjohnson388, on Flickr

Bret
 

Guster

Well-known member
Joined
Mar 11, 2012
Messages
1,543
Location
Auckland, New Zealand
Nice job sharpening your plane irons Bob. Good idea… never thought of using my ‘angle-ometer’ for that purpose. :thumbup: Nice fancy stones too. We’ve been dealing with the generic grey import marked fine and medium until diamond hones arrived. Marked coarse, medium and fine of course. :dunno:

I always wait too long between sharpening. Only think to sharpen once I’m dripping with sweat and thinking “I remember this being much easier” :lol_hitti


Might have to make a little plane shelf like this. I have mine on their side in a drawer as that is the only way they fit and it is cramped in there. Looking for some low angle block planes but held off buying one till I made room as the drawer is full. I like that ply wood handle though… gives me an idea to fix one of mine till I can find some rose wood scraps.
 
OP
B

Bob Heine

ALLIANCE MEMBER
Joined
Oct 24, 2009
Messages
10,713
Location
Boca Raton, Florida
Thanks for that, I thought I was the only one!
I occasionally visit a really nice tool shop that has Lie-Neilsen planes on display, all on wooden shelves, blade downwards. I always turn them on their sides, than browse around to see how long it takes before the shop staff set them 'upright' again.

Pete
Pete, I fear I am one of those tool abusers who step on the extension cord and pulls the cord on my power tools to unplug. Which way I set a plane down will take me some time to even recognize.
Bob: I suggest you laminate the email then attach it to your canopy, kind of like a show pass :)

stillp: I made a little shelf for my two most used planes, right above my work bench for quick access. I put little supports at one end to hold the plane irons off the shelf. It's eerie.

attachment.php
Andy, maybe I should sew a pocket in the canvas. Never know when the newbie code commandos will show up unannounced.

Now you have me worried about shelfless planes wasting away in my garage.
I did the same thing with my plane shelves. Only I didn't make enough shelves. Or big enough for my jointer planes.

Sent from my SM-G900T using Tapatalk
Oh Craptain, I had my finger over the send button the other night when I saw a large plane for a reasonable price. It had only two photos so I suspect there is hidden damage. Need to schedule time with my therapist.
I see what you did there. :lol_hitti


Hey Bob, you and Lyndon seem to have more planes than an aircraft carrier. :willy_nil


My coffee break's over - back to work.
Mark, great to see you here. Lyndon has the plane affliction and his are multiplying. I was only doing triage on the two I've owned forever.

You get coffee breaks? Oh I forgot, you work in a country that knows only indenture and not full-on slavery.
Bob, I'm thinking Ms. Code Lady call Mrs. Heine and asked how long was Bob allowed to have carport then sent you the email.


Sent from my iPhone using Tapatalk
Stewart, you made the hair on my neck stand up. That's as bad as one of my suppliers trying to reach me and the Duchess answers the call.
Bob, you did a great job on those planes. I admire you for rehabbing the rabbet plane. Those things have almost 20 separate parts and most planes found in the wild are missing something important like the depth stop or the center guide. As with most Stanley planes, the screws have oddball threads.

I have found the rabbet plane works best when you make a groove for the corner. That also means that you can carefully make your rabbet without the center guide.

Good luck using your planes.
Thank you Jim. I ordered the center guide from the UK and it arrived this week. I also found a UK supplier for the depth stop knob (reproduction) for a reasonable price.
Bob I look forward to some carport picks and great job on the hand planes. I can offer some insight to how to store them. Most of the hand tool cabinets that you see have homes for hand planes have the slots lined with leather or cork.

In my case its cork.

20170806_112436 by bjohnson388, on Flickr

20170806_112441 by bjohnson388, on Flickr

Bret
Bret, that is a beautiful storage solution. I may actually use my planes now that I've been able to make them work reasonably well. I worked out a less elegant storage solution and I'll post it in a few minutes.
Nice job sharpening your plane irons Bob. Good idea… never thought of using my ‘angle-ometer’ for that purpose. :thumbup: Nice fancy stones too. We’ve been dealing with the generic grey import marked fine and medium until diamond hones arrived. Marked coarse, medium and fine of course. :dunno:

I always wait too long between sharpening. Only think to sharpen once I’m dripping with sweat and thinking “I remember this being much easier” :lol_hitti


Might have to make a little plane shelf like this. I have mine on their side in a drawer as that is the only way they fit and it is cramped in there. Looking for some low angle block planes but held off buying one till I made room as the drawer is full. I like that ply wood handle though… gives me an idea to fix one of mine till I can find some rose wood scraps.
Guster, I didn't understand how soft those stones are and how quickly the plane iron turns their surfaces into mud. I broke down and ordered a diamond hone (fine/very fine) so I can flatten them and so I can dry sharpen stuff. While I was at it I ordered a leather strop and some compound.
 

markviii

Well-known member
Joined
Jan 25, 2010
Messages
1,310
Location
east central IL
I haven't checked in here for awhile because of us being so busy with the house build. Great work with doing maintenance on those planes. I won't show BB767 this thread update - he's got enough on his plate and he'd just get distracted. LOL

Chris
 
OP
B

Bob Heine

ALLIANCE MEMBER
Joined
Oct 24, 2009
Messages
10,713
Location
Boca Raton, Florida
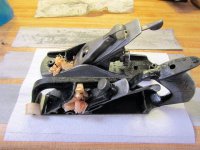
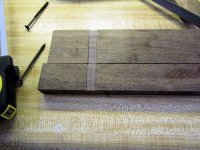
Every time I walked past the planes laying on their side on the workbench, I felt guilty. If I put them back in the shop they'll be out of sight and I'll forget to use them. I remembered my collection of wood scraps and decided to look through the boxes for something that would work. I found a piece that had obviously been through a planer because it was smooth but a bit thicker than standard one-by stuff.
attachment.php


I ripped the piece so I have one piece the width of the rabbet plane and a second wider piece just right for the other plane. I made a small rabbet in each shelf where the blade would sit without touching. Used the table saw to rip and the radial arm saw to make the rabbet. A little work with a file and the rabbets were clean and neat. While I was down in the shop I used the drill press to drill mounting holes and a hole for storing the centering fence on the rabbet plane shelf.
attachment.php


I stuck strips of 120- and 400-grit paper to the bench and sanded the shelving along with the vertical support. You can see some faint drill press vise marks in the narrow shelf that helped with that decision. I also countersunk the mounting holes -- I'm just using 3-inch drywall screws to mount it to the wall. The vertical support is attached to the shelves with stainless trim screws (you can see one of them in the photo below).
attachment.php


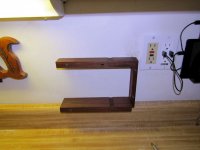
I aligned the vertical support with the metal stud in the wall so it is a solid mount at that end. The other ends of the shelves are screwed into plastic anchors in the drywall. I gave the shelf unit a quick coat of Tung Oil before mounting it. You can see the large hole for the centering fence mounting post.
attachment.php


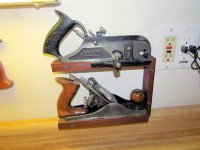
I know the shelf is pretty low on the wall (it doesn't touch the backsplash but it's real close). If my piece of scrap had been a half-inch longer, the planes would have fit perfect but I didn't want to cut one of my longer scraps just for this. It's two pieces of wood and 8 screws. Here's how the Stanley rabbet plane stores with the centering fence installed on the plane...
attachment.php


And here it is mounted on the shelf. I am going to put a stud on the shelf to hang the depth stop. It needs to have a threaded hole for the knurled knob that will be arriving shortly.
attachment.php


I don't expect anyone to notice but my phone/tablet charging station was mounted in this spot so I HAD to move it. Of course, when I did that the wall outlet with the USB charging ports had to be switched to the other side of the box. It also meant I had to tape and mud the mess around that box. Now it needs a coat of paint. Maybe I can get Gerard to help. :eek:
attachment.php


For those keeping track, The above photo shows my ability to ignore proper screw clocking but this was "before" enlightenment. The previous photo shows that I really am trying.
 

Attachments

  • Plane Shelf 1.jpg
    Plane Shelf 1.jpg
    95.2 KB · Views: 430
  • Plane Shelf 2.jpg
    Plane Shelf 2.jpg
    108.5 KB · Views: 430
  • Plane Shelf 3.jpg
    Plane Shelf 3.jpg
    106.9 KB · Views: 425
  • Plane Shelf 4.jpg
    Plane Shelf 4.jpg
    65.2 KB · Views: 425
  • Plane Shelf 7.jpg
    Plane Shelf 7.jpg
    88.1 KB · Views: 635
  • Plane Shelf 6.jpg
    Plane Shelf 6.jpg
    79.9 KB · Views: 626
  • Charger Rack 3.jpg
    Charger Rack 3.jpg
    72 KB · Views: 620
Last edited:
To avoid these ads, REGISTER NOW!
Top Bottom