kaymccampbell
Well-known member
Recharged the Caravan AC. Made a skipper ball. Added more hose to my tire inflator. Replumbed the wet grinder to use a fish pump instead of a gravity tank. Put a new touchscreen in my camera.j


My 95 ram needs a heater core. not looking forward to pulling the entire dash out. what a stupid design.
I hear ya, I had to replace the heater core in my '93 Dodge Shadow in November 1911, I used a bit of redneck engineering to hold the larger pieces off the floor.
I'm not sure which was worse, this one or my '84 Mustang with A/C.


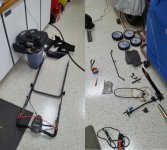
Last night I had an hour or so to put into my front wheel bearing from post #25067. I had to air hammer (chisel) the wheel hub from the bearing (original one, with 227K miles), which mangled the center of the hub...(sorry for the blurry photos.
The rest of the outer is out.
The mangled hub (from the air hammer) is why I usually always purchase the bearing & hub combo...even though the new one has "bling" gold studs.
Double bearing common on most wheels these days...which consists of two inner races & roller bearing sets, and one fat outer race. An oil seal is pressed in on each side, in one easy bearing package.
Bearing pressed into the knuckle. (Gonna have to kill my camera) Snap ring ready to go in.
Hub going into the double bearing. And yes, Ford FE cylinder heads provide a nice flat press surface when you need the space.Remember to brace the inner races when you do this, or they will separate halfway through.
Together & done for tonight, the hub spins freely. Reassembly on Friday!

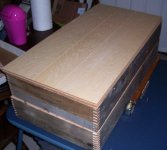
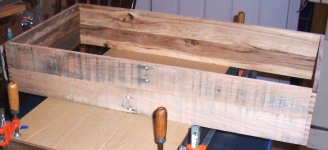
Made Sawdust after two evenings of re-thinking the stuff I wanted inside the "Supply" box; I cut the dados for the dividers and after dinner, the outside panels.
So I've almost got boxes!:
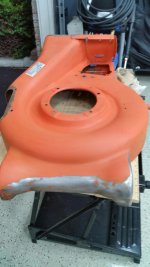
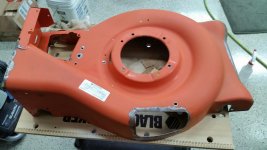
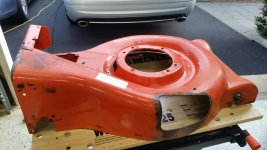
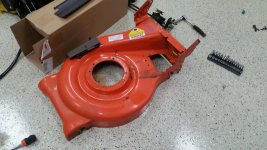
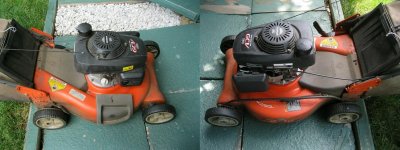
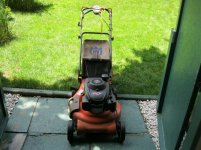
I think the Chrysler engineers made a mistake with the first buried evaporator design and then couldn't stop laughing about it. The merger with Daimler-Benz didn't help because I understand their evaporators are buried even deeper. I replaced the evaporator in my '04 PT Cruiser in 2007 but when it died in 2014 I paid $1,500 to a younger guy. He quoted $1,300 but had forgotten how bad the job was and I wanted him to stay in business ($1,500 was still $300 less than the next best quote).
I don't know how anyone forgets this:

 5c95c326b6d0f95d8dbc75e95b4cbb70 by mpower5266, on Flickr
 a6a1bc9708855db73c641f9ea90c4dc4 by mpower5266, on Flickr
 a2e5a0bcf13ef8c1ca119af0e7480e52 by mpower5266, on Flickr
Cool. Looks almost like old timey luggage.

Last night I finalized the Box plans for length and height (width had been determined...), and today glued some spit ends one some of the boards (It is Salvage wood...), then spend WAY more time than I expected to get the finger joint dado and fixture setup. Turns out my Dado is 5/8 and the arbor is 1/2.. so I had to come up with a sleeve. (I also bought the main hinges I needed as well as some magnet catches for the inner cabinet doors one box will have while I was at the HW store)
Then I realize the dado body is too bid forth e dang arbor length! so I dug out three identical new blades (also 5/8 hole, I had to cut about a 3/16 sleeve section off the bronze bushing I'd bought) and stacked them with the middle one offset, dang! this thing cuts an almost exact 1/4" kurf!
The after FOUR tries got the actual fixture to space correctly.
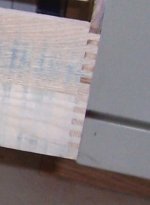
Here is a test on a some scrap... My very first (successful) Box/Finger joint:

I'm beat, but I'd like to get at least one set of box frames done tonight, (I'm typing as I needed a break been at it all dang day...)
I made a snake stick about 1am to get rid of a rattler that I almost stepped on letting my dog in!
I hear ya, I had to replace the heater core in my '93 Dodge Shadow in November 1911, I used a bit of redneck engineering to hold the larger pieces off the floor.
I'm not sure which was worse, this one or my '84 Mustang with A/C.
Made Sawdust after two evenings of re-thinking the stuff I wanted inside the "Supply" box; I cut the dados for the dividers and after dinner, the outside panels.
So I've almost got boxes!:
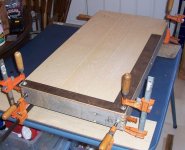
Plugging nail holes, sanding then I start gluing and clamping the cases, together. I wanted the panels so I can make sure the cases glue up square...

Oh, I can imagine.Try a heater core replacement on a 1999 Ford F-150.
Right?WOW! Look at those purdy gold studs.
Mike
That's the first time I've gotten gold studs with one of these bearing & hub sets, usually they are black.
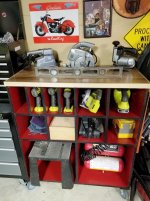
Walked through, going from the pool to the front door.

Plans from Family Handyman; I adjusted to make it a little longer.
 ), Then returning it as it's NOT 1/4" thick, its thicker;
  and going elsewhere and got the right stuff. (Dados were cut and the box ready to assemble. I was MOT going to go try to shave a bit more out of each of 20 dado cuts...)