To avoid these ads, REGISTER NOW!

New 24 x 32 Garage

mineallmine

Well-known member
Joined
May 22, 2014
Messages
100
Location
Ontario, Canada
Figured I'd may as well start a thread about my garage build.

I had been thinking about tearing down an old garage (more of a shed) for few years and build new but every time I suggested the size I wanted the wife suggested smaller so I waited. That was until 2 summers ago when she actually said why not go bigger (got to love a good wife) and that's when I jumped on it.

I had been thinking about it for a while so I already knew what I wanted so getting plans drawn up was easy. The city permit office even said my hand drawn plans were more accurate and detailed than some architects plans...yay OCD:beer:

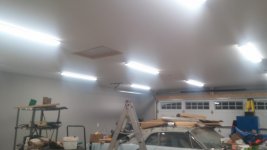
It will take a number of posts to bring everyone up to speed but try to be patient as it was a long journey to get this far.

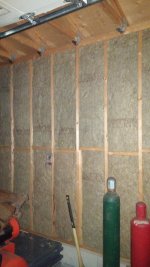
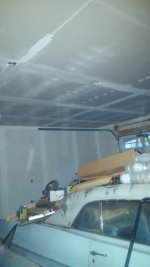
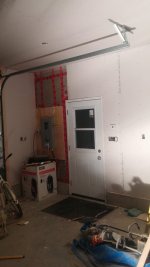
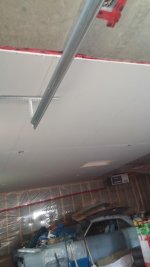
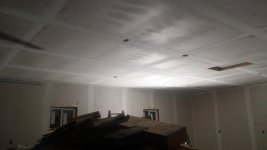
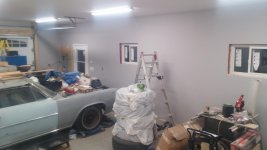
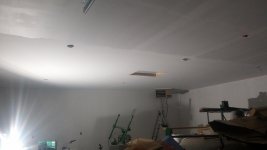
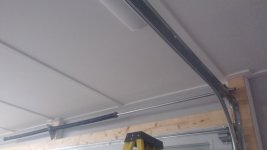
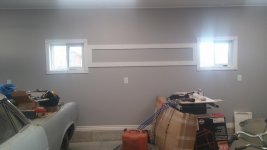
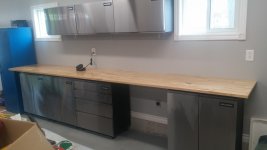
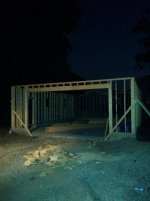
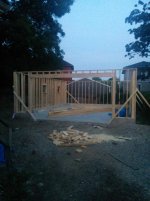
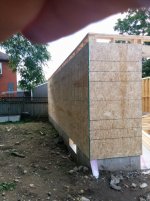
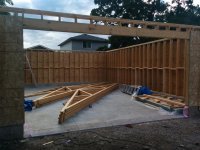
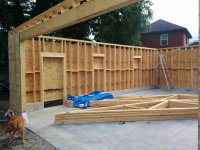
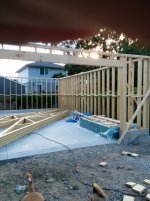
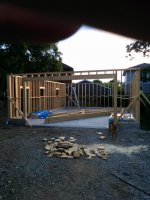
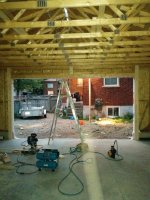
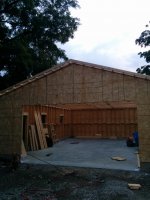
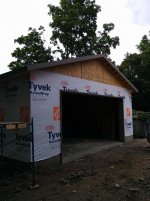
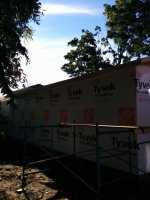
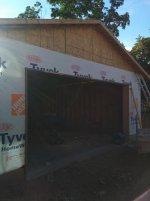
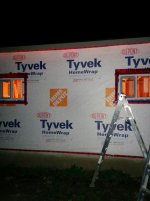
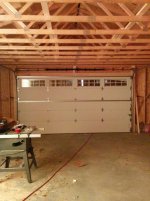
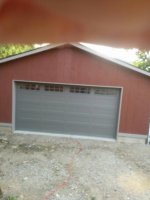
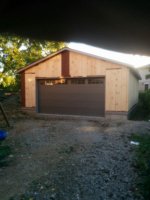
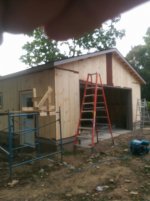
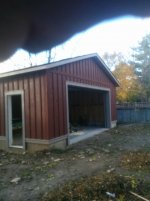
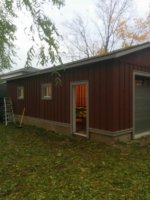
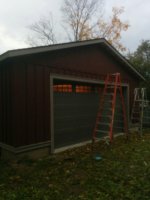
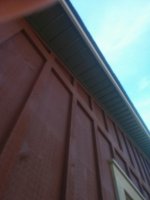
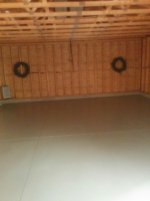
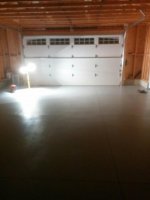
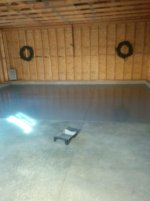
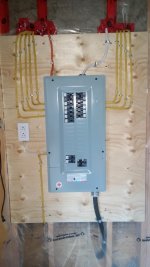
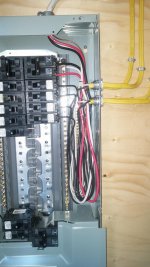
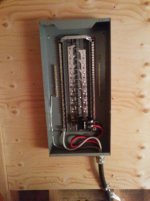
I built almost everything by myself after work and on weekends with only the foundation/floor and garage door being contracted out. The only help I received was to push up the first 3 walls (my brother and brother in law came out to help despite their busy work schedules and living out of town) and my wife helped with ice and water shield...story for another day.

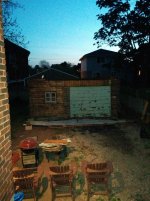
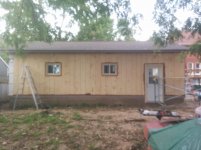
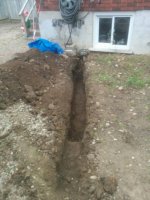
Here is when I started teardown of the old shed (wasn't worth considering a garage)

My brother in law and myself tore the roof off in a couple hours (with the help of a sledgehammer and a cut off saw)

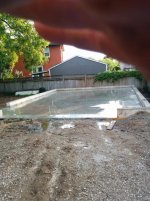
The walls I kept in big sections and made 4 trips to the dump to dispose of it all (all done in one day). The next 2 days was breaking up the foundation and removal and disposal (16000lbs and 4 trips to the dump with my utility trailer...poor trailer never saw it coming:eek:)

All the removal and cleanup was done mostly by me but with a little help from the wife and in less than a week (again before work) it was cleaned up like the last picture
 

Attachments

  • IMG_20150517_211512.jpg
    IMG_20150517_211512.jpg
    145.5 KB · Views: 176
  • IMG_20150530_122104.jpg
    IMG_20150530_122104.jpg
    148.2 KB · Views: 148
  • IMG_20150524_202334.jpg
    IMG_20150524_202334.jpg
    150.3 KB · Views: 128
  • IMG_20150524_202316.jpg
    IMG_20150524_202316.jpg
    152.2 KB · Views: 130
  • IMG_20150523_104151.jpg
    IMG_20150523_104151.jpg
    150.7 KB · Views: 142
  • IMG_20150521_134621.jpg
    IMG_20150521_134621.jpg
    150.5 KB · Views: 138
  • IMG_20150520_132422.jpg
    IMG_20150520_132422.jpg
    152.5 KB · Views: 142
To avoid these ads, REGISTER NOW!
OP
M

mineallmine

Well-known member
Joined
May 22, 2014
Messages
100
Location
Ontario, Canada
Foundation time

Found a guy on the local classifieds and what can I say, he was GREAT!! Fast, reasonably priced and did really good work.

Wound up with a full foundation as it was cheaper because the engineer I found to do a drawing for an engineered slab made it cheaper to go this way (which was really odd because an engineered slab is almost always cheaper and I had no unusual obstacles)

Final slab was 24 x 32 with an 18 inch curb wall (so water wouldn't affect walls if it ever got wet from snow off the cars etc.)

Slab wound up about 5 inches thick with fiber mesh and an extra hardener on the top to make the very top of the slab go from 32mpa to 52mpa. (I already dropped a hammer from the top of a 10 ft ladder and never left even a tiny mark)
 

Attachments

  • IMG_20150623_202805.jpg
    IMG_20150623_202805.jpg
    146.5 KB · Views: 179
  • IMG_20150622_194651.jpg
    IMG_20150622_194651.jpg
    148.3 KB · Views: 161
  • IMG_20150622_135438.jpg
    IMG_20150622_135438.jpg
    145.6 KB · Views: 143
  • IMG_20150617_055151.jpg
    IMG_20150617_055151.jpg
    146.5 KB · Views: 154
  • IMG_20150609_102246.jpg
    IMG_20150609_102246.jpg
    148.1 KB · Views: 172
  • IMG_20150607_143352.jpg
    IMG_20150607_143352.jpg
    147 KB · Views: 153
  • IMG_20150605_141102.jpg
    IMG_20150605_141102.jpg
    138.1 KB · Views: 164
OP
M

mineallmine

Well-known member
Joined
May 22, 2014
Messages
100
Location
Ontario, Canada
Build begins..

Here are some pics of the framing. First pic is what was done the first morning. Made short work of it with a framing gun, a lot of nails, a chop saw and a spacing jig for the studs. Took under 3 hours to have 3 walls up, only 3 of us there...none carpenters.

Pics take us up to end of day one IIRC. Header was built WAY overkill as well (everything in this garage was built heavier than necessary as it was only my time and little extra material cost...no labour cost) Header boards were tripled up instead of double and have a 1 inch spacer board added to make it truly 6 inches wide for maximum strength...this the extra supports (no way this sucker is EVER going to sag:thumbup:)
 

Attachments

  • IMG_20150729_214335.jpg
    IMG_20150729_214335.jpg
    139 KB · Views: 162
  • IMG_20150729_054911.jpg
    IMG_20150729_054911.jpg
    141.8 KB · Views: 151
  • IMG_20150727_202636.jpg
    IMG_20150727_202636.jpg
    138.1 KB · Views: 135
  • IMG_20150727_202455.jpg
    IMG_20150727_202455.jpg
    140.6 KB · Views: 139
  • IMG_20150725_193754nopm.jpg
    IMG_20150725_193754nopm.jpg
    141.6 KB · Views: 142
  • IMG_20150725_173826.jpg
    IMG_20150725_173826.jpg
    141.7 KB · Views: 156
OP
M

mineallmine

Well-known member
Joined
May 22, 2014
Messages
100
Location
Ontario, Canada
Build continues

As my walls were over 8ft (just) I added the required bracing halfway up. Would of added it anyway.

Putting chipboard up by yourself is no easy task (had a helper as you can see in picture but she wasn't much up to carrying plywood). Made up a little jig to help support edge of board while I got it level and got the first nail in. Went way better and faster than expected. Had the entire outside sheeted in 2 days(again by myself after work)
 

Attachments

  • IMG_20150804_190226.jpg
    IMG_20150804_190226.jpg
    147.4 KB · Views: 127
  • IMG_20150804_190211.jpg
    IMG_20150804_190211.jpg
    147.3 KB · Views: 140
  • IMG_20150804_190159.jpg
    IMG_20150804_190159.jpg
    144.5 KB · Views: 140
  • IMG_20150804_190143.jpg
    IMG_20150804_190143.jpg
    145.9 KB · Views: 152
  • IMG_20150803_172700.jpg
    IMG_20150803_172700.jpg
    149.5 KB · Views: 142
  • IMG_20150801_195127.jpg
    IMG_20150801_195127.jpg
    148.6 KB · Views: 131
  • IMG_20150801_195112.jpg
    IMG_20150801_195112.jpg
    144.6 KB · Views: 139
OP
M

mineallmine

Well-known member
Joined
May 22, 2014
Messages
100
Location
Ontario, Canada
Truss time

I had engineered trusses made and delivered as it was cheaper than making my own. Took me 2 evenings after work putting them all up by myself (again during week and my shifts being different hours, everyone was busy and I was stubborn...wanted it done)

Made up another set of spacer blocks to get the correct spacing and a jig to hold the truss up and away we went. Put up one end and then the other hanging truss upside down, then flipped it up pushing it up with a notched 2x4 and then supported it with the 4x4 stand I made until I could get up on the ladder to pull it up in place. Then I would put in a spacer block on either side and bungee it in place until I could put a nail in the bracing. Found the upside down method on line somewhere...spacers I came up with. Worked like a charm and in 2 evenings, I had the framework of a roof.
 

Attachments

  • IMG_20150812_124158.jpg
    IMG_20150812_124158.jpg
    147.5 KB · Views: 114
  • IMG_20150812_124122.jpg
    IMG_20150812_124122.jpg
    147.7 KB · Views: 136
  • IMG_20150809_204945.jpg
    IMG_20150809_204945.jpg
    140.4 KB · Views: 127
  • IMG_20150807_205313.jpg
    IMG_20150807_205313.jpg
    147.7 KB · Views: 136
  • IMG_20150807_204613.jpg
    IMG_20150807_204613.jpg
    132.1 KB · Views: 141
OP
M

mineallmine

Well-known member
Joined
May 22, 2014
Messages
100
Location
Ontario, Canada
Overhangs...and start of roof sheeting

Made up my own overhangs. (ladder trusses). They never informed me they wouldn't come with my trusses so I made my own. Goofed on one set as I mis-measured and had to rebuild one...no biggie.

These were a PAIN to put up alone. I wound up wrapping the end of the gable truss end to the ladder truss and pulled the other end into place and mailed it in, then made sure everything was even and nailed it all together. Each side was made up of two pieces as I never bought any 14ft 2x4s

Sheeting the roof wasn't as bad as the walls with the exception of the weight and when the wind came up. Once the first row was on and straight it went pretty easy and quickly.

Just before sheeting I made sure the walls were plumb and the hurricane ties went on

We started the wrap at this point too to keep the chipboard dry. My wife helped with this as the 10ft roll was a bit much to handle keeping it straight and getting a few staples in.
 

Attachments

  • IMG_20150826_201832.jpg
    IMG_20150826_201832.jpg
    145 KB · Views: 151
  • IMG_20150821_181834.jpg
    IMG_20150821_181834.jpg
    132.8 KB · Views: 140
  • IMG_20150819_201252.jpg
    IMG_20150819_201252.jpg
    143.1 KB · Views: 140
  • IMG_20150819_201231.jpg
    IMG_20150819_201231.jpg
    134 KB · Views: 134
  • IMG_20150819_201218.jpg
    IMG_20150819_201218.jpg
    144.2 KB · Views: 142
  • IMG_20150815_202410.jpg
    IMG_20150815_202410.jpg
    143.1 KB · Views: 139
  • IMG_20150812_124217.jpg
    IMG_20150812_124217.jpg
    139.8 KB · Views: 141
OP
M

mineallmine

Well-known member
Joined
May 22, 2014
Messages
100
Location
Ontario, Canada
Roofing prep

Did all the facia in stained pine board as to tie in more with the wood trim on the house and keep with the plan for the final look of the garage. Also framed out the garage door to be ready for Garage door install. Used 2x12s to frame it out and stained them to match the facia. Really happy with the final look.

Went with Grace ice and water shield as I was told it was the best to use (quality wise). While it was great quality it is very difficult to apply (especially in really warm weather) and if it sticks to itself it NEVER comes apart...ask me how I know:dunno:
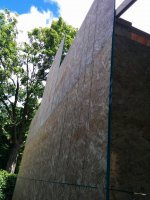
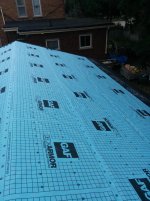
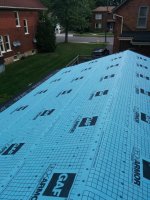
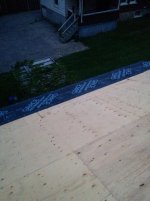
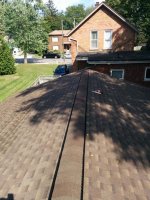
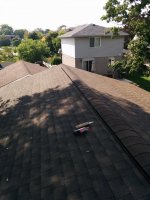
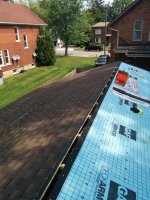
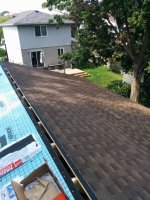
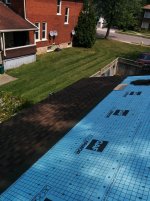
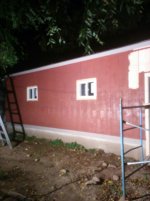
, thus the wife came out to help me put it on...good thing to because if I messed up even the tiniest piece I wouldn't of had enough and had to but a new roll

The underlayment is almost a cloth type material. It isn't required for this install, but again, overkill is better than just good enough :lol:
 

Attachments

  • IMG_20150902_123748.jpg
    IMG_20150902_123748.jpg
    149 KB · Views: 91
  • IMG_20150902_123745.jpg
    IMG_20150902_123745.jpg
    149.3 KB · Views: 100
  • IMG_20150829_201802.jpg
    IMG_20150829_201802.jpg
    138.8 KB · Views: 85
  • IMG_20150829_145229.jpg
    IMG_20150829_145229.jpg
    142.1 KB · Views: 86
  • IMG_20150827_180818nopm.jpg
    IMG_20150827_180818nopm.jpg
    141.5 KB · Views: 86
  • IMG_20150827_180754nopm.jpg
    IMG_20150827_180754nopm.jpg
    133.8 KB · Views: 92
  • IMG_20150827_162659.jpg
    IMG_20150827_162659.jpg
    136.5 KB · Views: 92
OP
M

mineallmine

Well-known member
Joined
May 22, 2014
Messages
100
Location
Ontario, Canada
Roofing day...or days

Did the shingling in 3 days. Two half days before work, and a Saturday. Could have been faster but took a little extra time sorting the shingles as I put them down to make the cedar shake look of the shingle a little more accurate...Damn OCD
 

Attachments

  • IMG_20150906_152117.jpg
    IMG_20150906_152117.jpg
    147.6 KB · Views: 101
  • IMG_20150906_152103.jpg
    IMG_20150906_152103.jpg
    146.6 KB · Views: 91
  • IMG_20150904_124328.jpg
    IMG_20150904_124328.jpg
    149.2 KB · Views: 90
  • IMG_20150904_124315.jpg
    IMG_20150904_124315.jpg
    149.4 KB · Views: 105
  • IMG_20150903_131015.jpg
    IMG_20150903_131015.jpg
    149.5 KB · Views: 88
  • IMG_20150903_131007.jpg
    IMG_20150903_131007.jpg
    151.2 KB · Views: 91
OP
M

mineallmine

Well-known member
Joined
May 22, 2014
Messages
100
Location
Ontario, Canada
Windows and doors

Garage door guy came and installed door. Really happy with it. 16 x 8 for added height and insulated. CHI door. Really heavy duty and seems like really good quality.

One of the few mistakes I made with this build...window size. Wish I had gone a little bigger on my windows. Didn't think that one through as well as I could have.

Also finished the wrap and picked up the siding. True 1 x 12 board and batten. Got it from a sawmill just outside the city. Known for the best quality in the area.
 

Attachments

  • IMG_20150918_203318.jpg
    IMG_20150918_203318.jpg
    130.3 KB · Views: 100
  • IMG_20150918_203058.jpg
    IMG_20150918_203058.jpg
    138 KB · Views: 100
  • IMG_20150918_203151.jpg
    IMG_20150918_203151.jpg
    142.1 KB · Views: 113
  • IMG_20150918_203054.jpg
    IMG_20150918_203054.jpg
    141.6 KB · Views: 104
  • IMG_20150917_200229.jpg
    IMG_20150917_200229.jpg
    144.2 KB · Views: 92
  • IMG_20150917_200144.jpg
    IMG_20150917_200144.jpg
    145.1 KB · Views: 101
  • IMG_20150910_203519.jpg
    IMG_20150910_203519.jpg
    141.3 KB · Views: 104
OP
M

mineallmine

Well-known member
Joined
May 22, 2014
Messages
100
Location
Ontario, Canada
Siding

This took so much time. The strapping of the garage was not bad but the staining of the boards took forever. Stained them inside with one coat and 3 on the sides and outside. (been 2 years and they still look like new...guess I did something right) Used a color close to brick to match the house again.
 

Attachments

  • IMG_20151001_204745.jpg
    IMG_20151001_204745.jpg
    144.7 KB · Views: 113
  • IMG_20151002_161552.jpg
    IMG_20151002_161552.jpg
    125.2 KB · Views: 154
  • IMG_20150928_202149.jpg
    IMG_20150928_202149.jpg
    134.2 KB · Views: 133
  • IMG_20150927_183235.jpg
    IMG_20150927_183235.jpg
    131.9 KB · Views: 125
  • IMG_20150924_170631.jpg
    IMG_20150924_170631.jpg
    126.3 KB · Views: 129
  • IMG_20150924_170235.jpg
    IMG_20150924_170235.jpg
    126.8 KB · Views: 142
  • IMG_20150923_143646.jpg
    IMG_20150923_143646.jpg
    125.4 KB · Views: 123
OP
M

mineallmine

Well-known member
Joined
May 22, 2014
Messages
100
Location
Ontario, Canada
Siding finished

Getting the trim around the widows it just kinda came to me. Laid it out on the floor to see how it looks...I like!
 

Attachments

  • IMG_20151025_165314.jpg
    IMG_20151025_165314.jpg
    131.4 KB · Views: 74
  • IMG_20151025_163621.jpg
    IMG_20151025_163621.jpg
    129.9 KB · Views: 78
  • IMG_20151020_181257.jpg
    IMG_20151020_181257.jpg
    133.3 KB · Views: 72
  • IMG_20151020_181244.jpg
    IMG_20151020_181244.jpg
    133.1 KB · Views: 64
  • IMG_20151009_193810.jpg
    IMG_20151009_193810.jpg
    136.3 KB · Views: 70
  • IMG_20151009_193806.jpg
    IMG_20151009_193806.jpg
    143.4 KB · Views: 73
  • IMG_20151006_165126.jpg
    IMG_20151006_165126.jpg
    130.2 KB · Views: 80
OP
M

mineallmine

Well-known member
Joined
May 22, 2014
Messages
100
Location
Ontario, Canada
Soffit.

Took a bit of planning to get the soffit to work like I wanted. I didn't want the soffit flush with the facia as I didn't want it visible against the stained wood.

I managed to recess it 1 inch from the facia by waiting to put on the corner boxes until last allowing me to slide it into the channel I made, Worked like a charm and the finished look is better than I could have hoped
 

Attachments

  • IMG_20151109_172205.jpg
    IMG_20151109_172205.jpg
    131 KB · Views: 75
  • IMG_20151106_134259.jpg
    IMG_20151106_134259.jpg
    126 KB · Views: 86
  • IMG_20151102_135635.jpg
    IMG_20151102_135635.jpg
    137.7 KB · Views: 86
  • IMG_20151102_135631.jpg
    IMG_20151102_135631.jpg
    127.4 KB · Views: 85
OP
M

mineallmine

Well-known member
Joined
May 22, 2014
Messages
100
Location
Ontario, Canada
Epoxy..

It is getting late in the season but I wanted to get the floors coated before I spilled something on them making it impossible next year. To accomplish this I set up oil heaters in each corner and had a propane construction heater going to keep the garage warm while I applied it. (the oil heaters stayed on for the next couple days to keep it above freezing while it cured)

I went with a basic grey industrial coating as 1. it was cheaper and 2.it's a garage I'm going to work in...no need for fancy flecks in it. Also this is a more industrial quality coating.
 

Attachments

  • IMG_20151119_183804.jpg
    IMG_20151119_183804.jpg
    152.5 KB · Views: 103
  • IMG_20151119_183754.jpg
    IMG_20151119_183754.jpg
    148.2 KB · Views: 121
  • IMG_20151119_183725.jpg
    IMG_20151119_183725.jpg
    143.5 KB · Views: 114
  • IMG_20151118_134251.jpg
    IMG_20151118_134251.jpg
    128 KB · Views: 144
  • IMG_20151118_115726.jpg
    IMG_20151118_115726.jpg
    136.5 KB · Views: 112
  • IMG_20151118_123934.jpg
    IMG_20151118_123934.jpg
    144.4 KB · Views: 117
  • IMG_20151116_202817.jpg
    IMG_20151116_202817.jpg
    147.7 KB · Views: 115
OP
M

mineallmine

Well-known member
Joined
May 22, 2014
Messages
100
Location
Ontario, Canada
Wiring..

Ran a 90Amp sub panel in my shop to be sure I could run any tools I wanted.

Put 4 20amp outlets on each wall halfway up to be above equipment and workbenches. Also ran a 30amp for my compressor and a 50amp for my arc welder. Put 9 light boxes for 3 rows of 4ft led fixtures. Also a few outside lights.

Used way more wire than I expected.

Also ran ACWU cable from house to garage in conduit for extra protection
 

Attachments

  • 20160604_191613.jpg
    20160604_191613.jpg
    138.5 KB · Views: 118
  • 20160604_191432.jpg
    20160604_191432.jpg
    144.8 KB · Views: 126
  • Message_1465069625308.jpg
    Message_1465069625308.jpg
    148.5 KB · Views: 136
  • Message_1465067578273.jpg
    Message_1465067578273.jpg
    145.4 KB · Views: 128
  • IMG_20151209_192914.jpg
    IMG_20151209_192914.jpg
    139.1 KB · Views: 125
  • IMG_20151209_192151.jpg
    IMG_20151209_192151.jpg
    140.8 KB · Views: 137
  • IMG_20151121_153319.jpg
    IMG_20151121_153319.jpg
    132.8 KB · Views: 126
OP
M

mineallmine

Well-known member
Joined
May 22, 2014
Messages
100
Location
Ontario, Canada
insulation

Used Roxul insulation as I like how easy it is to handle and can't stand the fiberglass insulation (I get way too itchy). I got a deal on the Roxul anyway.
 

Attachments

  • 20161010_195330[1].jpg
    20161010_195330[1].jpg
    137.5 KB · Views: 110
  • 20160527_211543.jpg
    20160527_211543.jpg
    147.2 KB · Views: 107
  • 20160527_211535.jpg
    20160527_211535.jpg
    149.4 KB · Views: 119
  • 20160527_211523.jpg
    20160527_211523.jpg
    146.6 KB · Views: 126
OP
M

mineallmine

Well-known member
Joined
May 22, 2014
Messages
100
Location
Ontario, Canada
Drywall

Things kinda went dormant for a while as I stopped working on the garage to go down east to be with my son who was battling a rare form of cancer.

Unfortunately he never made it. When I came back I basically went into full work mode to keep my mind occupied. The drywall and mudding took a long time but it was what I needed to keep me sane in a difficult time.

I also had the heater install finished at this time. Nice clean install. Barely see the gas line at all
 

Attachments

  • 20170123_170328.jpg
    20170123_170328.jpg
    146.1 KB · Views: 110
  • 20170123_170308.jpg
    20170123_170308.jpg
    145.3 KB · Views: 118
  • 20161017_125644.jpg
    20161017_125644.jpg
    133.4 KB · Views: 105
  • 20161029_200517.jpg
    20161029_200517.jpg
    136.5 KB · Views: 108
  • 20161201_181431.jpg
    20161201_181431.jpg
    131.9 KB · Views: 110
  • 20161017_125704.jpg
    20161017_125704.jpg
    125.7 KB · Views: 115
  • 20161014_221740.jpg
    20161014_221740.jpg
    138.6 KB · Views: 137
OP
M

mineallmine

Well-known member
Joined
May 22, 2014
Messages
100
Location
Ontario, Canada
Empty shop is such a pretty thing isn't it? Your work looks great!

Thanks.

It never stayed empty for long. When my son got sick it all got jammed in and I wound up working around it all to get to the point I'm at now. Hoping it'll soon all fall into place as I get it organized
 
OP
M

mineallmine

Well-known member
Joined
May 22, 2014
Messages
100
Location
Ontario, Canada
more drywall
 

Attachments

  • 20170316_101857.jpg
    20170316_101857.jpg
    140.6 KB · Views: 78
  • 20170305_182524.jpg
    20170305_182524.jpg
    140.9 KB · Views: 88
  • 20170305_182513.jpg
    20170305_182513.jpg
    136.7 KB · Views: 103
  • 20170302_212045.jpg
    20170302_212045.jpg
    137.6 KB · Views: 98
  • 20170223_201902.jpg
    20170223_201902.jpg
    153.8 KB · Views: 86
  • 20170223_201828.jpg
    20170223_201828.jpg
    141.3 KB · Views: 93
  • 20170123_170334.jpg
    20170123_170334.jpg
    145.9 KB · Views: 102
OP
M

mineallmine

Well-known member
Joined
May 22, 2014
Messages
100
Location
Ontario, Canada
Finally...Paint

Finally some color.

Started finishing electrical and trim at same time. Kinda more than I needed for a garage but hey, go big or go home right.

All my wife asked for is a picture to remember me by when I'm done...:lol:
 

Attachments

  • 20170327_195019.jpg
    20170327_195019.jpg
    143.4 KB · Views: 130
  • 20170326_191628.jpg
    20170326_191628.jpg
    143.7 KB · Views: 136
  • 20170326_191606.jpg
    20170326_191606.jpg
    137.3 KB · Views: 134
  • 20170321_204619.jpg
    20170321_204619.jpg
    135.9 KB · Views: 133
  • 20170321_204605.jpg
    20170321_204605.jpg
    134.8 KB · Views: 164
  • 20170316_211915.jpg
    20170316_211915.jpg
    145.4 KB · Views: 168
  • 20170316_211858.jpg
    20170316_211858.jpg
    150.7 KB · Views: 136
To avoid these ads, REGISTER NOW!
OP
M

mineallmine

Well-known member
Joined
May 22, 2014
Messages
100
Location
Ontario, Canada
Trim

Wanted something more for the celing than just bare...big flat surface. Also if mud ever cracked I figured this looked good and would hide it...lol

Also sealed the expansion joints in my floor with sealant. Used foam backer rod and then a large tube of proper sealant for this very purpose. This way I'm not sweeping dirt into the cuts in the floor
 

Attachments

  • 20170418_190624.jpg
    20170418_190624.jpg
    139.5 KB · Views: 107
  • 20170412_220732.jpg
    20170412_220732.jpg
    137.6 KB · Views: 99
  • 20170412_220712.jpg
    20170412_220712.jpg
    149.8 KB · Views: 103
  • 20170407_203004.jpg
    20170407_203004.jpg
    173.7 KB · Views: 125
  • 20170328_202415.jpg
    20170328_202415.jpg
    135.8 KB · Views: 102
  • 20170328_201554.jpg
    20170328_201554.jpg
    138.8 KB · Views: 116
  • 20170328_201530.jpg
    20170328_201530.jpg
    133 KB · Views: 107
OP
M

mineallmine

Well-known member
Joined
May 22, 2014
Messages
100
Location
Ontario, Canada
We're almost there...

Cabinets..

I was not sure what to do for cabinets when the wife made me buy these. :rocker:

I saved so much on labor se said get good cabinets. Funny thing is they wound up being on a really good sale. Saved almost 25%

Only thing I didn't like was the countertop was shallower than I wanted but most cabinets were the same. Also with the curb wall they were out from the wall a bit.

I fixed this by going to IKEA and got lucky and found birch countertop in the AS-IS area for half price. Only had some very light scratches in it (going to have a lot more than that when I'm done.) Perfect depth and fills in the gap. I secured them to the wall with the 90 degree anchors at each stud and drilled up from underneath each cabinet at the front corners and put screws in to secure them in place. Also the cabinets can not longer slide around.

The wall cabinets were designed to have a bracket behind them anchor to each stud but of course the studs were spaced wrong to match so I made up the wood frame anchoring it to the studs to give support to the brackets and painted it white to blend in. Couldn't get a better fit for the cabinets if I actually planned it for these cabinets:bounce:
 

Attachments

  • 20170420_163633.jpg
    20170420_163633.jpg
    142.3 KB · Views: 121
  • 20170427_203020.jpg
    20170427_203020.jpg
    136.8 KB · Views: 140
  • 20170420_164026.jpg
    20170420_164026.jpg
    134.1 KB · Views: 155
  • Message_1492720779598.jpg
    Message_1492720779598.jpg
    134.1 KB · Views: 124
  • Message_1492647844767.jpg
    Message_1492647844767.jpg
    139 KB · Views: 138
  • Message_1492647782818.jpg
    Message_1492647782818.jpg
    134.1 KB · Views: 147
  • 20170419_173009.jpg
    20170419_173009.jpg
    130.7 KB · Views: 130
OP
M

mineallmine

Well-known member
Joined
May 22, 2014
Messages
100
Location
Ontario, Canada
More cabinets and outside pic.
 

Attachments

  • 20170428_175113.jpg
    20170428_175113.jpg
    143.2 KB · Views: 139
  • 20161220_170231.jpg
    20161220_170231.jpg
    139.8 KB · Views: 168
  • 20170527_161309.jpg
    20170527_161309.jpg
    137.5 KB · Views: 132
  • 20170911_155253.jpg
    20170911_155253.jpg
    128 KB · Views: 123
  • 20170527_161245.jpg
    20170527_161245.jpg
    133.6 KB · Views: 105
  • 20170522_200033.jpg
    20170522_200033.jpg
    141.6 KB · Views: 120
OP
M

mineallmine

Well-known member
Joined
May 22, 2014
Messages
100
Location
Ontario, Canada
Finally getting some tools in place

Got some things in place. Realized I have zero wall space open once everything goes in. I guess I acquired more tools than I realized over the years. Worse complaints to have.

Compressor needs to be put together and I have a Rapid Air Maxline 3/4 air line kit (2 actually) to install (pictures to follow as I get the work done)

Also have more tools in place since these pictures as well but haven't gotten pictures yet.

I have 3 tool boxes across back wall with my buffalo 15 floor model industrial drill press and bench grinder and shelving unit. One side wall is Burgess parts washing station, 12ton press, fire cabinet, busybee horizontal bandsaw, busybee box/pan brake, sandblaster and compressor (mig slides in somewhere here). Other wall is workbench, coverall locker, soon to be welding table (5ft long by 30inches deep) and minifridge and large industrial fan.
 

Attachments

  • 20170922_201058.jpg
    20170922_201058.jpg
    135.5 KB · Views: 107
  • 20170922_201117.jpg
    20170922_201117.jpg
    132.1 KB · Views: 98
  • 20170829_125953.jpg
    20170829_125953.jpg
    146.4 KB · Views: 98
  • 20170911_175033.jpg
    20170911_175033.jpg
    134.3 KB · Views: 92
  • 20170829_125929.jpg
    20170829_125929.jpg
    135.2 KB · Views: 104
OP
M

mineallmine

Well-known member
Joined
May 22, 2014
Messages
100
Location
Ontario, Canada
Here are some pics of my welding table in production

Got all the metal from a metal scrapper. Gave it all to me for scrap cost. Actually all really good steel. Frame is 3 inch square tubing 1/4" thick. Lower shelf is 1/8" plate and top will be 1/4" stainless (lower grade stainless).

Would have gone lighter for frame but this is what he had and at 40 cents a pound I couldn't get the lighter stuff cheaper. The stainless sheet is beautiful and he gave it to me for the same price. Going to weigh over 600lbs when done I am figuring.

Pictures show before running a flap wheel over steel (I left it outside over winter), test fitting in my 90 degree vise, finished legs, lower shelf, and bench as it is today. Still need to finish welding the joints and clean it up more. Also put on some feet and the top but I am happy with it thus far.
 

Attachments

  • 20171031_135657.jpg
    20171031_135657.jpg
    145.9 KB · Views: 107
  • 20171018_175722.jpg
    20171018_175722.jpg
    152.8 KB · Views: 93
  • 20171017_201144.jpg
    20171017_201144.jpg
    135 KB · Views: 85
  • 20171015_194128.jpg
    20171015_194128.jpg
    143.2 KB · Views: 81
  • 20171013_185954.jpg
    20171013_185954.jpg
    138.4 KB · Views: 79
  • 20171013_185947.jpg
    20171013_185947.jpg
    152.5 KB · Views: 77
OP
M

mineallmine

Well-known member
Joined
May 22, 2014
Messages
100
Location
Ontario, Canada
This puts us up to date. Sorry for so many posts but it was a long time getting to this point. About 2 years 6 months to date. Not bad considering full time job, family obligations and doing most of it by myself. Hopefully soon I can get it all organized and have a fully functional shop.
 

thickhead

Well-known member
Joined
Apr 4, 2014
Messages
817
Location
Connecticut
Man what a job you have done. Really enjoyed reading through it all in one shot so thanks for taking the time to post everything.

That is a great looking shop.
 

old__man

Well-known member
Joined
Apr 29, 2017
Messages
294
Location
Gander, Canada
Your description of wrestling with the trusses, overhangs, and other things solo because no one is around and you're stubborn is basically exactly what I have been going through for the last month. It's nice to read. How long did the whole process take? Where are you located? The red tuck tape leads me to believe your are north of the border.


Sorry to hear about your son.
 

shortykorte

Well-known member
Joined
Sep 1, 2014
Messages
8,039
Location
Tallahassee, Fl
Yes, sorry to hear about your son. Coming up on 5th anniversary of our loss.

Your build is identical to my last shop except you finished yours. Mine had a 8' garage door and man door up front and a man door in back left corner. I should have done like you and only have a 16' on front. Cudos to your wife for helping. My "ex" wouldn't have know if I was dead or alive while building mine.


Sent from my iPhone using Tapatalk
 

Pluribus

Well-known member
Joined
Dec 16, 2012
Messages
2,143
Location
Skagit County, WA
Great job! You kicked *** on getting a lot done by yourself. I always enjoy reading how people creatively solve those problems of getting stuff done with minimal help.
 
OP
M

mineallmine

Well-known member
Joined
May 22, 2014
Messages
100
Location
Ontario, Canada
Your description of wrestling with the trusses, overhangs, and other things solo because no one is around and you're stubborn is basically exactly what I have been going through for the last month. It's nice to read. How long did the whole process take? Where are you located? The red tuck tape leads me to believe your are north of the border.


Sorry to hear about your son.


Thanks all. The entire job took about 2 1/2 years to date. The main building was closed in and had siding done in 3 months. Had the trusses up in 2 evenings. The trick was to flip up the last 4 or 5 trusses and push them close together. Then space them out. Otherwise you won't have room to flip up the last few.

I am located in Cambridge, Ontario.
 
OP
M

mineallmine

Well-known member
Joined
May 22, 2014
Messages
100
Location
Ontario, Canada
I highly recommend doing what you can.....saves a ton of money and I learned lots. I am no expert but am mechanically inclined and handy. I just researched each job beforehand to gain pointers and tips.
 
OP
M

mineallmine

Well-known member
Joined
May 22, 2014
Messages
100
Location
Ontario, Canada
So, been a bit, but finally seeing a little more progress. Got my welding table Made and in place. I got the steel cheap from a guy that sells it off for just above scrap cost. Was going to go lighter but when you buy this way you take what you can get...besides bigger is better right:thumbup:

Table is 30 inches deep (top) and 64 inches long. The frame is made up of 3inch square tubing 1/4 inch wall. The lower shelf is 1/8 plate steel and the top is 1/4 inch stainless. Came together pretty good for deciding as I went how to build it. I am also adding an air manifold at the front of the table for grinders or whatever I may need, thus the hole drilled in the tube.

I added a 6 inch vice I picked up cheap as well. 1/2 inch bolts and nuts on the front and 1/2 bolt threaded into table frame at rear

I figure the table weighs 5 to 600 pounds assembled. I bought 750lbs of steel but never used one of the 6 foot lengths of 3 inch square tubing and cut off 12 inches of the stainless and used half the 1/8 plate. Don't have any worries of it moving on me.
 

Attachments

  • 20171113_164317.jpg
    20171113_164317.jpg
    133.5 KB · Views: 80
  • 20171112_183907.jpg
    20171112_183907.jpg
    139.5 KB · Views: 63
  • 20171112_173251.jpg
    20171112_173251.jpg
    138.8 KB · Views: 66
  • 20171031_135657.jpg
    20171031_135657.jpg
    145.9 KB · Views: 61
  • 20171017_201144.jpg
    20171017_201144.jpg
    135 KB · Views: 50
  • 20171013_185954.jpg
    20171013_185954.jpg
    138.4 KB · Views: 51
  • 20171013_185947.jpg
    20171013_185947.jpg
    152.5 KB · Views: 53
Last edited:
OP
M

mineallmine

Well-known member
Joined
May 22, 2014
Messages
100
Location
Ontario, Canada
Started getting air lines run. Hope to soon have air.

Originally picked up 2 air line kits from Princess Auto that I thought were rapid air kits. These were the kits with 300' of air line each. Way more air line than I needed but the price was right so I ordered them....big mistake. They were princess auto knockoffs and bad ones at that. The air manifolds were different and all the fittings were cheap and machining was poorly done. I quickly returned them and Rapid Air hooked me up with 2 of their 100' Maxline air line master kits and a few extra fittings for close to the same price....a little more but worth it for the quality of parts.

All I can say is that it takes a bit to get a rhythm going and time to really plan your layout to maximize coverage, but once you get going this kit is great. I took my time assembling the manifold blocks adding a couple wraps of Teflon tape then following up with pipe dope as recommended to ensure a good seal and not to marr the threads during assembly. This worked really well.

Takes a bit to get the pipe straight and it never really stays that way while putting it up but it isn't too difficult to make it look nice once up. I never bothered making the straightening jig shown on the rapidAir website but I imagine it's worth the effort...but I'm too far in now to bother.

Just a small piece to go under the welding bench and one wall to go then end at my compressor and tighten up all the fittings. I left the hose fittings loose in case I ran into any issues I could easily pull things apart if needed

I even added a connector outside the front of the garage in case I was working outside and needed air so I wouldn't have to open the door. The manifolds have a port on the back to allow you to run your lines inside the walls so instead of putting in the plug I utilized it with black pipe run to the outside
 

Attachments

  • 20171127_205030.jpg
    20171127_205030.jpg
    132.3 KB · Views: 106
  • 20171127_205045.jpg
    20171127_205045.jpg
    140.5 KB · Views: 109
  • 20171127_205058.jpg
    20171127_205058.jpg
    138.6 KB · Views: 95
  • 20171124_182348.jpg
    20171124_182348.jpg
    146 KB · Views: 95

livwell

Active member
Joined
Dec 9, 2016
Messages
28
Location
Central Mass
Great build...there is nothing worse than loosing a child..all I can say is stay busy and remember all the good times,sorry to say I know what your going threw..God Bless..CONQUER KIDS CANCER ...
 

Chris Stapley

Well-known member
Joined
Jan 22, 2010
Messages
388
Location
Campbellford, Ontario
Great build thread, I'd love to get a set of plans to build the very same setup in eastern Ontario ( Campbellford) my sincere condolences to you and your family over the loss of your son, I expect you and he would have loved to have time together in this shop.
 
To avoid these ads, REGISTER NOW!
Top Bottom