To avoid these ads, REGISTER NOW!

What did you do "IN" your garage today?

To avoid these ads, REGISTER NOW!

Outlawmws

Well-known member
Joined
Aug 9, 2011
Messages
39,258
Location
The Badlands
Before that is the drill worn out? that would increase consumption, and also; any leaking hoses?

Slapped on the ugly stock rims and Blizzak winter tires on my FJ. Discovered that while using my CH air-drill, my cast-iron compressor couldn't keep up wit the demand of my drill. Compressor's a Campbell Hausfeld 6hp (*rolls eyes*) 60 gallon from the late 90's. Rated at 10CFM @ 90 psi. My drill consumes 9 cfm @ 90 psi, yet my pressure dropped to & maintained 75 psi while using the drill to brush the corrosion off the backside of the aluminum hubs. I never noticed a lack of capacity while using my sandblaster, which I assumed would need more air than a measly drill.

So, do I order a ring kit, would that be enough? It'd kill me to have my compressor not working after tearing it apart & waiting for the replacement parts. Kinda hoping I could order the parts in advance, make it a same-day deal.

Opinions?
 

BonzoHansen

Well-known member
Joined
Jun 24, 2005
Messages
1,740
Location
NJ
Started the fuel line/brake line/fuel tank replacement project in my 93 K1500. What a pain the nuts. 6 hours and I'm about half done. Here is a project that a lift would have made easier lol.
 

Bacon Man

Well-known member
Joined
Apr 18, 2017
Messages
91
We sat in the garage, drank beer, ate pork, sighted in the guns and got ready for deer season.
 

Motorman55

Well-known member
Joined
Apr 10, 2016
Messages
2,632
Location
South Jersey
Working on researching the family's military Civil War medals and Union Regimental history.

The tool on the right is a Fireman's wrench from my wife's grandfather who served with the Newark Fire Dept. in Newark, NJ back in the 1920/30's.
 

Attachments

  • IMG_1691 (2).jpg
    IMG_1691 (2).jpg
    145.9 KB · Views: 76

phoenix5x

Well-known member
Joined
Sep 28, 2010
Messages
103
Stripped the dog house off one of my projects..getting ready for the winter rebuild. New suspension, motor, trans, interior overhaul, new bed wood.957a0699b63279059bbef546520bbdff.jpg31bc1f0d75a511860d9542df1fa49e04.jpg

Sent from my VS995 using Tapatalk
 

Attachments

  • 31bc1f0d75a511860d9542df1fa49e04.jpg
    31bc1f0d75a511860d9542df1fa49e04.jpg
    43.1 KB · Views: 0
  • 957a0699b63279059bbef546520bbdff.jpg
    957a0699b63279059bbef546520bbdff.jpg
    64.4 KB · Views: 0

Joshua_Russo

Well-known member
Joined
May 14, 2015
Messages
104
Location
Huntsville, Alabama, USA
Took a break from fixing things in order to design and make something.

Not that I'm the first to make a pendant lamp out of license plates, but it was fun figuring out how to make the frame out of salvaged plywood.f0968b23da6823ab026fede8f6390256.jpg0898d859f2040b10f7b99458a2153992.jpgbeab1de3692e7a23a948349dd92b049b.jpg867f77308361782e8d834d5c215718ec.jpgfc6969c3b4e55e63173a353fcdd930ff.jpg

Sent from my VS988 using Tapatalk
 

Attachments

  • fc6969c3b4e55e63173a353fcdd930ff.jpg
    fc6969c3b4e55e63173a353fcdd930ff.jpg
    72.6 KB · Views: 0
  • 867f77308361782e8d834d5c215718ec.jpg
    867f77308361782e8d834d5c215718ec.jpg
    49.7 KB · Views: 0
  • 0898d859f2040b10f7b99458a2153992.jpg
    0898d859f2040b10f7b99458a2153992.jpg
    58.2 KB · Views: 0
  • f0968b23da6823ab026fede8f6390256.jpg
    f0968b23da6823ab026fede8f6390256.jpg
    37.2 KB · Views: 0
  • beab1de3692e7a23a948349dd92b049b.jpg
    beab1de3692e7a23a948349dd92b049b.jpg
    38.5 KB · Views: 0

JimVonBaden

Well-known member
Joined
Dec 2, 2011
Messages
15,716
Location
Northern Virginia
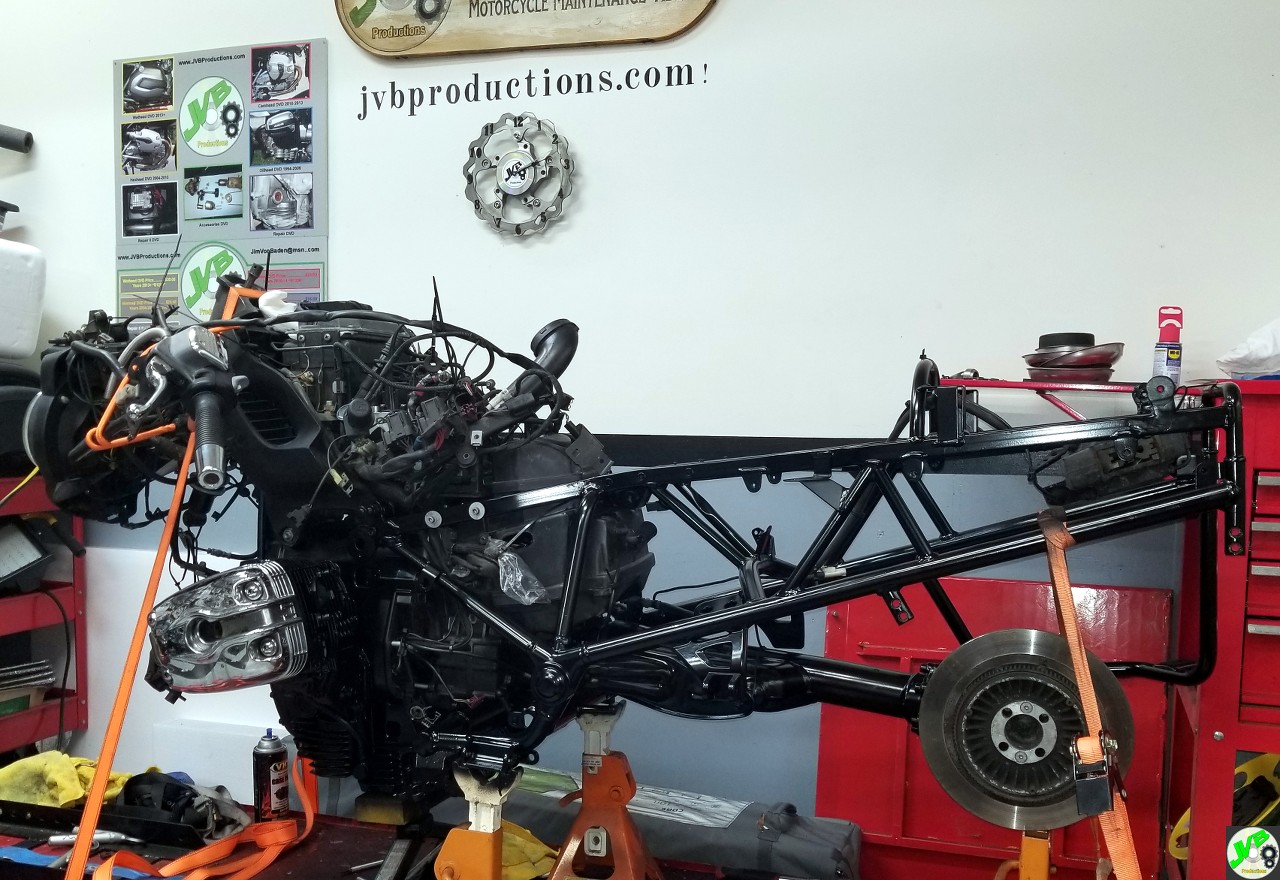
Made some progress on my project BMW:

A little more progress.

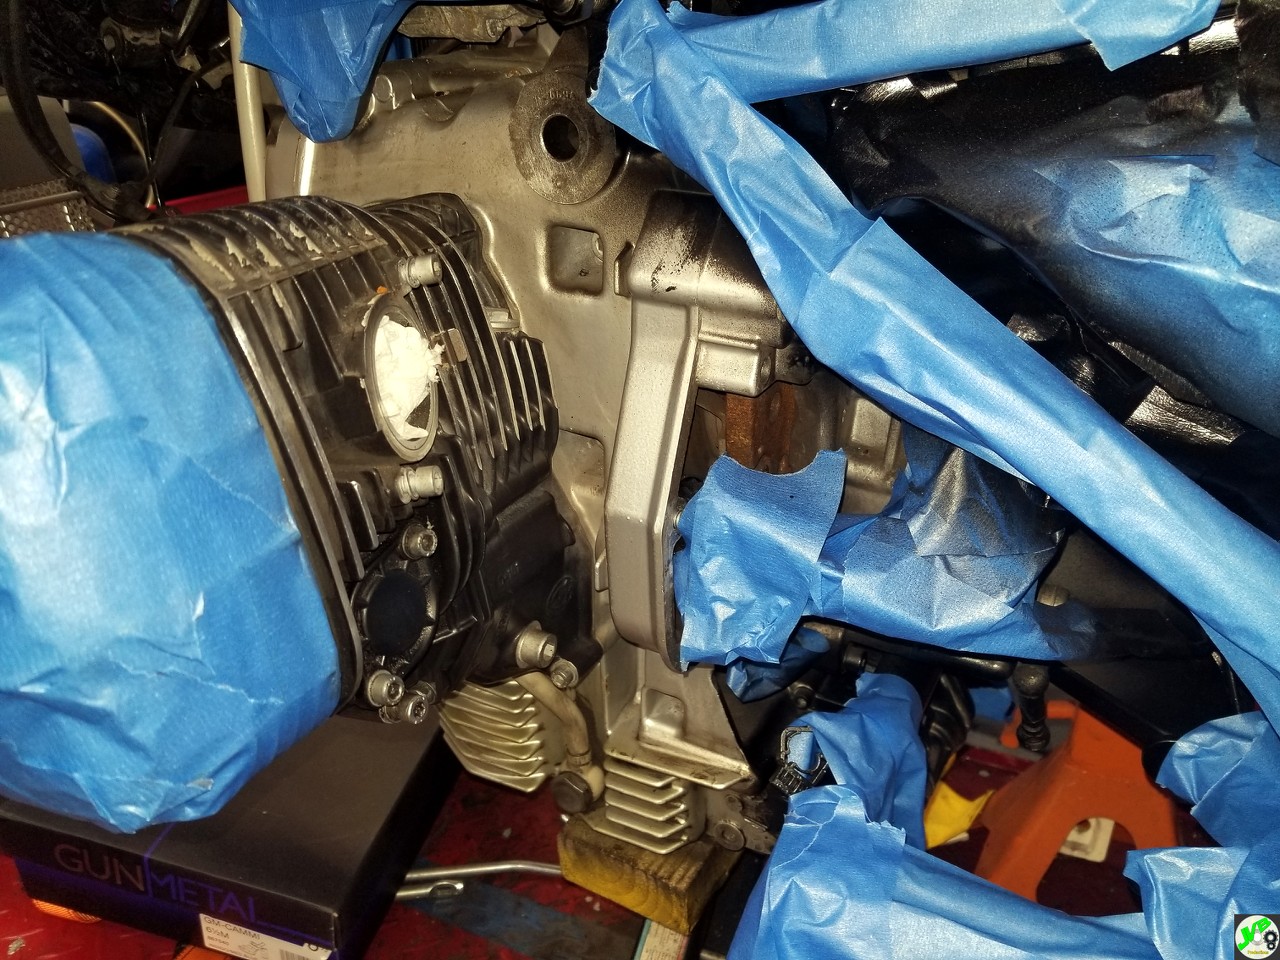
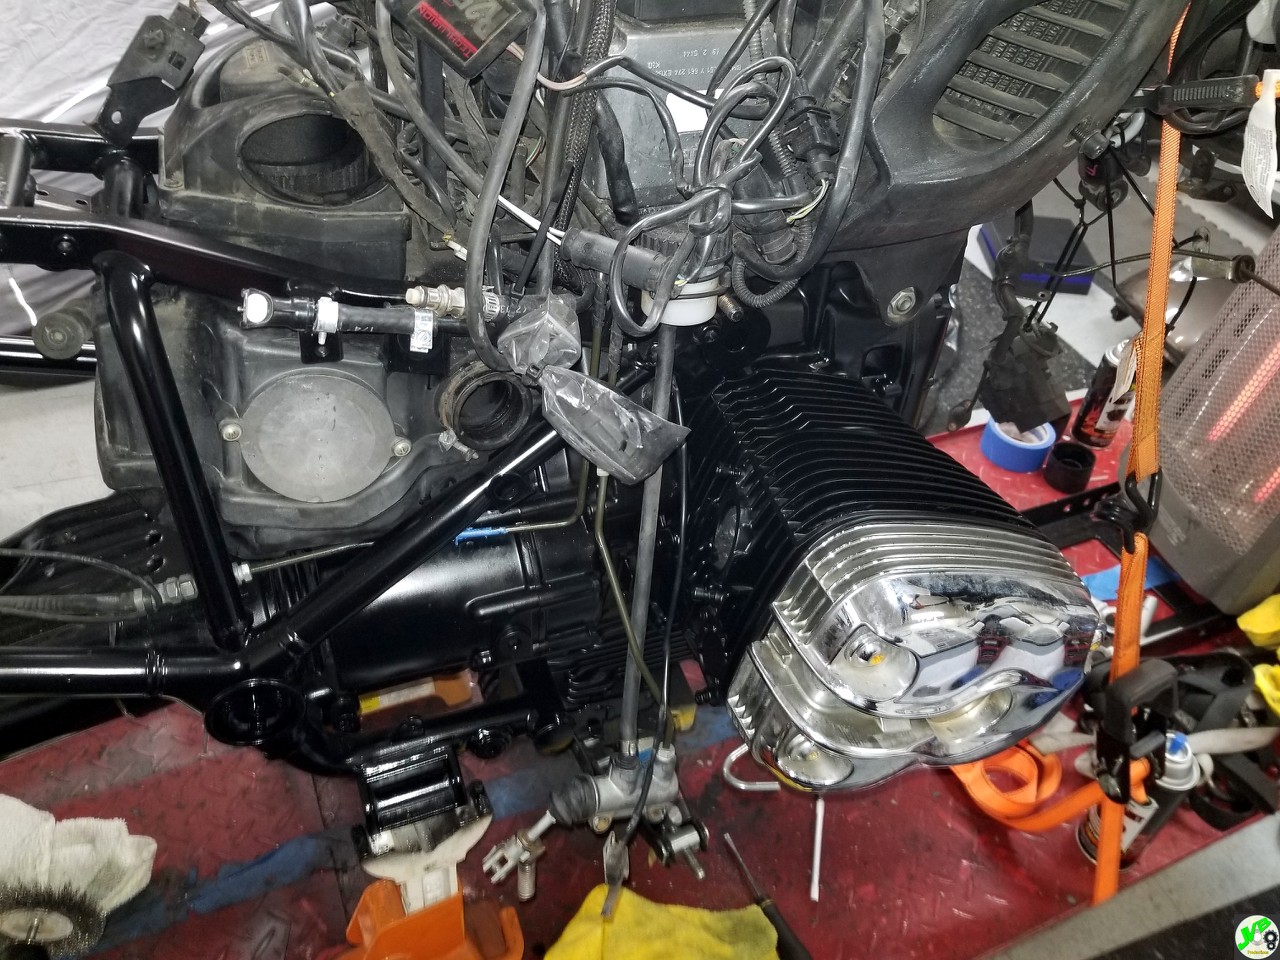
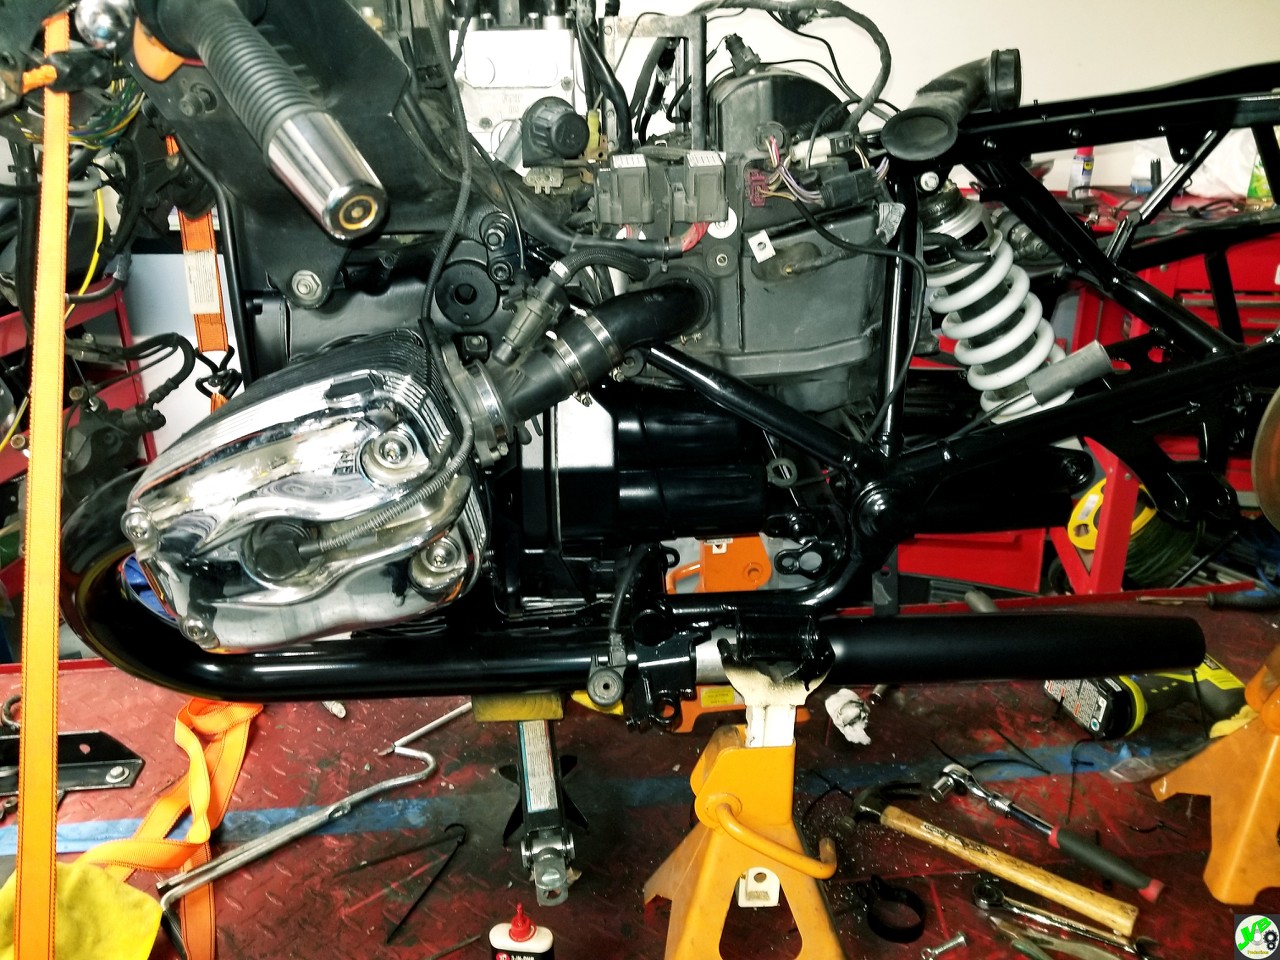
The first series is pre-paint, and pre-clean of the motor.


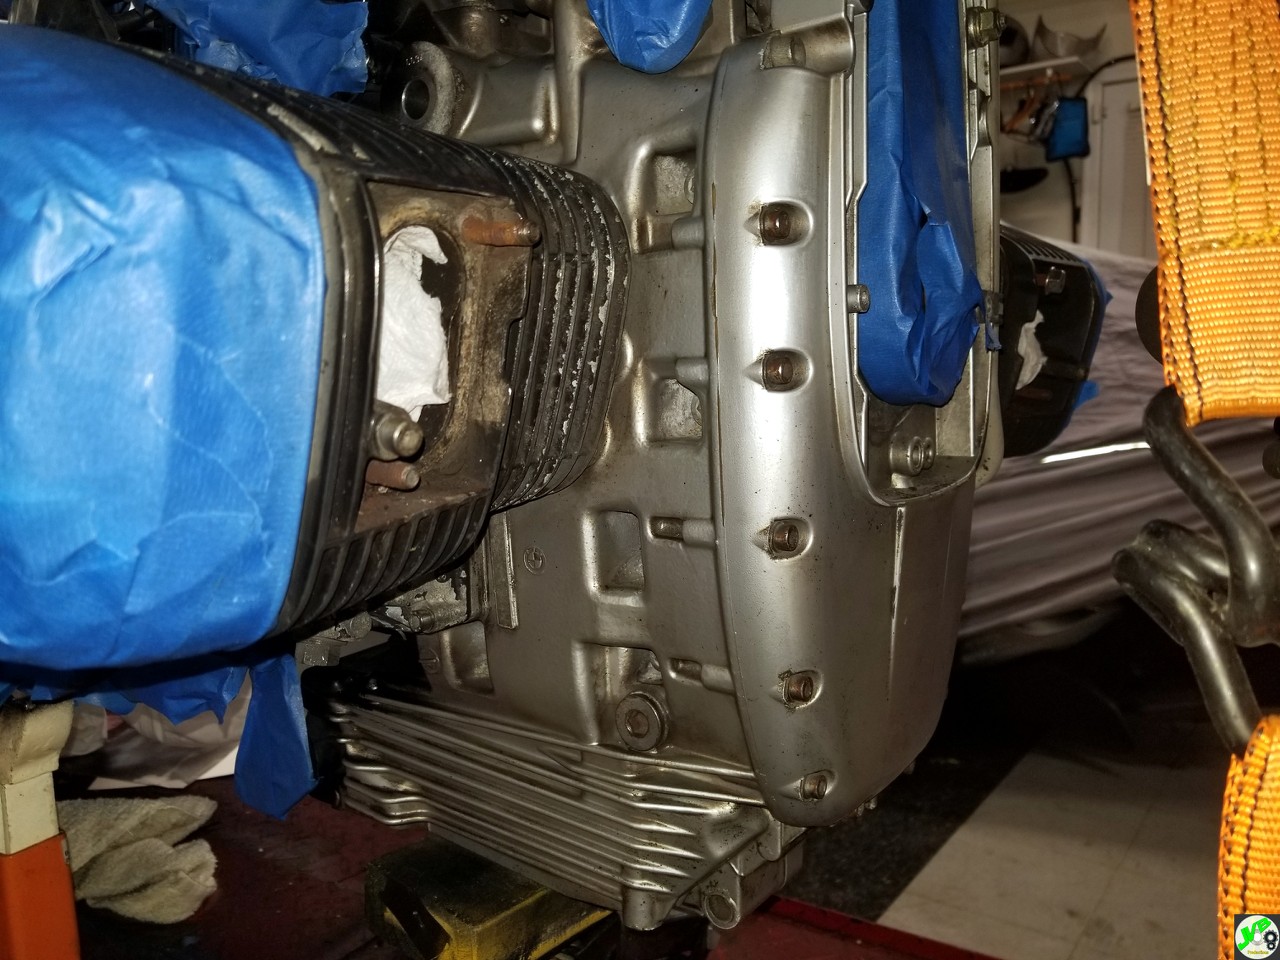
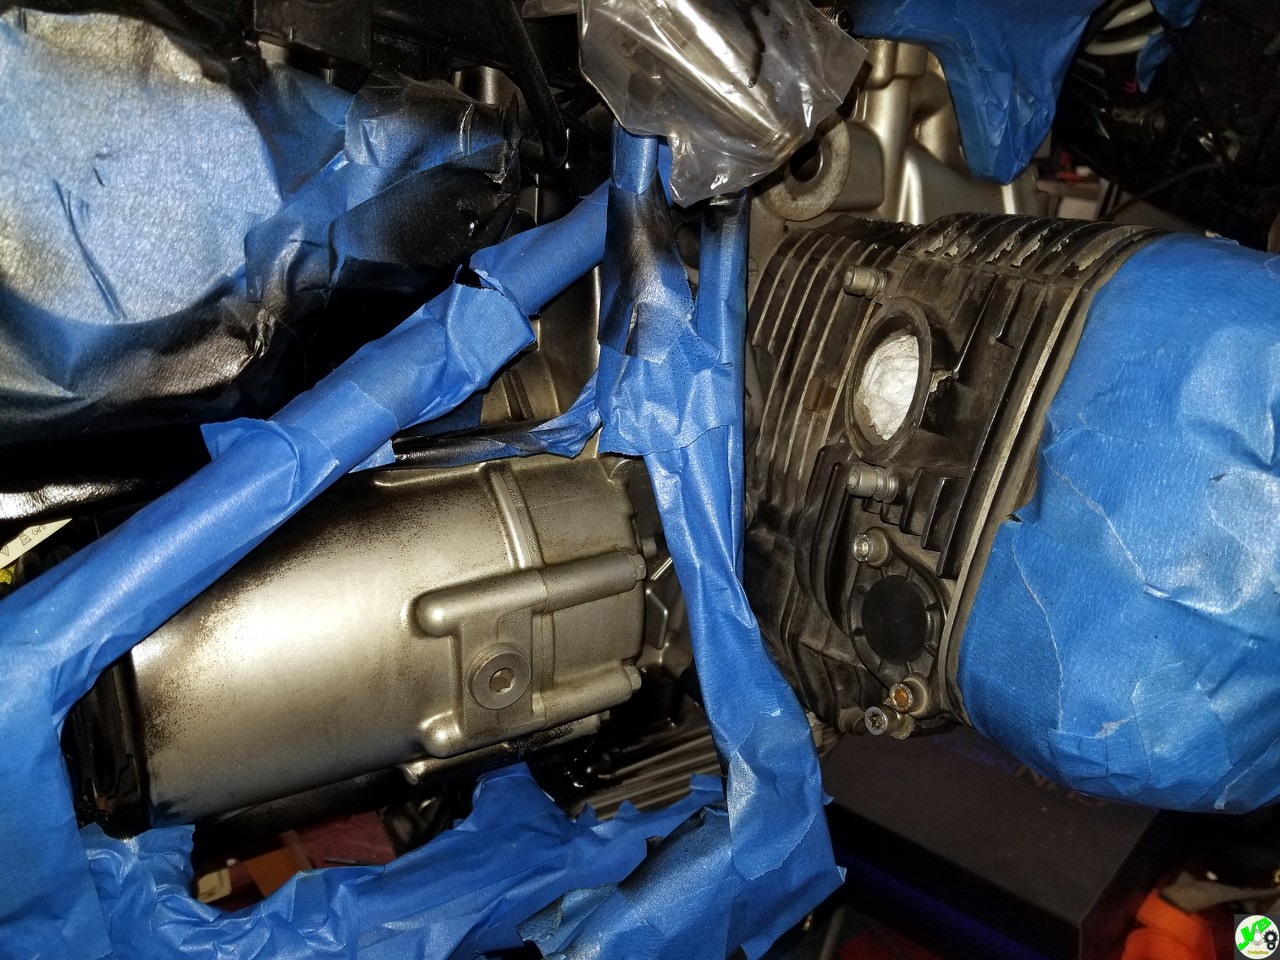
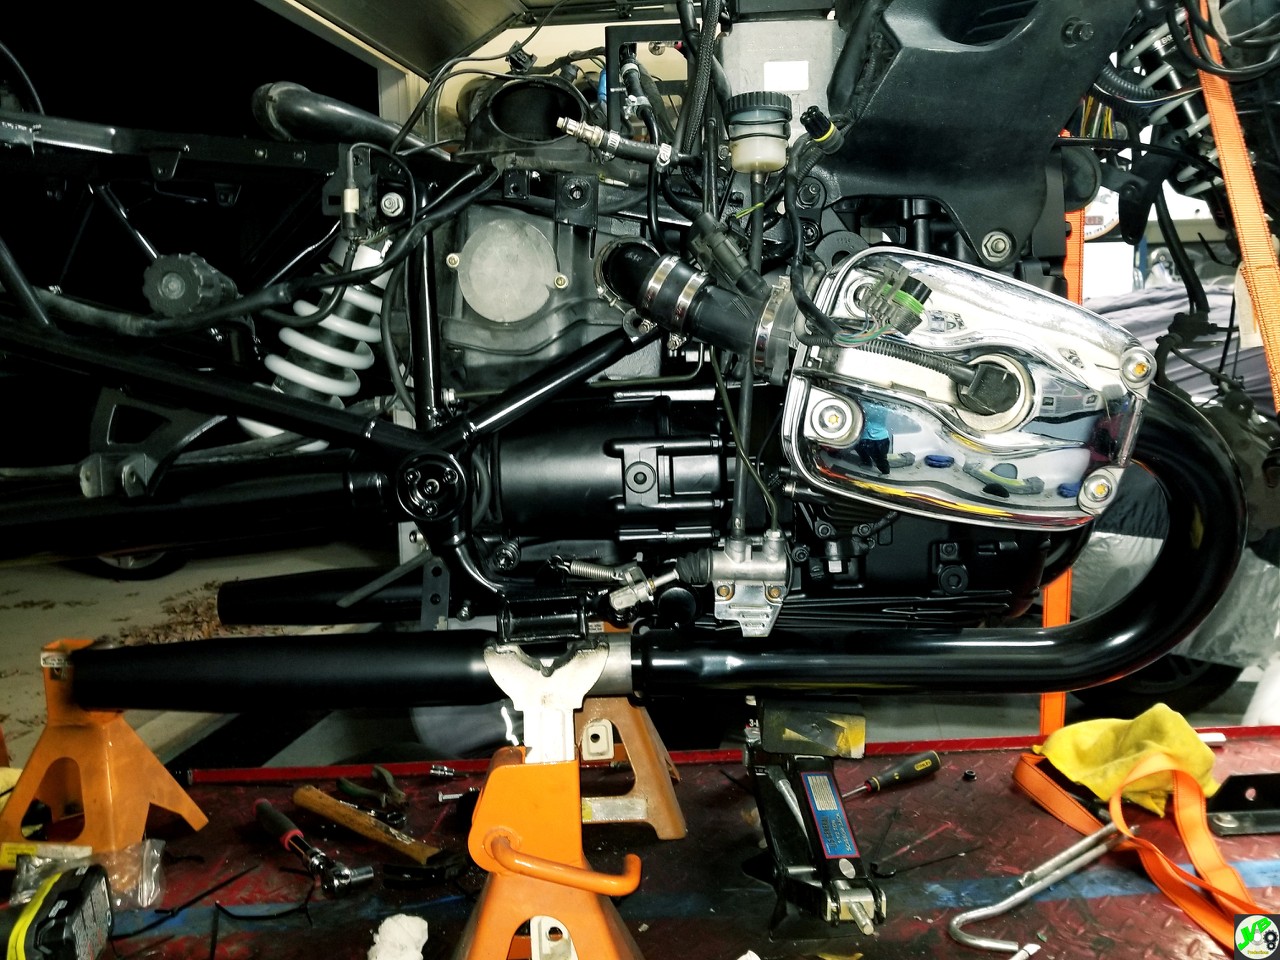
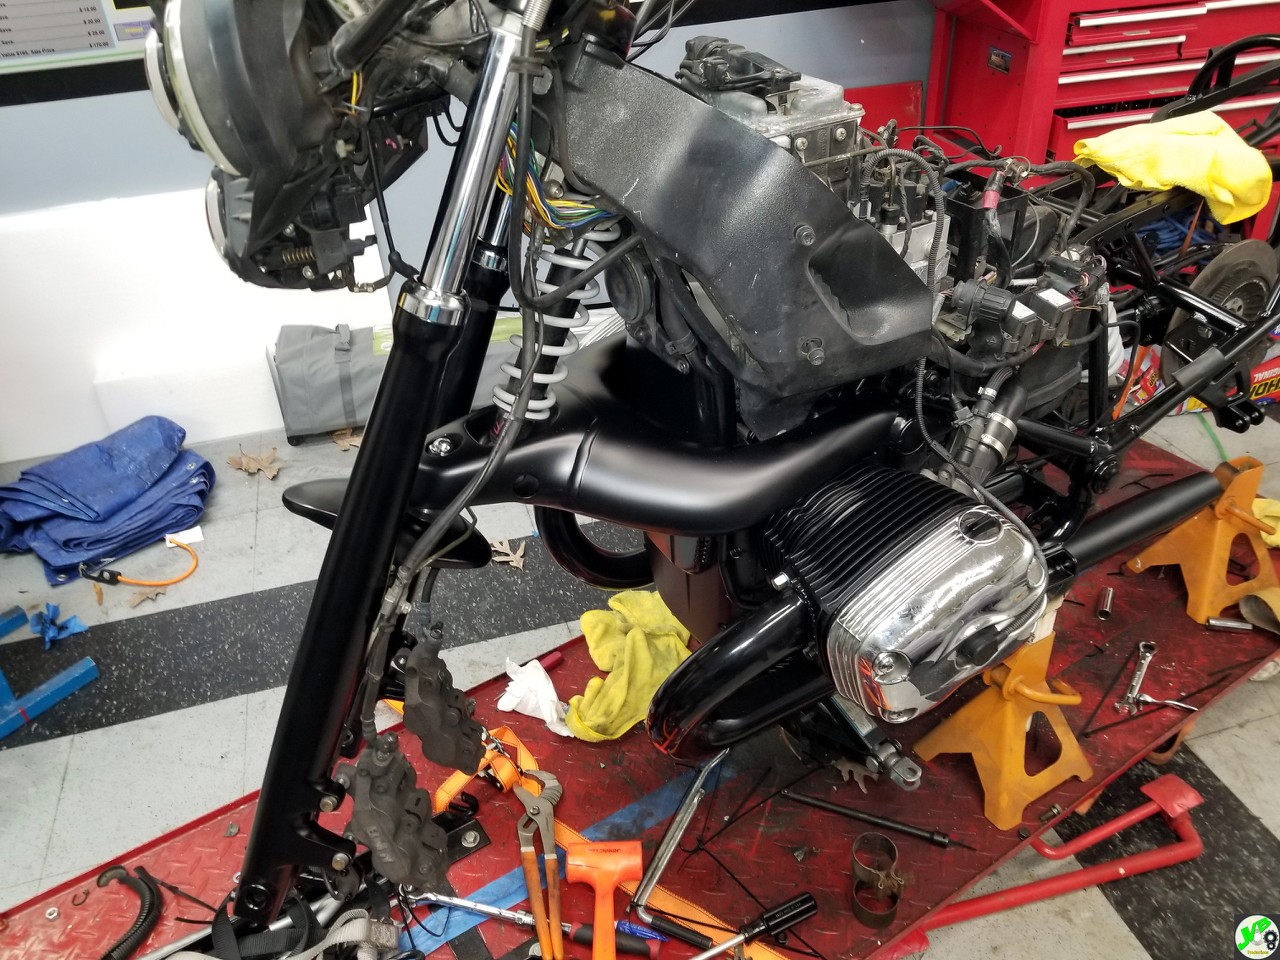
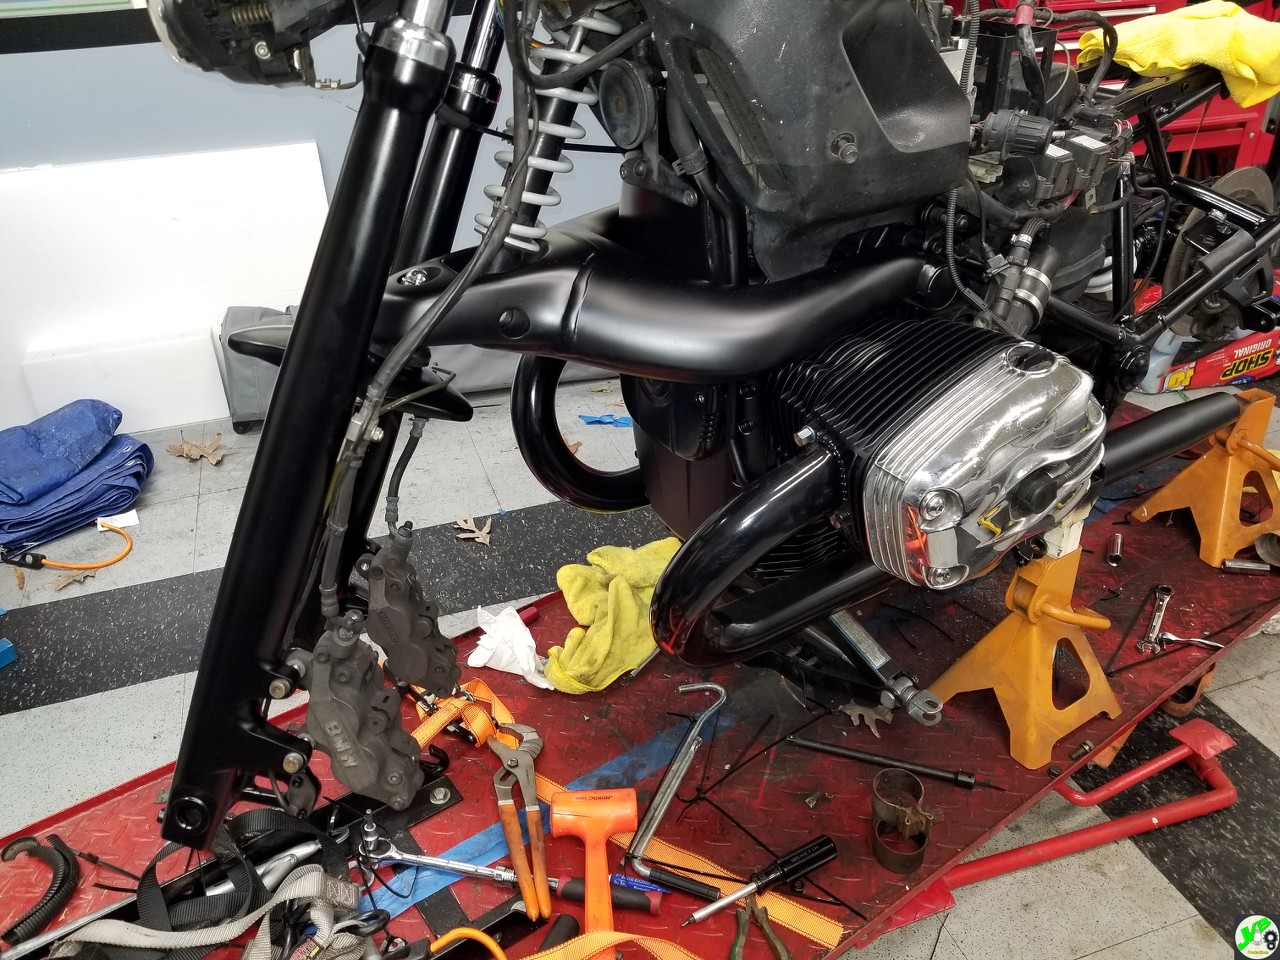
The second set is post engine paint. This is case paint, designed for temps up to 550F, and is oil and gas resistant.


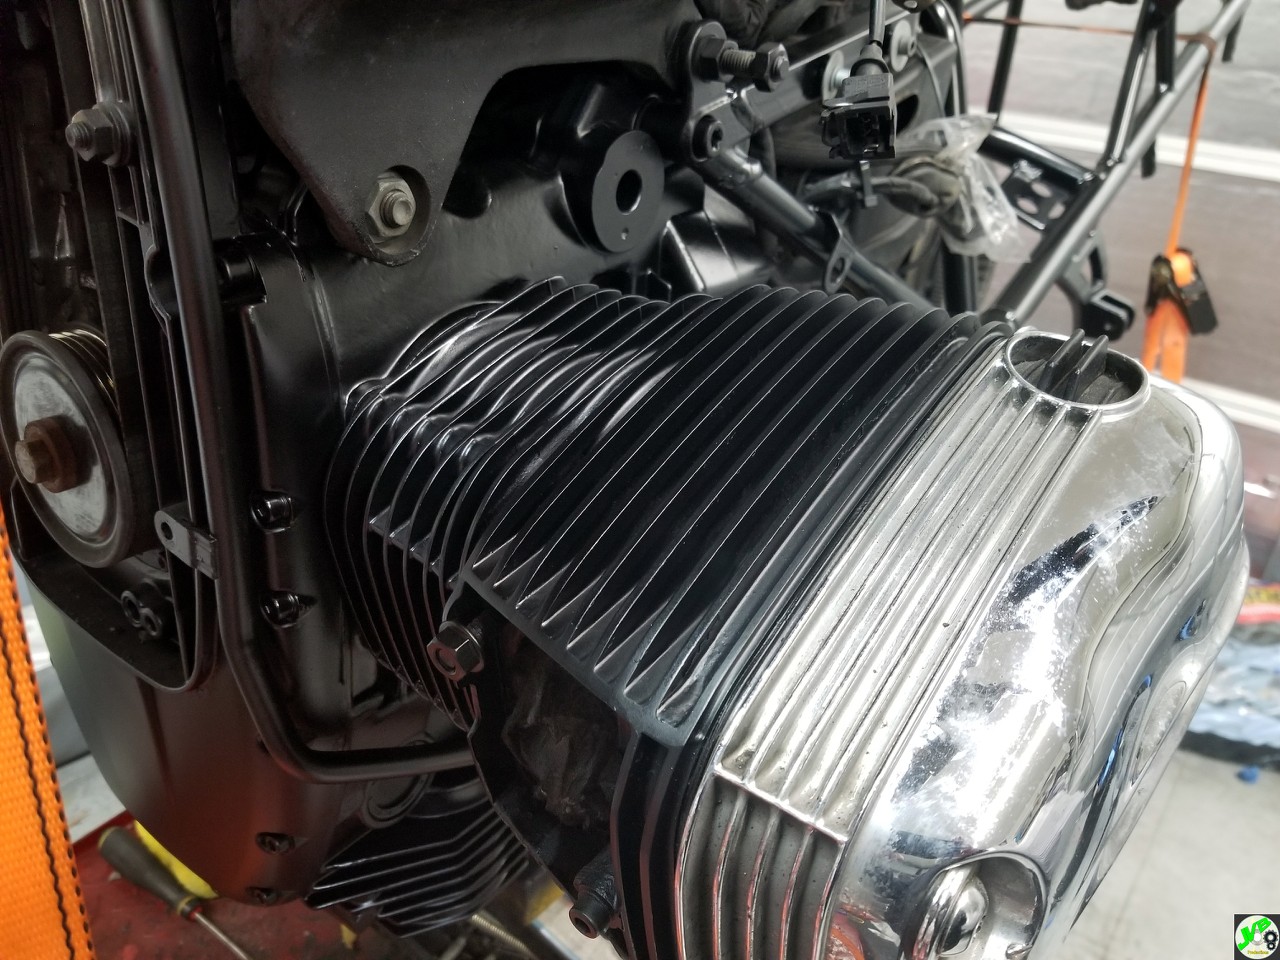
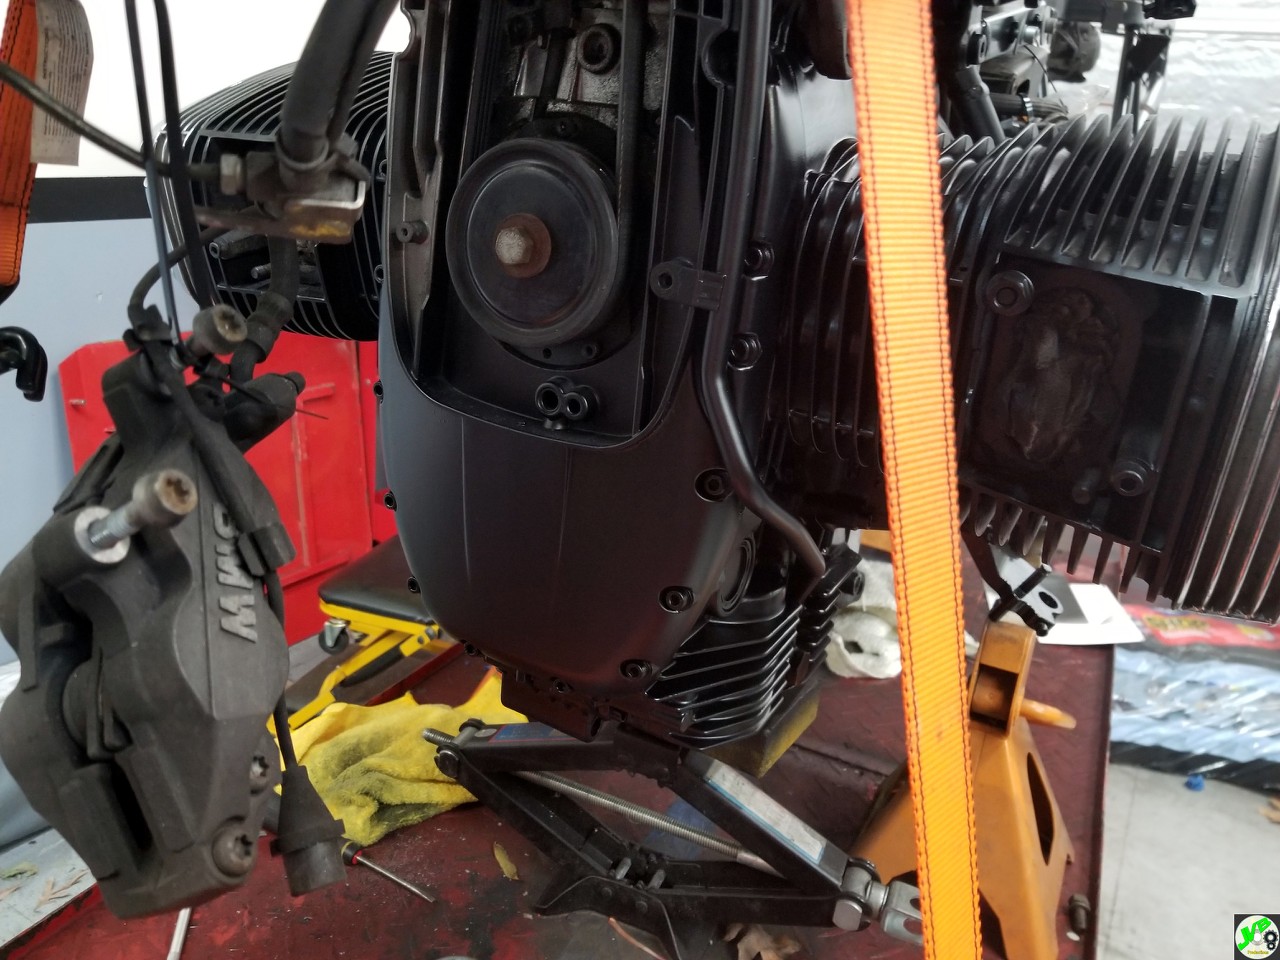
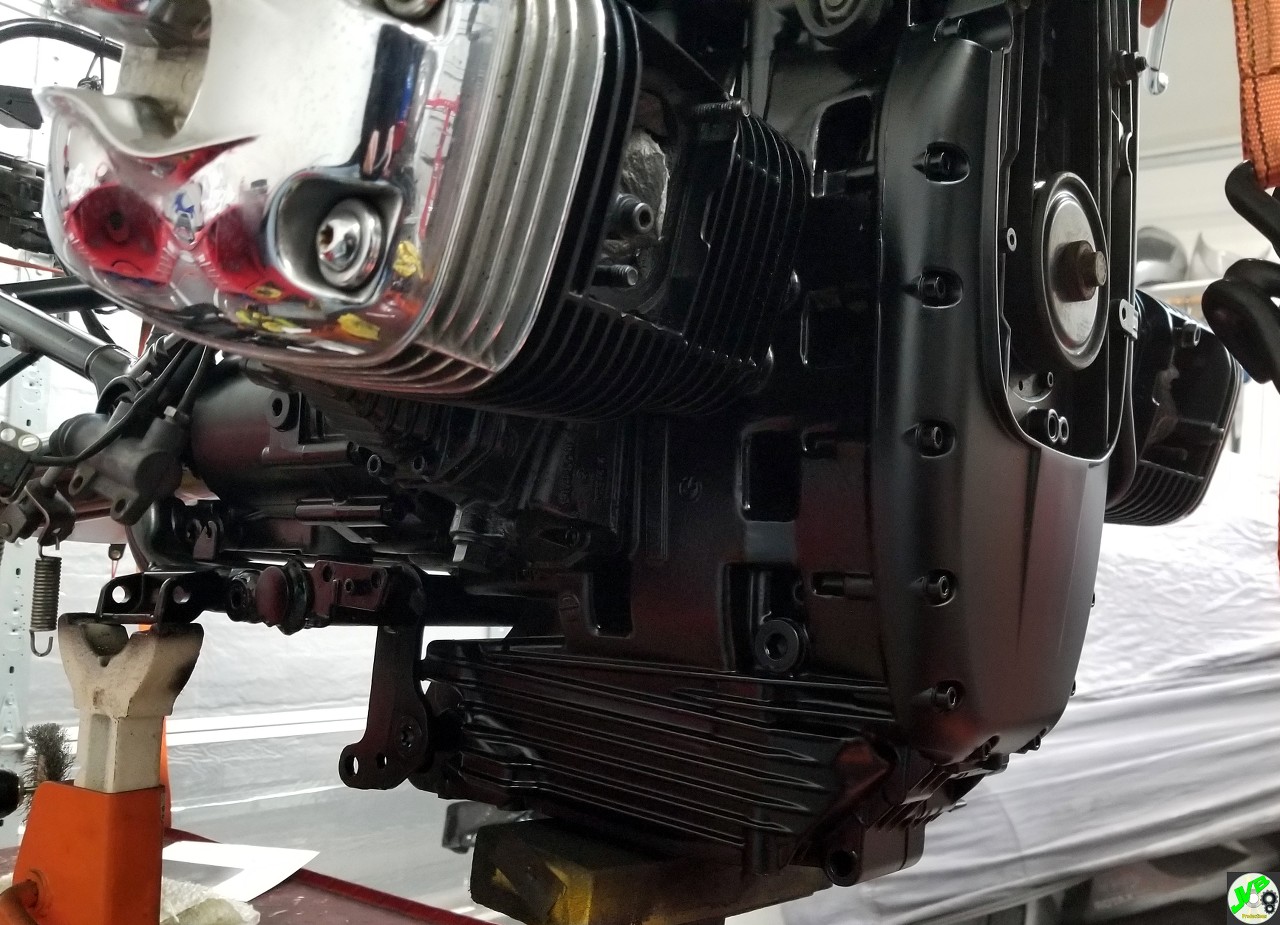
It looks good, a nice satin finish, with good coverage. It compliments the gloss of the frame.

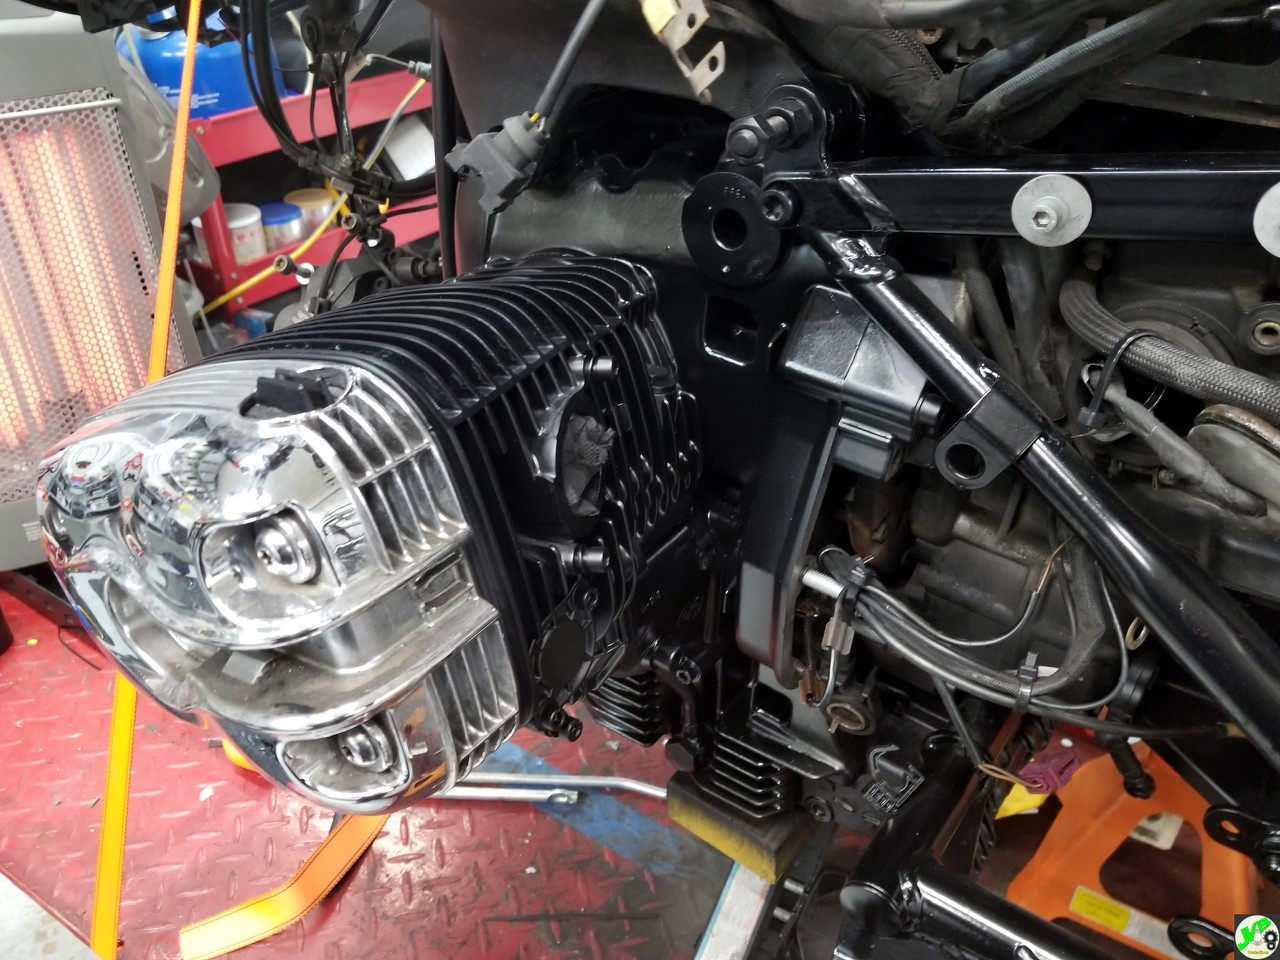
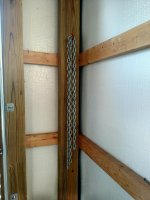
Lastly, a shot of why I didn't take the frame, wiring, nd other components off the bike pre-paint:


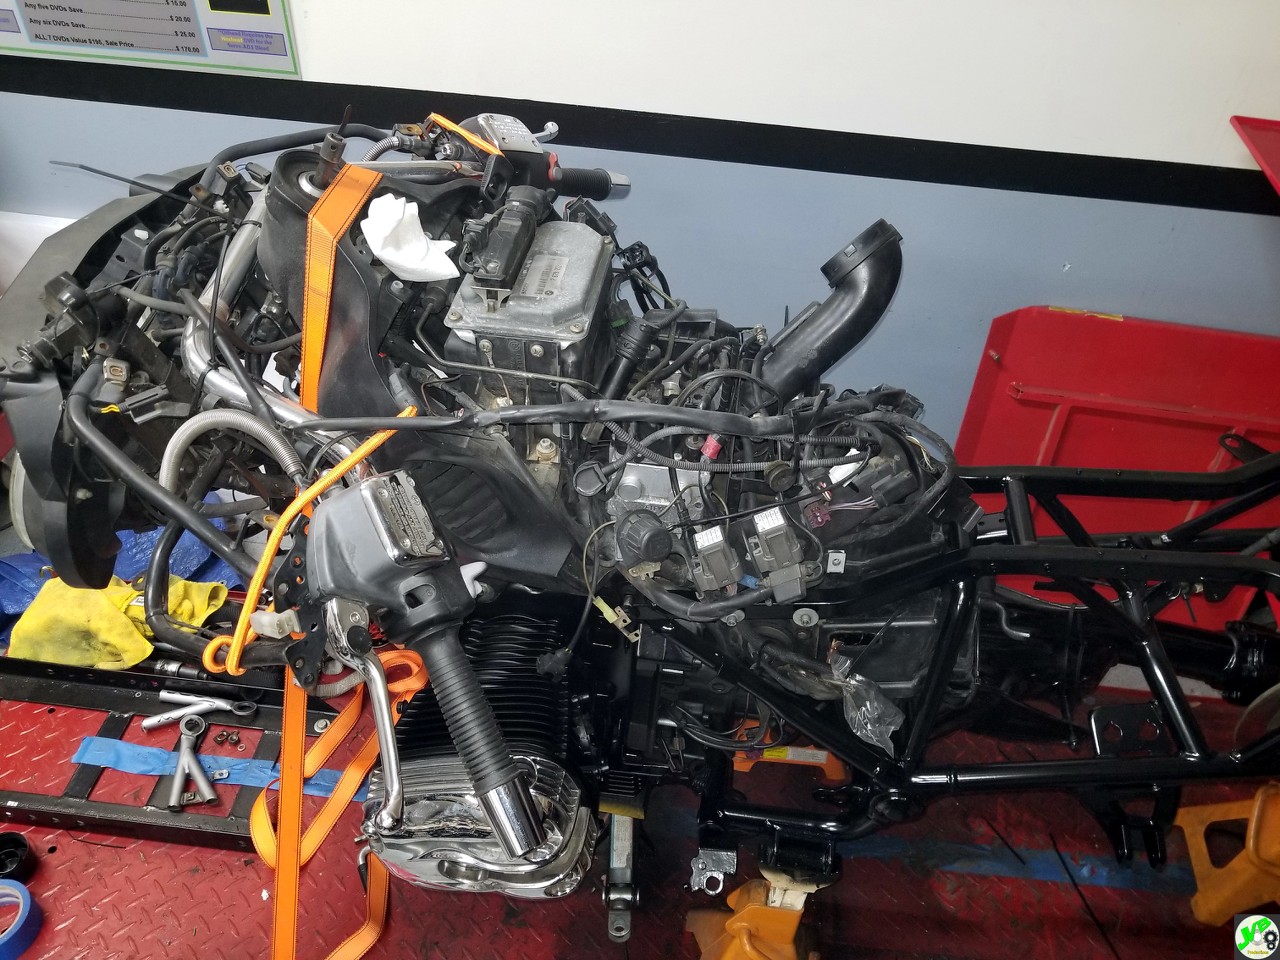
It would be worth it on a full resto bike, but this bike is more of a resto-mod.


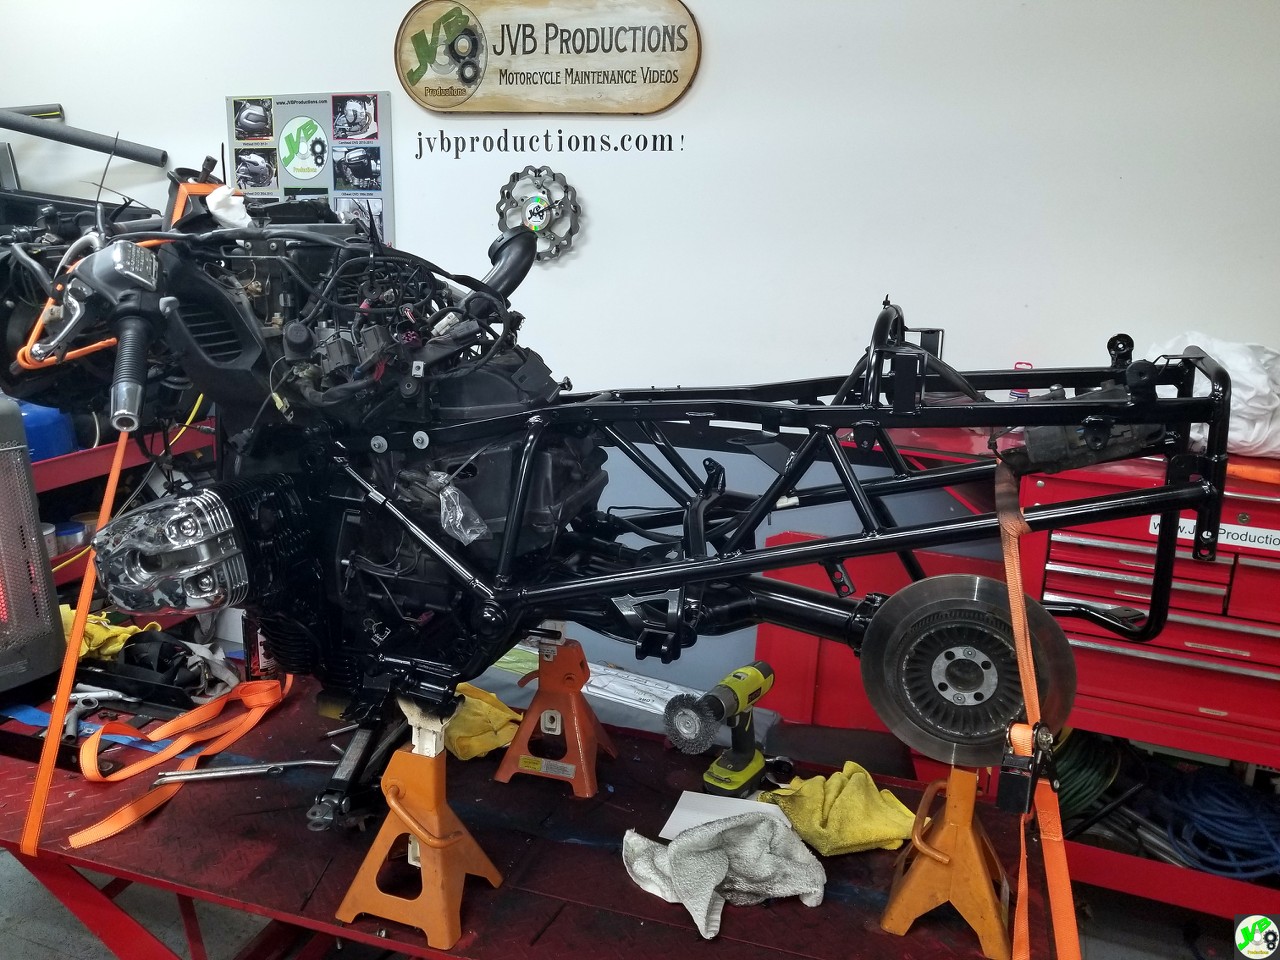
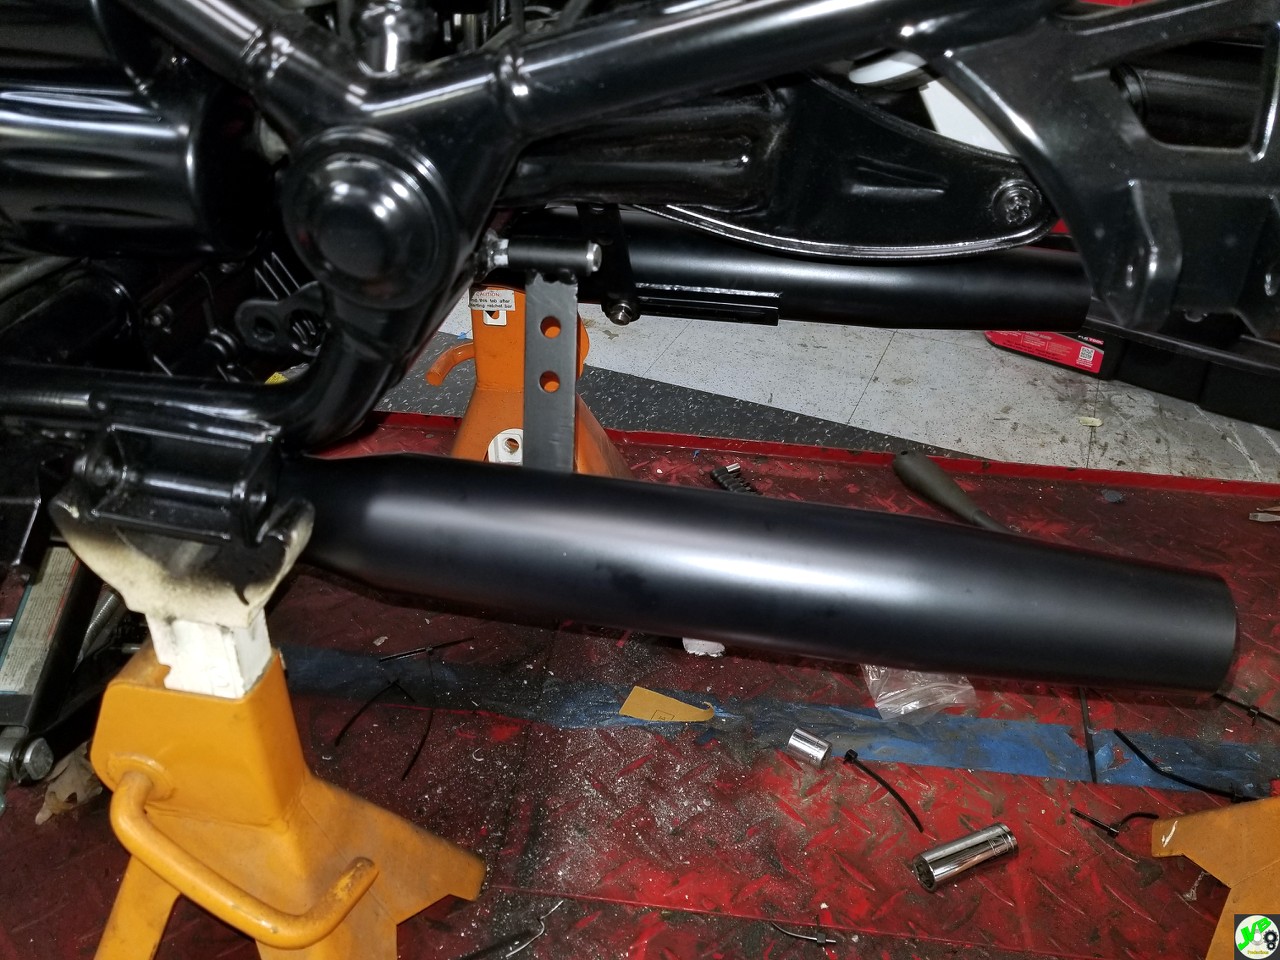
Started assembly. Some wiring, throttle injectors, and fabbed up mounts for the exhaust.


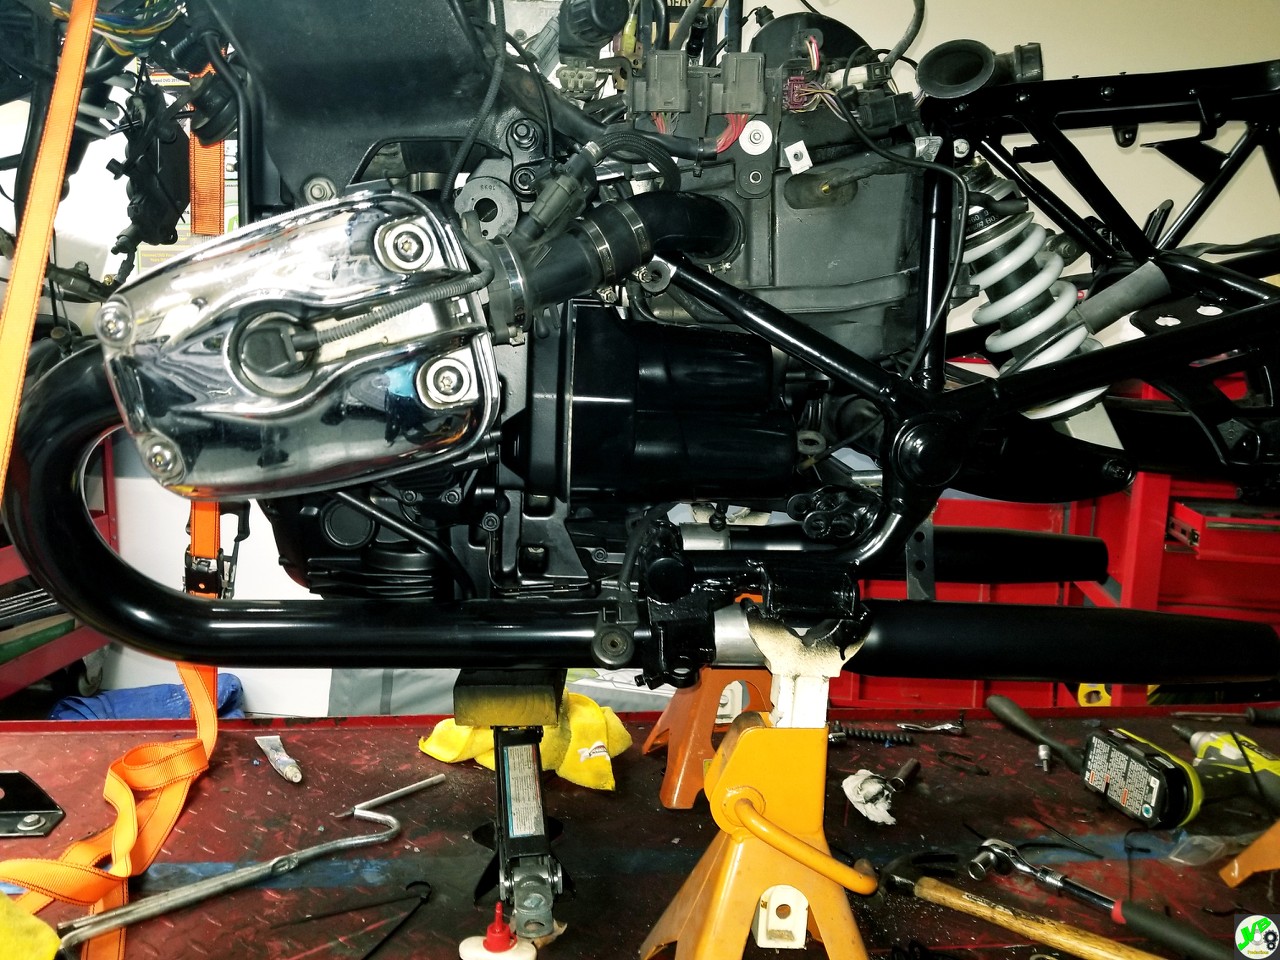
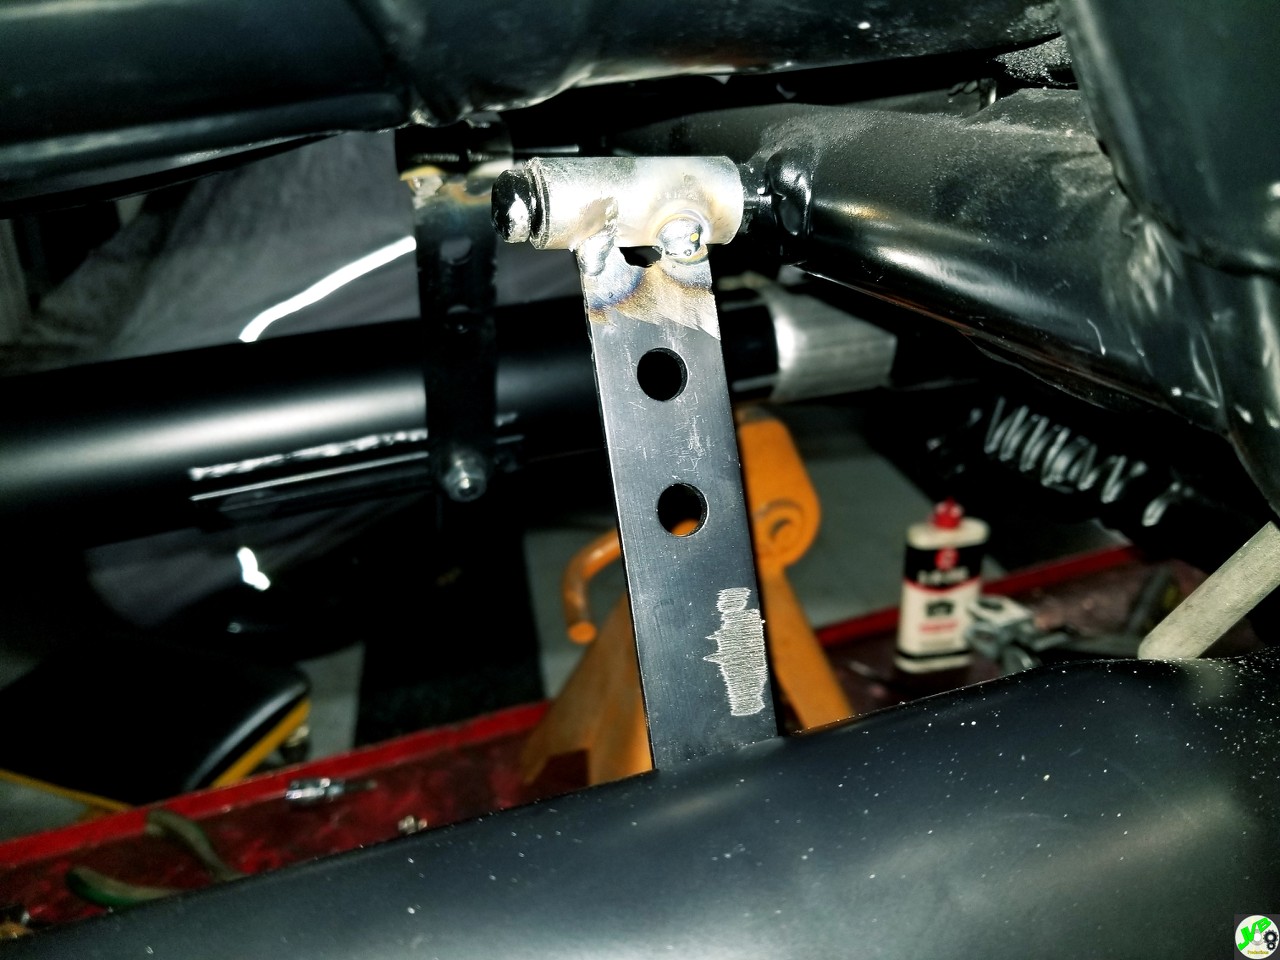
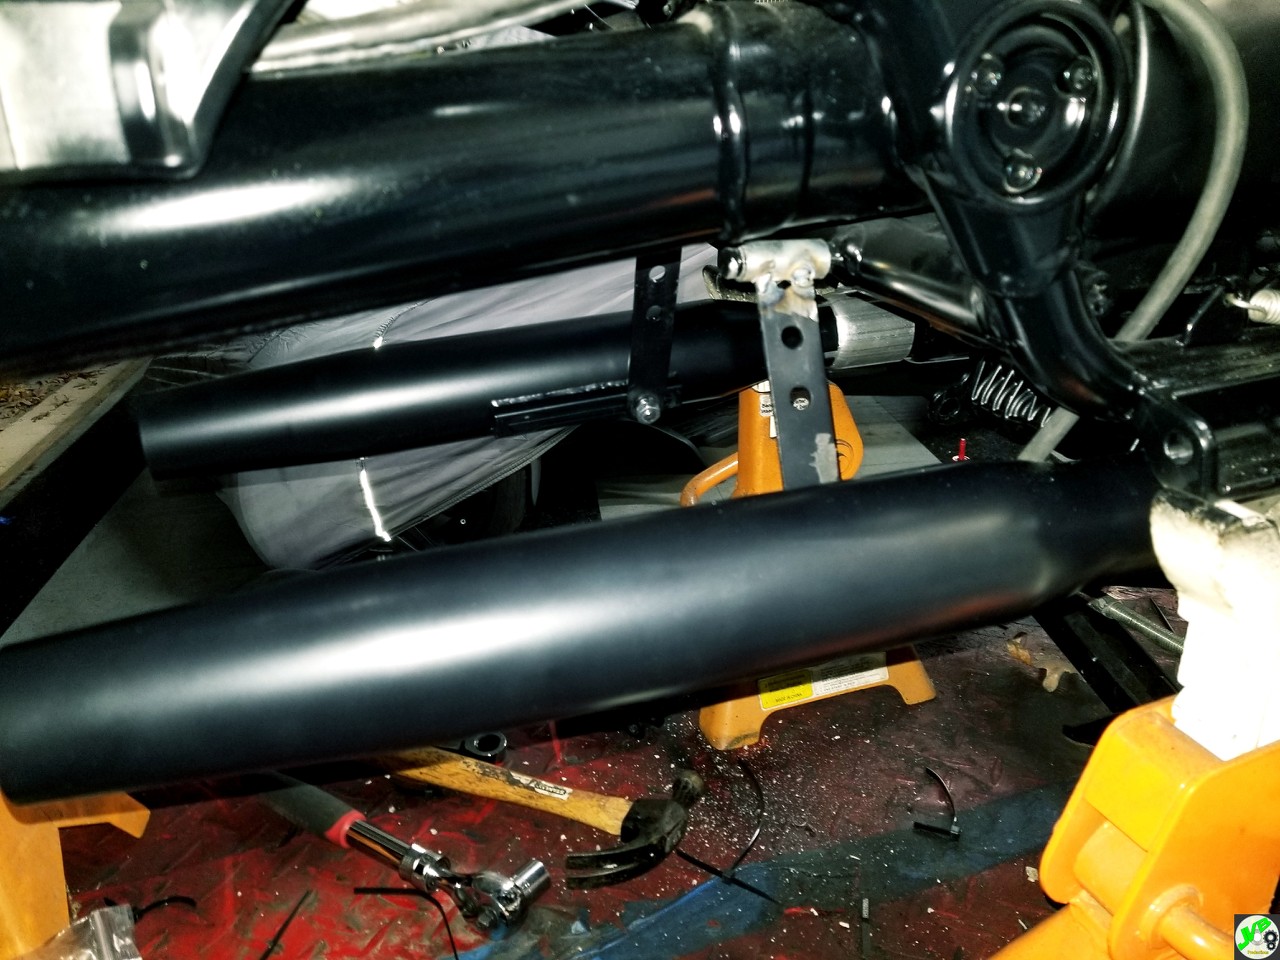
Next to dress and paint the exhaust parts, and replace one of the studs that broke.

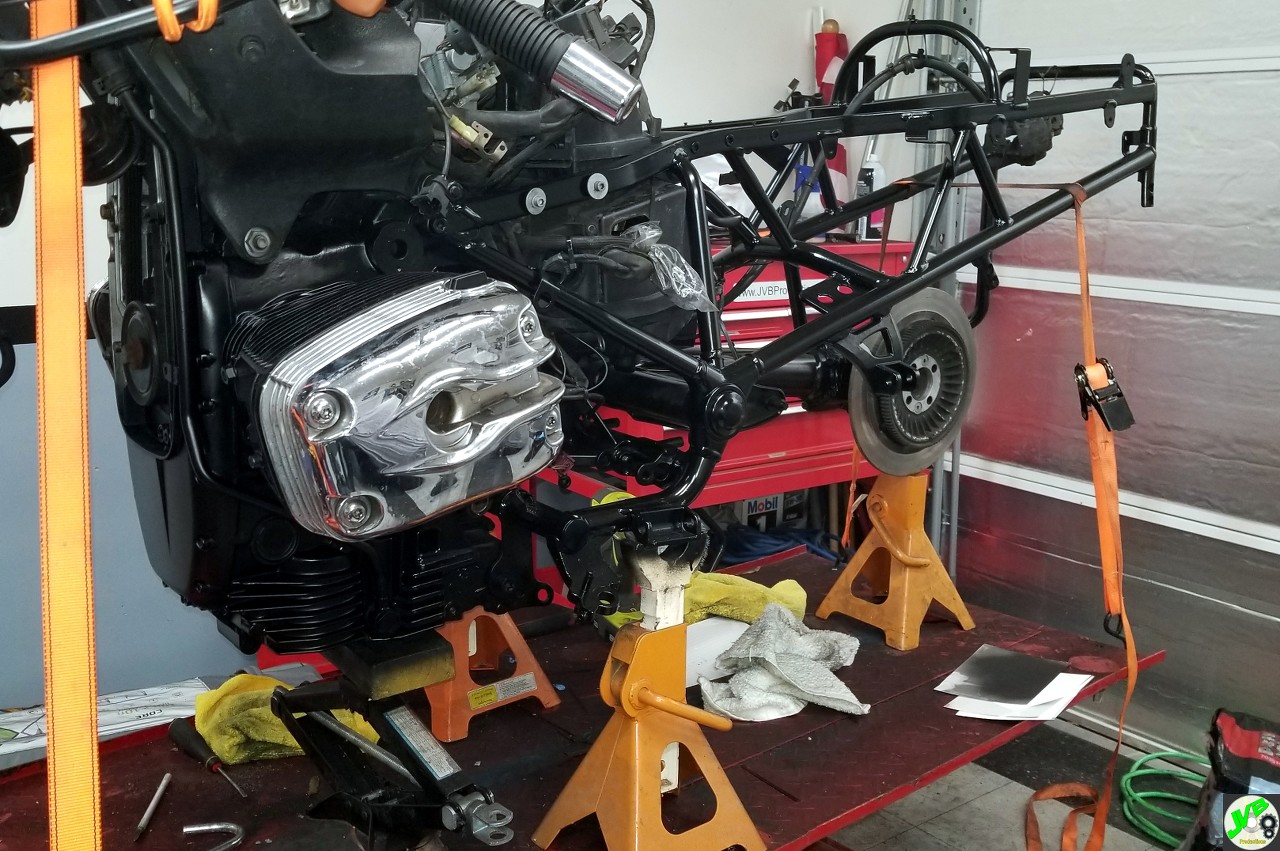
More assembly progress. I installed the upper triple tree, Telelever, forks (with new fluid), instruments, brakes and painted exhaust hangers.


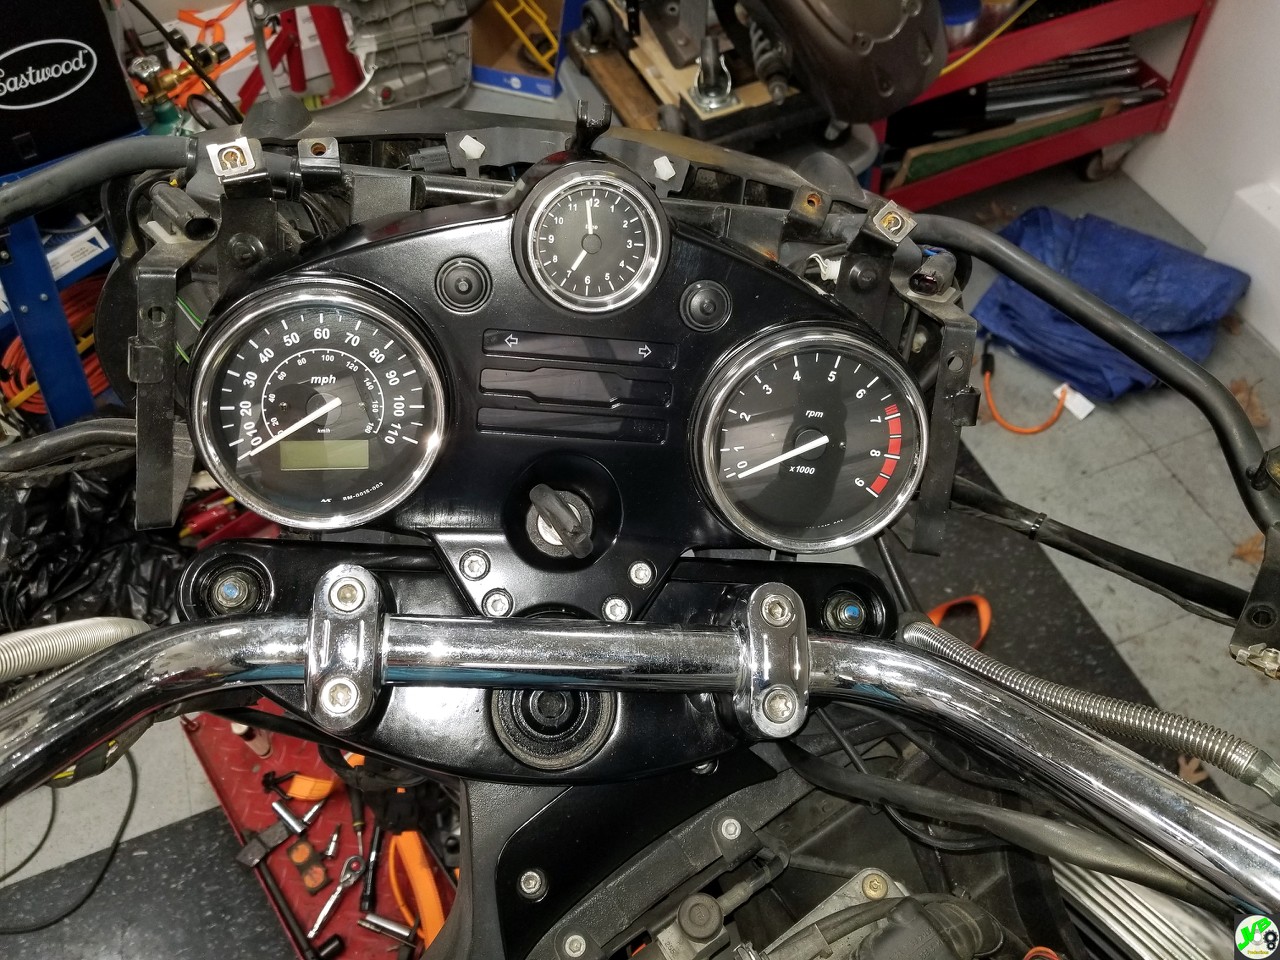
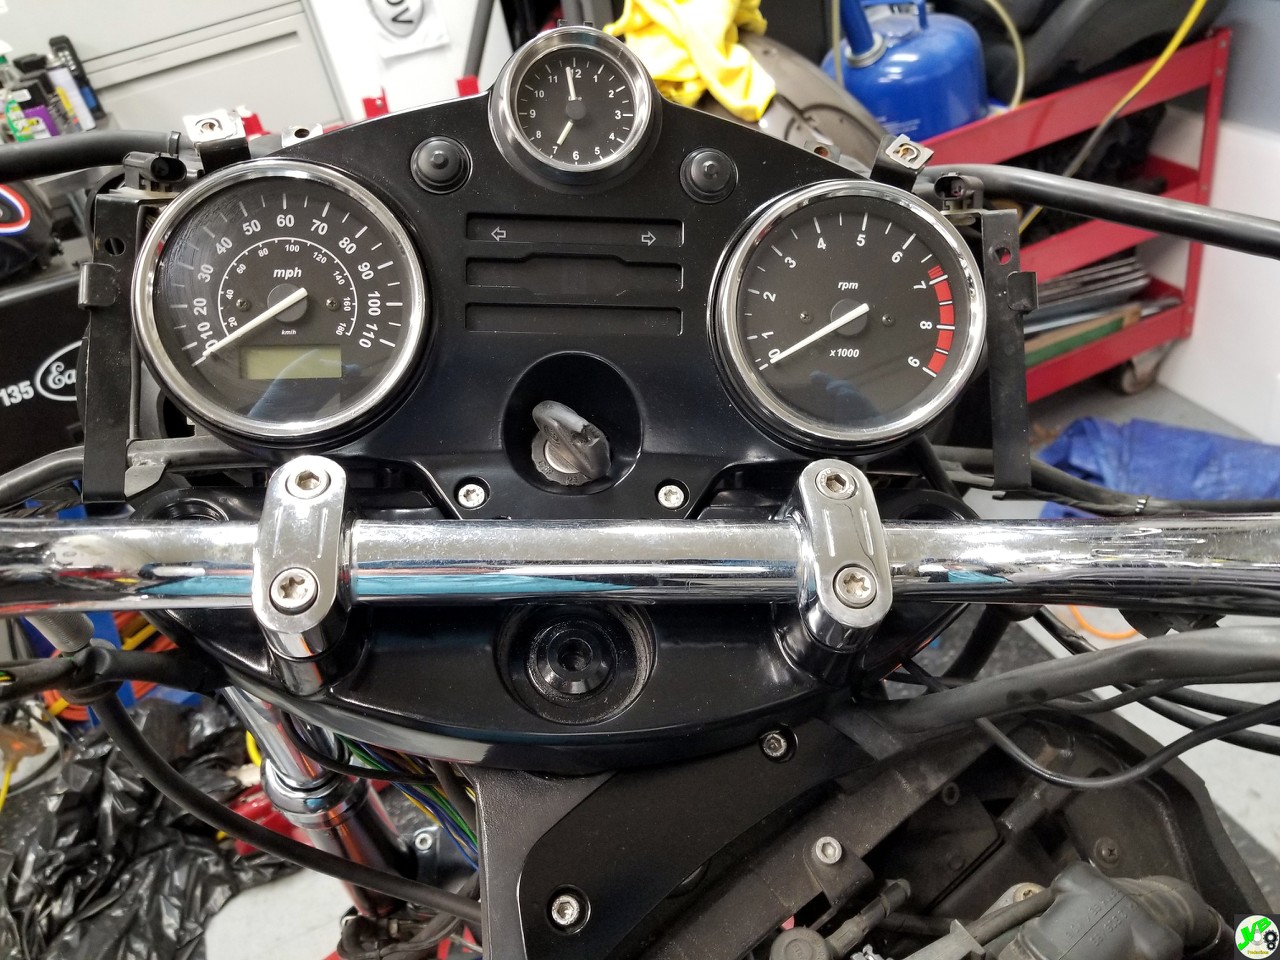
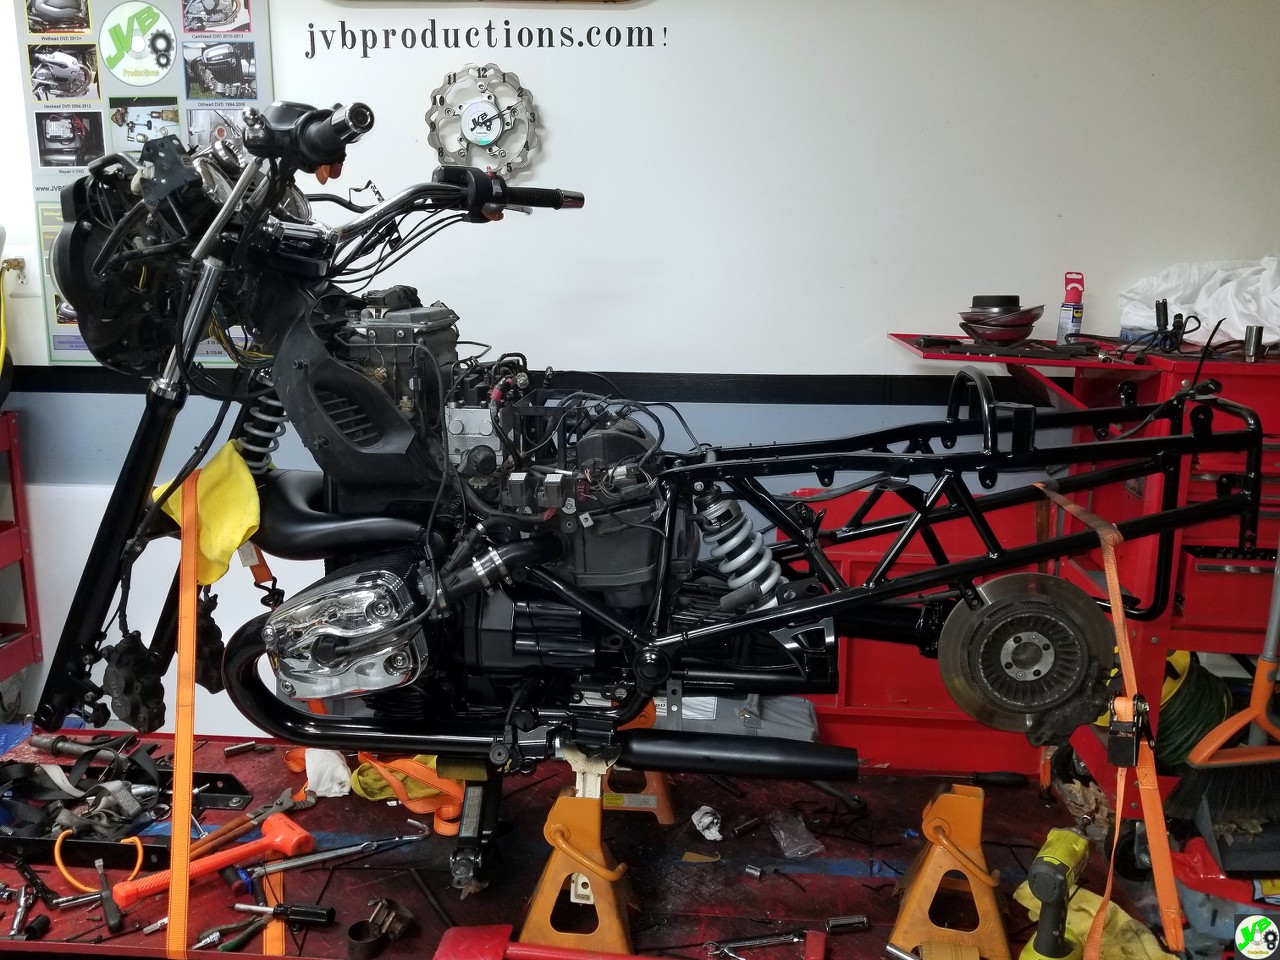
So far it looks good to me. I need a set of brake pads, likely new brake lines, and to keep going. Lots more left to detail, paint and install.
 

Scout3918

Well-known member
Joined
Feb 6, 2017
Messages
343
Location
Southern Indiana
I did some organizing .

hung a hanger for a chain, thermometer and rack for brooms.

reorganized my pegboard some and couple tool box drawers.

felt good be out in garage. we been working 7 days a week so this first time I actually had few hours to enjoy it.
 

Attachments

  • IMG_20171126_164213268.jpg
    IMG_20171126_164213268.jpg
    122 KB · Views: 61
  • IMG_20171126_164201451_HDR.jpg
    IMG_20171126_164201451_HDR.jpg
    141.1 KB · Views: 61
  • IMG_20171126_164124964_HDR.jpg
    IMG_20171126_164124964_HDR.jpg
    133.3 KB · Views: 64

crewchief888

Well-known member
Joined
Dec 3, 2009
Messages
13,745
Location
NW indiana
been working on xmas lights off and on for the past 4 days..

wife managed to misplace all the door wreath hangers we had last year...:wtf:

so i spent some time with some steel banding material and the vice bending up some new ones....

of course, i bring them in the house, and she's standing there with the "missing" hangers in her hand :scared:


:beer:
 

EOC_Jason

Well-known member
Joined
Jun 25, 2012
Messages
11,388
Location
Bentonville, AR
Replaced the worn out receptacles on my bayco cord reel with a homemade solution that should last for many years to come. :)
 

Attachments

  • 20171127_175752.jpg
    20171127_175752.jpg
    124.5 KB · Views: 110

frankthezapper

Well-known member
Joined
Apr 22, 2014
Messages
99
Location
Brunswick Heads, NSW, Australia
Worked on my little 2 AA battery torch (flashlight) that recently stopped working. I couldn't figure out why the aluminium body wasn't passing current, looked really hard and discovered there is a threaded joint where the steel pocket clip lives. Was able to get the joint apart with the body held in the vyse and using a Zyliss Mighty Boy jar opener from the kitchen!! Cleaned the corrosion off the threads, put some carbon impregnated conductive grease on the threads (from electronics store), but when I tested.....no go! Then remembered I hadn't put the batteries back in, THAT made a difference.
 

Joshua_Russo

Well-known member
Joined
May 14, 2015
Messages
104
Location
Huntsville, Alabama, USA
Worked on my little 2 AA battery torch (flashlight) that recently stopped working. I couldn't figure out why the aluminium body wasn't passing current, looked really hard and discovered there is a threaded joint where the steel pocket clip lives. Was able to get the joint apart with the body held in the vyse and using a Zyliss Mighty Boy jar opener from the kitchen!! Cleaned the corrosion off the threads, put some carbon impregnated conductive grease on the threads (from electronics store), but when I tested.....no go! Then remembered I hadn't put the batteries back in, THAT made a difference.
A good chuckle to start my day off, thanks!

Sent from my VS988 using Tapatalk
 

oldmxracer

Well-known member
Joined
Jan 29, 2006
Messages
1,204
Location
Ohio
Got two portable generators a 3000 and 5000 that had not been used in many years running.

Drained the old fuel pulled and cleaned the carbs two hours later they both run great !
 

fordkid88

Well-known member
Joined
Nov 10, 2013
Messages
680
Relocated the heater that I picked up on Black Friday and did the wiring and conduit and then worked on the drift trike in a t shirt with it being 40 degrees out. I have to adjust one piece of conduit, but it's purely a cosmetic thing so I'll add it to the list of **** I gotta finish. My spring garage project is gonna require some pto to get done.
 

Motorman55

Well-known member
Joined
Apr 10, 2016
Messages
2,632
Location
South Jersey
Worked on my Snapper lawn mower in preparation for a final mowing of the lawn, only to have it sit all day in the driveway because the X-mas lights took longer to put up then I figured.
 
To avoid these ads, REGISTER NOW!

EOC_Jason

Well-known member
Joined
Jun 25, 2012
Messages
11,388
Location
Bentonville, AR
Mounted some brackets for a ~8' shelf up high in the garage yesterday. It extends off some some existing shelves in the corner. Primed & painted the wood yesterday since it was hot & dry weather. Today it's been raining since like 3am and temp has dropped so I'm glad I got it done when I did.

When I get the shelf up and attached to the brackets I'll snap a pic. :)
 

EOC_Jason

Well-known member
Joined
Jun 25, 2012
Messages
11,388
Location
Bentonville, AR
Got the long shelf up today that I primed / painted yesterday. Had a decent piece left over so I figured I would add another shelf below it. Since taking the pic I have primed the board but since it rained today and humidity is high (and it was getting late in the day) I am waiting till tomorrow to paint...
 

Attachments

  • 20171129_162816.jpg
    20171129_162816.jpg
    139.4 KB · Views: 95

rohartman

Well-known member
Joined
Dec 28, 2012
Messages
968
Location
Ohio
Changed out some 4' fluorescent bulbs for 4' LED tubes, what a difference, WOW it's almost to bright now. nah never enough light in your work space.
 

Victorymike18

Well-known member
Joined
Oct 1, 2010
Messages
329
Location
North NJ
Got the long shelf up today that I primed / painted yesterday. Had a decent piece left over so I figured I would add another shelf below it. Since taking the pic I have primed the board but since it rained today and humidity is high (and it was getting late in the day) I am waiting till tomorrow to paint...

Looks good! I've learned it's always nice to take a picture before you fill them up, because there's a good chance you'll never see them empty again!

It looks like getting large items off the top shelf over by the door tracks might be a hassle... I'd save that end for infrequently used items and/or double-stacked bins.
 

dkroth

Well-known member
Joined
Mar 11, 2010
Messages
3,067
Location
Rochester, New York
Changed out some 4' fluorescent bulbs for 4' LED tubes, what a difference, WOW it's almost to bright now. nah never enough light in your work space.


Yeah, me too. I just installed these this evening. Put the worn out, crappy florescent lights up on the CL.

Limit 10 Costco, really?


attachment.php


.
 
Last edited:

Victorymike18

Well-known member
Joined
Oct 1, 2010
Messages
329
Location
North NJ
I've been spending a few nights a week in the garage working on my new partition wall. I finally got one side finished and built shelves all the way up for storage of tools and other garage stuff...

The wall is 10' tall and serves multiple purposes. I built the shelves only 12" deep on this side which is perfect for Kennedy boxes and all the cases for small hand tools. The top shelf is 18" for light and bulky items that aren't used much. I can't wait for the paint to dry so I can fill it in and clear out the pile of stuff on the floor.

38039979444_10aac3c420_b.jpg
 

cjcocn

Well-known member
Joined
Feb 22, 2016
Messages
152
Location
Manitoba, Canada
Finished the build on an 8.5 x 10.5 snowmobile trailer.

Going to roll it out after work and load up the machines.

First ride of the year tomorrow.
 

EOC_Jason

Well-known member
Joined
Jun 25, 2012
Messages
11,388
Location
Bentonville, AR
Yeah I have a similar shelf on the other side of my garage, though that side has a wider gap between the track & wall. On that side I have a spare weedeater and a couple small gas cans stored away.

I have a couple tarps, small battery charger, and few other misc items that I already planned on wedging behind / under the track. Basically relocating things not-often-used from lower shelf space up high to get it out of my way, then move things I use more often off my work bench onto the easily accessible shelves.

If I had to do it all over again I would have made them equal lengths, but originally I wasn't planning on that second shelf, it just kind of happened after looking at the toolbox height with lid open and realizing I had such a long piece leftover.

The board was free (leftover from new home construction a couple houses down). The brackets I paid probably a couple bucks for all of them at a garage sale... So I can't really complain... lol.

Though I've been wanting to build one of those things to hang my cordless tools & chargers and such. That might be the perfect spot on the end of that shelf area... hmmm...

Looks good! I've learned it's always nice to take a picture before you fill them up, because there's a good chance you'll never see them empty again!

It looks like getting large items off the top shelf over by the door tracks might be a hassle... I'd save that end for infrequently used items and/or double-stacked bins.
 
Last edited:

PhantomEB

Well-known member
Joined
Feb 6, 2006
Messages
6,787
Location
Medicine Hat, AB, Canuckistan
Converted my buddy's shop crane that no doubt is gonna be living here as he got it for free, to air over hydraulic. No wonder he got it for free, the old ram leaked like a sieve!

Buttoned up the front coils which needed further modifications to fit properly, today is the rear coils. Curious to see what it flexes out at with coils all captured top and bottom.

This weekend I plan to start designing the gas tank, aiming for 23 gallons plus.
 

rohartman

Well-known member
Joined
Dec 28, 2012
Messages
968
Location
Ohio
Yeah, me too. I just installed these this evening. Put the worn out, crappy florescent lights up on the CL.

Limit 10 Costco, really?

Yeah you're going to like LED shop lights. I think I need more lights I'm going to go check out Costco, thanks.

Today I change the oil on the Renegade Toterhome, 44 qts yikes!
 

Jazz1

Well-known member
Joined
Jan 3, 2016
Messages
4,188
Location
Thunder Bay On.
installed window tint for the first time,,and the last. Don't usually have this much fun in the back seat of a toyota with my clothes on. Never worked with window tint and did not realize film has to be heat formed to apply to side windows.
 

Attachments

  • fullsizeoutput_4c6.jpg
    fullsizeoutput_4c6.jpg
    20.9 KB · Views: 32
Last edited:

85lolo

Well-known member
Joined
Nov 10, 2014
Messages
261
Replace front axle u-joints and wheel bearings on my 2000 dodge 1500
And drink beer
 

isb cornbinder

Well-known member
Joined
Nov 3, 2010
Messages
7,073
Location
Pacific South West, BC, Canada
I found this CRAFTSMAN machinist's tool box on Craigslist. The seller and I agreed on $75.
I spent a few hours detailing. I am not a "patina" person, but, this box will not be restored because it looks good as is.
This machinist box is going to hold the hundreds of vintage and classic drafting tools and aids. I have collected this stuff in over five plus decades. I surely don't need this box for any practical reason, but it makes me feel good.
The quality and design of this machinist box says KENNEDY
 

Attachments

  • MACHINIST TOOLBOX OPEN LEFT.jpg
    MACHINIST TOOLBOX OPEN LEFT.jpg
    87.3 KB · Views: 78
  • MACHINIST TOOLBOX CLOSED.jpg
    MACHINIST TOOLBOX CLOSED.jpg
    63.1 KB · Views: 76
  • MACHINIST TOOLBOX RIGHT.jpg
    MACHINIST TOOLBOX RIGHT.jpg
    72.4 KB · Views: 78
Last edited:
To avoid these ads, REGISTER NOW!
Top Bottom