To avoid these ads, REGISTER NOW!

Cabinet for Small Parts Storage Cases

wyo george

Well-known member
Joined
Jul 24, 2014
Messages
933
Location
Wyoming, USA
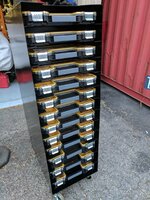
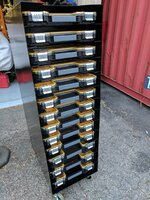
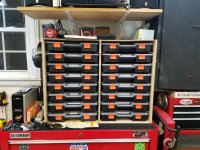
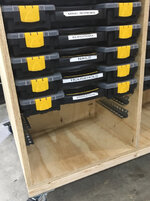
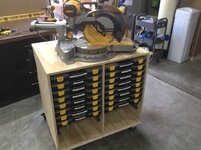
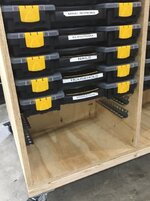
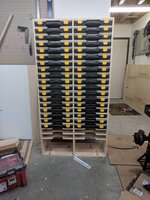
Finally I can contribute to the thread. I just finished building two of these towers, well...one is finished the other is waiting for varnish to dry then it will get the casters put on and go in the office beside this one. I built them as two separate towers just in case I want to move them around a bit later, but for now they will sit side-by-side in my office/parts room. I used most of a sheet of 3/4 ply and 1/4 hardboard for each tower. The cases are Home Depot units, roughly 15' wide by 12" deep and 3" tall. They are $10 for a two pack. I bought 42 cases and each tower holds 21 of them. The towers are roughly 78" tall including the casters. Here's the finished one waiting to go in the office. I still have to finish making labels, organizing, etc, but at least I can now get them in the towers and not all stacked on the floor.

IMG_61571.jpg


IMG_61561.jpg


IMG_61581.jpg


IMG_61591.jpg
 
To avoid these ads, REGISTER NOW!

glentre

Well-known member
Joined
May 21, 2016
Messages
909
Location
Gloucester, Virginia
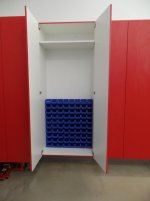
Here's my parts cabinet. 80 bins installed as a starter and can double quantity as needed. I can see everything without removing any bins and can take any bin off the wall to where I am working. Close the doors and all is hidden.

Glen
 

Attachments

  • SAM_2430.jpg
    SAM_2430.jpg
    122.3 KB · Views: 583

Victorymike18

Well-known member
Joined
Oct 1, 2010
Messages
329
Location
North NJ
^ Looks nice and clean, but what if you need to pull a bin for any reason? Are they mounted to a rail along the back (looks to tight for that) or just stacked on one-another?
 

eyeball

Well-known member
Joined
Jul 14, 2011
Messages
407
Here's my parts cabinet. 80 bins installed as a starter and can double quantity as needed. I can see everything without removing any bins and can take any bin off the wall to where I am working. Close the doors and all is hidden.


Glen


Seems like these is quite a bit of wasted cabinet space in front of those bins.


Sent from my iPad using Tapatalk
 

glentre

Well-known member
Joined
May 21, 2016
Messages
909
Location
Gloucester, Virginia
Victorymike & Eyeball,
All the bins are mounted on rails and are individually removable.

You are correct about a lot of wasted space if front of the bins. However, I have ordered and am waiting for delivery on rattle can racks which will mount on the inside of both doors. The cans will be slanted inward toward the bins and utilize this otherwise wasted space. I'll post a photo of the installed cans when the racks arrive and I get time to mount them. It will be nice to get all these cans out of the way and in a place where I can see what I have. In my old garage, I had the cans all together on an 18" shelf and I couldn't see beyond the first row without shuffling the cans around.

Glen
 

Waterh20

Well-known member
Joined
Mar 18, 2017
Messages
108
Here's my parts cabinet. 80 bins installed as a starter and can double quantity as needed. I can see everything without removing any bins and can take any bin off the wall to where I am working. Close the doors and all is hidden.

Glen
Nice. I like this sort of storage container in general too. Are they all stacked on one another? If not, Installing a little shelf for each row would be good.

Sent from my Pixel using Tapatalk
 

glentre

Well-known member
Joined
May 21, 2016
Messages
909
Location
Gloucester, Virginia
Waterh20,
As mentioned, all the bins are mounted on rails which allows them to be removed and rearranged as needed. Attached photo of the bins with some of the rails showing. Bins and rails come in a package from Northern Tool. These were installed but not loaded yet when the pics were taken.

Glen
 

Attachments

  • SAM_2431.jpg
    SAM_2431.jpg
    120.5 KB · Views: 299

glentre

Well-known member
Joined
May 21, 2016
Messages
909
Location
Gloucester, Virginia
WDEagle,

I had looked at your type of parts storage but felt it easier to be able to see everything I had without pulling out plastic bin boxes. Its just a matter of preference as many guys on the forum use the type of storage you show. I even have a few of them myself. For instance, one is loaded with auto related electrical stuff. Whenever working on electrics, I just grab the whole box and have everything I need in the area I'm working. It seems no one storage method works for everyone and many of us use a combination of storage containers. The point is that you have your little stuff neatly arranged so you can find it quickly when needed. Some shops have their **** scattered all over the place and that is what I'm trying to avoid, although I had much the same problem with my stuff in my old small and cramped garage where I could not find anyplace to neatly put stuff and found the place a constant mess. Some of the guys on the forum with small garages or shops are genious at using whatever space they have available to the best advantage with regard to keeping things neat, clean and uncluttered.

Glen
 

WDEagle

Well-known member
Joined
Jul 2, 2012
Messages
75
WDEagle,

I had looked at your type of parts storage but felt it easier to be able to see everything I had without pulling out plastic bin boxes. Its just a matter of preference as many guys on the forum use the type of storage you show. I even have a few of them myself. For instance, one is loaded with auto related electrical stuff. Whenever working on electrics, I just grab the whole box and have everything I need in the area I'm working. It seems no one storage method works for everyone and many of us use a combination of storage containers. The point is that you have your little stuff neatly arranged so you can find it quickly when needed. Some shops have their **** scattered all over the place and that is what I'm trying to avoid, although I had much the same problem with my stuff in my old small and cramped garage where I could not find anyplace to neatly put stuff and found the place a constant mess. Some of the guys on the forum with small garages or shops are genious at using whatever space they have available to the best advantage with regard to keeping things neat, clean and uncluttered.

Glen

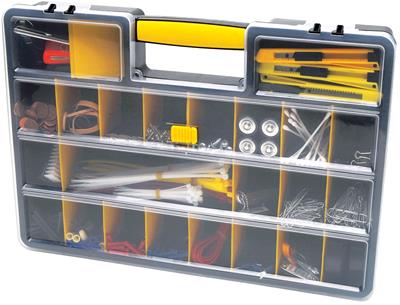
I will do both. I use the bins pictured above for items where I need to carry several different components/parts to a job/work location. On parts where I just need to pull one or two items, I will use these.

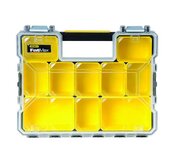
img_1_20121004171223_SHE16511-a.jpg


I bought 2 of these for $109 each @ HD. As these are only 56" tall, I plan to just stack all of the carry bins on top of them.
 
Last edited:

Teamelva

Active member
Joined
Dec 14, 2014
Messages
34
Location
Salt Lake City
I called Stanley Tools. They have replacement bins in various sizes.

Ray
Ray, I can confirm that replacement bins are available. I have the Stanley fatmax organizers. They are expensive, but I much preferred them over the HF trays. I just received my order of replacement bins. They are sold through the DeWalt parts service. If anyone is interested I am happy to look up the website. It took me two tries to order the correct bins. Don't do what I did. Make sure you order the right ones the first time. Kind of like "measure twice cut once".

Sent from my Pixel XL using Tapatalk
 

Teamelva

Active member
Joined
Dec 14, 2014
Messages
34
Location
Salt Lake City
Ray, I can confirm that replacement bins are available. I have the Stanley fatmax organizers. They are expensive, but I much preferred them over the HF trays. I just received my order of replacement bins. They are sold through the DeWalt parts service. If anyone is interested I am happy to look up the website. It took me two tries to order the correct bins. Don't do what I did. Make sure you order the right ones the first time. Kind of like "measure twice cut once".

Sent from my Pixel XL using Tapatalk
Here's the link to Dewalt's parts site: https://servicenet.dewalt.com/parts/index
In case it's helpful, here are some of the relevant part numbers (depending on the type of organizer you have):
H1200321150
H1200133150
H1200321150
H1200144150


Sent from my Pixel XL using Tapatalk
 

Teamelva

Active member
Joined
Dec 14, 2014
Messages
34
Location
Salt Lake City
SOJ's rack has such nice craftsmanship, I'm hesitant to post this on the same thread, but I just picked up my storage tray rack today and started to set it up.

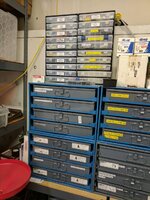
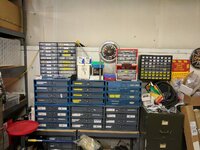
I already have too many fabrication projects stacked up in my home garage and I want to spend more time wrenching on my cars than on garage organization where I seem to find a never ending list of great ideas on threads like this one. Consequently, I decided to outsource the cabinet fabrication to a local fabrication shop that does really nice work at fair prices. I saw a design I really liked in another GJ forum by user justbummin1 (https://www.garagejournal.com/forum/showthread.php?t=280581) for a HF organizer based rack. He has the full design plan with dimension posted on that forum. I modified his dimensions for the Stanley FatMax organizers I have and which I prefer. If you follow his thread, he has great photos of his build in progress. He designed the rack to hold 10 slim organizers and 3 deep organizers on each side (total of 26 trays). Just like his, I had the rack made in 14 ga steel, powdercoated black and designed to use a set of 4" casters I had in my garage. I'll post the plan with the adjusted dimensions for the Stanley FatMax organizers in case anyone is interested. Justbummin1 deserves the credit for this great design.

All in, I spent more than i would have if I built it myself (as originally planned), but I've enjoyed my last three weekends of my "garage therapy" working on my cars so I'm not looking back with any regrets. This rack will enable me to replace the durham organizer "wall" (also pictured) to free up more much needed work surface and let me bring my fasteners to my project rather than constantly walking back to my durham racks.

The first six photos show the existing setup the rack will replace and the last two are of the new rack.1628416ddd7833397e250420d2e0e056.jpg89bd0b9f6c68614aeae359ad44ff705c.jpg9851ddbd39b0b450d4617f1e55f8f39b.jpga4e5a406fe0132615edf5ac5249520c4.jpg0a07e44ed932216dd171b7396c36cbe1.jpg7534d3bee3a72ca9ef119b3cb28f0d3c.jpg310e1f1c157b9c911ab0497f9f265dc6.jpg32ce79b70726b5df5bfcd0055016b2db.jpg

Sent from my Pixel XL using Tapatalk
 

Attachments

  • 1628416ddd7833397e250420d2e0e056.jpg
    1628416ddd7833397e250420d2e0e056.jpg
    160.2 KB · Views: 19
  • 89bd0b9f6c68614aeae359ad44ff705c.jpg
    89bd0b9f6c68614aeae359ad44ff705c.jpg
    110.1 KB · Views: 12
  • 9851ddbd39b0b450d4617f1e55f8f39b.jpg
    9851ddbd39b0b450d4617f1e55f8f39b.jpg
    135.1 KB · Views: 9
  • a4e5a406fe0132615edf5ac5249520c4.jpg
    a4e5a406fe0132615edf5ac5249520c4.jpg
    152.5 KB · Views: 9
  • 0a07e44ed932216dd171b7396c36cbe1.jpg
    0a07e44ed932216dd171b7396c36cbe1.jpg
    144.2 KB · Views: 9
  • 7534d3bee3a72ca9ef119b3cb28f0d3c.jpg
    7534d3bee3a72ca9ef119b3cb28f0d3c.jpg
    156.7 KB · Views: 8
  • 310e1f1c157b9c911ab0497f9f265dc6.jpg
    310e1f1c157b9c911ab0497f9f265dc6.jpg
    196.5 KB · Views: 8
  • 32ce79b70726b5df5bfcd0055016b2db.jpg
    32ce79b70726b5df5bfcd0055016b2db.jpg
    183.1 KB · Views: 8
Last edited:

bullnerd

Well-known member
Joined
Sep 17, 2012
Messages
5,690
Location
Jersey
Glen, did you build those cabinets?

Did you paint over the melamine on the outside?
 

Teamelva

Active member
Joined
Dec 14, 2014
Messages
34
Location
Salt Lake City
Here are the plans posted by user justbummin1 on the "Parts Storage Cart" thread. His plans were is designed for the HF organizers. Also attached is the version with dimensions modified for Stanley organizers I used. I modified the dimensions for the following organizer models:
Stanley FatMax Deep Pro Organizer FMST14820
Stanley Fatmax Shallow Pro Organizer FMST 14920.

I also ordered an extra 60 small shallow containers and 20 small deep containers so I can exchange the larger bins in the organizers for the smaller size. This enables increasing the numbers of bins in 15 deep organizer and 5 shallow organizers from 10 (8 small, 2 large) to 12 (all small containers)

[I seem to be experiencing user error trying to post the PDF documents. I'll try posting them again in the morning]

b69145e5987fae1e187c0aa0eb121834.jpg
5ba5b0823c6bd3357a72370677a6a1c1.jpg

Sent from my Pixel XL using Tapatalk
 

Attachments

  • b69145e5987fae1e187c0aa0eb121834.jpg
    b69145e5987fae1e187c0aa0eb121834.jpg
    39.5 KB · Views: 11
  • 5ba5b0823c6bd3357a72370677a6a1c1.jpg
    5ba5b0823c6bd3357a72370677a6a1c1.jpg
    73.8 KB · Views: 27
Last edited:

Teamelva

Active member
Joined
Dec 14, 2014
Messages
34
Location
Salt Lake City
I think I've finally figured this out. Attached are justbummin1's original drawings for a cart using Harbor Freight organizers and drawings with the larger dimensions using the Stanley FatMax organizers.
 

Attachments

  • Part Cart-Stanley version.pdf
    60.4 KB · Views: 140
  • Part Cart.pdf
    34.6 KB · Views: 200

jeffmoss26

Well-known member
Joined
May 25, 2011
Messages
12,860
Location
Cleveland, Ohio
One of our technicians has an Astro van and built a really nice organizer to hold larger size plastic containers in the rear door area. I will try and get a picture next time I see him.
 

kbs2244

Well-known member
Joined
Nov 11, 2006
Messages
14,065
Has anybody done comparison of these with the various sized fishing bait boxes.
I use one in my drive around tool box.
But only because I already had it.
 

54chevyls1

Active member
Joined
Dec 1, 2008
Messages
42
Location
E. Tenn
Here is my version for storing the Home Depot HDX brand of organizers. You can usually get these in a 2 pack for $9.88. I started using these when I first saw them a year or two ago and eventually had quite a few of them stacked on top of each other but that gets old having to un-stack them all to get to the bottom one. I hung one on the wall and the other is just on top of one of my HF 13 drawer tool boxes.
 

Attachments

  • 20171229_190417.jpg
    20171229_190417.jpg
    148.5 KB · Views: 357
  • 20171229_184228.jpg
    20171229_184228.jpg
    147.2 KB · Views: 462
To avoid these ads, REGISTER NOW!

58Yeoman

Well-known member
Joined
Oct 1, 2010
Messages
8,999
Location
Central IL
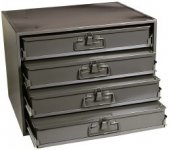
I bought one just like this a month ago at an estate sale. One drawer was full of nuts and bolts, one of all brake cups and parts, and two VW stuff. I sold the contents of the VW and brake drawers, so now I can put all my nuts and bolts and small stuff in the other drawers, and get rid of the plastic drawer cabinets.
I paid $25 for it all, and sold the stuff for $40.
 

Attachments

  • user18075_pic71782_1499444650.jpg
    user18075_pic71782_1499444650.jpg
    14.7 KB · Views: 242

PT Doc

Well-known member
Joined
Nov 12, 2010
Messages
3,197
Durham Manufacturing makes some really nice metal drawers.

http://www.durhammfg.com/catalog.html?id=29

Fastenal used to have their name on these drawers then they switched to plastic drawers that look similar. Could work equally well. FAstenal clearances out the metal ones and many members of gj picked them up cheaper.
 

DonkeyFluffer

Well-known member
Joined
Dec 17, 2016
Messages
121
Here is my version for storing the Home Depot HDX brand of organizers. You can usually get these in a 2 pack for $9.88. I started using these when I first saw them a year or two ago and eventually had quite a few of them stacked on top of each other but that gets old having to un-stack them all to get to the bottom one. I hung one on the wall and the other is just on top of one of my HF 13 drawer tool boxes.
I like it and am in the same dilemma. If you don't mind me asking, what are you using to space each bin apart? A metal bracket of sorts?

Sent from my SM-G930V using Tapatalk
 

LeeG

Well-known member
Joined
Nov 29, 2012
Messages
1,531
Location
Phoenix, AZ
I started with the Harbor Freight storage bin that the OP has. They worked fine, but the bins never seemed to be the right size for what I wanted to store in them, or I didn't have enough of the sizes I wanted.

After trying several different brands, I finally settled on the Allit units sold by Lee Valley tools.

27K8001s09.jpg


There are three models, Large and Small Professional, and Economy. The Professional models are very sturdy, well built cases. They are also pretty pricey at $60+ each. The economy models are not really sturdy enough for use in say a work truck or van, but are plenty adequate for in the shop. They are also more moderately priced at $21.50. The economy and small professional units have a common bin size, and the large professional has a taller bin.

2017%20Allit-Bins.jpg


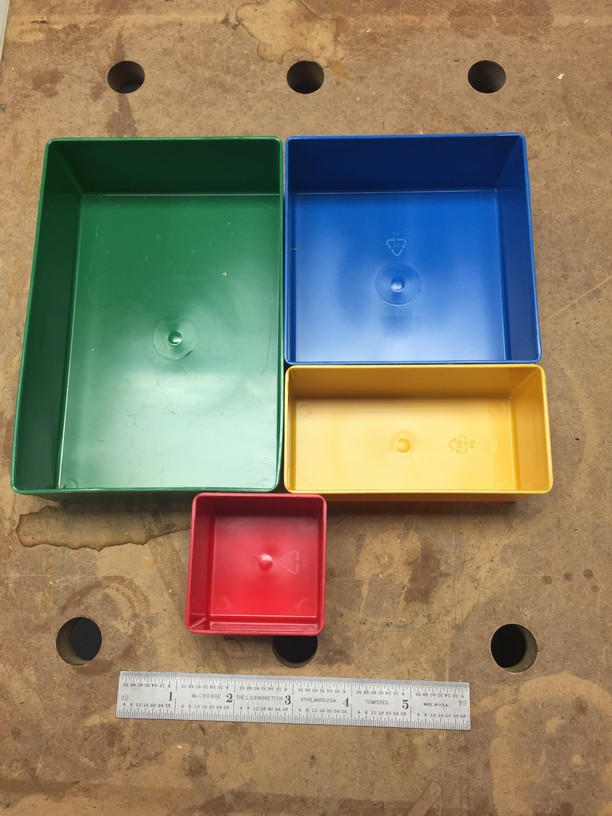
The bins are available in four sizes (2"x2", 2"x4", 4"x4" and 4"x6"), and can be purchased separately.

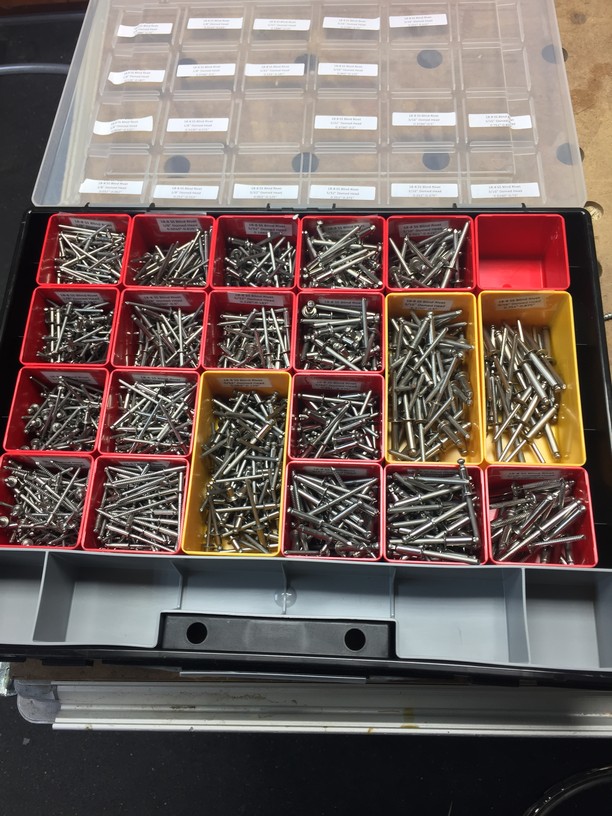
I buy my fasteners by the box from my local supply house, Copper State Nut and Bolt or from McMaster, and I try to stock most common sizes of fasteners I use, such as stainless blind rivets.

2017%20Allit-Single.jpg


I ended up with several of these, and it seemed like the one I wanted was always on the bottom of the stack, so I built these three cabinets out of some baltic birch plywood.

2017%20Allit-Cabinet.jpg


I did purchase one of the Small Professional cases so that if I am working outside the shop, I can put the parts I plan on using in that case and take what I need with me and not have to worry about them spilling.

Even the economy cases do a good job of keeping the parts in their own compartments. I gave it a good shake test with some brass #3 screws, and none shifted between bins. The latches on the economy cases are not as secure as the professional cases though - I wouldn't expect one to survive a drop without opening.
 

jthacker48

New member
Joined
Jul 6, 2017
Messages
4
Has anyone cut dados (3/4" x 3/8") and just slid the storage bins into the dado slots with no need for shelves?
 
OP
S

soj

Well-known member
Joined
Dec 3, 2007
Messages
729
Location
North Georgia
Has anyone cut dados (3/4" x 3/8") and just slid the storage bins into the dado slots with no need for shelves?
Maybe it's just me, but I can't figure how a storage box 2 1/4" high will fit in a 3/4" X 3/8" dado. Can you explain?

Sent from my Moto G (5) Plus using Tapatalk
 

jthacker48

New member
Joined
Jul 6, 2017
Messages
4
Storage Bin Cabinet.jpg
Maybe it's just me, but I can't figure how a storage box 2 1/4" high will fit in a 3/4" X 3/8" dado. Can you explain?

Sent from my Moto G (5) Plus using Tapatalk

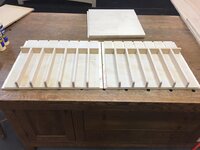
This is just a test run. I plan on making the actual cabinet out of 3/4 black mdf that I've got. I just wanted to see if the dado edges would hold up and it looks like they will. Thoughts?

E77kPae4jDHyTvlY2


YbvHT9qSMtiUUvmE3
 
Last edited:

sdavis622

Well-known member
Joined
Mar 19, 2014
Messages
518
Location
Surprise, AZ
I’ve been working on a miter station which I integrated my Hf bins int. Not finished but it’s turning out nicely! I left space for 4 more regular bins and two large on the bottom.

df569e45a306a84f1f7ca4713500d936.jpg

3560754ea8df4b5b878699b4b4f630d4.jpg


Sent from my iPhone using Tapatalk
 

Attachments

  • df569e45a306a84f1f7ca4713500d936.jpg
    df569e45a306a84f1f7ca4713500d936.jpg
    345.4 KB · Views: 32
  • 3560754ea8df4b5b878699b4b4f630d4.jpg
    3560754ea8df4b5b878699b4b4f630d4.jpg
    332.7 KB · Views: 17
OP
S

soj

Well-known member
Joined
Dec 3, 2007
Messages
729
Location
North Georgia
Storage Bin Cabinet.jpg

This is just a test run. I plan on making the actual cabinet out of 3/4 black mdf that I've got. I just wanted to see if the dado edges would hold up and it looks like they will. Thoughts?

E77kPae4jDHyTvlY2


YbvHT9qSMtiUUvmE3
Okay, the picture makes it clear. It looks like you have Stanley boxes. You can't do that with the HF boxes unless you cut off the reenforcement just under the lid. My opinion (speculation, not based on fact) is that if you load the box with heavy parts it could sag because there is no support under the bottom.
This is similar to the ones built with just a narrow support under the box on each side. Maybe guys with that type of cabinet can report on how the boxes are holding up. If you do, please mention when brand of boxes you are using. TIA
jp

Sent from my Moto G (5) Plus using Tapatalk
 
OP
S

soj

Well-known member
Joined
Dec 3, 2007
Messages
729
Location
North Georgia
I’ve been working on a miter station which I integrated my Hf bins int. Not finished but it’s turning out nicely! I left space for 4 more regular bins and two large on the bottom.

df569e45a306a84f1f7ca4713500d936.jpg

3560754ea8df4b5b878699b4b4f630d4.jpg


Sent from my iPhone using Tapatalk
This is the type of under box support referred to in my last post.

Sent from my Moto G (5) Plus using Tapatalk
 

sdavis622

Well-known member
Joined
Mar 19, 2014
Messages
518
Location
Surprise, AZ
This is the type of under box support referred to in my last post.

Sent from my Moto G (5) Plus using Tapatalk


Just read it. Hopefully it doesn’t happen, my cabinet is too new to tell. I’ll report back after after a while. I have read on GJ before someone had large plumbing fittings in one that started to sag so I’m sure it’s a possibility.


Sent from my iPhone using Tapatalk
 

EOC_Jason

Well-known member
Joined
Jun 25, 2012
Messages
11,388
Location
Bentonville, AR
Pretty slick idea... My only concern would be how much weight before they sag. I would try loading one up and see what happens. As long as there is enough lip for them not to pop out, I don't see what not. Keeping it simple is always best.

This is just a test run. I plan on making the actual cabinet out of 3/4 black mdf that I've got. I just wanted to see if the dado edges would hold up and it looks like they will. Thoughts?
 

gungatim

Well-known member
Joined
Jan 8, 2013
Messages
8,101
Location
west mich
I built a 3rd cabinet last weekend. moved all my parts bins to the back wall. they're kind of addictive...
 

Attachments

  • IMG_1938.jpg
    IMG_1938.jpg
    153.2 KB · Views: 629

Distephano

Member
Joined
Feb 8, 2005
Messages
11
Location
Wisconsin
Just wanted to pop in and thank you all for the inspiration!

I've still got a couple of shelves to go and I need to add the back yet, but I'm nearing completion! Looking forward to having everything sorted and at my finger tips!

I ended up making the outer frame, center divider, and back out of 3/4" birch, with individual full width shelves made out of 1/2" birch. All joinery is Kreg pocket screws. I sized the entire unit by determining the largest one I could make using a single sheet of 3/4" plywood. This ended up being two columns of cases, 22 rows high. It might be overkill, but I only wanted to build this once.

The shelves are full depth/width and have approximately 1/8" clearance above each parts case, with approximately 1/8" total clearance from side to side. So the cases fit snug! Due to the snug fit, each shelf required a cutout so you can grab the case handle. I used the 20 bin medium parts cases from HF. Waited for the sale price to go down to $5.99 before I purchased. I think I still need to buy about 8 more, plus a few spares.

Manufacturing the shelves was very time consuming. After cutting out all the shelf blanks, I traced, cut, and sanded the profile for the cutout I wanted on a single shelf. When this was complete, I transferred that profile to the remaining shelves, rough cut the opening with the jig saw, and trimmed it to final dimension with a router and pattern bit, using the first shelf I made as a the template.

QU1JNgJ.jpg

When the cutouts were complete, I rounded over the top and bottom edges of the fronts of the shelves using a 1/8" round-over bit. Finally it came time to drill the pocket holes; 7 on each shelf.

rYjs887.jpg
 
OP
S

soj

Well-known member
Joined
Dec 3, 2007
Messages
729
Location
North Georgia
Just wanted to pop in and thank you all for the inspiration!

I've still got a couple of shelves to go and I need to add the back yet, but I'm nearing completion! Looking forward to having everything sorted and at my finger tips!

I ended up making the outer frame, center divider, and back out of 3/4" birch, with individual full width shelves made out of 1/2" birch. All joinery is Kreg pocket screws. I sized the entire unit by determining the largest one I could make using a single sheet of 3/4" plywood. This ended up being two columns of cases, 22 rows high. It might be overkill, but I only wanted to build this once.

The shelves are full depth/width and have approximately 1/8" clearance above each parts case, with approximately 1/8" total clearance from side to side. So the cases fit snug! Due to the snug fit, each shelf required a cutout so you can grab the case handle. I used the 20 bin medium parts cases from HF. Waited for the sale price to go down to $5.99 before I purchased. I think I still need to buy about 8 more, plus a few spares.

Manufacturing the shelves was very time consuming. After cutting out all the shelf blanks, I traced, cut, and sanded the profile for the cutout I wanted on a single shelf. When this was complete, I transferred that profile to the remaining shelves, rough cut the opening with the jig saw, and trimmed it to final dimension with a router and pattern bit, using the first shelf I made as a the template.

QU1JNgJ.jpg


When the cutouts were complete, I rounded over the top and bottom edges of the fronts of the shelves using a 1/8" round-over bit. Finally it came time to drill the pocket holes; 7 on each shelf.

rYjs887.jpg
WOW! Excellent work. I like how you sized the cabinet for max use of the plywood, but I hope you are tall. Mine is only 19 rows high (plus wheels and a base), I am 6-1 and have trouble seeing in the top drawers. Good method on the shelf cutouts, and they are necessary to prevent skinned knuckles. I hope you enjoy your handy storage as much as I do mine.
jp

Sent from my Moto G (5) Plus using Tapatalk
 
Last edited:

Distephano

Member
Joined
Feb 8, 2005
Messages
11
Location
Wisconsin
WOW! Excellent work. I like how you sized the cabinet for max use of the plywood, but I hope you are tall. Mine is only 19 rows high (plus wheels and a base), I am 6-1 and have trouble seeing in the top drawers. Good method on the shelf cutouts, and they are necessary to prevent skinned knuckles. I hope you enjoy your handy storage as much as I do mine.
jo

Sent from my Moto G (5) Plus using Tapatalk
Thanks for the kind words! It is indeed a bit of a monster. Im still debating if it will end up on a mobile base or not, so it might get a bit taller. Otherwise it'll end up sitting on the floor and anchored to the wall.

You are a bit taller than me, but due to this design, the cases must be removed from the shelf to be opened, which means the cases are sure to be below eye level when used either way.


Sent from my Pixel using Tapatalk
 

FTWingRiders

Well-known member
Joined
Mar 21, 2012
Messages
1,561
Location
Central Ma
Here is my adaptation.. 3/4" shell and 1/2" shelves out of birch plywood. Man, routing all those dados made a lot of sawdust.. had to vacuum the whole shop!


I left the back side shelves removable as I don't have need for that many boxes yet, I'll adjust them to store random cases of hardware and the like..


I'm planning on adding a drop down shelf on the side to place the cases on when I need them.
 
Last edited:
To avoid these ads, REGISTER NOW!
Top Bottom