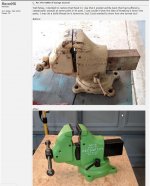
Is that Craftsman bent, or is that just the angle of the picture?
Yes brother in law managed to bend it and screw up the handle, hence the socket t-bar handle


Is that Craftsman bent, or is that just the angle of the picture?
Yes brother in law managed to bend it and screw up the handle, hence the socket t-bar handle
Yes brother in law managed to bend it and screw up the handle, hence the socket t-bar handle


Veeps you are the king of Parker vises!
Haha. I do believe they are the most stylish of all the vises, and have the best swivel base mechanism.
Veeps I've never bought a Parker to this day. Too in love with the Reeds. You got a pic to post of the swivel design on these Parkers? I can't recall if I've seen one torn down before.

So incredibly true!!That's what in-laws and relatives are for.---To temper ones patience until it's like carbide steel.
+1, I want to see a Reed/Parker showdown!
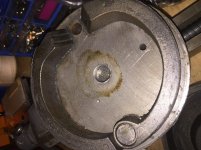
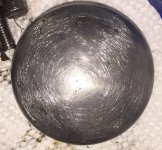
The Parker brake mechanism is akin to a car drum brake. The older ones have a single piece shoe and the newer ones have ring that has a hing (more efficient).
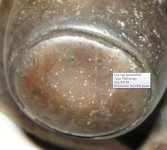
The first two photos are from my 204 and the last two photos are from the newer 974.
I got myself a nice little Parker 402-1/2. It’s very clean but the collar is broken.

I'd like to throw the Prentiss split ring base into the Reed/Parker showdown ... it locks around the sides of the base as versus mostly up on the bottom of the base with only a pin and/or swivel nuts stopping the side to side motion.
Yep, it's like greased lightning!


Razor, I think I am doing the link correctly:Tri,
So you describe that as a needle roller stack or something. Not a typical thrust roller bearing with spherical balls. I'd be interested in seeing the exact bearing you used. Its dims, specs etc as compared to the bore size. Any pics of the bearing you used?


Bags, the locking mechanism is what you see right under the slide support ... in the video the nut/bolt/handle combo isn't installed. But just a big hunk of metal sticking down underneath the static (the Wilton swivelers have that little indexing ridge, this is the same but almost as thick aa the base itself. So the bolt/nut go thru that hole, it is two tabs on either side of a split ring base. When you tighten the nut it pulls the sides of the base around that inner cylinder. 100% contact. The up/down motion when unclamped is held by a couple of big bolts and washers (as if the weight of the darn bise doesn't nearly hold it down lol)
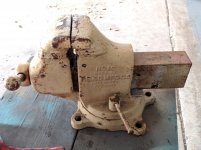
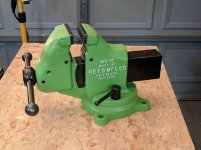
Well fellas, I decided to restore that Reed 1C vise that I posted awhile back that had suffered a catastrophic assault at some point in its past. I just couldn't bear the idea of breaking it down into parts. I may do a build thread on it tomorrow, but I just wanted to show how she turned out!
I used this vise to teach myself the in's & out's of cold-bluing for the slide and other moving pieces - after the bluing was buffed out with some steel wool, I sealed it with Johnson's Paste Wax. Also took a chance and used a faux-sandstone paint over to bring back the "fresh out of a mold" casting look to it. Pretty happy with it how it turned out!
To say I was proud of myself for carefully coaxing this big boy to come apart would be an understatement but everything went pretty easily though.
I removed the dynamic and re-threaded the spindle into the nut and used it to push out the dust cap which was already badly dented.
find a new dust cap
Hmm, I'm not seeing the before and after photos?

Wow! Incredible transformation Matt ... bravo sir
Yeah, someone call the cops cause Matt just stole the show! Great job!
Turned out great, well done!
Outlaw: i didn't see Matt's Reed 1C pics either until 007 posted them. they still aren't showing on MR's post for me.
Matt: nice work on the Reed 1C and how are you posting your pictures or can you try to post again and try a different method so we all can see them and I think we need more than just one or two if you have time. thanks and WELL DONE!!