To avoid these ads, REGISTER NOW!

ZMotorsports Shop Projects 2.0

To avoid these ads, REGISTER NOW!

LXCam

ALLIANCE MEMBER
Joined
Apr 23, 2013
Messages
19,207
Location
AZ
That's fits sweet mike. Are you going to need to make the mid pipes/cats or does a factory solution work? And those tires look killer! You got the rims yet?
 
OP
Z

zmotorsports

ALLIANCE MEMBER
Joined
Oct 20, 2009
Messages
21,477
Location
Northern Utah
You will love those Ridge Grapplers. I'm 12000 miles in and they are still quiet, a little louder than new, but still very quiet for that aggressive of tread. My Jeep loves them.

Sent from my Pixel 3 using The Garage Journal mobile app


Thank you. That is good to hear. I did a lot of research on tires before purchasing. I love my 35” BFG KO2’s but just wanted to try something different and didn’t want to go back to a mud tread. I like the aggressive look of it and heard really good things about their road manners. They classify this as a hybrid (cross between mud tread and all-terrain) or also called an aggressive all-terrain. I’m anxious to get them installed once I get the Jeep running.
 
OP
Z

zmotorsports

ALLIANCE MEMBER
Joined
Oct 20, 2009
Messages
21,477
Location
Northern Utah
That's fits sweet mike. Are you going to need to make the mid pipes/cats or does a factory solution work? And those tires look killer! You got the rims yet?


Thanks Cam. I’ll build the exhaust but use EPA compliant CATs. I bought some 49-State compliant catalytic converters with the rear bung for the rear O2 sensor and a Magnaflow single chamber muffler. The rest will be bent from 2-1/4” tubing into the muffler, then 3” out of the muffler and over the rear axle.

As for wheels I bought some Raceline Avengers back on a Labor Day sale.
 

larry4406

Well-known member
Joined
Jan 27, 2006
Messages
19,636
Location
Northern Virginia
Man the progress you are making is amazing! Everything looks damn near bolt-in!

Is this a pretty common swap or are you charting new territory?
 
OP
Z

zmotorsports

ALLIANCE MEMBER
Joined
Oct 20, 2009
Messages
21,477
Location
Northern Utah
Man the progress you are making is amazing! Everything looks damn near bolt-in!

Is this a pretty common swap or are you charting new territory?

Thank you. I guess that means I'm succeeding as I wanted this to look OEM. I'm not really charting new territory here. There are a couple of companies doing these swaps and have been for a few years. If I were to guess by as long as I have been researching this and the companies that are turning these out I would guess there are several hundred in the country by now, however, considering just how many JK's there are in general the LS powered ones are very, very rare. My wife and I belong to two Jeep clubs, a local club and a national club and no one in either club has an LS powered JK. There are several Hemi powered ones in the FMCA 4-Wheelers which is the national club that we belong to.

I don't know of any in my immediate area that are running an LS in their Jeeps, but a several Hemi powered ones so it will definitely be unique to my area. Also as much as my wife and I travel around the western U.S. with our coach towing our Jeep, I have only seen two others in the past 5 or so years. It's not a difficult swap by any means but I can see where is someone is unfamiliar with engine swaps or just mechanics in general could have issues. Most of the shops doing these swaps do custom fabrication to build the motor mounts and radiator mounting, etc. but there is an option or two out there to pretty much make them bolt in, but again none of them are cheap. There is a company called Motech that custom machines billet accessory drive brackets as well as bolt in motor mounts which are the ones I used. I think complexity of the systems and cost is why there aren't as many around, that and the fact of having to deal with the emissions/EPA aspect which scares the hell out of a lot of people so they don't even try. The companies that offer these mainly do in-house builds for people who aren't capable of doing them or simply don't want to and just drop the Jeep off and pick it up a couple of weeks later completed but that service is not cheap either so whether you have a company build it or you do it yourself and source all of the parts neither option is what I would call cheap. This is hands down the most expensive engine swap I have done but not necessarily the most difficult, just the most involved with all of the electrical and CANbus that needs to communicate for EPA compliance.

It's funny, since I've started doing this I have had about 20 people tell me "yeah an LS swap is on my to do list to my Jeep." Why is it that I don't see another one around but yet everyone I've talked to or sold my old parts to is going to do it?:headscrat

Me thinks there are a lot of talkers and less doers out there.

Anyway, thank you for following along.
 
OP
Z

zmotorsports

ALLIANCE MEMBER
Joined
Oct 20, 2009
Messages
21,477
Location
Northern Utah
Garsh, what a surprise huh? :headscrat

I would also say there are more people with "when i have the funds to do it, but never get the funds to do it" as reasons why you dont see more.

Actually as long as I have been wrenching, racing and showing cars, bikes and powersports I have found that people have the money when they want for what they want. Trust me I've raced with people in our car club about 20 years ago that couldn't afford to put their kids in decent clothes but yet they had all of the go fast **** on their race cars. Even currently in our Jeep clubs, people have the money for all of the bolt on, look cool **** yet when it comes to talking gearing or suspension they want as cheap as absolutely possible and start crying poverty, so I don't necessarily buy the theory that people don't have the money. I work with a guy currently that has been talking (emphasis on "talking") about putting an LS in his YJ for 6 years now, SIX YEARS, and yet he has the engine and transmission and has replaced about every other component on his Jeep yet the engine is still sitting there in his garage collecting dust.

I am more under the belief that people are just talkers and many talk to make themselves feel or sound superior or like they have a plan yet very, very few have any real intentions of actually attempting what they are talking about let along completing.

There's a saying I like and continually play it over in my head by President Roosevelt. The saying is "it is not the critic who counts, not the man who points out how the strong man stumbles, or where the doer of deeds could have done better. The credit belongs to the man who is actually in the arena." There is more of the quote but that is what I roll around in my head when people start rambling on to me about what I have done wrong, or the way they would have done it. This is one of the reasons when we go to Jeep rallies and/or club runs I usually keep to myself and don't interact too much because I get tired of hearing everyone run their mouths yet have done nothing substantial or have any real intentions of doing anything substantial.

Sorry for the tangent or rant, I just get so sick and tired of hearing people talk about how they are going to buy the world tomorrow or do this or that yet a decade or two later they haven't done any of it. These same people down play what others have done or are actually doing because all they do is talk.
 

slodat

ALLIANCE MEMBER
Joined
Feb 6, 2010
Messages
3,682
Location
Central-ish, WA
Mike, You REALLY hit on something important, at least to me. I have people tell me "I'm lucky".. to have a good career, a nice shop, and so much more. In the cases I'm referring to, the person is failing to see that my shop started out as a turd. It takes a lot of work to have a nice shop, career, LS swapped Jeep and all of the other things. I find that most people, when it comes down to it, like the idea of these things, but when faced with what it takes to DO it. Well.. they don't. This is something I really appreciate about GJ. A collection of people showing what they are doing.

Cheers. The swap is looking as good as I assumed it would!
 

TimeWarpF100

Well-known member
Joined
Aug 21, 2010
Messages
6,784
Location
not here
Happy New Year’s everyone. I hope you all have a very happy and prosperous 2019.


Tonight I arrived home about an hour and a half before the wife so I ran out to the shop and got a little bit done on the engine swap.

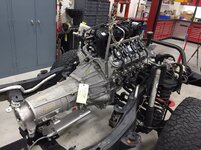
First off I got the engine separated from the pallet then bolted the transmission to the engine and torqued the converter bolts to the flex plate.
f5a59a2c50392306012b74c203086a4f.jpg

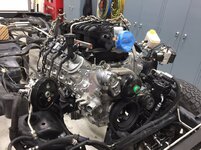
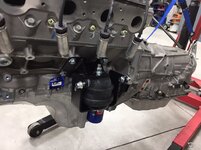
I assembled the Motech EZ motor mounts and bolted them to the engine leaving the actual mounts slightly loose for adjustability once the engine is sitting in the chassis.
26c27e6386fb3aa80bc4ff315208294f.jpg

Next I bolted the Motech billet A/C bracket to the engine.
631a70bcf50f2ca37e597506c110873d.jpg

Rear A/C compressor brackets.
224f146efa9fff4baaf4db36a6ae95ff.jpg

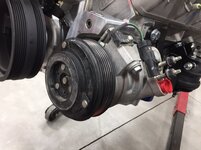
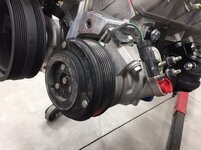
A/C compressor installed and ready to install the stretch belt. Robbie really did his R&D as these brackets fit perfectly and align exactly with the harmonic balancer.
b47acd301e7fc6398316117b75113e75.jpg

A/C stretch belt installed with the correct tool for the job.
b47b9097ba6a35ae8f9b50c95a332662.jpg

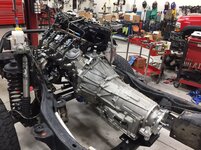
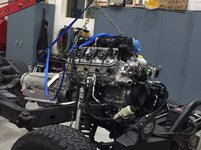
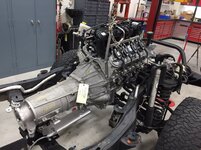
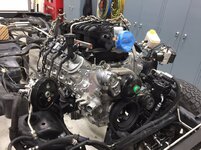
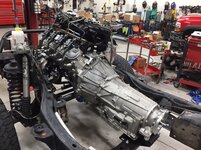
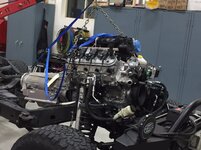
Next up I figured I’d set the engine & trans into the chassis.
e2adce0abb0c62f9d7dd884a03678343.jpg

a79a451deaaa1af9ca6fd58adb4e6632.jpg

1ad98ebd4a5672acc25fcdf64482f812.jpg

24b6fc690ccefd793186d64898363f0c.jpg

All in all I’m into the project about 10 hours and the engine is bolted into the chassis. I still have a little tweaking to get it aligned before tightening everything down in its final location but I feel I’m making decent progress so far.

Thanks for looking and I wish everyone a Happy New Year.

As usual a fantastic read! HP rating is 400?
 

Attachments

  • 631a70bcf50f2ca37e597506c110873d.jpg
    631a70bcf50f2ca37e597506c110873d.jpg
    116 KB · Views: 1
  • 224f146efa9fff4baaf4db36a6ae95ff.jpg
    224f146efa9fff4baaf4db36a6ae95ff.jpg
    120.3 KB · Views: 1
  • b47acd301e7fc6398316117b75113e75.jpg
    b47acd301e7fc6398316117b75113e75.jpg
    112.8 KB · Views: 1
  • 26c27e6386fb3aa80bc4ff315208294f.jpg
    26c27e6386fb3aa80bc4ff315208294f.jpg
    121.7 KB · Views: 1
  • e2adce0abb0c62f9d7dd884a03678343.jpg
    e2adce0abb0c62f9d7dd884a03678343.jpg
    132.5 KB · Views: 1
  • a79a451deaaa1af9ca6fd58adb4e6632.jpg
    a79a451deaaa1af9ca6fd58adb4e6632.jpg
    158.5 KB · Views: 1
  • 1ad98ebd4a5672acc25fcdf64482f812.jpg
    1ad98ebd4a5672acc25fcdf64482f812.jpg
    156.2 KB · Views: 1
  • 24b6fc690ccefd793186d64898363f0c.jpg
    24b6fc690ccefd793186d64898363f0c.jpg
    181.4 KB · Views: 1
  • f5a59a2c50392306012b74c203086a4f.jpg
    f5a59a2c50392306012b74c203086a4f.jpg
    146 KB · Views: 1
  • b47b9097ba6a35ae8f9b50c95a332662.jpg
    b47b9097ba6a35ae8f9b50c95a332662.jpg
    117.5 KB · Views: 2
Last edited:
OP
Z

zmotorsports

ALLIANCE MEMBER
Joined
Oct 20, 2009
Messages
21,477
Location
Northern Utah
Mike, You REALLY hit on something important, at least to me. I have people tell me "I'm lucky".. to have a good career, a nice shop, and so much more. In the cases I'm referring to, the person is failing to see that my shop started out as a turd. It takes a lot of work to have a nice shop, career, LS swapped Jeep and all of the other things. I find that most people, when it comes down to it, like the idea of these things, but when faced with what it takes to DO it. Well.. they don't. This is something I really appreciate about GJ. A collection of people showing what they are doing.

Cheers. The swap is looking as good as I assumed it would!

Thanks Steven. I think we could be brothers.:beer:

Like you, I am sure you have had to deal with the on-lookers throughout life. It seems like even in high school I couldn't wait to get out and start "creating" my life. I knew exactly what I wanted from an early age and pushed forward to try and bring it to fruition as quickly as possible.

Like you, I also started with a turd of a shop. Mine was on my families farm. It was a dirt corner of the shop or barn that my dad stored his tractors in and had one incandescent light hanging from a cord above a piece of plywood spanning two 55-gallon drums as a workbench. I had my little corner organized and I worked on small engine and such to earn a few bucks. That is where my love of all things mechanical started.

I remember early builds in high school and just out of high school where nearly all of my parts were acquired from a local Pic'n Pull because I couldn't afford new parts. I told my wife my dream was to someday be able to buy new parts and not have to scrounge around through junk yards for what I needed. I swore once I got to that point in my life I would never step foot in another salvage yard.

I too get tired of people telling me "boy, how would it be to have a nice shop in your back yard with all of the cool tools and equipment." That gets so freaking old coming from people who seem to have zero drive or ambition. Like you, I think people like the idea of having these things but simply don't have the drive or ambition to put in the real work or time. Most people don't realize that it took me and my wife 30+ years of working, saving, living below our means and taking on side jobs working sometimes until mid-night after putting it 8-10 hours at my regular job. The shop didn't simply "appear" in the back yard like some seem to think or imply.

Sorry again for the rant Steven, this just seems to get so old and with this LS swap that I am doing it has seemed to bring out all kinds of talkers again. I put up my used parts for sale locally, not trying to get rich as I priced them well below normal just trying to help fellow Jeepers out but it seems like every one of them that came to pick up some used parts had a story about their Jeep and the way they are going to do their LS swap and I would say none of them will ever get around to it nor execute it like they think they will.:rolleyes:

I appreciate this forum as well because I don't see that here like other forums nor in real life as people here seem to be like minded doers vs. talkers.

Thanks for following along Steven, and for the record your shop is no longer a turd, it is turning out freaking awesome.:bowdown:
 
OP
Z

zmotorsports

ALLIANCE MEMBER
Joined
Oct 20, 2009
Messages
21,477
Location
Northern Utah
As usual a fantastic read! HP rating is 400?

Yes, the L94 is rated @ 403 HP and 417 ft/lbs of torque. The tune I had installed is supposed to be closer to around 425 HP and 435 lb/ft. of torque yet still retain all of my oil aeration and hot protection modes unlike many of the hot rod tunes. The LS3 however, the Corvette/Camaro engines that came equipped with the manual transmission, is rated at 430 HP/425 ft/lbs of torque. That is an awesome engine but I like the idea of the VVT and taller intake for more low RPM torque vs. the single cam profile and higher RPM range of the LS3. I think for my application the truck/SUV engine will better suit my needs vs. the Corvette engine but the LS3 would fit a bit easier and is definitely better supported by the aftermarket.

Missed a few weeks stopping by. Happy belated 50th Mike!
Such a young fella. It's been so long ago since I turned 50 I can barely remember back that far.

62 next week.

Thanks. Funny, I don't feel 50, although I don't know what 50 is supposed to feel like.:lol_hitti
 
Last edited:

JasonJ

Well-known member
Joined
Aug 4, 2006
Messages
424
Location
Las Vegas
Actually as long as I have been wrenching, racing and showing cars, bikes and powersports I have found that people have the money when they want for what they want.

I am not in any Jeep clubs and just do my wheel'n with a small group of friends, so I don't see this there.

My Harley groups are a different story though. I see people ride miles out of their way to save cents on a gallon of gas, on a 4 gallon fill-up. But those same people won't hesitate to buy a shiner piece of chrome or the new T-Shirt design from the dealership.

As you said, they will find the money when they want it.

LS swap looks good. I am enjoying following this project... and anytime you are on the lathe/mill.

Are you going to put a big plastic engine cover on it when it's done? Make it all purdy? :) j/k
 

jeepinerdeep

Well-known member
Joined
Dec 28, 2013
Messages
2,099
Location
South Central PA
I too get tired of people telling me "boy, how would it be to have a nice shop in your back yard with all of the cool tools and equipment." That gets so freaking old coming from people who seem to have zero drive or ambition. Like you, I think people like the idea of having these things but simply don't have the drive or ambition to put in the real work or time. Most people don't realize that it took me and my wife 30+ years of working, saving, living below our means and taking on side jobs working sometimes until mid-night after putting it 8-10 hours at my regular job. The shop didn't simply "appear" in the back yard like some seem to think or imply.

x1000. That's not a rant Mike, that's just the truth.

I'm looking forward to the exhaust, you are really knocking stuff out quick.
 
OP
Z

zmotorsports

ALLIANCE MEMBER
Joined
Oct 20, 2009
Messages
21,477
Location
Northern Utah
I am not in any Jeep clubs and just do my wheel'n with a small group of friends, so I don't see this there.

My Harley groups are a different story though. I see people ride miles out of their way to save cents on a gallon of gas, on a 4 gallon fill-up. But those same people won't hesitate to buy a shiner piece of chrome or the new T-Shirt design from the dealership.

As you said, they will find the money when they want it.

LS swap looks good. I am enjoying following this project... and anytime you are on the lathe/mill.

Are you going to put a big plastic engine cover on it when it's done? Make it all purdy? :) j/k

Jason, my intentions all along were to try and include the engine cover, but it really depends on whether or not it will fit. I have a new one sitting on my bench at the ready and hope it will fit. I like the "clean" and/or "finished" look the cover adds vs. leaving the intake and wiring exposed. I may even have to do some trimming to get it to fit but that is the intention.

Thanks again for following along on my build.
 
OP
Z

zmotorsports

ALLIANCE MEMBER
Joined
Oct 20, 2009
Messages
21,477
Location
Northern Utah
x1000. That's not a rant Mike, that's just the truth.

I'm looking forward to the exhaust, you are really knocking stuff out quick.

Thank you.

I have some random bends and pretty much all of the parts for the exhaust so I hope it goes together as well as it does in my head.:lol_hitti

Last night before dropping the body I did a very rough mock up to see what kind of clearances or interferences I would be dealing with. I thought it would be easier to visualize without having the body on and looking at it from above vs. underneath. The one area I may have concerns is the driver's side where it crosses over the crossmember by where the driveshaft will occupy. For this reason I opted to stay with a 1310 series/size ujoints and driveshaft tube for the front, however I will be using a 1350 for the rear driveshaft. There was also a very slight chance of a tab near the upper suspension joint so I used my die grinder to cut that ear off of each side and remove that barrier before setting the body. The other area I may have to do some trimming is along the rear of the transmission where the transfer case is bolted on the right side. Unfortunately the fuel tank skid plate protrudes forward which reduces the amount of available space where I want to turn my exhaust and go behind the transfer case. My goal is to keep the exhaust completely above the crossmember height and that area would be questionable on whether I can keep it high enough and have enough room. Upon further inspection I think I may be able to trim about an inch or two off of the front of the fuel tank skid and open that area up enough to keep the exhaust at the height that I want. I don't see any negative outcome to trim that small amount off of the skid but I will hold off until I get to that point. If I can get lucky and have enough room without trimming, great, but if I do have to trim a little bit off I can easily do that with the Jeep on the lift.

Thanks again for following along and commenting.
 
To avoid these ads, REGISTER NOW!

cweidert03

Well-known member
Joined
Oct 19, 2015
Messages
417
Location
New Castle, IN
Part of me wants to see you finish ASAP but the other part wants it to drag on because your planning and attention to detail with your projects is very motivating.. I can’t wait to see the finished product with the new wheels and tires.


Sent from my iPhone using Tapatalk
 

C2tuck

Well-known member
Joined
Apr 22, 2015
Messages
663
Location
North Texas
Part of me wants to see you finish ASAP but the other part wants it to drag on because your planning and attention to detail with your projects is very motivating.. I can’t wait to see the finished product with the new wheels and tires.


Sent from my iPhone using Tapatalk


I want him to hurry so we can see it finished. Plus you know he’s got a ton of other projects...


Sent from my iPhone using Tapatalk
 
OP
Z

zmotorsports

ALLIANCE MEMBER
Joined
Oct 20, 2009
Messages
21,477
Location
Northern Utah
Sorry for not posting anything last night, I was a late night.

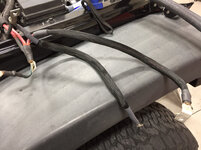
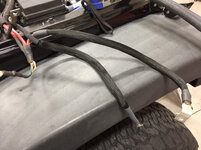
I started by removing the OEM split loom from my battery cables and replaced it with some abrasion resistant wrap. One cable is my ground that attaches to the body and the other is the positive to the TIPM.
96a38d35287291827418d3ad8eff61e4.jpg

I worked on getting the cooling system sealed up so I could pull a vacuum on it and ensure there were no leaks. Heater hoses connected and upper & lower radiator hoses installed. The lower hose took a little time as I had to move some things around to make room for the C300 connector which is the main connector between the chassis and body. I was trying to locate it where nothing would rub against it yet still have it protected. Also running through the same area are my transmission cooler lines. Lastly I mocked my intake tube and air filter up as the upper hose and hose from the steam port runs over the intake duct.
de450fc714e5000d2476fca22ad25e9f.jpg

After all of that I pulled a vacuum and the system held the remainder of the night so I know I have a tight cooling system. That was a relief due to all of the interferences that I had just dealt with.
c8b36971601f56ead5f26f5dea0b18b1.jpg

Then I moved on to mounting my master cylinder to the booster and mounting my ABS pump/module. This will allow me to start laying out wiring on the driver’s side if the engine bay.
55d82c107d8df49723e1ea2f9add0e79.jpg

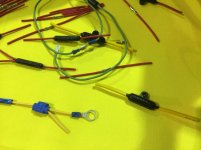
In the engine bay there were five wires that I had to run and tap into existing wires. Whenever I have to splice into a wire, after locating it I cut a small section (about 3/8”) of the insulation out then open the strands up by splitting them approximately in half. This is the C3 connector in which I had to tap into a brake wire, cruise wire and A/C signal wire. Then in the C1 connector I had to tap into a wire for the EVAP system to keep power to the vent valve that I installed at the EVAP canister.
afad5babb14c69c1a579f172b5756382.jpg

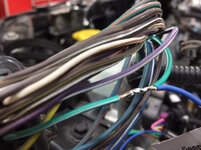
Next I strip between 3/8”-1/2” of the insulation of the wire I’m adding and insert it into the middle of the stands wrapping it around and pulling everything right before soldering.
25cbe907acc29ec1e633e56a5b87d2ab.jpg

Soldered connection complete. Then I wrap a small piece if clothe electrical tape followers by 3M Super 88 electrical tape as the final seal. This will provide a long lasting vibration and corrosion proof connection that won’t bite you in the **** down the road. Do NOT use **** connectors please. I cringe whenever I see those damn things. They have their place but not in the environment of an engine bay and definitely on your engine’s performance system.
84d64dab907f4a7d4ab254d988d2c516.jpg

Completed wiring after split loom installed and taped up. Looks OEM and will perform as well as OEM.
53fad0c21130fd0887d8b8676aee3378.jpg

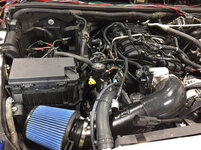
Final shot of the engine bay.
c329dcd72a16a18a2583e2291ca6f896.jpg

It’s getting closer. My new gaskets for my A/C lines are supposed to arrive today then I can get all A/C lines connected, run my control wire for the Camaro SS fan and that pretty much completed the engine bay other than tidying up a bit of the wiring. Then I can move inside and start completing the wiring.

Thanks for looking.
 

Attachments

  • 96a38d35287291827418d3ad8eff61e4.jpg
    96a38d35287291827418d3ad8eff61e4.jpg
    779.2 KB · Views: 2
  • de450fc714e5000d2476fca22ad25e9f.jpg
    de450fc714e5000d2476fca22ad25e9f.jpg
    882.6 KB · Views: 1
  • c8b36971601f56ead5f26f5dea0b18b1.jpg
    c8b36971601f56ead5f26f5dea0b18b1.jpg
    768.9 KB · Views: 1
  • 55d82c107d8df49723e1ea2f9add0e79.jpg
    55d82c107d8df49723e1ea2f9add0e79.jpg
    835.9 KB · Views: 1
  • afad5babb14c69c1a579f172b5756382.jpg
    afad5babb14c69c1a579f172b5756382.jpg
    775.5 KB · Views: 1
  • 84d64dab907f4a7d4ab254d988d2c516.jpg
    84d64dab907f4a7d4ab254d988d2c516.jpg
    760 KB · Views: 1
  • 53fad0c21130fd0887d8b8676aee3378.jpg
    53fad0c21130fd0887d8b8676aee3378.jpg
    785.8 KB · Views: 1
  • c329dcd72a16a18a2583e2291ca6f896.jpg
    c329dcd72a16a18a2583e2291ca6f896.jpg
    865.1 KB · Views: 1
  • 25cbe907acc29ec1e633e56a5b87d2ab.jpg
    25cbe907acc29ec1e633e56a5b87d2ab.jpg
    777 KB · Views: 13
Last edited:

WoodsTruck

Well-known member
Joined
Jan 12, 2013
Messages
1,028
Sweet!

Are you still running an under hood air compressor?

Looking forward to how you mount the wheelie bars without diminishing departure angle.
 
Last edited:

jbmatth

Well-known member
Joined
Jun 3, 2013
Messages
5,692
Location
Northern Ok.
Very nice work as per your usual Mike. You make it look very simple and neat. I have a couple of questions if you have a minute. When you strip a section of wiring to "Tee" it off how do you remove the insulation from that section of wiring without destroying the copper strands? Also the abrasion resistant wrap you use, is it split so it can be installed between existing connectors or is it more of a tube? If split where can I get some I haven't had much luck finding any at a reasonable price and I like it much more than split loom.

Thank you,
JB
 
Last edited:
OP
Z

zmotorsports

ALLIANCE MEMBER
Joined
Oct 20, 2009
Messages
21,477
Location
Northern Utah
Part of me wants to see you finish ASAP but the other part wants it to drag on because your planning and attention to detail with your projects is very motivating.. I can’t wait to see the finished product with the new wheels and tires.


Sent from my iPhone using Tapatalk

I want him to hurry so we can see it finished. Plus you know he’s got a ton of other projects...


Sent from my iPhone using Tapatalk

Thanks guys. Yeah, I'm getting excited to get it done as well. I'm also getting excited to get the new tires and wheels installed and provide a little cosmetic change. I am also very anxious to try out my new tires both on and off-road and see if I made a mistake or a good decision.

As for next projects, this one hit the savings a bit so I'll be going into save mode for a while and not really working on many personal projects. However, my son wants me to help him build new bumpers for his Jeep and I have a friend who has been wanting me to do some mods to his 2009 Jeep Wrangler so I will have plenty of things to post and document. Also, I have another Model A flywheel to turn and lighten.

Plenty to stay a little busy but hopefully not as busy as the past couple of years with moving, building the shop, putting in a yard and building two Jeeps. I hope to be able to slow down a bit this year and play, plus I have our son getting married and I would like to relax and not be so busy I can't enjoy that event.
 
OP
Z

zmotorsports

ALLIANCE MEMBER
Joined
Oct 20, 2009
Messages
21,477
Location
Northern Utah
Sweet!

Are you still running an under hood air compressor?

Looking forward to how you mount the wheelie bars without diminishing departure angle.

Thank you. I never thought about wheelie bars but I will have to take into account my departure angle for those.:lol_hitti

As for underhood air, I no longer have my underhood air system. I removed that around 2016. When I bought it and installed it my gut told me it wasn't a good idea from the get go but I didn't listen. There were so many running it and they seemed to be happy with it but I thought it would get too much heat soak from engine heat and not function correctly and after two compressors I removed it and installed my dual ARB compressors under the passenger seat. I have since switched over to CO2 for airing up tires but kept my ARB compressors as back up since they are under the seat and out of sight, out of mind. You know the old saying "2 is 1 and 1 is none."
 
OP
Z

zmotorsports

ALLIANCE MEMBER
Joined
Oct 20, 2009
Messages
21,477
Location
Northern Utah
Very nice work as per your usual Mike. You make it look very simple and neat. I have a couple of questions if you have a minute. When you strip a section of wiring to "Tee" it off how do you remove the insulation from that section of wiring without destroying the copper strands? Also the abrasion resistant wrap you use, is it split so it can be installed between existing connectors or is it more of a tube? If split where can I get some I haven't had much luck finding any at a reasonable price and I like it much more than split loom.

Thank you,
JB

Thanks for the comments JB.

To remove insulation from a wire, I use my wire strippers to cut the insulation and insulation ONLY so be certain you know what gauge wire you are working with before grabbing the strippers. I then just use a single edge razor and cut a slit down the length of the section I just cut and peel out the insulation. I then just use a small pocket screwdriver or pick to open up the wire strands.

As for the abrasion resistant loom it is a tube that you slide the wiring through so it is not good for adding wires later on. For areas of potential adding or subtracting wire I merely use the split loom casing. Also the abrasion resistant loom tends to fray quite easily on the ends to either use a small butane torch to melt the ends or what I like even better is to use some heat shrink on the ends but sometimes that is hard to install. On my positive that went to the TIPM the lug was bent at a 90-degree angle and had a small tang sticking out which made installing a small piece of heat shrink very difficult as I had to walk it on slowly.

Hope that's what you were looking for.
 

WoodsTruck

Well-known member
Joined
Jan 12, 2013
Messages
1,028
I used something like this on my Bronco:

https://www.amazon.com/dp/B07FXF12HC/?tag=atomicindus08-20

To cauterize the ends, I would slide something like a 1/2" extension down the sleeve to keep it straight, then align the cut over the swelled end to make sure the edges don't touch (keeps them from melting together when cutting). I used a soldering gun with a cutting edge to cut a nice edge. Once cut I could slide off the extension and install over existing wires.
 

Gone Boating

Well-known member
Joined
Apr 14, 2013
Messages
118
Location
Buffalo, NY
I have to ask. Why are you so anti **** connector?
In the marine world, solder is generally considered a no-no due to the vibration and corrosion encountered. **** connectors as a result are the go to. Truthfully, I prefer a **** connector and then adhesive heat shrink over solder.. But then again, I can't solder to save my life.
 
OP
Z

zmotorsports

ALLIANCE MEMBER
Joined
Oct 20, 2009
Messages
21,477
Location
Northern Utah
I used something like this on my Bronco:

https://www.amazon.com/dp/B07FXF12HC/?tag=atomicindus08-20

To cauterize the ends, I would slide something like a 1/2" extension down the sleeve to keep it straight, then align the cut over the swelled end to make sure the edges don't touch (keeps them from melting together when cutting). I used a soldering gun with a cutting edge to cut a nice edge. Once cut I could slide off the extension and install over existing wires.

Thanks. That looks like some nice stuff. I like the abrasion style loom but would prefer to use it in a wrap around/split style. I may have to get some of that. Thanks for the link.
 
OP
Z

zmotorsports

ALLIANCE MEMBER
Joined
Oct 20, 2009
Messages
21,477
Location
Northern Utah
I have to ask. Why are you so anti **** connector?
In the marine world, solder is generally considered a no-no due to the vibration and corrosion encountered. **** connectors as a result are the go to. Truthfully, I prefer a **** connector and then adhesive heat shrink over solder.. But then again, I can't solder to save my life.

I guess it comes from my maintenance background where we have had nothing but issues caused by **** connectors. When I started in 1988 I think the previous crew must have had stock in **** connectors because they were everywhere. It took us a few years to slowly replace the looms and wiring but from there on out I have always soldered and heat shrunk connections and never had a single issue with any of them. I am not a marine mechanic but with the moisture involved I am surprised that **** connectors are considered the preferred repair method. I've seen them on trailers go to **** in a year or two and cause issues with lighting so I can't see them keeping out corrosion.

I also used the solder/heat shrink method on snowmobiles, sandrails and ATV's which bounced around more than anything in an automobile. Secondly, I just don't like the looks of **** connectors. I think a properly soldered and heat shrunk connection is much more appealing to the eye and goes nearly undetected.

Although I did try out a few of those **** connectors that have the heat shrink built around them and was pleasantly surprised. I had a vendor give me some about 10 years or so ago and I tested/tried them out and actually keep a few in our coach and Jeep as an emergency repair.
 
Last edited:
OP
Z

zmotorsports

ALLIANCE MEMBER
Joined
Oct 20, 2009
Messages
21,477
Location
Northern Utah
What is curb weight going to be?


Sent from my iPhone using The Garage Journal mobile app

Curb weight shouldn't change much from before, unfortunately my Jeep is quite heavy @ 6k pounds. This engine/transmission combination is only about 40 pounds heavier than the original 3.8 liter engine and 4-speed auto trans. When I set it down the other night and measured my ride height there was no change from before I started the project.
 

LXCam

ALLIANCE MEMBER
Joined
Apr 23, 2013
Messages
19,207
Location
AZ
Coming right along Mike! I had to snicker on the splicing and shrink tubing trick on the loom covering. It's something I do a great deal of. With the looms my standard on a show motor is to remove every stinking pin and then use the shrink tubing that has the adhesive lining and ring the end making certain every piece of shrink tubing is cut to identical lengths and spaced off the connector just enough to see what color goes where. I have on many occasions when the connector is the right size and enough real estate gone from loom to connector body but inversely regardless of the adhesive had them work off an edge given enough time. However it sure looks good doing it that way.

Tinning your splices. I'm surprised to see you open that can of worms in this joint. Not as bad an argument as pvc airlines but they are certainly two different camps on this forum. While I'll completely agree with never tinning a pin at a connector I always splice, soldier and shrink tube every connection even if the means unpinning and rethreading the wire in the loom (not always possible) or even do two splices if I can't get enough slack to keep the bundle looking factory. Knowing that vibration will over time break the wire at a pin/connector (fixed unmovable point) have never once had that issue on a splice. And like you I always tin my splices knowing that connection will never fail.

The only reason I brought any of this up was to show you a system I saw at SEMA in 17. I thought the idea was pretty slick and wondered if you had seen this before. Spliseal offers various molds the use a **** connector, machined mold and a cheezy yet effective injection molded encapsulation system. I damn near bought their master kit but what stopped me was the overall bulkyness of it. However one of these days I'm going to sit down and machine my own molds for a soldered connection to achieve the same approach. I don't feel it's anymore effective then the other method, I just think it's slick as snot looking.

IMG_2429.jpg

IMG_2428.jpg

IMG_2427.jpg

https://spliseal.com/
 
OP
Z

zmotorsports

ALLIANCE MEMBER
Joined
Oct 20, 2009
Messages
21,477
Location
Northern Utah
Coming right along Mike! I had to snicker on the splicing and shrink tubing trick on the loom covering. It's something I do a great deal of. With the looms my standard on a show motor is to remove every stinking pin and then use the shrink tubing that has the adhesive lining and ring the end making certain every piece of shrink tubing is cut to identical lengths and spaced off the connector just enough to see what color goes where. I have on many occasions when the connector is the right size and enough real estate gone from loom to connector body but inversely regardless of the adhesive had them work off an edge given enough time. However it sure looks good doing it that way.

Tinning your splices. I'm surprised to see you open that can of worms in this joint. Not as bad an argument as pvc airlines but they are certainly two different camps on this forum. While I'll completely agree with never tinning a pin at a connector I always splice, soldier and shrink tube every connection even if the means unpinning and rethreading the wire in the loom (not always possible) or even do two splices if I can't get enough slack to keep the bundle looking factory. Knowing that vibration will over time break the wire at a pin/connector (fixed unmovable point) have never once had that issue on a splice. And like you I always tin my splices knowing that connection will never fail.

The only reason I brought any of this up was to show you a system I saw at SEMA in 17. I thought the idea was pretty slick and wondered if you had seen this before. Spliseal offers various molds the use a **** connector, machined mold and a cheezy yet effective injection molded encapsulation system. I damn near bought their master kit but what stopped me was the overall bulkyness of it. However one of these days I'm going to sit down and machine my own molds for a soldered connection to achieve the same approach. I don't feel it's anymore effective then the other method, I just think it's slick as snot looking.

IMG_2429.jpg

IMG_2428.jpg

IMG_2427.jpg

https://spliseal.com/


I have not seen those before Cam, although they do look cool. Sorry I opened that can of worms, just passionate about some things I guess and what works and has worked for me for decades, doesn't necessarily make it an industry standard and others may choose a different route. I agree about never soldering at a connection due to weight and causing fatigue cracking/breaking of the wire from bouncing around the rigid termination, never been a fan of that and always make my connections back away from the termination and keep them as small as possible. I'm sure you do this as well but I also don't make multiple splices in the same area in a loom. I stagger them up and down the loom based on how many wires I'm splicing in to keep the loom diameter consistant. It bugs me seeing a bunch of connections (**** or solder) in one small section of a loom. Seeing a big bulge in a loom is annoying. Unfortunately in the Jeep or off-road world I see it all too much from people adding in lights and/or other accessories but for some reason they feel they have to tap in all in the same place, so a 3/4" loom has a 2" bulge in the middle.:headscrat

I had to laugh at the last picture showing the Scotchlok though. I hate those damn things and started twitching when I saw it.:lol_hitti
 

jbmatth

Well-known member
Joined
Jun 3, 2013
Messages
5,692
Location
Northern Ok.
Thanks for the comments JB.

To remove insulation from a wire, I use my wire strippers to cut the insulation and insulation ONLY so be certain you know what gauge wire you are working with before grabbing the strippers. I then just use a single edge razor and cut a slit down the length of the section I just cut and peel out the insulation. I then just use a small pocket screwdriver or pick to open up the wire strands.

As for the abrasion resistant loom it is a tube that you slide the wiring through so it is not good for adding wires later on. For areas of potential adding or subtracting wire I merely use the split loom casing. Also the abrasion resistant loom tends to fray quite easily on the ends to either use a small butane torch to melt the ends or what I like even better is to use some heat shrink on the ends but sometimes that is hard to install. On my positive that went to the TIPM the lug was bent at a 90-degree angle and had a small tang sticking out which made installing a small piece of heat shrink very difficult as I had to walk it on slowly.

Hope that's what you were looking for.

I used something like this on my Bronco:

https://www.amazon.com/dp/B07FXF12HC/?tag=atomicindus08-20

To cauterize the ends, I would slide something like a 1/2" extension down the sleeve to keep it straight, then align the cut over the swelled end to make sure the edges don't touch (keeps them from melting together when cutting). I used a soldering gun with a cutting edge to cut a nice edge. Once cut I could slide off the extension and install over existing wires.

Thank you both for the answers and the help, so many fun things I need to buy to have on hand for wiring.

JB
 

HEEP

Well-known member
Joined
Nov 20, 2007
Messages
121
Location
Chattanooga, TN
Thank you both for the answers and the help, so many fun things I need to buy to have on hand for wiring.

JB

I think I have bought more tools and equipment for wiring my son's LS swap than I have for anything else. Having the correct crimpers and other tools have made the job much easier, but cost me in time waiting on something I didn't know I needed.
 
To avoid these ads, REGISTER NOW!
Top Bottom