To avoid these ads, REGISTER NOW!

ZMotorsports Shop Projects 2.0

To avoid these ads, REGISTER NOW!

4 FN 27

ALLIANCE MEMBER
Joined
Oct 19, 2015
Messages
4,635
Location
Minnesnowta
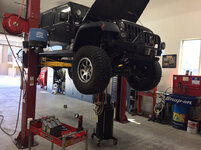
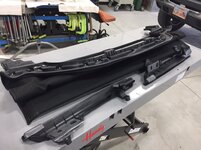
I got a call yesterday saying my son’s bumper was done so I stopped and picked it up. It usually takes about two weeks for powder coating but they’re pretty busy and had it three weeks. Good thing we had other things to work on and weren’t in a rush for it but at least it turned out nice.

4d8ab403163981618291b297cbde9951.jpg

Mike the bump is awesome!!! Very well designed and thought through!!!
 

Attachments

  • 4d8ab403163981618291b297cbde9951.jpg
    4d8ab403163981618291b297cbde9951.jpg
    114.8 KB · Views: 0
OP
Z

zmotorsports

ALLIANCE MEMBER
Joined
Oct 20, 2009
Messages
21,470
Location
Northern Utah
I didn’t work in the shop over the weekend nor the last couple of afternoons. Last night I went with my son to our local lawn & garden shop to help him pick out a mower, line trimmer and leaf blower for his new home and then helped him assemble everything last night.

Tonight when I got home I uncovered my air conditioner and blew the condenser coils out in addition to charging my sprinkler system then went through everything zone by zone to ensure everything is adjusted correctly.

245420e2589cf28ed474d237c831dc62.jpg

ae225481a8f0df815f7822176078a00e.jpg

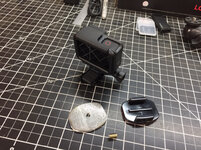
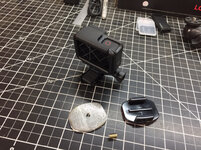
I went on my lunch hour today and bought a new action camera so I can try my hand at making some Jeeping videos that I can post to my channel.

Before the wife got home from work I cut out a small base in which to use for the GoPro mount on my RAM mount on my dash.

bf6fe895d354972c89759ec68fed2f34.jpg

After scribing and cutting out the plate I drilled and tapped a 1/4”-20 threaded hole and cut off a small section of thread that I will TIG weld into the plate.
0fe58499b14c07aa83783ffdddaf6ecb.jpg

4f9ef2020a6cb2f29a04539db039dc2e.jpg

88b525b13c659fa46b3bd0cb9e765bfa.jpg

Thanks for looking.
 

Attachments

  • 88b525b13c659fa46b3bd0cb9e765bfa.jpg
    88b525b13c659fa46b3bd0cb9e765bfa.jpg
    721.4 KB · Views: 0
  • 4f9ef2020a6cb2f29a04539db039dc2e.jpg
    4f9ef2020a6cb2f29a04539db039dc2e.jpg
    777.5 KB · Views: 0
  • 0fe58499b14c07aa83783ffdddaf6ecb.jpg
    0fe58499b14c07aa83783ffdddaf6ecb.jpg
    819.1 KB · Views: 0
  • bf6fe895d354972c89759ec68fed2f34.jpg
    bf6fe895d354972c89759ec68fed2f34.jpg
    882.8 KB · Views: 0
  • ae225481a8f0df815f7822176078a00e.jpg
    ae225481a8f0df815f7822176078a00e.jpg
    678.2 KB · Views: 0
  • 245420e2589cf28ed474d237c831dc62.jpg
    245420e2589cf28ed474d237c831dc62.jpg
    680.3 KB · Views: 0

fnieto

Well-known member
Joined
Aug 27, 2013
Messages
1,401
Location
Tucson,Arizona
Hey Mike, is that winter rye grass? It looks lush man. I cut the water on mine all month in an effort to wake up the dormant Bob sod. Nice job on the mount too.
 
OP
Z

zmotorsports

ALLIANCE MEMBER
Joined
Oct 20, 2009
Messages
21,470
Location
Northern Utah
Hey Mike, is that winter rye grass? It looks lush man. I cut the water on mine all month in an effort to wake up the dormant Bob sod. Nice job on the mount too.

Paco, I'm not sure exactly what blend of grass it is to be honest. It was what the local supplier recommended for our climate/soil. I thought it was Kentucky Bluegrass but that was what my neighbor told me.

As for the lushness, we have had so much rain and such a long drawn out winter here it has gotten plenty of water over the past several months, unfortunately with our sandy soil it doesn't hold the moisture long. They turned our secondary water on nearly 10 days ago but it has been so wet I haven't even bothered charging my system until now. It was looking rather brown and spotty until this week when we had our first consecutive several days of sun and high 60's and just turned plush green nearly overnight into what you see there.

The guy I have spray my fertilizer came by Monday night and had asked if I had already fertilized because it looked so nice. I had been frustrated over the past two years trying to bring the front yard back and get the back yard to grab hold and he had told me on a new yard or trying to bring one back it will take several years before I may be happy with it but so far I am very happy with how it looks right now. My neighbor came over last night while I was going through my zones as he just returned from an RV rally and was commenting on how thick and plush my front yard was looking so I took that as a very nice compliment because last year it wasn't looking very good and I started second guessing myself thinking maybe I should have ripped the front yard out and redone it like I did in the back yard.

Thanks again for the comments Paco and thanks for stopping by.

I hope the GoPro works better than my little point and shoot camera for off-road videos so the mount will get some use although it is a pretty simple and cheesy mount.
 

WoodsTruck

Well-known member
Joined
Jan 12, 2013
Messages
1,026
Mike,

You are provided a primary water system for your house and a secondary system for non-potable applications like watering the lawn?

How do these two systems differ and what is their purpose?

Thanks
 
OP
Z

zmotorsports

ALLIANCE MEMBER
Joined
Oct 20, 2009
Messages
21,470
Location
Northern Utah
Mike,

You are provided a primary water system for your house and a secondary system for non-potable applications like watering the lawn?

How do these two systems differ and what is their purpose?

Thanks

That is correct. Domestic potable water is fed into the house's main water system and the secondary is fed in generally on the opposite side of the properties and is for irrigation only. The two have no connection and should never be connected.
 

shortykorte

Well-known member
Joined
Sep 1, 2014
Messages
8,039
Location
Tallahassee, Fl
Mike,


You are provided a primary water system for your house and a secondary system for non-potable applications like watering the lawn?


How do these two systems differ and what is their purpose?


Thanks


Difference is potable vs non-potable. Areas that have water availability issues have started installing irrigation/non/potable networks. Non-potable doesn’t require the same water quality treatment and it’s easier to regulate how much water is sprinkled on the streets thus down the storm drains during drought conditions.


Sent from my iPhone using The Garage Journal mobile app
 

Firstram

Well-known member
Joined
May 16, 2017
Messages
1,393
A non potable system makes sense, as far as conservation goes, but the cost of a 2nd infrastructure is essentially the same as a standard water supply. Is it compulsory if offered? Where does the less than purified water come from?

I was happy with our well water for 20 years but when the city ran water mains it was $1200 if paid before the contract start date. Not sure but I think it's $5k to tie in to the now existing system. I can't imagine being forced to pay twice.

All that aside, we still irrigate with water from the lake (FREE H2O) and my lawn looks nothing like Mike's.
 
OP
Z

zmotorsports

ALLIANCE MEMBER
Joined
Oct 20, 2009
Messages
21,470
Location
Northern Utah
A non potable system makes sense, as far as conservation goes, but the cost of a 2nd infrastructure is essentially the same as a standard water supply. Is it compulsory if offered? Where does the less than purified water come from?

I was happy with our well water for 20 years but when the city ran water mains it was $1200 if paid before the contract start date. Not sure but I think it's $5k to tie in to the now existing system. I can't imagine being forced to pay twice.

All that aside, we still irrigate with water from the lake (FREE H2O) and my lawn looks nothing like Mike's.

Thanks. We've actually had secondary water in our immediate area for about 28 years now. When I lived on my parent's farm, which is just about 2 miles east of where I'm living now, we simply flood irrigated with the ditch and all of the property owners had X amount of water shares which determined how long they could water. When the wife and I bought our first home in West Point (Davis County) and I put my sprinkler system in, I had to have the city turn off the water to the house while I installed a T and a stop & waste valve as well as a backflow preventer directly into the main culinary line coming into the house which the city inspector had to inspect and verify before they would turn the water back on to my house. About two years later they dug up the streets and put in the infrastructure for the secondary system which also included the aqua-ducts/canals and retention ponds. At this point everyone was forced to get onto secondary as well as pay the connection fee. I had to dig up my front yard again and make the connection as they merely brought the connection into the front park strip.

At the time Weber County (where I'm at now again) also went to secondary so pretty much any home or subdivision built after about 1993/1994 timeframe will have secondary water. As far as the usage fees, when we were in Davis County they were paid as part of the monthly city bill, but in Weber County they are added on to your property taxes and you pay them annually along with the property assessment.

Last summer Weber County started installing meters on the secondary water connection at each residence. They tried telling us it was merely to "help" us monitor our usage and create graphs and data so we can water more conservatively in which I called ******** on as soon as I read the news letter. The last several month of the season last year we would get a monthly letter indicating how much water we were using and in percentage of what we were using compared to what they feel we should be using. The first month I was nearly 200% but I was also trying to get my yard dialed in. I actually did make a LOT of adjustments to mine between trimming back days and amount of time per zones as well as assessing my lawn to determine which zones could be cut back individually and even to the extent of which sprinkler heads I could install smaller nozzles on so I could tailor my lawn zone by zone and sprinkler head by sprinkler head. It seemed like the last couple of months of last year all I was doing was tweaking my sprinkler heads and felt like I made a lot of progress but the monthly reports were still showing me at around 134% which was the lowest I could get it down to without having too many dry spots and even then I had a few dry spots I was nursing along. I got the feeling I was the only one in my subdivision even messing with trying to reduce their secondary water consumption. In talking with a few of my neighbors they were complaining about the meters and the reporting but none said they were doing anything about it, I was at least trying to trim mine back.

Well guess what, this year we got a letter stating that they will now be billing for any water usage over our 100% of our allocated usage. Go figure, who'd a thunk it???? I will still try and tweak my nozzles a bit but if I'm over, I'm over and will just pay the difference I guess because I am not going to let my lawn go.
 

fnieto

Well-known member
Joined
Aug 27, 2013
Messages
1,401
Location
Tucson,Arizona
Interesting. Now I know why your lawn looks so amazing. If I understand this correctly, your lawn is watered by effluent/reclaimed water. Much better than all the chemically treated potable water. Our parks and golf coursed are on this but most older residences are not in Tucson.

Tucson waster was once the gold standard until they brought in the Central Arizona Project (CAP) and began blending the Colorado River water to the aquifer resulting in nasty corrosive potable water. Many older pipes around town began failing and the city was forced to abandon this practice and use the CAP for recharging the aquifer. They still inject countless chemicals making the water just as nasty but less corrosive.
We're on well water and enjoy quality inexpensive water for now. You never know when the man will step in and muck this up by ruining the quality and driving the cost up.

Like you Mike, I enjoy my natural lawn and am always challenged to make it better than last year no matter the attention required.
With four GSD's it can be a task but they sure love the benefits of a lush green lawn.

You'r not alone in getting reamed, my property taxes have gone up 52% since 2015. Funny how a guy takes pride in his castle only yo get penalized for said pride. I now contribute to an escrow account with $660/month to cover my taxes. Now you know why I drive older rigs hahah.
 

PhantomEB

Well-known member
Joined
Feb 6, 2006
Messages
6,817
Location
Medicine Hat, AB, Canuckistan
Love your lawn! Wish I could have the same out back but a Doberman/Pitty and an English Bulldog have other ideas with their high akilinine(sp?) urine.

We in the process of collecting up to 8 rain barrels dedicated for yard and garden, might see one for hosing the cars and toys off with next to the pressure washer.
 
OP
Z

zmotorsports

ALLIANCE MEMBER
Joined
Oct 20, 2009
Messages
21,470
Location
Northern Utah
Interesting. Now I know why your lawn looks so amazing. If I understand this correctly, your lawn is watered by effluent/reclaimed water. Much better than all the chemically treated potable water. Our parks and golf coursed are on this but most older residences are not in Tucson.

Tucson waster was once the gold standard until they brought in the Central Arizona Project (CAP) and began blending the Colorado River water to the aquifer resulting in nasty corrosive potable water. Many older pipes around town began failing and the city was forced to abandon this practice and use the CAP for recharging the aquifer. They still inject countless chemicals making the water just as nasty but less corrosive.
We're on well water and enjoy quality inexpensive water for now. You never know when the man will step in and muck this up by ruining the quality and driving the cost up.

Like you Mike, I enjoy my natural lawn and am always challenged to make it better than last year no matter the attention required.
With four GSD's it can be a task but they sure love the benefits of a lush green lawn.

You'r not alone in getting reamed, my property taxes have gone up 52% since 2015. Funny how a guy takes pride in his castle only yo get penalized for said pride. I now contribute to an escrow account with $660/month to cover my taxes. Now you know why I drive older rigs hahah.

I hear ya Paco. I will be driving my old Jeep and truck for many years now because I want a green lawn.:lol_hitti
 
OP
Z

zmotorsports

ALLIANCE MEMBER
Joined
Oct 20, 2009
Messages
21,470
Location
Northern Utah
Love your lawn! Wish I could have the same out back but a Doberman/Pitty and an English Bulldog have other ideas with their high akilinine(sp?) urine.

We in the process of collecting up to 8 rain barrels dedicated for yard and garden, might see one for hosing the cars and toys off with next to the pressure washer.

Thank you for the compliment.

Growing up on my parent's farm there were always the bare spots on the lawn from our animals, which is why I don't have nor want animals at my home. I do however have an issue with a neighbor's dog that keeps leaving his presents on my front lawn. If I knew who the owner was I would be sure to return said presents, in a flaming bag on their doorstep.:bounce:
 
OP
Z

zmotorsports

ALLIANCE MEMBER
Joined
Oct 20, 2009
Messages
21,470
Location
Northern Utah
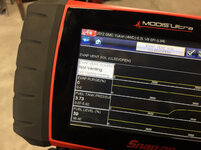
I have about 4200 miles on my LS engine in the Jeep now and it has been running phenomenally. However, during the last several tanks of fuel I have been getting a P0442 code which is a small EVAP system leak. Small in less than .020” so usually the gas cap is the culprit. The gas cap is the original that came on my 2011 Jeep Wrangler so it is logical that it could have lost its seal. Rather than diagnose it because we were in the middle of my son’s LB7 injector project I simply stopped by my local Chrysler/Jeep dealership and bought a new cap. I prefer the OEM caps because they have the provisions for the lanyard whereas the aftermarket do not, at least on the majority from my experience. Well, the gas cap was NOT the source of the leak.

Tonight after getting home from work I decided to properly troubleshoot it and correct the problem. Doubting myself my first thought was that I had a connection or hose that I had either installed or modified.

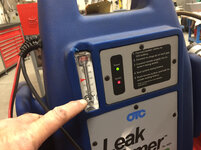
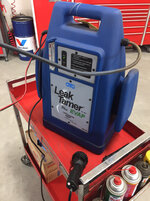
I hooked up my trusty old OTC smoke machine (Leak Tamer) in preparation for diagnosing.
c000516774889679a887ddaa2420024f.jpg

Turned on the smoke and you can see by the flow meter that a leak is present as it is pegged.
a9060ea1a00d1d85ee6b45d306c20833.jpg

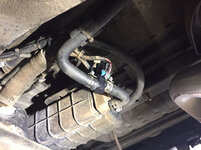
I looked everywhere and could not see smoke coming out of any of my connections or the ESIM (Evap System Integrity Monitor) which is kind of another location I was suspecting if it wasn’t my connections. There is a quad ring that seals the ESIM to the EVAP canister and I had disturbed it during the pinning of the shuttle valve during the LS swap.

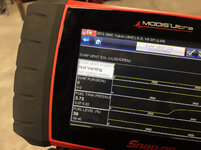
You can pinch off the hose coming out of the vent valve because it is normally open but I prefer to use the computer to simulate the operational sequence so I used my scanner to activate the vent valve thus closing the vent valve.
3cd4eeddfb74df6c7f73d03f5bda3afd.jpg

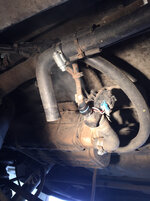
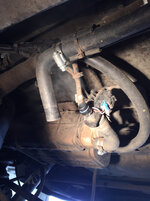
After not seeing any smoke I decided to pull the hose leaving the closed vent valve and BINGO, there’s the problem. There should not be anything passing through the vent valve.
586a20d39b456cbb8f6d8859a3982a3b.jpg

For reference, this is the vent valve deactivated (open). I hope you can see the difference and it shows up in the pictures.
1fe2f08a73c148f382c531a0a649672e.jpg

I went ahead and put a plug/cap on the outlet of the vent valve and the flow meter dropped to zero so I needed to run and grab a new vent valve from my local NAPA.
84453e582f60c58154d581a0dc22f039.jpg

I installed the new valve and could have put everything back and run it but I’m a firm believer in trust but verify. Here’s the new valve activated closed and no smoke coming out.
415edaf0c859021c95d2f4e6872788a3.jpg

Everything reconnected and ready to go.
f37096256d750b7778a8bb3f6aa893fe.jpg

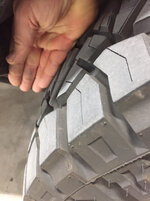
Lastly while I had the Jeep on the lift I decided to address one of my two interference issues that I discovered during my last trip to Moab. I trimmed the pinch weld back a little more than I did 8- years ago and also trimmed, heated and reformed the inner fender splash shields.

Here you can see how much more room I have between the front of my rear tire and the inner fender. Should be plenty to allow full stuff.
3b9a87e299dc72ed1460b82a62f7a987.jpg

My accurate measuring practice. I’m thinking about 2-3/4”. [emoji12]
24810790f373f31c1b40ab5fa493c8c7.jpg

Look at that, pretty accurate.
597bd037373d25d676fb094630f8233c.jpg

Thanks for looking.
 

Attachments

  • 597bd037373d25d676fb094630f8233c.jpg
    597bd037373d25d676fb094630f8233c.jpg
    578.6 KB · Views: 0
  • 24810790f373f31c1b40ab5fa493c8c7.jpg
    24810790f373f31c1b40ab5fa493c8c7.jpg
    730.2 KB · Views: 0
  • 3b9a87e299dc72ed1460b82a62f7a987.jpg
    3b9a87e299dc72ed1460b82a62f7a987.jpg
    643.7 KB · Views: 0
  • f37096256d750b7778a8bb3f6aa893fe.jpg
    f37096256d750b7778a8bb3f6aa893fe.jpg
    762.3 KB · Views: 0
  • 415edaf0c859021c95d2f4e6872788a3.jpg
    415edaf0c859021c95d2f4e6872788a3.jpg
    702.4 KB · Views: 0
  • 84453e582f60c58154d581a0dc22f039.jpg
    84453e582f60c58154d581a0dc22f039.jpg
    770.9 KB · Views: 0
  • 1fe2f08a73c148f382c531a0a649672e.jpg
    1fe2f08a73c148f382c531a0a649672e.jpg
    731.8 KB · Views: 0
  • 586a20d39b456cbb8f6d8859a3982a3b.jpg
    586a20d39b456cbb8f6d8859a3982a3b.jpg
    689.2 KB · Views: 0
  • 3cd4eeddfb74df6c7f73d03f5bda3afd.jpg
    3cd4eeddfb74df6c7f73d03f5bda3afd.jpg
    748 KB · Views: 0
  • a9060ea1a00d1d85ee6b45d306c20833.jpg
    a9060ea1a00d1d85ee6b45d306c20833.jpg
    733.5 KB · Views: 0
  • c000516774889679a887ddaa2420024f.jpg
    c000516774889679a887ddaa2420024f.jpg
    843.2 KB · Views: 1
Last edited:

protegeV

Well-known member
Joined
Apr 18, 2018
Messages
13,363
Location
DFW
Gm valve or the original Chrysler valve?

First thing I thought of with the ls was a purge, but the vent is a close second.
 
OP
Z

zmotorsports

ALLIANCE MEMBER
Joined
Oct 20, 2009
Messages
21,470
Location
Northern Utah
Gm valve or the original Chrysler valve?

First thing I thought of with the ls was a purge, but the vent is a close second.


The vent valve was a GM component that I added at the time of the swap as the Chrysler system doesn’t use a vent valve, it is a very primitive system using a shuttle valve inside the ESIM.

I threw a vacuum gauge on the purge valve the other night as it was a quick test just to verify the purge valve wasn’t leaking but I didn’t suspect a vent valve. After the gas cap wasn’t it I actually thought either a leaking connection or the quad ring at the ESIM to charcoal canister connection.
 
Last edited:
To avoid these ads, REGISTER NOW!
OP
Z

zmotorsports

ALLIANCE MEMBER
Joined
Oct 20, 2009
Messages
21,470
Location
Northern Utah
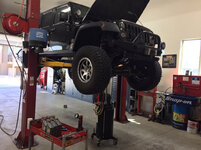
I had a little time this morning so I decided to pull the Jeep back into the shop and perform the third service on the LS engine as I have about 3k on the second service.

b35419e0619d294506716e981339eb7b.jpg

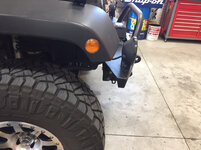
While it was on the lift I decided to rotate the tires as they have a little over 4K on them and since the front tires were off I thought I may as well address the front bumper interference issue.

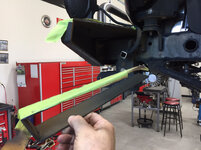
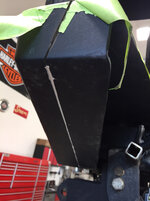
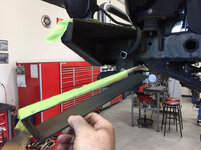
Taped off with the amount to remove determined.
85ab72e9fc39d552570a61df3ebf8d51.jpg

Top and ends cut with a 3” cutoff wheel to keep it as clean as possible.
7a9f96b1f50e512ccd27bd83fe81a1b8.jpg

6f8747a68e9923f872a0ba179259089b.jpg

Underside marked and cut with the plasma cutter.
e514d2304ee2ea7374e903c08cf257d5.jpg

Amount removed ended up being about 1.5” on the top at the outer edge tapering inward and 2” at the bottom outside tapering inward to 1.5”.
ebdd509dceb4ff24d815cadd8e764844.jpg

I touched up the cut edge with some semi-gloss black POR-15 using a small brush.
e6fe39c9a4fc50c17195180cd2910929.jpg

72d265fb31b0ffb8b29c811d5b844ac1.jpg

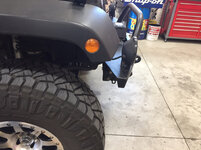
That should be plenty of clearance as I was only catching the bottom lip of the bumper by about a half inch.
12dc608b34ffb6d7b45e7b493c0c1b3c.jpg
 

Attachments

  • b35419e0619d294506716e981339eb7b.jpg
    b35419e0619d294506716e981339eb7b.jpg
    756.8 KB · Views: 0
  • 85ab72e9fc39d552570a61df3ebf8d51.jpg
    85ab72e9fc39d552570a61df3ebf8d51.jpg
    639.3 KB · Views: 0
  • e514d2304ee2ea7374e903c08cf257d5.jpg
    e514d2304ee2ea7374e903c08cf257d5.jpg
    642.5 KB · Views: 0
  • 12dc608b34ffb6d7b45e7b493c0c1b3c.jpg
    12dc608b34ffb6d7b45e7b493c0c1b3c.jpg
    736.6 KB · Views: 0
  • 72d265fb31b0ffb8b29c811d5b844ac1.jpg
    72d265fb31b0ffb8b29c811d5b844ac1.jpg
    729.5 KB · Views: 0
  • e6fe39c9a4fc50c17195180cd2910929.jpg
    e6fe39c9a4fc50c17195180cd2910929.jpg
    652.2 KB · Views: 0
  • ebdd509dceb4ff24d815cadd8e764844.jpg
    ebdd509dceb4ff24d815cadd8e764844.jpg
    734.5 KB · Views: 0
  • 6f8747a68e9923f872a0ba179259089b.jpg
    6f8747a68e9923f872a0ba179259089b.jpg
    669.3 KB · Views: 0
  • 7a9f96b1f50e512ccd27bd83fe81a1b8.jpg
    7a9f96b1f50e512ccd27bd83fe81a1b8.jpg
    699.3 KB · Views: 0
Last edited:

Ohmthis

Well-known member
Joined
Jan 20, 2013
Messages
3,021
Location
Outside of Louisville KY
You have all the cool toys, I mean tools! Thanks for the troubleshooting guide. I learn something new every time I log on here. Your boys bumper looks very nice. I like the fact that you left some of the welds to be seen, truly an art form.
 
OP
Z

zmotorsports

ALLIANCE MEMBER
Joined
Oct 20, 2009
Messages
21,470
Location
Northern Utah
You have all the cool toys, I mean tools! Thanks for the troubleshooting guide. I learn something new every time I log on here. Your boys bumper looks very nice. I like the fact that you left some of the welds to be seen, truly an art form.

Thank you. I was going to blend those couple of welds but my son wanted them left untouched. I was unsure how that would look overall but I think I can live with it.

Thank you for following along and I am glad it is informative.
 
OP
Z

zmotorsports

ALLIANCE MEMBER
Joined
Oct 20, 2009
Messages
21,470
Location
Northern Utah
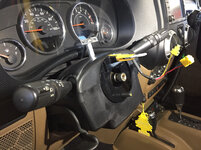
A couple of days ago I got the SRS (Supplemental Restraint System) or airbag light on the dash. It would occasionally go out then come back on as I turned the steering wheel so I knew it was the clock spring in the steering column. I’ve been busy the last couple of evenings and didn’t get any shop time but today on my lunch hour I stopped by my local dealership and picked up a new clock spring.

Upon arriving home I disconnected the battery and allowed the system to discharge for about fifteen minutes while I grabbed the mail and changed.

I started by removing these two 6mm bolts (10mm head) on either side of the steering wheel which hold the airbag to the steering wheel.
5a5637586a3810dad58e630043791c62.jpg

Gently tip the airbag out of its pocket being careful not to tug on the wires.
f4b3470ca5cb0226448311a12e31a88a.jpg

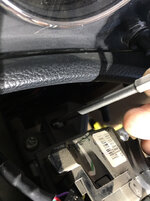
There’s a small hole in this connector for the horn in which to insert a pick and gently separate the connector.
47acada85a6d5e6ea6ca6870a19f1579.jpg

Next squeeze the tabs together on each of these black and yellow connectors on the back of the airbag and disconnect.
ab510c99fa0dc5d16466e7c36fb18430.jpg

Remove the airbag/horn assembly.
9646f005c9294c2cce0112ebb1ec8636.jpg

Next remove the 10mm (13mm head) bolt holding the steering wheel to the splined shaft and install a two arm puller the apply pressure. You may find it necessary to smack the end of the puller with a hammer to get the splined hub to release from the shaft.
a54648397bb54d4da918eb4d6a02d2c8.jpg

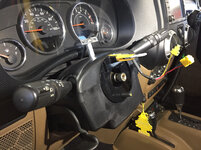
Steering wheel removed.
943f076c1e8a80e91efd4d729df20784.jpg

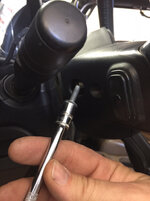
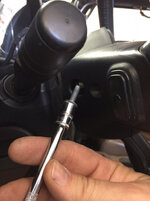
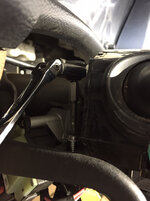
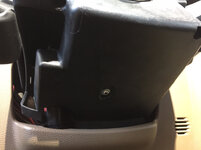
Next remove the column shroud by removing these two T-20 Torx screws.
dbd65702b9d413f5798d96659f0118bc.jpg

You’ll need a long thin bladed T-20 to reach up into these two holes as they are quite deeply recessed.
14ca6ac16b231a9fef46fe5f2b58ffa4.jpg

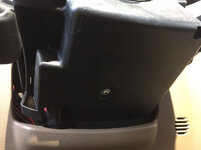
And this T-20 under the bottom of the lower shroud.
fe9be26cab13d0171a9be43a2cc72890.jpg

Then pop the two shroud halves apart and set aside. The aluminum standoff is for my Aeroforce gauge along with the small black wire seen here just under the gauge cluster.
d26220104ba6882bcefe55fcea030831.jpg

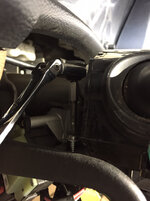
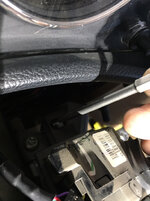
Then you’ll need about a 2"-3” T-20 and preferably a flex head ratchet to remove the next two fasteners.
f9c86f88685e481226a9f3091a0b002c.jpg

One here behind the turn signal lever.
a060b90b4c302a7a6fd3093692ef3d74.jpg

One here behind the wiper switch.
a997fc267330fb3cb391092d7bb14ecb.jpg

And the last one here on the front just ahead of the ignition tumbler.
fdd670b7c62bf4a8ae196459f8f9637b.jpg

Lift the assembly off and turn upside down to reveal four connectors that must be disconnected. These are simple squeeze the tab and pull.
19c4f3e4e7bfa625236c2e8b8a9b44ff.jpg

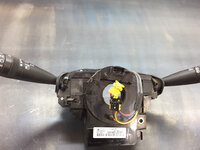
Assembly out and on the bench.
3f36dfbd500ddaee32a2f9319a77ad49.jpg

Next to the turn signal switch there is a Phillips head screw to remove.
c09c6a9effa684e8f9a337f3bf2507a0.jpg

And behind the wiper switch a Phillips head screw to remove.
ab50530cce45681b2ddd62486724ce06.jpg

Then the turn signal and wiper assemblies slide apart from the clock spring assembly. No need to unplug the connectors merely leave them connected.
e50f235e2ed8b6ced4e701b3f56bfe25.jpg

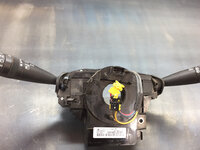
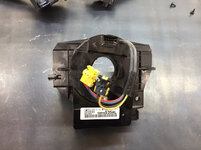
There’s the nugget you’re after, the clock spring assembly.
833b5c21b0aa0e521029497712d8c642.jpg

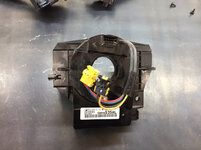
New left, old right.
09e4fd5c6c4d6b444d0f8e3e64c81b7d.jpg

Chrysler part number of the new clock spring.
077dec5995d8eee415937ad0412a3332.jpg

Reassembly is the reverse of disassembly. Clock spring/turn signal/wiper assembly reinstalled. Do not remove this keeper until after the steering wheel is installed as this is what prevents the clockspring from rotating and you can damage the new one before it is completely installed.
9fe06900d66ab0f4cbe62abf06328b22.jpg

Upper and lower column shrouds installed.
7c2607d90227e40677ea1078b6bdc04e.jpg

Steering wheel, airbag and Aeroforce gauge installed. Project complete.
2caca360b23bc0620b7ae67a92fd6998.jpg

Thanks for looking.
 

Attachments

  • 2caca360b23bc0620b7ae67a92fd6998.jpg
    2caca360b23bc0620b7ae67a92fd6998.jpg
    686.6 KB · Views: 0
  • 9646f005c9294c2cce0112ebb1ec8636.jpg
    9646f005c9294c2cce0112ebb1ec8636.jpg
    673.5 KB · Views: 0
  • ab510c99fa0dc5d16466e7c36fb18430.jpg
    ab510c99fa0dc5d16466e7c36fb18430.jpg
    695.1 KB · Views: 0
  • f4b3470ca5cb0226448311a12e31a88a.jpg
    f4b3470ca5cb0226448311a12e31a88a.jpg
    734.3 KB · Views: 0
  • 5a5637586a3810dad58e630043791c62.jpg
    5a5637586a3810dad58e630043791c62.jpg
    650.3 KB · Views: 0
  • f9c86f88685e481226a9f3091a0b002c.jpg
    f9c86f88685e481226a9f3091a0b002c.jpg
    652.3 KB · Views: 0
  • a54648397bb54d4da918eb4d6a02d2c8.jpg
    a54648397bb54d4da918eb4d6a02d2c8.jpg
    756 KB · Views: 0
  • 943f076c1e8a80e91efd4d729df20784.jpg
    943f076c1e8a80e91efd4d729df20784.jpg
    704 KB · Views: 0
  • 7c2607d90227e40677ea1078b6bdc04e.jpg
    7c2607d90227e40677ea1078b6bdc04e.jpg
    817.1 KB · Views: 0
  • 9fe06900d66ab0f4cbe62abf06328b22.jpg
    9fe06900d66ab0f4cbe62abf06328b22.jpg
    718.9 KB · Views: 0
  • 077dec5995d8eee415937ad0412a3332.jpg
    077dec5995d8eee415937ad0412a3332.jpg
    611.3 KB · Views: 0
  • 09e4fd5c6c4d6b444d0f8e3e64c81b7d.jpg
    09e4fd5c6c4d6b444d0f8e3e64c81b7d.jpg
    717.1 KB · Views: 0
  • 833b5c21b0aa0e521029497712d8c642.jpg
    833b5c21b0aa0e521029497712d8c642.jpg
    698.4 KB · Views: 0
  • e50f235e2ed8b6ced4e701b3f56bfe25.jpg
    e50f235e2ed8b6ced4e701b3f56bfe25.jpg
    699.2 KB · Views: 0
  • ab50530cce45681b2ddd62486724ce06.jpg
    ab50530cce45681b2ddd62486724ce06.jpg
    674.9 KB · Views: 0
  • c09c6a9effa684e8f9a337f3bf2507a0.jpg
    c09c6a9effa684e8f9a337f3bf2507a0.jpg
    668.3 KB · Views: 0
  • 3f36dfbd500ddaee32a2f9319a77ad49.jpg
    3f36dfbd500ddaee32a2f9319a77ad49.jpg
    693.8 KB · Views: 0
  • 19c4f3e4e7bfa625236c2e8b8a9b44ff.jpg
    19c4f3e4e7bfa625236c2e8b8a9b44ff.jpg
    775.8 KB · Views: 0
  • fdd670b7c62bf4a8ae196459f8f9637b.jpg
    fdd670b7c62bf4a8ae196459f8f9637b.jpg
    746.7 KB · Views: 0
  • a997fc267330fb3cb391092d7bb14ecb.jpg
    a997fc267330fb3cb391092d7bb14ecb.jpg
    724.7 KB · Views: 0
  • a060b90b4c302a7a6fd3093692ef3d74.jpg
    a060b90b4c302a7a6fd3093692ef3d74.jpg
    673 KB · Views: 0
  • d26220104ba6882bcefe55fcea030831.jpg
    d26220104ba6882bcefe55fcea030831.jpg
    786.4 KB · Views: 0
  • fe9be26cab13d0171a9be43a2cc72890.jpg
    fe9be26cab13d0171a9be43a2cc72890.jpg
    645 KB · Views: 0
  • 14ca6ac16b231a9fef46fe5f2b58ffa4.jpg
    14ca6ac16b231a9fef46fe5f2b58ffa4.jpg
    730.1 KB · Views: 0
  • dbd65702b9d413f5798d96659f0118bc.jpg
    dbd65702b9d413f5798d96659f0118bc.jpg
    706.6 KB · Views: 0
  • 47acada85a6d5e6ea6ca6870a19f1579.jpg
    47acada85a6d5e6ea6ca6870a19f1579.jpg
    710.9 KB · Views: 0
Last edited:
OP
Z

zmotorsports

ALLIANCE MEMBER
Joined
Oct 20, 2009
Messages
21,470
Location
Northern Utah
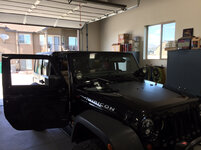
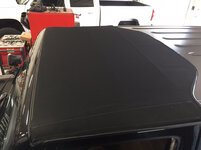
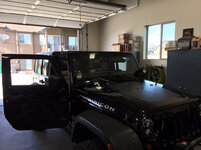
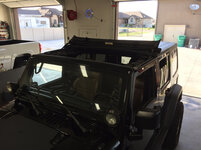
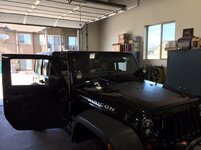
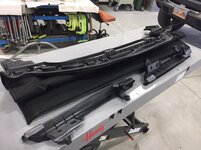
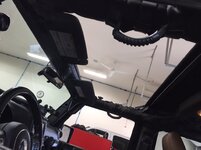
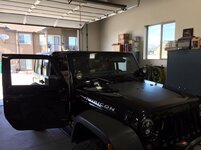
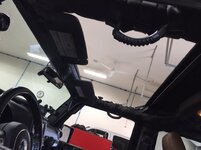
The clock spring replacement went so quickly that I had time before the wife arrived home from work so I thought I’d install my new Bestop Sunrider top.
a722cf2971dfdaa6afc888092365eef5.jpg

Freedom tops removed.
0bd5dd67b7573d078b4c794bc6d398df.jpg

Sunrider top installed in place of the Freedom tops.
c903281b0827a8634fae3052def0077f.jpg

Open position.
e4b585671c2a68f7eea85ca6a66f7f48.jpg

e22643a60dfa4fefe467d1dca0b86850.jpg

8a0cc2cc9dfcaf7c2e18d507999398a9.jpg

Thanks for looking.
 

Attachments

  • a722cf2971dfdaa6afc888092365eef5.jpg
    a722cf2971dfdaa6afc888092365eef5.jpg
    699.9 KB · Views: 0
  • 0bd5dd67b7573d078b4c794bc6d398df.jpg
    0bd5dd67b7573d078b4c794bc6d398df.jpg
    638.3 KB · Views: 0
  • c903281b0827a8634fae3052def0077f.jpg
    c903281b0827a8634fae3052def0077f.jpg
    620.9 KB · Views: 0
  • e4b585671c2a68f7eea85ca6a66f7f48.jpg
    e4b585671c2a68f7eea85ca6a66f7f48.jpg
    658.5 KB · Views: 0
  • e22643a60dfa4fefe467d1dca0b86850.jpg
    e22643a60dfa4fefe467d1dca0b86850.jpg
    621.2 KB · Views: 0
  • 8a0cc2cc9dfcaf7c2e18d507999398a9.jpg
    8a0cc2cc9dfcaf7c2e18d507999398a9.jpg
    659 KB · Views: 0
Last edited:

Wanna Ride

Well-known member
Joined
Jul 28, 2010
Messages
2,790
Mike, it's been several months since I've stopped in here, work's been just crazy busy. I just skimmed through and saw some pics of the swap and your son's bumper project - as always, phenomenal work! I'll get some time this weekend to read through all the details.
 

GRN96WS6

Well-known member
Joined
Dec 23, 2012
Messages
2,267
Location
SOMD
Did the code tell you it was the clock spring or was it experience or a common issue?
 
OP
Z

zmotorsports

ALLIANCE MEMBER
Joined
Oct 20, 2009
Messages
21,470
Location
Northern Utah
Mike, it's been several months since I've stopped in here, work's been just crazy busy. I just skimmed through and saw some pics of the swap and your son's bumper project - as always, phenomenal work! I'll get some time this weekend to read through all the details.

Thank you very much for the comments. Sorry to hear you have been so busy but glad to stopped by and thumbed through my thread. I hope you'll have time to give it a deeper look as I think there is a lot of detail in the content.
 
OP
Z

zmotorsports

ALLIANCE MEMBER
Joined
Oct 20, 2009
Messages
21,470
Location
Northern Utah
What connector controls the steering wheel controls? Only saw two and three wire connectors.

Look at the picture where I removed the clock spring from the column showing the back side of the assembly, there are 4 connectors located there that I point out and each connector has between 5 and 12 wires.
 
OP
Z

zmotorsports

ALLIANCE MEMBER
Joined
Oct 20, 2009
Messages
21,470
Location
Northern Utah
Did the code tell you it was the clock spring or was it experience or a common issue?

Yes on both. Experience told me straight away that I had a clock spring issue but pulling the codes there was a open circuit in SRS. Everything else on my steering wheel still worked such as cruise, toggling through my driver information, radio volume and channel buttons as well as voice recognition so it was early enough that only once circuit was affected but over time others will start to drop off if not replaced. Some people report cruise being the first option to be affected but I have not personally seen that, it's always been the SRS system being the first to be affected.

Thanks for stopping by and following along.
 

C2tuck

Well-known member
Joined
Apr 22, 2015
Messages
663
Location
North Texas
The clock spring replacement went so quickly that I had time before the wife arrived home from work so I thought I’d install my new Bestop Sunrider top.
a722cf2971dfdaa6afc888092365eef5.jpg

Freedom tops removed.
0bd5dd67b7573d078b4c794bc6d398df.jpg

Sunrider top installed in place of the Freedom tops.
c903281b0827a8634fae3052def0077f.jpg

Open position.
e4b585671c2a68f7eea85ca6a66f7f48.jpg

e22643a60dfa4fefe467d1dca0b86850.jpg

8a0cc2cc9dfcaf7c2e18d507999398a9.jpg

Thanks for looking.


Like that top Mike. Had a 14 Sahara that leaked from there and they couldn’t ever fix it so I got rid of it. Never saw a top like that or I would have tried that first!
 

Attachments

  • 8a0cc2cc9dfcaf7c2e18d507999398a9.jpg
    8a0cc2cc9dfcaf7c2e18d507999398a9.jpg
    100.2 KB · Views: 0
  • 0bd5dd67b7573d078b4c794bc6d398df.jpg
    0bd5dd67b7573d078b4c794bc6d398df.jpg
    98.7 KB · Views: 0
  • a722cf2971dfdaa6afc888092365eef5.jpg
    a722cf2971dfdaa6afc888092365eef5.jpg
    114 KB · Views: 0
  • c903281b0827a8634fae3052def0077f.jpg
    c903281b0827a8634fae3052def0077f.jpg
    79.6 KB · Views: 0
  • e4b585671c2a68f7eea85ca6a66f7f48.jpg
    e4b585671c2a68f7eea85ca6a66f7f48.jpg
    101 KB · Views: 0
  • e22643a60dfa4fefe467d1dca0b86850.jpg
    e22643a60dfa4fefe467d1dca0b86850.jpg
    81.5 KB · Views: 0
OP
Z

zmotorsports

ALLIANCE MEMBER
Joined
Oct 20, 2009
Messages
21,470
Location
Northern Utah
Like that top Mike. Had a 14 Sahara that leaked from there and they couldn’t ever fix it so I got rid of it. Never saw a top like that or I would have tried that first!

You're Freedom Tops were leaking?

That's one of the things I like about mine is that they are leak free and quiet. I worried about this Sunrider top leaking but not tested yet, although I've heard and read good things about it. I really liked my Bestop Trektop NX soft top but didn't care for the rear zipper setup and lost a little bit of storage at the back due to the slant back design, although LOVED the looks of it. Once I made up my mind to sell the soft top and stick with the hard top only my wife and I both commented on missing the ability to flip the front section back with the soft top. When Bestop came out with this product last year I thought the best of both worlds, hard top at the back and ability to flip the front section back for open top drives.

I will reinstall my Freedom tops during the colder winter months but we're sure looking forward to our drives with the top back.

Thanks for stopping by. Sorry to hear that you had issues with your 2014 Wrangler, I hadn't heard of issues with the OEM top(s).
 

bmxdad

Well-known member
Joined
Feb 18, 2014
Messages
2,539
Location
Puyallup, WA
Look at the picture where I removed the clock spring from the column showing the back side of the assembly, there are 4 connectors located there that I point out and each connector has between 5 and 12 wires.


Saw that, I was wondering about the controls in the steering wheel itself. No big ... my son has a new Rubicon. I'll check his out.


Nice HowTo, as always :thumbup:
 
To avoid these ads, REGISTER NOW!
Top Bottom