
You are using an out of date browser. It may not display this or other websites correctly.
You should upgrade or use an alternative browser.
You should upgrade or use an alternative browser.
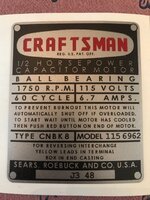
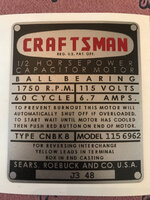
Vintage Grinder Sticker Reproduction
- Thread starter mattblast
- Start date




JoCoSawdust
Well-known member
Amazing work Matt, looks great!
If I can ever find a photo of the same model, would love to get a repro tag for a Rockwell 7" 200V 3 phase grinder (came from a school district in Truckee, CA & 208V is common in schools), other then the missing tag it is in pretty good shape.

Added a VFD in the pedestal which would have required buck/boost transformers otherwise to reduce the line voltage from 240V to around 208V if had used a RPC instead.

Added a VFD in the pedestal which would have required buck/boost transformers otherwise to reduce the line voltage from 240V to around 208V if had used a RPC instead.
Last edited:
If I can ever find a photo of the same model, would love to get a repro tag for a Rockwell 7" 200V 3 phase grinder
If you can find one and the owner’s willing to remove and scan the tag then I can make it. It’s also possible to repro it with a photo and then taking measurements of each item with a caliper but that takes a lot longer.
If you can find one and the owner’s willing to remove and scan the tag then I can make it. It’s also possible to repro it with a photo and then taking measurements of each item with a caliper but that takes a lot longer.
I have a single phase model of the same grinder, so getting the tag outline should be easy, I'll have to ask at OWWM if a 3 phase version is available.
Old Radar
Well-known member
Matt--
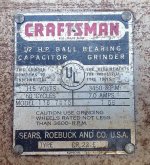
I was vectored here from members of the "Pre-Block Grinders--Where's the Love?” thread after I asked for ideas on how recover from my mistake that ruined my grinder’s label. https://www.garagejournal.com/forum/showthread.php?p=8068683#post8068683
I read through this thread and saw all your spectacular work—including where you helped Pendragon1998 with his aluminum label in post #91. Mine is exactly the same except for the date of manufacture.
I also read that you were contemplating a purchase of a sublimation printer. Since I didn’t notice many Pre-Block or other aluminum-label owners publicly pledge support for this purchase, I’m wondering if you went through with it and are able to create a label for me. I’m more than willing to contribute.
Thanks for this great service!
Lance
I was vectored here from members of the "Pre-Block Grinders--Where's the Love?” thread after I asked for ideas on how recover from my mistake that ruined my grinder’s label. https://www.garagejournal.com/forum/showthread.php?p=8068683#post8068683
I read through this thread and saw all your spectacular work—including where you helped Pendragon1998 with his aluminum label in post #91. Mine is exactly the same except for the date of manufacture.
I also read that you were contemplating a purchase of a sublimation printer. Since I didn’t notice many Pre-Block or other aluminum-label owners publicly pledge support for this purchase, I’m wondering if you went through with it and are able to create a label for me. I’m more than willing to contribute.
Thanks for this great service!
Lance
I was vectored here from members of the "Pre-Block Grinders--Where's the Love?” thread after I asked for ideas on how recover from my mistake that ruined my grinder’s label.
I have been making adhesive labels that you can attach over the top of you metal label. It's not exactly the same look, but very close and looks great when done.
Rick B.
Well-known member
That's amazing the way you can do that. Great work.
Vernhartjr
New member
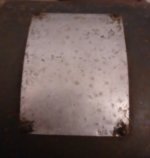
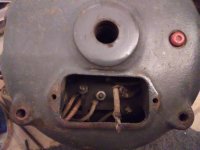
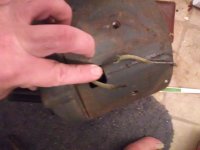
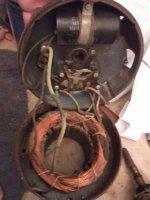
Help. Just got this motor and want to use it on my craftsman table saw. I'm wet behind the ears so please speak slowly and assume I know nothing.
Attachments



JoCoSawdust
Well-known member
Matt--
I was vectored here from members of the "Pre-Block Grinders--Where's the Love?” thread after I asked for ideas on how recover from my mistake that ruined my grinder’s label. https://www.garagejournal.com/forum/showthread.php?p=8068683#post8068683
I read through this thread and saw all your spectacular work—including where you helped Pendragon1998 with his aluminum label in post #91. Mine is exactly the same except for the date of manufacture.
I also read that you were contemplating a purchase of a sublimation printer. Since I didn’t notice many Pre-Block or other aluminum-label owners publicly pledge support for this purchase, I’m wondering if you went through with it and are able to create a label for me. I’m more than willing to contribute.
Thanks for this great service!
Lance
Radar- Matt's done 4 stickers for me, all for grinders that have metal tags on them. I merely cleaned up the back of the original tag and mounted Matt's stickers on them. I figure if a purist ever comes along and absolutely wants the original tag, it's still there. The results far exceeded my expectations. I highly recommend this method.

Vernhartjr
New member
Can someone tell me where these wires go or point me to a wiring diagram that I can understand. Also, I have no idea the model/power of this motor isbecause the label is unreadable. Any ideas?
Old Radar
Well-known member
Can someone tell me where these wires go or point me to a wiring diagram that I can understand. Also, I have no idea the model/power of this motor isbecause the label is unreadable. Any ideas?
Welcome to the forum Vern! This particular thread is mostly focused on reproducing the labels from vintage grinders and other labeled equipment. Since it appears you have other issues with your motor that are taking a priority over its label at the moment, you may want to direct your questions to a thread more directly related to your issues. If you know what tool your motor came from, you can use the site’s search feature to hunt for threads related to that tool. If not, you could start your own thread requesting aid in identifying the original use of your motor and you will soon be overwhelmed with information from the knowledgeable members of the Garage Journal. Good Luck!
Old Radar
Well-known member
Radar- Matt's done 4 stickers for me, all for grinders that have metal tags on them. I merely cleaned up the back of the original tag and mounted Matt's stickers on them. I figure if a purist ever comes along and absolutely wants the original tag, it's still there. The results far exceeded my expectations. I highly recommend this method.
Thanks Jo! There's no question--Matt is a master. My only concern with this method was, for my Pre-Block grinder, the model and date are stamped into the aluminum. To maintain that aspect of originality (call me a purist--I've been called worse
 ), I would need to stamp through the top of the sticker, which would ruin the integrity of the sticker and allow air and dirt to infiltrate, or stamp the aluminum before applying the sticker--which would trap pockets of air under the sticker at the stamp points.
Luckily, Matt and I have been corresponding via PM and he still has a spare aluminum label that he made when he completed a job for another member who has the same grinder as me.
Now I have a question for you! I see you have re-attached your aluminum label with original-looking rivets. My rivet knowledge is micron-thin. These rivets have nice smooth domes while all Home Depot rivets I've ever noticed have a center hole with the little shaft sheared off (actually "tensiled" off) inside it. Are these a special order? Is the same rivet gun used to place them or is another specialty tool in my future?
JoCoSawdust
Well-known member
Radar- I feel your pain as far as the engraved data on that plate. Glad you and Matt worked something out.
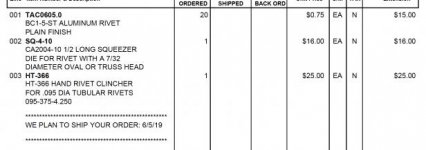
The rivets I used on this are indeed original type rivets. I redid an old Craftsman tool box and wanted to use an authentic method to re-attach the Heritage logo. I contacted Hanson Rivet and Supply, talked to one of their guys and he steered me in the right direction. Minimum order for rivets was 15 bucks so that equated to 200 or the suckers. I also got the setting tools required to secure them without flattening the heads. I think it turned out great and looks so much better than the "pop" rivets set with a gun from the box stores. Fortunately the length of the rivets I hoarded for the tool box worked with the grinder so it was win/win for me.
If you choose to contact Hansen, they'll need the diameter of the hole along with the thickness of both surfaces to be mated. If you're not in a hurry I'd be more than happy to send you a half dozen rivets, that'd leave you holding the bag for the setting tools if you don't have something that'd work for that purpose. I'm away from home with work right now and probably be a week-10 days before I'm home. I think I may still have the invoice that I could give you the parts numbers for the setting tools as well.
Looking forward to seeing your pre-block when it's done!
https://www.hansonrivet.com/rivets/know-your-rivets/
EDIT: Actually had the invoice in my email. Came to 56 bucks which is a lot for one project but I've now done 4 grinders and a couple of boxes so it pans out. If yours is a one-time project shoot me a PM and we'll work something out.
The rivets I used on this are indeed original type rivets. I redid an old Craftsman tool box and wanted to use an authentic method to re-attach the Heritage logo. I contacted Hanson Rivet and Supply, talked to one of their guys and he steered me in the right direction. Minimum order for rivets was 15 bucks so that equated to 200 or the suckers. I also got the setting tools required to secure them without flattening the heads. I think it turned out great and looks so much better than the "pop" rivets set with a gun from the box stores. Fortunately the length of the rivets I hoarded for the tool box worked with the grinder so it was win/win for me.
If you choose to contact Hansen, they'll need the diameter of the hole along with the thickness of both surfaces to be mated. If you're not in a hurry I'd be more than happy to send you a half dozen rivets, that'd leave you holding the bag for the setting tools if you don't have something that'd work for that purpose. I'm away from home with work right now and probably be a week-10 days before I'm home. I think I may still have the invoice that I could give you the parts numbers for the setting tools as well.
Looking forward to seeing your pre-block when it's done!
https://www.hansonrivet.com/rivets/know-your-rivets/
EDIT: Actually had the invoice in my email. Came to 56 bucks which is a lot for one project but I've now done 4 grinders and a couple of boxes so it pans out. If yours is a one-time project shoot me a PM and we'll work something out.
Last edited:
JoCoSawdust
Well-known member
Can someone tell me where these wires go or point me to a wiring diagram that I can understand. Also, I have no idea the model/power of this motor isbecause the label is unreadable. Any ideas?
Vern-check this link out. Frank Lee is the Grand Master of motorized Craftsman. I've also included a link to Old Wood Working Machines website, lots of machine knowledge over there as well. You'll have to register on OWWM as well but it's free and there's a wealth of knowledge there. Good luck!
https://www.garagejournal.com/forum/showthread.php?t=314803&showall=1
http://owwm.org/index.php
Old Radar
Well-known member
Jo--
You're right, that's pretty pricey for a single application. However, I expect I will find other tools in the future that will benefit from re-riveting. So, thank you for your generous offer, but I'll look into getting a new tool.
One point for clarification: you say in your post you bought 200 rivets, but the invoice says 20. Slip of a zero or do they come in packs of ten?
You're right, that's pretty pricey for a single application. However, I expect I will find other tools in the future that will benefit from re-riveting. So, thank you for your generous offer, but I'll look into getting a new tool.
One point for clarification: you say in your post you bought 200 rivets, but the invoice says 20. Slip of a zero or do they come in packs of ten?
JoCoSawdust
Well-known member
Radar- They must charge by packs of 10 but I got one bag with 200 rivets in it.
I haven't yet made the perfect aluminum tag or older grinders. I tried sublimation, but that process has a very glossy surface that can flake off when stamping the date onto the tag. I've also tried printing them and sticking them to the existing tag, but then the date needs to be printed and that doesn't look quite right.
A perfect reproduction can be made by screen printed on 0.020" thick aluminum. This is a more costly process to setup as screens need to be made one per color. But then it is very inexpensive to make each additional tag.
The screens are large enough to hold several different tags, so I figured it would be good to try to get them all done so I'm ready for any future needs.
So far I have layouts done for 397.19580, 397.19410, 397.19580, 115.6962, and 115.7575. But I need good quality flatbed scans to make a few more.
If you have one of these please scan and send me a copy and I will be able to make a prefect reproduction: 115.19500, 397.19501, 115.7561 (plus any others I may be missing)
A perfect reproduction can be made by screen printed on 0.020" thick aluminum. This is a more costly process to setup as screens need to be made one per color. But then it is very inexpensive to make each additional tag.
The screens are large enough to hold several different tags, so I figured it would be good to try to get them all done so I'm ready for any future needs.
So far I have layouts done for 397.19580, 397.19410, 397.19580, 115.6962, and 115.7575. But I need good quality flatbed scans to make a few more.
If you have one of these please scan and send me a copy and I will be able to make a prefect reproduction: 115.19500, 397.19501, 115.7561 (plus any others I may be missing)
awwr999999
New member
Amazing work.
Does anyone have any kind of foolproof method for applying decals/labels/stickers so that they line up perfectly? I've been struggling with this for decades and haven't figured out any easy way of doing it.
Does anyone have any kind of foolproof method for applying decals/labels/stickers so that they line up perfectly? I've been struggling with this for decades and haven't figured out any easy way of doing it.

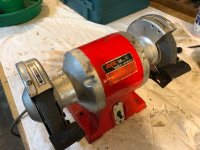

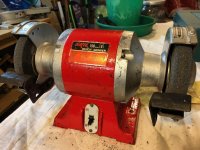
Skil 6" grinder (Australian edition) refurb - aluminium bearing housings polished up nicely.
Thanks to Matt for his help with decals.
Nice!
Farmer J.
Well-known member
Amazing work.
Does anyone have any kind of foolproof method for applying decals/labels/stickers so that they line up perfectly? I've been struggling with this for decades and haven't figured out any easy way of doing it.
Sure. Follow the instructions from Jim at Engine-Decals.com
All his adverts have the fitting instructions for wet or dry on them, if you scroll down, like this one.
https://www.ebay.com/itm/Plomb-Tool...-Inset-set-2/392028930232?hash=item5b46bec0b8
Great quality.
lafester
Well-known member
I'm going to need one of these as well, along with the on-off switch label.
Curious how you deal with the stamped model and date codes? I searched the thread but did not see one done previously.
Anyway thought I would chime in if were already going to make one.
Thanks!
Curious how you deal with the stamped model and date codes? I searched the thread but did not see one done previously.
Anyway thought I would chime in if were already going to make one.
Thanks!
Matt--
I was vectored here from members of the "Pre-Block Grinders--Where's the Love?” thread after I asked for ideas on how recover from my mistake that ruined my grinder’s label. https://www.garagejournal.com/forum/showthread.php?p=8068683#post8068683
I read through this thread and saw all your spectacular work—including where you helped Pendragon1998 with his aluminum label in post #91. Mine is exactly the same except for the date of manufacture.
I also read that you were contemplating a purchase of a sublimation printer. Since I didn’t notice many Pre-Block or other aluminum-label owners publicly pledge support for this purchase, I’m wondering if you went through with it and are able to create a label for me. I’m more than willing to contribute.
Thanks for this great service!
Lance
I have been making adhesive labels that you can attach over the top of you metal label. It's not exactly the same look, but very close and looks great when done.
396foxRN
Well-known member
any chance you could make these? Restoring an auction find, a Kwik-Way large sandblaster cabinet, model 274.
396foxRN
Well-known member
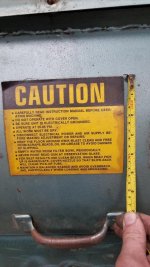
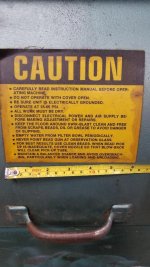

Got the label recreated based in the photo. It would be better to have a flatbed scan but caution labels are less critical for exact positioning.
The original has some odd hyphenation which I kept.
Pm me of you want me to print one up.
(The CAUTION text is Eurostyle bold condensed)
Attachments

Had some trouble making a label this morning.
Here’s how it printed
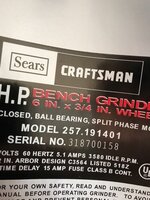
The printer I’m using can only print one color at a time then rewinds so I can insert the next color ribbon. There is an inherent shifting between colors that the OEM software compensates for but that the software I use doesn’t.
To work around this I had to add a 0.015” stroke to the red text, make it over print, and then make a knock out in the background rectangle. Took several tries to perfect (the user manual was very vague on this function and offered no help)
Here’s the end result
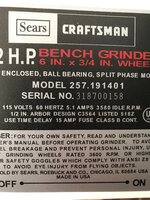
I printer similar labels in the past and usually make an extra one of each. Looked though my pile and found that this issue has been going on for a while unnoticed. So I went back and corrected the source files.
Here’s how it printed
The printer I’m using can only print one color at a time then rewinds so I can insert the next color ribbon. There is an inherent shifting between colors that the OEM software compensates for but that the software I use doesn’t.
To work around this I had to add a 0.015” stroke to the red text, make it over print, and then make a knock out in the background rectangle. Took several tries to perfect (the user manual was very vague on this function and offered no help)
Here’s the end result
I printer similar labels in the past and usually make an extra one of each. Looked though my pile and found that this issue has been going on for a while unnoticed. So I went back and corrected the source files.
Attachments

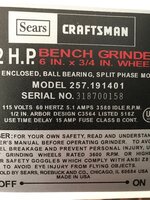
87 IROC LT1
Well-known member
Had some trouble making a label this morning.
Here’s how it printed
The printer I’m using can only print one color at a time then rewinds so I can insert the next color ribbon. There is an inherent shifting between colors that the OEM software compensates for but that the software I use doesn’t.
To work around this I had to add a 0.015” stroke to the red text, make it over print, and then make a knock out in the background rectangle. Took several tries to perfect (the user manual was very vague on this function and offered no help)
Here’s the end result
I printer similar labels in the past and usually make an extra one of each. Looked though my pile and found that this issue has been going on for a while unnoticed. So I went back and corrected the source files.


Wow I cant wait to get this installed.
Great work Matt, thank you
Attachments
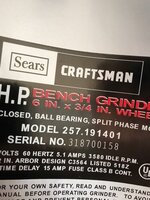

396foxRN
Well-known member
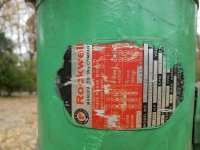
I tried to send these to you via PM, but cant seem to get images from my files into the PM, so here ya go. One is decent condition, one is not. I was hoping you'd already made some old Rockwell tags before and could use those as templates and just change the codes/numbers.
Attachments


ncollins31
New member
Hi Mattblast!
I bought this old Craftsman 3/4 HP block grinder from an auction several years ago to get the cast iron pedestal under it. When I started shopping around for a replacement grinder to put on top, I ultimately went with a Dewalt DW758 - that thing danced around so much it wouldn't stay on a lead pedestal! Thanks to garagejournal forums, I was able to realize what a diamond in the rough I had on that auction pedestal. Thanks to MattBlast, I wont have to make excuses for why the grinder looks like it does!
MattBlast - thank you for the time, effort and energy you put in to helping Joe's like me make silk purses out of these sows' ears!
I am new here and hope this is the right place to put these images. Please let me know what I owe for the new sticker. Thanks again!
I bought this old Craftsman 3/4 HP block grinder from an auction several years ago to get the cast iron pedestal under it. When I started shopping around for a replacement grinder to put on top, I ultimately went with a Dewalt DW758 - that thing danced around so much it wouldn't stay on a lead pedestal! Thanks to garagejournal forums, I was able to realize what a diamond in the rough I had on that auction pedestal. Thanks to MattBlast, I wont have to make excuses for why the grinder looks like it does!
MattBlast - thank you for the time, effort and energy you put in to helping Joe's like me make silk purses out of these sows' ears!
I am new here and hope this is the right place to put these images. Please let me know what I owe for the new sticker. Thanks again!
Attachments
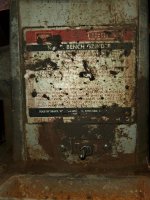

Hi Mattblast!
I bought this old Craftsman 3/4 HP block grinder from an auction several years ago to get the cast iron pedestal under it.
That’s going to look great once restored. I was able to get the label done to Igor and it will go out with tomorrow’s mail.
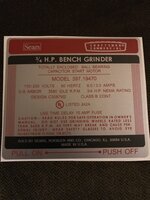
Attachments
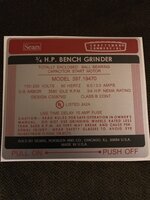
@Mattblast- a 397.19350 came into my possession today - that I plan on fully restoring.
I saw on pg 7 you had a label for this. What's the chance I could purchase one from you along w/ any other labels for the 397.19350 that you may have already made? Mine is also fully yellowed like your 'before' example. Thank you! Your work is incredible
I saw on pg 7 you had a label for this. What's the chance I could purchase one from you along w/ any other labels for the 397.19350 that you may have already made? Mine is also fully yellowed like your 'before' example. Thank you! Your work is incredible
@Mattblast- a 397.19350 came into my possession today - that I plan on fully restoring.
I saw on pg 7 you had a label for this. What's the chance I could purchase one from you along w/ any other labels for the 397.19350 that you may have already made? Mine is also fully yellowed like your 'before' example. Thank you! Your work is incredible
Here is the before photo you sent to me:

And the new one on the way:

Attachments


396foxRN
Well-known member
Hey Matt, was wondering if you looked into the question on the Rockwell labels a few posts up the page?
Ss95003
Well-known member
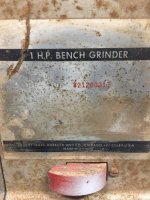
Matt I have several block grinders but I think these are the two I’m going to tackle right now. Is there anyway I can get some stickers for them?
The first One all that is left is the 1hp and serial number. But I’m pretty sure it’s a 397.19360 which I believe you’ve made several for.
The first One all that is left is the 1hp and serial number. But I’m pretty sure it’s a 397.19360 which I believe you’ve made several for.
Attachments

Does anyone know where to get Wilton vise decals?
I tried ordering some and they couldn't find a part number. I need a bunch. This one...
https://www.ebay.com/itm/WILTON-6-I...929136?hash=item420d4c0bf0:g:gTUAAOSwCDxd3pT6
I tried ordering some and they couldn't find a part number. I need a bunch. This one...
https://www.ebay.com/itm/WILTON-6-I...929136?hash=item420d4c0bf0:g:gTUAAOSwCDxd3pT6
Does anyone know where to get Wilton vise decals?
I tried ordering some and they couldn't find a part number. I need a bunch. This one...
https://www.ebay.com/itm/WILTON-6-I...929136?hash=item420d4c0bf0:g:gTUAAOSwCDxd3pT6
I can make them for you. Let me know the dimensions and ideally send me a scan of the original for positioning. You can PM me your mailing address.