To avoid these ads, REGISTER NOW!

ZMotorsports Shop Projects 2.0

To avoid these ads, REGISTER NOW!

PhantomEB

Well-known member
Joined
Feb 6, 2006
Messages
6,817
Location
Medicine Hat, AB, Canuckistan
Thanks for the explanation. I too will be doing something to put as much as I can inside to keep out of the mud. I can only see seating for one back there in mine. Will see how much room I get with the new wheel wells. Gonna be fun making room for a small box like that, VIARR compressor/small tank fire extinguisher and 12vbeer/subway cooler. Plus a seat, all in an early bronco.
 
OP
Z

zmotorsports

ALLIANCE MEMBER
Joined
Oct 20, 2009
Messages
21,464
Location
Northern Utah
Thanks for the explanation. I too will be doing something to put as much as I can inside to keep out of the mud. I can only see seating for one back there in mine. Will see how much room I get with the new wheel wells. Gonna be fun making room for a small box like that, VIARR compressor/small tank fire extinguisher and 12vbeer/subway cooler. Plus a seat, all in an early bronco.


You’re welcome. Thanks for stopping by.

I was going to mount my Hi-Lift to my roll bar but due to having other things in the cargo area just ended up fabricating a mount to my tire carrier. It works well but I’d rather have it out of the elements. Luckily I avoid mud as much as humanly possible.
 
OP
Z

zmotorsports

ALLIANCE MEMBER
Joined
Oct 20, 2009
Messages
21,464
Location
Northern Utah
I didn’t get more than a few minutes in my shop last night but did have the opportunity to clean up and put some tools away from last week’s fabrication work.

I also cleaned off my workbenches and disposed of a few boxes and left over parts from my son’s WJ project. This is the first time in two years my benches have been free and clear of anything on them.
b5376364660c5401b2b2b4efac2ffa03.jpg
 

Attachments

  • b5376364660c5401b2b2b4efac2ffa03.jpg
    b5376364660c5401b2b2b4efac2ffa03.jpg
    93.5 KB · Views: 0
Last edited:

Finallygotit

ALLIANCE MEMBER
Joined
Jul 6, 2013
Messages
4,097
Location
Tucson, AZ
:willy_nil


b5376364660c5401b2b2b4efac2ffa03.jpg

Mike, that is just not right. Are you sick, bud? You can tell me, it's OK. ;)

:beer:
 

Attachments

  • b5376364660c5401b2b2b4efac2ffa03.jpg
    b5376364660c5401b2b2b4efac2ffa03.jpg
    93.5 KB · Views: 0
OP
Z

zmotorsports

ALLIANCE MEMBER
Joined
Oct 20, 2009
Messages
21,464
Location
Northern Utah
After a long weekend of having to be at work due to this “event” that is taking place in our world right now, it was nice to get off work at a reasonable hour and get home to work in the shop.

We ran into a minor interference issue on my son’s WJ. He had been hearing a slight noise when he’d hit a bump and we couldn’t locate, it until last week. When we built the long arm suspension system we pushed the front axle forward a small amount to keep the tire centered in the wheelwell but also to keep the springs as straight as possible. Well the front sway bar appears to be barely contacting the coil springs when compressing.

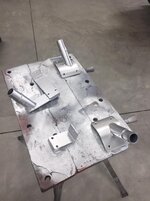
While I machined a couple of standoffs for the Hi-Lift jack to mount to the rear hoop, my son primed and painted the last two remaining tube structures for the rear cargo area.
3dc7c78e8af6a2312d937f9f51bdeb4e.jpg

1da2903fdc026f97aca509d90b755b43.jpg

eb7137cb4756aada25098e9c8a9103dc.jpg

f316b06eab535eeb401f05e7839da875.jpg

6e0ceba179ec58724c56e8a3ba79cc1c.jpg

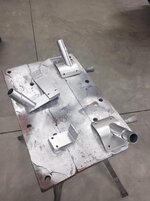
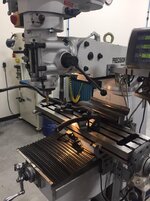
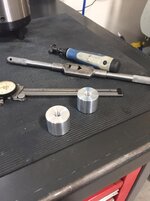
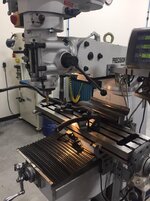
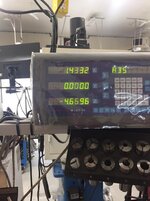
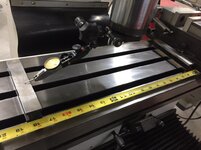
In between coats of paint my son removed the sway bar so I could begin working on it. I mounted it to my milling machine to flatten out the mounting tabs and then I will drill the new hole 1” further forward and trim an inch off of the end. This should provide plenty of clearance.

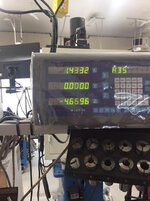
This was kind of a fun project as I’ve not had to offset my table to head like this before. Head pulled forward and table pushed back nearly to capacity.
6d579e8407e1ca8de67d76a6d6fbd188.jpg

557f853aa209e10b780c7a0eb3e9ec5c.jpg

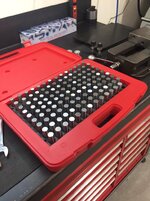
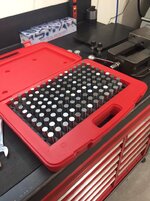
Pin gage set used to locate center of the mounting hole and then measure back 1” for the new hole.
4726f3e946f2e92fa01225fbd21b5cdf.jpg

4e4b90bf446f4efc266d305c3735e621.jpg

8544597e8d38ddaa5af3e9c60a5f637e.jpg

Started with a 1/2” roughing end mill then switched over to a 4-flute for cleanup.
2be2c35689eda2137562a2e1f486b215.jpg

4089c0358e8aa316b11ee0518de0ad06.jpg

68c5b75ae20e4a2300a620d9fd629135.jpg

Lastly before closing up the shop, we mounted the sliders as we picked them up from the powder coater already.
89e1d04e7b35af4f7edf3855ed7427ba.jpg

Thanks for looking.
 

Attachments

  • f316b06eab535eeb401f05e7839da875.jpg
    f316b06eab535eeb401f05e7839da875.jpg
    80.5 KB · Views: 0
  • 1da2903fdc026f97aca509d90b755b43.jpg
    1da2903fdc026f97aca509d90b755b43.jpg
    77.7 KB · Views: 0
  • eb7137cb4756aada25098e9c8a9103dc.jpg
    eb7137cb4756aada25098e9c8a9103dc.jpg
    68.6 KB · Views: 0
  • 6e0ceba179ec58724c56e8a3ba79cc1c.jpg
    6e0ceba179ec58724c56e8a3ba79cc1c.jpg
    87.7 KB · Views: 0
  • 6d579e8407e1ca8de67d76a6d6fbd188.jpg
    6d579e8407e1ca8de67d76a6d6fbd188.jpg
    98.4 KB · Views: 0
  • 557f853aa209e10b780c7a0eb3e9ec5c.jpg
    557f853aa209e10b780c7a0eb3e9ec5c.jpg
    98.5 KB · Views: 0
  • 4726f3e946f2e92fa01225fbd21b5cdf.jpg
    4726f3e946f2e92fa01225fbd21b5cdf.jpg
    112.6 KB · Views: 0
  • 4e4b90bf446f4efc266d305c3735e621.jpg
    4e4b90bf446f4efc266d305c3735e621.jpg
    89.7 KB · Views: 0
  • 8544597e8d38ddaa5af3e9c60a5f637e.jpg
    8544597e8d38ddaa5af3e9c60a5f637e.jpg
    85.5 KB · Views: 0
  • 3dc7c78e8af6a2312d937f9f51bdeb4e.jpg
    3dc7c78e8af6a2312d937f9f51bdeb4e.jpg
    146.6 KB · Views: 0
  • 89e1d04e7b35af4f7edf3855ed7427ba.jpg
    89e1d04e7b35af4f7edf3855ed7427ba.jpg
    69.5 KB · Views: 0
  • 68c5b75ae20e4a2300a620d9fd629135.jpg
    68c5b75ae20e4a2300a620d9fd629135.jpg
    119.2 KB · Views: 0
  • 4089c0358e8aa316b11ee0518de0ad06.jpg
    4089c0358e8aa316b11ee0518de0ad06.jpg
    101.5 KB · Views: 0
  • 2be2c35689eda2137562a2e1f486b215.jpg
    2be2c35689eda2137562a2e1f486b215.jpg
    114.9 KB · Views: 0
Last edited:

OutlawDrifter

Well-known member
Joined
Jan 20, 2015
Messages
3,898
Location
KS
Mike, I love a challenge, and that just looks like fun!

A mill and lathe are two of my "wants" for when there is fun money to spend...but, a hydraulic exhaust tubing bender like a Huth or Ben Pearson, comes first.
 
OP
Z

zmotorsports

ALLIANCE MEMBER
Joined
Oct 20, 2009
Messages
21,464
Location
Northern Utah
Mike, I love a challenge, and that just looks like fun!

A mill and lathe are two of my "wants" for when there is fun money to spend...but, a hydraulic exhaust tubing bender like a Huth or Ben Pearson, comes first.

Thanks Marc. You'll love the world of possibilities that opens up with a lathe and milling machine.

Thanks for checking in on my latest project Marc.
 
OP
Z

zmotorsports

ALLIANCE MEMBER
Joined
Oct 20, 2009
Messages
21,464
Location
Northern Utah
So with all of the fear and worry that is going on right now I though I would post up a positive observation about two vendors that I have used for a while now and something I noticed today.

With all of the fabrication I have been doing over the past 3 years in my new shop I have depleted a couple of items to the point of needing to reorder. I am pretty **** about having supplies and/or "backups" on the shelf for various items. My wife jokes with me about if I have a backup for her.:bounce:

Back in December of 2015 when I purchased my two new bandsaws, my Baileigh BS-210 horizontal bandsaw and my Birmingham KB-45 vertical bandsaw, I also ordered some new blades for each from bandsawbladesdirect.com. I had used them on my previous machines and actually let the replacements go with the saws when I sold them. I had ordered 4 of each blades at the time. I noticed I had a missing tooth or two on my vertical bandsaw a few weeks ago but last night my son had the blade on the horizontal break so I figured I would replace both while I had the box down from the shelf. I noticed that I was using the last saw blade for the horizontal and would have one remaining for the vertical so I ordered a few more of each today.

The guy was very friendly on the phone even though I was probably being less than helpful because I didn't know when I had ordered the blades last or even if I ordered them under my own name or my old company's name. He finally found my last order and after placing a new order I realized that the cost had only gone up a couple of dollars on each one. At first I was contemplating ordering a roll and just welding them together myself but was so pleased with the overall quality and shipping speed last time plus how quickly I could change them out and be back in business I went ahead and just duplicated my order. I was really surprised that the cost hadn't gone up more than that. Don't get me wrong, I don't want to pay any more than I have to but in 4+ years only going up a couple of bucks is pretty amazing that a company can control their costs in a manner that allows them to pass that along to their customers.

The other items I ordered were some 12" sanding disks and 6x48 sanding belts from Benchmark Abrasives as I am on my second to last belt and only about 4 disks left. Same experience as before but with the exception that I opted to try out the latest and greatest ceramic media. I placed the order yesterday, received a tracking notification that states they will be her tomorrow.

Great service from two different companies that I purchase products from very infrequently yet they consistently deliver quality products and treat me professionally and respectfully each time I call.
 

bmxdad

Well-known member
Joined
Feb 18, 2014
Messages
2,539
Location
Puyallup, WA
Kind of curious about machining the sway bar. Aren't you concerned about it breaking at the thinned area? I've heard of front torsion bars breaking because of a bad bushing wearing into the bar.
 
OP
Z

zmotorsports

ALLIANCE MEMBER
Joined
Oct 20, 2009
Messages
21,464
Location
Northern Utah
That's quite the setup on the swaybar! Did it chatter when cutting?

It didn't chatter much at all. I was worried about that as well when I was setting up but it really didn't vibrate or chatter. You can see the surface finish is still quite good, other than the shot where I finished with the roughing end mill and hadn't used the 4-flute end mill yet.
 
OP
Z

zmotorsports

ALLIANCE MEMBER
Joined
Oct 20, 2009
Messages
21,464
Location
Northern Utah
Kind of curious about machining the sway bar. Aren't you concerned about it breaking at the thinned area? I've heard of front torsion bars breaking because of a bad bushing wearing into the bar.

No I'm not worried. It's the same thickness it was before. I didn't make it any thinner, I just moved the mounting tab measurements back an inch and will cut an inch off the end. The taper is a bit more aggressive but the actual thickness at the mounting hole is the same.
 

DennisK

Well-known member
Joined
May 2, 2009
Messages
145
I've seen your threads on the RV sites, nice coach! Did you stress relieve the edges on the those cuts hard? I can turret my Bridgeport to do some weird stuff and try to manual 5 axis?

Got to skim through your other threads......a couple of weeks of lunches well spent !

Nice Shop and view!
 
OP
Z

zmotorsports

ALLIANCE MEMBER
Joined
Oct 20, 2009
Messages
21,464
Location
Northern Utah
I've seen your threads on the RV sites, nice coach! Did you stress relieve the edges on the those cuts hard? I can turret my Bridgeport to do some weird stuff and try to manual 5 axis?

Got to skim through your other threads......a couple of weeks of lunches well spent !

Nice Shop and view!

Thanks for reading through my projects and for following along.

No stress relief. I still need to drill the new holes and cut the excess off of the ends and then I'll do some blending to reduce the stress risers. This has all been rough cutting so far.
 
To avoid these ads, REGISTER NOW!

casmurbax

Well-known member
Joined
Sep 25, 2012
Messages
2,761
Location
Wilton, NY
Mike,

That's nice to know that those vendors had what you needed and was able to find your old order. Not much cost difference to boot.

Glad to see you cleaned up your bench top...What is that top made out of?
 
OP
Z

zmotorsports

ALLIANCE MEMBER
Joined
Oct 20, 2009
Messages
21,464
Location
Northern Utah
Mike,

That's nice to know that those vendors had what you needed and was able to find your old order. Not much cost difference to boot.

Glad to see you cleaned up your bench top...What is that top made out of?

Thank you.

The workbenches have two layers of 3/4" plywood covered by 10 gauge steel. It is very solid and no deflection at all even with heavy parts.
 
OP
Z

zmotorsports

ALLIANCE MEMBER
Joined
Oct 20, 2009
Messages
21,464
Location
Northern Utah
It's been a hell of a morning here in Northern Utah. We had a 5.7 earthquake at around 7:10 am.

People are freaked out and not processing things well at this point. We've been trying to comfort people and help them through this but I am far from being qualified to be a counselor, I'm a mechanic for hell's sake.:bounce:
 

gearhead1960

ALLIANCE MEMBER
Joined
Mar 21, 2019
Messages
1,864
Location
Manassas, VA, a small blot in history
It's been a hell of a morning here in Northern Utah. We had a 5.7 earthquake at around 7:10 am.

People are freaked out and not processing things well at this point. We've been trying to comfort people and help them through this but I am far from being qualified to be a counselor, I'm a mechanic for hell's sake.:bounce:

Haha...I've only been through one major earthquake in my life and it was like a 6. It was the quake that almost toppled the Washington Monument. What a helluva ride. Didn't know what the F.... was happening until it was over :lol_hitti
 
OP
Z

zmotorsports

ALLIANCE MEMBER
Joined
Oct 20, 2009
Messages
21,464
Location
Northern Utah
Haha...I've only been through one major earthquake in my life and it was like a 6. It was the quake that almost toppled the Washington Monument. What a helluva ride. Didn't know what the F.... was happening until it was over :lol_hitti

I won't say this is my first but it was the first one that I really felt like I did and was especially anxious to the fact that it lasted as long as it did. Seemed like much longer but it had to be at least 5-7 seconds. I know that doesn't seem like a long time but I had just walked into my office and sat down when it hit. I was up and out my door heading for the shop before it quit shaking.
 

rattle_snake

Well-known member
Joined
Jun 25, 2015
Messages
5,231
Location
Chandler, AZ
Thanks for sharing the photos of your previous projects. The quality and attention to detail appear very high back then, I know you have progresses a lot but the rest of the world is still impressed with your work.
:bowdown:
I assume that many of your project took a significant amount of hours/days/months that may not show in the finished photos.

Looks like you have laid down a fair amount of paint, you must love to do body work. As a painter it must have been hard to have someone else paint your coach and ignore the inevitable imperfections.

I didn't know sleds could be so over-the-top, some fancy money pits for sure!
 
OP
Z

zmotorsports

ALLIANCE MEMBER
Joined
Oct 20, 2009
Messages
21,464
Location
Northern Utah
Thanks for sharing the photos of your previous projects. The quality and attention to detail appear very high back then, I know you have progresses a lot but the rest of the world is still impressed with your work.
:bowdown:
I assume that many of your project took a significant amount of hours/days/months that may not show in the finished photos.

Looks like you have laid down a fair amount of paint, you must love to do body work. As a painter it must have been hard to have someone else paint your coach and ignore the inevitable imperfections.

I didn't know sleds could be so over-the-top, some fancy money pits for sure!

Thank you Justin. Some of those projects were years to build. My 1940 Chev coupe was 5 years exactly as I showed it in the exact same Cache Valley Cruise-In that I purchased it at 5 years prior. Granted much of that time was spend making money to fund the project and not all of that 5 years was spent building the car.

On the yellow 1936 Ford coupe that was a 27-month project and even then there were a few other smaller projects in between comprised of sleds and ATV's.

My sandrail was a 7-month project and that was fairly precise working on most weekends and each night after work.

Most of the sleds and complete ATV builds were 6-10 week long projects on average.

I actually liked doing paint & body work when I had a place to do it, like the shop I converted on my parent's farm. Having my supplies on a shelf within easy reach and organized made a huge difference. Once I lost that option I started to despise paint & body work because I swore I would never paint at my home shop and having to paint something outside in the back yard was hard on my OCD.

I learned the basics of paint & body work from my brother who messed with it on the side and then when I started working at a paint & body supply house in Ogden in high school I wanted to really perfect that skill and build show cars. That's when I really started pushing myself to get the body nearly perfect before primer and fine tuned my color sanding, polishing and buffing techniques. Something about having a completely fresh paint job, sand it down with 1k through 1600 grit wet sandpaper to flatten it out and eliminate that slight orange peel and then polish a step at a time and bring that mirror finish to life that really hits me and made me feel like I had created a piece of art. I don't get that feeling as much since I quit painting.

Thanks for taking the time to look through all of the pictures Justin and checking in on my projects. I've sure enjoyed following along on yours as well as you are working on some cool **** yourself.
 
OP
Z

zmotorsports

ALLIANCE MEMBER
Joined
Oct 20, 2009
Messages
21,464
Location
Northern Utah
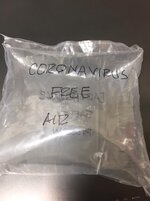
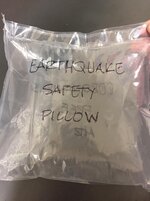
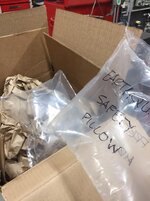
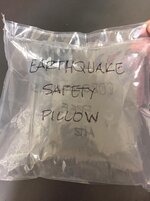
I had a Utah care package arrive today.

7ab3add048c8361db3b9c1cf5c0c76dc.jpg

191f614f5230562da887138c56cbecdf.jpg

c436334d1401b793ef32bd4f4c261b3c.jpg

They’re multi-purpose.
 

Attachments

  • c436334d1401b793ef32bd4f4c261b3c.jpg
    c436334d1401b793ef32bd4f4c261b3c.jpg
    79.8 KB · Views: 0
  • 191f614f5230562da887138c56cbecdf.jpg
    191f614f5230562da887138c56cbecdf.jpg
    67.2 KB · Views: 0
  • 7ab3add048c8361db3b9c1cf5c0c76dc.jpg
    7ab3add048c8361db3b9c1cf5c0c76dc.jpg
    51.8 KB · Views: 0
Last edited:
OP
Z

zmotorsports

ALLIANCE MEMBER
Joined
Oct 20, 2009
Messages
21,464
Location
Northern Utah
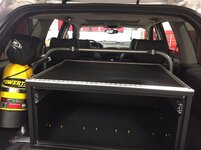
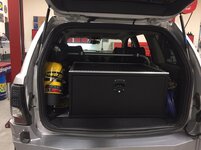
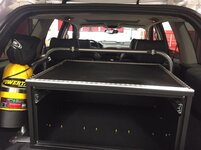
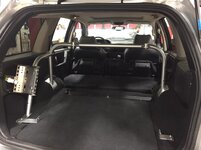
We finished up the rear cargo area of my son’s WJ tonight as well as finished the machining on the front sway bar.

5c4fa4b9f214fbec3e11d39abfec2c3f.jpg

a8553561e037c74d34e0e6011e7cdf37.jpg

c8ae54919f6ffadeb96e73107e96213a.jpg

d84673157143da5f7f4e84260632d3a3.jpg

27ab02c36d2cd8d0c8be36e24955a9c4.jpg

Had to get creative. Zero’d on the the holes center and shifted it an inch. I actually placed a 2-4-6 block under it and my large angle plate to clamp it solid before drilling.
f8ed4a0e82bce16c1279d56f8030743b.jpg

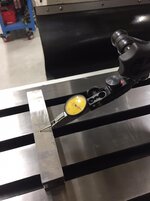
Lastly while the paint was drying on the sway bar I trammed the head.
3e65ad01c9857873f39acc9f57ce0c59.jpg

f00ac8c0a745bf32f848e7e710122dd3.jpg

Less than half a thou out in 18”. I can live with that for a quick tram.
8e3df99a6f1cd12497d4c9eeb8ae7e48.jpg

Vise squared up back on the table, cleaned and ready for its next job.
a1928398519264633020aaf7eb934dc9.jpg

Hopefully I can get out of work at a reasonable time to get the rest of the shop cleaned.


Thanks for looking.
 

Attachments

  • a1928398519264633020aaf7eb934dc9.jpg
    a1928398519264633020aaf7eb934dc9.jpg
    94.3 KB · Views: 0
  • 3e65ad01c9857873f39acc9f57ce0c59.jpg
    3e65ad01c9857873f39acc9f57ce0c59.jpg
    54.6 KB · Views: 0
  • f8ed4a0e82bce16c1279d56f8030743b.jpg
    f8ed4a0e82bce16c1279d56f8030743b.jpg
    96.7 KB · Views: 0
  • 8e3df99a6f1cd12497d4c9eeb8ae7e48.jpg
    8e3df99a6f1cd12497d4c9eeb8ae7e48.jpg
    80.5 KB · Views: 0
  • f00ac8c0a745bf32f848e7e710122dd3.jpg
    f00ac8c0a745bf32f848e7e710122dd3.jpg
    74.5 KB · Views: 0
  • 27ab02c36d2cd8d0c8be36e24955a9c4.jpg
    27ab02c36d2cd8d0c8be36e24955a9c4.jpg
    74.1 KB · Views: 0
  • d84673157143da5f7f4e84260632d3a3.jpg
    d84673157143da5f7f4e84260632d3a3.jpg
    73.9 KB · Views: 0
  • c8ae54919f6ffadeb96e73107e96213a.jpg
    c8ae54919f6ffadeb96e73107e96213a.jpg
    70.3 KB · Views: 0
  • a8553561e037c74d34e0e6011e7cdf37.jpg
    a8553561e037c74d34e0e6011e7cdf37.jpg
    69.2 KB · Views: 0
  • 5c4fa4b9f214fbec3e11d39abfec2c3f.jpg
    5c4fa4b9f214fbec3e11d39abfec2c3f.jpg
    76.3 KB · Views: 0
Last edited:

rattle_snake

Well-known member
Joined
Jun 25, 2015
Messages
5,231
Location
Chandler, AZ
Hope your care package worked out for you
:)

Is the cargo mount system to keep the large box in place in a rollover or impact event? What all goes in that box, that is a big one!
I built a custom box-o-stuff in my bronco for stuff like tools, spare parts, first aid and so on. It was about 1/4 that size. it was mounted securely and lockable (no roof).
 
OP
Z

zmotorsports

ALLIANCE MEMBER
Joined
Oct 20, 2009
Messages
21,464
Location
Northern Utah
Hope your care package worked out for you
:)

Is the cargo mount system to keep the large box in place in a rollover or impact event? What all goes in that box, that is a big one!
I built a custom box-o-stuff in my bronco for stuff like tools, spare parts, first aid and so on. It was about 1/4 that size. it was mounted securely and lockable (no roof).


Justin’s, the hoop is for accessory mounting to Jeep things secured. Mainly the Hi-Lift jack and his Powertank but there’s still some space for whatever else he may come up with down the road.

The Mac’s Black Box is the same one I’ve had in my Jeep for the past four years but was designed for a JKU so we had to build a different mounting system to hold it securely in his WH but the mounting system is j dependent if the hoop. The hoop doesn’t secure the box.

He is carrying his tools, recovery gear and some spare fluids in his toolbox.

Thanks for stopping by Justin.
 
OP
Z

zmotorsports

ALLIANCE MEMBER
Joined
Oct 20, 2009
Messages
21,464
Location
Northern Utah
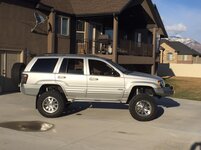
While my son put the finishing touches on his Jeep last night I did a major cleaning of the shop as it was filthy and dusty from the fabrication work lately. He then backed the Jeep out of the shop to take pictures and drove it home.

ae7a5dbb49b057b2d68933ebf7b8c274.jpg

Sliders match pretty well.
355a61674d251d764eea01169550d7f1.jpg

6679158b458abbb339e33d7f270796e2.jpg

16d59bcd5793f6373becd7a4896018e7.jpg

8c5ebd84b10b661c27cadb1913cafce6.jpg

674393213eb3833f495d563e74d7bc8b.jpg

4cb05e32fc1546bd9a9e0d7d8ae3c625.jpg

Thanks for looking.
 

Attachments

  • ae7a5dbb49b057b2d68933ebf7b8c274.jpg
    ae7a5dbb49b057b2d68933ebf7b8c274.jpg
    60.7 KB · Views: 0
  • 355a61674d251d764eea01169550d7f1.jpg
    355a61674d251d764eea01169550d7f1.jpg
    58.8 KB · Views: 0
  • 6679158b458abbb339e33d7f270796e2.jpg
    6679158b458abbb339e33d7f270796e2.jpg
    67.4 KB · Views: 0
  • 16d59bcd5793f6373becd7a4896018e7.jpg
    16d59bcd5793f6373becd7a4896018e7.jpg
    87.3 KB · Views: 0
  • 674393213eb3833f495d563e74d7bc8b.jpg
    674393213eb3833f495d563e74d7bc8b.jpg
    82.1 KB · Views: 0
  • 8c5ebd84b10b661c27cadb1913cafce6.jpg
    8c5ebd84b10b661c27cadb1913cafce6.jpg
    82.3 KB · Views: 0
  • 4cb05e32fc1546bd9a9e0d7d8ae3c625.jpg
    4cb05e32fc1546bd9a9e0d7d8ae3c625.jpg
    77.8 KB · Views: 0
Last edited:

Duker

Well-known member
Joined
Sep 25, 2010
Messages
10,863
Location
Livingston, TX
That looks great Mike...! You tell it’s for a young guy... the first thing I thought was how the heck would I get in and out of the thing.... !


Sent from my iPad using Tapatalk Pro
 
OP
Z

zmotorsports

ALLIANCE MEMBER
Joined
Oct 20, 2009
Messages
21,464
Location
Northern Utah
That looks great Mike...! You tell it’s for a young guy... the first thing I thought was how the heck would I get in and out of the thing.... !


Sent from my iPad using Tapatalk Pro

Thanks Duke. Luckily both he and his wife are tall and it's pretty easy for them to get in and out of.
 
To avoid these ads, REGISTER NOW!
Top Bottom