To avoid these ads, REGISTER NOW!

Between 485 & 705 SQ/FT Mid-Century Moto Mecca Makeover

Workspaces between 485 and 705 squarefeet.

capww8

Well-known member
Joined
Sep 6, 2013
Messages
94
Another way to find deals on Festool....

Festool has a 30-day return policy on tools. Those returned tools get refurbished and sold at discounts. Go to festoolrecon.com and register for alerts. Sometimes they have none. Other times they have quite a few different products. Tends to be pretty popular on Black Friday in the past.

Be careful... this approach leads to compulsory festool purchases as the refurbs are often only available for a matter of minutes.

I’m sure that MFK700 and Planex will come in handy some day...
 
To avoid these ads, REGISTER NOW!

H1Pete

Active member
Joined
Dec 19, 2014
Messages
26
Gregor - would you post some details about how you engine turned the number plate? Always loved that look. Great video btw!
 
OP
S

sakurama

Well-known member
Joined
Oct 10, 2010
Messages
1,458
Location
Portland - the cool one.
I feel like I should be working on the GS but at the same time this feels like found time - free time in a way, that could be going to wrapping things up. So I'm doing a lot of that sort of thing.

i-DDdvjq7-X2.jpg


This is where I used to keep the 5C lathe collets.

Since the 5C collet rack turned out so nice I decided I needed to make one for the R8 collets. The goal is to get all the Bridgeport stuff together and all the lathe stuff together. I really need to deal with all the end mills and cutters but that's a bigger project than I want to get into.

i-FcCXSv4-X2.jpg


Since the mill doesn't need so many sizes of collets (the lathe collets hold parts of many sizes while the mill collets hold end mills of limited and consistent sizes) I laid out a bit of extra room for expansion just in case.

i-frGWSgK-X2.jpg


I have a few more larger cutters like fly cutters or face mills but they can live in the side door. This will cover me for now.

As a side note the new lathe tool holder is really a nice improvement. I like that the tools are all laid out in the orientation that I will use them in. It alleviates my dyslexic tendencies.

i-gxHRkBM-X2.jpg


Engine turning is done many ways - traditionally with a soft wood dowel and valve grinding paste I think. I went for the quick way which was a scotchbrite disc from my air tool collection and then you just lay out a grid.

i-xpHQFS9-X2.jpg


If you're using a 2" disc like I was then you'd lay out a grid of lines at 1" intervals and then you just use the drill press and press down, move over one inch, press down and keep repeating.

i-ZpcTsTj-X2.jpg


Since I'd robbed some parts off of Lara's XR and it had been run pretty hard in the flat track races it was time to give it a bath and get it running.

i-vS7xsdQ-X2.jpg


The exhaust has been getting progressively louder and wobblier and I knew it was rusted but didn't realize it was broken in two. That tiny square at the end of the perf tube was all the packing that was left. So the plan there is to make a new exhaust from stainless and machine a new end cap from aluminum and, of course, to repack it.

And because I can't not be me and because if I was going to make a new exhaust it seems like a good time to finally clean up the corroded head and barrel which were destroyed from the trip to the salt flats.

i-drKFnCH-X2.jpg


So I pulled the engine, took it apart and bead blasted the head and barrel back to it's shiny former self. I drew the line at splitting the cases. I man has to have limits.

This used to be a really impressive little XR and was so clean and tidy. The years haven't been kind but I'm looking forward to getting it back into shape and making it cool again. No big upgrades, just lots of cosmetic maintenance.

Well, maybe a few little things. I mean, while it's apart...

Gregor

PS Oh, and the last video of the XR series is now up. It was a bit of a mess with a few different cameras being used and me not having a handle on color correcting just yet but it will work for the purpose or wrapping this up.

 
Last edited:

Sham

Well-known member
Joined
Jan 29, 2013
Messages
76
Location
Antibes, France
As for the "engine turning", just my $0.02 : having a mild OCD tendancy myself, I made a jig to layout precisely the circles :


That did the trick pretty nicely. Details here.
 

E12-535iTurbo

Well-known member
Joined
Feb 27, 2014
Messages
492
Location
The Netherlands
Thanks for the vid and update Gregor. It's greatly appreciated!

Could you share any details on the blasting of alu-parts? Do you only use the blaster box for that specifically or do you switch? I've the desire to get me a blaster cabinet but have no experience at all. So all recommendations and experience is very welcome.
 

Brian R

Well-known member
Joined
Dec 1, 2009
Messages
591
Location
Chestertown, MD
Gregor,
That smile when you get back from riding it after you solved the ECU problem says it all. Well done and thanks for the update.
 

H1Pete

Active member
Joined
Dec 19, 2014
Messages
26
Thanks Gregor and Sham. I know the general concept but never found material to use for the turning (is that what you call it?). Scotchbrite pad is so obvious in hindsight. Kicking myself for not thinking of that.
 
OP
S

sakurama

Well-known member
Joined
Oct 10, 2010
Messages
1,458
Location
Portland - the cool one.
As for the "engine turning", just my $0.02 : having a mild OCD tendancy myself, I made a jig to layout precisely the circles...
That did the trick pretty nicely. Details here.

That is a very cool site and the jig is awesome. I think if I had intentions of doing it more I would make one. I can use the mills DRO for smaller things but I don't think I'll make a habit of it. Someone mentioned to me to do a technique that watchmakers use which I'd like to try - it's essentially just overlapping lines like an end mill would leave. Can't recall the name of it.

Thanks for the vid and update Gregor. It's greatly appreciated!

Could you share any details on the blasting of alu-parts? Do you only use the blaster box for that specifically or do you switch? I've the desire to get me a blaster cabinet but have no experience at all. So all recommendations and experience is very welcome.

Again, I have a hard time remembering where someone replied so it's hard to find messages - especially on IG. But I'd mentioned that I am using Potters AC grade glass bead. I'm not knocking the pressure down from the compressor so it's really high - like over 100psi and that is most likely pulverizing the glass bead to powder but it makes really fast work of stripping things. Someone had mentioned using ceramic beads which would stand up to the pressure but I haven't researched that.

It's a real hassle to swap media - you don't want to do that. I had a coarse grade bead at one point - from horror fright - and it was an awful disaster. Parts were rough, dull and ugly. I asked the guys at Baisley High Performance what they used and then got that. It's perfect. I only use the cabinet for bead blasting. I only want the one surface and the one look from that bead so I'm happy with that. The process of swapping that media was a complete mess so I only want to do that once a year if that.

Get a cabinet that is large enough too. I worried my cabinet was too large but like the mill I haven't regretted it one bit.

I did finally get a buffer but it's not here yet. I spent about 3 hours hand sanding a new side case for the project XR and that time was enough to remind me how much I hate hand processes. I'd been searching for one for about two years and finally got a good deal.

i-TSTVjZh-X2.jpg


There's a lot of reasons to polish outside of the looks. When I had my studio in Soho I shared the floor with a company, Nanz, that made high end door hardware. The polishing room was just outside my studio and I had unfettered access. I polished everything but mostly my old fans. A real buffer is a great tool and a polished surface is far more resistant to oxidation and rust.

We will go over that when it shows up. In the mean time I'm going to get the little XR wrapped up and unpack the 2x72" belt sander that I bought a year or two ago. I bought it and never opened the box because I had no room. Crazy right? It's still in the box under the router table.

But this week is the week. Lucas wants another knife for his birthday and this seems like the right opportunity to set the grinder up and get it working. I have some space now any my first project will be a knife for Lucas that we'll make together. No forging - just stock removal.

So lots of cool stuff planned for the shop in the next few weeks. It seems that all these projects I've never had the time for are all finding the perfect time to be done in this crisis.

G
 

On Edge

Well-known member
Joined
Jan 25, 2005
Messages
110
Location
Cincinnati, OH
Love the bike! I have really enjoyed your video content. I can see you getting a big following as more people find you on the Tube. One thing I just love and have taken from you is your sketches in your notebook. I have an Engineering background and I just love seeing your notebook. I have started doing the same thing because of you. Also I think I need to take the plunge and buy real baltic birch plywood. Those ends look so good and your shop organization with it looks awesome. Thanks for sharing. Always look forward to seeing what you are up to.
 
OP
S

sakurama

Well-known member
Joined
Oct 10, 2010
Messages
1,458
Location
Portland - the cool one.
Love the bike! I have really enjoyed your video content. I can see you getting a big following as more people find you on the Tube. One thing I just love and have taken from you is your sketches in your notebook. I have an Engineering background and I just love seeing your notebook. I have started doing the same thing because of you. Also I think I need to take the plunge and buy real baltic birch plywood. Those ends look so good and your shop organization with it looks awesome. Thanks for sharing. Always look forward to seeing what you are up to.

If you're thrifty it hurts to pay 30-50% more for baltic birch. The difference is that any scrap actually has value. Jigs, tiny blocks or end cuts all become really pretty and add all this visual appeal. Plus, sanding it is really nice. It doesn't flake or fray and the top is fairly thick - as thick as the other plies - unlike shop grade or worse, what you get at Home Depot which is a paper thin veneer over ****** ply and particle.

One project with it and you'll realize it's worth it.

My biggest regret is that I built all my cabinets from veneer plywood. I did that as a concession to Jwoo and while they look okay I really wish I'd followed my instinct and done them all from baltic birch and left them natural. Live and learn.

G
 

250

Well-known member
Joined
Oct 16, 2014
Messages
537
Location
West of the Sierras
Thanks for the vid and update Gregor. It's greatly appreciated!

Could you share any details on the blasting of alu-parts? Do you only use the blaster box for that specifically or do you switch? I've the desire to get me a blaster cabinet but have no experience at all. So all recommendations and experience is very welcome.

Might be worth browsing though if you haven't already.

https://www.garagejournal.com/forum/showthread.php?t=237844

Also, look at the Skat Blast website. There is some good primer information there.
 

bdking

Well-known member
Joined
May 16, 2013
Messages
94
Location
PDX
But this week is the week. Lucas wants another knife for his birthday and this seems like the right opportunity to set the grinder up and get it working. I have some space now any my first project will be a knife for Lucas that we'll make together. No forging - just stock removal.

You’re welcome to use my forge & quenching oil for heat treating.
 

McRae

Well-known member
Joined
Nov 18, 2009
Messages
114
Someone mentioned to me to do a technique that watchmakers use which I'd like to try - it's essentially just overlapping lines like an end mill would leave. Can't recall the name of it.

G

It's called Côtes de Geneve FYI.
 

Sham

Well-known member
Joined
Jan 29, 2013
Messages
76
Location
Antibes, France
Someone mentioned to me to do a technique that watchmakers use which I'd like to try - it's essentially just overlapping lines like an end mill would leave. Can't recall the name of it.

Probably "Geneva waves" or "Geneva stripes", aka "côtes de Genève" in French.

Edit : I just saw that McRae had already answered, sorry!
 

uroford

Member
Joined
Aug 31, 2017
Messages
18
Location
MI
Have you ever experienced "tear-out" or "chip-out" while cutting baltic birch? While using my table saw, which has cut regular ply with no problems, I had some trouble that even blue tape didn't totally alleviate. Without tape it basically tooth-picked the entire cut.
 
OP
S

sakurama

Well-known member
Joined
Oct 10, 2010
Messages
1,458
Location
Portland - the cool one.
You’re welcome to use my forge & quenching oil for heat treating.

Thanks.

I may take you up on that. I have to remember what the steel I got was but I think it was O-1 with the intention of using the oxy-acetylene to heat and then the used motor oil to quench just to keep it simple. I was hoping a differential heat on the blade would work.

But first I need to do some organizing.

And yes, côtes de Genève - thanks. I would like to try that since I've not seen that used outside of watches and it could be a fun new way to do it.

G
 

E12-535iTurbo

Well-known member
Joined
Feb 27, 2014
Messages
492
Location
The Netherlands
Might be worth browsing though if you haven't already.

https://www.garagejournal.com/forum/showthread.php?t=237844

Also, look at the Skat Blast website. There is some good primer information there.

Thanks for the redirect! Much appreciated!

Again, I have a hard time remembering where someone replied so it's hard to find messages - especially on IG. But I'd mentioned that I am using Potters AC grade glass bead. I'm not knocking the pressure down from the compressor so it's really high - like over 100psi and that is most likely pulverizing the glass bead to powder but it makes really fast work of stripping things. Someone had mentioned using ceramic beads which would stand up to the pressure but I haven't researched that.

It's a real hassle to swap media - you don't want to do that. I had a coarse grade bead at one point - from horror fright - and it was an awful disaster. Parts were rough, dull and ugly. I asked the guys at Baisley High Performance what they used and then got that. It's perfect. I only use the cabinet for bead blasting. I only want the one surface and the one look from that bead so I'm happy with that. The process of swapping that media was a complete mess so I only want to do that once a year if that.

Get a cabinet that is large enough too. I worried my cabinet was too large but like the mill I haven't regretted it one bit.

Thanks, really appreciate that.

I did finally get a buffer but it's not here yet. I spent about 3 hours hand sanding a new side case for the project XR and that time was enough to remind me how much I hate hand processes. I'd been searching for one for about two years and finally got a good deal.

It's a childhood memory where I polished my little Honda for days on end. Everyhting was shiny like chrome. My hands were sore for days.

There's a lot of reasons to polish outside of the looks. When I had my studio in Soho I shared the floor with a company, Nanz, that made high end door hardware. The polishing room was just outside my studio and I had unfettered access. I polished everything but mostly my old fans. A real buffer is a great tool and a polished surface is far more resistant to oxidation and rust.

We will go over that when it shows up.

I'm really looking forward to that as I'm certainly not going to get sore hands from restoring the Honda in it's former glory. I'm way past that at this age.
 
To avoid these ads, REGISTER NOW!

smschriefer

Well-known member
Joined
May 28, 2009
Messages
842
Location
Yorktown, VA
Have you ever experienced "tear-out" or "chip-out" while cutting baltic birch? While using my table saw, which has cut regular ply with no problems, I had some trouble that even blue tape didn't totally alleviate. Without tape it basically tooth-picked the entire cut.
What type of blade are you using and how old is the blade? I don't think you want a standard rip blade installed. I'd suggest a crosscut blade.
 

laralovesmoka

New member
Joined
Oct 10, 2018
Messages
4
Location
Westcliffe CO
I’m at the (current) end! Where’s my tshirt? Why is it called engine turning? When it stops snowing and virus-ing, can I get my bead blasting job back?
 

Stuart in MN

Well-known member
Joined
Sep 8, 2005
Messages
23,125
Location
Minneapolis
Good job on the XR100, and the videos are fun to watch.

Something I appreciate is how you make actual drawings in your notebook by hand. :) I still enjoy pulling my drafting tools out of the drawer and creating things on paper rather than on a computer screen.
 
OP
S

sakurama

Well-known member
Joined
Oct 10, 2010
Messages
1,458
Location
Portland - the cool one.
Have you ever experienced "tear-out" or "chip-out" while cutting baltic birch? While using my table saw, which has cut regular ply with no problems, I had some trouble that even blue tape didn't totally alleviate. Without tape it basically tooth-picked the entire cut.

What type of blade are you using and how old is the blade? I don't think you want a standard rip blade installed. I'd suggest a crosscut blade.

Thanks, I think it's 40 tooth general purpose, defiantly not cross-cut specific.

No, but I don't have or use a table saw. I generally will cut on top of foam sheets and I'm using the Festool tracks which have a strip to help prevent tear out so my boards are really sandwiched in a way to prevent this - it's never been an issue for me. Sometimes I'll get a little on the cross cut saw if I rush the cut but generally no.

Gregor
 

bdking

Well-known member
Joined
May 16, 2013
Messages
94
Location
PDX
No, but I don't have or use a table saw. I generally will cut on top of foam sheets and I'm using the Festool tracks which have a strip to help prevent tear out so my boards are really sandwiched in a way to prevent this - it's never been an issue for me.

I usually use a Festool tracksaw as well and that yields perfect cuts. Often I'll use a tablesaw when making many identical rips (I don't love the Festool parallel guides) or cutting dados & I've never had significant tearout on the face of Baltic birch (sometimes on the edge if I'm not careful.) I keep two of every blade so I always have one sharpened & ready to swap on when I'm making a critical cut. I pretty much always use a crosscut blade on the table saw, unless cutting dovetails or something.
 

Guster

Well-known member
Joined
Mar 11, 2012
Messages
1,543
Location
Auckland, New Zealand
Hi Gregor! Really enjoyed episode 9 in the flat tracker series. You had character development, drama and suspense and a great outcome in one show. Though I can see many a future house party inviting Kerry, innocently timed just when needing to have a project bike ready the following day! :thumbup:

As for engine turning. I've always used a brass wire cup brush as my "turning" tool. They are cheap, come in different sizes and provide a nice uniform burnished finish. It is quite easy to get the overlapping line effect(instead of circles) on a mill with one of them. Which is a great way to quickly refinish scrap stainless for a project that doesn't require extensive polishing. Though a foam Roloc with polish compound like Mother's does a great job on polished stainless with the drill press on high speed. More of a shiny sphere than a concentric burnish. Really worth experimenting a bit sometimes.
 

Vertigo Cycles

Well-known member
Joined
Jan 14, 2010
Messages
193
Location
Portland, OR
I usually use a Festool tracksaw as well and that yields perfect cuts. Often I'll use a tablesaw when making many identical rips (I don't love the Festool parallel guides) or cutting dados & I've never had significant tearout on the face of Baltic birch (sometimes on the edge if I'm not careful.) I keep two of every blade so I always have one sharpened & ready to swap on when I'm making a critical cut. I pretty much always use a crosscut blade on the table saw, unless cutting dovetails or something.

I was getting a little bit of edge tearout while building cabinets this month. I started keeping a little thin CA glue and accelerator nearby. Wicking a little CA glue into the edge where the saw will exit made for extremely clean corners. It adds a little time, but then saves some because you don't have to clean up the corner before running it into the stop before cutting the next panel.
 

bdbecker

ALLIANCE MEMBER
Joined
Nov 18, 2015
Messages
5,564
Location
Iowa
...As for engine turning. I've always used a brass wire cup brush as my "turning" tool. They are cheap, come in different sizes and provide a nice uniform burnished finish...

This is how I've done it as well. Wrapping all but the last 1/4" of the bristles in tape (I use electrical tape) helps keep the pattern even tighter and more uniform.
 

bdking

Well-known member
Joined
May 16, 2013
Messages
94
Location
PDX
I was getting a little bit of edge tearout while building cabinets this month. I started keeping a little thin CA glue and accelerator nearby. Wicking a little CA glue into the edge where the saw will exit made for extremely clean corners. It adds a little time, but then saves some because you don't have to clean up the corner before running it into the stop before cutting the next panel.

That's really clever- good idea! Were you applying any finish afterwords? I wonder how that would affect absorption.
 

Vertigo Cycles

Well-known member
Joined
Jan 14, 2010
Messages
193
Location
Portland, OR
That's really clever- good idea! Were you applying any finish afterwords? I wonder how that would affect absorption.

It will definitely block the absorption of whatever finish you put on. In my case, I used a poly that doesn't absorb very well anyway and the corners are darker where the CA was applied. These were for my shop and I didn't go out of my way to finish them nicely.
 

Bad Mojo

Well-known member
Joined
Sep 2, 2012
Messages
119
If you're thrifty it hurts to pay 30-50% more for baltic birch. The difference is that any scrap actually has value. Jigs, tiny blocks or end cuts all become really pretty and add all this visual appeal. Plus, sanding it is really nice. It doesn't flake or fray and the top is fairly thick - as thick as the other plies - unlike shop grade or worse, what you get at Home Depot which is a paper thin veneer over ****** ply and particle.

One project with it and you'll realize it's worth it.

My biggest regret is that I built all my cabinets from veneer plywood. I did that as a concession to Jwoo and while they look okay I really wish I'd followed my instinct and done them all from baltic birch and left them natural. Live and learn.

G

I second this! The price has a little sticker shock at first, but it is so nice to work with. All the drop at work gets saved and turned into pieces for other projects. Also depending on your supplier you can a 5'x5' or a 4'x8'.

Below are links to a 4 part Instagram post that one of the lumber yards did on plywood. They do a really nice job breaking down everything one needs to know about birch plywood.

https://www.instagram.com/p/BnUfA8KgFN2/

https://www.instagram.com/p/BnZcCEIAHEF/

https://www.instagram.com/p/BnsHO9MFLEn/

https://www.instagram.com/p/Bn13MrrAkjh/

Lastly, speaking of plywood means one should watch Tom Sach's Love Letter To Plywood.

 
OP
S

sakurama

Well-known member
Joined
Oct 10, 2010
Messages
1,458
Location
Portland - the cool one.
Before there is any progress there's chaos.

I keep telling myself that. In some ways I feel like this time of quarentine is so precious that I need to try to get so many things done - things that aren't "real" projects but are the supporting parts of them.

i-MfVxGqC-X2.jpg


What I wanted to do was put the XR back together and then collect the parts of the third bike and get that out the door and get the grinder unpacked. But I was waiting on parts so the XR stalled. I cleaned the shop and organized but then chaos happened again when I unpacked the grinder.

Putting it on top of the cabinet that was already in front of the window it was apparent that it was way too tall. I considered making a stand for it but then what do I do with the accessories, the belts and the misc parts? I had this old Kennedy cabinet that I'd tried to sell a few times without luck...

i-gWrGFkX-X2.jpg


With it's wheels it was still too high and also too unstable. Without them though, it was a pretty good height and also it was now stable. I cleaned it out piled the contents on the welding table since the other surface was covered with XR parts...

i-5vw8RPz-X2.jpg


i-FC4STgv-X2.jpg


I used the baltic birch for a top because the top of the Kennedy was rather thin so this gave me a good place to drill through and solidly connect the grinder to the cabinet. I also pulled out this old grinder that I've had for years. Bench grinders are like single socks - they just seem to multiply and none of them are exactly what you want. Oddly, when I bought this as a package deal many years ago I knew it was the nicest one I had so I didn't set it up. I make so little sense some times.

I collected the three other bench grinders and will keep one for wire brushing which I do a fair amount of and this one I may build a baltic birch pedestal on top of the cabinet to bring it to a normal height.
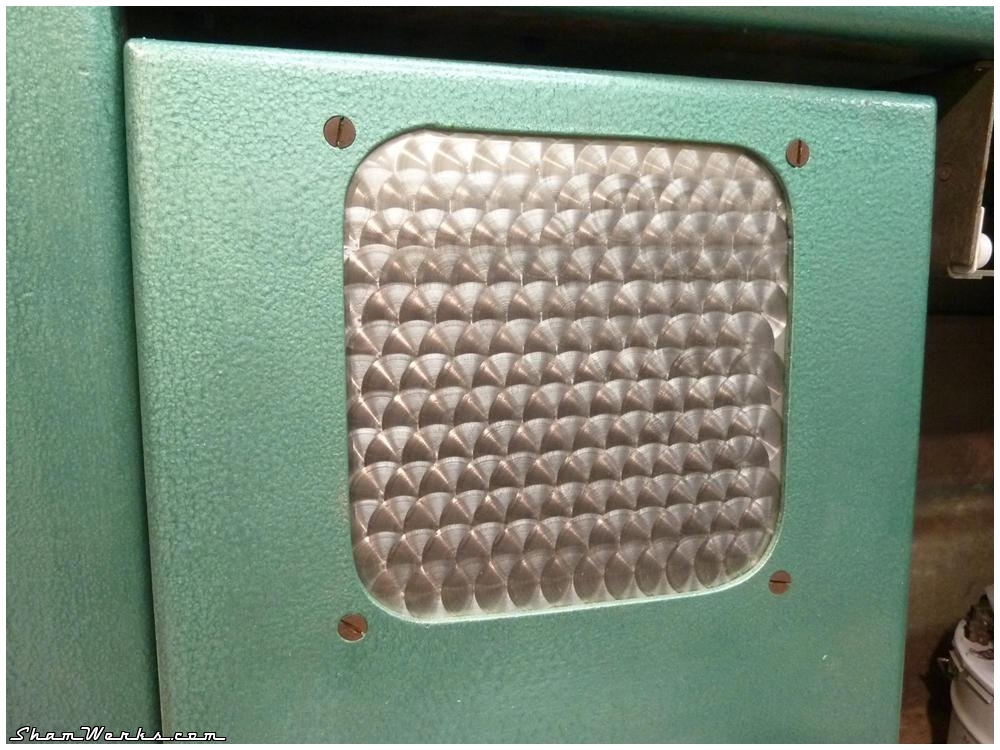
The Black Fox Knife Works grinder is amazing. It weighs about 120lbs and is so well made. It tracked perfectly right out of the box. His new ones have an integral VFD as part of the base and I really like that but I'm happy to have mine out of the way up on the wall.

i-TWtHqRf-X2.jpg


One of the deeper drawers is perfect for keeping the belts. I'm sure I'll eventually have too many for this solution but right now this is great.

i-BXfTPDF-X2.jpg


I had been planning a Scorpion-esque french cleat hanging Milwaukee tool storage set up but the reversing switch is right at the narrow part of most of the drivers and that really bugged me. I wasn't excited about that project either but this is exactly the solution I needed - a found solution.

I still have the larger space at the bottom of the cabinet empty but I have a plan to fill that too.

i-C2JvBnx-X2.jpg


Paypal giveth and Paypal taketh away. This is a very serious Baldor 1-1/2hp 3600rmp polisher. I am worried that it will trip my breaker but I have a work around if that happens. This will need a an actual stand bolted to the floor but a friend in the polishing business is supposed to be sending me a care package of buffs and compounds and they'll live in the bottom of the Kennedy. It may seem a strange addition since I don't really do "shiny" things but I love polishing. Every one of my fans was stripped, sanded and polished on one of these. It's very therapeutic and also messy. I'll have to find a way to deal with that. But for now I'm excited to get this set up.

The finishing wall is taking shape.

Nothing about the shop now is what I was thinking it would be when I started this 7 or so years ago. Like most people I was drawn in my Jacks perfect shop and wanted something like that. This is so not that shop but it is exactly what I need and want shaped by the actual work I'm doing. Which makes this shop exactly what I want.

i-DQZXDFK-X2.jpg


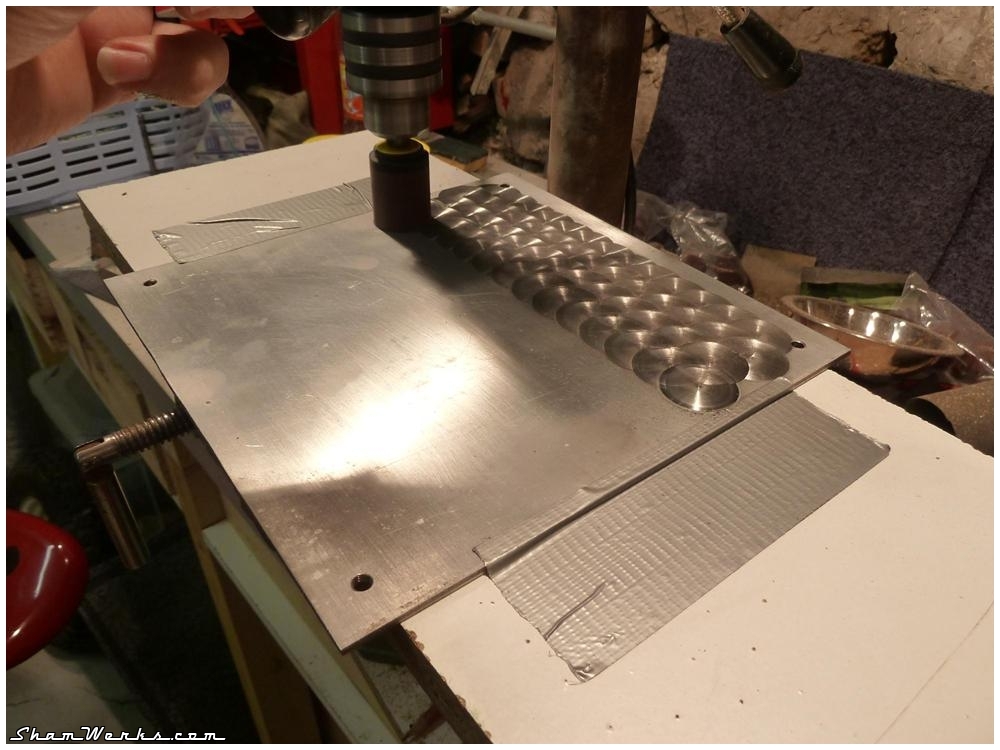
This is a tiny thing but to me it's not. When I bought this mill vise it came with this nicely made work stop. I have meant to make one for years and never did so I was happy to get this. But all the adjustments were made with socket head bolts. How many years did the person who made this search for that wrench each time they needed to adjust the stop? Even if it was close by it was a hassle. I kept the right sized allen key on the mill table and it still was a pain.

So from McMaster I got three small adjustable lever arms - the kind we use on photo lighting equipment.

i-WP3Krxf-X2.jpg


I will never look for a wrench again or fumble with an allen key at the wrong angle. To me this is a key part of setting up a shop - the streamlining of the work process. Sean amazes me with the jigs and setups he's created to make his bicycles and sadly we were going to be spending time together right before this whole thing went down so I could see that process and his attention to detail.

Luckily he's been posting shots of his process and tools and sharing that on his instagram: https://www.instagram.com/vertigocycles/

It's completely worth going through to see that attention to detail.

It bugs me that I'm so scattered sometimes but I want to make the most of this time and as soon as I hit a road block or snag I dart off in another direction trying to accomplish something else. I swear it feels like there's a clock ticking. I have so much I want to do and then I look on Instagram and see all these people who are bored out of their minds - I can't even fathom that. Really? Bored? I'm baffled.

i-3TvCd84-X2.jpg


The mission creep of the XR is so classic. I start to fix the exhaust then decide the wheels have been bugging me. I don't want to make a nice new exhaust with these horrible faded wheels with brown rims so I break the rims down to have them powder coated.

i-Tbxg2f9-X2.jpg


I changed the triple clamps to a set that I got for the other bike but decided against using. Really this has become a second restoration of the bike.

Now I have that fourth tool chest just sort of sitting in the middle of the shop. I have decided to change the island to a narrower bench but before I can rearrange that I need to clear the top of XR parts... and before I can do that I need to finish the one on the lift.

Little by little I make progress but each step forward seems to be accompanied by about 20 steps of dancing in place.

Alright, that's the quick update.

Gregor
 
Last edited:

Terranova

Well-known member
Joined
May 12, 2008
Messages
854
Location
Grove City, OH
Before there is any progress there's chaos.

Nothing about the shop now is what I was thinking it would be when I started this 7 or so years ago. Like most people I was drawn in my Jacks perfect shop and wanted something like that. This is so not that shop but it is exactly what I need and want shaped by the actual work I'm doing. Which makes this shop exactly what I want.

This. So much this.
I’m working toward this.
Eloquently stated. This idea has been in my head, but I had yet to put it into words.

Thank you.
 
Last edited:

douglawrence42

Active member
Joined
Oct 13, 2017
Messages
43
Location
Evington, Virginia
Tangent. I’m curious about your tungsten sharpening process. You always put so much detail into your tool and process selection, I’m curious what you do (please let it be something cheap and awesome rather than a $1500 purpose built unit)?
 

zmotorsports

ALLIANCE MEMBER
Joined
Oct 20, 2009
Messages
21,405
Location
Northern Utah
Great job on the shop organization Gregor.

My last shop was similar to yours, trying to organize 10-gallons of **** in a 5-gallon bucket. No offense, just making a size to tool ratio comparison.

I had it where I wanted it but it was still a tight shop and I felt claustrophobic at times when I had a project going on. When I had the opportunity to build my new dream shop and the wife gave me the green light I started making notes of everything I would do different, although truth be told I already had most of them in my head, and how I would lay it out for the kind of work that "I" do routinely. That is the important thing because everyone does different work and we all seem to work in different manners so making them our own is part of the fun. Laying out tools and equipment to fit our exact needs and wants is what makes us all the same yet different.

I enjoy following along on your shop projects and organizing.

If I could ask a few questions Gregor...

Do you have the DiAcro stand for your 24" finger brake or is yours sitting on a table or something similar? I looked up the exact spec's on DiAcro's website and it appears the stand measures 38" wide, 15" deep and 33.25" tall.

Is it at a comfortable working height for you and how tall are you?

Anything you would change about the stand itself?

Thank you.
 

stsmytherie

Well-known member
Joined
Dec 16, 2005
Messages
176
Location
VT
"Yak shaving" is a phrase that comes to mind. In a good sense.

Yak shaving is doing what seems like trivial, disconnected tasks, but are actually useful steps to do a bigger job correctly (or perhaps more efficiently over time).

http://projects.csail.mit.edu/gsb/old-archive/gsb-archive/gsb2000-02-11.html

As opposed to "bikeshedding," which is obsession over trivial tasks to avoid doing a difficult or tedious, but necessary, job.

When I was a younger man, I had a tendency to move physically toward doing one thing while thinking what else needed doing, and sometimes found myself turning circles as my brain went "you should do this, but you need that, too, but I ought to get this other thing first...". Not some of my finer moments.

Stay safe out there folks.
 

Sham

Well-known member
Joined
Jan 29, 2013
Messages
76
Location
Antibes, France
have so much I want to do and then I look on Instagram and see all these people who are bored out of their minds - I can't even fathom that. Really? Bored? I'm baffled.
I know right?! That's something I will never understand!

I mean, I can be frustrated by the quarantine, not having access to my former workshop, and the construction of the new one being stopped 2 weeks short of it's completion... But even so, boredom has never, ever been an option. Too much to do. Tick, tock...
 

TwoBytes

Well-known member
Joined
Mar 14, 2014
Messages
790
Location
Canberra, 'Stralia
"Yak shaving" is a phrase that comes to mind. In a good sense.

Yak shaving is doing what seems like trivial, disconnected tasks, but are actually useful steps to do a bigger job correctly (or perhaps more efficiently over time).

http://projects.csail.mit.edu/gsb/old-archive/gsb-archive/gsb2000-02-11.html

As opposed to "bikeshedding," which is obsession over trivial tasks to avoid doing a difficult or tedious, but necessary, job.

I love both the terms "yak shaving" and "bike shedding".

My favourite description of "yak shaving" is here...
https://seths.blog/2005/03/dont_shave_that/
---
Yak Shaving is the last step of a series of steps that occurs when you find something you need to do. “I want to wax the car today.”

“Oops, the hose is still broken from the winter. I’ll need to buy a new one at Home Depot.”

“But Home Depot is on the other side of the Tappan Zee bridge and getting there without my EZPass is miserable because of the tolls.”

“But, wait! I could borrow my neighbor’s EZPass…”

“Bob won’t lend me his EZPass until I return the mooshi pillow my son borrowed, though.”

“And we haven’t returned it because some of the stuffing fell out and we need to get some yak hair to restuff it.”

And the next thing you know, you’re at the zoo, shaving a yak, all so you can wax your car.

---

And there's a great description of "bike shedding" here...
https://en.m.wikipedia.org/wiki/Law_of_triviality
 
To avoid these ads, REGISTER NOW!
Top Bottom