

You are using an out of date browser. It may not display this or other websites correctly.
You should upgrade or use an alternative browser.
You should upgrade or use an alternative browser.
What did you do "IN" your garage today?
- Thread starter mayhemman
- Start date
Loose Nut Buster
Well-known member
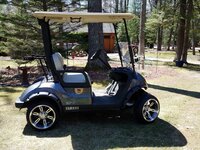
Bought into the golf cart craze n picked up a stock 2018 Yamaha EFI cart brought it home n went to work on it.
1st was a 3" lift kit then on to 1" rear tire spacers, tires n rims, fender flares and a front mount trailer hitch and adjusted the toe in.
The results were not only rewarding but makes it fun to tool around in with my wife.
Last night I installed my seat belts and a rear seat kit, fabed a trailer hitch n removed the decals.
All that's left is wait for the street legal LED lightkit to arrive, currently on BO.
It will then be 100% street legal on roads 25 mph and under, my top speed is 19-20 mph by gps.
I'll post more pics after I get the lights are installed, hopefully next week.


Sent from my SM-T387V using Tapatalk
1st was a 3" lift kit then on to 1" rear tire spacers, tires n rims, fender flares and a front mount trailer hitch and adjusted the toe in.
The results were not only rewarding but makes it fun to tool around in with my wife.
Last night I installed my seat belts and a rear seat kit, fabed a trailer hitch n removed the decals.
All that's left is wait for the street legal LED lightkit to arrive, currently on BO.
It will then be 100% street legal on roads 25 mph and under, my top speed is 19-20 mph by gps.
I'll post more pics after I get the lights are installed, hopefully next week.
Sent from my SM-T387V using Tapatalk
Attachments


jkherd
Well-known member

smalltown
Well-known member
Dan in Pasadena they came out pretty good. I really like the sink.
PhantomEB
Well-known member
Got enough drawer liner from HD to do all my drawers in the new top and bottom box. Emptied out the old box that’s going to moms place soon.
Amazingly, I still got empty drawers but that’s easy to fix. And the very top is where I putting my stereo receiver/satellite receptor and cellphone charger.
Amazingly, I still got empty drawers but that’s easy to fix. And the very top is where I putting my stereo receiver/satellite receptor and cellphone charger.
Attachments

Magnum440d100
Well-known member
I had the same lockup problem on my Dodge B3500 one ton Van. After considerable frustration I found that some one had replaced the shoes on that corner with shoes that were 1/2" too wide. The 3/4 and one ton trucks and vans had several axles and brake sizes available on order, easy to get the wrong part.
I was actually thinking something similar. Especially when I went to order parts and they asked me 12” or 13” brakes.
I was thinking maybe someone along the line had bought the opposite of what it took.
I was all set on taking it apart to find out what size they were before I ordered parts, when I remembered that the tag under the hood showed what brakes were on it. Or at least what was supposed to be on it lol. So that’s what I ordered

The brakes that came off, were the same size as what I ordered. 13”.
Been 200 miles since I did the brakes, and she stops perfectly.
My guess is still the star wheel. It was partially seized, and difficult to turn, coupled with the adjusting lever worn a bit where it contacted the star wheel, caused for a bad adjustment. The one liner being cracked, I don’t know if I did that when I was futzing with the drum or if it was cracked before.
Whatever it was, it’s fixed and back to working like new (compared to how it WAS lol)

Kevkx125
Well-known member
Just played with the trailer a bit checked all the lights to make sure they are working, just need to shorten the harness a bit, then that should do it for the wiring.
GeeTeeOhh
Well-known member

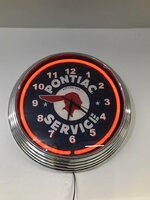

Attachments



Dan in Pasadena
Well-known member
Dan in Pasadena they came out pretty good. I really like the sink.
Thanks!
I'm really pleased I found it cheap. Seller bought four for his rentals units and only needed three. I think he just wanted it gone.
Not sure yet what I will put on the lower shelf? Maybe a couple cleaning products. I'll put a towel bar on the side I guess. I have a good paper towel dispenser that will go on the wall and I suppose a soap dispenser & first aid kit are advisable. Suggestions welcome.
ZRX61
Well-known member
Added a bit more green to the ZRX, thereby making it a bit faster than it was yesterday 
kaymccampbell
Well-known member
I didn't like how one of the tubes on the compressor looked. My 1/2" bender was liberated, along with the rest of the full set. So, I borrowed a bender from a friend and redid it.

JSGAuto
Well-known member
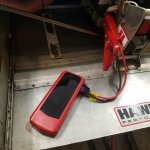
PhantomEB
Well-known member
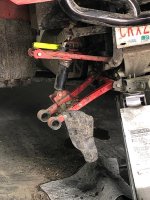
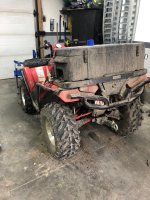
Replaced a torn CV boot on my 06 Sportsman 500HO then washed it.
Now troubleshooting why my winch is not working, then it’s bolt down the box as the stock Polaris quick release keeps slipping out, thus why the ratchet strap hold down.
Now troubleshooting why my winch is not working, then it’s bolt down the box as the stock Polaris quick release keeps slipping out, thus why the ratchet strap hold down.
Attachments

Outlawmws
Well-known member
Nice job on the copper tubing Kay!
Jazz1
Well-known member
What started with replacing a broken door handle on my '91 Toyota 4x4 exploded into a week of work ,,I was not overly ambitious. Then a brake shoe fell apart and locked up my wheel I changed my rear shoes, rear shocks, replaced fuel tank crossmember, installed new exhaust that has been leaning against garage wall 4 months.
These shoes are 6 years old
These shoes are 6 years old
Attachments

Last edited:
MushCreek
Well-known member
I was doing some heavy-duty furniture making today. I had 5 planks of maple left over from making my kitchen counters 7 years ago. They are full 2X8, spalted (a fancy term for starting to rot) and 10' long. They weigh a ton! I had to plane them, as they were still rough, and varied in thickness. I have an ancient Craftsman (Parks) 12" planer, and muscled them through it. I jointed the edges using a big router bit and a straight edge clamped in place. Once I got the maple done, I had bought some 2" poplar to make the base out of. Same thing; plane and joint, then rip to size. A year or so ago, I scored a set of massive maple table legs, 5" square and turned. They list for $85 each; scored them on CL for $100 for all four.
Next week, I'll drill for lag screws to hold it all together. Once I get everything fit and assembled, I'll take it apart to finish it. I'm going to varnish the maple top, and paint the base white. Then I'll assemble it again. I have to assemble it in place, as it will be too heavy to move by myself! I'm in the process of finishing off a big great room on one end of my barn, and this table will sit in the middle of the room for big dinner parties.
I'll post some pics when I get it done.
Next week, I'll drill for lag screws to hold it all together. Once I get everything fit and assembled, I'll take it apart to finish it. I'm going to varnish the maple top, and paint the base white. Then I'll assemble it again. I have to assemble it in place, as it will be too heavy to move by myself! I'm in the process of finishing off a big great room on one end of my barn, and this table will sit in the middle of the room for big dinner parties.
I'll post some pics when I get it done.
I swapped out the radiator on the wife's explorer. What joy to remove and replace. The quick connect fittings were a royal PITA.
Pruittx2
Well-known member
hey fella's,,, been a while,,
Today in the barn,, I hooked up a FB marketplace purchased rear bagger set up for my Deere La135. <--- That was bought with issues a few weeks, back. Those have slowly been resolved. Today I also repaired said unit from surging issues, with a $35 dollar Amazon carb. One of the choke butterfly brackets was wrong,, so I pulled choke plate,, and swapped shafts with the old one onto the new carb. bolted her back up and runs like a top. Installed new blades,, and I'm back off to go see how many bags my front yard is!
Today in the barn,, I hooked up a FB marketplace purchased rear bagger set up for my Deere La135. <--- That was bought with issues a few weeks, back. Those have slowly been resolved. Today I also repaired said unit from surging issues, with a $35 dollar Amazon carb. One of the choke butterfly brackets was wrong,, so I pulled choke plate,, and swapped shafts with the old one onto the new carb. bolted her back up and runs like a top. Installed new blades,, and I'm back off to go see how many bags my front yard is!
kaymccampbell
Well-known member
Refreshed a free pipe cutter. Cleaned the shop. Tested the 30yo regulator, and watched it break itself.
PassnThru
Well-known member
I swapped out the radiator on the wife's explorer. What joy to remove and replace. The quick connect fittings were a royal PITA.
What year? I have a 2007 and have replaced the radiator once and it's leaking again.
I've replaced a few radiators in my time on this earth - none of them prepared me for this. You know the old joke - the first part when they build a car is the heater core. They build the car around it.
With the Explorer, they somehow found a way to start assembly with the heater core and the radiator

PassnThru
Well-known member
After a successful build of a screen door for the detached garage, I started working on a screen door for the attached garage. This one is a little bigger - a standard 7X9 door. This time I bought three screen doors to start with. I found 32" wood doors at Lowes on clearance for about 17 bucks apiece. The same 36" door cost me about 70 but I'm still ahead after buying decent lumber.
So I'm basically building them out with 1 by pieces to fit the opening (two 32" doors plus a 36" door). Got the two 'dead' doors glued up today with a 3" piece between them. Got the side frames cut and routed out for hinges for the 'dead' door. Test fit tomorrow to see just how bad the frame and the concrete is - adjustments will be made.
So I'm basically building them out with 1 by pieces to fit the opening (two 32" doors plus a 36" door). Got the two 'dead' doors glued up today with a 3" piece between them. Got the side frames cut and routed out for hinges for the 'dead' door. Test fit tomorrow to see just how bad the frame and the concrete is - adjustments will be made.
jkherd
Well-known member

niget2002
Well-known member
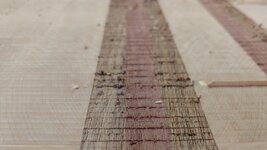
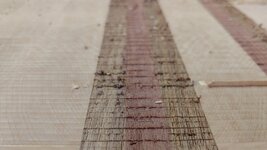
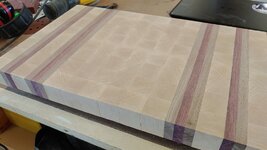
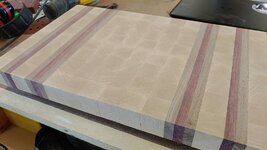
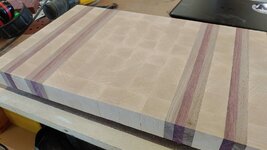
Finally made progress on the cutting board I've been working on. Used the CNC to flatten one side. Found out my z axis has a slight flex in it so it cut deeper one direction vs the other, so I had to spend some time sanding.
Still need to flatten the other side, then I have a design I plan on burning into the center with a laser.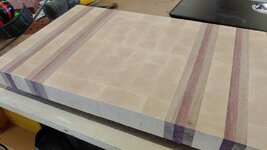

Sent from my LM-G820 using Tapatalk
Still need to flatten the other side, then I have a design I plan on burning into the center with a laser.
Sent from my LM-G820 using Tapatalk
Attachments

driftpin
Well-known member
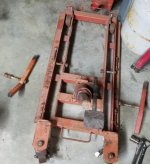
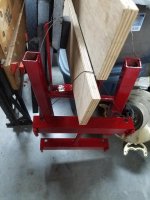
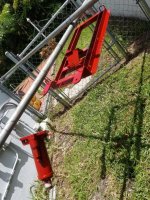
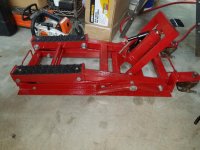
A few years-ago I bought a Harbor Freight motorcycle ******** craigslist. Given the shape it was in and etc, though it worked, it didn't leak, and wasn't visibly 'tweaked' out-of shape, I think I got them to get rid of it for $25. They didn't want it, I was willing to give 'em that-much, and give it a place of storage. After that I bought a Handy-Lift, so I didn't really have a burning use for it. It sat there, waiting to be used. It appeared that it had been stored outside much of its life, the paint was Florida-sun-faded to pink from the HFT red. In COVID-lockdown, I decided to do-something about it.
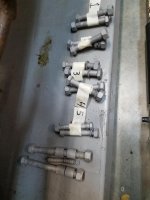
I disassembled it, and used a 'mule-skinner' heavy twisted-wire cup on a DeWalt side-grinder to get-rid of the rust, most of-which turned out to be surface rust. Smaller parts were bead-blasted, I'd just finished refurbishing my free Harbor Freight benchtop blasting cabinet, which works great, using glass beads. I did all the nuts, bolts and miscellaneous small parts. I wasn't going for a spray-gun finish, I used an oil-based paint from Ace Hardware that I already had. It got brushed-on. The wheels and the foot pedal pump for the 4 ton bottle jack it uses, were given a rattle-can black, two coats.
It went back together, I used flat washers where the OEM split washers would have torn-up my new paint, so the split-washers bear-upon the flat washers.
Harbor Freight has black rubber glue-backed diamond-plate treads I used to cut-to-size for the bike-lifting saddle. I tried to pop-rivet them on, but with the jack assembled, it seemed the bottom of the pop-rivet interfered with the full lowering of the mechanism. I drilled out the pop-rivets and took a pop-rivet, removed the frangible nail/stud leaving the pop-rivet. I cut a slot in the rivet tube with a Dremel cut-off disc, and the I flattened the split-side with a circular flat punch, after inserting the rivet into the rubber tread and the steel saddle it sat-upon.
It was somewhat labor-intensive, but about the only thing I spent any $ on were the rubber diamond-plate patter treads. The paint, the fasteners, the surface prep pieces, all were things I already had on-hand. A good COVID-era project, cheap to-do, and the jack functions perfectly, and has a better appearance.
I disassembled it, and used a 'mule-skinner' heavy twisted-wire cup on a DeWalt side-grinder to get-rid of the rust, most of-which turned out to be surface rust. Smaller parts were bead-blasted, I'd just finished refurbishing my free Harbor Freight benchtop blasting cabinet, which works great, using glass beads. I did all the nuts, bolts and miscellaneous small parts. I wasn't going for a spray-gun finish, I used an oil-based paint from Ace Hardware that I already had. It got brushed-on. The wheels and the foot pedal pump for the 4 ton bottle jack it uses, were given a rattle-can black, two coats.
It went back together, I used flat washers where the OEM split washers would have torn-up my new paint, so the split-washers bear-upon the flat washers.
Harbor Freight has black rubber glue-backed diamond-plate treads I used to cut-to-size for the bike-lifting saddle. I tried to pop-rivet them on, but with the jack assembled, it seemed the bottom of the pop-rivet interfered with the full lowering of the mechanism. I drilled out the pop-rivets and took a pop-rivet, removed the frangible nail/stud leaving the pop-rivet. I cut a slot in the rivet tube with a Dremel cut-off disc, and the I flattened the split-side with a circular flat punch, after inserting the rivet into the rubber tread and the steel saddle it sat-upon.
It was somewhat labor-intensive, but about the only thing I spent any $ on were the rubber diamond-plate patter treads. The paint, the fasteners, the surface prep pieces, all were things I already had on-hand. A good COVID-era project, cheap to-do, and the jack functions perfectly, and has a better appearance.
Attachments

PhantomEB
Well-known member
Cut up my ATV riser and ramps for a better packaged design.
Welded up some and should finish tomorrow. Then I can load her up and set a Chock and paint it all up. Will have removable ramps and room to put the other ramps flat on the floor underneath the quad.
Welded up some and should finish tomorrow. Then I can load her up and set a Chock and paint it all up. Will have removable ramps and room to put the other ramps flat on the floor underneath the quad.
FANTM58
Well-known member
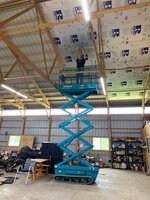
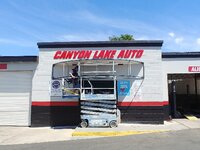
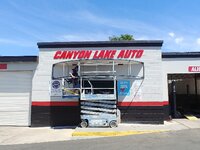
I’ve never seen a scissors lift on tracks,, it looks fun..Important note to self: next time around, have the builder insulate the roof from the get-go. It’s amazing how much heat is radiated through a bare metal roof on a sunny day. Hopefully today’s project will cut down on that quite a bit.
Sent from my iPad using Tapatalk

Attachments
Menifee Valley Speed Shop
Well-known member
AWESOMEFinally made progress on the cutting board I've been working on. Used the CNC to flatten one side. Found out my z axis has a slight flex in it so it cut deeper one direction vs the other, so I had to spend some time sanding.
Still need to flatten the other side, then I have a design I plan on burning into the center with a laser.
Sent from my LM-G820 using Tapatalk


Sent from my LG-LS998 using Tapatalk
Attachments


Menifee Valley Speed Shop
Well-known member
We finished our awning frame today, started in garage finished at shop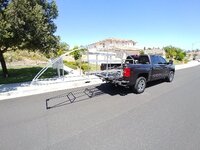


Sent from my LG-LS998 using Tapatalk
Sent from my LG-LS998 using Tapatalk
Attachments



kaymccampbell
Well-known member
Finally made progress on the cutting board I've been working on. Used the CNC to flatten one side. Found out my z axis has a slight flex in it so it cut deeper one direction vs the other, so I had to spend some time sanding.
Still need to flatten the other side, then I have a design I plan on burning into the center with a laser.
Sent from my LM-G820 using Tapatalk


Is that a MPCNC? If so, did you print it yourself?
Attachments


Motorman55
Well-known member
This morning I polished up my old Marine Corp Dress Blues and Duty Belt brass belt buckles. I display them in the shop office.
The white Dress Blues belt will require a good scrubbing/cleaning to bring it back to white before I reattach the 4 pc buckle.
I tried to put the belt around my waist...lets just say 47 years later, I'm not that young U.S. Marine with a 28" waist anymore...
Nice day today so its out to the garage now...
The white Dress Blues belt will require a good scrubbing/cleaning to bring it back to white before I reattach the 4 pc buckle.
I tried to put the belt around my waist...lets just say 47 years later, I'm not that young U.S. Marine with a 28" waist anymore...
Nice day today so its out to the garage now...
Attachments

Last edited:
What year? I have a 2007 and have replaced the radiator once and it's leaking again.
I've replaced a few radiators in my time on this earth - none of them prepared me for this. You know the old joke - the first part when they build a car is the heater core. They build the car around it.
With the Explorer, they somehow found a way to start assembly with the heater core and the radiator
Ummm Hers is a 2007 as well. Yeah I'll agree with the first thing put together. It fits down inside that saddle mounts but the bottom tank has to fit under the AC condensor ? How in the Hell ?

I started about 6:30pm and got out of the shower about 1am.
When I took off the expansion tank, I found the crack on top where it was leaking. If it does it again in the same spot, I'm going to try to use some PVC/ABS glue to fix it. or maybe JB Weld rather than pull that ******* out again. . . . better yet, trade it in.
Steveodle
Well-known member
Wired up the over the air tv and strung up some tomatoes.
Sent from my SM-N950U using The Garage Journal mobile app
Sent from my SM-N950U using The Garage Journal mobile app
kaymccampbell
Well-known member
Transmission fluid n filter on the Journey.
dkroth
Well-known member
All fluids and filters on the family van....
.
.
GeeTeeOhh
Well-known member



Attachments



Outlawmws
Well-known member

This morning I polished up my old Marine Corp Dress Blues and Duty Belt brass belt buckles. I display them in the shop office.
The white Dress Blues belt will require a good scrubbing/cleaning to bring it back to white before I reattach the 4 pc buckle.
I tried to put the belt around my waist...lets just say 47 years later, I'm not that young U.S. Marine with a 28" waist anymore...
Nice day today so its out to the garage now...
FWIW I doubt you will ever scrub that dress belt back to white and bleach is probably going to yellow it some. Not sure where you are located but if you want to display it I would just go online or to a nearby PX and pick up a replacement dress belt. This looks like a pretty decent deal https://www.marineshop.net/white-belt-for-male-dress-blue-uniform-500772
bobj49f2
Banned
Repaired and painted two mangled panels off of my son's hay cutter. Not perfect but they were really mangled. And its going on a piece of farm equipment thats going to used and abused.
View media item 104597
View media item 104597
Outlander
Well-known member
Nothing. Was running around for the ATV club yesterday making sure the trail agents were out, and today was a 3 hr Zoom meeting for the federation's annual general meeting. Today was kind of like every other confinement day except I am usually in 6 hours of online meetings!
I did get a 90 minute nap!!
I did get a 90 minute nap!!
stonesfan68
Well-known member
What year? I have a 2007 and have replaced the radiator once and it's leaking again.
I've replaced a few radiators in my time on this earth - none of them prepared me for this. You know the old joke - the first part when they build a car is the heater core. They build the car around it.
With the Explorer, they somehow found a way to start assembly with the heater core and the radiator
Ummm Hers is a 2007 as well. Yeah I'll agree with the first thing put together. It fits down inside that saddle mounts but the bottom tank has to fit under the AC condensor ? How in the Hell ?
I started about 6:30pm and got out of the shower about 1am.
When I took off the expansion tank, I found the crack on top where it was leaking. If it does it again in the same spot, I'm going to try to use some PVC/ABS glue to fix it. or maybe JB Weld rather than pull that ******* out again. . . . better yet, trade it in.
When i did my son's 2007 Explorer I kept telling myself, "FordTechMakuloco did the job in 13 minutes on the Youtube video, what am I doing wrong?!"
FordTechMakuloco- Don't Buy Cheap Radiators
FordTechMakuloco- Explorer Radiator Replacement
Last edited: