To avoid these ads, REGISTER NOW!

What did you do "IN" your garage today?

sweetk30

Well-known member
Joined
Jan 2, 2011
Messages
2,312
Location
finger lakes area upstate ,ny
Brown santa dropped me a box off today . It had these 6 sets of lights inside. 3 white & 3 blue icicle non twinkle .

I added them to my 2 white twinkle lights from last year & my light balls .

Now the BLUE LIGHT LOUNGE is a lot better for light but still dim for after hr's fun time hanging out .
 

Attachments

  • 20210104_221018.jpg
    20210104_221018.jpg
    93.3 KB · Views: 141
  • 20210104_221006.jpg
    20210104_221006.jpg
    130.5 KB · Views: 180
To avoid these ads, REGISTER NOW!

rpcraft

Well-known member
Joined
Aug 14, 2014
Messages
1,069
Location
Waco
Took apart a 25 year old battery charger that was making all of the right noises, but wasn't charging. Tested continuity everywhere, disconnected and reconnected all of the wires and cables and put it back together - and like magic, charges like it is supposed to. :dunno: :)


attachment.php

I'm curious if the internals were all marked with Schumacher, lol.
 

Rsharp66

Well-known member
Joined
Mar 27, 2013
Messages
191
Location
Raleigh, NC
Changed oil and filter on Challenger. Pulled dead battery out of Camry for core on new one. Soaking old 1896 bicycle in penetrating oil to try to break various parts loose.
Will do bike picture on next post
 

555

Well-known member
Joined
Nov 10, 2007
Messages
2,325
Location
Nomad-Arkansas & Georgia
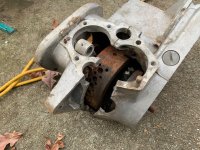
Took on this 1969 T120 (Bonneville) engine repair. I am not much of a Brit motorcycle guy but I think a little screen wire and bondo will make this good as new. Remember to always clean your sludge trap!
 

Attachments

  • 69 Triumph 650 case carnage.jpg
    69 Triumph 650 case carnage.jpg
    145.9 KB · Views: 125

LS6 Tommy

Well-known member
Joined
Dec 27, 2013
Messages
26,162
Location
Northern NJ
Took apart my old laser pointer. It's been in a drawer with the AAA batteries in it since I stopped teaching. Knocked the old, corroded batteries out and cleaned it up. Tried new batteries, but no luck. I'll bring my mulitimeter home from work this weekend and see if the switch is just not making contact. Should be and easy fix if that's all it is.

Tommy
 

jonshonda

Well-known member
Joined
Jul 17, 2017
Messages
4,753
Location
Wisconsin
Hung this bad boy up! I had to build some extra shelving to accommodate the items that is misplaced. Still have to source the vent components, and cut a hole in the wall. As well as get the gas line ran, and get power close to it. 75k BTU ADP unit.

20210105_172003 by Jon S, on Flickr

Finished up my Kreg Miter saw improvements. Works great and sure beats pulling out a tape measure, pencil, and square for every cut.

20210105_172109 by Jon S, on Flickr
 

JasonMcElroy

Well-known member
Joined
Sep 5, 2012
Messages
380
Location
San Jose by way of Philly & NYC
Took on this 1969 T120 (Bonneville) engine repair. I am not much of a Brit motorcycle guy but I think a little screen wire and bondo will make this good as new. Remember to always clean your sludge trap!

Nice.

Are you going to repair the cases or build a mix with parts and another core?

Those left rods love to punch through cases when the big ends starve for oil. But you already know that ;-0

Have fun.

Jason
 

rsparks64

Well-known member
Joined
Mar 22, 2015
Messages
584
Location
Hill Country Texas
EZ, Youse gots to explain or post what products your using to get this transformation.

Please ?

Based on that picture I would say he had some elves from the workshop helping.

Some of the car forums have whole threads devoted to pictures showing reflections. Some are pretty phenomenal.
 

ezriderga

Well-known member
Joined
Apr 1, 2009
Messages
1,741
Location
NW GA
Based on that picture I would say he had some elves from the workshop helping.

LOL. Actually the elves are still taking time off from all their hard work last year.

For Ben Buck. After washing the paint, I used a clay bar (fine) to get the contamination out of the paint. I then polished the paint with a 3” and 5” random orbital polisher. I used an orange polishing pad and Meguiar’s 205 polish. After cleaning off the residue left by the polish, I coated the paint with Collinite 845.
 

Deadsquiggles

Well-known member
Joined
Nov 3, 2014
Messages
769
Location
Chesapeake, VA
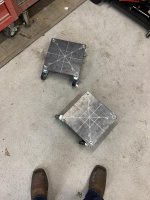
Took some steel plate that showed up today inside and marked it up so I could drill it for casters tomorrow. Gonna be my bench grinder and belly sander mounts whenever my 4” tubing shows up.
 

jonshonda

Well-known member
Joined
Jul 17, 2017
Messages
4,753
Location
Wisconsin
Tell me about your improvements. Did you add some type of measurement device?

https://www.kregtool.com/shop/cutting/miter-saw-cutting/

I added the Kreg Production Stop, and Top track to the right side of the saw. It has a tape measure on top, so I just slide the production stop over to the needed measurement, and cut away.

The mounting isn't fancy. I just used 1x3's for the working surfaces, and some 2x4's bolted onto the stand.
 

WisJim

Well-known member
Joined
Dec 20, 2010
Messages
2,351
Location
Menomonie, WI
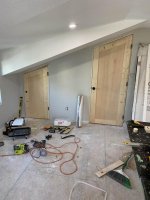
My new garage and shop is getting drywalled this week, so I am mostly sticking my head in the door and going "Wow" at the progress the guys are making. I'm hoping that they are able to get the taping (and maybe paint) done before the weather gets really cold, and then I'll be able to start organizing with new shelving and other storage. It's been a long hard summer for construction projects, and I'm not used to hiring people to do things for me, but old age is slowing me down.
 
To avoid these ads, REGISTER NOW!

Flat Thunder Channel

Well-known member
Joined
May 4, 2020
Messages
402
Location
Ohio
Santa finally dried out so he no longer taunts me in the garage. I worked on the snow plow last night and found another missing link. Hopefully the Wheelhorse will be pergulating before too long.

This week's video is up. It's a simple battery swap in a 2015 Ford Fusion. It's simple but really makes you wonder what / why they built it like this? I love Ford, but come on!!! What's next lifting the body off to swap a battery. Check out the video if you get bored and or want to see some 'awesome' car engineering!

Check it out

Thanks!
 

Attachments

  • 2021-01-06_12-16-43.jpg
    2021-01-06_12-16-43.jpg
    148.2 KB · Views: 92

steve308

Well-known member
Joined
Nov 20, 2011
Messages
2,085
In the process of refinishing my teak tables....did the final wipe down with a tac cloth and applied the first coat of tung oil. Look like new and even my wife is happy I didn't let her chalk paint them.
 

engineer2

Well-known member
Joined
Dec 13, 2009
Messages
11,846
Location
Chicago burbs
Assembled a drawer unit the wife bought. She overpaid about $50 for it I figure, but oh well. Made in China quality complete with a couple of partially drilled holes on one of the drawers, sloppy tolerances, and really soft particle board. Lots of wood glue and a rubber mallet helped. Instructions were OK except for the small blurry drawings. I feel sorry for people who buy it and don't have any assembly skills or tools.
 

CoogarXR

Well-known member
Joined
Jan 11, 2016
Messages
6,888
Location
Ohio
Put the finishing touches on my built-in AV rack in my theater room. I took the shelves out to the garage and used a router and a rabbet bit in my router to cut a channel to recess an LED strip into the edge of the shelves. I used my tiny table saw to cut a groove down the side to hide/protect the wire.

I am not a woodworker at all, but I think the project turned out OK:

attachment.php

attachment.php

attachment.php


Yes, the top LED strip is a different type. I didn't have the forethought to cut a channel into the top of the rack (and now the wall is finished and the carpet is in, so no more sawdust in the house, lol). So I made a lens out white plastic and used a flat led strip up there. The light from all 4 shelves is pretty even, even thought the top strip looks much brighter on camera.
 

Attachments

  • IMG_20210104_152232852.jpg
    IMG_20210104_152232852.jpg
    77.6 KB · Views: 804
  • IMG_20210104_152210094.jpg
    IMG_20210104_152210094.jpg
    98.2 KB · Views: 810
  • IMG_20210104_200458445.jpg
    IMG_20210104_200458445.jpg
    56.2 KB · Views: 797
Last edited:

AJHD

Well-known member
Joined
Jan 4, 2020
Messages
3,115
Location
AZ
This week's video is up. It's a simple battery swap in a 2015 Ford Fusion. It's simple but really makes you wonder what / why they built it like this? I love Ford, but come on!!! What's next lifting the body off to swap a battery. Check out the video if you get bored and or want to see some 'awesome' car engineering!

I did some contract work building autonomous vehicles for testing purposes. Our primary platform was the Ford Fusion because everything is electric and computer controlled, even the power steering. We had 2018 models at the time, I believe... It was late 2017/early 2018. About $40k from the dealership fully loaded before we even touched them.

We had to tear that damn thing down to bare metal, inside and out, for installation of the equipment and running all the wiring. But for some reason I don't remember the battery being in the front like that, the models we worked on the battery was in the back (trunk).

I worked for a Ford dealership for a minute in 2017 and I think it was the Ford Edge, the battery was like that under the cowl and behind the air box. Pain in the a$$ to replace. There was another model, cannot remember which, that had the battery under the passenger seat. I've also seen them under the rear seats. Don't recall if those were Ford or not though.

But despite not being a fan of domestic vehicles in general, it beats Dodge's brilliant idea of putting the damn battery in the wheel wells. I mean really Dodge?
 

Deadsquiggles

Well-known member
Joined
Nov 3, 2014
Messages
769
Location
Chesapeake, VA
Drilled some holes in my steel plate that showed up the order day and laid out all the markings for the placement of the 4” square tubing I’m waiting on and where the gussets are gonna go. And then installed the casters to clear some room off the shelf.
 

Attachments

  • 8DD8176E-9A9A-4DC4-A417-522F0C240C5C.jpg
    8DD8176E-9A9A-4DC4-A417-522F0C240C5C.jpg
    115.9 KB · Views: 115

vertguy

Well-known member
Joined
Apr 6, 2010
Messages
1,263
Location
SE WI
The replacement PTO/electric clutch and PTO switch showed up for the tractor, so I decided to tackle what I thought should be a quick repair. Of course the snow blower mounting bracket was in the way, so while removing it I did not notice the chute motor cable and promptly broke off the connector while pulling the blower away from the tractor. The PTO repair was completed and I am ready for the next snowfall. But now I am awaiting the $130 replacement chute motor so I can fix that self induced issue :(

Fingers crossed I make through this year without some additional repairs.
 

SuperCat

Well-known member
Joined
Jan 6, 2012
Messages
1,100
Location
Sacramento, CA
Yesterday I needed a small ball peen hammer to reduce the bump caused by previous house owner putting a large screw in a small hole in wood. Noticed my old hammer had some rust and it irritated me. That was yesterday, so today I took some sandpaper and hand sanded two of my old ball peen hammers to get rid of the rust and crud. Put a little engine oil on them to keep rust at bay. Maybe when the weather stops raining and warms up I can paint/clear coat them for a longer lasting solution to the rust problem, but now isn't a good time. It is true, rust never sleeps. :thumbup:
For the record, I did not polish them. Lol. :D
 

555

Well-known member
Joined
Nov 10, 2007
Messages
2,325
Location
Nomad-Arkansas & Georgia
Nice.

Are you going to repair the cases or build a mix with parts and another core?

Those left rods love to punch through cases when the big ends starve for oil. But you already know that ;-0

Have fun.

Jason

Jason, It is not mine, belongs to the son of a friend. I split the cases for him. I have a good left side that he is welcome to use. I've been told that a mismatch may or may not work. I will bolt them together and see if I have any obvious issues. If not, I'll add the crank and cams for further evaluation. If that doesn't work he will need to find a matched set. This is a bitsa bike he bought cheap last spring. So no problem with changing the engine numbers.
Regards,
555
 

Copymutt

Well-known member
Joined
Sep 3, 2016
Messages
3,432
Location
Colorado
Posting more than usual today as I put my back out yesterday ice fishing.
Last winter my ice fishing consisted of sled, shelter, fish finder, heater, buckets and tackle. This year I’ve been all about minimalism.
Made this multifunction tool to serve ice fisherman needs w/o having to carry separate items. Hate digging through the bucket.
image.jpg
Combines ice scoop, ice thickness ruler, fish ruler, rod holder, beer opener, bait holder.
Headed out to the ice now, back feels better.
 

Flat Thunder Channel

Well-known member
Joined
May 4, 2020
Messages
402
Location
Ohio
I did some contract work building autonomous vehicles for testing purposes. Our primary platform was the Ford Fusion ......I worked for a Ford dealership for a minute in 2017 and I think it was the Ford Edge, the battery was like that under the cowl and behind the air box. Pain in the a$$ to replace. There was another model, cannot remember which, that had the battery under the passenger seat. I've also seen them under the rear seats. Don't recall if those were Ford or not though.

But despite not being a fan of domestic vehicles in general, it beats Dodge's brilliant idea of putting the damn battery in the wheel wells. I mean really Dodge?

You were much more intimate with a Fusion than I have been. My real distaste stems from the huge panel retained by 11 screws I have to remove just to change the engine oil. These are the little details that frustrate me.

Why place a serviceable part in a location that isn't accessible? I have worked on a saturn with a battery in the truck. It was easily accessed and it even contained a jump start lug in the engine compartment. That's thinking!

I imagine placing the battery in different locations is probably frowned upon due to the expense of long battery cables. Put it as close to the power distribution box as possible.

End of the day if they put it in there, I can get it out. It was just surprising why they made a special clamp just to tuck it under the cowl.

Have you seen the hybrid, hydrogen electric powered cars? I was at a Ford testing facility in 2004. You have to drop out the entire underbelly of the car to service the system / batteries. It looked like a nightmare for people to work on. I haven't heard much about them since. It must have been a pipe dream they entertained to appease the government.

Maybe we can get more car designers to work on their creations? Go team Ford! I still like you even if you make a few questionable designs.

Cheers,
 

AJHD

Well-known member
Joined
Jan 4, 2020
Messages
3,115
Location
AZ
You were much more intimate with a Fusion than I have been. My real distaste stems from the huge panel retained by 11 screws I have to remove just to change the engine oil. These are the little details that frustrate me.

The splash guards? Yes, just about every vehicle made has them. Some are worse than others. I forget the model (something Euro), but when I was with Brake Masters, there was a vehicle one day that literally had splash guards from front to back. All you could see underneath the car were the wheels.

Toyota trucks (and probably others too) have heavy metal skid plates up front. Those are always fun too.


Why place a serviceable part in a location that isn't accessible? I have worked on a saturn with a battery in the truck. It was easily accessed and it even contained a jump start lug in the engine compartment. That's thinking!

Some splash guards have holes in them or a removable cover that allows access to the oil drain plug, oil filter and/or trans.

Also, yes, most vehicles with batteries not located in the engine bay will usually have lugs that you can use to jump the vehicle or run a battery test. They don't always work, but it's a common feature.


Have you seen the hybrid, hydrogen electric powered cars? I was at a Ford testing facility in 2004. You have to drop out the entire underbelly of the car to service the system / batteries. It looked like a nightmare for people to work on. I haven't heard much about them since. It must have been a pipe dream they entertained to appease the government.

Again, an unfortunate but common feature. Most vehicles these days have so much **** shoved into the engine bay, it can be impossible to replace valve covers or timing covers, or a timing belt/chain job, etc. So designers use sub-frames/engine cradles that allow you to drop everything down and work on it outside of the car. Like other things, some are easier than others and it depends on the car and the job you're doing.
 

DLW875

Active member
Joined
Jan 6, 2018
Messages
27
Location
Iowa
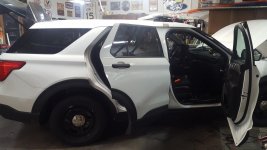
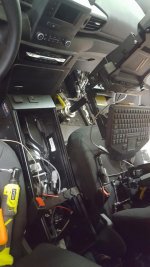
This is my latest project. It turned out great, aside from tying up my garage longer than expected. Momma isn't happy with her car sitting outside in the winter, lol.
 

Attachments

  • 20210107_103518.jpg
    20210107_103518.jpg
    44.3 KB · Views: 167
  • 20210107_102833.jpg
    20210107_102833.jpg
    48.6 KB · Views: 162
  • 20210104_173808.jpg
    20210104_173808.jpg
    114.6 KB · Views: 165
  • 20210102_200905.jpg
    20210102_200905.jpg
    74.8 KB · Views: 176
  • 20210102_200845.jpg
    20210102_200845.jpg
    145.6 KB · Views: 168
  • 20210102_200822.jpg
    20210102_200822.jpg
    148.4 KB · Views: 172

LS6 Tommy

Well-known member
Joined
Dec 27, 2013
Messages
26,162
Location
Northern NJ
Started checking the freebie LED trees someone tossed in the dumpster at work. They're Restoration Hardware brand, apparently not cheap stuff. From what I can find, they're discontinued, but ran between up to $350.00 each when they were new. Two are 9' and three are 5'. The two 9' work perfectly. Two of the three 5' are missing the wall warts. No biggie. The ones that work check out as 24VAC. For a few bucks, I;ll get generic wall warts and make my own weatherproof connectors. I'm going to have some nice new additions to my Christmas lights next year.

From the Restoration Hardware website:

restoration hardware starlit trees.jpg

Tommy
 

Flat Thunder Channel

Well-known member
Joined
May 4, 2020
Messages
402
Location
Ohio
The splash guards?.....
Some splash guards have holes in them or a removable cover that allows access to the oil drain plug, oil filter and/or trans.

I think they also reduce underbody drag. It's an effort to help improve fuel economy. I agree being able to remove a small portion of access cover would be ideal. They hosed that idea on my fusion. The oil plug is on the side of the pan. This causes it to drain with a nice long projected stream front to back. I was going to make a smaller access panel until I noticed this. I would need to add a feature or part to make it drain straight down. The oil filter location also isn't located in position that would make access holes a good option. Looks like I'll be removing the cover for several years. That is unless I get lucky and win the lotto. A new family car sure would be fancy!

Last night I was looking at the mysterious wiring issue on my wheelhorse 520-H. Tonight I'm off to poke it some more. I might be on to something or it's just tricking me again. Here a poke, there a poke, everywhere a poke poke..... Seems to be my general ability to diagnosis tricky wiring faults. Look out sparks.... Cheers,
 

Attachments

  • IMG_20210107_123055_893.jpg
    IMG_20210107_123055_893.jpg
    158.8 KB · Views: 112

Deadsquiggles

Well-known member
Joined
Nov 3, 2014
Messages
769
Location
Chesapeake, VA
Swapped some casters on my tool cart and engine stand, cleaned up a bunch of metal chips from the other day, and finally organized all my sockets. It kinda annoys me that the casters on my tool cart are mismatched but they didn’t have black in stock and I won’t about to pay an extra $35 just to get two more blue casters.
 

Attachments

  • 3B188B27-A0CE-418A-8676-FB82D978DD50.jpg
    3B188B27-A0CE-418A-8676-FB82D978DD50.jpg
    141.3 KB · Views: 81
  • 8BA53A32-7101-427E-817B-CB1B58C4F5B0.jpg
    8BA53A32-7101-427E-817B-CB1B58C4F5B0.jpg
    127.4 KB · Views: 85
  • 92C68F42-C5D1-4147-932A-FCF5A25E1D72.jpg
    92C68F42-C5D1-4147-932A-FCF5A25E1D72.jpg
    154.7 KB · Views: 84

Magnum440d100

Well-known member
Joined
Dec 2, 2018
Messages
3,581
Location
Indiana
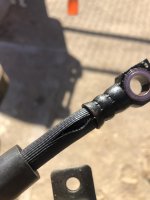
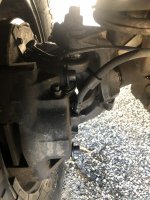
This one was interesting.


These were on my Cummins truck. I just got done pulling a loaded cargo trailer. Slowing down to make a turn, I noticed my brakes were “fading”. We got to the property, unhooked the trailer, and as we were leaving to make the last run (pickup bed load only) I discovered I had no pedal.

Made it to a n Oreillys, checked the reservoir and it was empty :shocking:

Walked around the truck looking for signs of leaks, and found the passenger front was leaking.

Fixed that yesterday morning, and while under the truck, I noticed that the drivers front was leaking as well.

What would cause BOTH lines to go out at one time?!?!


I did have work done (ball joints) and I suspect that the shop may have let the calipers hang. But it’s been 25k miles since.

I have done some loaded panic stops (car cuts me off and I have to stand on the brakes, with a loaded trailer).

I was in a yard with a lot of small pieces of branch material. I wonder if branches kicked up and got the lines. But BOTH?!?!

Maybe they were just old? The truck is a 99 with 215k miles. Maybe it was just time?


Who knows :3gears:
 

Attachments

  • 61FE0236-32DF-4959-BA66-D85E228BA7A2.jpg
    61FE0236-32DF-4959-BA66-D85E228BA7A2.jpg
    59.4 KB · Views: 91
  • 411320C5-BAC1-4139-8E1F-51E0D98620C6.jpg
    411320C5-BAC1-4139-8E1F-51E0D98620C6.jpg
    119.5 KB · Views: 86
  • 03339B6F-2E19-49CD-8999-2C75138F3F6D.jpg
    03339B6F-2E19-49CD-8999-2C75138F3F6D.jpg
    90.6 KB · Views: 89

vertguy

Well-known member
Joined
Apr 6, 2010
Messages
1,263
Location
SE WI
Installed the replacement blower chute motor that I managed to damage (snapped off the wire harness connector) while swapping a failed PTO electric clutch on the tractor. And now that the snow blower is fully functional again, we are guaranteed to not have snow anytime soon :thumbup:
 
To avoid these ads, REGISTER NOW!
Top Bottom