To avoid these ads, REGISTER NOW!

Wood cabinets for tool, parts or nuts and bolts or even your socks. please show them

Craig Balzer

Well-known member
Joined
Sep 21, 2005
Messages
867
Location
Colorado Springs
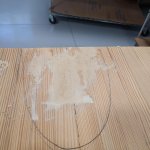
I used plastic wood to fill the gouges made by the chisel.

I started by circling the bad spots but it it took more effort to sand the permanent marker marks than the plastic wood. Reverted to marking an X on both sides of the gouge. Still lots of sanding was required.
 

Attachments

  • 20210327_160636.jpg
    20210327_160636.jpg
    100.4 KB · Views: 88
  • 20210327_160609.jpg
    20210327_160609.jpg
    115.5 KB · Views: 67
  • 20210328_104738.jpg
    20210328_104738.jpg
    146.3 KB · Views: 61
  • 20210328_092316.jpg
    20210328_092316.jpg
    125.1 KB · Views: 53
  • 20210328_092352.jpg
    20210328_092352.jpg
    120 KB · Views: 58
To avoid these ads, REGISTER NOW!
OP
D

drivesitfar

Well-known member
Joined
Oct 23, 2013
Messages
36,040
Location
Pacific Northwest
Craig: I’m posting from my cell so making it a bit brief but wanted to thank you very much for taking the time to post up all these pictures with comments too

I’m wondering if another way to remove all that bowling alley finish might have been with an old power craftsman or makita 3.25 inch wide hand planer? I’m guessing it might have gone thru more than a few blades but you wouldn’t have the gouges or all the time involved hand chiseling.

Again thanks for sharing
 

Craig Balzer

Well-known member
Joined
Sep 21, 2005
Messages
867
Location
Colorado Springs
That prepared the surface for use as a bench.
The underside was as labor intensive

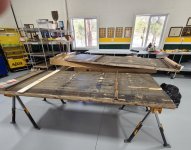
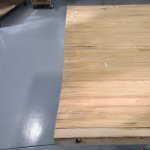
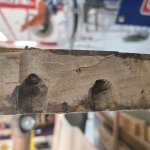
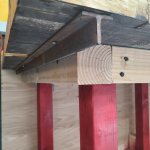
Photo 1 - this chunk of wood bracing was on the edge of one of the lanes. No idea what it was for but I needed a sawz-all to lose it. It had 5 long, thick screws holding it in place -- couldn't pry them out with out damaging the lane.

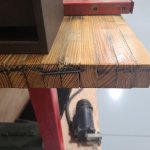
Photos 2-5: The inverted T steel cross braces were about 6 feet apart. The came off easily with a large screwdriver. (Needed to remove them to make room for the frame and legs.)
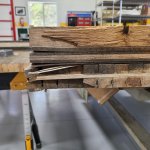
They provided lateral strength to the whole lane structure. The splitting / separation was bad enough on each lane that I ended up removing the edge board from each. Lanes are 40" wide so I have plenty of width to play with.

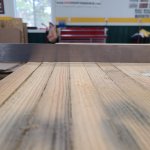
Photo 6 shows the unevenness that resulted in the steel brace not spanning the entire width of the lane. I needed to pry loose those 3-4 boards and reattaching them with screws. Improved the surface smoothness but I could have done better.
 

Attachments

  • Splitting section of maple lane.jpg
    Splitting section of maple lane.jpg
    150.2 KB · Views: 59
  • Splitting elements on pine lane - close up.jpg
    Splitting elements on pine lane - close up.jpg
    144.5 KB · Views: 58
  • Bowling Lanes on edge.jpg
    Bowling Lanes on edge.jpg
    151.7 KB · Views: 58
  • Bowling Lanes long view.jpg
    Bowling Lanes long view.jpg
    153.8 KB · Views: 59
  • Maple Lane view of lip.jpg
    Maple Lane view of lip.jpg
    142.7 KB · Views: 63
  • 20210325_161806 (2).jpg
    20210325_161806 (2).jpg
    79.3 KB · Views: 66
Last edited:

Craig Balzer

Well-known member
Joined
Sep 21, 2005
Messages
867
Location
Colorado Springs
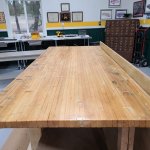
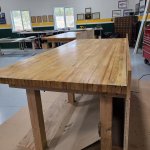
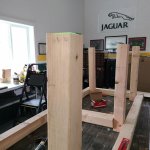
I used 4x4 wood to build a box frame to rest the lanes on. The frame was flush with the rear edge and I left a 5" ledge on both edges and the front to allow for clamping and apply a future vice.

The six 4"x4" legs were set inside the corners of the frame so they end up being inset a bit along the front of the bench but it is plenty stable. I also added a pair of legs centered on the length for strength. If I were to do to again I would skip the center pair of legs -- the tables sit level but with 6 legs it is hard to turn when moving the benches.
I used a laser level on the legs while they were inverted on the work surface to ensure they were all the same length

The legs sit on 6" casters each rated at 1000 lbs -- yeah, overkill and expensive but the benches will hold a ton of weight.

I used 3/4" plywood for both the backsplash and the shelf. The shelf was to provide stability and add a thick target for the hardware to mount the swiveling casters (the base of the casters is bigger than the 4x4s - used 1/2" wood screws when the footprint matched the caster; 3/8" through bolts and nut otherwise).

I drilled through the lane in two places between each leg and used 3/8" lag bolts to fasten the frame to the top. I ran a countersink drill ~1" into the lane surface and plugged it with 1" dowel sections and wood glue. Sanded them smooth and finished it off with 3 coats of semi-clear polyurethane.

Last point: the crew that cut out the lanes nearly cut them at 90°. Just a quick pass with a circular saw cleaned that up.

Hope this helps
 

Attachments

  • 20210422_131824.jpg
    20210422_131824.jpg
    149.5 KB · Views: 63
  • 20210422_131835.jpg
    20210422_131835.jpg
    149.1 KB · Views: 67
  • 20210422_143202.jpg
    20210422_143202.jpg
    146.7 KB · Views: 71
  • LaserLevel to get legs the same length 08APR21.jpg
    LaserLevel to get legs the same length 08APR21.jpg
    125.2 KB · Views: 65
  • Close up Hardwafre.jpg
    Close up Hardwafre.jpg
    115.7 KB · Views: 57
  • 20210325_165934.jpg
    20210325_165934.jpg
    115.9 KB · Views: 63
Last edited:

Craig Balzer

Well-known member
Joined
Sep 21, 2005
Messages
867
Location
Colorado Springs
I’m wondering if another way to remove all that bowling alley finish might have been with an old power craftsman or makita 3.25 inch wide hand planer?

Maybe. In fact -- likely. But I am not a wood guy; I built my hobby shop to work on old cars. I wasn't inclined to spend money on another one-time-use tool.
All I know is that whatever the coating was on the lanes was chemically bonded to the wood. By the way -- the pine and maple boards composing the lane were 1.75" thick. Older lanes were as thick as 2".

Anyone thinking about bowling alley benches should move now:
  • 2" thick lanes are getting scarce;
  • My lanes were covered with the white plastic inserts to cover exposed nails; check carefully when buying;
  • My lanes were covered with the black stains from rusted/rusting nails; check carefully when buying;
  • Maple boards are located on the first and last 10-15 feet of the lane cuz they are stronger than old-growth pine (ball landing area and pin deck) -- pricier cuz of the type of wood used but the existence of the markings on/in the wood -- arrows, pin dots, etc.
 

RTM

Well-known member
Joined
May 13, 2019
Messages
13,221
Location
SF Bay Area
Do you have through bolts running across the lane! Seems to show in the last photo of the last post w photos. Buddy bought a lane, and hoped to narrow it, didn’t know about the bolts in advance, hit them with the saw.
 

Private Lugnutz

Well-known member
Joined
Mar 30, 2012
Messages
30,643
Location
The Authentic Jersey Shore
Those are beautiful workbenches, Craig. I've never heard or seen of re-purposed bowling alley lane workbenches before, and without prior knowledge, I would've just thought of them as original butcher block.

This is totally subjective and off the top of my head and no comment whatsoever on your decisions. Again, they're beautiful. But I have to say, just riffing here, I also think it would be neat to leave the coating and the markings. Not only because it is bonded and difficult to remove, but I kind of like the aesthetics of seeing the remnants of vintage bowling alley markings, especially if it was local, of not only not concealing but accentuating that the benches were made with salvaged material. While I can see how that surface might be a little slick, it would also be easier to clean.

Reminds me of a story. One of my older brothers, a veterinarian, went to school at Indiana University. This was in the 80's. His first job was out there and he was doing large animal work. One of his clients was a horse farm just outside of Bloomington where they specialized in dressage. The dressage arena was ringed with boards about 4-feet high. All of them were salvaged from the old IU basketball arena and you could see the various lines and markings from the court.
 

Jayman17

Well-known member
Joined
Feb 6, 2017
Messages
3,812
Location
Seattle, Wa
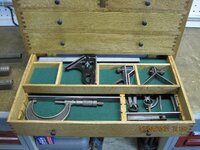
Craig, those are some nice cabinets you posted. That on in your house is a nice way to show some collectibles from family.
Those alley worktops sure took some hard work to get right. Nice job!

Jay

You should post a photo of that Accel cabinet in the metal cabinet thread. Lol
 

Outlawmws

Well-known member
Joined
Aug 9, 2011
Messages
39,301
Location
The Badlands
Those are beautiful workbenches, Craig. I've never heard or seen of re-purposed bowling alley lane workbenches before, and without prior knowledge, I would've just thought of them as original butcher block.

Really? I've seen dozens! Especially on GJ! I've given up looking for some lane as it's always mega bucks. I almost got one at a yard sale, but he wouldn't budge.
 

RTM

Well-known member
Joined
May 13, 2019
Messages
13,221
Location
SF Bay Area
The bowling alleys were big 20 years ago when I got into woodworking, but don’t see too many showing up these days. Most guys go for the quick cheap bench, laminated 2x stock. Seems less work, and you can upgrade later.
 

Private Lugnutz

Well-known member
Joined
Mar 30, 2012
Messages
30,643
Location
The Authentic Jersey Shore
The bowling alleys were big 20 years ago when I got into woodworking, but don’t see too many showing up these days.
I've been set on workbenches for 30 years, added the 41-C-15 cabinet with the butcher block top about 5 years ago, and don't follow the garage or fab threads, so I'd be ignorant of any trends out there. It's definitely a neat idea. I can see why it's popular.
 

Craig Balzer

Well-known member
Joined
Sep 21, 2005
Messages
867
Location
Colorado Springs
Do you have through bolts running across the lane! Seems to show in the last photo of the last post w photos. Buddy bought a lane, and hoped to narrow it, didn’t know about the bolts in advance, hit them with the saw.
RTM

I do not have through bolts across the lane. I do not have the skill to drill a 40" deep hole through all that wood without the drill breaking through the top or bottom.

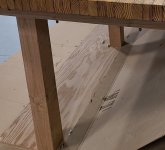
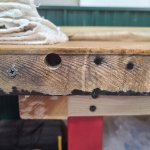
The hole you ask about is actually hole that is 45° through the end board. I ended up removing that board from the lane. See photos 1 & 2. As luck would have it I keep that board after I removed it -- don't ask me why.

Photos 3 thru 9 show better how I assembled the frame and attached it to the top, including the hardware I used.

Photo 7 shows how reattached the heavy steel T bar to add rigidity to top top.

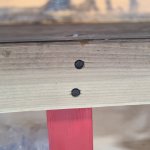
Photo last shows the only hardware I cut through when trimming/squaring both ends of the lane for the top. This nail is representative of how the boards of the lane were assembled. There are dozens -- if not 100's -- of these nails throughout the bowling alley top.
 

Attachments

  • 20210519_091203.jpg
    20210519_091203.jpg
    2.7 MB · Views: 42
  • 20210519_091208.jpg
    20210519_091208.jpg
    2.5 MB · Views: 40
  • 20210519_085416.jpg
    20210519_085416.jpg
    2.3 MB · Views: 37
  • 20210519_085425.jpg
    20210519_085425.jpg
    2.3 MB · Views: 33
  • 20210519_085610.jpg
    20210519_085610.jpg
    2.6 MB · Views: 33
  • 20210519_085621.jpg
    20210519_085621.jpg
    2.3 MB · Views: 33
  • 20210519_085729.jpg
    20210519_085729.jpg
    2.4 MB · Views: 33
  • 20210519_085510.jpg
    20210519_085510.jpg
    2.4 MB · Views: 35
  • 20210519_085514.jpg
    20210519_085514.jpg
    2.4 MB · Views: 42
  • 20210519_085526.jpg
    20210519_085526.jpg
    2.3 MB · Views: 75

RTM

Well-known member
Joined
May 13, 2019
Messages
13,221
Location
SF Bay Area
Where yours had nails, I’ve seen several lane tops where they had a long piece of all thread holding the lane together, from the lane factory, not user installed.
 

steaks&anvils

Well-known member
Joined
Oct 15, 2016
Messages
2,470
Location
Colorado
I found some eye candy on the web.

It's cool as heck. I like the hinged lids.

This is a small, table top cabinet for watches and parts.

I edited the auction listing to remove the fluff.

"Made for watchmaker Patek Philippe. Watchmakers chest from the late 1800’s that was used by Patek Philippe. Estimated to sell at auction between $6500 and $8500.

Details: 51 individual drawers each with a hinged top, stile feet, also flat sided, measures 29x14x16 inches in size."
 

Attachments

  • Patek-Philippe-Antique-Tool-Cabinet-thumb-550x958.jpg
    Patek-Philippe-Antique-Tool-Cabinet-thumb-550x958.jpg
    136.6 KB · Views: 69

misterfixit

Well-known member
Joined
Feb 9, 2013
Messages
199
Location
Kaufman Texas
I posted this in the General room, Steaks&Anvils asked me to post it here.

20210618_145915.jpg

Well, there it is. I know it may not look like it, but this is a pretty magical thing right here. I moved it today into my new shop I built and decided I needed to tell folks about it. Before I can tell you about the magic, I have to tell you about the guy that had it before me, he was my grandfather. His name was Waylon, but I knew him as Gran Gran. Gran Gran had a lot of adventures growing up, but that's another story. He worked for Ford when the factory was in Dallas. He built cars as well as B24's at one point before leaving for the War. He served in the 24th Rainbow Division of the US Army as some sort of communication tech. He didn't talk alot about it, but he did say he helped run telephone lines as they advanced into Germany.

Gran Gran came back home after the War, went back to Ford and retired there when Ford left Dallas. Gran Gran had this wooden storage unit in his garage in Crandall Texas. I remember it very well, since he was always "piddleing around" in the garage. Over the years he built furniture, worked on cars, restored antique trunks, rebuilt and repaired a few travel trailers, and rebuilt several bicycles for kids, as well as lots of other things. In fact, he bought broken bikes and mixed and matched parts and pieces to make bikes.

What I always remember about this set of drawers and pigeon holes is that was where he kept 'stuff'. He had stuff for fixing plumbing, wiring, cars, boats, bikes and toys. It just seemed that whenever he, or we needed a part or a bolt or something, he would go out and dig around in the drawers and always found something that would work. This was moved to his new house when they moved out of Crandall and stayed there for many years. Gran Gran taught me, by direct instruction and by just doing what he did, that it's good to know how to fix things. He taught me to take pride in my work and to do a good job, even if its just me that knows it.

Gran Gran passed away many years ago, and my grandmother "Granmommy" told my dad to bring my brother and me to get whatever tools we wanted. We weren't in a hurry to go clean out his stuff, but after awhile we got together to talk about it. I told dad that the only thing I wanted was this, that I would love to have some of his other things but this was what I wanted above all else. We agreed on a time and met at Granmommies to load some things up. Dad started to open drawers to unload the contents. He kind of looked at me like I was crazy when I told him I wanted the stuff in it too. We carefully loaded it up, it actually is made in several layers of drawers. I brought it home and have had it since.

So what makes this 'magic'? I can't tell you how many times I needed some odd bolt, or nut or washer, or something that I just couldn't find. Many times I have said to myself and to my sons 'let's go see if Gran Gran has anything that will work". More often than not, in fact most of the time after some digging I find it. I have of course added 'stuff' to it. Lots of pocket parts have been dropped in since I got it. But I'm still finding his stuff that I can use. Another thing it has is it's aroma. I can't begin to explain what it smells like, old wood, oils, dirt, I'm not sure. But when I get close and especially when I open a drawer I smell it, and it takes me right back to his garage, 'helping' him work, watching him, and hearing him say as he walked over to it to dig for what he needed "well, let's go see what we can do".
 

Provincial

Well-known member
Joined
Sep 21, 2011
Messages
6,872
Location
Near Salem, OR
This is a wonderful story, very well-told. It is the sort of story that should be "trending" on social media, but they are focused on quite the opposite. It is their loss, and a loss for everyone.
I'm still using things accumulated from my great-grandfather, grandfather, and father. My son is now starting to use them, too.

I can picture "Gran Gran" in his shop.
 
To avoid these ads, REGISTER NOW!
OP
D

drivesitfar

Well-known member
Joined
Oct 23, 2013
Messages
36,040
Location
Pacific Northwest
Mr fixit: I posted a like but your story really deserved a post and a huge well done. Nothing better than stories shared about our family’s doings that helped make us who we are. Big congrats and definitely worth saving.
 

steaks&anvils

Well-known member
Joined
Oct 15, 2016
Messages
2,470
Location
Colorado
I posted this in the General room, Steaks&Anvils asked me to post it here.
Thanks!

I too have an "old tool/garage smell" that reminds me of old tools, garages and people. Uncle Dwight for car things. And great uncle Lester who was crotchety, frugal and resourceful. He and aunt Pearl lived in a rail road boxcar on the Kansas farm land during the depression (no house there yet). I have a few small tools that came from him. I recall his "sheds" having cubbies like yours.
 

Outlawmws

Well-known member
Joined
Aug 9, 2011
Messages
39,301
Location
The Badlands
Great Story Mr.Fixit. I also "collect" parts and fasteners, and have extensive storage so it's "organized" (to me). My dad had a far less extensive collection, and far less organised, but I know where I got it from.
 

Sumboodie

Well-known member
Joined
Mar 20, 2021
Messages
10,711
Location
AK
82: great point. sparks and welding splatter might be another good reason i don't have any. if i live long enough i'll have a wood shop and a metal shop sort of like school where both had their own separate areas.
Sparks aren't going to light a cabinet on fire.
Slag, if it's hot enough and falls directly into a wood cabinet, possibly.

As a SOP I've always done a 30+ min fire watch after doing hot work. Saved my garage twice in ~20 years.

Once was smoldering rags, the other was a trash can some spatter fell into.
 

misterfixit

Well-known member
Joined
Feb 9, 2013
Messages
199
Location
Kaufman Texas
I have to say that I honestly wasnt aware of this section on the forum. Thanks to Steaks&Anvils for pointing me here with my Grandfathers magic cabinet above. Funny, now I find that I have more to share:

20210625_151003.jpg

This is an old cabinet/bench from a high school science lab. I got it from my dad, who most likely got it when the school took them out of the classroom. I say most likely because he was a principal and later maintenance director for the school district many years ago. he had it in his shop and wanted to get rid of it to make more room. But he's like me, or I'm like him, and he just couldn't throw it away as trash. He had a replacement top on it of MDF which over the years had swollen. I replaced it with 2 layers of 3/4" plywood and one layer of 3/16 hardboard. I expect it to give me many more years of service.
 

steaks&anvils

Well-known member
Joined
Oct 15, 2016
Messages
2,470
Location
Colorado
I have to say that I honestly wasnt aware of this section on the forum. Thanks to Steaks&Anvils for pointing me here with my Grandfathers magic cabinet above. Funny, now I find that I have more to share:

20210625_151003.jpg

This is an old cabinet/bench from a high school science lab. I got it from my dad, who most likely got it when the school took them out of the classroom. I say most likely because he was a principal and later maintenance director for the school district many years ago. he had it in his shop and wanted to get rid of it to make more room. But he's like me, or I'm like him, and he just couldn't throw it away as trash. He had a replacement top on it of MDF which over the years had swollen. I replaced it with 2 layers of 3/4" plywood and one layer of 3/16 hardboard. I expect it to give me many more years of service.
Glad to help!

Nice cabinet and new top. Old school/office/medical etc stuff is great, built to last.

FYI, my dad was a school principal for 48yrs.
 

Bears Fan

Well-known member
Joined
Jan 26, 2012
Messages
3,439
Location
Indiana
20210618_145915-jpg.1474295


I love those two bottom cabinets (y) (y)
 

Private Lugnutz

Well-known member
Joined
Mar 30, 2012
Messages
30,643
Location
The Authentic Jersey Shore
I have to say that I honestly wasnt aware of this section on the forum.
Shhhh! Mum's the word. We like it like that. Waaaaay fewer ******* ******* contests down here. :evil:
But he's like me, or I'm like him, and he just couldn't throw it away as trash.
Yeah, you'll fit right in.
 

Jayman17

Well-known member
Joined
Feb 6, 2017
Messages
3,812
Location
Seattle, Wa
Mrfixit, nice refresh on your chem lab cabinet set. Like you said that should last you a good long time.

Jay
 
OP
D

drivesitfar

Well-known member
Joined
Oct 23, 2013
Messages
36,040
Location
Pacific Northwest
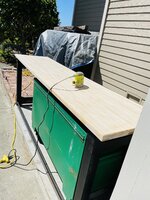
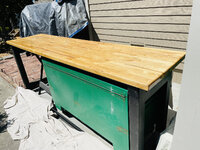
thought this old thread could use a bump and sorry no wooden cabinets to post, but i do have a WOOD treatment question.

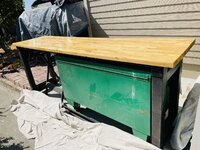
I just sanded the top off one of my old fairly cheap butcher block topped metal framed benches and my wife would like it as an outside garden bench when I'm done using it while i'm building our fence. any tips on how to protect this from rain/dew during the summers cause we'll probably tarp it during the winter? of course I thought BLO first off, but thought i'd see if any of you old wood guys know of a better product.
 

Attachments

  • 854AE90F-691D-4100-AFBA-C2E804BB4348.jpeg
    854AE90F-691D-4100-AFBA-C2E804BB4348.jpeg
    389.1 KB · Views: 25
  • 6FEA79A9-49E1-4C31-8686-39810A6B806B.jpeg
    6FEA79A9-49E1-4C31-8686-39810A6B806B.jpeg
    408.5 KB · Views: 16
  • 1D60D96A-5AF1-46C1-8EF1-26941555A681.jpeg
    1D60D96A-5AF1-46C1-8EF1-26941555A681.jpeg
    422.6 KB · Views: 14
  • 449A6A11-4CED-4259-AD23-EEFA58304AAF.jpeg
    449A6A11-4CED-4259-AD23-EEFA58304AAF.jpeg
    294.2 KB · Views: 19

RTM

Well-known member
Joined
May 13, 2019
Messages
13,221
Location
SF Bay Area
Nah, the weather will destroy it either way. I've had one under a tarp for a couple of years, and the moisture gets under the tarp, and split all the glue lines.
 

Provincial

Well-known member
Joined
Sep 21, 2011
Messages
6,872
Location
Near Salem, OR
Any tarp in contact with a surface will hold moisture. You need to have an air gap, which you can provide by building a frame above the surface.

I have had the best luck with polyurethane varnish, but it still doesn't make the wood impervious to weather for all that long.
 
OP
D

drivesitfar

Well-known member
Joined
Oct 23, 2013
Messages
36,040
Location
Pacific Northwest
RTM: this one was stored under a tarp with no air gap thru a PNW winter and seemed to do ok with a beat up finish I bought it with. I hear you on the wood not fairing very well thru winters, but the sections of the new cedar fencing I put up held up well thru last winter with 2 coats of PPG's wood stain (was sikkens brand prior to PPG buying them out).

Provi: i've stored several thousand board feet of cedar from the mill the last 10-15 years and I hear you when it's stickered and kept kinda out of the weather it does ok. thanks for the tip on the polyurethane and if it was yours would you prep it first or how many coats after sanding?

ALL: another option i'm thinking about is giving it a few coats of BLO to soak in a bit before I use this bench to make fencing parts and when i'm done with my fencing and it's ready to become my bride's? at that point i'll probably need to resand the entire thing and either use a coat or three or 4 of poly or maybe there is a better product out there now that it's 2021?

thanks everyone and hope you all find something cool to either put in your shop or maybe give to your bride so she (and you) can display it inside your home.
 
OP
D

drivesitfar

Well-known member
Joined
Oct 23, 2013
Messages
36,040
Location
Pacific Northwest
We’ll I asked this question over on woodworking 101 thread in general tools here on GJ snd a couple members sent me down the rabbit hole of marine varnishes.
SO I drove down to Rocklers and planning to buy a $32 quart can of polyurethane with the plans of painting on a few coats and using thus bench for a few months. Then at that point seeing what a couple months of working on it while building our fence did to it and either sand and find a better product or just put in to place fir my bride to use.
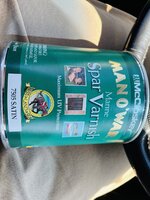
The older sales guy at rockler thought I should put down a clear oil but after talking about it a bit more and showing him a few pics I ended up buying this quart of spar marine varnish for $40. My bride painted on one coat in about 15-20 minutes and first section was almost dry to touch since it was in direct sun and about 85 degrees. Two hours later she put in a second coat. I think we are planning on putting in two more coats today and I’ll be using the bench Monday. Pics are after first and second coats and a before pic and the can of varnish. Thoughts?
 

Attachments

  • 14C0B143-43CB-4614-9011-E315E02012F7.jpeg
    14C0B143-43CB-4614-9011-E315E02012F7.jpeg
    355.4 KB · Views: 16
  • 94ECD3B1-CDBC-4BF7-94F7-019A95BD7FA5.jpeg
    94ECD3B1-CDBC-4BF7-94F7-019A95BD7FA5.jpeg
    447 KB · Views: 16
  • 3D8A4955-D235-4476-8894-CDAB1EB77D71.jpeg
    3D8A4955-D235-4476-8894-CDAB1EB77D71.jpeg
    417.7 KB · Views: 14
  • 5ED66B03-5867-4C11-855A-E7974ABCB16F.jpeg
    5ED66B03-5867-4C11-855A-E7974ABCB16F.jpeg
    402.7 KB · Views: 20
OP
D

drivesitfar

Well-known member
Joined
Oct 23, 2013
Messages
36,040
Location
Pacific Northwest
Jgaz: we’ll done sir!!

all: my bride put on a third coat of spar varnish today and had to use a brush she didn’t like as much. Not sure if that was the issue or if a light sanding was needed in beteeen coats but third had lot’s of bubbles. No worries cause she said it’s a workbench now for about two months til it’s 100% hers after that.
 

ray h

Active member
Joined
Nov 20, 2020
Messages
36
Location
back of house
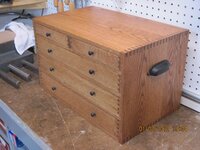
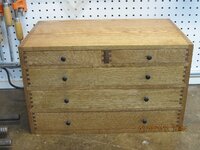
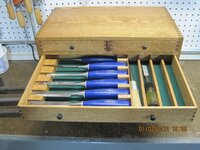
Jgaz, beautiful job. I want to build a chest for my reloading room using box joints, I prefer them to dovetails. Looking at your drawers, what is the thickness, 3/8 or 1/2?? Did you use Alum for the drawer bottoms and cover with felt? I really like the sliding till, I've been looking at old tools chests for ideas. Thanks for sharing.
 
To avoid these ads, REGISTER NOW!
Top Bottom