To avoid these ads, REGISTER NOW!

ZMotorsports Shop Projects 2.0

OP
Z

zmotorsports

ALLIANCE MEMBER
Joined
Oct 20, 2009
Messages
21,495
Location
Northern Utah
Mike,
This disease is hereditary. It was a pet peave of my dad's, and I have it as well. It even has spread inside the house. On the flip side, my wife can never put anything away in the same place and is always asking me where her car keys are (among other things)..... :ROFLMAO:

It isn't hereditary in my family or at least it skipped a generation. My dad was horrible with tool organization. It was more of a stand in the doorway of the shop and throw it. Where it lands it lands. Drove me absolutely insane. I'm definitely a product of my environment but in the opposite way. :ROFLMAO:

My son on the other hand has my OCD to some extent but not as severely.

My wife has OCD as well but hers is ever changing. She is very organized, however, she may not put the same thing back in the same place twice. I will look for a serving spoon where I grabbed it last week but lo and behold, she's found a more efficient place for it since then.:rolleyes:
 
To avoid these ads, REGISTER NOW!

rattle_snake

Well-known member
Joined
Jun 25, 2015
Messages
5,244
Location
Chandler, AZ
.. I can't seem to sleep at night knowing I have tools that aren't in their proper home. :rolleyes: Tool cart gets rolled up right next to the toolbox and tools are wiped down and put away in their respective location....Also, things like wrenches, screwdrivers and pliers need to be facing the correct direction or there is a disturbance in the force and I can feel it. 🤣
Ok I feel a little better about myself now, not alone.
Evidently I clean up and put away tools as others are still using them. :unsure:
 

LXCam

ALLIANCE MEMBER
Joined
Apr 23, 2013
Messages
19,216
Location
AZ
Rest assured you're not the only one that engraves / marks those values. I do the same thing for diff's and rotating torque on engine builds for both the short block and long block values Mike. Everyone thinks I'm nuts but it sure answers some upfront questions at times.
 
OP
Z

zmotorsports

ALLIANCE MEMBER
Joined
Oct 20, 2009
Messages
21,495
Location
Northern Utah
Had somewhat of a relaxing weekend. Friday morning while waiting for the owner to pick up the Ford F-150 I racked my Jeep and gave it a good once over and changed the engine oil and filter plus hit some grease zerks with a couple pumps of grease.

The owner showed up and we talked for a bit while I enjoyed my morning coffee and then I racked the wife's Acura and gave it a full LOF service in preparation for the winter months. By the time the owner of the Ford left it was nice enough outside to even kick the shop doors open. Currently it is somewhat unseasonably warm here in Northern Utah and not sure how much longer I will be able to work with the shop doors open so may as well take advantage of the nice weather.

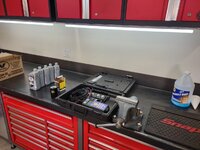
Fluids at the ready as well as my Midtronics battery and charging system tester.
shop1.jpg

Car racked and engine oil draining.
shop2.jpg

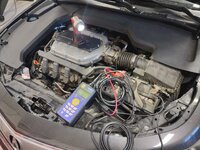
Engine cover removed and battery/charging system tester connected. The engine under the cover sure is dusty and needs a good cleaning.
shop3.jpg

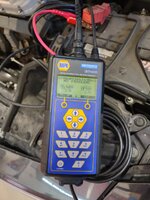
Everything looks good with the battery and charging system.
shop4.jpg

Car and Jeep should be service to get us through the Christmas and New Year's holidays now and well into late January/early February before the next service on either.

Thanks for looking.
 
OP
Z

zmotorsports

ALLIANCE MEMBER
Joined
Oct 20, 2009
Messages
21,495
Location
Northern Utah
Here are a few pictures from last weekends trip to the San Rafael Swell with the wife. Three plus days of off-roading into some beautiful back country.

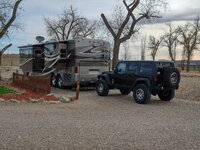
Base camp in Green River, UT for the weekend just as we pulled in with our Dynasty flat-towing our Jeep Wrangler. Slides are out and the satellite dish is searching for the signal. Wife is inside fixing a snack then we're going to go exploring.
swell1.jpg

swell2.jpg

Crystal Geyser where it flows into the Green River.
swell3.jpg

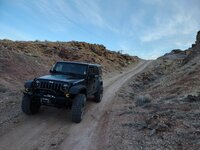
A less traveled trail called Salt Wash just south of Green River, UT.
swell4.jpg

It was a bit late getting off the trail the first night but luckily I had some decent lights. This was just at sunset but it got dark as hell before we arrived back to pavement.
swell5.jpg

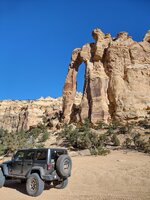
Next day explored the south side of the Swell. Went past Swasey's Cabin and continued down into Eagle Canyon where we came across the Eagle Canyon Arch.
swell6.jpg

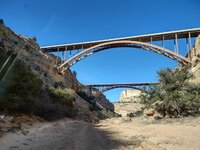
We continued on as the trail turned north and went under the I-70 bridges that I had heard so much about. These really were something to see in person.
swell7.jpg

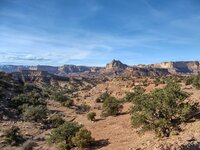
As we approached Eva Conover trail the expanse grew. The scenery here reminds me much of the Monument Valley area.
swell8.jpg

Our lunch spot for the day was below this small butte and overlooking what was either a large ravine or a small canyon.
swell9.jpg

The last day's air-down spot after turning off of I-70 and going through a closed gate to BLM land.
swell10.jpg

More to follow......
 
Last edited:
OP
Z

zmotorsports

ALLIANCE MEMBER
Joined
Oct 20, 2009
Messages
21,495
Location
Northern Utah
Coming up and out of the west side of Black Dragon Canyon.
swell11.jpg

The sign at the west side of the canyon just before approaching the Jackass Benches and Rattlesnake Flats areas.
swell12.jpg

Prior to joining up with the Buckhorn Wash main dirt road we did in fact see a small heard of about 6-8 burros as we were leaving Jackass Benches.
swell13.jpg

We drove north on Buckhorn Wash road to locate the Swinging Bridge that I had read about.
swell14.jpg

swell15.jpg

Just a little further north from the Swinging Bridge there was the Buckhorn Wash pictograph panel where we stopped to walk around.
swell16.jpg

swell17.jpg

After leaving the pictograph panel we wanted to find somewhere to eat our lunch but the wind was picking up and it was a bit on the cold side. We found this beautiful little pullout into an alcove where there was even a picnic table to eat at and it served as a great lunch spot to shelter us from the wind. The sun on the rocks really warmed things up a bit as well..
swell18.jpg

As we headed back south towards I-70 we found a turnoff that after weaving through the vast countryside, it dropped us down into another canyon and we ended up joining Fix-It pass trail and followed that back down to the interstate where we aired up and headed back east towards Green River.
swell19.jpg


It was a great extended weekend getaway and everything ran and performed flawlessly. I'm really liking the new Mickey Thompson Baja Boss A/T tires so far. Nice and quiet on the pavement and they gripped very well off-road. I only used 4-lo a handful of times throughout the 165 miles of off-road that we covered.

Unfortunately it is now time to put the coach away for the winter. I washed it and parked it last night after arriving home. I will need to perform a LOF service on it and then a couple of minor things then it is ready for the 2022 RV'ing season. Come on spring.......

Thanks for looking.
 

TimeWarpF100

Well-known member
Joined
Aug 21, 2010
Messages
6,784
Location
not here
Coming up and out of the west side of Black Dragon Canyon.
swell11.jpg

The sign at the west side of the canyon just before approaching the Jackass Benches and Rattlesnake Flats areas.
swell12.jpg

Prior to joining up with the Buckhorn Wash main dirt road we did in fact see a small heard of about 6-8 burros as we were leaving Jackass Benches.
swell13.jpg

We drove north on Buckhorn Wash road to locate the Swinging Bridge that I had read about.
swell14.jpg

swell15.jpg

Just a little further north from the Swinging Bridge there was the Buckhorn Wash pictograph panel where we stopped to walk around.
swell16.jpg

swell17.jpg

After leaving the pictograph panel we wanted to find somewhere to eat our lunch but the wind was picking up and it was a bit on the cold side. We found this beautiful little pullout into an alcove where there was even a picnic table to eat at and it served as a great lunch spot to shelter us from the wind. The sun on the rocks really warmed things up a bit as well..
swell18.jpg

As we headed back south towards I-70 we found a turnoff that after weaving through the vast countryside, it dropped us down into another canyon and we ended up joining Fix-It pass trail and followed that back down to the interstate where we aired up and headed back east towards Green River.
swell19.jpg


It was a great extended weekend getaway and everything ran and performed flawlessly. I'm really liking the new Mickey Thompson Baja Boss A/T tires so far. Nice and quiet on the pavement and they gripped very well off-road. I only used 4-lo a handful of times throughout the 165 miles of off-road that we covered.

Unfortunately it is now time to put the coach away for the winter. I washed it and parked it last night after arriving home. I will need to perform a LOF service on it and then a couple of minor things then it is ready for the 2022 RV'ing season. Come on spring.......

Thanks for looking.
Looks fun! Maybe when my '22 Raptor R shows up I can do a bit of offroading. (dreaming)
 
OP
Z

zmotorsports

ALLIANCE MEMBER
Joined
Oct 20, 2009
Messages
21,495
Location
Northern Utah
Trip looks amazing Mike. The I70 overpass is pretty neat!

Thanks Marc. Yeah, we missed those bridges when we were there in April so we were on a mission to find them this trip. Evidently we made a left in the bottom of the wash in April and this time we made a right and it took us right under them.
 

Jayman17

Well-known member
Joined
Feb 6, 2017
Messages
3,820
Location
Seattle, Wa
I have to admit I used to think of a desert landscape as just brown and boring but your awesome photos are making me change my mind. Some incredible scenery in your photos.
Thanks for taking the time to post those. 👌

Jay
 
OP
Z

zmotorsports

ALLIANCE MEMBER
Joined
Oct 20, 2009
Messages
21,495
Location
Northern Utah
I have to admit I used to think of a desert landscape as just brown and boring but your awesome photos are making me change my mind. Some incredible scenery in your photos.
Thanks for taking the time to post those. 👌

Jay

Thank you for the kind words.

The desert has quickly become mine and my wife's favorite areas to visit. We used to always be drawn to the forested mountains when we traveled for leisure. However, in about 2009 shortly after getting out of racing and using our Jeeps for more leisure travel with our coach we met up with a group of fellow RV'ers who showed us the beauty of the desert and we were hooked.

The desert to many just seems baron and vast but when you get up close and personal traveling through it the beauty becomes evident and it then turns to an addiction. Even as we were airing up on Saturday afternoon alongside the interstate, my wife made a comment about how often we had driven past this exact point without realizing how beautiful the terrain was if we would have just stopped and paid attention. Now we tend to look for these opportunities and take advantage of them as often as we can.

Thanks for following along and I'm glad you enjoyed the pictures.
 

csp

Well-known member
Joined
Mar 23, 2010
Messages
5,720
Location
Franktown, CO
Photos never do justice to the scale of those bridges when you're under them.

The same thing is true of walking bridges over the Colorado river in the bottom of the Grand Canyon. You start walking across one and realize how wide the river is from a perspective you can't get from either shoreline.
 

StormcrowAz

Well-known member
Joined
Nov 3, 2011
Messages
750
Location
Phoenix, AZ
Mike,

Great pictures and looks like a fantastic trip.

Maybe I'm a bit biased, being born and raised here in Arizona, and I've traveled my fair share...but I think the desert does hold a special sense of serenity and beauty.

More off-road time is one of the things I'm working towards. Not sure what it is, maybe being out where most people aren't and going places most people wont, but the stresses of life seems to melt away when you're out there away from it all.

Then there's the machine aspect of it and the sheer pleasure of driving. Reminds me of one of my favorite songs by Rush - Red Barchetta:

Wind in my hair
Shifting and drifting
Mechanical music
Adrenaline surge

Well-weathered leather
Hot metal and oil
The scented country air
Sunlight on chrome
The blur of the landscape
Every nerve aware


Probably not in our lifetime, but I can see where sometime in the future burning fossil fuels is outlawed and even driving anything off-road will be banned. Sad to think of simple pleasures and freedoms lost.

Anyway, sorry for the side-track. Thanks for sharing your adventures!
 
OP
Z

zmotorsports

ALLIANCE MEMBER
Joined
Oct 20, 2009
Messages
21,495
Location
Northern Utah
No need to apologize Todd. Like you, the time spent while off-roading seems to melt the stresses away. My wife and I were talking while away last week and she mentioned that she hoped this is what retirement looks like for us. I couldn't agree more but then I went on to comment by stating I don't want to wait until retirement and we should just keep doing what we're doing because we may not be able to when we retire if a certain group or groups of people have their way.

I also had a completely different discussion with a co-worker a few weeks ago who commented on how clean and free of damage my Jeep was and the fact that I must not take it off-road much. I don't know if he was just trying to get me fired up or if he really is that ignorant. I had to laugh because he knows when I'm not at work and what my wife and I are doing when on vacation so that seemed like kind of a stupid comment to make.

I told him that to me off-roading is much more than just going out and beating the **** out of your vehicle, in fact, it is the exact opposite. While he goes to EJS and Trail Hero to beat on his Jeep and see what he can break, he then spends the other 50 weeks of the year piecing it back together.

I explained that to me it is more than just about the time off-road but it is about the preparation and commitment to the machinery. It is about building a vehicle that can take the demands that we throw at it off-road, get it perform in the manner in which we built it and then once aired up, driving 70+ MPH back to camp. Doing this 6+ days for a week long rally and then towing it another 700+ miles back home all to just unhook it from the coach and drive it to work Monday morning. Then turn around and do the same exact routine in a few weeks. I think I may have pissed him off but I told him anyone can throw something together and go pound on it for a weekend or even a week and odds are pretty good it will hold together for that short of a time. However, to do that at least one week a month throughout better than half the year with just routine maintenance and minimal work between trips is something that I pride myself on. To me THAT is more of an achievement than merely going out and beating on your stuff for a weekend. Besides, I don't have the money to continue throwing at something by breaking and fixing the same **** every trip out like some people. :rolleyes:

While my wife and I were on our first trail Thursday afternoon shortly after arriving at our destination, we had aired down and took off for our short adventure knowing we only had about 3+ hours of daylight remaining in the day. The weather was so beautiful we just couldn't wait until the next morning. As we were driving and I was listening to the throaty V8 just lumber along and rumble through the small narrow slot canyons I was grinning like an idiot. Whereas all my wife could think about was the terrain reminded her of the movie "The Hills Have Eyes" and was scanning the tops of the canyon walls.:ROFLMAO: I would perk up as we approached an obstacle that I had to navigate around or through and looking for the proper line to keep the tires planted yet flex the suspension to the point that I was either drooped all the way out or bumped on the opposite side yet the Jeep just continued to progress through the obstacle. Being able to conquer those challenges with absolutely no interferences nor odd noises is something I think must be similar to being high, as it is very gratifying.

I like the challenge of pushing my Jeep to take on various obstacles or even just a plain dirt road yet respecting the machinery to the point of knowing where that limit that each vehicle has. Pushing to the point of knowing what the vehicle, and my driving capabilities are yet not so far as to damage or break anything and still be able to drive effortlessly back to civilization. To me that is where I like the personal challenge that goes hand in hand with building off-road vehicles. To be able to build or alter a vehicle that barely resembles what it started out as from the factory and still have all of the creature comforts for leisurely travel is a very rewarding experience and not something everyone understands. I am certain I have built my Jeep to withstand much harder trails that I will ever take it on but I still enjoy the challenge of going out and coming back to the pavement without any issues.
 

Bob Heine

ALLIANCE MEMBER
Joined
Oct 24, 2009
Messages
10,709
Location
Boca Raton, Florida
Probably not in our lifetime, but I can see where sometime in the future burning fossil fuels is outlawed and even driving anything off-road will be banned. Sad to think of simple pleasures and freedoms lost.
Todd, on one hand I feel blessed to have been alive in the golden age of gasoline-powered cars, including a brand new Fuel Injected '57 Bel Air 2-door hardtop at the dealership with a fuelie Corvette next to it. The Ford dealer didn't have one but there were supercharged Thunderbirds built that year as well. Also blessed to go walking with scenery and national parks that didn't have a single interstate highway nearby. Also lived at a time when we didn't have to make reservations to stay in a national park. Back then we just got in line behind the two cars at the entrance gate booth, paid the small fee and drove on it. When I say "small fee," the most popular parks, like Yellowstone and Yosemite charged $3 for a car and trailer for 15 days (we only stayed for a week).

On the other hand, the first vehicle to have the Chevrolet Performance eCrate System installed is a 1977 K5 Blazer. The kit is soon to be a an orderable reality, with Hot Rod's Project X '57 Chevy getting a prototype installed. If GM put the first kit in an iconic off-road vehicle, I'd say the future for off-road folks looks pretty promising.
1977 K5 eCrate:
1957 Project X Chevy:

The eCrate System in the '57 Chevy is only 340hp and 325lb-ft but the torque is instantaneous and with no transmission to shift it should do well on the road or the drag strip. They put a quick change rear in it so they can run a 2.36 or 7.22 gear. I don't think they are using regenerative braking or a lot of the efficiency stuff in a Tesla but if eCrate conversions take off, who knows what hot rodding will look like in the future. Like you said, I won't be around to see it but I agree it will be different.
 
OP
Z

zmotorsports

ALLIANCE MEMBER
Joined
Oct 20, 2009
Messages
21,495
Location
Northern Utah
Last night I conducted my post off-road trip cleaning ritual on the Jeep. I cleaned the coach before backing it into the shop on Sunday when we returned home but last night it was the Jeep's turn to get a good cleaning.

I started off the procedure by stopping by a local car wash and getting after the exterior and undercarriage with some high pressure. Unfortunately, the last few miles of the last trail on Saturday we came across a heard of cattle and there was cow **** everywhere on the trail and I couldn't dodge all of it. That meant I had cow **** under my driver's side fenders, driver's side rock rails and even on my driver's side door handles and rear fender from being flung up by the tires. When off-roading I try to take on any adverse issues such as mud or **** on the road with the driver's side so the wife doesn't have to get it on her clothes getting in or out of the Jeep.

After pulling it into the shop I went to town on de-dusting the interior by using compressed air to blow it out, vacuum the interior then blow it out again. Followed by hitting the engine bay with compressed air then a damp cloth to the engine bay followed lastly by an application of Zep Power House on the plastic trim and a wipe. The interior gets a full wipe down with damp towel and then a thorough cleaning of the dash and gauge cluster, radio and HVAC controls.

clean1.jpg

clean2.jpg

clean3.jpg

Rear cargo area gets a wipe down with damp towel to the tailgate interior, Powertanks and Mac's Black Box.
clean4.jpg


After the interior is complete I move on to the exterior with an application and wipe down using Meguiar's Final Inspection to rid it of any water spots followed lastly by a foam glass cleaner on the windows both inside and out.
clean5.jpg

clean6.jpg

clean7.jpg

clean8.jpg


All in all not a bad way to spend a couple of hours and very therapeutic in fact. Tunes on in the shop, heater set to a comfortable level and just giving the Jeep a thorough cleaning of the past week's trails and anticipating the next ones we'll be taking her on.

Thanks for looking.
 

Mr.zippy

Well-known member
Joined
Apr 27, 2020
Messages
2,221
Location
Wyoming
Man that Jeep looks really good Mike! I sure do like all the room you have to work with in that shop.....It looks like a real pleasure to have the space!
 
OP
Z

zmotorsports

ALLIANCE MEMBER
Joined
Oct 20, 2009
Messages
21,495
Location
Northern Utah
Man that Jeep looks really good Mike! I sure do like all the room you have to work with in that shop.....It looks like a real pleasure to have the space!

Thank you. Yes, I have a lot of room for activities in this shop. Such a big change from my previous shop where I had it so full of equipment it was basically a one car shop. It was so tight I had to go outside to change my mind. This shop is such a pleasure to work in that sometimes I feel as though I need to pinch myself to see if I'm dreaming or not.
 
OP
Z

zmotorsports

ALLIANCE MEMBER
Joined
Oct 20, 2009
Messages
21,495
Location
Northern Utah
The next couple of projects rolled into the shop Friday night. A 1977 Chevrolet K10 stepside truck and a stainless steel keg.

Plus I have a couple of small items to address on my 2006 Duramax as well as get the Toro snowblower ready for snow and oil and filter at the ready to do a season end LOF service on the coach once my new drain plug and washers/seals arrive from Cummins.

shop.jpg

shop1.jpg

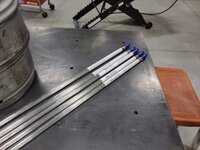
Also, I was getting low on a couple of TIG rods so I had placed an order with Arc Zone earlier last week and the package containing my TIG rods arrived on Saturday.
tigrod.jpg


Thanks for looking and stay tuned for some updates once work commences.
 
Last edited:
To avoid these ads, REGISTER NOW!
OP
Z

zmotorsports

ALLIANCE MEMBER
Joined
Oct 20, 2009
Messages
21,495
Location
Northern Utah
I used to own that exact same truck mike. Sure wish I’d have kept it. What ya going to do to it?

Nothing too high tech going on with it Cam. Started out being contacted to install a 6" lift by the owner. Then through a few conversations I kind of discouraged going 6" and the suggested only going 4" with 35" tires. That seemed to satisfy the owner as he wants to drive this thing. Then through more back and forth conversations I inquired about steering and suggested a raised steering arm and maybe some replacement steering components now that 45 year old components will be stressed more with the lift. I then mentioned gears and brake lines which turned into new stainless steel brake lines and brake flush along with 4.56 gears.

I cut my teeth on these 70's GM trucks so I was excited to get this one into the shop. I have never been fond of the step sides as I was more of a fleet side lover myself. It's not quite as clean as it looks in the pictures but it's a survivor and will be a nice driver for the owner. I'm still working on him to replace the high horsepower 350 cid engine and SM465 transmission with a salvage yard 5.3 liter LS and maybe a 6L80 or at least a 4L65 transmission in which he will really like the setup with those gears and tire selection. If memory serves that original 350 cid engine only had something like 165 HP new, it is probably lucky to have 140 HP now so a stock 5.3 LS will be about a 200% improvement over stock. :bounce:
 

LXCam

ALLIANCE MEMBER
Joined
Apr 23, 2013
Messages
19,216
Location
AZ
I’ve owned 6 of the square nose fleetsides and the one step. The last three years I’ve attended the Dino’s Get Down square body event in Phoenix sine I’ve got a BIL who is bigtime into this game. I’m floored at what these things are going for now. At this point I’d give anything to have back that step side or the couple short beds I owned.

I got a little trivia for ya. In 83 I set up my 2wd drive SB with 3/4ton springs and spacers and leaf blocks. Added some 33” Armstrong Norseman Tire’s and did the whole off road look to it, not including buckets seats out of a K5 and complete custom interior that was pretty cool.

In 85 I bought a new S10 blazer I was building as a show truck. So I drove the C10 down to one of the major off-road stores (hell I can’t remember who now) to order bell tech dropped spindles for the blazer. While there the guys were completely impressed with the whole 2wd off-road thing and the next thing ya know, that look took off like a rocket. So yes, I credit myself with yet another idear I wasn’t smart enough to capitalize on.

I can’t wait to see what you do as I know it’ll be perfect when it’s finished.
 
OP
Z

zmotorsports

ALLIANCE MEMBER
Joined
Oct 20, 2009
Messages
21,495
Location
Northern Utah
Cam, a friend from hi-school's dad raced off-road back in early to mid 80's. He raced with guys like Larry Minor. His race truck was a mid-70's 4WD lifted shortbed with BFG Mud-Terrains and small block built up to a 377 (400 cid block with 350 crank) for hi and quick rev's. His chase truck was a 1976 Blazer 2WD that had the bulged front fenders and long travel, at least long travel for that day or era. I remember my friend driving his dad's chase truck to school once in a while and I drooled over it in shop class.

When I was a senior in hi-school, my BIL bought a truck that the guy used to race with my friend's dad, it was a 1976 shortbed Chevy. It needed a LOT of work when my BIL purchased it and I got to do all of the work. It had a cab rollcage with firewall connectors and then a cage over the engine which also served as shock crossover supports. It was a pretty bad *** truck but required a lot of work to get it to where it was more street friendly as a daily driver. I really got into the desert race look and performance at the time even though I didn't race.

I had my 1984 Chevy shortbed that I built up including a 396 cid big block bored .030" over turning it into a 402 cid. I swapped out the massive 305 V8 for that 402 and then backed it with a TH400 transmission. That particular TH400 was the first automatic transmission that I ever rebuilt/built and I loved that setup. Really wish I had that truck back and would put it back to somewhat where it was.

I have pictures of my old mid-80's truck earlier in this thread as that was when I first started wrenching professionally as an industrial maintenance mechanic when my wife and I were first married.
 
Last edited:

Bigblue&Goldie

Well-known member
Joined
Mar 12, 2009
Messages
10,746
Location
AZ
I used to own that exact same truck mike.

I'm willing to bet your truck even had the beer keg in it......


It's crazy to think how much these square bodies are going up in value. My friend bought one about 10yrs ago for like $1,500 that was straight and ran great. That same truck would be $10k right now. He jokingly called it his "county truck" because it looked like the basic white truck the county road and construction employees drove around.
 
OP
Z

zmotorsports

ALLIANCE MEMBER
Joined
Oct 20, 2009
Messages
21,495
Location
Northern Utah
I'm willing to bet your truck even had the beer keg in it......


It's crazy to think how much these square bodies are going up in value. My friend bought one about 10yrs ago for like $1,500 that was straight and ran great. That same truck would be $10k right now. He jokingly called it his "county truck" because it looked like the basic white truck the county road and construction employees drove around.

It's crazy what these things are going for nowadays. I would love to build another one but not crazy enough to pay the prices for one. I guess this will just be another thing I day dream about but don't follow through on.


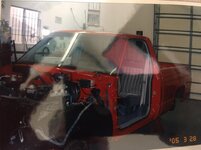
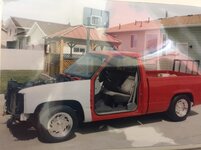
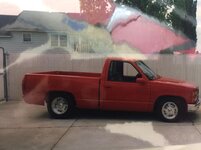
My very first vehicle in high-school was a 1979 GMC Jimmy (same as Blazer). I purchased it wrecked from a local dealer that dealt heavily in wrecked vehicles. I ended up buying a lot of vehicles from him over the years. I had saved up enough money from repairing and flipping small engine powered lawn and garden equipment to pay for the parts to get it back on the road. My dad helped me with the initial purchased as the banks wouldn't loan for a wreck. Looking back it was a hell of a stretch for my dad because he was struggling to keep the farm going as it was. My older brother helped me rebuild it and get it on the road. It had the big ole' 350 cid and SM465 manual transmission with the NP205 gear driven transfer case. I remember wanting a manual transmission because that was all we had on the farm and auto's scared me at the time. After a very short period of time I swapped in a TH350 transmission from a wrecking yard because I was tired of shifting and I was reading more about automatic transmissions and they were becoming less scary of a magic black box.

I drove the Jimmy during my sophomore and junior years of high-school. Mid-way through my senior year of high-school I found another wrecked truck, this one a 1984 GMC Sierra fleet side short bed with the hella big 305 cid V8 engine and another manual transmission. This one was hit hard in the rear and shoved the bed up into the cab plus some frame damage. My cousin straightened the frame for me and I built my second wrecked truck. I drove this one for a very short time before building up a 402 big block plus buying a TH400 from a wrecking yard and building my first auto trans.

This was a fun as hell truck and the night I met my wife was just before I graduated high school in 1987 while driving this truck the first night, dragging the boulevard. I didn't even have the bumpers on it yet nor any of the trim. I had just finished the paint, unmasked it and was anxious to get it out and cruise in it. So off to the boulevard I went and ended up meeting my wife that night. This was about mid-March 1987.
sb5.jpg


My first shop truck was a 1982 Chevy 2 wheel drive short bed. It was an electric meter reading truck and I picked it up at the utility company's auction for $800.00. It burned some oil but I got it home and freshened it up plus a full transmission overhaul. I added a few cosmetic goodies and a bunch of body work. If memory service I was in to it around $4500 completed and got that back out of it after driving it for about 4 years.
sb1.jpg

sb2.jpgsb3.jpgsb4.jpg

This was in the late 90's going into the early 2000's while I was building the yellow 1936 Ford coupe for a client. When the coupe was done I sold the 1982 and purchased a wrecked 1991 to transform in to our new shop truck.

sb6.jpg

sb7.jpg

sb8.jpg

sb9.jpg

sb10.jpg
 

bradpac

Well-known member
Joined
Sep 8, 2013
Messages
721
Location
Central TX
Some nice trucks there. Those things would fetch a really pretty penny right now. I'm watching a 91 K5 Blazer on a local auction right now, it's bone stock, but used and abused and it's been bid up to $7000 so far. Unreal for a beater, but square body Chevys have always been popular.
 
OP
Z

zmotorsports

ALLIANCE MEMBER
Joined
Oct 20, 2009
Messages
21,495
Location
Northern Utah
My wife ordered my Christmas present several weeks ago and she received a text that it was done and ready to be picked up Saturday so we ran and grabbed it. She informed me we would need to take the truck.

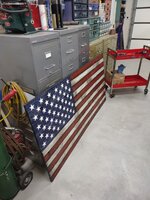
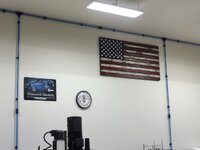
A gentleman she works with builds custom American flags out of wood of all shapes, sizes and design configurations. She wanted a rather large one for my 16' tall walls in the shop. The flag she had made is 3' x 6' and turned out freakin' AWESOME! Now I need to get it hung.
flag.jpg

I noticed when I drove my 2006 Duramax last week to work that the driver's side HVAC control wasn't functioning correctly. When I got home from work that afternoon I hooked up my Snap-on Modis Ultra and ran a vent door recalibration and it seemed to work but it was only temporary. A couple of days later it did the same thing so I ordered a new blend door actuator and installed it last night.
act1.jpg

Luckily it was the driver's side and the easiest of all four actuators to access. This was only about a 10-minute job. I think it took longer to get the tools out than to do the actual job.
act2.jpg

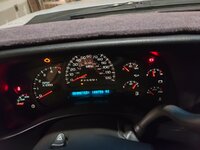
Next I decided to hurry and tackle my dash issue. Saturday when the wife and I took the truck to dinner I glanced down and noticed that my volt gauge was pegged at over 19-volts. I immediately thought I lost a voltage regulator and the alternator was over-charging. However, I noticed all of my other gauges were spot on and my lights didn't seem any brighter so I pulled over and grabbed my meter from under the back seat to test. Sure enough the voltage was fine at around 14-volts so it had to be a stepper motor in the gauge cluster. I didn't have any stepper motors left over from the last one I did so I ordered another set of them. They arrived yesterday so after replacing my blend door actuator I pulled the gauge cluster to replace the volt gauge stepper motor. I am only replacing the faulty stepper motor at this time and will set the others aside for if/when I have another issue as the others are working perfectly still.

Here you can see with the KOEO, I am showing nearly 19 volts.
dash1.jpg

Removing the gauge cluster after the trim panel is removed.
dash2.jpg

Gauge cluster out and unplugged from the back side.
dash3.jpg


More to follow of the process....
 
OP
Z

zmotorsports

ALLIANCE MEMBER
Joined
Oct 20, 2009
Messages
21,495
Location
Northern Utah
Continuing on with the gauge cluster repair.


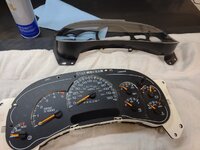
Once out on a soft towel on the workbench I used a plastic interior trim tool to slightly lift the locking tabs to remove the rear and front of the gauge cluster.
dash4.jpg

Soldering tools at the ready. My Weller soldering station, 60/40 solder, solder sucker and needle removal tool.
dash5.jpg

Front cover and clear removed.
dash6.jpg

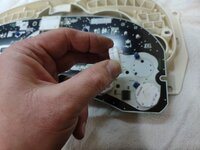
They make a plastic needle removal tool, shown two pictures above, but I have found one of these trim tab tools to work much better and pull straight away on the needle from the stepper motor.
dash7.jpg

After you have the rear removed and the front laminate removed, determine exactly which stepper motor you're after and de-solder the connection. There are four solder connections for each stepper motor.
dash8.jpg

dash9.jpg

Here are the four solder connections de-soldered.
dash10.jpg

Old stepper motor removed and new one ready to insert into place.
dash11.jpg

New stepper motor installed, dash reassembled and testing with KOEO to verify proper voltage.
dash12.jpg


As a final test sat my VOM meter on the hood and verified that the dash gauge matched the volt meter with the engine running. At this point I can call this repair complete and rely on my gauges again.

Thanks for looking.
 

Mark_17

Well-known member
Joined
Jun 27, 2018
Messages
755
Location
NJ
I had an '05 1500 silvy and those gosh dang blend door actuators are the worst. I did the one you did, then I had to replace the one deep in the dash. What a fun job that is...
 

Bob Heine

ALLIANCE MEMBER
Joined
Oct 24, 2009
Messages
10,709
Location
Boca Raton, Florida
After you have the rear removed and the front laminate removed, determine exactly which stepper motor you're after and de-solder the connection. There are four solder connections for each stepper motor.
dash8.jpg
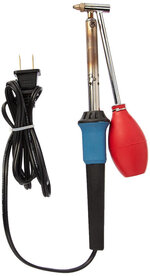
Mike, I love that solder sucker much better than mine because it takes up less room. I use the old fashioned combination iron/sucker because it's a one-hander but if I'm not careful, it blows the solder rather than **** it. Hmm, I think I just discovered it doesn't ****. :dunno:

Desoldering Tool.jpg.
 
OP
Z

zmotorsports

ALLIANCE MEMBER
Joined
Oct 20, 2009
Messages
21,495
Location
Northern Utah
I had an '05 1500 silvy and those gosh dang blend door actuators are the worst. I did the one you did, then I had to replace the one deep in the dash. What a fun job that is...

I've done several of the passenger side one and the recirc door actuators on client's GMT800's and yes, they are a PITA but I was happy to see mine was the easy one. :D
 
OP
Z

zmotorsports

ALLIANCE MEMBER
Joined
Oct 20, 2009
Messages
21,495
Location
Northern Utah
Mike, I love that solder sucker much better than mine because it takes up less room. I use the old fashioned combination iron/sucker because it's a one-hander but if I'm not careful, it blows the solder rather than **** it. Hmm, I think I just discovered it doesn't ****. :dunno:

Desoldering Tool.jpg.

I've never seen one like that Bob. I have had my solder sucker for 30+ years now and the tip is starting to get a bit scorched but other than that is still works perfectly. If memory serves I purchased mine from a local Radio Shack back when they were around. It's not a tool that gets used very often but it's nice to walk to the toolbox and grab it when needed.
 
OP
Z

zmotorsports

ALLIANCE MEMBER
Joined
Oct 20, 2009
Messages
21,495
Location
Northern Utah
When I arrived home last night I couldn't wait to hang my new American flag that the wife had made for me for Christmas. She said I had to wait until Christmas but I didn't want it damaged leaning against the wall plus I wanted to show it off hanging on the wall. When she arrived home she wasn't pleased with me but not because I hung it, because I hung it alone and didn't wait for my son to help. I had asked him to help me lift it up on ladders one night after work and I would get everything ready and let him know when. Well, I hate bugging him and he has his own life to live rather than worrying about helping me so I fabricated a couple of french cleat style of metal hangers and got them leveled up about 16" below the 16' ceiling height. I figured then I could have my son stop by and raise it. However, once I got the brackets mounted I thought "it can't be that heavy". I would guess it to weigh around 40~ish pounds which isn't that heavy but as I slid it up the ladder and neared the final resting height I really started re-thinking my decision.:oops: IT got really heavy, really quick and by that time I realized that the cable had hooked on the ladder and I had to continue upwards as it wouldn't come back down. Definitely NOT my best thought process there.
flag1.jpg

flag2.jpg

flag3.jpg

flag4.jpg

After putting my welding equipment back in place I thought while I had the ladder out I would address one more item.

Last year as we entered the winter season I noticed a heavy frost on the shop as well as my neighbor's shop that was just being built at the time. I noticed a horizontal line about a foot or so up from the eve over my RV bay door. This indicated a small air leak that was obviously letting some heat up through the joint between the ceiling and wall board in the RV bay. It wasn't bad as it was just indicated with a heavy frost, when it snowed the snow stuck uniformly over the roof.

Here is a picture of the air gap over the RV bay door.
roof1.jpg

While I had the ladder out I went into the RV bay and caulked the small gap between the ceiling and wall juncture in the RV bay. This morning it was still dark when I left for work but I noticed that the frost was very uniform across the roof of the shop so that item can be checked off the white board as being completed.

Thanks for looking.
 
OP
Z

zmotorsports

ALLIANCE MEMBER
Joined
Oct 20, 2009
Messages
21,495
Location
Northern Utah
After hanging my sign I commenced getting to work on the 1977 Chevy K10 that I have in my shop. The owner had picked up the original tires/wheels and dropped off the new 35" General mud terrains mounted on slotted U.S. Mag aluminum wheels right after I got home.

I started getting ready to drop the front axle out and noticed the coiled brake hose on the driver's side. Whomever put the brake caliper back on obviously didn't pay too much attention to the fact that they twisted the brake hose. The drag link was also in poor condition so it was removed and then the steering arm on the knuckle as it will be receiving a new raised steering arm plus new drag link rod ends and adjusting sleeve.
c101.jpg

Tie-rod removed, differential cover removed to drain fluids, front driveshaft yoke removed and all U-bolts soaked with penetrant. I had soaked the leaf spring bolts down prior to starting and they came loose easily and the leaf's are ready to drop.
c102.jpg

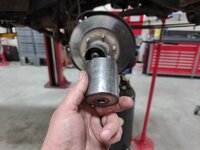
After removing the locking hubs I walked over to my toolbox and grabbed my locking nut socket from my top drawer. I then realized that this socket is over 35 years old. It was one of the first, if not THE first, specialty socket I had ever purchased. I was in high school and just starting to work on these front axles and while working at an auto parts store I purchased this axle nut socket. It looks a bit rough and has been used a LOT but not so much over the past decade now. It was kind of cool to be able to walk to the toolbox and grab it and know exactly where it was still after all these years. I wonder how many in other trades have tools from their high school years that they know exactly where they are and can walk right to them.
c103.jpg


Thanks for looking.
 
Last edited:

LXCam

ALLIANCE MEMBER
Joined
Apr 23, 2013
Messages
19,216
Location
AZ
I gotta laugh at your ladder story Mike. A couple weeks back I was staying in the toy hauler (36’ huge one - very tall) and opened the bathroom vent. Well the damn thing came off the track and the wind flipped it all the way over.

Not a huge deal except the forecast called for rain.

Also not a huge deal had I not removed the ladder to rebuild it.

So here it is pitch black outside and no one around. So my ole *** climbed up on the hand rail by the door, then pulled myself up on top of the kitchen pop out which btw reminded me I’m no we’re as nimble as I used to be and up on top I went.

It was while trying to climb down where I couldn’t feel where my foot was going to land on the rail when I let loose of the pop out that I realized....this was probably not the brightest decision I’ve ever made. Especially with nothing but catcus and a cemented in place camp site BBQ as my landing pad if I screwed the pooch.

And yes, the ladder is now fixed ;).
 
OP
Z

zmotorsports

ALLIANCE MEMBER
Joined
Oct 20, 2009
Messages
21,495
Location
Northern Utah
Love the flag Mike! But please be careful with **** like that in the future (I should talk.....:rolleyes:), we'd like to have you around for a few more years.

:beer:

Thanks Justin. Yeah, I work with risk avoidance and reliability engineering all day long and as I was in my "predicament" with the flag stuck on the ladder rung it hit me that this was a stupid move on my part all because I was in a hurry and wanted the flag hung NOW, not tomorrow when my son could help. I tell my mechanics at work that there is nothing worth getting hurt over and then I go and do something stupid like that. Not my best moment for sure.

Cam, based on your story, I think you can relate. :ROFLMAO:
 
To avoid these ads, REGISTER NOW!
Top Bottom