To avoid these ads, REGISTER NOW!

ZMotorsports Shop Projects 2.0

OP
Z

zmotorsports

ALLIANCE MEMBER
Joined
Oct 20, 2009
Messages
21,477
Location
Northern Utah
Catching up Mike. Gotta say, this photo may have made my YEAR!!! I can it believe no one else spit up their drink like I did. 🤣

05C17B63-D7BB-42E4-9974-16F7D4A5A259.jpeg

I mean come awn guys, this is priceless. Takin a cell phone pick through its eye piece and everything…”cheese!!!”

9A3BC3FF-DCA8-49F9-8982-D6640816B22F.jpeg

Thanks Matt. I am actually quite proud to open up my engine bays, whether coach, Jeep or truck, as I try to keep them nice and clean. Checking fluids in a campground sometimes catches a passerby who inquires but actually it just brings me comfort and calmness when I open up either the rear engine hatch on the coach or the hood of the Jeep to check fluids. My OCD simply cannot take opening one of my engine bays and seeing filth, spaghetti like wiring or just clutter of any sort.

Funny thing, as you know I have had my Powertank CO2 tanks in the Jeep for several years now for airing up my tires. Prior to that I had the ARB dual air compressor which is mounted under the passenger's seat. It worked well for my 35's but when I was tail-gunning on trails I was the last to pull into the air-up spot and then everyone was waiting on me to complete my air up before we could head on back to camp. When I went to the 37's I told my wife I did NOT want to be the one everyone was waiting on so I purchased a couple of 10 lb. CO2 tanks to mount in the Jeep. I LOVE the Powertank CO2 setup. My only complaint is that when completed airing up, my hose is stiff. My coiled air hose from the CO2 tank that is..... :ROFLMAO:

Anyway, it makes it difficult to place back into the storage bag and tuck it away in the rear cargo bay with the first several feet of the coiled air hose frosted and stiff from the expanding CO2 coming out of the tank. Immediately after switching over to the CO2 tanks I decided that this was not going to work. Some fellow wheelers would toss the air hose into their Jeeps to warm and then back at camp they would coil the hoses back up and store them or worse, just cram them into a cavity in the Jeep all tangled and twisted. Well that just doesn't work with my OCD.... When I installed the Powertanks I chose not to remove the ARB dual air compressor from the Jeep as I like the old saying "two is one and one is none", this way I have a backup way of airing up tires in the event I need it. The ARB compressor setup being under the passenger's seat is out of the way and not visible so I figured I would just leave it installed and continue to carry it along with us.

After one trail run several years ago, I wondered to myself if the compressed air from the compressor would thaw the hose. After airing up the tires from the CO2 tank after a trail run one day I plugged the frozen coiled hose into the compressor outlet, flipped on the compressor and went about blowing the dust from the dash, door pockets and then popped open the hood to blow the dust off the engine. These couple of minutes of dust detail was just enough to bring my coiled hose back into shape where it would easily fit back into the storage bag and in its place in the cargo bay. BINGO! Two issues solved at once, no more dust in the engine bay or cabin area and no more frozen coiled hose. And I am still one of the first ones aired back up and walk around BS'ing with others and no one is waiting on me.:)

The only issue is now I seem to get razzed by our fellow RV'ers/Jeepers who think I'm a little over the top because I detail my engine bay and passenger area before hitting the pavement. But I don't see anything wrong with having a clean Jeep interior to enjoy driving back to camp or to dinner after an enjoyable day on the trail.:unsure:
 
To avoid these ads, REGISTER NOW!
OP
Z

zmotorsports

ALLIANCE MEMBER
Joined
Oct 20, 2009
Messages
21,477
Location
Northern Utah
Last night after arriving home on the 24th day of the year in the triple digits, yes we broke our previous record from yesterday at 23-days, I decided to tackle a minor maintenance issues that I have wanted to do for a few months now.

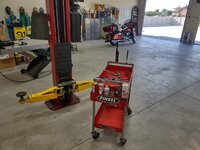
I wanted to show the Ammco 10k pound 2-post lift some love by re-torqueing the floor anchors, adjusting the cables and a good wipe down.

I have noticed over the past few months that my lock "clicks" or "clunks" had gotten just a bit more out of time and seeing as how I hadn't adjusted the equalizer cables since I moved the lift from the old shop into the new shop 5+ years ago, I figured they could use a little tweak. This is probably where I differ from many as most people want to hear one solid clunk as the locks engage with each rising carriage. I prefer to hear two very close and consecutive clunks, like simultaneously and no noticeable gap between them as the carriage is rising, think "cluuuunk" rather than "clunk----clunk". :) I'm sure this is just my "quirkiness" but this way I know that both locks have actually snapped firmly into place.

I got a few tools out and after raising the carriage arms up to the first lock position went about adjusting the equalizing cable attachment on the higher side carriage to bring the low side up slightly.
shop1.jpg

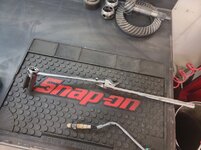
I found that after loosening the jam nut on top, that a 5/8" crowsfoot socket on a long extension reaching down inside the column to hold the hex on the cables swaged end and then a 15/16" deep 1/2" socket on the adjusting nut are the easiest way to adjust these.
shop2.jpg

After a couple of cycles to ensure the locks are engaging to my liking I raised them up and commenced cleaning the bases and arms and sweeping up the area around the bases before grabbing the torque wrench and ensuring the floor anchors are still torqued to spec. I will admit, I have laxed a bit on the torque intervals. When I first installed the lift at my last shop I checked them every six months like the manual suggested but after not finding any discrepancies in their torque I backed that off to annually. Then about every other year. When I broke the lift down at my old shop and installed it in the new shop I torqued them initially, then about a month later and then six months later. I thought to myself that being new concrete and new install there may be some "set" the anchors will have to take being in new concrete. After the six month interval I got no change, then at a year I got no change. I did however, give them a check about two and a half years ago after we had our earthquake here in Northern Utah as my son's Jeep was on the lift during the quake. I found no change at that time and to be honest, I haven't checked them again until yesterday in which there was only a slight movement out of two of the fasteners. I noted my spec's and date in my manual and will probably go about checking them every couple of years unless I suspect something.
shop3.jpg

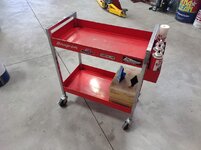
While I was working on and cleaning the lift I noticed that my ole' trusty Snap-on tool cart that gets the snot used out of it was looking a bit grungy and I heard a slight squeak out of one of the casters. I removed all of my aerosols from the side tray and was disgusted at the oily film or residue in the bottom of the tray. I began by cleaning the casters with brake wash, then reapplying some Tri-Flow to the casters. Next I deep cleaned the tray and both upper and lower shelves on the cart as well as gave the vertical supports a good wipe down.
shop4.jpg

The lower tray wasn't too bad but a distinct outline of where my box of paper towels resides was noticeable so I grabbed some degreaser and went to work cleaning.
shop5.jpg

That looks much better after only about a half hour of work.
shop6.jpg

shop7.jpg

That ole' Snap-on tool cart is probably, if not, one of the most used pieces of equipment in my shop. It seems like it is always loaded up with tools and rolled next to whatever I'm working on, then back to the toolbox to unload the tools back into the main toolbox followed by a quick wipe down. I can't even begin to fathom how many miles those caster wheels have traveled between my two shops in the 20+ years I've had it.

Thanks for looking.
 
OP
Z

zmotorsports

ALLIANCE MEMBER
Joined
Oct 20, 2009
Messages
21,477
Location
Northern Utah
Geez Mike, you folks have been hotter than us and I think that's saying something.

Stay hydrated!

:beer:

Yeah, it's been an odd year Dan. Usually Southern Utah area (St. George) is about 10-12 degrees warmer than we are up north here but there have been many days this summer where they have actually been cooler than we've been.

When we were on vacation last week my wife and I enjoyed the mid-70's to low-80's and my wife said she wasn't looking forward to going home to triple digits again. I told her to relax as we are past the triple digits and mid-August we are generally around 90-degrees. Well wouldn't ya know it, we have continued to have record heat and I have continued to hear about it. :lol: Like it's my fault.:headscrat
 
OP
Z

zmotorsports

ALLIANCE MEMBER
Joined
Oct 20, 2009
Messages
21,477
Location
Northern Utah
Friday after work I wanted to get my yardwork done but as I was driving home the sky filled with clouds, dark ones.

By the time I opened up the shop to begin working it was a nice, steady little drizzle with some claps of thunder. I opened up my gate to have a guy bring his car by so it was nice to watch it rail while I waited.
frnight.jpg

The car I agreed to work on this weekend belonged to a client that I've done work for in the past. His wife's car, 2010 Buick LaCrosse failed emissions testing and the shop told him that he needed a new catalytic converter. They mentioned that he could try replacing the Bank 1 O2 sensors but still insisted that it needed catalytic converters. He talked to me about it earlier in the week and I had a small opening over the weekend so I told him to drop it off and I'd take a look at it.

When he and his wife dropped the car off I took some initial scans to determine course of action. Now Bank 1 was responding a bit different than I like to see on the downstream O2 sensor but figured I would rack the car and also take some temperature readings of the catalytic converters to see if they are firing off. They were in fact, the front cat had about 280 degrees at the inlet and 340~ish at the outlet. The rear cat had an inlet temp of around 330 degrees and an outlet temperature of just over 400 degrees so both cats appear to be firing off and creating heat which is a good sign.
la1.jpg

While he was there I popped the engine cover off and immediately noticed that the PCV hose from the valve cover to the intake duct was disconnected at the valve cover. I looked at it was after the MAF sensor so it was in fact, unmetered air. I explained that this could be causing some of the issue. I then looked at LTFT (Long Term Fuel Trims) and sure enough they were a bit high positive so the ECM was adding fuel to compensate. He was a little frustrated because he had just had the car into the Buick dealer where they bought the car brand new in 2010 for a service and that they must have not put the hose back on.

I told him I'd give it some love and let him know what I found out. I was going to do my yardwork on Saturday morning but again, the skys were filled with very dark clouds on Saturday morning and I knew as soon as I fired up the mower that the skies would open up so I just commenced on working on the Buick in the shop.

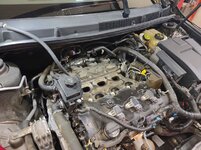
The second thing I noticed is that the front bank (closest to the radiator) had two new O2 sensors, however, when I looked at the engine arrangement I noticed that the rear bank was actually further forward so Bank 1 is actually the rear head closest to the firewall on this engine and not the front bank closest to the radiator. He had changed the wrong O2 sensors based on the P0420 code and what the shop was telling him that he could try changing O2 sensors on before replacing the catalytic converter. Neither were good signs that he had competent mechanics working on it prior.
la2.jpg

Another sad realization came about when I removed the air filter and housing. This does NOT look like it just had a service performed.
la3.jpg

la4.jpg

As I was disassembling I noticed that the throttle body could use a bit of cleaning as well so that was added to the list.
la5.jpg

Then looking at the mileage and seeing it had 125k on the clock I text the owner to ask when he had the serpentine belt replaced and the spark plugs. He replied stating that they have never been changed. Add those to the list.
la6.jpg

As components were coming off the car just to get to the Bank 1 (rear) upstream O2 sensor I figured that would be the time to replace the spark plugs also seeing as how the upper intake plenum needed to come off.
la7.jpg

Still not easy to get to but at least I could see the upstream O2 sensor on Bank 1 now.
la8.jpg

More to follow.....
 
OP
Z

zmotorsports

ALLIANCE MEMBER
Joined
Oct 20, 2009
Messages
21,477
Location
Northern Utah
Continuing on with the Buick LaCrosse 3.0 liter V6.

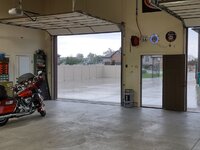
By late morning the sky opened up again and we received some more much appreciated rain. It was nice to have the shop doors open while it was raining and smelling the nice clean air while listening to the faint rumble of thunder in the distance.
sat.jpg

I cleaned the intake ports making them ready to receive the new gasket. I also picked up a set of spark plugs but they only had one of the O2 sensors that I needed and didn't have the correct upper intake gasket in stock so I just moved forward on what I could get done before I had to close the shop to go to a celebration of life for one of my wife's cousins later Saturday.
la11.jpg

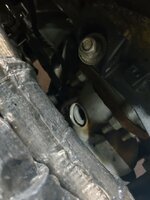
The upstream O2 sensor gave me a bit of trouble removing. First due to the placement and me having a hard time getting my large hands in behind the wiring harness and hoses, but second because my socket wouldn't fit down inside the heat shield properly.
la12.jpg

This is usually my "go-to" socket for O2 sensors and it worked perfectly for the downstream sensor but wouldn't even begin to work on the upstream. I also couldn't get a wrench on the upstream sensor properly.
la16.jpg

After the socket slipped I didn't want to risk rounding off the sensor's hex and then having a whole other set of problems so off to the lathe I went to turn down a small step on my socket.
la13.jpg

That step allowed the socket to fully seat on the hex of the sensor and get down inside of the heat shield. However, it was so close to the firewall I couldn't get a ratchet on the socket so I had to use a combination wrench and my leverage extender to get enough "ummph" on the thing to break it loose.
la14.jpg

Here you can see the upper portion of the hex that began to round off with the socket not fully engaging down onto it past the heat shield.
la15.jpg

At that point I was out of parts and it was nearing the time when I had to close up the shop. The new spark plugs were installed but I left the Bank 1 coil packs out to give me enough room for the upstream sensor installation once I get it.
la17.jpg

All that is left remaining is to install the upstream O2 sensor on Bank 1, reinstall the upper intake plenum then I can put a floor jack under the engine to support it while I remove the upper engine mount on the passenger side and replace the serpentine belt and pulleys then wrap it up and take her for a test drive and see if my theory is correct about the cats.

Thanks for looking.
 
OP
Z

zmotorsports

ALLIANCE MEMBER
Joined
Oct 20, 2009
Messages
21,477
Location
Northern Utah
I finally got around to my yardwork yesterday morning while it was cool outside.

Trimmed, edged then mowed and other than the spot in the back yard where I have grubs, the yard is looking quite good even with our water restrictions this year. Now to get the dead spot from the grubs to fill in but doubtful I'll see much results until near the end of the season. :mad: The area that the grubs got into was the nicest and healthiest part of the back yard over the past several years, just on the east side of my shop. Right where we usually sit and relax when we have bar-b-ques.

I suspected something was going on a few weeks ago but when we returned from vacation to find that area dead and the rest of the yard flourishing, I called my fertilizer guy and after coming by to look at it he confirmed we had grubs in the lawn and they ate the roots. He sprayed for them last week but told me I would have to be patient for the lawn to come back. Patience is not something I excel at.:(
 

OutlawDrifter

Well-known member
Joined
Jan 20, 2015
Messages
3,899
Location
KS
I finally got around to my yardwork yesterday morning while it was cool outside.

Trimmed, edged then mowed and other than the spot in the back yard where I have grubs, the yard is looking quite good even with our water restrictions this year. Now to get the dead spot from the grubs to fill in but doubtful I'll see much results until near the end of the season. :mad: The area that the grubs got into was the nicest and healthiest part of the back yard over the past several years, just on the east side of my shop. Right where we usually sit and relax when we have bar-b-ques.

I suspected something was going on a few weeks ago but when we returned from vacation to find that area dead and the rest of the yard flourishing, I called my fertilizer guy and after coming by to look at it he confirmed we had grubs in the lawn and they ate the roots. He sprayed for them last week but told me I would have to be patient for the lawn to come back. Patience is not something I excel at.:(


Yards can be frustrating Mike. I don't water ours, the cost would be astronomical with 3 acres, so I have to make due with what comes from the sky. We generally do well until the end of July or first part of August. Friday night was the first time I have mowed since we got back from vacation...3 weeks. While there were a few patches that were growing, the bulk of it was browning and crunchy. We had an 1.80" of rain last week and that helped bring it back to life, still looks like poo, but better than it was. If we get some September harvest rains, it will come back just in time to go dormant this fall :ROFLMAO:
 
OP
Z

zmotorsports

ALLIANCE MEMBER
Joined
Oct 20, 2009
Messages
21,477
Location
Northern Utah
Yards can be frustrating Mike. I don't water ours, the cost would be astronomical with 3 acres, so I have to make due with what comes from the sky. We generally do well until the end of July or first part of August. Friday night was the first time I have mowed since we got back from vacation...3 weeks. While there were a few patches that were growing, the bulk of it was browning and crunchy. We had an 1.80" of rain last week and that helped bring it back to life, still looks like poo, but better than it was. If we get some September harvest rains, it will come back just in time to go dormant this fall :ROFLMAO:

I don't know how you do it Marc. I love my lush green lawn and not that we are on a metered system I have to watch my watering weekly to ensure I don't go over my allotted water. That being said, I have been able to "tune" my sprinkler system by downsizing certain nozzles where they are shaded and upsizing nozzles where they need a bit more water on the same zone. Had I been a little more in-tune with my yard when I was installing my sprinkler system and knowing my shop would shade the areas that it does, I think I would have done my zones a bit different and combined sprinklers in the shade into a common zone and those more in the sun in common zones but over the past two years now of being metered, I can look online and see my changes that are working and not working. I think late last year I had the yard pretty well sorted and then the damn grubs got in this year. I have heard about grubs but have never had any issues at either this home or our last home so this is all new to deal with.

That being said, I am finally back to having to mow twice a week as my lawn is doing so well and I love it. I actually find mowing my lawn and making it look nice very therapeutic. I generally just run around the lawn with the mowers early in the week around Monday and then around Thursday or Friday I will trim, edge and then mow so it looks nice with clean crisp edges for the weekend. Sitting on the deck enjoying my morning coffee on Saturday and Sunday mornings is much more enjoyable when the lawn it looking good with clean edges. The coffee even tastes better. ;)
 

OutlawDrifter

Well-known member
Joined
Jan 20, 2015
Messages
3,899
Location
KS
It is frustrating at times, but we are on Rural Water Coop vs a well. The electricity to run the well would be far cheaper than the rural water rates. Living in the country with an upwind neighbor who doesn't understand weed control makes my life harder as well. His pasture is full of thistle and every other noxious weed.

So I do the best I can, fertilize in the Spring with some crabgrass preventer, and a Spring 2-4-D application and a Fall 2-4-D application to stay ahead of the weeds. I try to plug aerate once a year as well. It's an uphill battle always though! I prefer to mow on Thursday so the yard is nice all weekend, so I totally get that!
 

LXCam

ALLIANCE MEMBER
Joined
Apr 23, 2013
Messages
19,204
Location
AZ
I laughed at the lift “one clunk” engagement mike. It drives me nuts when my four poster isn’t synced. The worst part is you can dial in the sides, but not front to back as the weight bias changes for different rides and which end I’m working on.


First world problems eh?
 
OP
Z

zmotorsports

ALLIANCE MEMBER
Joined
Oct 20, 2009
Messages
21,477
Location
Northern Utah
I laughed at the lift “one clunk” engagement mike. It drives me nuts when my four poster isn’t synced. The worst part is you can dial in the sides, but not front to back as the weight bias changes for different rides and which end I’m working on.


First world problems eh?

Thanks Cam. Glad you got a chuckle out of that.

Mike - in post 6926 you showed a leverage extender. Neat tool. Never seen one before.

Who makes that?

If memory serves, mine is made by Laser. I think it is similar to one branded by Monster. I've only had it a short time but I have used it multiple times and quite like it. I used to just wrap a boxed end onto the open end of a combination wrench which works great but no so much when you are using the open end and need a bit more leverage, such as on suspension components so this solves that issue. I like how rounded the handle is so it is comfortable to use. I've seen some that the handles are quite "blocky" and look like they would not be as comfortable to apply pressure to.
 

Mr.zippy

Well-known member
Joined
Apr 27, 2020
Messages
2,221
Location
Wyoming
I was thinking groundhogs are pretty effective at getting rid of grubs?

Sorry Mike, being a smart-*** today ....... :rolleyes:
 
OP
Z

zmotorsports

ALLIANCE MEMBER
Joined
Oct 20, 2009
Messages
21,477
Location
Northern Utah
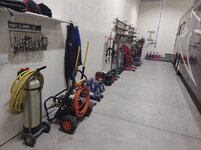
Friday afternoon while waiting for the Buick to show up I took some time move a few things around in the storage/RV bay to fill in the gap where the bike used to live. I moved things like floor jacks and one set of jack stands a little closer to the man door between the shop and the storage/RV bay and things I use even more like the DI cart and pressure washer just inside the man door of the storage/RV bay. The oil drain buckets and the Branick strut compressor I moved about to the middle of the wall whereas they used to be down closer to the air compressor at the back corner.

rvbay.jpg

Now if I could just get the bike sold and out of the shop that would be a load off my mind.
 

Swanny1953

ALLIANCE MEMBER
Joined
Jul 28, 2010
Messages
1,082
Location
Lucas, TX
Mike, understand the grub issue - only, when we get them, the armadillos tear the living daylights out of the yard trying to get at them. I have used a product called GrubEx by Scotts for many years, and the armadillo rutting sessions have dramatically declined!
 

larry4406

Well-known member
Joined
Jan 27, 2006
Messages
19,585
Location
Northern Virginia
If memory serves, mine is made by Laser. I think it is similar to one branded by Monster. I've only had it a short time but I have used it multiple times and quite like it. I used to just wrap a boxed end onto the open end of a combination wrench which works great but no so much when you are using the open end and need a bit more leverage, such as on suspension components so this solves that issue. I like how rounded the handle is so it is comfortable to use. I've seen some that the handles are quite "blocky" and look like they would not be as comfortable to apply pressure to.
Found it!
 

signcrafter

Well-known member
Joined
May 9, 2012
Messages
12,519
If memory serves, mine is made by Laser. I think it is similar to one branded by Monster. I've only had it a short time but I have used it multiple times and quite like it. I used to just wrap a boxed end onto the open end of a combination wrench which works great but no so much when you are using the open end and need a bit more leverage, such as on suspension components so this solves that issue. I like how rounded the handle is so it is comfortable to use. I've seen some that the handles are quite "blocky" and look like they would not be as comfortable to apply pressure to.

I think the technical name I've heard them called is a warranty checker. Used to check how good of a warranty a particular brand of wrench has. LOL
 

SilverJimmy

Well-known member
Joined
Apr 14, 2012
Messages
1,688
Location
Prescott/Flagstaff, AZ
Quick question to you guys about things that are linked to Amazon. At the end of the link I see “tag=atomicindus08-20”
Does that mean the boss gets a spiff if we order it with that link. I’m asking because I’ll look at something on here but when I go to order it I use the wife’s account cuz she has Prime. So when I search for the item it doesn’t have that link/tag on it when ordered. If so I’ll need to open GJ on here iPad and then link those items for Ryan since I wouldn’t have seen it without his hard work!
Please let me know if I’m correct in my thinking.
 
To avoid these ads, REGISTER NOW!

rharman

Well-known member
Joined
Apr 22, 2012
Messages
8,911
Location
SoCal
Quick question to you guys about things that are linked to Amazon. At the end of the link I see “tag=atomicindus08-20”
Does that mean the boss gets a spiff if we order it with that link. I’m asking because I’ll look at something on here but when I go to order it I use the wife’s account cuz she has Prime. So when I search for the item it doesn’t have that link/tag on it when ordered. If so I’ll need to open GJ on here iPad and then link those items for Ryan since I wouldn’t have seen it without his hard work!
Please let me know if I’m correct in my thinking.
Yes, Ryan gets a small commission. Your wife should be able to get you added to her Prime account quite easily.

See this: https://www.amazon.com/gp/help/customer/display.html?nodeId=GWZ7QXD2X8WL8YE8
 
OP
Z

zmotorsports

ALLIANCE MEMBER
Joined
Oct 20, 2009
Messages
21,477
Location
Northern Utah
Send me the add to it. I love looking for bad ideas on ksl

Me too.

Plenty of snowmobiles listed there. Mike should have time, room and money for one after that bike is gone.


Here is a link to the ad.


Thanks guys.

Dave, this has your name written ALL over it. And IF you're really interested I may be a bit flexible or throw the helmets in as well.
 
Last edited:
OP
Z

zmotorsports

ALLIANCE MEMBER
Joined
Oct 20, 2009
Messages
21,477
Location
Northern Utah
Last night I finished up the Buick LaCrosse and took her for a nice road test.

She turned out to be a bit more work than I originally thought, but at least I don't think it needs catalytic converters like the owner was told by the last shop.

On the way home from work I had to pick up the new intake plenum gasket and the last O2 sensor that my local NAPA didn't have on Saturday.

After installing the Bank 1 upper O2 sensor, which was a PITA and cut the **** out of my hands, I went to work replacing the serpentine belt. On this model the engine must be supported, the upper motor mount and mounting bracket must be removed to even get to the serpentine belt.

Upper motor mount removed.
la20.jpg

View of the crossover mount from head to head which the upper motor mount attaches to.
la21.jpg

Crossover mount removed and you can see the belt train exposed in the background.
la23.jpg

While I was in there and with 125k miles on the car I replaced the tensioner and idler pulleys. They weren't making any noise, yet, but seeing how long they continued to freespin I don't think they were long for this world. Seeing how much work it is to get to them I hope the owner is OK with me replacing them now vs. having to do all this work a second time in the near future. Belt, idler and tensioner replaced and ready to reassemble the upper motor mount.
la24.jpg

Before installing the intake plenum I took a few minutes and cleaned the throttle body and throttle blade as it had a nice heavy deposit of carbon in it.
la25.jpg

All back together with only the cover remaining.
la26.jpg

Under the hood is complete. Now to raise the car up and install the downstream O2 sensor on Bank 1 and she's ready for a test drive.
la27.jpg

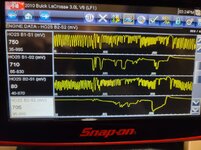
After some driving the readings look much better than when it rolled into the shop. Both upstream O2 sensors are switching beautifully and the downstream O2 sensors are pretty stable. A bit higher voltage than I prefer, but stable which indicates the catalytic converters are performing their duties.
la28.jpg

Here is the Bank 1 upstream and downstream O2 sensors as well as the STFT and LTFT for Bank 1 while driving. The LTFT (Long Term Fuel Trim) came right back to pretty much normal during the test drive.
la29.jpg

All ready for the owner to pick it up.
la30.jpg


Thanks for looking.
 
OP
Z

zmotorsports

ALLIANCE MEMBER
Joined
Oct 20, 2009
Messages
21,477
Location
Northern Utah
It definitely looks MORE better on the scan info, Mike!

After some more driving, I bet that B2S2 reading smooths out a bit.

Yeah, I was thinking the same thing. It's a bit "noisy" but it's at least pretty flat and not switching like the upstream. I think it is still recovering from adding all that fuel from the PCV hose being disconnected and the fuel trims being high positive. The cats were both firing off and hotter at the outlet than the inlets, so they are working. I'm sure pumping all that extra fuel through the engine and ultimately the cats didn't do them any good though. This job definitely took a bit longer than expected however.
 

WoodsTruck

Well-known member
Joined
Jan 12, 2013
Messages
1,028
My buddy from high school went to the GM school to be a service mechanic. Got a job at the local Chevy dealership and worked there for a while but got seriously frustrated when he would find something additional that needed attention "while he's there" and would bring it up to the service manager. "Nope", only fix what the rig was brought in for. He determined the dealership liked the return business on the next to do item creating more labor dollars. That isn't how he worked so he quit there and moved on.

Glad to see you fix what needs fixed while you are there. The cost of labor to that point is already paid for.
 
OP
Z

zmotorsports

ALLIANCE MEMBER
Joined
Oct 20, 2009
Messages
21,477
Location
Northern Utah
My buddy from high school went to the GM school to be a service mechanic. Got a job at the local Chevy dealership and worked there for a while but got seriously frustrated when he would find something additional that needed attention "while he's there" and would bring it up to the service manager. "Nope", only fix what the rig was brought in for. He determined the dealership liked the return business on the next to do item creating more labor dollars. That isn't how he worked so he quit there and moved on.

Glad to see you fix what needs fixed while you are there. The cost of labor to that point is already paid for.

Thank you. When I ran my own business/shop I tried to do the same thing. My goal has always been to help people to keep their vehicles properly maintained rather than nickeling and diming them to death with repeat visits. I look at it that money doesn't grow on my trees so I'm sure it doesn't on other's either, so by informing my clients and assisting them to cut costs where possible it would result in repeat business and trust vs. just ****** them over and over and over again to make that extra revenue.

That being said, I also knew/know money is tighter for some than others so there are still times when I have to fix what the issue is and cannot do any additional "this needs to be done" items. Although this pains me I know it is the reality at times and I just have to inform the owner and they have to make the decision of when they can address the "additional" items.

You are right that on many items the labor is already paid for when you are right there but parts on the other hand can still add up for certain jobs and some people just don't have that kind of discretionary income to do them at that time. Another example of living paycheck to paycheck can limit one's choices for such items and ultimately cost more money down the road.
 

bigdave_185

Well-known member
Joined
Feb 14, 2021
Messages
443
Location
Utah
If I didn’t have my new Duramax getting off a train tomorrow I’d definitely be excited to come look at it. But the wife has me on lockdown lol
 

npp

Well-known member
Joined
Dec 6, 2012
Messages
296
Friday after work I wanted to get my yardwork done but as I was driving home the sky filled with clouds, dark ones.

By the time I opened up the shop to begin working it was a nice, steady little drizzle with some claps of thunder. I opened up my gate to have a guy bring his car by so it was nice to watch it rail while I waited.
frnight.jpg

The car I agreed to work on this weekend belonged to a client that I've done work for in the past. His wife's car, 2010 Buick LaCrosse failed emissions testing and the shop told him that he needed a new catalytic converter. They mentioned that he could try replacing the Bank 1 O2 sensors but still insisted that it needed catalytic converters. He talked to me about it earlier in the week and I had a small opening over the weekend so I told him to drop it off and I'd take a look at it.

When he and his wife dropped the car off I took some initial scans to determine course of action. Now Bank 1 was responding a bit different than I like to see on the downstream O2 sensor but figured I would rack the car and also take some temperature readings of the catalytic converters to see if they are firing off. They were in fact, the front cat had about 280 degrees at the inlet and 340~ish at the outlet. The rear cat had an inlet temp of around 330 degrees and an outlet temperature of just over 400 degrees so both cats appear to be firing off and creating heat which is a good sign.
la1.jpg

While he was there I popped the engine cover off and immediately noticed that the PCV hose from the valve cover to the intake duct was disconnected at the valve cover. I looked at it was after the MAF sensor so it was in fact, unmetered air. I explained that this could be causing some of the issue. I then looked at LTFT (Long Term Fuel Trims) and sure enough they were a bit high positive so the ECM was adding fuel to compensate. He was a little frustrated because he had just had the car into the Buick dealer where they bought the car brand new in 2010 for a service and that they must have not put the hose back on.

I told him I'd give it some love and let him know what I found out. I was going to do my yardwork on Saturday morning but again, the skys were filled with very dark clouds on Saturday morning and I knew as soon as I fired up the mower that the skies would open up so I just commenced on working on the Buick in the shop.

The second thing I noticed is that the front bank (closest to the radiator) had two new O2 sensors, however, when I looked at the engine arrangement I noticed that the rear bank was actually further forward so Bank 1 is actually the rear head closest to the firewall on this engine and not the front bank closest to the radiator. He had changed the wrong O2 sensors based on the P0420 code and what the shop was telling him that he could try changing O2 sensors on before replacing the catalytic converter. Neither were good signs that he had competent mechanics working on it prior.
la2.jpg

Another sad realization came about when I removed the air filter and housing. This does NOT look like it just had a service performed.
la3.jpg

la4.jpg

As I was disassembling I noticed that the throttle body could use a bit of cleaning as well so that was added to the list.
la5.jpg

Then looking at the mileage and seeing it had 125k on the clock I text the owner to ask when he had the serpentine belt replaced and the spark plugs. He replied stating that they have never been changed. Add those to the list.
la6.jpg

As components were coming off the car just to get to the Bank 1 (rear) upstream O2 sensor I figured that would be the time to replace the spark plugs also seeing as how the upper intake plenum needed to come off.
la7.jpg

Still not easy to get to but at least I could see the upstream O2 sensor on Bank 1 now.
la8.jpg

More to follow.....
Bank 1 is always the side that has number 1 cylinder.
 
OP
Z

zmotorsports

ALLIANCE MEMBER
Joined
Oct 20, 2009
Messages
21,477
Location
Northern Utah
Bank 1 is always the side that has number 1 cylinder.

Yes, I know that.

Maybe you didn't read the post entirely. The owner was told Bank 1 was closest to the radiator in which he replaced the upstream and downstream O2 sensors on and when I removed the engine cover I quickly noticed the rear bank, closest to the firewall, was further forward on the engine, therefore cylinder # 1 was on the rear bank. The owner was told the wrong bank.
 
OP
Z

zmotorsports

ALLIANCE MEMBER
Joined
Oct 20, 2009
Messages
21,477
Location
Northern Utah
If I didn’t have my new Duramax getting off a train tomorrow I’d definitely be excited to come look at it. But the wife has me on lockdown lol

I understand Dave. If you know of anyone looking please give them my contact information. I hate to see this bike go unridden as it screams to be ridden and I would like to see it go to a good home.

Thanks.
 

LXCam

ALLIANCE MEMBER
Joined
Apr 23, 2013
Messages
19,204
Location
AZ
That’s a smoking deal and a gorgeous ride Mike. I’ll pass on your add to my Socal counterpart. Seems like a majority of his crew have all been jumping on new rides this past year and with bonuses getting distributed this Friday, who knows?
 
OP
Z

zmotorsports

ALLIANCE MEMBER
Joined
Oct 20, 2009
Messages
21,477
Location
Northern Utah
Last night the wife arrived home from work a little early so I racked her car and performed a service on it while I had a free night.

Here the oil has been drained and the oil filter replaced. I also gave her a good once over and checked for leaks, suspension issues and just a thorough inspection of the undercarriage before setting the tires/wheels back on in their new orientation. Next will be to set it on the ground and torque the wheels to spec and fill with oil.
aug1.jpg

After inspecting the undercarriage of the Acura and while the oil was draining I did however, take a few minutes to move the newer Handy SAM 2 motorcycle lift out of position and dig the old original Handy lift out of the storage/RV bay and move it into place where the SAM 2 was.

I purchased this original Handy motorcycle lift back in the early 90's right after building my last shop. I bought it at a commercial estate sale that was being clearanced after a death. They had several of these Handy lifts brand new still in the crates and I should have bought all of them and sold them as they were discounted quite a bit from retail price at the time. However, after just building my shop I was lucky I could afford one, let alone any more. Later I purchased the side extension kit and this particular lift got the snot used out of it for the 20 years we had our speed shop. It saw more snowmobiles, ATV's and motorcycles than I can count and still has held up excellent. After a quick cleaning it hardly looks used at all.

As we got busier and busier in our shop I got tired of having to move client's toys off of this lift table while awaiting parts to put another one to make money so I purchased another lift so we had two motorcycle/ATV lifts in the shop. I wanted another Handy but they were top shelf as far as price and my budget netted me a Cycle Pro lift instead. I HATED the Cycle Pro lift with a passion but continued to use it for about 10-12 years. There for a while we used the Handy for our long term projects and the Cycle Pro was for quick in/out jobs. For those who followed along on our original shop projects thread you may recall seeing both this Handy lift and the Cycle Pro sitting side by side with bikes, ATV's or sleds on them. When we closed down our old shop and moved to our new place we took both lifts with us but I still hated that Cycle Pro. About three years ago I talked myself into getting rid of the Cycle Pro and purchased the newest Handy model that had both front and rear drop down sections and was 4" wider and about a foot longer. This has been a great lift but just don't see myself using it much any longer.

I had originally hoped that someday my son and I would be building custom bikes in the new shop and we would have both lifts occupied much like at our last shop when we had our speed shop/powersports business going in full swing but I don't see that happening and after my son sold his bike and now ours for sale I really don't need two motorcycle lifts. I was torn on which lift to sell as I do like the slightly wider, longer and taller raised height of the SAM 2 with the front and rear drop out sections, however the original Handy has so much more sentimental value to me plus I already have the side extensions for it in the event I need them at some point.

Here is the original Handy moved into place. I had forgotten I was a sticker ***** and had stickers on a lot of things in the last shop so those will go and it will get a good cleaning.
aug2.jpg

Old original Handy lift in the background in position and the newer Handy SAM 2 in the foreground which is ready to sell.
aug3.jpg

The original Handy lift after about 20 minutes of removing stickers and giving it a good wipe down and some grease on the few greaseable fittings/pivot points.
aug4.jpg

It cleaned up nearly like new after nearly 30 years and countless bikes, sleds and ATV's have been on this lift.
aug5.jpg

The table is the only real part that shows any wear at all and really isn't that bad.
aug6.jpg

I will admit when I was moving the side extensions to get the table out, I did notice that they show much more wear as the skags from snowmobiles really scratched up the side extensions much more than the center part of the lift table.

Also if you look at post #6935 above of the RV/storage bay, way at the back against the wall behind the coach you can see this lift and side extension along with several jack stands sitting on it. That area is now clear with only the side extensions against the back wall and the jack stands sitting on the floor.
 
OP
Z

zmotorsports

ALLIANCE MEMBER
Joined
Oct 20, 2009
Messages
21,477
Location
Northern Utah
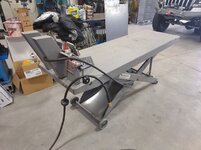
Last night a gentleman showed up with a lift gate pickup and hauled his new to him Handy SAM 2 lift away.
lift.jpg


When he text me the night before he said I wouldn't have to lift a finger to help him load it and he was right. He and his buddy had it loaded and were off in less than about 10 minutes and I didn't even have to stop what I was doing.

While they were loading the lift, my son gathered up a bunch of parts that he had been collecting to build his 2014 Street Glide but with that gone now he decided to post the parts up for sale. Between my son hauling the parts home to sell and the second motorcycle lift gone, it cleared a bit of space in the shop and RV/storage bay this week.
 
To avoid these ads, REGISTER NOW!
Top Bottom