To avoid these ads, REGISTER NOW!

Between 265 & 485 SQ/FT My first house, my second garage - 2-car in CA

Workspaces sized between 265 and 485 squarefeet.

JP_CA

Well-known member
Joined
Sep 20, 2015
Messages
207
Location
Bay Area, CA
Hi everyone!

My first garage was at my parents' house and is shown in the link below, but some things have changed since then! I sold my Mini, my Tahoe, and bought a few new cars which I'm sure will pop up in the photos.

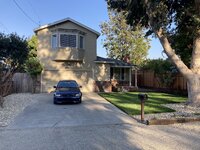
In September 2021 I was lucky enough to buy my first house. It's in the San Francisco Bay Area, built in 1952, and met the needs of me and my partner. In this thread I'll try to document goings-on with the garage and will probably veer into documenting other projects.
IMG_9495.jpeg

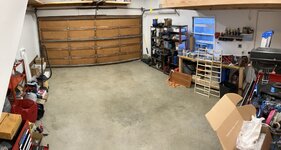
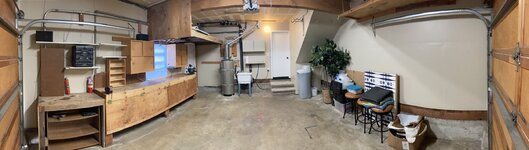
Here's what the garage looked like when we closed on the house.
IMG_9083.jpeg

IMG_9081.jpeg

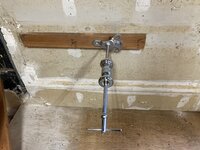
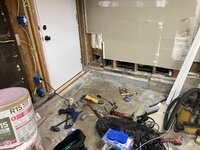
Needless to say, it was pretty cluttered. Given that it's a 2-car (and I want to put 2 cars in it, plus tools), it was time for some reconfiguration. The first thing to go was the water heater and the utility sink. While I'd love to have a utility sink in the garage, I couldn't spare the space for it. The kitchen is right through the door and I can wash my hands there. Anything else gets cleaned outside!

Check out this nastiness. The amount of wood on the wall for this water heater was hard to believe. Apple Box city!

IMG_9087.jpeg

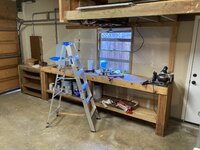
One by one, the cabinets started coming down.
IMG_9594.jpeg

And, naturally - whenever you take something apart, you'll find something unsavory. How about this cord disappearing into the drywall behind a cabinet? Unbelievable!

IMG_9596.jpeg

Water heater and utility sink delete nearly complete - just had to remove the drain after this.

IMG_9795.jpeg

New Rinnai water heater went onto the exterior garage wall. Little did I know, I'd be installing a recirculation pump later - live and learn.

IMG_9718.jpeg

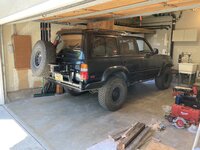
By early October I couldn't help but test fit one of my toys in the garage. It won't live in there, but you know the deal. WILL IT FIT?? Not by much . .

IMG_9799.jpeg

IMG_9800.jpeg
 
To avoid these ads, REGISTER NOW!
OP
J

JP_CA

Well-known member
Joined
Sep 20, 2015
Messages
207
Location
Bay Area, CA
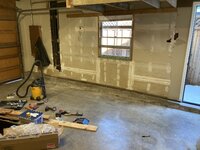
At this point I'll stop and complain about the number of nails that were used to construct the shelving, workbenches, etc - I've never pulled so many nails in my life. Had to get creative with the slide hammer to remove the numerous 2x4s nailed through drywall to studs. At this point I thought the drywall was going to stay up, for the most part. Boy, was I wrong!


IMG_9802.jpeg

IMG_9850.jpeg

After some cursing, the workbench was gone and the wall was cleared.

IMG_9853.jpeg

More surgery to replace the drywall that I borked along the way . . remember, I thought this was going to be a minor job at this point, so I was trying to save what was there.

IMG_9856.jpeg

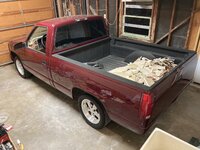
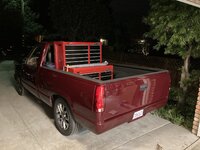
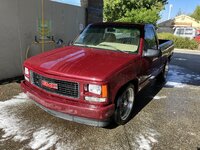
Two weeks later I decided that the drywall was coming off. I wanted to insulate, there was some evidence of termites, and I wanted more outlets anyway. Bought a '95 GMC pickup (long story, which I can tell if anyone is curious) and immediately filled it with construction waste :0)

IMG_9944.jpeg

IMG_9952.jpeg

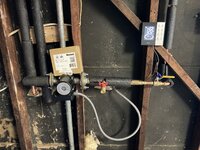
The sink upstairs took 60+ seconds to get hot, and I realized that I needed a recirc pump for the hot water heater. Another call to the plumber and it was in. 60 seconds turned into ~10, which is a great improvement and helps conserve some water in this drought-stricken state.


IMG_0174.jpeg

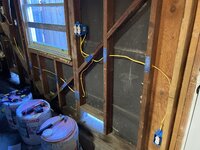
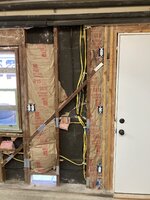
While the walls were in, I roughed in some outlets. Don't worry - an electrician came in later to check and finalize this work. What I didn't know at the time was how much more electrical work we'd be doing on the house. More on that later!

IMG_0236.jpeg
 
OP
J

JP_CA

Well-known member
Joined
Sep 20, 2015
Messages
207
Location
Bay Area, CA
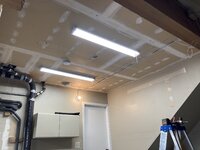
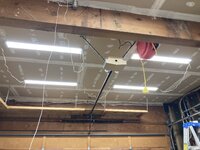
At this point I started roughing in some lighting, too. I've had good luck with the Feit 4-foot LED lamps, so I bought 8 of those for the garage. The first few went up over where the workbench would be under the loft, and the others went onto the ceiling behind the main ceiling beam.

IMG_0333.jpeg

IMG_0322.jpeg

IMG_0332.jpeg

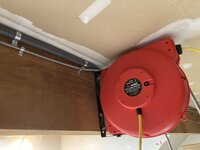
Did some other wiring cleanup by installing boxes and conduit and installed the cord reel, which I consider a must-have. It reaches to the end of the driveway. Killer addition to any workspace. As with anything else, some of this wiring would end up getting re-shuffled later, but it felt good at the time!

IMG_0347.jpeg

IMG_0414.jpeg

Lights got located and mounted in the front half. Lots of wiring clean-up to do . .

IMG_0517.jpeg

Not my favorite part of the shop, but I wanted to get power to the back wall and to the crawlspace, so I routed it through a sort of threshold plate. I would end up running more circuits up and over the door later . .

IMG_1210.jpeg
 
OP
J

JP_CA

Well-known member
Joined
Sep 20, 2015
Messages
207
Location
Bay Area, CA
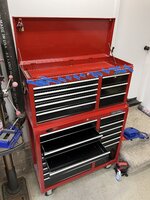
As you can see, the garage was in a pretty hellish mess at this point - so, naturally, time to buy a toolbox! Forget that I have 3 bottom chests and 2 top chests at my folks' place! Time to put that truck to work again.

IMG_1216.jpeg

IMG_1227.jpeg

IMG_1309.jpeg

You can see the rolls of insulation rolling around. Yep, time to put those in.

IMG_1354.jpeg

Keep in mind that all along, I'd been thwarted by the storage loft. It's great, but it's in the way. My life would've been easier if I had taken it down first.

IMG_1914.jpeg
 
OP
J

JP_CA

Well-known member
Joined
Sep 20, 2015
Messages
207
Location
Bay Area, CA
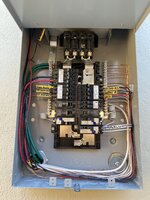
Here's where things really change. It's April 2022 and my homeowners insurance has been on my back because my wiring is partially knob and tube. Look, I'm not thrilled about that either, and I'm running out of space for more breakers anyway.

The house was expanded twice in the past. Once to widen the house (extending the kitchen, creating a large pantry, and adding a laundry room), then a second time to add a bedroom and bathroom above the garage. The new additions are wired with Romex and grounded outlets, but the old part of the house is all ungrounded knob and tube.

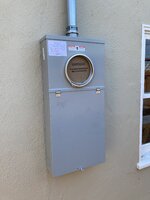
Fortunately, the house has an accessible attic and a crawlspace below, so I decided to bite the bullet and have the house re-wired, and upgrade the panel to 200 A service. What I didn't realize was that to do that, the panel would need to move. The original panel was too close to the gas line.

My electrician handled all of that work and did a great job. It wasn't cheap, but it was the right thing to do for the house.

IMG_2006.jpeg

IMG_2009.jpeg

IMG_2012.jpeg

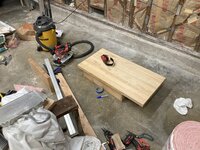
Took a break to cut down a butcher block slab into a coffee table with beveled edges. I'm not a woodworker by any stretch. I bought the legs online, so this was a pretty easy deal, but I like the result. It felt good to do a project that wasn't related to construction!

IMG_2193.jpeg

IMG_2227.jpeg

IMG_2232.jpeg

IMG_2233.jpeg
 
OP
J

JP_CA

Well-known member
Joined
Sep 20, 2015
Messages
207
Location
Bay Area, CA
Along the way, we snuck in some additional wiring and outlets. Two 240 V outlets for welding / EV charging (NEMA 14-50R) both inside and outside the garage, plus one 240 V circuit for a future air conditioner, so that I don't have to open the wall back up.

More insulation was on the menu.

IMG_2773.jpeg

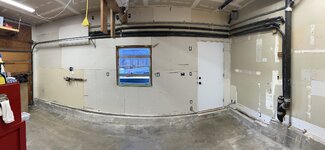
That brings us to July 2022, when I decided that I wasn't a drywall expert and that I wanted some help. Just like that, drywall was up. I did some basic finishing on the opposite wall, which had some ugly seams. This was a major milestone for me and the garage finally felt like a room and not a job site.

IMG_2901.jpeg

IMG_2947.jpeg

IMG_3589.jpeg

Got everything hooked up and charged a car from work - super exciting!

IMG_3672.jpeg

Time for paint! The drywall isn't crazy flat, so I went for a semi-gloss white. I'm still not sure whether it was the right choice. I read about 10,000 threads on the subject. It reflects more of the imperfections than I was hoping for, but it should be reasonably easy to wipe off. Whatever, it's done.

IMG_4400.jpeg

Voila! Bad photo, but it's all one color. Radical!

IMG_4413.jpeg
 
OP
J

JP_CA

Well-known member
Joined
Sep 20, 2015
Messages
207
Location
Bay Area, CA
The floor is concrete and shows the history of owners and renters who came before. I don't want that! I want it to show MY stains! So, time to grind and semi-polish it. I chose not to go for a hard seal or epoxy coat as I don't like the way that it chips and gets slick. To each their own here, but this is the path I chose. I hired another local company to do this work and they did a great job, leveling some bad areas and filling some cracks.

While prepping for this, I realized that the water softener had been bypassed for the entirety of our ownership, over a year. Oops.

IMG_4556.jpeg

IMG_4557.jpeg

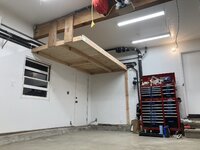
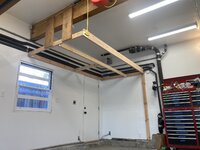
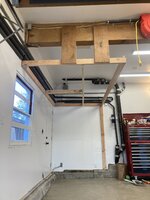
At that point, it was time to build a new loft, since that storage space is so critical. I know I'll get comments about the construction here, so no, they're not 2x8s on 16" spacing, etc. I know, I know. If I did it again, I'd make a few changes. Not hard to modify either.

IMG_4610.jpeg

IMG_4611.jpeg

IMG_4708.jpeg

IMG_4719.jpeg

Lights went back up and I started planning for the new workbench.

IMG_4771.jpeg
 
OP
J

JP_CA

Well-known member
Joined
Sep 20, 2015
Messages
207
Location
Bay Area, CA
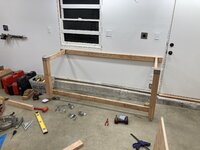
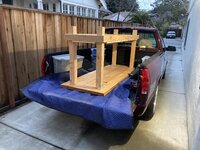
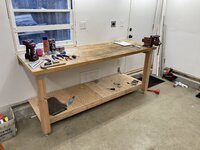
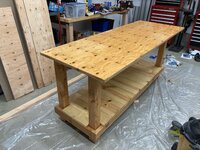
Next step was putting together some structure for a basic workbench. 7' wide, ~30" deep, using a thick slab I had at the old house.

IMG_4899.jpeg

IMG_4935.jpeg

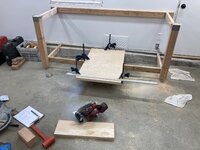
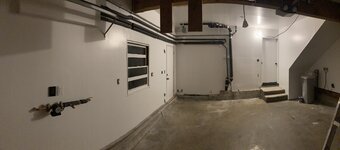
When you don't have a workbench but you need a workbench to build the workbench . . .
IMG_4936.jpeg

IMG_4992.jpeg

Naturally, had to go and steal the workbench from the old house.

IMG_0259.jpeg

IMG_5216.jpeg

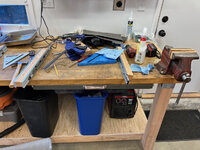
And just like that, I have a workbench! Now I can pile lots of garbage on it!

IMG_5240.jpeg

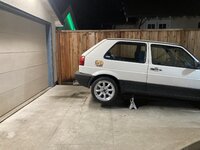
While I was over at my folks' place getting the workbench, I pulled my Golf out of the garage and discovered a fuel leak. Brilliant. Fixed that!

Parked next door (that's not their house). A nice pair, if I may say so myself.

IMG_5215.jpeg

IMG_5218.jpeg

IMG_5220.jpeg
 
OP
J

JP_CA

Well-known member
Joined
Sep 20, 2015
Messages
207
Location
Bay Area, CA
Truck got jealous and decided it needed a new ignition switch. Wish granted.

IMG_4946.jpeg

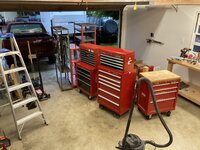
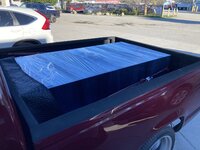
Anyway, I decided it was time to move over the other boxes and racks. I crammed a box truck into the tiny driveway, just inches from the gutter, and got to work.

IMG_5244.jpeg

IMG_5245.jpeg

IMG_5248.jpeg

IMG_5253.jpeg

IMG_5254.jpeg

IMG_5255.jpeg

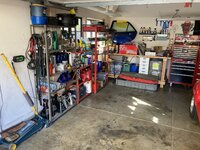
Rough positioning starting to formulate - note how perfectly the new-to-me wide box fits between the stairs and the drain pipe. The drill press is a tight fit where it is now, and I'll rethink that if necessary.

IMG_5328.jpeg
 
OP
J

JP_CA

Well-known member
Joined
Sep 20, 2015
Messages
207
Location
Bay Area, CA
Thank you!

So now we're beginning to catch up, hitting January 2023.

Why have one workbench when you could have two? At this point it makes sense to briefly discuss the outdoor setup. On the left side of the house (facing it from the street) there's a paved pad, with enough room for some storage and some workspace. I've always used a portable table for dirty scrubbing / sanding / painting projects in the past, but I already have a workbench base, so now's the time to put a new top on it and make an outdoor workbench. It's exactly the same size as the indoor one, which satisfies some odd corner of my brain.

Bought the new M18 track saw (finally) and made some cuts. Easy enough! I used spar urethane with the hopes that it'll last a while. Took a while to dry, that's for sure!

IMG_5530.jpeg

IMG_5538.jpeg

IMG_5623.jpeg

Lucked out at an office surplus store and got a pretty sturdy metal cabinet. This is where I'll store chemicals, oil, etc. Feels great to get that stuff out of the garage for the sake of clearing up space.

IMG_5511.jpeg

IMG_5512.jpeg

I did some measuring and decided that I could fit another top chest if I cut off the lid, so I put the grinder to work. Worth it.

IMG_5667.jpeg

Perfect fit:

IMG_5668.jpeg

IMG_5669.jpeg
 
OP
J

JP_CA

Well-known member
Joined
Sep 20, 2015
Messages
207
Location
Bay Area, CA
February. Time for The Great Shuffle - rearranging tools into the different chests. I get pretty weird when it comes to this stuff, so it was a very iterative process. I'm sure I will revise as I go, but I got to a decent stopping point.

Emptied the box:

IMG_6385.jpeg

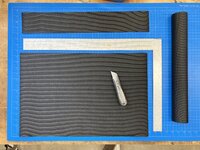
Got completely sidetracked on drawer lining:

IMG_6387.jpeg

IMG_6388.jpeg

IMG_6424.jpeg

Preliminary labeling and organization:

IMG_6473.jpeg

IMG_6474.jpeg

IMG_6475.jpeg

And the ever-present clutter . . .
IMG_6563.jpeg
 
OP
J

JP_CA

Well-known member
Joined
Sep 20, 2015
Messages
207
Location
Bay Area, CA
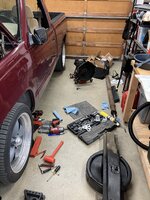
Despite the ongoing organization and outfitting, the GMC demanded a new clutch and I had to get the garage ready enough to do that job. Ignore the fact that the interior trim is removed so that I can redo the headliner . . which I still haven't done.

The racks on the left will stay, but the stacked floor jacks . . maybe not the final iteration. Work in progress!

IMG_6559.jpeg

IMG_6573.jpeg

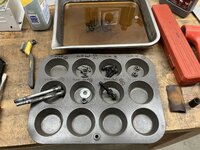
Ye Olde muffin tin with socket/wrench sizes - write in Sharpie, wipe off later with a solvent.

IMG_6581.jpeg

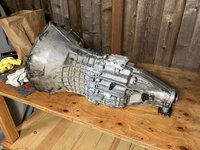
And out it came! This is an NV3500 5-speed. The truck is a 305 V8, rear wheel drive.

IMG_6585.jpeg

Toasty!

IMG_6596.jpeg

IMG_6598.jpeg

The transmission was disgusting. Did my best to clean it up, and it's good enough to go under the truck and get oily again.

IMG_6622.jpeg

IMG_6633.jpeg

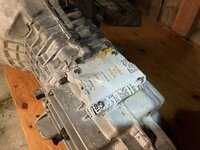
Protected the shifter area with some tin foil, some blue shop towels inside, and finally a White Claw can. You can laugh, but it worked!

IMG_6634.jpeg
 
OP
J

JP_CA

Well-known member
Joined
Sep 20, 2015
Messages
207
Location
Bay Area, CA
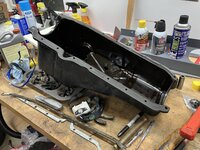
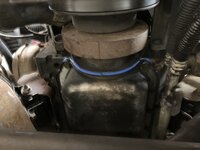
Did the rear main while I was in there . . but that requires dropping the oil pan if you want to do it right, at least the way I was looking at it. So, here we go. Dropped and re-sealed the pan, replaced the rear main.

IMG_6646.jpeg

IMG_6647.jpeg

IMG_6652.jpeg

IMG_6735.jpeg

IMG_6736.jpeg

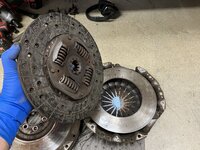
New clutch and hydraulic actuation (both cylinders):

IMG_6821.jpeg

All done! Not the most fun job to do on my back, but certainly not impossible.

IMG_6923.jpeg
 

fourmotioneer

Well-known member
Joined
Mar 19, 2015
Messages
240
Location
Ann Arbor, MI
Really digging the Golf/Pickup combo. Have been causally searching for a similar Chevy with that early 90s charm. 5-speed (not even sure what was offered) single cab is the dream!
 

nicholam77

Well-known member
Joined
Dec 18, 2016
Messages
2,682
Location
Minneapolis, MN
Love the Golf and the truck. And "Ye Olde muffin tin" is an excellent idea.

The whole space is looking great, obviously you did a lot of planning with the electrical and such. I have a similarly tight two-car (18x20) and these type of spaces are always my favorite to follow.

How do you like the Milwaukee track saw? I'm a track saw fan but haven't heard from anyone with the M18 yet.

This is a cool thread, keep it going!

🍻
 
OP
J

JP_CA

Well-known member
Joined
Sep 20, 2015
Messages
207
Location
Bay Area, CA
Really digging the Golf/Pickup combo. Have been causally searching for a similar Chevy with that early 90s charm. 5-speed (not even sure what was offered) single cab is the dream!

Thanks! This truck has a 5-speed from the factory, which is a fun detail. I wish it had a 5.7 / 350, but settled for the 305 V8 because I liked other aspects of the truck - super unmodified under the hood, welded and molded roll pan, and the unusual color.

Love the Golf and the truck. And "Ye Olde muffin tin" is an excellent idea.

The whole space is looking great, obviously you did a lot of planning with the electrical and such. I have a similarly tight two-car (18x20) and these type of spaces are always my favorite to follow.

How do you like the Milwaukee track saw? I'm a track saw fan but haven't heard from anyone with the M18 yet.

This is a cool thread, keep it going!

🍻

Appreciate it. My previous garage was truly tiny. Fortunately, the cars were small too, but by the end I felt like I had it pretty well dialed in.

The M18 track saw has been great so far. It's my first track saw, so I'm learning as I go. Track connectors are effective, although I got a bum set screw in my package. The dust bag seems to fill up quickly, but that's easily solved by connecting a vacuum if I don't want to be lazy about it. Otherwise, the dust is low, the cuts are straight and consistent. The rail clamps were backordered but should be delivered soon, which should help. I didn't bother looking for clamps of other brands but I'm sure they would do the trick. I'm still getting the hang of setting rail friction/tension on the saw itself. Definitely not a woodworker by nature!
 
OP
J

JP_CA

Well-known member
Joined
Sep 20, 2015
Messages
207
Location
Bay Area, CA
So - with the GMC - smog was due some months back. The first time I smogged it, the tech complained that he couldn't get the motor up to temperature. I figured it just ran cold, but soon realized that the thermostat was probably stuck open. I procrastinated, even though it's an easy job . . finally threw a new GM thermostat at it back in April and a few days later, I went to get it smogged.

Now, keep in mind that while the truck runs well, it occasionally gets cranky about shifting. Naturally, I went to get the truck smogged on a hot day, and I wanted to make sure the engine and the cat were up to temperature to give me a good chance of passing. By the time I got to the smog shop, it was so hot that the clutch clearly wasn't disengaging all the way, and the smog tech refused to test the vehice because he couldn't drive it. That's what motivated shotgunning a clutch into it, which you all saw above.

So, big deal, got the clutch in, time to get that smog done! Back I go, truck goes on the rollers, feeling great.

The truck fails smog. Numbers are sky-high across the board. Brilliant!

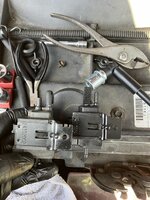
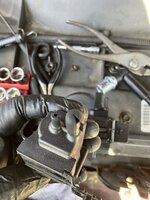
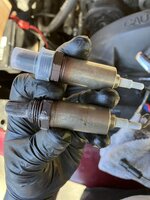
So, time for another tune-up, this time with some better ignition and emission parts. New PCV, new EGR valve, Delco cap and rotor, a few vacuum lines and grommets, new O2 sensor, etc. Great to find that someone hooked up the EGR solenoid backwards with a cracked hose cap . . that probably explains the sporadic EGR code too.

IMG_7083.jpeg

IMG_7084.jpeg

IMG_7085.jpeg

The final punch a bottle of fuel system cleaner plus several hundred miles of driving to run it through the system. Fortunately, I live in a pretty picturesque part of the world, so this wasn't really such a chore.

IMG_7114.jpeg

IMG_7118.jpeg

IMG_7121.jpeg

IMG_7125.jpeg

IMG_7129.jpeg

IMG_7133.jpeg

Anyway, I brought the truck back in to the smog shop and it passed. I got updated tags the same day. The neighbor's cherry blossom was in full bloom. Life was good.

IMG_6440.jpeg
 
Last edited:
To avoid these ads, REGISTER NOW!
OP
J

JP_CA

Well-known member
Joined
Sep 20, 2015
Messages
207
Location
Bay Area, CA
I've been driving the GMC around with no interior trim panels (A and B pillar, etc) since I pulled the headliner, and in June I finally got around to upholstering it. I still need to wrap the edges over, but I jumped at the opportunity to do it at a friend's shop to have some extra hands while I lay down the material after glue sets up. The fiberglass is pretty wavy but the foam-backed fabric is reasonably forgiving. It's far from perfect, but good enough for me.

IMG_7432.jpeg

IMG_7433.jpeg

IMG_7434.jpeg

IMG_7435.jpeg
 
OP
J

JP_CA

Well-known member
Joined
Sep 20, 2015
Messages
207
Location
Bay Area, CA
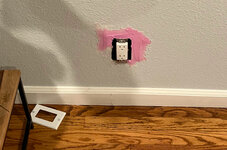
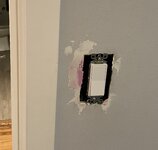
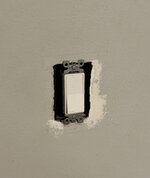
So . . since the electrical was done, the outlets have looked like hell. Looked like someone tried to feed wires with a hammer . . .

Anyway, time to get that all corrected in 4 or 5 rooms.


IMG_7419.jpeg

IMG_7418.jpeg

IMG_7421.jpeg

IMG_7426.jpeg

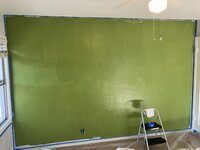
Next up - housemate moved out. Time to un-bork that room. Patch, paint, you know the deal.

IMG_7424.jpeg

IMG_7425.jpeg

IMG_7430.jpeg

IMG_7485.jpeg
 
OP
J

JP_CA

Well-known member
Joined
Sep 20, 2015
Messages
207
Location
Bay Area, CA
Apologies for the lack of garage updates, by the way. I will get back to it soon, but other projects have taken priority!

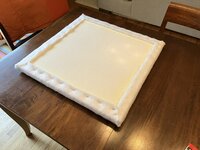
That spare bedroom is becoming a music room, so I put on my Arts & Crafts hat and got to upholstering some fiberglass sound treatment panels to calm down the reflections. The room can still use a lot of treatment, but these were free from a neighbor and they're better than nothing!

IMG_7768.jpeg

IMG_7765.jpeg

IMG_7763.jpeg

IMG_7766.jpeg

IMG_7769.jpeg

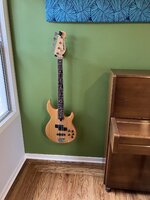
Now, everyone join me in welcoming home this beautiful 1978 Yamaha P2F! And, of course, the rest of the instruments that have been clogging the garage and various closets . .

IMG_7812.jpeg

IMG_7843.jpeg

IMG_7844.jpeg

IMG_7845.jpeg
 
OP
J

JP_CA

Well-known member
Joined
Sep 20, 2015
Messages
207
Location
Bay Area, CA
As you might expect, other house projects mean the garage has become a bit of a dumping ground. Here's what it looks like now.

IMG_7893.jpeg

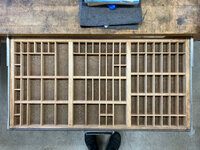
I'm excited about these "printer's drawers" which come from a print shop (as in, printing press). These are somewhat common at antique shops in the area and I decided they'd be nice low-profile fastener drawers under the bench. I can hack up the dividers as needed without feeling too bad about it.

IMG_7631.jpeg

IMG_7751.jpeg

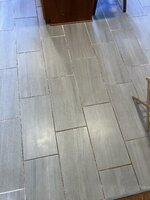
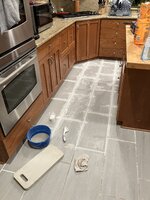
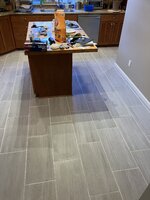
Meanwhile, my fiance kicked *** getting the grout cleaned up in the kitchen. Home Depot installed the flooring and I'm 95% sure they never sealed the grout, so it went to hell immediately. Hopefully now that it's sealed it'll hold up a bit better.

IMG_7806.jpeg

IMG_7820.jpeg

Sealant still drying in this pic - it dries matte, like the grout. Good stuff!

IMG_7859.jpeg
 
OP
J

JP_CA

Well-known member
Joined
Sep 20, 2015
Messages
207
Location
Bay Area, CA
That's a gorgeous piano. I wish that was in my living room instead of the one we've got.

Thanks. I feel very lucky to have found it. It plays well and has a killer mute feature on the middle pedal. It was either a Yamaha P2* or a Yamaha U-1 for me - didn't feel like messing with cheaply-built pianos, even if they were free. I paid only $700, which I think is a very respectable price for such a nice piano. Moving and tuning it will cost more than that in total!
 
OP
J

JP_CA

Well-known member
Joined
Sep 20, 2015
Messages
207
Location
Bay Area, CA
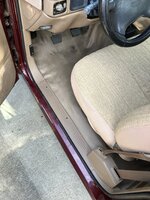
I finally got around to finishing the headliner and that allowed me to put all the trim back in the pickup - which seems minor, but makes a huge different for road noise. I slapped a couple panels of Dynamat on the roof before the headliner went in for good measure. Pretty happy with how it came out, although the interior is certainly a "symphony of tan."

IMG_7940.jpeg

IMG_7960.jpeg

IMG_8137.jpeg

IMG_8136.jpeg

I even installed the missing storage tray behind the bench seat, which is a nice way of keeping things from disappearing back there. Straps, a moving blanket or two, and there's one of those horrendous spider web cargo nets shoved into the little box in case I feel like cursing.

IMG_8139.jpeg

Naturally, it was only fair to wash the truck . . and the Lexus . .

IMG_8140.jpeg

IMG_8131.jpeg

Don't mind the Land Cruiser . . that's its "natural habitat" :0)

IMG_8141.jpeg
 
OP
J

JP_CA

Well-known member
Joined
Sep 20, 2015
Messages
207
Location
Bay Area, CA
Back in the garage, have knocked out a few baby projects in between everything else.

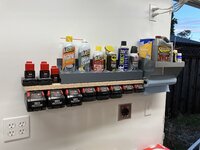
The first was to get my battery storage sorted out. I bought these battery mounts on Amazon a while back and frankly, I think they're awesome. Quality is decent and fit is good.

https://www.amazon.com/gp/product/B0837K3K2R/?tag=atomicindus08-20

1690504922826.png

So, put them on a rail and got them mounted. Now, if I'd thought in advance about it, I would've given myself a little extra shelf space to fit the M12 batteries . . . but they "fit."

IMG_8162.jpeg

With that mounted, and the can rack up, and my absolutely indispensible Rockler paper towel holder / shelf combo - now it's feeling a bit more organized.

IMG_8164.jpeg

So, then it was time to put my "finish carpenter" hat on - and let me be clear, that hat doesn't fit me very well. But with a little bit of silicone, I'm sure it'll look fine.

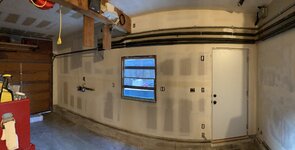
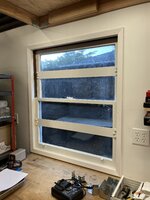
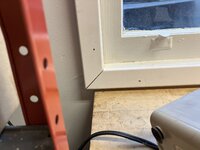
Trimmed out the window (that I still want to replace) and the door, to close up the gaps in the drywall. It helps some.

IMG_8208.jpeg

IMG_8209.jpeg

IMG_8210.jpeg

IMG_8206.jpeg
 
OP
J

JP_CA

Well-known member
Joined
Sep 20, 2015
Messages
207
Location
Bay Area, CA
Alright . . picking up where we left off.

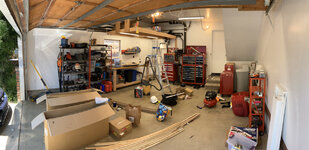
The garage had become a mess again. The general theme here is I buy materials for a project, then I curse myself for clogging the garage, and the only way to clean the garage is to do the project. So, I'll get to that project in a minute, but here's what the garage looked like on July 29 - just for a snapshot.

IMG_8244.jpeg

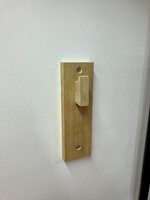
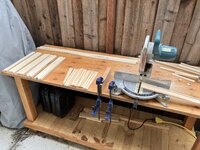
So, time to organize the track saw stuff. I built a little track saw "cleat / hook" - pretty happy with it.

IMG_8292.jpeg

IMG_8290.jpeg

I'm not much of a "tool wall" guy - I generally think it's visual noise - but this is functional and holds the big, flat stuff efficiently.

IMG_8291.jpeg
 
OP
J

JP_CA

Well-known member
Joined
Sep 20, 2015
Messages
207
Location
Bay Area, CA
Now, remember those type drawers I bought? Time to mount them!

Mocking these up was surprisingly difficult . . an exercise in patience, to be sure. Finding stuff that was JUST thick enough to stack, but wouldn't fall off as I put the drawers on top. Not the end of the world, but I did curse a considerable amount.

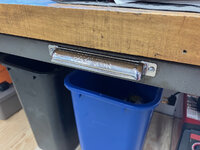
I bought soft-close drawer slides from Home Depot, mostly because I like that they pull themselves shut. Got that all mounted up with some . . 2x2? So here's the drawer subassembly:

IMG_8245.jpeg

I went back and forth on whether I wanted the handles to be proud of the benchtop, but decided to recess them. Good choice, I think.

IMG_8247.jpeg

IMG_8248.jpeg

IMG_8261.jpeg

And, like magic, they're mounted! I'm very happy with the final result.

IMG_8262.jpeg

IMG_8263.jpeg

IMG_8264.jpeg

IMG_8265.jpeg

IMG_8266.jpeg
 
OP
J

JP_CA

Well-known member
Joined
Sep 20, 2015
Messages
207
Location
Bay Area, CA
So, like I said, do the project to clean the space.

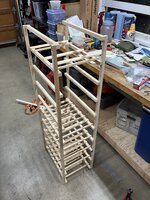
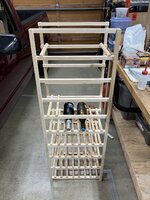
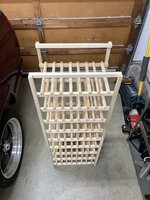
Time to do the project. The project is a wine rack insert.

Poor man's stop block . . . but it worked.

IMG_8891.jpeg


IMG_8890.jpeg

First side complete - 15-ga brad nailed together:

IMG_8892.jpeg

Both sides:

IMG_8894.jpeg

Assembly time! I'll admit it . . I bought another tool for this. It's the 23-ga pin nailer from Milwaukee. That thing is a little work of art . . what a neat tool. Exactly what's needed for something like this.

IMG_9238.jpeg

IMG_9239.jpeg

Complete!

IMG_9249.jpeg

So, here it is in its home! Pretty good for no sanding, no gluing, and Home Depot trim wood:

IMG_9254.jpeg

IMG_9253.jpeg
 
OP
J

JP_CA

Well-known member
Joined
Sep 20, 2015
Messages
207
Location
Bay Area, CA
Admittedly slightly out of order here, but I wanted to put the wine rack together into one post.

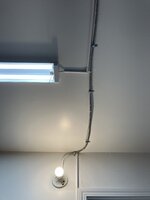
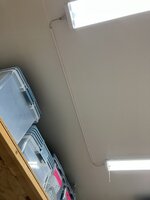
Having put this off for, let's see . . . about 11 months . . . it was time to actually deal with the hanging wires from the lights.

Sticky conduit time! Will I regret this? Who knows??

I shortened several of the cords, because that's how I am. I also used a laser because, well . . that's how I am!

IMG_9018.jpeg

IMG_9019.jpeg

Garage door button is back in place:

IMG_9020.jpeg

IMG_9021.jpeg

Yes, I am showing off :D

IMG_9023.jpeg

IMG_9025.jpeg

Tidied the wiring for the garage door opener again. I hope to replace this thing soonish, as it's a real hazard (no lasers, mounted in a questionable way) and it's loud.

IMG_9027.jpeg

Here's the finished result. So much better!!

IMG_9028.jpeg

Clean up time!

IMG_9031 2.jpeg

IMG_9033.jpeg
 

klean63

Well-known member
Joined
Jun 21, 2009
Messages
95
Location
Orange, CA
Looking good! Question about the lights, how many can be linked together and how long is the “linking cord”?

Also, can you share the link to the lights?
 
OP
J

JP_CA

Well-known member
Joined
Sep 20, 2015
Messages
207
Location
Bay Area, CA
Looking good! Question about the lights, how many can be linked together and how long is the “linking cord”?

Also, can you share the link to the lights?

Thank you! Here are the details. I like these because of the color temperature and the simple on/off control - no automatic stuff. I bought mine in an 8-pack, but it looks like they are still available as singles. Costco carried an automatic on/off variety of these for a while.


Feit Feit Electric, 4', 45 Watt, 2 Light, LED Utility / Shop Light
  • Perfect Lightweight Bright 2 Light fixtures for Garage, Shop, Utility Room or Basements . No need to change bulbs, 50,000 hour average life .
  • With Backplate
  • Instant Brightness and Works Well Down to 0 degrees Fahrenheit
  • Linkable, Connect Up to 4 Units Together Using Included Integrated Plug On Side of Fixture
  • On/Off Pull Chain
  • Bright 4500 Lumens
  • 4000K
  • Includes Hanging Chains and Hardware
  • 5' ft , 2 Prong Cord
  • 50,000 Hours Life
  • Perfect For Either Hanging Or Flush Mount Installation
  • Fully Assembled , Simple 5 Minute Installation
  • 5' Plug In Cord
 

nicholam77

Well-known member
Joined
Dec 18, 2016
Messages
2,682
Location
Minneapolis, MN
Catching up here, nice improvements! I like the track saw cleat. Hopefully it's very sturdy 😁

How do you like the Milwaukee track saw? I'm a track saw fan, but haven't heard from anyone with that one yet. Looks nice, though.

Those slim under-mount drawers are pretty sweet.

Wine cellar turned out great. I really need to do one of those. I like how you have the shelf space on top so you can still store larger bottles, boxes, other things.

I have those same Feit lights, or a close variation thereof (Costco special) and they are great. I did 8 of them in my 18'x20' and there is no shortage of light!
 
OP
J

JP_CA

Well-known member
Joined
Sep 20, 2015
Messages
207
Location
Bay Area, CA
Thanks for the positive feedback!

How do you like the Milwaukee track saw? I'm a track saw fan, but haven't heard from anyone with that one yet. Looks nice, though.

Yeah, I got it as early as I could - really held out for the Milwaukee saw. I've been really pleased with it so far, but I don't have experience using the competitor saws. It has plenty of power, the rails are super straight (even when connected), tension/friction adjustment is trivial. One of the rail connectors had a bad set screw out of the box, but if that's the worst thing, we're doing ok. I was pleased with the blades offered as well.
 
OP
J

JP_CA

Well-known member
Joined
Sep 20, 2015
Messages
207
Location
Bay Area, CA
More noodling . .

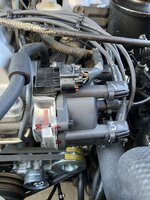
Had an off-roading trip coming up, so it was a good motivator to finally do some Land Cruiser maintenance I've been avoiding. Replaced the distributor chasing a tapping noise and it seems to have helped, but still haven't eliminated it. Replaced rear wheel bearings, wheel seals, e-brake shoes, pads, and rotors.

Check out the disintegrating o-ring :|

IMG_9265.jpeg

IMG_9269.jpeg

IMG_9317.jpeg

IMG_9320.jpeg

IMG_9440.jpeg

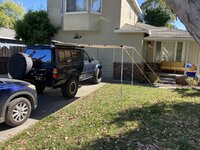
The trip was fun. This is Corral Hollow OHV. Extremely easy trail, but picturesque.

IMG_9487.jpeg

IMG_9507.jpeg

IMG_9522.jpeg

Had to dry out the awning when I got home :D

IMG_9680.jpeg
 
OP
J

JP_CA

Well-known member
Joined
Sep 20, 2015
Messages
207
Location
Bay Area, CA
I hit a major milestone last weekend - after two years of living in the house, I finally brought home my trusty forever car . . my 1990 Golf. I had been storing it at my parents' house, but I did some cleanup and now it fits in the garage at home. I feel like a part of me has returned.

Still has a bent front left fender, but cleans up nice enough anyway.

IMG_9843.jpeg

First test fit was with the Lexus, and that was easy!

IMG_9787.jpeg

Now . . replace that with a pickup truck! It's tight. I've since shuffled a few things around and made some more room to shove the Golf against the wall. It helps enormously. Here it is BEFORE I did that:

IMG_9825.jpeg

IMG_9826.jpeg
 

briceandy4

Member
Joined
Oct 22, 2023
Messages
8
Just looking though this thread and your garage turned out great. I know it’s the little things that go unnoticed by most but your electrician did a great job trimming out that panel. Very clean work.
 
To avoid these ads, REGISTER NOW!
Top Bottom