To avoid these ads, REGISTER NOW!

What did you do "IN" your garage today?

DGersic

Well-known member
Joined
Mar 12, 2017
Messages
6,365
Location
DeKalb, IL
I learned a bit about Holley carburetors this afternoon, watching YouTube. I was able to cure some stumbling with some accelerator pump adjustments and moving the position of the little plastic cam, along with a float adjustment. Surprised to have a significantly better running 289.

On to find a transmission leak next, and then learn to weld a floor pan in...

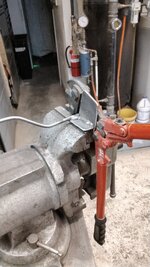
If anyone wants to point me in the right direction of 'learn to mig weld in three easy steps', I am all ears/eyes. 20230602_172329.jpg

what were your symptoms, and what was the correction? I’m also fighting a Holley carburetor here.
 
To avoid these ads, REGISTER NOW!

Roger M

Well-known member
Joined
Oct 11, 2022
Messages
151
Location
Snohomish, WA
The car had been parked and not started since sometime before covid. When I got it started the other day, it would barely idle after warm up, and there was a pretty big hesitation/stumble when hitting throttle off of idle.

Here's what worked:

I adjusted the floats so there was only a little fuel dripping out of the sight hole(when I first checked there was quite a bit of fuel running out.

The plastic cam(orange color) for the accelerator pump was set in the number one position, and not moving the pump lever right off of idle. I moved it to number 2 position and that fixed that(along with adjusting the spring loaded bolt).

Put a vacuum gauge on the base of carb, and adjusted idle mixture screws until I got highest vacuum reading. Turned the car off and turned both screws in, counting how many turns for each screw. Added numbers, divided by two, and turned out each screw that number.

Car is running pretty well now(after fresh gas replaced old). I'm still learning about tuning this carburetor, but I am happy with the results so far. Youtube and Google are your friends...

Good luck with your carb issues.
 

rayra

Well-known member
Joined
Dec 1, 2014
Messages
4,724
Location
Escaped from Los Angeles
Today I got horizontal valances for the high bookshelves trimmed to fit and got the bottom arches shaped. Each of the four panels is slightly different. Nothing in a house is ever straight, true or plumb. The 'art' is making it look like it is.


91F out in the garage still, at 2215hrs.

In the morning I'll iron on the edge banding, finish sand, blow out all the dust and apply stain. Monday I'll apply the poly coat. Tues I'll nail them up and be done with this project.

/next next next next


eta Sunday midday, edge banding ironed on the arches, sanded / blended, and stained.
 

Attachments

  • sparta high bookcases 32 verts done top sized.jpg
    sparta high bookcases 32 verts done top sized.jpg
    66.2 KB · Views: 49
  • sparta high bookcases 34 valances shaping.jpg
    sparta high bookcases 34 valances shaping.jpg
    90.4 KB · Views: 43
  • sparta high bookcases 35 valances shaping.jpg
    sparta high bookcases 35 valances shaping.jpg
    101.7 KB · Views: 46
  • sparta high bookcases 36 valances stained.jpg
    sparta high bookcases 36 valances stained.jpg
    119 KB · Views: 38
Last edited:

fishwatcher

Well-known member
Joined
Jan 26, 2023
Messages
759
I found an 11mm Craftsman USA combination wrench that I lost yesterday. Maybe the 10mm wrench gave it escape ideas. It drove me crazy that I just had it.. was so close to filling a set from 8mm - 19mm with the purchase of a 15mm and now I was missing the 11mm.

I cleaned up everything around that area and found it had fallen onto a nearby shelf.
 

welder4956

Well-known member
Joined
Apr 8, 2010
Messages
3,072
Location
Birmingham, AL USA
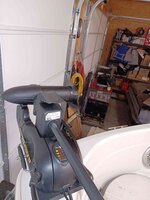
Replaced the batteries in the boat. Trolling motor still not working. I have 12 volts at the plug now, but still the motor is still dead. The connections inside the head and at the control board look good. I'm suspecting a bad control board.
 

rzims

Well-known member
Joined
Oct 25, 2006
Messages
459
Location
Grass Valley, CA
Actually spent some time working "in" the garage instead of working "on" the garage. A local guy with a mill gave me a couple of live edge oak boards that we're going to put up in the bar as shelves.
Chiseled and wire wheeled off the bark and started sanding....lots of sanding still to gooak shelf.jpg
 

Chance

Well-known member
Joined
Dec 4, 2022
Messages
720
Location
New England

Copymutt

Well-known member
Joined
Sep 3, 2016
Messages
3,401
Location
Colorado
Shot both front fenders and lower valance for K-20. You can’t do too much prep. It pays big dividends. Really like the Massey grey. Must have 20 swatches to decide the accent color.
Hood is next. That’s a biggie for me. So much real estate to cover uniformly.
Throw together paint booth is doing what it’s supposed to! Keep all surfaces wet or damp and no noticeable dust issue.image.jpgimage.jpgimage.jpg
 
To avoid these ads, REGISTER NOW!

Magnum440d100

Well-known member
Joined
Dec 2, 2018
Messages
3,581
Location
Indiana
Drug a FMB freebie home and inspected it.


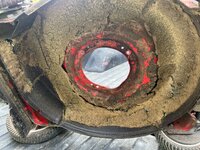
Dunno if any of y’all remember the story about this craftsman riding mower I bought off a kid last year for the carb linkages? IMG_9144.jpeg
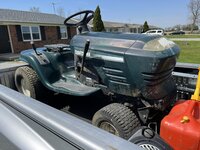

And remember he had a “good” push mower engine for sale as well? IMG_9145.jpeg

Well, perusing FMB yesterday, came across an ad for free scrap. One item in the pile being a mower carcass. From the pic, it looked decent enough. I’m not worried about the self propel. Or anything fancy. IMG_1606.jpegIMG_1605.jpeg


If the engine bolts up “square” in the hole, and the kill cable works, this will be the lightweight mulching mower. I have a few spots of overgrowth still, that I have no idea what lays under. And I don’t want to risk my riding mower or “good” Husqvarna. Between this mower (if it goes together) and the whipper snipper, I should be able to get to the back “corner” of my lot. I hope.


Oh, and “best of all”, they have a riding mower carcass I can have when they clear out the shed enough to get to it. Is a newer older craftsman. It’s a carcass. No engine. No electrical it looked like. BUT, it looks like the rear brackets that hold the transaxle in place are the same as my Ariens. I have a broken bracket or 2 on my spare Ariens. I may drag the carcass home to scavenge the brackets lol

That is all. It’s late and 4am comes too quickly.


Night y’all.
 

welder4956

Well-known member
Joined
Apr 8, 2010
Messages
3,072
Location
Birmingham, AL USA
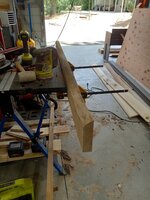
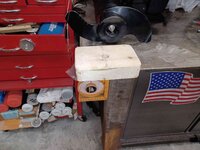
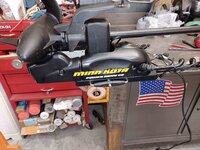
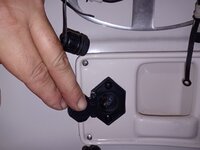
Continued trying to get the trolling motor to work. I made a temporary mount from a piece of 2 x 6 to attach it to the corner of my workbench to make it easier to work on. Once I had it mounted, I put 12V from the battery charger to the motor leads coming from the control board just to make sure the motor was still good and it spun over fine. Then I put 12V to the power leads going into the control board and was able to use the remote to spin the motor over. So, that made me think the problem was a bad wire in the power cord, but I put 12V into the connector pins and it worked fine. So, I rolled up some sandpaper and cleaned the female receptacle pins, then did the same with the male pins on the boat, and coated both with dielectric grease. Mounted the motor back on the boat and plugged it in, everything works fine now. The problem was corrosion in the connector.

20230605_133923.jpg

20230605_134014.jpg

20230605_144912.jpg

20230605_144858.jpg

20230605_144930.jpg
 
Last edited:

DGersic

Well-known member
Joined
Mar 12, 2017
Messages
6,365
Location
DeKalb, IL
Put the carburetor back together with new power valve.

Compared the old power valve:

IMG_2789.jpeg

to the new one:

IMG_2790.jpeg

Both are Holley ”6.5”. It seems wrong to me that they open so differently. But they feed in to a pair of restrictors in the metering block, so it may not matter.

Road test, still have a part throttle surge, so it was t the power valve.
 

rayra

Well-known member
Joined
Dec 1, 2014
Messages
4,724
Location
Escaped from Los Angeles
early this morning I brushed semi-gloss polyurethane on the arched valances for my high bookcases.
Late this evening I installed them.
In between, we loaded about 10 boxes of books into them. With more to come, as well as other artifacts and souvenirs.
 

Attachments

  • sparta high bookcases 38 rounds complete.jpg
    sparta high bookcases 38 rounds complete.jpg
    56.3 KB · Views: 54
  • sparta high bookcases 39 rounds complete.jpg
    sparta high bookcases 39 rounds complete.jpg
    88 KB · Views: 62

Flat Thunder Channel

Well-known member
Joined
May 4, 2020
Messages
402
Location
Ohio
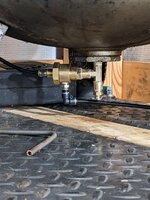
I haven't posted in a long time, but I finally plumbed in my HF air compressor tank drain. I had to order fittings and tubing to mate it to my machine.

I don't really understand why the 'English standard' kit came with metric tubing? It only took 6 months to complete a 30 minute job, but it's working good! Not sure why I procrastinated so long. Great idea and tank saver!


IMG_20230606_071703 (1).jpg. IMG_20230606_071703.jpg
 

cherokee

Well-known member
Joined
Mar 2, 2010
Messages
980
Location
Kansas City MO
I haven't posted in a long time, but I finally plumbed in my HF air compressor tank drain. I had to order fittings and tubing to mate it to my machine.

I don't really understand why the 'English standard' kit came with metric tubing? It only took 6 months to complete a 30 minute job, but it's working good! Not sure why I procrastinated so long. Great idea and tank saver!


IMG_20230606_071703 (1).jpg. IMG_20230606_071703.jpg

Reminds me, with summer here if you are somewhere where it is hot and humid, if you don't you ****.....but if you do drain that tank often, the humidity will really be squeezed out of the air this time of year.
 

ecotec

Well-known member
Joined
Oct 5, 2010
Messages
5,463
Yesterday, I played Tetris (what I call reorganizing)in the garage while my wife was reupholstering a couch.

I reorganized a couple drawers that had become catch-alls. I have been trying to make it so every drawer has only one layer of tools. There are a lot of exceptions, though.

I put a bunch of tools into the giveaway/donation drawer.

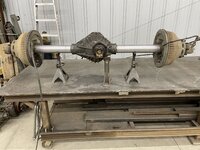
I found rust on a 3/8” drive impact swivel. I will get that off later… and look for any other living rust.
 
Last edited:

LeonardY

Well-known member
Joined
Apr 16, 2011
Messages
5,081
Location
Southern California
Machined a couple of aluminum plugs for a buddy. He's going on to hike Mount Whitney and wanted a walking stick made from a titanium tube he had. One fit a walking cane spike. The top I made so it would allow him to mount a camera on it.
I offered to 3D print the head piece from the Staff of Ra to have on the top when he wasn't using the camera mount. :ROFLMAO:
 

nadogail

Well-known member
Joined
Jan 23, 2009
Messages
32,028
Location
Coronado, CA
Put the storage box I made on the 12 Volt Power Cart and Generator Set. The Jumper Cables filled the box.
Stripped about a foot of 8 gauge 4 conductor cable to make an extension terminal set for the 12 Volt power, I will be running the 8 Gauge conductors in parallel. I just happened to have 8 feet of 8/4 cable looking for a good use.
Considering that many jumper cables are made with 8 gauge wire, two 8’s in Parallel should be ok for the purpose.
 
To avoid these ads, REGISTER NOW!
Top Bottom