To avoid these ads, REGISTER NOW!

Above 1200 Sq/FT 30 x 48 shop on Lopez Island, WA

Wokspaces above 1200 squarefeet.

LopezBart

Well-known member
Joined
Oct 13, 2023
Messages
2,564
Location
Lopez Island, WA
I felt I should start a build thread on our shop on Lopez Island since I'm finally getting to the building stage... but I thought it might be nice to start with some photos and comments about what it has taken to get to this point.
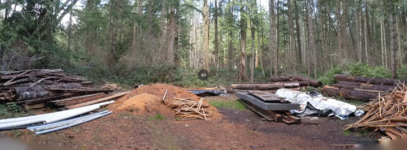
Site prep - 2020​

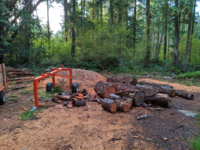
This is where the siding for our house was milled w/ a small swing arm mill. Some of the trees were from our 10 acres, but most came from the next island over. There's a pile of slabs and off-cuts to the left, and some unused finish lumber in the middle, and some logs that just weren't needing on the right. This photo was taken just as the pandemic started, and I was returning to our house in CA for work.

1707011097476.png

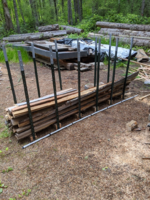
A few days after returning to CA, my work sent us all home due to the pandemic. I quickly got used to working from home, and we decided to return to Lopez and work from my parent's guest house. I was cleaning up the slabs by stacking them up between the fence posts, and cutting them into stove lengths. Lots of work for someone who spends most of their day sitting in a chair behind a monitor and keyboard.
1707011940174.png
Wood worth saving was stickered, stacked and tarped elsewhere on the property. I was loading the biggest beams with our tiny Kubota.
1707012183623.png

I dragged the logs out of the pipe w/ a chain and our 4wd pickup:

1707012423948.png
I cut the logs into short pieces I could split:
1707012536697.png

The inertial splitter has been earning its keep:
1707012558371.png

We accumulated a lot of firewood; much of it we donated to folks who needed help staying warm. I used to log arch I'd made in CA to move the red cedar logs out of harms way; I milled those later with an Alaska mill into 2x14" rough lumber for raised beds in our garden. Once I'd cleaned up most of the mess the construction crews had left, I started felling the trees that were in the way of our proposed shop.

1707016946491.png1707017070087.png1707017127515.png
 

Attachments

  • 1707017002680.png
    1707017002680.png
    2 MB · Views: 23
To avoid these ads, REGISTER NOW!
OP
L

LopezBart

Well-known member
Joined
Oct 13, 2023
Messages
2,564
Location
Lopez Island, WA
We had lots of slash, of course, so a fire was definitely in order. We can typically burn a 10' diameter pile until the end of May w/ a simple on-line burn permit. The little tractor definitely made pushing the debris around a lot easier.

1707017545385.png

By this time I'd ordered the metal building I'd selected from World Wide Steel buildings, and it had arrived. My wife had applied for a building permit. I set up a meeting with a local excavation contractor and walked up to the shop site to find a pine tree had narrowly missed taking out our moving trailer and the building panels:

1707017867506.png

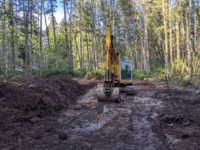
After I cut up this tree, the contractor arrived and started excavation, clearing the organic material and digging down to the clay:
1707018054125.png

At this point, we discovered that the very wet winter had left a lot of ground water and the excavator started to sink in....

1707018149195.png

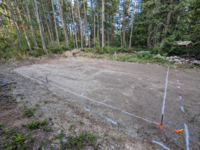
This took a while to drain, dry out and finish, and meanwhile and our negotiations with the county building department continued. One would think that a engineering metal building would be an easy permit to obtain, but inexperienced people and our hectic schedule meant that the summer was over before we obtained a permit. The next year, the contractor we'd selected for the foundation began work:

1707018535821.png

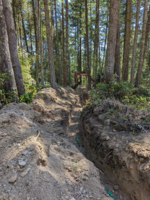
Since we already had plenty of experience with the lack of site drainage, we had a footing drain installed that daylighted down the hill:

1707018632768.png

The forms for the footings, the pier posts and the drain pipe was ready to go before we left for Burning Man in mid August:

1707018875736.png
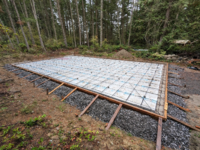
When I returned from Burning Man after Labor Day and with COVID, (we volunteer there), the footings were poured, and the the drains were in. place. They soon had the forms in for the slab, and the rebar and foam ready to go:

1707018822909.png

The weather and our contractor's busy schedule kept delaying the slab pour for several months. We were getting pretty antsy....
 
OP
L

LopezBart

Well-known member
Joined
Oct 13, 2023
Messages
2,564
Location
Lopez Island, WA
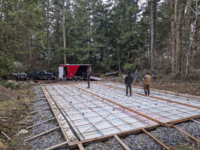
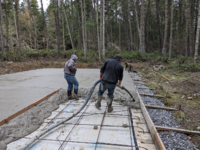
Finally, last Thursday the contractor let us know he was ready to go, and Friday morning the slab pour happened:
1707019200705.png
1707019221555.png
1707019241573.png
1707019262015.png

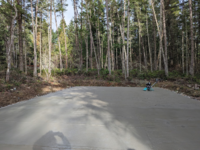
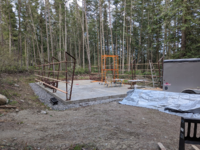
This morning we had 45F temperatures with light misting rain. The slab looks great:
1707019321642.png

Next week they'll strip the forms, and perhaps next weekend I can start layout and drilling of the holes for the epoxied anchor bolts that will fasten down the trusses you can see just to the right of the foundation contractor's trailer. The slab is 8" thick over the footings, and 6" over the foam.
 
OP
L

LopezBart

Well-known member
Joined
Oct 13, 2023
Messages
2,564
Location
Lopez Island, WA
Great pics! That’s going to be a nice shop! Planning on insulating and finishing the inside? What do you plan to do in it once it’s done?


The shop will be insulated (likely spray foam and rock wool) and "finished"; I'm partial to sanded plywood on the walls. The underside of the purlins needs to be covered with something; I've not decided that yet. The purlins and girts run lengthwise/horizontal and will be 2x8s and 2x6s.
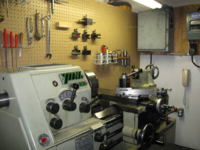
I have a 15" lathe and Bridgeport, plus welding equipment and metal fab stuff. My machine tools are still in CA; I need them to get our 26' steam boat back running again. Since we're on an island with one or two mechanics, doing my own routine work on our vehicles is part of the process.

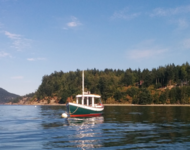
Photos of lathe back in garage in CA, and our steamboat floating in the bay down the hill from our new place here on Lopez.

1707072962994.png1707073144392.png
 

dmittz

Well-known member
Joined
Dec 2, 2016
Messages
1,298
Thanks for sharing your cool build. I'm just bit north of you up in B.C Canada. You have some nice metal working machines. I have a wells-index 745 Mill and South bend 9A lathe, as well as a South Bend 13 Lathe. They sure do come in handy.

I look forward to following along with your build.
 
OP
L

LopezBart

Well-known member
Joined
Oct 13, 2023
Messages
2,564
Location
Lopez Island, WA
We've had rain/mist almost every day since the day after the concrete was poured. The contractor pulled the forms, and I spent much of Saturday cleaning up, cleaning the spilled concrete out of the drain rock, policing up bits of stuff, left-over stakes, etc. I measured the foundation to see how close it is to the print.... we're within 1/8" square over 56' (diagonal;), and we're 1/4" large in width at one end and 1/4" small at the other. The overall length is 1/4" overlong. Plenty close enough for a shop building.
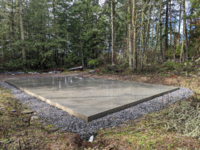
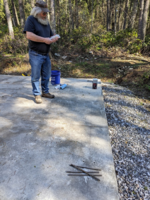
I ordered a new Tajima chalk line; my old Irwin has definitely seen better days, and I want something w/ finer lines for doing the hole layout.
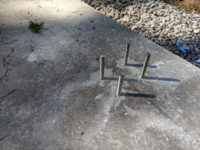
I went with epoxy & threaded rod over cast-in j-bolts since we get a nicer finish this way, and hopefully more accurate hole locations. The anchor bolts are 1/2", and the holes in the truss are 11/16 - lots of room for adjustment,

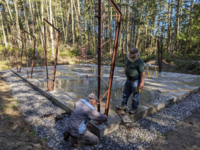
I made a steel template for drilling 5/16" pilot holes for the 9/16" holes in the concrete for each truss end; we'll see how that works out.


1707783503715.png
 

Pluribus

Well-known member
Joined
Dec 16, 2012
Messages
2,143
Location
Skagit County, WA
Looks like it's going to be an interesting build worth following! I have a friend who lives just across the water from you on Biz Point, and it's fun to see these local-ish projects. I've been thinking about getting a log arch too, as I have a lot of blowdowns from this year's storms, and I'm hoping a shop project is in my near future as well.
 

Jayman17

Well-known member
Joined
Feb 6, 2017
Messages
3,815
Location
Seattle, Wa
I will be following this too. Did you already build a house on site? You mentioned siding for your house but then said you were staying at your parent's place. I'm assuming shop first then house? Beautiful location for sure!
 
OP
L

LopezBart

Well-known member
Joined
Oct 13, 2023
Messages
2,564
Location
Lopez Island, WA
I will be following this too. Did you already build a house on site? You mentioned siding for your house but then said you were staying at your parent's place. I'm assuming shop first then house? Beautiful location for sure!
We had the house built... it is sided w/ local wood (some from our plot, but most from the next island over.). We stayed in my parent's guest house sometimes while the house was being built, as our properties are next to each other. The shop is something I'm tackling, other than outsourcing concrete & excavation. I did a bunch of the clearing - lots of work dropping & cutting up 80' trees. I'm still working a tech job full-time remote (well, in between posts here :) ).
 
OP
L

LopezBart

Well-known member
Joined
Oct 13, 2023
Messages
2,564
Location
Lopez Island, WA
Well, the weather cleared for a bit this month and I drilled 40 9/16" holes 8" deep as per drawings for the 1/2" diameter, 12" long threaded rods (anchors) for the steel frames that support the shop. Getting the holes drilled in the right place is a PITA; the best method I found was:
  1. Layout grid of the frame locations as per drawings.
  2. Mark large (1') lines that form the center of each set of 4 holes.
  3. Using a steel template I made up with the 4 holes needed for each frame, use a (cheap) transfer punch to lightly punch hole locations in the concrete. Use a proper center punch to make them slightly larger.
  4. Use a 4x6 block as a guide with a vertical hole drilled in a dialed in drill press table. Stand on the block while starting the hole. Once down a couple of inches, switch to the next hole. I used a 1" M18 SDS-plus drill; it had no trouble at all .
  5. Once each set of 4 are down, drill down 8" - marked on SDS drill bit with toolmaker's ink. Stop every couple of inches to blow out the dust - of course, you're wearing the right PPE.
  6. To prep the holes for epoxy, I followed the epoxy directions -
    1. blow 2 seconds w/ compressed air using a offset blowgun nozzle that reaches the bottom of the hole
    2. brush twice full length of the hole with steel brush
    3. repeat the blowing.
  7. Degrease the 1/2" x 12" rods, first with detergent, after drying use brake cleaner.
  8. Following the directions on the epoxy, fill the hole as needed and spinning the rods, bed them in epoxy. A small amount should come out.
Of course, I ended up running short, even though I'd gotten an extra tube. One more set of holes left to go. My wife installed most of the rods (and took a couple of pictures) while I squeezed the epoxy into the holes. Note all the debris on the slab; we've had plenty of wind and rain the last month. I'll get another tube of epoxy and install the last four rods (plus drill two more holes for either side of the man door so as to not waste the epoxy) during the week. Next weekend I hope to start setting some columns in place.

1710735245503.png1710735292923.png
 
To avoid these ads, REGISTER NOW!

red

Well-known member
Joined
Feb 20, 2009
Messages
721
Location
Hudson Valley, NY
Well, the weather cleared for a bit this month and I drilled 40 9/16" holes 8" deep as per drawings for the 1/2" diameter, 12" long threaded rods (anchors) for the steel frames that support the shop. Getting the holes drilled in the right place is a PITA; the best method I found was:
Of course, I ended up running short, even though I'd gotten an extra tube.

1710735292923.png
The older I get the more it annoys me when I run short, especially when you planned or allowed for waste. Being on an island with limited access to somethings readily available on the mainland doesn't help either.

thanks for sharing your install procedure, never gave a thought to degreasing the studs before installation.
 

littlebean

Well-known member
Joined
Mar 7, 2018
Messages
777
looks like a nice project, also interested in the steam boat - had a wonderful trip on a steam boat around Ullswater (Lake District, GB) on a misty day
 
OP
L

LopezBart

Well-known member
Joined
Oct 13, 2023
Messages
2,564
Location
Lopez Island, WA
looks like a nice project, also interested in the steam boat - had a wonderful trip on a steam boat around Ullswater (Lake District, GB) on a misty day
I'll check that out when we head back to GB one of these years. I really like riding in other people's boats, too. Here's a couple of pictures from ten years ago or so; we're taking a family out for a steamboat ride at Elkhorn Slough, CA in our smaller boat, Otter. The slough empties out through a harbor directly into the Pacific; the first picture shows us transiting the open mouth of the slough.
1710869448724.png
1710869198312-png.2076520
 

Attachments

  • 1710869198312.png
    1710869198312.png
    2.7 MB · Views: 1,160
OP
L

LopezBart

Well-known member
Joined
Oct 13, 2023
Messages
2,564
Location
Lopez Island, WA
During Saturday's rain I did some prep work; I got the storm debris off the slab and loaded our utility trailer w/ tools & the bolts & other fasteners for the shop building . The shop site is about 100 yards from the house towards the road, so it's nice having a safe place to lock away the tools. Today my wife and I started lifting and setting the bottom frame members. They're not too heavy - perhaps 60 or 70 lbs, but a bit tall and awkward. Unfortunately, the building manufacturer welded the lowest girt brackets a bit low, so we're notching the PT sills where those brackets sit to fit.

Here I am fitting the first piece of PT; this one has the man door, so gets a couple of bolts on either side of the door opening. There's some odd distortion in the picture, though; that ladder doesn't seem right.
1711335912202.png

After a bit of futzing around, we got the first frame bottom bolted down. At this point, we're finally going
three-dimensional! We use the moving dolly to avoid carry the frames as much as possible. You can the
sun drying things out after yesterday's ample rains.

1711336028167.png

After lunch, my friend Mike stopped by to supervise and help out; he's an ex professional motorcycle racer,
retired machinist, fellow steam boater here on the island (there are three of us), and above all raconteur.

1711336269678.png

Of course, Mike had to get his hands dirty too; he also helped with lifting the frames - I hope I'm as
spry when I hit 80.
1711336394144.png

We quit early (before dinner time) after we got the frames up; a cup of tea and chocolate seemed
appropriate. Some of the frames may need a bit of tweaking to get square and the right distance from
the edge of the slab; time for that during lunch next week (I work from home). Next week I hope to get
the sliding miter saw up from our parent's estate where my brother is working on remodeling; that saw
will speed up cutting the girts and notching all those pressure treated sills. My wife finds my model 77
Skilsaw too heavy to use comfortably, but she's quite comfortable with the miter saw.

1711337004264.png

The next couple of weekends, we'll put up the girts, sills and wall wind rods (1/2" steel X bracing), and
once we're satisfied w/ that the walls are skookum, I'll rig a lifting pole on the loader to get the roof part
of the frames in place.
 
OP
L

LopezBart

Well-known member
Joined
Oct 13, 2023
Messages
2,564
Location
Lopez Island, WA
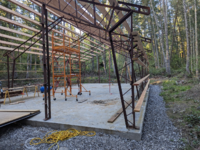
Well, the weather was nice this past weekend, and we got all the girts up, wind rods and the chord bracing as well. Tonight I assembled most of the scaffolding I'll use to reach the purlins in the center of the building; the scaffold guards are still to come. The shop roof slope is 5:12, both for looks and to help the snow slide down...

Next weekend I have my brother and a friend helping out; we're going to lift some trusses w/ a extension on our loader (in right foreground) plus a chain fall for control. The lumber is covered in the foreground; rain tomorrow evening.


1712029685413.png
 

red

Well-known member
Joined
Feb 20, 2009
Messages
721
Location
Hudson Valley, NY
I'll check that out when we head back to GB one of these years. I really like riding in other people's boats, too. Here's a couple of pictures from ten years ago or so; we're taking a family out for a steamboat ride at Elkhorn Slough, CA in our smaller boat, Otter. The slough empties out through a harbor directly into the Pacific; the first picture shows us transiting the open mouth of the slough.
1710869448724.png
1710869198312-png.2076520
Cool, a boat with a build in still . . . high octane to go!
 
OP
L

LopezBart

Well-known member
Joined
Oct 13, 2023
Messages
2,564
Location
Lopez Island, WA
Despite intermittent rain, we were able to make good progress this past weekend, raising all the trusses and fastening the girts. My brother and and a friend of ours from Burning Man did all the high work, while my wife and I did things like cut girts to length and hand them up, and carefully use the loader to raise the trusses into position, as well as taking pictures.. I used an wooden extension (4 16' 2"x6"s) on one of the loader tines to lift the trusses; for final positioning we used a chain host to carefully adjust the height. The yellow 3K WL straps took the working load; I used an additional chain for safety.

1712611259032.png

There were lots of discussions about how best to get everything square; building like this is quite different from the stick building my brother and I are accustomed to doing:
1712616327746.png
Here's my wife cutting the last purlin to length; we were all wearing rain gear as we had intermittent rain both days.
1712610873106.png
 
OP
L

LopezBart

Well-known member
Joined
Oct 13, 2023
Messages
2,564
Location
Lopez Island, WA
Funny, but progress is slower when it's just a couple of us... Barbie and I epoxied in the bolts last weekend, and I did a bunch of minor pickup work like installing some missing chord bracing. I still want to replace some fasteners, but the post office returned them to the vendor as undeliverable, sigh. I've got all the eave extensions installed after my order of bolts, nuts and washers (needed since the building kit's fasteners were too short) arrived from McMaster-Carr , and Mike and I lifted the end wall columns and got them reasonably straight after work tonight. Next step is to put the two remaining purlins (one at the wall, the other at the eave) all around; this is a bit fiddily since the wall purlins end up getting notched. 62 F today - nice and warm while I sat inside banging on my keyboard. Looks like rain this weekend and next weekend, though; maybe I'll setup the sliding bevel saw in the trailer and trim, rout and install PT girts.


1713495519464.png
 
OP
L

LopezBart

Well-known member
Joined
Oct 13, 2023
Messages
2,564
Location
Lopez Island, WA
Last weekend we made some progress despite the rain, getting the remaining perlins - eave and wall - up. Took a tumble off the bottom rung of a ladder since it was wet - a reminder to work slowly and carefully, especially in the rain.

1713930603242.png

Hyper Lite was having a sale, so I ordered a 150W UFO 4000K to see how I liked it. It arrived today.... I ran the numbers and I think the 8 they suggest would provide ample light hung at the almost 14' level shown here... the auto light leveling feature on the phone (Pixel 6 Pro) makes this difficult to judge from the photo, however. Plenty of light for close work; the machine tools will have their own task lighting, of course.

1713930743771.png 1713930772072.png

I will be ordering the rest ahead of the electrical work and stringing them up w/ extension cords once the roof is on since it will be pretty darn dark in there.

Next up: some more/stronger fasteners on some of the doubled roof perlins, adding the two remaining wind rods in the roof, tensioning the roof wind rods and adding the PT floor girts. The latter need routing, since the factory goofed and put the plates on the trusses at 1 5/16" from the bottom instead of 1 1/2". The end columns need final leveling and I can then add the end walls, and frame the man door & main door (basically where the trailer is situated above). At that point, it's on to the siding and roof!
 

FTWingRiders

Well-known member
Joined
Mar 21, 2012
Messages
1,561
Location
Central Ma
Looking good! One thing I’ve found.. I can NEVER have too much light in the shop! I’ve had to add additional work lights over my bench, which helps tremendously.
Also be careful! Glad you’re ok, I’ve found I just don’t bounce like I use to, and have also learned the hard way to take it slow and easy when I counts!
Thanks for the updates!
 

brit vet

Well-known member
Joined
Aug 15, 2017
Messages
265
Location
Manchester, England
looks like a nice project, also interested in the steam boat - had a wonderful trip on a steam boat around Ullswater (Lake District, GB) on a misty day
That'll be on one of the Ullswater Steamers. We hold a Corvette Club event there every September at Park Foot Holiday Village which sits on the edge of Lake Ullswater and just outside the small village of Pooley Bridge. A club member and mate has a holiday home further down the lake and tradition now is when the Corvette event winds down on Sunday a few of us head over to their private beach and enjoy a few adult beverages and snacks while the sun goes down.

20210905_192819_resized_1.jpg

 
OP
L

LopezBart

Well-known member
Joined
Oct 13, 2023
Messages
2,564
Location
Lopez Island, WA
It's been a few weeks since an update... I ended up in CA for one weekend, helping a friend celebrate his 70th birthday, and we had a fair amount of rain. But this weekend was beautiful, and I got a lot of shop time in, so here's what's been done since last time:
  • Cut the top rung off the Baker-style scaffolding ladder on one side - much easier to manage the transition from ladder to platform.
  • Replaced all the .25" x 1.25" lag screws in the double purlins w/ 3" SDS screws - much stronger. Added missing constructions screws along the double purlins. It's amazing how getting on and off the scaffolding 20 times will tire me out; I was working by myself that day so every time it had to be moved, down I went.
  • Added roof wind rods and tensioned them.
  • Framed most of the east end wall. To finish the top, I'll need to get the sloped girt attached to the underside of the purlins. It's amazing how much faster construction happens when I don't need to climb and carry lumber up ladders.
  • Framed the man door opening; still a header and sister on the girt above the door.
That's a guide temporarily screwed (mostly) vertically to the girts, center picture...

Next steps:
  • Finish man door frame.
  • Attach sloped girts that form the tops of the west and east end wall to the underside of the purlins. It'll be a bit tricky to locate these as they end up about 1/2" out from the truss frame. I may drop a plumb bob from the purlins to the end of the concrete to define the edge of the wall. Seems like a job for a laser of some sort.
  • Finish framing east wall.
  • Frame west wall.
  • Add gable ends.
And then I get to start messing with trim and sheet metal :)


1715610841267.png
 
OP
L

LopezBart

Well-known member
Joined
Oct 13, 2023
Messages
2,564
Location
Lopez Island, WA
Another busy weekend spent on the shop. I was working by myself again, so things took longer, especially since I've been working up in the air on ladders and scaffolding. I must have been up and down the scaffolding 30 times this weekend. I finished putting up all the girts on the east wall, including the slanted ones at the very top of the wall under the purlins. A scissor lift would be a handy thing, but given that I'm still working full-time on my day job, not very economical. I guess I'll think of my time climbing ladders & scaffolding and hauling wood into the air as work-out time - no gym membership needed :).

I did learn a new knot for lifting the sloped girts into place - a scaffold knot. Quick and easy to tie as well... just what is needed for a swing, too. The bowline knot on top ties the ends together, of course. Perhaps I'll tie a scrap of 2x6 to one of the truss frames as a place to take a break....

1716177456561.png1716177424682.png

I finished the man door framing as well. Next weekend is camping, and after that comes framing the big door opening (10'6" x 12'). Later on I'm going to weld up steel frames and have hinging doors w/ 2" foam inside. I think I'll make the man door out of some left-over 2x6 T&G from the house build - a classic cabin door w/ Z bracing and big T hinges.

1716176491904.png
 
To avoid these ads, REGISTER NOW!
Top Bottom