To avoid these ads, REGISTER NOW!

Between 485 & 705 SQ/FT jonshonda-A Man On Too Many Missions

Workspaces between 485 and 705 squarefeet.

jonshonda

Well-known member
Joined
Jul 17, 2017
Messages
4,735
Location
Wisconsin
It's interesting what motivates me sometimes, whether the threat of impending boredom, a persistent curiosity, or embracing the fact that variety is the spice and life it too short. I like adventure, and love to research and learn. I'm not in my happy place if I'm sitting idol, and after many years, dozens of threads, and thousands of posts I figured it was high time this fella created his own thread.

Just a few quick things about me. I'm in my early 40's, married since 2009, we have two kids 13yo and 10yo, two yellow labs, and my wife has a cat. I have what I call "functional ADD" (no not A Dumbass Disorder, it's pronounced Attention Deficit Disorder), so it's extremely easy for me to develop an intense interest for a wide variety of things, hence the title of the thread "A Man On Too Many Missions". While I do overwhelm myself at times with the variety of things I work on, I am typically able to execute projects to completion which isn't very common for those with ADD 😎.

Over the years GJ and it's members have delivered countless hours of entertainment and enjoyment, along with a wealth of knowledge and advice. Yes GJ has helped me spend some money, but I don't regret a single purchase or action that was a result of GJ influence.

Content of this thread will most likely come from the following topics, and the list is guaranteed to to grow as time rolls on.
1) Stuff around the house (yard work, home improvement, etc)
2) 2017 Lexus GX460 Luxury (wife's dd and towing rig).
3) 2009 Honda Fit Sport (jonshonda dd from Florida).
4) 1994 Mazda Miata R-Package (fair weather cruiser and auto-x toy).
5) 2018 Rockford Roo 19 Camper and camping related items.
6) My son's recent interest in gun deer hunting and 22LR Steel Target Challenge.
7) I want to buy my neighbors boat.
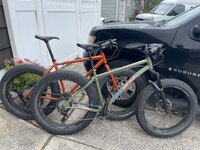
8) I am a board members and the Trails Director and trail builder for our local Mountain Bike Organization.
9) Just bought a Bambu Labs A1 3D printer (arrives 11/4/24)
10) I have too many meat smokers.
 
To avoid these ads, REGISTER NOW!
OP
J

jonshonda

Well-known member
Joined
Jul 17, 2017
Messages
4,735
Location
Wisconsin
I kicked the weekend off with a spur of the moment urge to start a project I have been wanting to complete all summer. While I did not create the vast majority of the trails at this property, I am the current liaison and one of the only builders in our organization that runs the mini-ex.

As always pics never do hills justice, but this is on some steep grade. While our mini-ex has made these trail possible, there are many pucker moments when using it, especially on steep side slopes. Between the rocks and the roots, something is always challenging my nerves when breaking fresh ground.

I made good progress, but the day was cut short when the low fuel light came on and I realized the fuel can was missing....and a hydro line to the front blade had sprung a leak. Oh yeah, that log wasn't nearly as rotten as I had hoped to I'll need to bring the chainsaw next time. I was ok stopping at that point. I'm guessing another 4-6 hours will get the rough cut through the hill, then I will come back with our Ditch Witch SK650 with the 5 way blade attached to clean things up.

1000009059.jpg
 
OP
J

jonshonda

Well-known member
Joined
Jul 17, 2017
Messages
4,735
Location
Wisconsin
I woke up to rain Sunday morning, which always motivates me to work indoors. I didn't really have anything specific planned, so I just headed out into the garage with a plan to simply clean up the work bench from the previous weeks activities. I don't know why I popped the hood of the Honda Fit in the first place, but man-o-man did I create some work for myself.

Hmmm, when is the last time I checked the air filter...dirty time to replace. Hey what is that teal powdery substance peaking out from under the positive battery terminal cover. :headscrat Time for a new battery too, with some heavy rehab to the positive and negative battery terminals/cables.

1000009067.jpg1000009068.jpg
 
OP
J

jonshonda

Well-known member
Joined
Jul 17, 2017
Messages
4,735
Location
Wisconsin
A few weeks back I had a tire that was losing air, so I took it upon myself to extract the nail and plug it. Well, the tire continued to lose air so I figured it was a good time to investigate the tire to determine wtf was going on. Seems like the plug didn't hold. :fawk:

1000009078.jpg1000009079.jpg

Instead of trying to find a shop to do a professional patch job on a Sunday afternoon, and with winter fast approaching (hopefully) I thought it would just be better to swap out the winter wheels. The Daytona Super duty well regarded by many on GJ has always made loud squealing noises when raising any of my vehicles, and while it has always worked it's never given me the warm fuzzies. Well, less then a year of light use and it bled out....leaving a nice puddle on the floor.

1000009080.jpg1000009081.jpg

Called the local HF, they looked up my info, confirmed that it was covered under warranty and that there was stock for replacement. While I was there I remembered I needed a new heat gun to replace the old Chicago Electric that had crapped the bed after many years of service. Even though it was on sale I asked to use the 15% off ITC coupon, and due to the warranty transaction of the $289.00 jack the system took %15 off the jack, not the heat gun. They had already battled the system to get the floor jack warranty entered correctly, and didn't know how to correct the coupon application, so I got me a new heat gun for $1.36

1000009082.jpg

I put the new jack right to work.

1000009084.jpg
 
OP
J

jonshonda

Well-known member
Joined
Jul 17, 2017
Messages
4,735
Location
Wisconsin
Wanting to impress @D.F.B with a somewhat clean-ish engine bay, I doused the dirt with Super Clean, brush, and finished with 303. But no good deed goes unpunished, and working too quickly I snapped my oil dip stick. While not to DFB level, it's good enough for me.

1000009088.jpg


Also whilst at the parts store picking up the air filter and battery, I bought some brighter reverse light bulbs. Having tinted windows and and somewhat difficult driveway to navigate whilst reversing in the dark, means I need all the help I can get. Counting on these to light up my reverse life.

1000009085.jpg

Winter in Wisconsin and the associate salty roads really take a number on anything metal. Not wanting to let the rust stain the plates, I found some stainless mounting hardware. It's the little things ya know!

1000009086.jpg
 

D.F.B

Well-known member
Joined
Aug 2, 2023
Messages
1,564
Location
Australia
Wanting to impress @D.F.B with a somewhat clean-ish engine bay, I doused the dirt with Super Clean, brush, and finished with 303. But no good deed goes unpunished, and working too quickly I snapped my oil dip stick. While not to DFB level, it's good enough for me.

1000009088.jpg
Looks pretty good to me! Nice work. (y)
 
OP
J

jonshonda

Well-known member
Joined
Jul 17, 2017
Messages
4,735
Location
Wisconsin
Good news!!! Bambu A1 showed up yesterday...delivered to my neighbors house my mistake. Nice of the FedEx driver to take a picture of the wrong from porch, it made finding it much easier! To be honest, it's a very common issue as our neighbors address is very similar to ours.

I found a perfect spot in the basement for it, a small custom build desk with cheaper laminate counter top. Bummer is that the surface wasn't perfectly level and sagging in the middle. Date code on the bottom was from 1999 so I supposed gravity was taking its toll.

Nothing a few 2x4's and a bfh couldn't fix though, and without much trouble I had the surface almost perfectly level and flat. #winning. So I placed the A1 on the surface and stuck a level on the print bed....hmmm it was wayyyy out from level, probably close to 1/4". Well one thing led to another and I found that the bed was suspened by springs on 3 of the four corners...so I started adnusting. But i quickly found the bed couldn't be leveled without elongated holes in the bed. Well things went south from there and lets just say I have a support ticket in with Bambu. #*******.

@nicholam77 I would be curious if you tried to level your bed? I know the bed leveling software is built into the program, but man I would think that much compensation would have SOME effect on the quality and accuracy? For reference there are 3 fasteners on the top of the bring bed thar fasten it to the carriage below (green) The back right corner has a concave extrusion that I assume is meant to be the "zero" corner and makes contact with the carrier (marked in red) The red corners are suspended by springs, which make me think that they are meant to allow you to level the bed.

There are two more fasteners on the right side of the bed, but they are under the bed and tie the right side of the bed to the carriage. What I found was that I couldn't level the right side of the bed front to back as the screw under the bed would limit the downward travel. So that's when I got the bright idea to "fix" Bambu's manufacturing defects and elongated the hole. That went fine until I broke a wire on the sensor under the bed. FML.

20241105_175013.jpg
20241105_175104.jpg
20241105_175052.jpg
20241105_175643.jpg

Mock up of the AMS on top to help free up desk space.
 

Attachments

  • 20241105_175723.jpg
    20241105_175723.jpg
    767.8 KB · Views: 23

nicholam77

Well-known member
Joined
Dec 18, 2016
Messages
2,655
Location
Minneapolis, MN
1st off congrats on the printer!

Sorry to hear you’re having a few troubles

I’m a little confused as to what’s going on. The bed shouldn’t have any springs that affect how level it is (that I recall). It does not have bed-leveling wheels like an Ender. I remember there were some screws to remove that held the bed in place for shipping. Does the carriage slide back and forth on the Y-axis?

I’ll have to take a look at mine when I have a chance, but something doesn’t seem right. I highly doubt any holes would need to be elongated due to manufacturing defects.

I hate to ask… but did you read the assembly instructions :ROFLMAO: ? I thought their documentation was pretty good. Otherwise you could look up a setup video on YouTube.

The bed leveling that happens in software doesn’t actually change anything with the bed — it creates a topographical map of the print surface called a “mesh”, and uses that to compensate the nozzle Z-axis height over the first few layers. That’s just for minor imperfections in the bed surface… 1/4” would be far more than can be compensated for.

I’ll take a look at mine when I can but I would start by watching a setup video. Good luck!
 

loganb

ALLIANCE MEMBER
Joined
Dec 29, 2011
Messages
5,516
Location
Omaha, NE
Subscribed so I can encourage further printing shenanigans!

I'm also with nick, I don't recall anything with leveling screws on the setup of the A1. I for once actually read the instructions and it was pretty painless
 
OP
J

jonshonda

Well-known member
Joined
Jul 17, 2017
Messages
4,735
Location
Wisconsin
None of this is in the instructions or part of the setup @nicholam77 @loganb, this is a carpenter and design engineers obsession with having things level and understanding the engineering of a product. I read the instructions and assembled as needed, I may have just not done a good job describing what the issue is.

When I place the printer on a level surface, the machine itself is level meaning when I place a level on the top of z-axis column it is level. But, when I place a level on the actual build plate (I called it a bed as the machine is referred to as a bed slinger, maybe a better term for it?) it was out of level relative to the surface the printer was resting on. I also placed a level on the y-axis guide rails that the build plate (bed) travels on, and they were level. So I initially thought one of the manufactured components must be a bit out of tolerance, as if the surface the printer is sitting on is perfectly level then the build plate should be level as well, right?

1000009182.jpg

So like a ******* idiot I decided it was time to start tearing my brand new printer apart. With the level still resting on the bed I started turning the screws marked in red. I noted that the bubble on the level started to move, so I took a look under the bed where it fastens to the Y axis carriage, and sure enough there was a spring under all three red fasteners. I then noted the lack of a fastener in the upper right corner (marked in green) and figured that must be the datum or zero point. So I start adjusting the screws to level every axis off of the datum or zero point.

1000009184.jpg

While I was able to level the bed left to right (x-axis) I wasn't able to get the far right side level front to back (y-axis) as the screw (shown with the oversized or elongated hole shown in the pic) was limiting downward travel.
1000009189.jpg


Bambu did recognize the need for adjustment as the hole in the front of the bed is larger then the one near the datum point, but it wasn't large enough to allow the bed to be leveled. So to achieve level in the y-axis the hole needed to be elongated as shown below. After doing so I was able to get the bed to be perfectly level.

1000009159.jpg
 
OP
J

jonshonda

Well-known member
Joined
Jul 17, 2017
Messages
4,735
Location
Wisconsin
While I recognize that the machine is likely able to compensate for such things, I just can't believe that the printer constantly having to compensate for the bed being so far out of wack would lead to good quality.
 

loganb

ALLIANCE MEMBER
Joined
Dec 29, 2011
Messages
5,516
Location
Omaha, NE
While I recognize that the machine is likely able to compensate for such things, I just can't believe that the printer constantly having to compensate for the bed being so far out of wack would lead to good quality.

As an engineer who at times is still recovering from some of the machine qualification stuff I had to do in prior roles....I get what you're going for.

I also think it's un-necessary unless there is a failure of the auto bed level/mesh routine and it's giving you problems

They do have a tramming procedure documented for these:


The bigger part here in my opinion is the axis squareness/perpendicularity and consistency of that across the working envelope. The auto bed level/mesh can compensate for a wave bed plate or some level of out of squareness, but as it gets worse thats where tramming it in may help.

And if you really want to drive yourself crazy....toss that plastic green level back in the garage and pickup a used machinist level like a Starrett 98...
 
OP
J

jonshonda

Well-known member
Joined
Jul 17, 2017
Messages
4,735
Location
Wisconsin
As an engineer who at times is still recovering from some of the machine qualification stuff I had to do in prior roles....I get what you're going for.

I also think it's un-necessary unless there is a failure of the auto bed level/mesh routine and it's giving you problems

They do have a tramming procedure documented for these:


The bigger part here in my opinion is the axis squareness/perpendicularity and consistency of that across the working envelope. The auto bed level/mesh can compensate for a wave bed plate or some level of out of squareness, but as it gets worse thats where tramming it in may help.

And if you really want to drive yourself crazy....toss that plastic green level back in the garage and pickup a used machinist level like a Starrett 98...

I will always blame every issue the machine could possibly have on the inability to level the bed correctly, as a solid base is the route of everything I do so dismissing it isn't something I am capable of. It's just too engrained in me to make things square and level so no one will ever win an argument with me that it doesn't matter if something is square or level. It just seems silly to me to have the base for every project I print start off handicapped like that.

Regarding the cheap *** level it was only used for quick reference pics and I knew I would be getting some **** from someone. I confirmed using 3 different levels yesterday that I wasn't totally nuts for trying this. I also wondered what the "holy grail" of levels might be, and will keep my eye out for a Starrett.
 

loganb

ALLIANCE MEMBER
Joined
Dec 29, 2011
Messages
5,516
Location
Omaha, NE
I will always blame every issue the machine could possibly have on the inability to level the bed correctly, as a solid base is the route of everything I do so dismissing it isn't something I am capable of. It's just too engrained in me to make things square and level so no one will ever win an argument with me that it doesn't matter if something is square or level. It just seems silly to me to have the base for every project I print start off handicapped like that.

Regarding the cheap *** level it was only used for quick reference pics and I knew I would be getting some **** from someone. I confirmed using 3 different levels yesterday that I wasn't totally nuts for trying this. I also wondered what the "holy grail" of levels might be, and will keep my eye out for a Starrett.

I totally get it and have also fought machine calibrations trying to get that .002" off nominal value on a 10 piece run adjusted to be dead on....to make parts with a .030 or .050" tolerance. Makes 0 discernible difference to the end result but dang I knew it was just a bit off!

I'm not an expert on levels, but if you search for Machinist Levels you'll find a bunch out there. I was introduced to them by my Dad as he showed me the progression of something I thought was "level" thru a couple different levels of accuracy. The one in my drawer is a Starrett 98....not because I actually need it but because like many things I saw it for a great price and picked it up :)
 

nicholam77

Well-known member
Joined
Dec 18, 2016
Messages
2,655
Location
Minneapolis, MN
@jonshonda I understand what's going on more now, after further explanation, and looking at the tramming procedure Logan linked.

Tbh I didn't even know there was a tramming procedure or ability to adjust the bed on this printer. I did not need to do that at all. I figured they were just manufactured within a good tolerance and the mesh system would take care of the rest.

My take is that, yes, you are correct, if the surface the printer is sitting on is level, and the base of the printer is level, then the bed carriage should also be dang close to level. True level doesn't really matter, but they should be level relative to one another. Machinist perfection not required by any means, but 1/4" out seems very off.

Again, I am surprised that the hole would need to be elongated... personally that would make me nervous and want to send the printer back for being out of spec.

Maybe you're all sorted now, but I would also follow the tramming procedure with the gcode that Logan linked.

Because like he said, it's more than just being level with the surface the printer it's sitting on... the most important thing is that the print surface is parallel with the X-axis that the extruder rides on (and thus the nozzle).

The purpose of tramming or "leveling" the bed, is to get it very close to that. And then the software can compensate for any minor imperfections (especially important with warping where the build plate is not perfectly flat). But as mentioned earlier, 1/4" is WAY more than a software mesh can deal with.

I feel like these machines should be set up fairly well from the factory, so I think your experience is probably unusual. Up to you of course, but since you already opened a support ticket, I would almost see if you could do an exchange.

For reference, the level reading on my desk, base of the printer, and bed are all the same for me, and I didn't have to do any adjusting.

IMG-7535.jpg

And yeah my desk is not actually level thanks to my curvaceous basement floors 🤣
 
OP
J

jonshonda

Well-known member
Joined
Jul 17, 2017
Messages
4,735
Location
Wisconsin
For reference, the level reading on my desk, base of the printer, and bed are all the same for me, and I didn't have to do any adjusting.

I understand that the most important thing is the software maps out the bed to understand what is going on. But that doesn't mean I'm just going to be ok with buying something that is that far out. :dunno: Some might think I'm overcomplicating things, which I have accepted as part of my SOP with things like this.

I've also spent a fair amount of time in China for work, and feel I have enough experience with their manufacturing to have a healthy distrust for their ability to execute 100% of the time w/o a middle man of sorts to help with their quality control. Imho there should be enough adjustment built into the bed to allow for proper leveling if the printer is on a level surface.

Long story short imho I got a dud, and will request a new unit. But the new unit will also be dialed in until the bed is as level as my cheap green level will allow! haha
 

nicholam77

Well-known member
Joined
Dec 18, 2016
Messages
2,655
Location
Minneapolis, MN
I understand that the most important thing is the software maps out the bed to understand what is going on. But that doesn't mean I'm just going to be ok with buying something that is that far out. :dunno: Some might think I'm overcomplicating things, which I have accepted as part of my SOP with things like this.

I think Logan and I are on the same page as you. The software mesh is going to be part of the print process no matter what. But the bed should absolutely be trammed properly, too.

When I say the mesh compensates, I'm talking tenths of a millimeter, ideally.

A standard printing layer height is only 0.2mm, and the goal is to have that perfectly consistent across the bed. Knowing the printer is manufactured in China, the bed is aluminum, and it's heated, it's very unlikely that you're going to get a perfectly trammed bed and a perfect 1st layer without a software mesh. That's why the software mesh exists. It's not meant to correct extremes like what you're dealing with.

Imho there should be enough adjustment built into the bed to allow for proper leveling if the printer is on a level surface.

There absolutely should, which is why I worry something else might be off, and I think requesting a new unit is a good idea.

But the new unit will also be dialed in until the bed is as level as my cheap green level will allow! haha

As long as it's not another dud, it shouldn't *need* to be as they are supposed to do that before it ships, but sure, knock yourself out! Can't hurt and if it gives you peace of mind, why not. But I'm sure *most* people with A1's have never touched those screws you've been adjusting.

If you do feel the need to redo it from the factory, I would follow the tramming guide Logan linked, so you are "leveling" in relation to the nozzle, instead of blindly leveling to the machine base or to your desk surface.

Again, good luck! You'll get it sorted!
 
OP
J

jonshonda

Well-known member
Joined
Jul 17, 2017
Messages
4,735
Location
Wisconsin
I don't want to derail my own thread with my 3D printer woes, so I'll post something that might appeal to a broader audience.

After being on jackstands for the majority of the summer due to the suspension being on back order, I was able to get the Miata back on the road and even got a couple of auto-x events under my belt.

It was riding on the factory R-Package Bilstein suspension which was known to be harsh even when new. It was tired and needed to be refreshed.

I pulled all the control arms off for a fresh coat of paint, and new oem mazda rubber boots for the ball joints.

New brake rotors, calipers, and pads, and last but not least the Xida Race coilovers. Man did they make a huge difference on the ride quality. Firm but forgiving, and with the 200TW Falken RT660's they help keep the car composed in the corners.

Unfortunately it went into storage for the winter, and won't come back out until April. But I'll be on the hunt for some parts to throw on come spring.

1000007784.jpg1000007781.jpg
 

loganb

ALLIANCE MEMBER
Joined
Dec 29, 2011
Messages
5,516
Location
Omaha, NE
I got curious....lol...mostly just cause...but as a point of reference

I tossed the Starrett 98-8 (8") on the A1, standard bullet level for reference. The 98 was purchased used, off an estate and has some surface rust but it sits flat on a calibrated surface place when I checked it so I'm assuming it's more accurate and correct than the reference level

level1.jpg

Tough to get both bubbles in focus on the phone camera, but the normal level looks to be dead center, the machinist level you can see is several graduations off center. Now those graduations are .005" per ft...so it looks significantly off but really isn't that bad. This is just a baseline as well

level2.jpg

Can't really check the plumb-ness of the vertical supports, but can set it on the bridge and see how that compares to the bed
level3.jpg

And on the bubble:
level4.jpg

The bubble on the bridge is slightly off relative to the bed, however when the graduations are .005" per ft and we're not even a full mark apart, it's well within what bed mesh/probing can handle.

I did run manually push the bed back and forth and see how it changed and it was pretty consistent in travel. If you'd like me to measure/check anything for a reference point happy to, just let me know what it is!
 
To avoid these ads, REGISTER NOW!
OP
J

jonshonda

Well-known member
Joined
Jul 17, 2017
Messages
4,735
Location
Wisconsin
I got curious....lol...mostly just cause...but as a point of reference

I tossed the Starrett 98-8 (8") on the A1, standard bullet level for reference. The 98 was purchased used, off an estate and has some surface rust but it sits flat on a calibrated surface place when I checked it so I'm assuming it's more accurate and correct than the reference level

level1.jpg

The bubble on the bridge is slightly off relative to the bed, however when the graduations are .005" per ft and we're not even a full mark apart, it's well within what bed mesh/probing can handle.

I did run manually push the bed back and forth and see how it changed and it was pretty consistent in travel. If you'd like me to measure/check anything for a reference point happy to, just let me know what it is!
Ohh great, now you've got me lusting for a Starrett level!! Looks like you've got yourself a nicer A1 then what I got. Hit that Starrett up with some 0000 and WD40 and it will likely look good as new! That added corrosion probably throws the tolerance off by 0.00002"...ain't nobody got time for that!
wow, that is one good looking Miata. I love how it sits and red/bronze color combo (y)

Thanks! Funny story on the wheels as I am aware not everyone is a Japanese wheel connoisseur. They are Rays Engineering CE28's in 14x6.5" weighing in at 6.8lbs each. They aren't easy to come by used in my area as not many people ever bought 14's, most went with 15's or bigger. They are also very expensive wheels when new, retailing for well north of $500/wheel.

Well I was cruising craigslist randomly one day came across the ad for them. Typically people either have replicas or are trying to pass replicas off as real wheels as they are very expensive new. I figured they were fake but called just because. I arranged to head over to the sellers house ASAP, as if they were real the deal was too good to pass up.

Upon arrival to a very small, somewhat run down house I am greeted by a gentleman well into his 70's. He directs me to his garage where the wheels/tires on high up on a shelf, behind a mountain of "stuff". The old man grabs a crappy wooden ladder, props it up on some junk, leans it against some more junk and makes his way up the ladder. Before climbing the ladder I said "If you fall I will call an ambulance, but I'm not waiting around to answer questions about how your injury happened and why I am here". haha

After pulling the wheels down I confirm they are real, and am blown away by the fact that this old man, living in this house, had purchased these wheels for a Kia Rio. I had to know where he got them, and he said he was surfing Ebay and found them. CRAZY!! In typical GJ fashion I suggested a lower price then his already amazing asking price, and he accepted.
 
OP
J

jonshonda

Well-known member
Joined
Jul 17, 2017
Messages
4,735
Location
Wisconsin
It's been a while since I've taken a trip to Menards, and last night I had a few hours before the Big Green Egg needed to be fired up for wings, so I made a list and took off.

My 3D printing station has somewhat consumed the majority of my interest lately, so this trip was focused around adding some additional lighting in the basement. I also needed to drill a large hole in a laminate work surface to run cords.

I tried to buy USA, hopefully these items will help me to not struggle as much stripping romex too.

20241110_080255.jpg
 
Last edited:
OP
J

jonshonda

Well-known member
Joined
Jul 17, 2017
Messages
4,735
Location
Wisconsin
I've really been having a blast with the Bambu A1. Mostly been focusing on optimizing work station space and mods to improve the consistency and quality of the machine.

1) Poop bucket
2) Color sample cards and stand
3) Wall mounted AMS
4) Inverted AMS numbers with tube supports
5) Moving the AMS above meant the support for the extruder cable was not available, so I added strain reliefs.
6) Added light in ceiling above the workstation.

DVI to display port cables are supposed to be arriving today, then I can fire up the PC and see what else I need.

20241110_094436.jpg20241110_094436.jpg
 

nicholam77

Well-known member
Joined
Dec 18, 2016
Messages
2,655
Location
Minneapolis, MN
I'm amazed at the speed by which the A1 prints!! That thing RIPS.

Yeah, that was my first thought, at least compared to my Ender. Which was like half that speed.

1) Poop bucket

Gotta be #1 🤣

3) Wall mounted AMS

That's pretty neat. I don't *need* the desk space right now, but it's a logical choice where I have the printer placed.

I came across this wall mounted system I thought was interesting:


I still need to figure out a camera, but not sure what I want to do for that yet. Because the integrated one literally doesn't work lol. Never shows up in the app.


Glad you got it sorted and are having fun with it.

🍻
 
OP
J

jonshonda

Well-known member
Joined
Jul 17, 2017
Messages
4,735
Location
Wisconsin

nicholam77

Well-known member
Joined
Dec 18, 2016
Messages
2,655
Location
Minneapolis, MN
Hey I thought you said there was no need for a dry box!!! haha

Not with PLA... I mean it probably doesn't hurt but I don't do it. I was more intrigued by storing the filament on the wall and freeing it from the AMS itself. Not sure if that's a good idea or not!

Silly question, but did you take the screen cover off the camera?

It's not a silly question... honestly I feel like troubleshooting 50% of the time is asking the silly questions. But yes, the screen cover is off 😁

It showed up in Bambu Studio when I first got it (crappy quality anyways), but now it just shows black. I'm not too bothered by that and will likely get a cheap webcam or security cam just to have a way to check on it.
 
OP
J

jonshonda

Well-known member
Joined
Jul 17, 2017
Messages
4,735
Location
Wisconsin
@nicholam77 you aren't missing anything with the A1 camera. Funny thing is by the time you get a nice Webcam you are creeping closer to the P1S price that has a much nicer camera then the A1. Typical
 
OP
J

jonshonda

Well-known member
Joined
Jul 17, 2017
Messages
4,735
Location
Wisconsin
The 09 Fit was originally from Florida, which from a maintenance aspect gets lots of thumbs up from this Wisconsin shadetree mechanic. But the sun certainly does a number on plastics, and the headlights needed some love as I was sick of looking at the yellowing lenses, and the restorations weren't lasting long enough to make it worth my time. So onto the 2K spray.

They turned out great, and a lot cheaper then buying new ones.

20241110_115117.jpg
 

Denwood

Well-known member
Joined
Sep 22, 2014
Messages
4,184
Location
Thunder Bay, Ontario, Canada
Wanting to impress @D.F.B with a somewhat clean-ish engine bay, I doused the dirt with Super Clean, brush, and finished with 303. But no good deed goes unpunished, and working too quickly I snapped my oil dip stick. While not to DFB level, it's good enough for me.

1000009088.jpg


Also whilst at the parts store picking up the air filter and battery, I bought some brighter reverse light bulbs. Having tinted windows and and somewhat difficult driveway to navigate whilst reversing in the dark, means I need all the help I can get. Counting on these to light up my reverse life.

1000009085.jpg

Winter in Wisconsin and the associate salty roads really take a number on anything metal. Not wanting to let the rust stain the plates, I found some stainless mounting hardware. It's the little things ya know!

1000009086.jpg
Never owned one, but I've always appreciated the overall packaging with the FIT. Had no idea there was a "sport" version out there either.

As an MTB enthusiast myself, and 10 years of autox with the local club, I figure we'd get along just fine.

That Miata is pretty much the perfect autoX car these days. What are the two "wands" about in your new suspension pic? I would assume remote adjustment on the rears? Do you corner scale the car as well? Either way, that suspension looks too nice to put on the car!

Ya, and thanks for adding to the mounting pressure to take up 3D printing at home...ha. I purchased an insanely expensive 3D printer back in my R&D days with my company that printed with a UV cured monomer (like $600 per liter of one component...and you needed support too). Essentially a big inkjet printer, it was a PITA to maintain, expensive to run, but when all was well, produced some amazing results. Printing with essentially a hot glue gun using affordable media seems so much more manageable.
 
Last edited:

XJSuperman

Well-known member
Joined
Jan 26, 2018
Messages
3,087
Location
Central Iowa
It showed up in Bambu Studio when I first got it (crappy quality anyways), but now it just shows black. I'm not too bothered by that and will likely get a cheap webcam or security cam just to have a way to check on it.
I have no experience with the A1, but my P1S was having camera issues the other day. Shutting the printer off completely and restarting did the trick. It wasn't initializing on the app, nor the computer. Never had that issue before so I believe it came in with an update.
 
OP
J

jonshonda

Well-known member
Joined
Jul 17, 2017
Messages
4,735
Location
Wisconsin
Never owned one, but I've always appreciated the overall packaging with the FIT. Had no idea there was a "sport" version out there either.

As an MTB enthusiast myself, and 10 years of autox with the local club, I figure we'd get along just fine.

That Miata is pretty much the perfect autoX car these days. What are the two "wands" about in your new suspension pic? I would assume remote adjustment on the rears? Do you corner scale the car as well? Either way, that suspension looks too nice to put on the car!

Ya, and thanks for adding to the mounting pressure to take up 3D printing at home...ha. I purchased an insanely expensive 3D printer back in my R&D days with my company that printed with a UV cured monomer (like $600 per liter of one component...and you needed support too). Essentially a big inkjet printer, it was a PITA to maintain, expensive to run, but when all was well, produced some amazing results. Printing with essentially a hot glue gun using affordable media seems so much more manageable.

The "sport" gets different front and rear bumpers, side skirts, fog lights, and 16" wheels. I realize I'm a bit spoiled with our Lexus GX460, but I find the NVH of the Fit just this side of tolerable. I needed a cheaper commuter that I could fit my XXL mountain bike in, or two yellow labs, or misc **** that a sedan just doesn't do well and the Fit was pretty much everything I needed. Also being from Florida and the seller needing the funds quickly for a real-estate purchase helped as well.

Regarding mountain biking I am the trails director for our local mountain bike organization https://corbatrails.org/. I'm also a certified trail builder and currently have our Cat mini-ex somewhat bound up on the side of a steep hill. After the initial bench with the mini-ex and the mess it creates I always...always second guess why I get myself into these things.

I only have one bike at the time, it's a Growler American Stout in XXL. In the summer I run 29x3" tires on 40mm internal rims, and in the winter I run either 4.8" on 90mm, or 4.6 studded tires on 80mm rims.

20221218_162322.jpgThis is from a few winters back...don't get too excited.

My Miata is an R-Package which means manual everything and an LSD. The LSD is certainly fun on the auto-x course but puts me up against the Honda S2000 in STR class, which makes things extremely tough for me to think about placing very high in my class if the S2000's come to play (it's more of a mental thing for me, as I'm not nearly fast enough yet to actually be concerned about the competition).

The wands are remote adjusters for the rear suspension as they aren't easy to access. The suspension is very nice, somewhat middle of the road for actual racing, but will suit me just fine. It has really good street manners, but stiff enough springs to keep the fender liners off my 200TW tires in the corners even at the lowered ride heights. My engineering manager is currently building a Miata for racing, and has offered his scales for corner balancing. I will take him up on that next season.

Regarding 3D printing, if you have the funds then there really isn't any reason for you to not jump in the deep end. I cannot speak towards any other manufacturers, but Bambu has provided an excellent machine and user experience. The assembly is the easy part, anyone on GJ could do it blindfolded. But the rest of the package from Makerworld, to Bambu Studio, to filament...they really did an excellent job with making the complete package accessible to a much larger audience.
 

nicholam77

Well-known member
Joined
Dec 18, 2016
Messages
2,655
Location
Minneapolis, MN
I cannot speak towards any other manufacturers, but Bambu has provided an excellent machine and user experience. The assembly is the easy part, anyone on GJ could do it blindfolded.

But then how would you see the bubble on your machinist level?? 😜

But the rest of the package from Makerworld, to Bambu Studio, to filament...they really did an excellent job with making the complete package accessible to a much larger audience.

I fully agree with you, though, it's a "complete package" and it's fairly polished.

Nice pic of the mountain bike.
 
To avoid these ads, REGISTER NOW!
Top Bottom