To avoid these ads, REGISTER NOW!

Restoring lettering on plastic-handle tools

nz44tool

ALLIANCE MEMBER
Joined
Nov 5, 2024
Messages
333
Location
New Britain CT
I couldn't find an existing thread on this topic (though I'm pretty sure it would have been discussed previously), so...
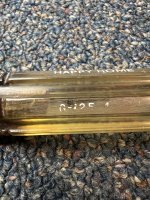
Does anyone have a good method for restoring the white paint often seen in the lettering on some plastic-handle tools (e.g. S-K, many others) without making a large mess and degrading the plastic around the lettering?
Would White-Out work? Or some kind of paint that could be easily wiped away from the surface surrounding the lettering?
Any help appreciated!
 

Attachments

  • IMG_8111.jpeg
    IMG_8111.jpeg
    701.4 KB · Views: 26
  • IMG_8112.jpeg
    IMG_8112.jpeg
    771.5 KB · Views: 24
To avoid these ads, REGISTER NOW!
OP
N

nz44tool

ALLIANCE MEMBER
Joined
Nov 5, 2024
Messages
333
Location
New Britain CT
Thanks for the replies, folks - I bought some White-Out at the supermarket just now (who knew they would still carry something from the typewriter age??), will try it out.
 

d42jeep

Well-known member
Joined
Oct 22, 2014
Messages
16,529
Location
Northern California
The results were mixed on the first one I tried. It could have just been that the embossing was worn down from use. IMG_7742.jpegIMG_7743.jpegIMG_7744.jpegIMG_7745.jpegIMG_7747.jpeg
I’m going to let these dry overnight and scrape the excess off tomorrow,IMG_7752.jpeg
-Don
 
OP
N

nz44tool

ALLIANCE MEMBER
Joined
Nov 5, 2024
Messages
333
Location
New Britain CT
The results were mixed on the first one I tried. It could have just been that the embossing was worn down from use. IMG_7742.jpegIMG_7743.jpegIMG_7744.jpegIMG_7745.jpegIMG_7747.jpeg
I’m going to let these dry overnight and scrape the excess off tomorrow,IMG_7752.jpeg
-Don
Yeah, that's what my attempts looked like as well - not great.
The Wite-Out doesn't stick to the plastic quite well enough.
Maybe there's a water-based paint that would work better.
...would like to hear from someone who's gotten a better result, either with Wite-Out or something else.
 

floyd

Well-known member
Joined
Apr 13, 2005
Messages
647
Location
MD
I’d try enamel model paint. Apply with small brush or q-tip. Then wrap a cloth rag tightly around you finger and dab it in thinner to wipe away the excess. The rag should be moist, not soaked in thinner. Several quick wipes using clean portions of the rag. I usually use lacquer thinner, but it’s pretty strong. I’d test it on the plastic first to make sure it doesn’t mar the plastic.

Make sure the recessed letters are cleaned thoroughly beforehand so you get good paint adhesion (detergent and a tooth brush)
 

Davefr

Well-known member
Joined
Jan 7, 2010
Messages
11,823
Location
OR
I'd use a sharp toothpick with a tiny drop of enamel model paint and just fill in the recess. Or maybe use these:
7136c0aipmL._SL1500_.jpg
 

4xdog

Well-known member
Joined
Aug 18, 2012
Messages
5,605
Location
Santa Fe, NM
If the imprint has enough depth, a Lacquer-Stik paint stick can work well. They're available in various colors and seem to harden after being rubbed in, at least enough to resist typical handing.

Here is one of my Milwaukee utility-blade knives in which I've filled in the imprints on front and back with a white Lacquer-Stik to be able to tell which one has a (white) ceramic blade. You'll note I still have some cleaning to do of the grained finish of the plastic to remove the last of the rubbed-in white paint. Sometimes I'll use mineral spirits on a Q-tip to help this process.

If the imprint is really shallow, this approach won't work well -- the burnishing needed to remove the excess will end up taking all the paint off.

i-jzWRZSw-X5.jpg

i-GM3xWzB-X5.jpg
 
To avoid these ads, REGISTER NOW!

59Sled

Well-known member
Joined
Sep 22, 2025
Messages
147
Location
Santa Clarita, California
I used a China marker/grease pencil with decent luck. The excess wipes off with a dry cloth.
Also this method is for more display purposes. I think if you were to use the tool then my method wear off fast.

I've also tried making the engraving a little deeper with a rounded off awl before. Mixed results on that. Some look ok and others came out terrible. In the end it wasn't worth it especially how much time it took not to go out of the lines and put a scratch on the handle.


666666.jpg
 
OP
N

nz44tool

ALLIANCE MEMBER
Joined
Nov 5, 2024
Messages
333
Location
New Britain CT
I’d try enamel model paint. Apply with small brush or q-tip. Then wrap a cloth rag tightly around you finger and dab it in thinner to wipe away the excess. The rag should be moist, not soaked in thinner. Several quick wipes using clean portions of the rag. I usually use lacquer thinner, but it’s pretty strong. I’d test it on the plastic first to make sure it doesn’t mar the plastic.

Make sure the recessed letters are cleaned thoroughly beforehand so you get good paint adhesion (detergent and a tooth brush)
Thanks - I think this will be my next method to try.
 
OP
N

nz44tool

ALLIANCE MEMBER
Joined
Nov 5, 2024
Messages
333
Location
New Britain CT
This one came out quite good (Wite-Out), helped by the letter imprints for "Happy Home" being fairly deep. The model number, not so much. I wiped the excess away with some light swipes with 400 grit sandpaper.
I have my doubts the Wite-Out would stand up well to actual use. Also, it does look a little too new on an old screwdriver.
 

Attachments

  • IMG_8136.jpeg
    IMG_8136.jpeg
    1.1 MB · Views: 10
  • IMG_8137.jpeg
    IMG_8137.jpeg
    994 KB · Views: 11
OP
N

nz44tool

ALLIANCE MEMBER
Joined
Nov 5, 2024
Messages
333
Location
New Britain CT
If the imprint has enough depth, a Lacquer-Stik paint stick can work well. They're available in various colors and seem to harden after being rubbed in, at least enough to resist typical handing.

Here is one of my Milwaukee utility-blade knives in which I've filled in the imprints on front and back with a white Lacquer-Stik to be able to tell which one has a (white) ceramic blade. You'll note I still have some cleaning to do of the grained finish of the plastic to remove the last of the rubbed-in white paint. Sometimes I'll use mineral spirits on a Q-tip to help this process.

If the imprint is really shallow, this approach won't work well -- the burnishing needed to remove the excess will end up taking all the paint off.

i-jzWRZSw-X5.jpg

i-GM3xWzB-X5.jpg
Interesting. The deep and clearly defined lettering definitely helps.
The tool has a lightly textured finish, which I guess made it hard to completely remove the residue "halo"
 

garilla

Well-known member
Joined
Feb 21, 2024
Messages
114
I have had some success using tub and tile white caulk to fill letters. The stuff sticks pretty good to plastic is water proof after drying. Smear a blob into the letters using a plasic spreader which works good. Plastic Coffee can top can work as spreader just cut to size. It spreads nicely, the spreader removes excess well. Let it dry, apply another coat and it gets better, clean up with the spreader, better than paint as it has thickness. There isn't much you can do with shallow letters though.
 
OP
N

nz44tool

ALLIANCE MEMBER
Joined
Nov 5, 2024
Messages
333
Location
New Britain CT
I have had some success using tub and tile white caulk to fill letters. The stuff sticks pretty good to plastic is water proof after drying. Smear a blob into the letters using a plasic spreader which works good. Plastic Coffee can top can work as spreader just cut to size. It spreads nicely, the spreader removes excess well. Let it dry, apply another coat and it gets better, clean up with the spreader, better than paint as it has thickness. There isn't much you can do with shallow letters though.
That's a good idea - will try that too.
 
To avoid these ads, REGISTER NOW!
Top Bottom