To avoid these ads, REGISTER NOW!

Above 1200 Sq/FT CCColtsicehockey Garage Build - 2440sqft storage, shop, and loft

Wokspaces above 1200 squarefeet.
OP
C

cccoltsicehockey

Well-known member
Joined
Apr 3, 2014
Messages
1,401
Location
Charlotte, NC
Last night I started one of my least favorite projects. Irrigation repair for getting it ready for use this year. I knew I had 1 repair that needed to be made as I had a small leak, which I figured was a cracked elbow, as the area around that head stayed wet for a while more than normal towards the end of last year.

What I didn't expect was two more repairs, but not unexpected either with the driveway work. I found a head that looked like it was fine but it was completely broken off from the elbow line underground. Almost like someone knew they broke it off and then buried it back to look like it was fine.

The second was much less expected. Not one but two broken sections in a 3ft span on either side of a 45 coupler. I assume this happened while they were putting in the forms for the driveway. Was honestly impressed they managed to break it twice. Just unfortunate as this is the section I just installed with all new pipe last March when they were doing the garage septic connection at the same time.

IMG_20260324_132317.jpg


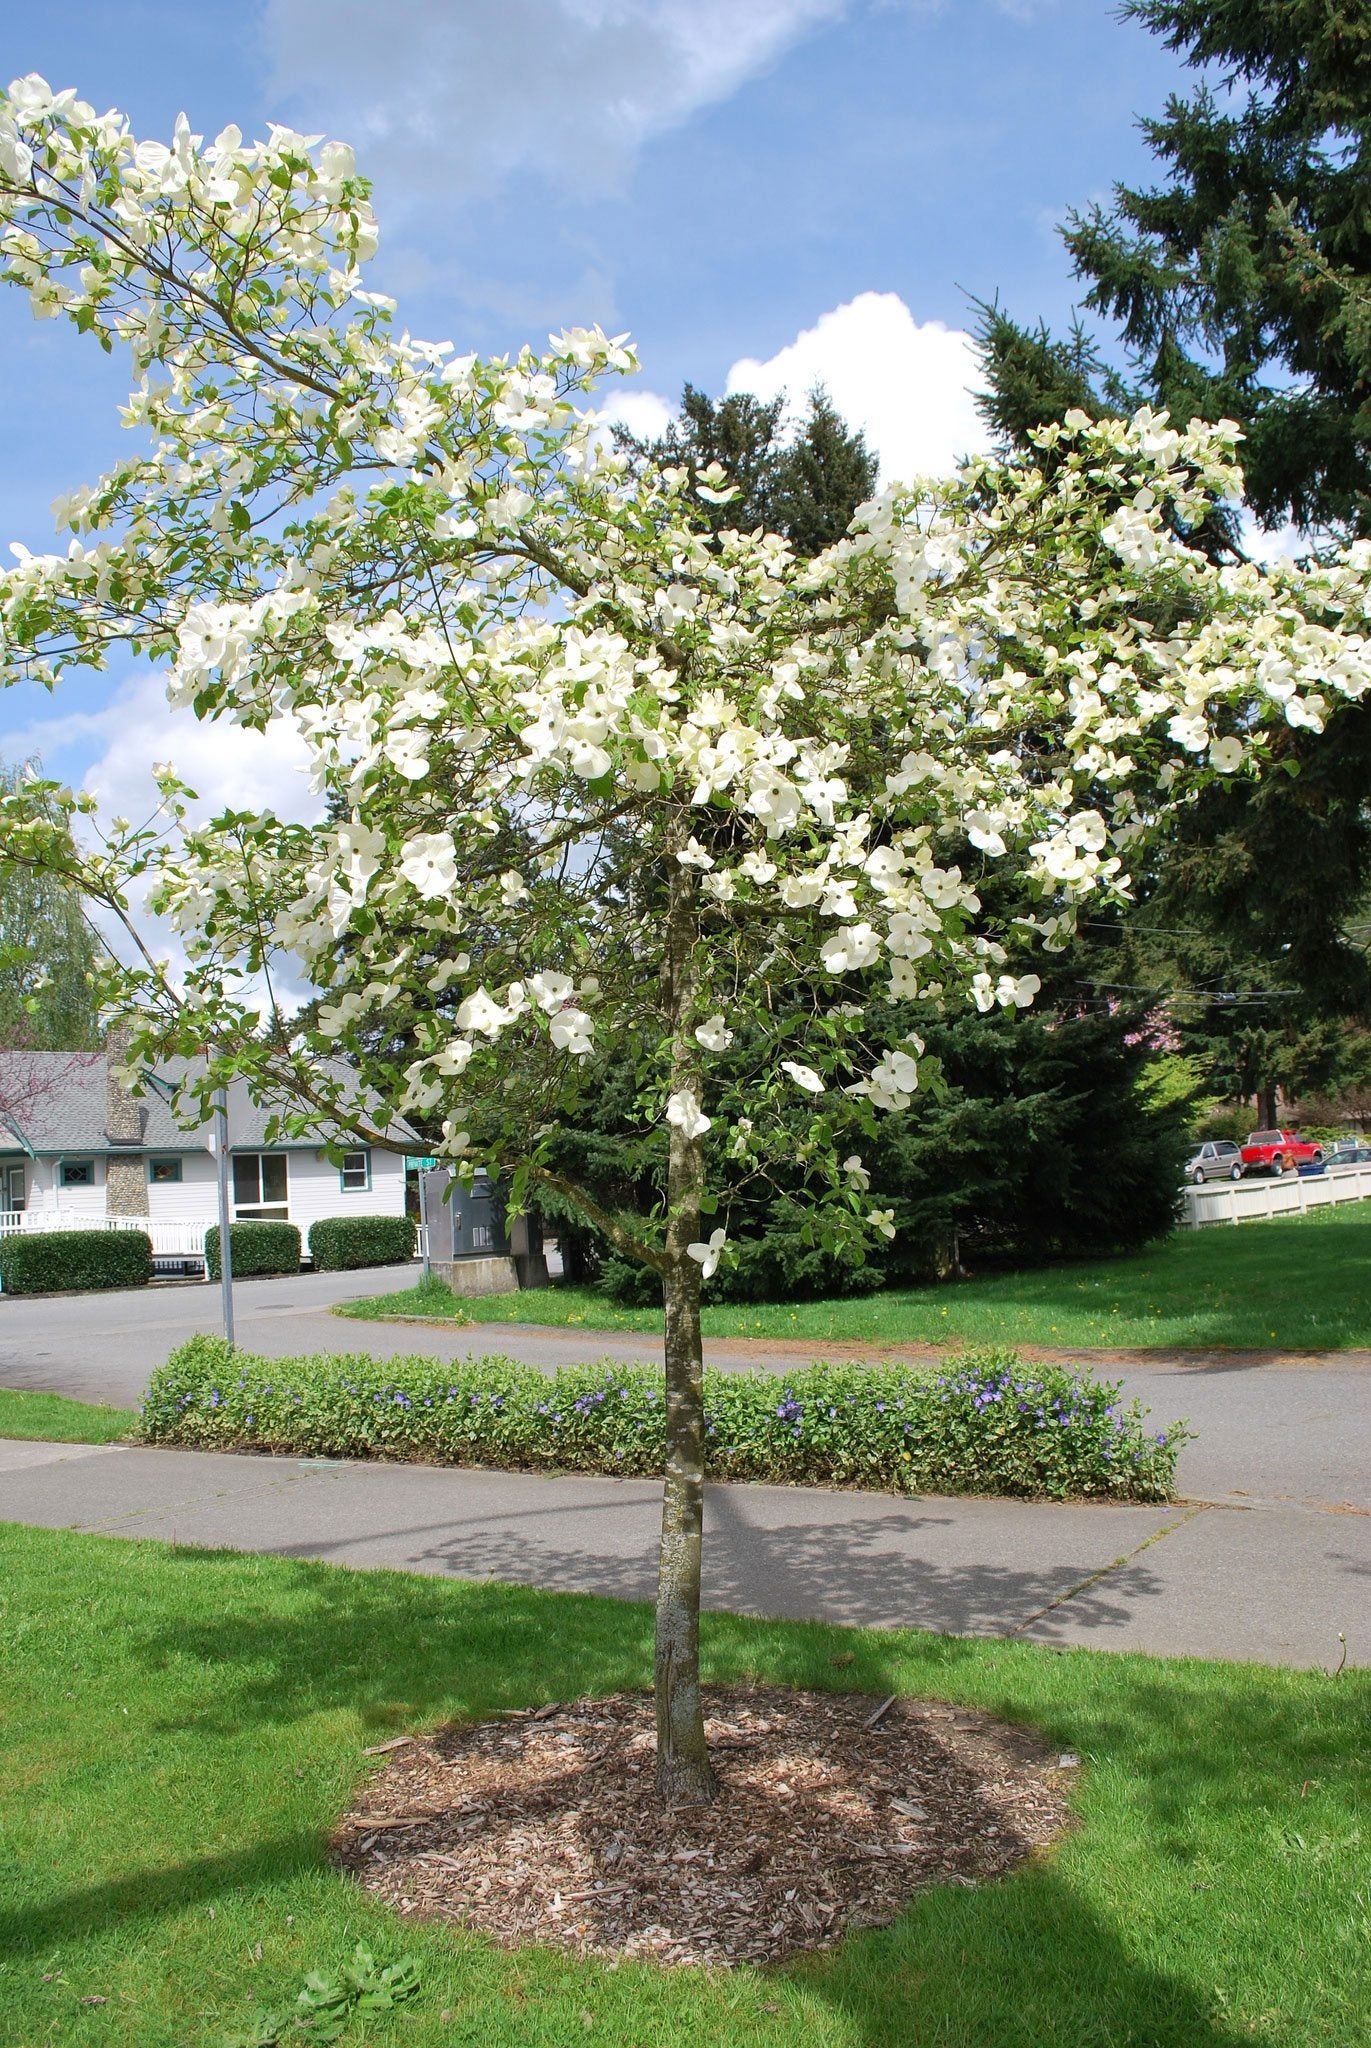
This weather is making everything grow. My largest dogwood in the front yard has decided to bloom finally. The dogwoods in my front yard are my favorite part of my landscaping. They are both wild dogwoods and original to the house. I found another young one in the woods behind the house, and I am tempted to try to transplant it into the bed I will build by the retaining wall. I don't know much about transplanting trees, though, so I don't know if it would be a good idea.

IMG_20260324_132354.jpg
 
To avoid these ads, REGISTER NOW!

kj_mustang

Well-known member
Joined
Feb 9, 2011
Messages
1,213
Location
Harrisonburg, VA
They will transplant fine if you take care of it.
 
OP
C

cccoltsicehockey

Well-known member
Joined
Apr 3, 2014
Messages
1,401
Location
Charlotte, NC
They will transplant fine if you take care of it.
Thank you for this. I need to also decide the area will be able to accomodate both its growth and a red oak I have been growing on that side of the driveway for 11 years now. I migth be better off with a short Japanese Maple instead. I just would love to have 3 dogs woods out front in my 3 primary beds.
 
OP
C

cccoltsicehockey

Well-known member
Joined
Apr 3, 2014
Messages
1,401
Location
Charlotte, NC
I got a lot done over the holiday four day weekend.

Borrowed this from a neighbor, and on Thursday, I knocked out the new caps for the extended retaining wall. I had to get it finished up for the next step.
IMG_20260405_235347.jpg

IMG_20260405_235403.jpg

The reason for getting the wall wrapped up was so I could finally install landscape lighting. The M12 cutoff wheel with a diamond disc made quick work of creating wire channels.
IMG_20260405_235209.jpg

IMG_20260405_235242.jpg

IMG_20260405_235316.jpg

On Friday, once all the new lights showed up, I was able to knock out the bulk of the project. Except for the wall lights, I used Volt Lighting for everything. They have a really good discount on it if you have a Costco membership. Needed a second transformer from the one I already had for things on the left side of the driveway. I don't use timers on any of them as I use ZWave plugs instead.
IMG_20260405_235441.jpg

I am a big fan of landscape lighting. Really happy to have this back and working as the old lights were falling apart before the garage project, and when they redid the stone on the front of the house, most of the existing lights didn't survive. I have a little big of dialing in to do with the fact that the bulbs have adjustable spread and additional control with an adjustable hood, but overall happy with the first effort.
IMG_20260405_235101.jpg

IMG_20260405_235127.jpg

IMG_20260405_235143.jpg

Saturday was finally the first mow with the tractor. It is amazing how much better of a cut it creates than the hand mower, even though I am mulching with both machines.
IMG_20260405_235917.jpg

I also finally got the permanent hardware installed on the doors in the breezeway and the rest of the garage build.
IMG_20260405_235738.jpg

I really like the clean look of the Yale Touch 2 Locks with touchscreen. Still trying to figure out how I utilize them besides autolocking each night for sure. I have not decided if I will do a location based automation or just leave the garage always locked with quick access since they do finger print access.
IMG_20260405_235756.jpg
 
OP
C

cccoltsicehockey

Well-known member
Joined
Apr 3, 2014
Messages
1,401
Location
Charlotte, NC
Such a beautiful property congrats, just gotta seal the drive and done?
Thank you. I gave up on trying to seal the driveway at this point. Work still needed to get work done and with pollen it wasn't possible to do it. If I do try and seal it, it will have to be this fall and I will need to either rent a gas pressure washer or hire someone to come and clean it before doing it.
 

madison069

Well-known member
Joined
Nov 5, 2010
Messages
4,171
Location
Monroeville, PA
That yard does look great! Looks like you installed the same lights in the retaining wall as I did back in 2016 at the current place and it's still working. The power supply box is faded but it's still kicking. I know I have 2 lights that needs some work since they don't turn on. It's possible the wires got cut while I wasn't living there. When I get ready to repair the retaining walls, I'll get those lights fixed.

The Volt lighting box, is that the power supply for the landscaping lights?
 
OP
C

cccoltsicehockey

Well-known member
Joined
Apr 3, 2014
Messages
1,401
Location
Charlotte, NC
That yard does look great! Looks like you installed the same lights in the retaining wall as I did back in 2016 at the current place and it's still working. The power supply box is faded but it's still kicking. I know I have 2 lights that needs some work since they don't turn on. It's possible the wires got cut while I wasn't living there. When I get ready to repair the retaining walls, I'll get those lights fixed.

The Volt lighting box, is that the power supply for the landscaping lights?
Thank you. Glad to hear someone installed the same lights on the wall with good success. The ones from Amazon for the wall lights were from a company called LeonLite. They seemed to me the most reviewed wall lights on there. If I have one complaint, I wish I could actually make them dimmer. I have them on the lowest setting already, though.

Yes, the Volt lighting box is the power supply for the lights on that side of the driveway. It is only a 100W one, but it came as part of a kit with 5 lights. I think I have overhead on it still though for 2 more 5w lights if I want, while still staying at the 80% threshhold.
 
OP
C

cccoltsicehockey

Well-known member
Joined
Apr 3, 2014
Messages
1,401
Location
Charlotte, NC
I used Protrade for all my landscape lighting and transformer. I have had really good results from it, but always looking for good options for different types of lights.
Protrade was one of the brands I compared when researching my main fixtures. Really nice that you can get a lot of the stuff locally at Site-One, and they have a great warranty too. Their prices are pretty close to the Volt fixture at full price as well. When ordering through the Costco Next program, still a direct order to Volt, the fixture prices were like 25 or 30% lower. You can't get every fixture they sell through the program, but you can get the top model spot light, which is what I mostly using anyways for my up lighting.
 
OP
C

cccoltsicehockey

Well-known member
Joined
Apr 3, 2014
Messages
1,401
Location
Charlotte, NC
This weekend was mulch weekend. I started with cleaning out all the beds along the house and the garage. I normally do a full cleanout every 3-4 years, but this year it was even more important to do it cause of all the construction mess contractors had left around both.

I had 19 yards delivered on Thursday. This is the most I have ever ordered but I really just didn't want to run out with some new beds and some temporary spaces I need to reset what will be my normal order.
IMG_20260413_115004.jpg

I wasn't sure what I was doing with the second tier, as I have begun using pine needles in places touching the woods for a more natural appearance. I ended up deciding, since it was still inside the retaining wall and also touching the driveway and the building, to go with regular wood mulch here.
IMG_20260413_115031.jpg

Seems crazy, as I have had this loader now for like 6 years I believe, but this was the first year I was able to do the mulch fully with it since the first two years the hydraulic valve unit failed. JD ended up getting a bad bad of them and I got unlucky that my original unit was one and then the repair ended up also being one.
IMG_20260413_120214.jpg

This marks the completion of landscaping for the most part till I can plant plants in the beds and continue the reseeding project in the backyard, and the little I need to finish on the left side of the driveway now that construction has been cleaned up.
IMG_20260413_115117.jpg

IMG_20260413_115137.jpg

Did end up overshooting the order a bit. Not sure what I will do with this. It's like too much to store extra and too little to offer for sale.
IMG_20260413_115155.jpg

I decided this was the weekend to finally take down the temporary fence splitting the backyard, while I let the new grass establish itself without the dogs running all over it. I half-debated on waiting till the fall to do it, but I was getting sick of the path to get the tractor out to the front yard. We will see if I regret this decision or not.
IMG_20260413_115904.jpg
 

madison069

Well-known member
Joined
Nov 5, 2010
Messages
4,171
Location
Monroeville, PA
Great looking yard!
If you want to visit me, you can bring that mulch with you, and I could spread it around my new place. :giggle: :ROFLMAO:

Maybe you could just spread it around the wood to cut down overgrowth along the wood boarder?
 
To avoid these ads, REGISTER NOW!
OP
C

cccoltsicehockey

Well-known member
Joined
Apr 3, 2014
Messages
1,401
Location
Charlotte, NC
Great looking yard!
If you want to visit me, you can bring that mulch with you, and I could spread it around my new place. :giggle: :ROFLMAO:

Maybe you could just spread it around the wood to cut down overgrowth along the wood boarder?
Thanks.

That might be a bit of a hike with a trailer, which I don't have haha.

I need to see if pine straw will help keep down the overgrowth, as it would blend in more. It would be nice to have a little less brush right out from the yard without having to whack it every year. I do have a walking path I need to work on clearing again this year in the woods. I normally just cover it with a layer of leaves so maybe the entraces get mulch.
 
OP
C

cccoltsicehockey

Well-known member
Joined
Apr 3, 2014
Messages
1,401
Location
Charlotte, NC
Looking good, you could always add another inch or so to what you put out and then next year you could just turn it all over with a rake and make it look new. It will settle.
Maybe I should let it just sit for a week or two and see how much things settle. Not a bad idea. Although the neighbors might like it out of the street.

Design, execution, planning, results. Outstanding project and transformation!
Thank you. Glad to be finished and begin enjoying it with some project work.
 

Nolift911

Well-known member
Joined
May 16, 2011
Messages
1,015
Location
Lansdowne, VA
Everything looks great - not sure why your thread keeps falling off my watch list.

Lighting turned out awesome! Your property reminds me a lot of my parents - they have quite the yearly cycle lawn pre-gaming, bed clean up, mulch delivery/spreading, grass cutting, watering, then leaf raking and the cycle repeats. They love it. My dad has a grey market Kubota with everything written in Japanese - its probably 30-ish years old, getting parts is tough. I was trying to convince him to upgrade but he seems to think it has another season in it every year - :)
 
OP
C

cccoltsicehockey

Well-known member
Joined
Apr 3, 2014
Messages
1,401
Location
Charlotte, NC
Everything looks great - not sure why your thread keeps falling off my watch list.

Lighting turned out awesome! Your property reminds me a lot of my parents - they have quite the yearly cycle lawn pre-gaming, bed clean up, mulch delivery/spreading, grass cutting, watering, then leaf raking and the cycle repeats. They love it. My dad has a grey market Kubota with everything written in Japanese - its probably 30-ish years old, getting parts is tough. I was trying to convince him to upgrade but he seems to think it has another season in it every year - :)
Thank you. It has been a while since I have been able to find a decent amount of time to get on here. Definitely a continuous cycle with no major downtime on the yard/landscaping. I would say the most downtime is likely the heat of the summer.

That is a pretty interesting item to have here in the States with a Japanese grey market Kubota. I can't blame him for keeping it going, but there is definitely some nice tech in the modern small tractors that make life more convenient.
 
OP
C

cccoltsicehockey

Well-known member
Joined
Apr 3, 2014
Messages
1,401
Location
Charlotte, NC
Life has been hectic, and I also just needed a break from things. Going to take several posts to make some updates in some sort of order.

Back in April, I got away for our annual guys' trip to Pinehurst. Three of us from the Carolinas and four from Pittsburgh get together each year. This year we had to try and dodge the weather a bit. Our usual plan is to play on Wednesday, Thursday, Saturday, and Sunday. On Friday, we normally try to get a round or two in at The Cradle for a little break. This year we were supposed to play Talamore on Saturday, but it looked like rain all day, so we last minute took whatever course the booking place could find an opening to play on Friday, which was Longleaf. So in the end we played Tot Hill Farm, Mid Pines, Longleaf, and Southern Pines. We managed to dodge the rain except two litle spurts during two of the rounds for about 3 holes. Nothign heavy thankfully.

Tot Hill Farm
IMG_20260617_081950.jpg

IMG_20260617_082035.jpg

Mid Pines
IMG_20260617_082107.jpg

Longleaf
IMG_20260617_082148.jpg

Southern Pines
IMG_20260617_082209.jpg

IMG_20260617_082252.jpg

IMG_20260617_082318.jpg
 
OP
C

cccoltsicehockey

Well-known member
Joined
Apr 3, 2014
Messages
1,401
Location
Charlotte, NC
Shortly after I got back from the golf trip at the end of April/early May, we finally drew things to a close with the builder about the middle of May. They finished the punch list by then, the final payment was made, and we went our separate ways. I have never felt such relief from handing over a check. It was just nice to bring this to a close in that regard and feel a weight off my shoulders of no more back and forth with things.

Once that was done, I started working on my own projects in the garage that needed to get completed. The first one of those was the shutters for both the house and the garage. The builder had built the ones for the garage, which was their requirement, but since I decided to use actual hinges to mount this vs screwing them to the house, I didn't bother to require them to hang them.

I started by knocking out building the ones for the house before I mounted any of them.
IMG_20260617_082423.jpg

IMG_20260617_082434.jpg

Then I started on the install on the new garage first since there are no plants yet.
IMG_20260617_082626.jpg

I didn't trust the included screws to reach through to the framing, so I picked up some longer 2.5in screws. With 8 of those per shutter and at least 1-1.5in in the framing, these shouldn't go anywhere.
IMG_20260617_082643.jpg

IMG_20260617_082658.jpg

Not a fan of the standard style stays, so I decided to use hidden ones.
IMG_20260617_082652.jpg

The garage is all finished up. The color matches the garage door perfectly which was the goal.
IMG_20260617_082732.jpg
 
OP
C

cccoltsicehockey

Well-known member
Joined
Apr 3, 2014
Messages
1,401
Location
Charlotte, NC
Around the end of May I got the trimming done on the house. This needed to be done before I could do the rest of the shutters.

Things had gotten a little overgrown.
IMG_20260617_082811.jpg

I picked up a new tool for this. I really love my gas powered trimmers for my larger hedges, so they won't be going anywhere. They are all also double side of blade cutting. This EGO though is nice and light for doing the shaping on the smaller bushes and I plan to have another 7 of those on the other side of the driveway eventually.
IMG_20260622_104112.jpg

IMG_20260617_082831.jpg

Trimming is complete except for the one hedge that had flowered. I need to knock that one out still now that it is done.
IMG_20260617_083104.jpg
 
OP
C

cccoltsicehockey

Well-known member
Joined
Apr 3, 2014
Messages
1,401
Location
Charlotte, NC
Early June, I got around to the rest of the shutters in the mornings of the weekend and painting in the afternoons in the storage room.

The last of the shutters pretty much wraps up most of the street-facing exterior work. The only piece left is the lighted house numbers I plan to create for the house.
IMG_20260617_083124.jpg

IMG_20260617_083403.jpg

IMG_20260617_083415.jpg


In the afternoon on that weekend, I worked on getting the storage room's AdvanTech floor sealed. Because of the nature of AdvanTech, I had to use oil based primer/sealer, which I absolutely hate due to the smell. I am still trying to get rid of the smell, almost a month later.

Taped the entire edges and got started.
IMG_20260617_082915.jpg

IMG_20260617_082928.jpg

I built myself a raised paint tray holder with some scrap wood and 3in deck screws so I could leave it on the paint without messing things up. Rollering on Killz was like rolling on Elmer's glue. Absolutely awful experience, but it is done.
IMG_20260617_082940.jpg

Thankfully, the weather was decent for the next 3 days as I tried to vent the VOC out of the room. I can't say I feel it helped much. The entire loft still smells of paint.
IMG_20260617_082956.jpg

I then applied the indoor/outdoor floor/deck paint. I likely will put Swisstrax over this, but at least it is sealed underneath and will blend better with the flooring.
IMG_20260617_083014.jpg

Ended up needing two coats to get full coverage with no white showing through.
IMG_20260617_083045.jpg
 
OP
C

cccoltsicehockey

Well-known member
Joined
Apr 3, 2014
Messages
1,401
Location
Charlotte, NC
Two weekends ago, with temps getting really hot, I realized the single sheet of plywood covering the skuttle hole was not going to cut it anymore, and I needed to deal with that project.

The room was showing 82 degrees. This picture shows the actual floor temp.
IMG_20260617_083256.jpg

This was the skuttle hole board temp. The air in the attic space was 121 as well.
IMG_20260617_083307.jpg

It was time to build an insulated panel. This isn't the final solution, but it was what I had on hand. It is R23 rockwool. Better than nothing, but a long-term solution will be 2 layers of 2in purple foam. Foam is better in this application, but I am not going to buy enough to make 4 layers of a 25x54in panel since I would need 4x-4x8 sheets. The lift was also super helpful in getting this from the workshop to the storage room.
IMG_20260617_083324.jpg

I plan to use a layer of drywall that I paint ceiling color over top of the plywood as well as paint the trim the ceiling color to make it disappear.
IMG_20260617_083338.jpg
 
OP
C

cccoltsicehockey

Well-known member
Joined
Apr 3, 2014
Messages
1,401
Location
Charlotte, NC
I had a rule with the new driveway in that I wouldn't work on a car without pulling it into the garage so as not to stain the driveway. That lasted not even 6 months from having a new driveway at it bit me in the ***.

The truck door hinge was making loud noises and was extremely tough to open/close. I decided to use some red and tacky to fix it. Completely not noticing that the grease gun that I had not used in a while was leaking out the other end, all over my new pavers in the center of the driveway. I tried a homemade remedy of baking soda and Dawn, but it didn't do anything really. I thought I was already going to need to have the paver company come back and replace them with some of the spare pavers I had.

IMG_20260617_083145.jpg

Some research though, led me to this product, which turns out is pretty amazing.
IMG_20260617_083159.jpg

You just pour it on the stain and let it dry. It is still working here. It somehow has a chemical reaction that pulls the stain out and then it is suspended in the stuff once it dries as a powder.
IMG_20260622_111358.jpg

Fully dry, it looks like a chalk like substance.
IMG_20260622_111412.jpg

Then you just brush it away with a stiff bristle brush. It worked wonder for me. I was doing it on an only 3 day old stain so I don't know how well it works on older stains but extremely happy with my outcome with it. I will be keeping a freshly sealed bottle on hand at all times now.
IMG_20260617_083234.jpg
 
OP
C

cccoltsicehockey

Well-known member
Joined
Apr 3, 2014
Messages
1,401
Location
Charlotte, NC
Love the updates!! Looking great!! Looks like you are running a punch list of your own - that oil stain stuff is amazing!
Thanks. Yeah, I have put together a pretty substantial list of things to work on now that they are gone. I expect it to take me the rest of the year or maybe the end of Q1 next year to wrap it up, but at least they are at my pace now.

Congrats on finally being done with contractors.

Can't wait to see what else you do
It is a great relief to finally be done with that part.

Thanks for the recommendation on the Chomp product - have some coming!

That oil remover is wild! I am going to have to grab a bottle to test it myself.
It did way better than I ever could have imagined. One thing I will say is that after I brushed it off I never bothered to get the shop vac out, which might have been a mistake. I seem to have a few new spots that have happened, and I think it might be from the powder getting wet from the rain. We have some cooler temps this week so I will be treating those two small areas again. That said it is less than 10% of what was there before, so I still truly believe in the project, just wanted to share that bit of information.
 

madison069

Well-known member
Joined
Nov 5, 2010
Messages
4,171
Location
Monroeville, PA
Shutter looks good! You plan to use them for storm reasons or just to block out sun or winter?

I need to do the same thing with the attic opening, the current 1/4" sheet I have in it's place keeps warping and changing every day. It's almost like a game now of is it flat or curved today? lol

I need to get a bottle of that to keep in the garage once the concrete gets poured outside. That stuff seems to work great!
 
To avoid these ads, REGISTER NOW!
Top Bottom