To avoid these ads, REGISTER NOW!

The making of a serrated tool steel vise swivel jaw

royce

Well-known member
Joined
Jun 22, 2014
Messages
3,110
Location
fairbanks ak
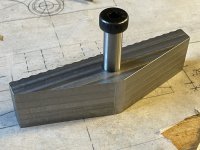
This is new ground for me, having not worked with A2 tool steel nor having ever serrated a vise jaw before.
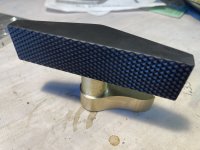
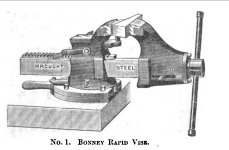
It is an interesting swivel jaw for a Bonney rapid transit vise.
Not having a example to work from made for some guesstimating from etchings from the late 1800's and leaning on my pal Kevin to guide me through the serrating process.
First orders of business; buy steel, slitting saw and arbor, then sending the saw to Kevin for grinding.
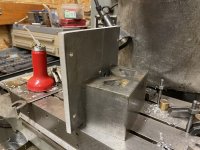
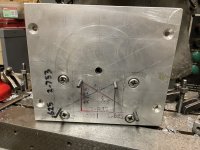
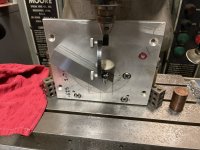
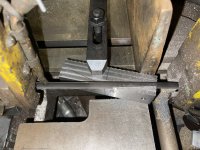
Next up, building a fixture for holding at 30 degrees for cutting serrations
 

Attachments

  • IMG_8230.jpeg
    IMG_8230.jpeg
    143 KB · Views: 48
  • Image 23.jpeg
    Image 23.jpeg
    276.4 KB · Views: 42
  • Image 22.jpeg
    Image 22.jpeg
    67.6 KB · Views: 40
  • IMG_9306.jpeg
    IMG_9306.jpeg
    1 MB · Views: 40
  • IMG_9308.jpeg
    IMG_9308.jpeg
    758.7 KB · Views: 39
  • IMG_9309.jpeg
    IMG_9309.jpeg
    782 KB · Views: 45
To avoid these ads, REGISTER NOW!
OP
R

royce

Well-known member
Joined
Jun 22, 2014
Messages
3,110
Location
fairbanks ak
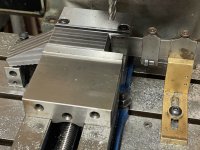
Kevin gave me the pitch of .125 and rough depth of cut of .035, so I set up to test cuts to verify depth.
Then drilled and tapped the jaw blanks to screw to fixture plate.
Then fastened blanks at 30 degrees on the fixture and commenced cutting.
Then just a matter of turning the hand wheel and hope I did not screw up the spacing.
Then flop it over and cut the opposing serrations
 

Attachments

  • IMG_9411.jpeg
    IMG_9411.jpeg
    687.7 KB · Views: 40
  • IMG_9404.jpeg
    IMG_9404.jpeg
    708.3 KB · Views: 38
  • IMG_9398.jpeg
    IMG_9398.jpeg
    751.9 KB · Views: 38
  • IMG_9399.jpeg
    IMG_9399.jpeg
    519.2 KB · Views: 42
OP
R

royce

Well-known member
Joined
Jun 22, 2014
Messages
3,110
Location
fairbanks ak
Next up sawing to rough shape
Then milling to final dimension
Then bored for rotary table center pin
Then cutting apex radius on rotary table
I don't know how, but I missed the mark a bit, but it will still function
 

Attachments

  • IMG_9431.jpeg
    IMG_9431.jpeg
    681.2 KB · Views: 39
  • IMG_9428.jpeg
    IMG_9428.jpeg
    632 KB · Views: 40
  • IMG_9421.jpeg
    IMG_9421.jpeg
    766.7 KB · Views: 39
  • IMG_9418.jpeg
    IMG_9418.jpeg
    894.8 KB · Views: 38
To avoid these ads, REGISTER NOW!
OP
R

royce

Well-known member
Joined
Jun 22, 2014
Messages
3,110
Location
fairbanks ak
Next up drilled, counterbored and tapped for 1/2" shoulder bolt.
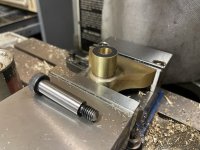
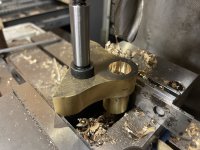
Then started on bronze pivot mount, rough shaping and silver brazing a boss for the shoulder bolt pivot.
Then bored, counterbored and reamed bronze pivot.
At this point I left everything a bit long and did not drill for the vise mounts and will finish when I have the vise to get hard numbers from.
 

Attachments

  • IMG_9435.jpeg
    IMG_9435.jpeg
    616.9 KB · Views: 36
  • IMG_9437.jpeg
    IMG_9437.jpeg
    688.1 KB · Views: 33
  • IMG_9440.jpeg
    IMG_9440.jpeg
    706.1 KB · Views: 36
  • IMG_9446.jpeg
    IMG_9446.jpeg
    561.9 KB · Views: 41
OP
R

royce

Well-known member
Joined
Jun 22, 2014
Messages
3,110
Location
fairbanks ak
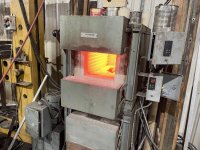
Next up heat treating.
Kevin gave me the parameters he uses for A2 and a hardness of 54-56
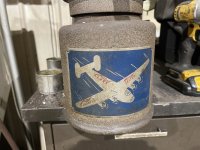
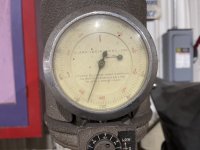
Went to a buddy's shop who has an oven and a hardness tester
Got it hardened, tempered and checked, 4 tests 53, 54, 56 and 56+
Spot on hardness.
Next up fitting mounting pins.
That might be a bit as we are in summer mode not shop mode!
 

Attachments

  • IMG_9447.jpeg
    IMG_9447.jpeg
    844.1 KB · Views: 36
  • IMG_9448.jpeg
    IMG_9448.jpeg
    576.5 KB · Views: 32
  • IMG_9450.jpeg
    IMG_9450.jpeg
    823 KB · Views: 31
  • IMG_9449.jpeg
    IMG_9449.jpeg
    686.5 KB · Views: 30
  • IMG_9457.jpeg
    IMG_9457.jpeg
    465.8 KB · Views: 32
  • IMG_9455.jpeg
    IMG_9455.jpeg
    500.7 KB · Views: 33
  • IMG_9461.jpeg
    IMG_9461.jpeg
    637 KB · Views: 38
To avoid these ads, REGISTER NOW!
Top Bottom