To avoid these ads, REGISTER NOW!

Imperial Journey - a Restoration Saga

Ohmthis

Well-known member
Joined
Jan 20, 2013
Messages
3,019
Location
Outside of Louisville KY
Freaking slide rules and compasses to the rescue!!!! When you said drafting set, I said the **** is getting real! My dad has a ton of drafting tools that I have used and keep in my tool box. That was a great idea to make a series of radii to match what was there. I may make a set on poster board and keep with my fab tools!
 
To avoid these ads, REGISTER NOW!
OP
R

rdoty

ALLIANCE MEMBER
Joined
Feb 7, 2018
Messages
650
Location
Massachusetts
I still have my first slide rule <digs it out of drawer> - a Pickett N4-ES Vector-type Log Log Dual Base Speed Rule... Slide rules make nice decoration, but I don't miss using them at all!

I find it fascinating how much modern solid modeling CAD systems are built on drafting style geometric construction. Almost everything I do while building complex solid models is based on drafting techniques I learned <way to many> years ago! Plus drafting based design really forces you to get good at visualizing parts.

While CAD is great you need physical tools to measure physical parts. And there is still a place for manual layout and classic Cardboard Aided Design!
 

dscheidt

Well-known member
Joined
Apr 26, 2017
Messages
2,909
Freaking slide rules and compasses to the rescue!!!! When you said drafting set, I said the **** is getting real! My dad has a ton of drafting tools that I have used and keep in my tool box. That was a great idea to make a series of radii to match what was there. I may make a set on poster board and keep with my fab tools!
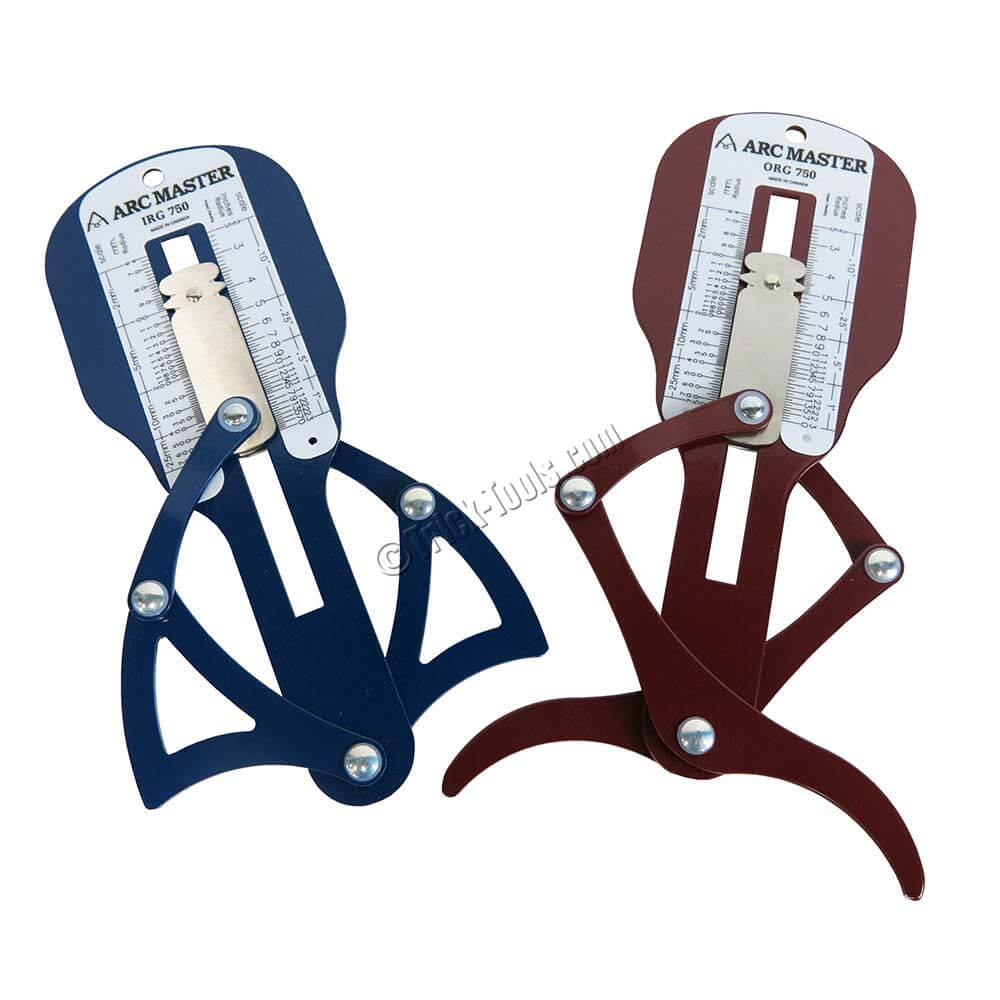
There are adjustable radius gauges, which you adjust to match the radius you're copying, and and then read the result off the scale. They're not cheap, and you need an inside and outside, but they're very handy.
 

Ohmthis

Well-known member
Joined
Jan 20, 2013
Messages
3,019
Location
Outside of Louisville KY
There are adjustable radius gauges, which you adjust to match the radius you're copying, and and then read the result off the scale. They're not cheap, and you need an inside and outside, but they're very handy.
Yep, my late stepdad (a tool and die maker) had radius gauges. A few minutes and some card board and I could make several. It’s an idea I guess. Thank you for the info.
 
OP
R

rdoty

ALLIANCE MEMBER
Joined
Feb 7, 2018
Messages
650
Location
Massachusetts
There are adjustable radius gauges, which you adjust to match the radius you're copying, and and then read the result off the scale. They're not cheap, and you need an inside and outside, but they're very handy.
Interesting! I wasn't familiar with them and had to look it up. Fascinating, elegant, and somewhat complex gadgets. The people who made the industrial revolution weren't dummies! I've got a huge amount to learn about machining, fabrication, and metrology. Thanks for the reference!
 
To avoid these ads, REGISTER NOW!

dscheidt

Well-known member
Joined
Apr 26, 2017
Messages
2,909
This is the sort I've used. (I don't know if they were this exactly, but they were similar). different from the fixed sort of radius gauges that machinists use. 1783565415964.png

Interesting! I wasn't familiar with them and had to look it up. Fascinating, elegant, and somewhat complex gadgets. The people who made the industrial revolution weren't dummies! I've got a huge amount to learn about machining, fabrication, and metrology. Thanks for the reference!
No kidding. The number of amazing machines and mechanisms that came out of the 18th and 19th centuries are mind boggling, as are the ways they figured out how to make stuff with pretty basic machine tooling.
 
OP
R

rdoty

ALLIANCE MEMBER
Joined
Feb 7, 2018
Messages
650
Location
Massachusetts
Unfortunately we aren’t done yet. Three back panels are required – two sides and a center piece. These panels fit around the mounting brackets for the seat back and arm rest. Unlike the factory cover, these will be seat material instead of carpet. Measure each panel, cut it out, sew it together, test fit, and then sew to the rest of the seat cover.

Finally we are ready to fit the entire cover. With some pushing, pulling, tweaking, and cursing the complete cover is in place and looking good. Flip the seat over the use hog rings to secure the seat cover to the frame. Then flip it back upright and check the overall fit. Not bad, not bad at all! Since everything is in its final position, cut out the holes for all of the mounting points.

Being thoroughly paranoid at this point, completely assemble the entire seat – including arm rest and seat backs – and check the whole seat over for any last problems. Everything still looks good…

Time to take the seat back apart, drag the engine hoist out of the corner, hook everything up, and call She Who Must Be Obeyed for help.

The seat base went back into the car smoothly. The mounting bolts slipped into their holes in the bottom of the car – everything still fits. Run the nuts onto the mounting bolts and tighten everything up. The next moment of truth – plug in the power seat and see if it works. It does! It moves in all six directions. So far, so good…

Install the arm rest with its cover. Install both seat backs. Install the trim pieces on the sides of the seats. Everything is still looking good.

Now for the real moment of truth – run the seat back to its correct position, slide in, and sit on it.

Wait for it, wait for it…

It is good! The seat is now firm and comfortable. Much better support and it doesn’t feel squishy. It even looks good! And there was much rejoicing!

FrontSeatInstalled.jpg
New front seat

We’re not quiet finished – the front door cards still need to be done and I need to do some tweaking around the windows. But the car is usable and even looks good. We may eventually get a Thursday that isn’t raining so I can take it to a local car show!
 
To avoid these ads, REGISTER NOW!
Top Bottom