To avoid these ads, REGISTER NOW!

Below 265 SQ/FT DRIVESITFAR IS GETTING ORGANIZED in his 9x15 portion of 2 car garage. DIY’s & COOL VI

All workspaces below 265 squarefeet.
OP
D

drivesitfar

Well-known member
Joined
Oct 23, 2013
Messages
36,053
Location
Pacific Northwest
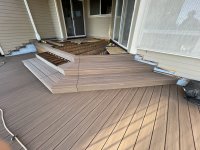
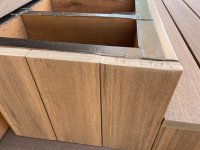
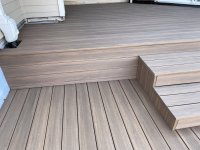
I spent most of the day yesterday learning how to do folded corners with Timbertech. Getting the saw depth figured out, then angle and the pvc glue and activator has a learning curve that is for certain.

Since my technique isn’t exact yet we’ll see how everything looks once installed. I still need to trim everything so there is a continuous gap line coming down the steps sort of like a waterfall but it’s progress.

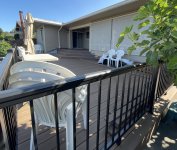
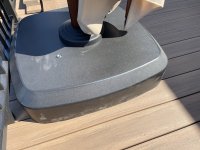
Have a grand day all while I get a haircut and start looking for some good deck furniture. IMG_1256.jpegIMG_1255.jpegIMG_1257.jpegIMG_1258.jpeg
 
To avoid these ads, REGISTER NOW!
OP
D

drivesitfar

Well-known member
Joined
Oct 23, 2013
Messages
36,053
Location
Pacific Northwest
Making this corner waterfall look happen sure has a lot of moving parts so marking cutting and screwing in each step is just hoping after I cut each piece it looks ok (and that my bride approves). I’m looking forward to getting it done.

My ears are officially lowered for summer now and after our shopping experience I might need to start a go fund me page for new quality deck furniture. Or maybe learn how to build furniture is the other option.
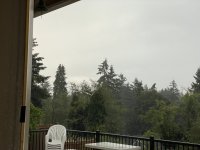
Anybody want to comment on sunbrella fabric or their favorite table and chairs for outside eating furniture please do.

It’s sunny in the PNW so my day is great snd hope yours is grand tooIMG_1259.jpeg
 
Last edited:
OP
D

drivesitfar

Well-known member
Joined
Oct 23, 2013
Messages
36,053
Location
Pacific Northwest
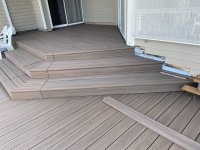
Another day and some more progress. I won’t be doing this for a living that is for certain but the steps are coming along nicely. I cut and installed the corner pieces (we are calling it a waterfall) and finished cutting and installing one side of a step.

Hopefully I’ll have both steps installed tomorrow.

Have a grand day everyone!!IMG_1262.jpegIMG_1261.jpegIMG_1260.jpeg
 
To avoid these ads, REGISTER NOW!
OP
D

drivesitfar

Well-known member
Joined
Oct 23, 2013
Messages
36,053
Location
Pacific Northwest
Ollie: thanks for the good words and glad you like how my deck is looking. This deck project is taking more than a little time and working with my bride as my only helper (except her BBF for a few days screwing in blocking and deck boards) it really is coming together. Also living through this with your other half really has further improved our relationship too. Keep checking in cause we should be done soon but lots of projects on the to do list.

Jon: thank you!!

Jay: I’ve never been a big fan of stringers so one of my contractor friends almost 40 years ago no helped me build 3 similar steps out of treated wood and we decided 2 steps was plenty now that we don’t have 5 kids using it daily. There’s a ton of moving parts but my bride has great ideas and a good eye and my OCD and attempts at perfection might have our deck looking good. Thanks for posting a few good words cause you’ve always been positive so keep it up!!

P: thanks and at least I still have all my fingers cause I think I’ve used more than a few of my cutting tools on this deck rehab. I have to give a big shout out to my bride for always pushing me to do what looks best and to all the guys on YouTube that took the time to post some great ideas and how to do it.

52: thank you and it’s mostly my bride that has me doing this when I kinda mention a video or picture looks great and then scratching my balding head more than a few times trying to figure out how to make it happen. Thanks for stopping in.

All: with all the moving parts having the right side of the steps framing not quite level (in the bubble but to the edge of one side) it created some pretty interesting discussions. I was close to taking it somewhat apart and rebuilding it then thought maybe I could fix it with a few shims under the decking. We picked up a 300 pack of plastic shims from 1/32 to 1/4 so I screwed in a few onto the framing and we both are pretty happy with the result.

When working somewhat slow at my 70 year old pace and having my OCD and my bride notice when things are off 1/32 or a 1/16th is interesting but in the end I hope it will last us another 20+ years or until we sell or hopefully go to a finished golden deck elsewhere.

Today steps should be finished and the upper deck will get boards on it.

Have a grand day everyone


IMG_1262.jpegIMG_1264.jpegIMG_1266.jpegIMG_1265.jpegIMG_1267.jpeg
 
OP
D

drivesitfar

Well-known member
Joined
Oct 23, 2013
Messages
36,053
Location
Pacific Northwest
The steps are finally finished and the top deck has started to look like a real deck again.

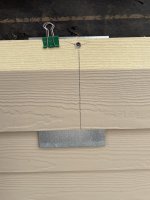
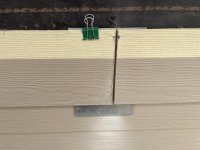
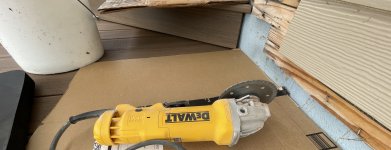
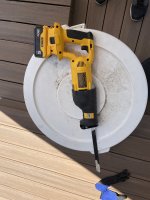
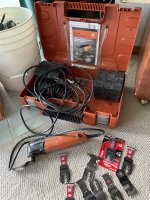
When I installed this 12 inch trim piece on the side of the steps a couple days ago I knew I should have trimmed it an 1/8 to allow for it being an 1/8th to high above the deck and step framing. We don’t like big gaps and there would have been one once the first piece of decking sat on this trim piece. So I thought about removing it, belt sander or even a skill saw but decided to put a new metal cutting blade on my old fien and hand cut it in place. To hopefully give me a guide and keep the surrounding pieces and g tape undamaged I taped on a couple pieces of thin galvanized steel. I could have maybe done a bit better in the cut if I had younger eyes but it worked ok and I got rid of the protruding 1/8th so decking went on nicely. It’s far from perfect but my bride loves it so I’m happy it’s moving forward. I think it looks a lot better than it would have if I hadn’t cut off the 1/8th.

We started the top deck and figured out the angle (43 degrees) to make the gap on the angled pieces look great. Only 17 more boards to cut and install. Also most of the blocking I did on the lower deck framing had joists ending up 12-13 inches on center and it’s super solid. The upper deck framing was going the correct fit for our new decking and even though it’s 16 inches on center it’s very adequate and solid too.

Hope you all enjoy your day cause I know I will finishing up this project. IMG_1267.jpegIMG_1269.jpegIMG_1268.jpegIMG_1272.jpegIMG_1273.jpegIMG_1279.jpegIMG_1275.jpegIMG_1281.jpeg
 
Last edited:
OP
D

drivesitfar

Well-known member
Joined
Oct 23, 2013
Messages
36,053
Location
Pacific Northwest
P: Thanks!!!

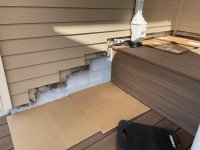
So this upper deck installation is going great so far. The angle stayed consistent even when turning the opposite direction. The point miraculously met at the corner do I didn’t have to cut a double sided piece and the full board pattern only had me notching one board on one of the two sides of the partial wall. My bride wanted me to use a scrap 3 foot piece of timbertech for a pattern but since I’ve got a few cardboard scraps I made one out of that. First attempt after transferring the pattern with my whit marker and cutting with my old black and decker 6.5 inch skill saw worked great.

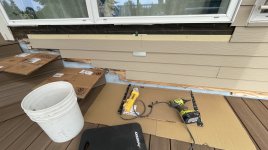
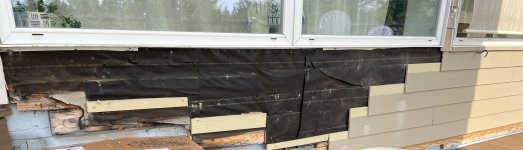
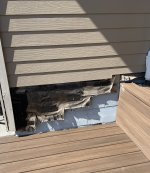
Only 5 boards left to cut and install today on top deck and trim out my brides bottom Garden work area with Timbertech and I’ll go shopping for a few pieces of hardie plank siding and trim to finish the deck.

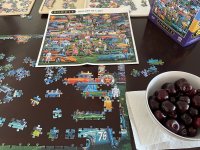
We still have a little down time to do a few puzzles and of course eat a good meal or two. I’m putting Les’s or no syrup on my crapes and pancakes and I’ve lost 5 of the 15 pounds I’d like to lose before September.

Hope you all have a grand day!!IMG_1288.jpegIMG_1289.jpegIMG_1290.jpegIMG_1287.jpegIMG_1286.jpeg
 

patlun

Well-known member
Joined
Apr 12, 2015
Messages
243
Location
Värmland, Sweden
I looked in now as I had not get any notifications from it for a while. Great process with the deck. Some new tools too and some tasty food pictures.

I also like my corded Makita track saw, the last year I have bought some 18V Makita tools, but I will also keep my old Ryobi tools until they dies. I am using my 12V Bosch Professional tools for most things in either case. The heavier 18V tools are only used when I need some more power and don't will bother with cords.
 
To avoid these ads, REGISTER NOW!
Top Bottom