To avoid these ads, REGISTER NOW!

Above 1200 Sq/FT The Underground Upgrade (or the opposite of The Flying Shop)

Wokspaces above 1200 squarefeet.
OP
P

phred

Well-known member
Joined
Apr 23, 2009
Messages
530
Location
NC
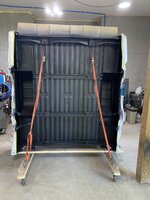
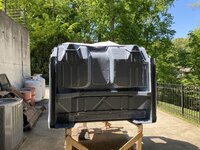
With the bed and tailgate sealed and ready to go the underside was next. Luckily no one had undercoated or molested this bed so it was in very good condition. I had the blasters pay extra attention in getting any surface rust and grime off of the cavities between the inner bed side and the outside skins. I spent a lot of time in those tight areas with a flash light making sure everything was clean and rust free. Then 2 coats of epoxy primer was sprayed on everything. I poured primer down the sides into places I could not reach with the sprayer and hoped it would flow into all the seams and joints. Gave it a few days to cure and then 2 coats of raptor liner on everything underneath.
 

Attachments

  • IMG_1545.jpeg
    IMG_1545.jpeg
    614.3 KB · Views: 304
  • IMG_1544.jpeg
    IMG_1544.jpeg
    778.7 KB · Views: 151
  • IMG_1549.jpeg
    IMG_1549.jpeg
    889.7 KB · Views: 91
Last edited:
To avoid these ads, REGISTER NOW!
OP
P

phred

Well-known member
Joined
Apr 23, 2009
Messages
530
Location
NC
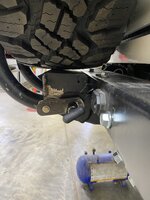
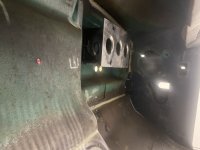
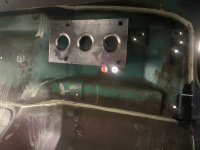
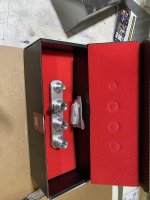
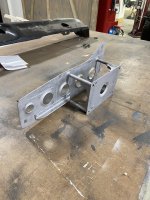
I finally got back to the tire carrier modifications for my 78 bronco. This carrier is designed to fit a Bailie Bilt bumper on an early bronco. The latch system as designed tucks into the recess in the early bronco tailgate. The 2nd gen bronco tailgates are flat which is a problem as the latches will not allow the tailgate to be lowered. I cut the latches off and extended the sides of the carrier mount and instead of latches I chose spring pins to lock the carrier in the closed position. I added a safety hook incase the pins fail (it would be hard to imagine 2, 1/2” pins failing but just in case). The carrier uses big torsion springs as assist and allows one to easily lower load and unload a heavy wheel/tire without pulling a muscle.
 

Attachments

  • IMG_9469.jpeg
    IMG_9469.jpeg
    819.4 KB · Views: 74
  • IMG_9471.jpeg
    IMG_9471.jpeg
    661.1 KB · Views: 56
  • IMG_9468.jpeg
    IMG_9468.jpeg
    812.4 KB · Views: 74
OP
P

phred

Well-known member
Joined
Apr 23, 2009
Messages
530
Location
NC
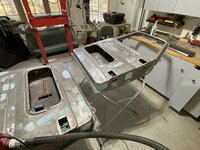
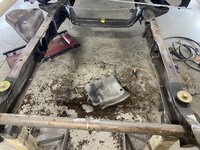
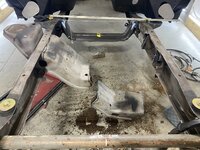
I don’t think I posted photos of the underside of the cab. So here are a few shots. The chain fall in the shop comes in really handy to move stuff around by myself.
 

Attachments

  • IMG_1551.jpeg
    IMG_1551.jpeg
    758.2 KB · Views: 64
  • IMG_1552.jpeg
    IMG_1552.jpeg
    888.3 KB · Views: 56
  • IMG_1556.jpeg
    IMG_1556.jpeg
    1.2 MB · Views: 51
  • IMG_1563.jpeg
    IMG_1563.jpeg
    913.3 KB · Views: 77
OP
P

phred

Well-known member
Joined
Apr 23, 2009
Messages
530
Location
NC
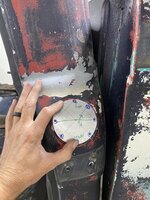
Since I am relocating the fuel tank from inside the cab to the rear under the bed I need to patch the hole for the old gas filler. I didn’t want to make a patch and weld it in. I wanted something different that still called out the filler hole but would be something along the lines of an old race car type patch. A piece of aluminum, a leather shot bag, body hammer and I have a patch that I think looks pretty cool.
 

Attachments

  • IMG_1649.jpeg
    IMG_1649.jpeg
    966.9 KB · Views: 66
  • IMG_1648.jpeg
    IMG_1648.jpeg
    1 MB · Views: 66
  • IMG_1650.jpeg
    IMG_1650.jpeg
    1 MB · Views: 93
OP
P

phred

Well-known member
Joined
Apr 23, 2009
Messages
530
Location
NC
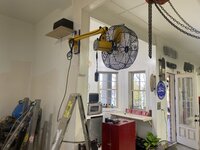
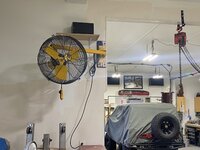
My brother being the ever diligent scrounger and knowing everyone in the county picked up a couple goodies for me that were being tossed out by a local municipality. The Big *** fan is brand new and had never even be assembled. It was a quick search on the interwebs to make sure I had all the parts and an hour later it was mounted in my welding shop.
 

Attachments

  • IMG_3023.jpeg
    IMG_3023.jpeg
    642.8 KB · Views: 70
  • IMG_3024.jpeg
    IMG_3024.jpeg
    698.8 KB · Views: 63
  • IMG_3025.jpeg
    IMG_3025.jpeg
    730.7 KB · Views: 70
OP
P

phred

Well-known member
Joined
Apr 23, 2009
Messages
530
Location
NC
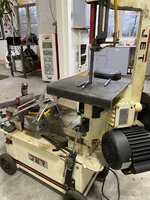
The next goody is a jet horizontal/vertical bandsaw. It had been used by the gas department to cut 2” pipe for years. It was filthy, greasy and generally disgusting. It was missing the table to convert it to a vertical saw but for free I could live with that. Here’s a before and after (32 oz of purple power, 2 cans of engine degreaser, serious scrubbing and hot water pressure wash down) pictures.
 

Attachments

  • IMG_3028.jpeg
    IMG_3028.jpeg
    1.1 MB · Views: 68
  • IMG_3026.jpeg
    IMG_3026.jpeg
    819.9 KB · Views: 64
OP
P

phred

Well-known member
Joined
Apr 23, 2009
Messages
530
Location
NC
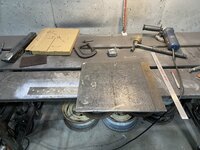
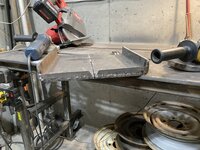
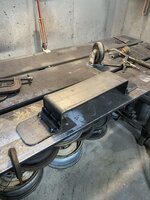
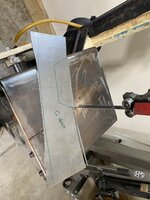
After the clean up I gave the saw a test run and it cuts great. The coolant pump works and after cleaning out the 10 year old grossly thick and lack coolant I now have a good saw to cut tube and plate that will not fit my cold saw. Since I can’t leave well enough alone I decided to make the table so I can use it as a vertical saw but saw. First a CAD template to determine the correct dimensions. Then some 1/4 plate to start the new part.
I sliced up the plate with a plasma cutter and cleaned up the edges with a grinder.
 

Attachments

  • IMG_3032.jpeg
    IMG_3032.jpeg
    1.2 MB · Views: 56
  • IMG_3033.jpeg
    IMG_3033.jpeg
    1,023.7 KB · Views: 61
OP
P

phred

Well-known member
Joined
Apr 23, 2009
Messages
530
Location
NC
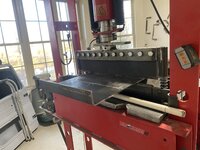
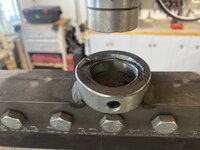
Now we all do some questionable things in the shop from time to time and here is mine for the week. I have a SWAG press brake that I use a lot. Here’s the rub. I failed to stack angle iron in the lower die which let the short leg of the plate being bent to slip off the back of the brake. Well 35 tons of pressure just found the weak link and bent the brake forward. 7/8” steel rod apparently can’t take that much pressure on an angle🤦‍♂️🤪😠
 

Attachments

  • IMG_3034.jpeg
    IMG_3034.jpeg
    693.6 KB · Views: 67
  • IMG_3035.jpeg
    IMG_3035.jpeg
    783.4 KB · Views: 62
  • IMG_3036.jpeg
    IMG_3036.jpeg
    590.5 KB · Views: 65
Last edited:
OP
P

phred

Well-known member
Joined
Apr 23, 2009
Messages
530
Location
NC
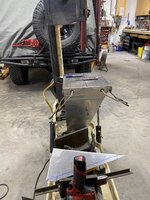
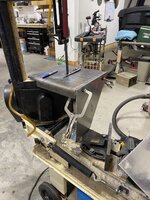
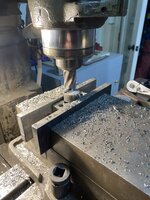
I ordered some 7/8” bar stock and I’ll repair the brake once the parts arrive but I need the brake now. No photos of the temporary repair but a torch and BFH moved the rods back to a useable condition. Once the table had the proper bends it was off to the mill to make a spacer/standoff to support the back side of the table. (A lathe would have been much faster and more accurate but since I don’t have one the mill gets used.) With the spacer welded to the table a 5/16” hole is drilled through table and spacer. Drill and tap a 1/4x20 hole in the saw frame and now the table is solid and secure.
 

Attachments

  • IMG_3037.jpeg
    IMG_3037.jpeg
    937.4 KB · Views: 62
  • IMG_3038.jpeg
    IMG_3038.jpeg
    1 MB · Views: 47
  • IMG_3039.jpeg
    IMG_3039.jpeg
    1 MB · Views: 37
  • IMG_3040.jpeg
    IMG_3040.jpeg
    873.3 KB · Views: 40
OP
P

phred

Well-known member
Joined
Apr 23, 2009
Messages
530
Location
NC
I didn’t like the fact the entire weight of the work to be cut is balanced on the band saws rear guide. I wanted something in front of the table to take the load off of the guide. Again some CAD design transferred to some aluminum plate, some speed holes and a few tapped holes on the table and saw base and now I have no worries about the table flexing.
 

Attachments

  • IMG_3041.jpeg
    IMG_3041.jpeg
    990.1 KB · Views: 39
  • IMG_3042.jpeg
    IMG_3042.jpeg
    1 MB · Views: 39
  • IMG_3043.jpeg
    IMG_3043.jpeg
    1,017.7 KB · Views: 38
  • IMG_3044.jpeg
    IMG_3044.jpeg
    983 KB · Views: 39
  • IMG_3047.jpeg
    IMG_3047.jpeg
    969.1 KB · Views: 45
OP
P

phred

Well-known member
Joined
Apr 23, 2009
Messages
530
Location
NC
@phred, I was going to let you slide but that statement demands a double YOU **** for the fan and bandsaw.
Hey Bob don’t I know it, but in reality it’s all my brothers fault. He finds all this stuff and I have more room in my shop so it always seems to find its way here. He’s the one that found the mill too. He called me on day and said I found a couple mills lets go look at ‘em. Well I ended up buying both and combined them to make one good one and sold the cannibalized one for almost what I had in both. So you see he ***** too. 🤦‍♂️🤪
 
OP
P

phred

Well-known member
Joined
Apr 23, 2009
Messages
530
Location
NC
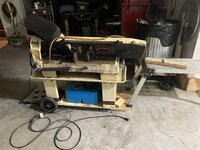
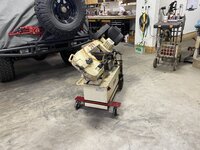
Well while I was trying to put the saw away I realized that it doesn’t have a steer axle so it rolls great in a straight line but making a turn is awkward. 2 casters and some more 1/4” plate and it now can be easily moved around the shop. Almost all the big tools except the mill are in casters so I can store stuff I’m not using.
 

Attachments

  • IMG_3051.jpeg
    IMG_3051.jpeg
    911.7 KB · Views: 36
  • IMG_3052.jpeg
    IMG_3052.jpeg
    935.3 KB · Views: 38
  • IMG_3053.jpeg
    IMG_3053.jpeg
    848.3 KB · Views: 38
  • IMG_3054.jpeg
    IMG_3054.jpeg
    910.9 KB · Views: 47
OP
P

phred

Well-known member
Joined
Apr 23, 2009
Messages
530
Location
NC
Well my brother and his all knowing of everyone called and said he found a junked 78 Lincoln Versailles with a good 351w and a disc brake 9”. Well I loaded up some tools and headed over to his place and pulled the 9” out. I was hoping to use it under the ‘66 pickup but it is too narrow. Swapping the brake parts over to the good housing I have will not work because the bearing ends are different. Sold it to a buddy for $500. The 351 will be pulled later and stored for future use.
 

Attachments

  • IMG_1636.jpeg
    IMG_1636.jpeg
    1.9 MB · Views: 60

ScottW

Well-known member
Joined
Mar 9, 2021
Messages
109
Location
WA State
Yeah those rearends used to be highly desired by Mustang owners before rear disc conversion kits were commonplace. These days the Lincoln brake parts are getting harder to find, and the factory gears in them are so tall you have to change them for performance anyway, so not as much demand but still not surprised you seem to have found a buyer quickly. That plus a good 351W? Good score!
 
OP
P

phred

Well-known member
Joined
Apr 23, 2009
Messages
530
Location
NC
It’s been a minute since I really spent any time in the shop. We’ve been traveling some since my wife retired. Visiting family and friends we don’t get to see very often. Started another Bronco project. This one was a complete restoration. It went much faster than the last couple. It still needs to have the interior buttoned up but she turned out nice.
 

Attachments

  • IMG_3091.jpeg
    IMG_3091.jpeg
    713.9 KB · Views: 43
  • IMG_3108.jpeg
    IMG_3108.jpeg
    1.1 MB · Views: 39
  • IMG_3109.jpeg
    IMG_3109.jpeg
    1.1 MB · Views: 36
  • IMG_3111.jpeg
    IMG_3111.jpeg
    875.4 KB · Views: 36
  • IMG_3112.jpeg
    IMG_3112.jpeg
    734.9 KB · Views: 36
  • IMG_3113.jpeg
    IMG_3113.jpeg
    738.8 KB · Views: 37
  • IMG_3120.jpeg
    IMG_3120.jpeg
    827.3 KB · Views: 40
  • IMG_3121.jpeg
    IMG_3121.jpeg
    454 KB · Views: 39
  • IMG_3122.jpeg
    IMG_3122.jpeg
    806.6 KB · Views: 39
  • IMG_3123.jpeg
    IMG_3123.jpeg
    705.3 KB · Views: 46
OP
P

phred

Well-known member
Joined
Apr 23, 2009
Messages
530
Location
NC
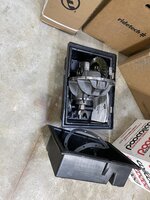
Christmas arrived early. Well at least the first shipment did. All new suspension and brakes for the ‘66. I’ve been planning and researching exactly what I want to do and have now settled on a pro touring style setup. Power plant will be modern, the 390 I have on the stand will get built for something else later.
 

Attachments

  • IMG_3461.jpeg
    IMG_3461.jpeg
    994.4 KB · Views: 27
  • IMG_3462.jpeg
    IMG_3462.jpeg
    1.1 MB · Views: 28
  • IMG_3463.jpeg
    IMG_3463.jpeg
    858 KB · Views: 21
  • IMG_3457.jpeg
    IMG_3457.jpeg
    704.2 KB · Views: 36
OP
P

phred

Well-known member
Joined
Apr 23, 2009
Messages
530
Location
NC
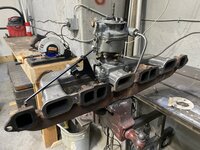
While I was waiting on those parts to arrive a buddy dropped off an intake, carb and exhaust manifold for a ‘64 chevy 6 cylinder pickup. I rebuilt the little Rochester cleaned up the intake in about an hour. The exhaust manifold took some effort. All the studs were broken off flush and rusted completely together. It took some head scratching to figure out how to hold this piece in the mill. Well redneck engineering and a good straight 2x8 and some long bolts solved that problem. I cut all the studs out and retapped all the holes including the small 1/8” pin that holds the heat riser spring.
 

Attachments

  • IMG_3390.jpeg
    IMG_3390.jpeg
    827.5 KB · Views: 35
  • IMG_3391.jpeg
    IMG_3391.jpeg
    817.4 KB · Views: 33
  • IMG_3393.jpeg
    IMG_3393.jpeg
    786.2 KB · Views: 32
  • IMG_3460.jpeg
    IMG_3460.jpeg
    834.4 KB · Views: 32
  • IMG_3459.jpeg
    IMG_3459.jpeg
    809.1 KB · Views: 31
  • IMG_3458.jpeg
    IMG_3458.jpeg
    878.8 KB · Views: 44
To avoid these ads, REGISTER NOW!
OP
P

phred

Well-known member
Joined
Apr 23, 2009
Messages
530
Location
NC
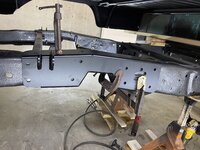
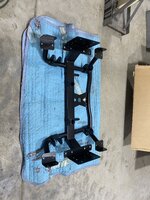
Unboxing began this week and I have started to test fit a few parts. I slipped the engine cradle in place to measure for boxing plates. I fabbed up two plates and tacked them in place. I still need to make plates for the crossmember to tie it and the frame together.
 

Attachments

  • IMG_3486.jpeg
    IMG_3486.jpeg
    1,017.7 KB · Views: 27
  • IMG_3481.jpeg
    IMG_3481.jpeg
    841.6 KB · Views: 25
  • IMG_3482.jpeg
    IMG_3482.jpeg
    854.7 KB · Views: 26
  • IMG_3487.jpeg
    IMG_3487.jpeg
    879.2 KB · Views: 35
OP
P

phred

Well-known member
Joined
Apr 23, 2009
Messages
530
Location
NC
Made a little progress today. Talked to a friend that builds race car chassis about how to box this frame and he gave me some pointers on keeping stress points limited. More plating, welding and grinding. This is gonna take a while.
 

Attachments

  • IMG_3514.jpeg
    IMG_3514.jpeg
    814.9 KB · Views: 29
  • IMG_3515.jpeg
    IMG_3515.jpeg
    771.3 KB · Views: 29
  • IMG_3519.jpeg
    IMG_3519.jpeg
    696.9 KB · Views: 40
OP
P

phred

Well-known member
Joined
Apr 23, 2009
Messages
530
Location
NC
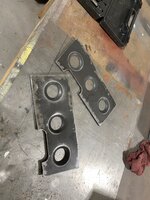
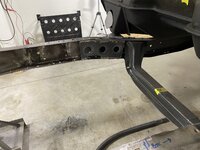
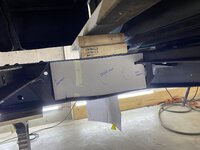
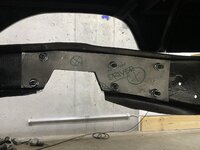
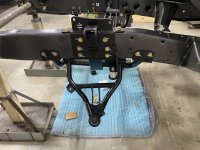
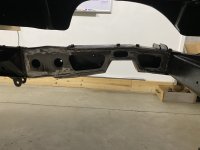
Work on the front suspension has come to a halt. A couple brackets from ridetech are on back order so I moved to the rear over the weekend. Cut out the “c” notch and test fit the reinforcement plates. Also made some backing plates for the front link bar hangers. These will be trapped once the frame is boxed so they will be welded in before the boxing is completed.
 

Attachments

  • IMG_3549.jpeg
    IMG_3549.jpeg
    687.7 KB · Views: 18
  • IMG_3548.jpeg
    IMG_3548.jpeg
    914.4 KB · Views: 17
  • IMG_3571.jpeg
    IMG_3571.jpeg
    792.1 KB · Views: 18
  • IMG_3596.jpeg
    IMG_3596.jpeg
    944.8 KB · Views: 18
  • IMG_3566.jpeg
    IMG_3566.jpeg
    946.6 KB · Views: 32
OP
P

phred

Well-known member
Joined
Apr 23, 2009
Messages
530
Location
NC
Made a little more progress on the rear suspension. The c-notches are all bolted in as are the front 4-link pickups. I dropped the 9” housing off to be magged for cracks and have a backbone installed along with a few other mods. Then on to powder coat.
 

Attachments

  • IMG_3570.jpeg
    IMG_3570.jpeg
    954.8 KB · Views: 42
OP
P

phred

Well-known member
Joined
Apr 23, 2009
Messages
530
Location
NC
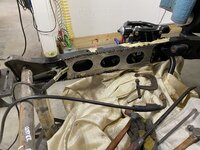
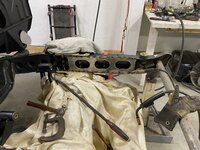
It’s been a minute since I’ve updated this thread. I’ve got the rear c-notches finalized and welded in the boxing plates over them. Started working in the boxing plates for the frame at the engine cradle and the center section of the frame. Still a lot of welding and grinding to do on the frame to make it smooth.
 

Attachments

  • IMG_3737.jpeg
    IMG_3737.jpeg
    944.8 KB · Views: 19
  • IMG_3711.jpeg
    IMG_3711.jpeg
    1 MB · Views: 20
  • IMG_3710.jpeg
    IMG_3710.jpeg
    1.1 MB · Views: 20
  • IMG_3705.jpeg
    IMG_3705.jpeg
    599.6 KB · Views: 22
  • IMG_3704.jpeg
    IMG_3704.jpeg
    740.2 KB · Views: 40
Last edited:
OP
P

phred

Well-known member
Joined
Apr 23, 2009
Messages
530
Location
NC
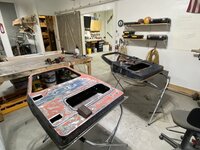
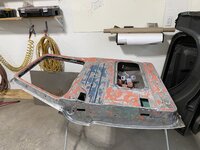
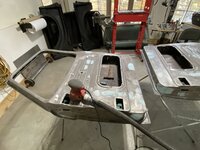
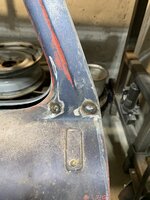
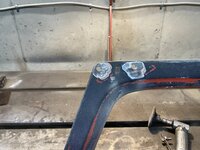
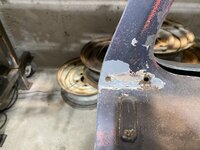
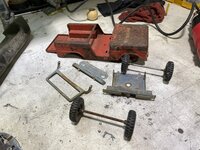
Worked on the doors. Cleaned up the inside and coated with epoxy primer. Worked all the dents out of the inside face of the doors and welded up all the holes from the multiple mirrors attached over the years.
 

Attachments

  • IMG_2716.jpeg
    IMG_2716.jpeg
    715.5 KB · Views: 24
  • IMG_2828.jpeg
    IMG_2828.jpeg
    851.4 KB · Views: 24
  • IMG_2838.jpeg
    IMG_2838.jpeg
    679.2 KB · Views: 23
  • IMG_2839.jpeg
    IMG_2839.jpeg
    753.6 KB · Views: 21
  • IMG_2840.jpeg
    IMG_2840.jpeg
    933.4 KB · Views: 21
  • IMG_2846.jpeg
    IMG_2846.jpeg
    968.2 KB · Views: 21
  • IMG_2847.jpeg
    IMG_2847.jpeg
    757.2 KB · Views: 21
  • IMG_2848.jpeg
    IMG_2848.jpeg
    842.4 KB · Views: 34
OP
P

phred

Well-known member
Joined
Apr 23, 2009
Messages
530
Location
NC
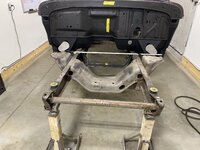
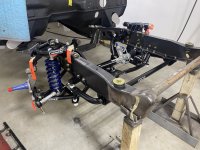
Chopped the main crossmember out of the ‘66 truck and test fit the new engine cradle and suspension hanger assembly. Got an email from the engine builder late yesterday that the 445 should be on the dyno late next week for break-in and testing. Hoping for 625+ at the crank on pump gas.
 

Attachments

  • IMG_3467.jpeg
    IMG_3467.jpeg
    802.7 KB · Views: 30
  • IMG_3468.jpeg
    IMG_3468.jpeg
    945.8 KB · Views: 18
  • IMG_3470.jpeg
    IMG_3470.jpeg
    1.1 MB · Views: 18
  • IMG_3471.jpeg
    IMG_3471.jpeg
    1.2 MB · Views: 18
  • IMG_3480.jpeg
    IMG_3480.jpeg
    1.1 MB · Views: 19
  • IMG_3481.jpeg
    IMG_3481.jpeg
    841.6 KB · Views: 20
OP
P

phred

Well-known member
Joined
Apr 23, 2009
Messages
530
Location
NC
Got this photo and an update from the engine builder. My new improved 7.3 Godzilla with all new internal goodies is scheduled to go to the dyno for testing and tuning next week. Aiming for 625hp+ with no power adders. That should move the ‘66 along nicely.
 

Attachments

  • IMG_4969.jpeg
    IMG_4969.jpeg
    1.2 MB · Views: 30
OP
P

phred

Well-known member
Joined
Apr 23, 2009
Messages
530
Location
NC
In effort to stay ahead of the of the engine builder I’ve been working on the the front suspension and cradle. It is now mostly complete. Rear suspension is next but I’m waiting on the 9” housing to be completed. I took a good housing, had it magnafluxed and checked to be sure it is straight. While it’s in the jig it’s getting a fill port, better venting, a reinforced drain on the bottom and all the welds redone.
 

Attachments

  • IMG_3606.jpeg
    IMG_3606.jpeg
    877.9 KB · Views: 19
  • IMG_3608.jpeg
    IMG_3608.jpeg
    796.2 KB · Views: 17
  • IMG_3612.jpeg
    IMG_3612.jpeg
    900.4 KB · Views: 16
  • IMG_3614.jpeg
    IMG_3614.jpeg
    810.1 KB · Views: 16
  • IMG_3672.jpeg
    IMG_3672.jpeg
    781.7 KB · Views: 15
  • IMG_3675.jpeg
    IMG_3675.jpeg
    807.8 KB · Views: 15
  • IMG_3680.jpeg
    IMG_3680.jpeg
    855.2 KB · Views: 24
OP
P

phred

Well-known member
Joined
Apr 23, 2009
Messages
530
Location
NC

I’ve been traveling a lot the last few weeks visiting family for thanksgiving and then spending a week in the Everglades recovering from said family visits. While I was away I received the above video from the engine builder. Looks like they managed to hit the power numbers I wanted. 600lbft of torque from 2800-6000 should destroy tires with abandon.
 
OP
P

phred

Well-known member
Joined
Apr 23, 2009
Messages
530
Location
NC
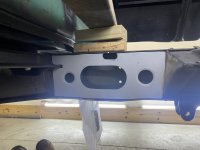
Added boxing plates forward of the front crossmember and over the rear axle at the “C” notch.
 

Attachments

  • IMG_3712.jpeg
    IMG_3712.jpeg
    995.1 KB · Views: 18
  • IMG_3711.jpeg
    IMG_3711.jpeg
    965.7 KB · Views: 11
  • IMG_3710.jpeg
    IMG_3710.jpeg
    1,014.2 KB · Views: 12
  • IMG_3705.jpeg
    IMG_3705.jpeg
    573.6 KB · Views: 13
  • IMG_3704.jpeg
    IMG_3704.jpeg
    695.6 KB · Views: 13
  • IMG_3703.jpeg
    IMG_3703.jpeg
    792.7 KB · Views: 14
OP
P

phred

Well-known member
Joined
Apr 23, 2009
Messages
530
Location
NC
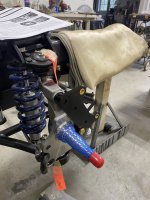
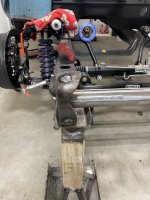
Front suspension is complete and the big brake kit from wilwood is installed. I tossed on a 15x8 wheel just to see if it would clear. It does with about 1/8” to spare. I was planning to run a deep stock style wheel with dog dish hub caps for the sleeper look but the lack of tires available in 305 and wider in 15” has forced me to look at wheels in the 18” range.
 

Attachments

  • IMG_3956.jpeg
    IMG_3956.jpeg
    800.9 KB · Views: 12
  • IMG_3960.jpeg
    IMG_3960.jpeg
    688.9 KB · Views: 11
  • IMG_3955.jpeg
    IMG_3955.jpeg
    646.8 KB · Views: 10
  • IMG_3953.jpeg
    IMG_3953.jpeg
    708 KB · Views: 10
  • IMG_3954.jpeg
    IMG_3954.jpeg
    830.6 KB · Views: 10
  • IMG_3950.jpeg
    IMG_3950.jpeg
    711.2 KB · Views: 19
OP
P

phred

Well-known member
Joined
Apr 23, 2009
Messages
530
Location
NC
Fabbed up a couple more boxing plates, painted the moser third member (3:73 gear, Eaton trutrac, billet 1350 yoke yada yada yada) welded in the front crossmember and modified the frame horns to fit late model front bumper.
 

Attachments

  • IMG_4384.jpeg
    IMG_4384.jpeg
    796.6 KB · Views: 14
  • IMG_4383.jpeg
    IMG_4383.jpeg
    706 KB · Views: 14
  • IMG_4377.jpeg
    IMG_4377.jpeg
    884.7 KB · Views: 13
  • IMG_4348.jpeg
    IMG_4348.jpeg
    893.9 KB · Views: 12
  • IMG_4342.jpeg
    IMG_4342.jpeg
    610.4 KB · Views: 12
  • IMG_4341.jpeg
    IMG_4341.jpeg
    637.9 KB · Views: 21
OP
P

phred

Well-known member
Joined
Apr 23, 2009
Messages
530
Location
NC
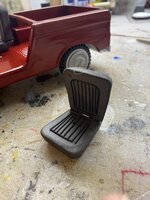
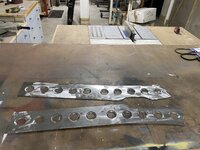
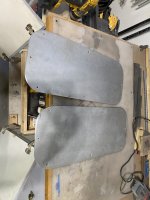
Wow it’s been a minute since I updated this thread. I’ve been busy with the truck, making progress. The rear housing is back from the fabricator and I had it powder coated. In the meantime I worked on panels for the doors. The lower panels for the doors were hacked by the PO for speakers. The factory upper panels are thin plastic so I formed some from sheet aluminum that will be painted Wimbledon white with a pleated cloth insert to match the seats.
 

Attachments

  • IMG_4867.jpeg
    IMG_4867.jpeg
    718.2 KB · Views: 15
  • IMG_4865.jpeg
    IMG_4865.jpeg
    775.4 KB · Views: 14
  • IMG_4861.jpeg
    IMG_4861.jpeg
    708.4 KB · Views: 13
  • IMG_4859.jpeg
    IMG_4859.jpeg
    1 MB · Views: 17
  • IMG_4860.jpeg
    IMG_4860.jpeg
    905 KB · Views: 25
OP
P

phred

Well-known member
Joined
Apr 23, 2009
Messages
530
Location
NC
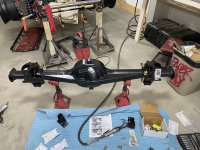
Spent some time assembling the rear. Moser alloy shafts, wilwood 4 piston calipers and rotors with internal parking brake. Moser nodular center section with 3.70 gears with an Eaton trutrac.
 

Attachments

  • IMG_4876.jpeg
    IMG_4876.jpeg
    931.9 KB · Views: 13
  • IMG_4877.jpeg
    IMG_4877.jpeg
    886.1 KB · Views: 13
  • IMG_4878.jpeg
    IMG_4878.jpeg
    888 KB · Views: 14
  • IMG_4881.jpeg
    IMG_4881.jpeg
    778.6 KB · Views: 22
OP
P

phred

Well-known member
Joined
Apr 23, 2009
Messages
530
Location
NC
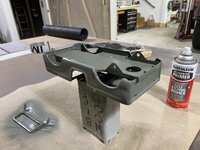
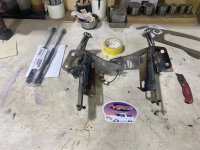
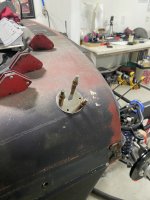
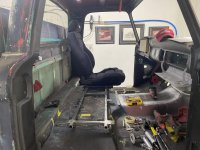
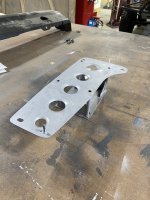
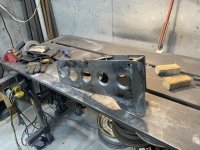
A bit more progress this week. A pair of recessed hood hinges arrived, started laying out the seat frame for the recaro seats, finished up the rear housing install with the big wilwood brakes and made patch to cover the antenna hole.
 

Attachments

  • IMG_4890.jpeg
    IMG_4890.jpeg
    857 KB · Views: 11
  • IMG_4905.jpeg
    IMG_4905.jpeg
    848.5 KB · Views: 11
  • IMG_4910.jpeg
    IMG_4910.jpeg
    766.4 KB · Views: 10
  • IMG_4916.jpeg
    IMG_4916.jpeg
    779.1 KB · Views: 9
  • IMG_4918.jpeg
    IMG_4918.jpeg
    729.1 KB · Views: 9
  • IMG_4920.jpeg
    IMG_4920.jpeg
    714.4 KB · Views: 9
To avoid these ads, REGISTER NOW!
Top Bottom