To avoid these ads, REGISTER NOW!

Between 485 & 705 SQ/FT Three Single Car Garages, Thatched Cottage: an inefficient use of space!

Workspaces between 485 and 705 squarefeet.
To avoid these ads, REGISTER NOW!
OP
B

BiTurbo228

Well-known member
Joined
Jun 13, 2016
Messages
257
Location
South of England
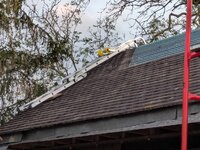
Right! So I had planned last week to cement in the edge tiles and start on the ridge, but I managed to tweak a muscle in my back hoiking this ****** thing along the roof:

54943852834_94fbfb99e5_o.jpg

Hardly a major exertion, but it was the same muscle that let go a year or so ago so that's clearly a bit of a weakness now. Would not recommend. Felt like being stabbed, but it did subside over a couple of hours (must have been in spasm or something).

So, onto light duties again, and instructed to actually test out this whole 'completer-finisher' thing by my other half :D

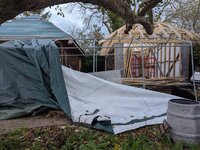
First thing was a storm had blown the cover off the car tent again and I didn't fancy pulling it back over, so I thought I'd decant as much as I could out of it into the garage. A bit ahead of schedule as I'd wanted the other one covered so I still had a decent working space, but I'm mostly done on the inside there now anyway.

54943903050_a91093bc26_o.jpg

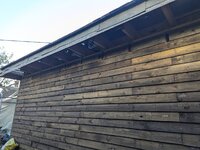
It did mean I could finally get to the cladding on the front of the two garages, so I did that too:

54943850669_b9630aa9af_o.jpg

Next up was cutting the slots for the beams on the flat roof between the two garages. The idea is that because each base is likely to be a little mobile compared to the other, if I make the beams sliding joints then they should be able to take up that movement without loading them with tons of stress.

54943903025_1ca68affed_o.jpg

That also meant sorting slots in the battens on the outside, which I got halfway through on one garage...

54943903035_aa7c75a9d9_o.jpg

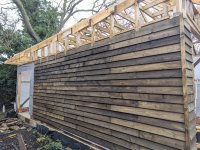
...and all the way through including cladding on the other:

54943593056_f71d37396e_o.jpg

Not bad for light duties I thought! And yes, maybe this completer-finisher thing isn't the worst thing in the world...
 
OP
B

BiTurbo228

Well-known member
Joined
Jun 13, 2016
Messages
257
Location
South of England
True to form in the UK, it's an odd mishmash of imperial, metric and cost-cutting.

We still buy our timber in '4x2' or '6x2', but they've been snuck down in dimensions so the pressure treated stuff is actually 44mm x 95mm for a '4x2' (if not even worse at 38x89, which you have to be a bit careful about, though moreso with ungraded timbers). Even the unplaned stuff is a smidge smaller than old stock imperial timber, so it's not just the treating process sneaking off dimensions. Lengths tend to be advertised in metres, so you'll buy a '2.4m 4x2' (which is really just a half-metricised 8ft 4x2, though because the metric dimension is smaller than the imperial it will actually be 2.4m in length rather than 2.44m).

There's three main conventions for stud centres, which are done in metric. 400mm, 450mm, or 600mm as I've done mine. 600mm and 450mm are metricised 2ft and 1.5ft old money measures, but 400mm is a newer standard created after the metric switch so doesn't align with a neat imperial measurement.

Oh, and plywood/OSB boards are another mess as they are actually sold in metricised imperial measurements (so a plywood board will be 1220mm x 2440mm). Though plasterboard is metric at 1.2m x 2.4m.

Also, and the publically available timber span tables I talked about towards the end of page 1 were developed in WW1 so well before metric in the UK, and as far as I can tell were just ported directly over to the new metric standards (even though 600mm is actually 1.97ft not 2ft), so presumably that's just chalked up to a bit of an extra safety factor.

It's a mess man :D though I don't particularly fancy changing it, they'll probably use it to short-change us on dimensions again...
 
OP
B

BiTurbo228

Well-known member
Joined
Jun 13, 2016
Messages
257
Location
South of England
Little update. Back's probably feeling better enough to do some tiling at a careful pace, but the weather hasn't been co-operating. Next job on the tiles is to grout in the ones at the back and start on the ridge, but there hasn't been a 12hr period without rain for 2 weeks! Let alone the 48 hours I'd be more comfortable with.

So, more pottering on with other jobs.

Inside wall on the other garage clad:

54975605535_f9c51096aa_b.jpg

Insulated the garage that's currently uncovered, which is probably a bit of an odd decision as it'll hold the moisture in, but depending on the weather there's a significant chance I'll get this one covered up before the tiling on the other's finished. This way, I'm in the position to board the inside of the second garage for racking strength ready to start tiling on that one pronto.

54975311396_12dee44217_b.jpg
54975606060_25faf156b1_b.jpg

Shuttled the remaining good timber from the tent into the dry:

54975563469_296917c516_b.jpg

And nearly there with boarding in the loft. Just the gable and the hip ends left to do.

54975486933_1c3d35de96_b.jpg
54975311501_2f96934a6b_b.jpg
54975564569_b918487604_b.jpg
 
OP
B

BiTurbo228

Well-known member
Joined
Jun 13, 2016
Messages
257
Location
South of England
Thanks!

Christmas tends to be a multi-day affair at my folks' place so no luck there, though we're hosting my other half's family in the couple of days after so I'll try and cluster a couple of two-man jobs that I can rope some helpers into around then ;)

I'm thinking tile shuttling up to the roof, which is massively quicker with someone else at the bottom of the pulley.
 

sawduststeve

Well-known member
Joined
Oct 7, 2016
Messages
2,140
Location
Havering-Atte-Bower,London/Essex boarders, England
Tiny little break in the weather so managed to cram as much cementing into 3 evenings as I could!

54986732379_d17210a2f6_b.jpg

Both sides of the gable and 7 ridges done. Little under halfway I think. Don't look to closely at it, it was mostly done in the dark :D
Looks good. It surprising how much muck a ridge tile takes , about a bucket full per tile.
Well done with putting the broken pieces of tile in, may I suggest leaving it sticking out so that it ties in to the next ridge tile.
Keep at it.
Merry Christmas
Steve 🍻
 
OP
B

BiTurbo228

Well-known member
Joined
Jun 13, 2016
Messages
257
Location
South of England
Yeah they do take a ton of the stuff! Makes you think just how much weight is in a tiled roof, especially with each plain tile being 1.25kg and each garage taking 8000 of the things.

It might not look like it on the last one, but I've been leaving a little nub sticking out for the next batch of mortar to sit on. Just doesn't look like it on this one due to the camera angle :)

Definitely saves a decent chunk of the stuff!
 
OP
B

BiTurbo228

Well-known member
Joined
Jun 13, 2016
Messages
257
Location
South of England
Nearly there with the ridge tiles. Only 2 left to go, plus a little section on the end after I've done the hip tiles.

55007441197_772d66fdef_b.jpg

Also managed to rope the fam into helping lug some more tiles up inbetween Christmas meals, so now up to 88% of the tiles up there. Not that many to go now!

55008499178_dfe53a3f6f_b.jpg
 
OP
B

BiTurbo228

Well-known member
Joined
Jun 13, 2016
Messages
257
Location
South of England
Thanks! Yeah I definitely am :) especially as it's taking a bit more shape.

Well, having been too rainy to mortar tiles it's now transitioned to being too cold to mortar tiles, so I've been spending my time doing more finishing bits and pieces inside. I shouldn't complain though as by all rights it should have been much colder much earlier in the year, so all of the mortaring I've been able to do is effectively bonus time.

I've nailed in some little props on the corners of the hips as previously the overhands were supported only by the thickness of the rafters:

55025067311_cbda659307_b.jpg

I've nailed in half of the noggins on the ceiling joists, supporting the edges of the boarding (I'd have done the rest of them, but some inconsiderate soul has piled up a load of timber underneath them...)

55025067281_e13821a670_b.jpg

I also had a neat idea to try and sneak some storage space back as my (rather optimistic) plan is to try and have absolutely nothing cluttering up the floor. Considering I'm definitely on the 'hoarder' end of parts accumulation I figure I'll need some creative solutions to storage.

First step was to order some neat little wooden crates and clad them in breathable membrane:

55025067381_cc482a594a_b.jpg

Those get fixed in place up here, between the ceiling joists and poking into the otherwise-unutilised eaves space:

55024179382_d854c98f6c_b.jpg
55025067351_3644d68fac_b.jpg
55025252788_6026c38d20_b.jpg

They're going to be a bit of a pain to get to with cars in the way, but there's a lot of stuff that doesn't really need quick access to that can be stashed away in places like this. Who knows how useful they'll be, but it's a lot easier to put them in now.
 
OP
B

BiTurbo228

Well-known member
Joined
Jun 13, 2016
Messages
257
Location
South of England
Well, it's warmer now, but considering that's because there's a named storm going on it's swapped cold for wet again. So, more work inside.

Eaves space all boarded up from the inside (though some are only held in with a couple of screws as I'll have to take them back out to do the lean-to rafters).

55032238054_eef3687383_b.jpg

Getting quite dark up here now!

As the left-hand wall has no boarding that needs to be removed again I chucked a couple of shelves up. 3.6m of shelving is nothing to sneeze at, though no doubt I'll need much more. I've also got some ideas about how to make best use of the space underneath them, as otherwise the pitch of the roof makes it difficult to access.

55032317090_75d2bc444d_b.jpg

The other thing I've been thinking about is that I've got quite a few big chunky things (gearboxes, engine blocks etc.) that are really annoying to have to work around just lying on the floor, but are also a pain in the backside lugging up a ladder (especially the circa 50kg LT77 and R380 I have). So some mechanism to get those upstairs would be very welcome.

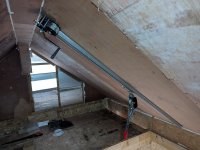
The easiest option would be to fix a winch to the ridge beam and lift things dead up the middle, but that would be quite difficult when there's a car in the way, so something to lift up from the corner of the garage would be best. This is what I've come up with:

55032237814_8d779b428b_b.jpg

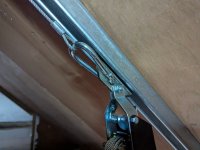
This is a piece of unistrut screwed into the rafter with a hand winch at one end, and a little trolley attached to a come-along at the other:

55031980151_f13465877f_b.jpg

So this lets me lift a load upwards with the come-along, and then pull it diagonally up the roof using the hand winch. From that point I'll either be able to lug it into the loft space, or better still fit another piece of unistrut with a trolley and come-along to the ridge beam longitudinally so I can transfer it to there and move it wherever it needs to go in the attic.

I've done some calculations to get me my safety factors so I know how much I can lift with it. The unistrut trolley and come-along are all well overspecced for what it'll see. 2 tons on the come-along, though it's a cheapy one so that'll probably be rated as rolling load (though the 5mm steel rope is rated to 1.6 tons, so that'll be fine). The unistrut trolley is about 500kg which is way more than I'll use. The screws holding it in should be around 160kg each, even with no load sharing between the 10 of them (inclusive of safety factors).

The lowest safety factor I can find is an assumption of the rafter strength. It's specced to UK building regulations for where I live, which requires a 75kg/m2 snow load to be factored in. That means each rafter I have should be capable of supporting nearly 150kg of snow load. So I'll use something like 75kg as the maximum I'll use it for, considering that snow load is evenly distributed but the winch will be something closer to a point-load (albeit distributed somewhat across the length of the unistrut). Plenty enough for most of the stuff I'll need it for.
 

larry4406

Well-known member
Joined
Jan 27, 2006
Messages
19,948
Location
Northern Virginia
Well, it's warmer now, but considering that's because there's a named storm going on it's swapped cold for wet again. So, more work inside.

Eaves space all boarded up from the inside (though some are only held in with a couple of screws as I'll have to take them back out to do the lean-to rafters).

55032238054_eef3687383_b.jpg

Getting quite dark up here now!

As the left-hand wall has no boarding that needs to be removed again I chucked a couple of shelves up. 3.6m of shelving is nothing to sneeze at, though no doubt I'll need much more. I've also got some ideas about how to make best use of the space underneath them, as otherwise the pitch of the roof makes it difficult to access.

55032317090_75d2bc444d_b.jpg

The other thing I've been thinking about is that I've got quite a few big chunky things (gearboxes, engine blocks etc.) that are really annoying to have to work around just lying on the floor, but are also a pain in the backside lugging up a ladder (especially the circa 50kg LT77 and R380 I have). So some mechanism to get those upstairs would be very welcome.

The easiest option would be to fix a winch to the ridge beam and lift things dead up the middle, but that would be quite difficult when there's a car in the way, so something to lift up from the corner of the garage would be best. This is what I've come up with:

55032237814_8d779b428b_b.jpg

This is a piece of unistrut screwed into the rafter with a hand winch at one end, and a little trolley attached to a come-along at the other:

55031980151_f13465877f_b.jpg

So this lets me lift a load upwards with the come-along, and then pull it diagonally up the roof using the hand winch. From that point I'll either be able to lug it into the loft space, or better still fit another piece of unistrut with a trolley and come-along to the ridge beam longitudinally so I can transfer it to there and move it wherever it needs to go in the attic.

I've done some calculations to get me my safety factors so I know how much I can lift with it. The unistrut trolley and come-along are all well overspecced for what it'll see. 2 tons on the come-along, though it's a cheapy one so that'll probably be rated as rolling load (though the 5mm steel rope is rated to 1.6 tons, so that'll be fine). The unistrut trolley is about 500kg which is way more than I'll use. The screws holding it in should be around 160kg each, even with no load sharing between the 10 of them (inclusive of safety factors).

The lowest safety factor I can find is an assumption of the rafter strength. It's specced to UK building regulations for where I live, which requires a 75kg/m2 snow load to be factored in. That means each rafter I have should be capable of supporting nearly 150kg of snow load. So I'll use something like 75kg as the maximum I'll use it for, considering that snow load is evenly distributed but the winch will be something closer to a point-load (albeit distributed somewhat across the length of the unistrut). Plenty enough for most of the stuff I'll need it for.
Clever arrangement and use of the unistrut, winch, trolley, and come-along.
 
To avoid these ads, REGISTER NOW!
OP
B

BiTurbo228

Well-known member
Joined
Jun 13, 2016
Messages
257
Location
South of England
Lt77 & R380-now you are speaking my langauge....:)
Indeed! Though mine are of the RWD variety (even the R380, which was a lucky find...). I do have a transfer case from a Disco knocking around in the parts pile, but no real plans for it! I bought it with the idea of cramming an AWD drivetrain into an MGB, but that's a looong way down the projects list...
 
OP
B

BiTurbo228

Well-known member
Joined
Jun 13, 2016
Messages
257
Location
South of England
Next few step forwards. Finally got round to cladding the back face, which involved various degrees if clambering through hedges (hence why I've been putting it off :D)

55046631919_4f7f7931cf_b.jpg

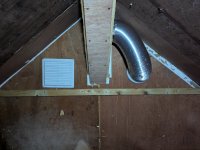
I've actually clad the whole back face, but the last photo I got was of the vents at the top:

55045475392_1b40312f71_b.jpg

One of those vents the loft space and the other vents the ridge and rafters. There's conflicting information as to whether you need to with breathable membrane, but extra ventilation can't hurt.

55046555883_618c18cdbc_b.jpg

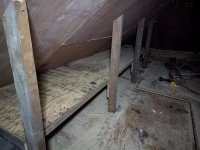
I've also stuck another board down in the loft to make it a bit less lethal walking from the back to the front, but still short enough that the winch should clear it:

55046631694_656609975d_b.jpg

Lastly, the big job for the past couple of days, hip tiling. It's painstaking work having to cement each tile in and then cut each abutting tile to shape, but managed to get one whole run done (and most of the front tiled). As usual, a photo of it nearly there as I lost the light by the time I was finished.

55045475272_e2405f65cc_b.jpg

A few more good weather days should see it done I think, which is a big milestone sorted. Then I get to do it all again with the other roof :D
 
OP
B

BiTurbo228

Well-known member
Joined
Jun 13, 2016
Messages
257
Location
South of England
Haha I got as far as picking up a rusted-out MGB on eBay for 99p, getting a gearbox and transfer case, and working out that I'll probably need a front diff from a Skyline (preferably a V-Spec) as it's on the correct side of the engine and the right ratio to match a Jag rear end.

But other projects that are a little more sensible got in the way (and by a little more sensible, I still mean stuff like making my Spitfire into a unibody and sticking a 400hp turbodiesel into my Jaguar XJ40, so not actually 'sensible' in the true meaning of the word ;)).
 
OP
B

BiTurbo228

Well-known member
Joined
Jun 13, 2016
Messages
257
Location
South of England
Thanks man! I am really too :) especially when I look back and think of how much work it's all been.

Yeah it's interesting. You never really see asphalt or metal shingles here. Asphalt flat rooves or single sheet shed rooves, but not shingles.

Bit of an update too :) after what was pretty much a month of non-stop rain the weather's finally broken and I've been able to cement in the final 7 hip tiles and button up the rest of the roof.

55110265043_9ceec26327_b.jpg

Looks alright if I say so myself!

I haven't been idle in the interim though. Filled the parking space in the middle with the first drainage layer:

55110058431_62db004be5_b.jpg

I've got my lighting plumbed in, but not yet connected to a switch (because that'll be out in the rain) or the consumer unit (because there's boards stacked in the way):

55082743851_ddb8ca231d_b.jpg
55082946178_231152fdbd_b.jpg

...and finished putting together all the little storage caster trays:

55109171142_643a8d22f2_b.jpg
55110264618_a4112a1256_b.jpg

Now, I've got a pretty tight deadline for getting all of this at least close to a workable situation. My folks are selling their place (where approx. 80% of my junk is stored) which completes on the 1st May! I've thought that if I can at least get the other garage closed up with membrane, battens and boards on to free up space in the more complete garage, and doors in place then I'm doing ok. That sounds doable, though working it in with actually moving everything over is going to be tight I think.

We'll see how we go!
 

littlebean

Well-known member
Joined
Mar 7, 2018
Messages
787
Now, I've got a pretty tight deadline for getting all of this at least close to a workable situation. My folks are selling their place (where approx. 80% of my junk is stored) which completes on the 1st May!
and they're under starters orders - race is on
 
OP
B

BiTurbo228

Well-known member
Joined
Jun 13, 2016
Messages
257
Location
South of England
Right! Quite the ride the past few months. Time for an update.

I've completely lost the chronology of stuff as it was all a bit of a blur, so I'll divvy it up job-by-job. Most of this stuff happened between the last update and the end of April.

The corridor

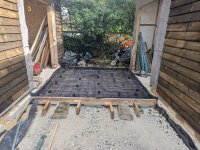
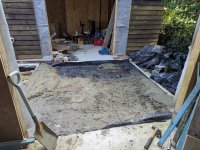
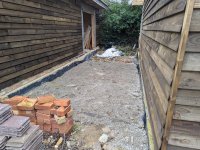
Job 1 was to get the two holes in the sides of the garages sealed up. First off was a bit of ground preparation between the two garages. Thin drainage layer covered by sheeting then Type 1.
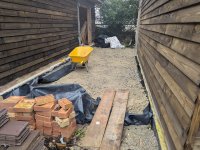
55399863259_7c22ff9f09_b.jpg

Shuttering and mesh...

55399861574_2818f92d44_b.jpg

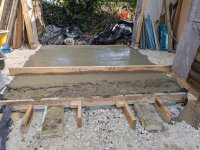
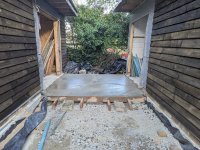
...and finally concrete.

55399859819_b0e339bab2_b.jpg
55398740127_c9ffdc8637_b.jpg
55400072775_756bc226f7_b.jpg

Dwarf wall, stud walls up (free-standing from the rest of the structure), and a couple of beams in for the flat roof.
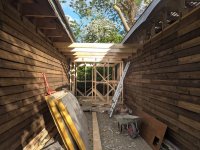
55398735097_fa1f74c0cb_b.jpg

First few soffits in as I won't be able to get to them afterwards (which I'm sure will never come and bite me in the backside...)
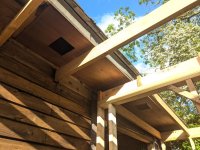
55399798233_f8a16c576c_b.jpg

And some horribly fiddly roofing attempting to seal off the corridor while allowing for relative movement between the two garages. I eventually ended up with boarding on the corridor rafters, then a double-layer of breathable membrane and black membrane between the two, covered by roofing sheets (which are screwed in before the corridor starts and after it ends, but not in the middle).
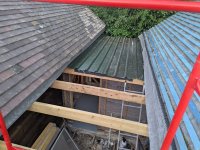
55399675611_a06a65f14d_b.jpg

And managed to actually get some paint on this bit before filling it with junk (which didn't even nearly happen for the rest of it!).
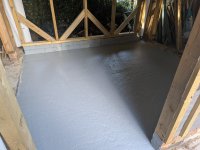
55399797318_1fca4be902_b.jpg

Roofing the second garage

Job 2 was to get the second garage weatherproof.

I'd managed to sort the insulation before this as it's a quiet job that can be done after kiddo has fallen asleep. Useful as it got the insulation out of the way!
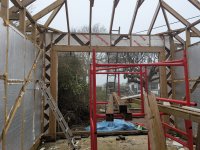
55398744192_1f0287896f_b.jpg

After that, job proceeded much as the other one. Membrane then battens, though having done it once before I managed to space them properly and finish the hips correctly so I didn't need to re-do those.

55399806973_4776d91997_b.jpg
55399685031_05538ed448_b.jpg

Good enough to be usable!

Oh, and layed a couple more metres squared of blockwork, which isn't roofing but I might as well mention here.

Shuttling stuff from one garage to the other

That helped get the rest of the battens up and out of the way, and let me decant a load of stuff from the near-complete garage to the other. Here's the stuff pre-moving (with a couple of boards already decanted).

55400075860_2b8c8ac410_b.jpg
55399806513_305581c110_b.jpg

This was necessary because of the looming deadline of getting my stuff hauled over from my folks' place!

Endless lugging heavy stuff from one place to another place 1.5 hours away

Jesus H Christ had I managed to accrue a lot of stuff over the years. I don't even think I got a 'before' picture, but this is the closest I have. Garage (to which I'd added a Fiat X1/9 engine, 2x O-Series turbo blocks, a spare set of Jag wheels and a zyto mini-lathe on a stand):
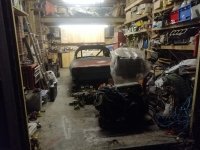
55431491846_a3ab42cd7b_b.jpg

Parts shed (which had lost the 2nd Spitfire, but gained a boatload of random junk, though not all of that stuff is mine):
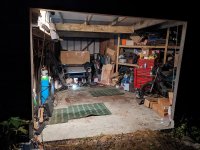
55431604653_58f831bcfd_b.jpg

Over the course of 3x horsebox loads, one flatbed transit, and innumerable car trips (timed up with childcare to save on fuel costs), we eventually got it to this:

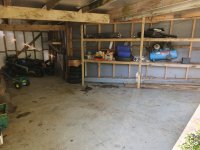
55399855019_61b052ac25_b.jpg
55431632359_6c05aa563d_b.jpg

...but now my nice fresh garage looks like this!
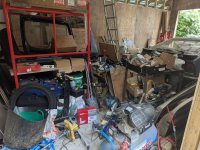
55400068305_3c1d7b29f0_b.jpg

On the positive side the winch worked an absolute treat shifting all my gearboxes and 4-cyl blocks up into the loft, which is also rammed full of stuff (though that's at least arranged in totes by car). Best decision ever was turning this into storage.

55398740917_b8c70cc68e_b.jpg
55399682506_0442bd028e_b.jpg

I reckon with a bit of sorting through and selling the bits I genuinely won't ever need I might even be able to fit all of my stuff up there!

Proper haul for the scrap metal man (again, not all mine):
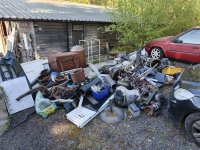
55431463186_ab2793b8be_b.jpg

We were going to take it ourselves but completely ran out of time. Didn't even manage to nab the copper water tank!

Last four engines loaded into a trailer at silly o'clock in the evening:
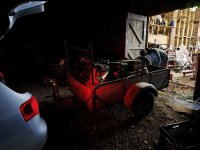
55430488952_63f4174eb4_b.jpg

...and unloaded at the other end with an engine crane that didn't have quite the same reach as the other one, meaning lots of fernangling to get the big ol' Jag lump out!

55398738602_448dec7611_b.jpg

Oh, but before that the trailer decided to eat its brake shoes. Because of course it did. So those needed replacing.

55399683671_50fde3dbdd_b.jpg

...not just junk but cars too!

First to make the leap were the Fiat and the Spitfire, which happily were the first ones that needed to go in and also towable with the VW Passat I bought off my sister as the Jag decided it wanted to pick up a couple of electrical faults right around MoT time...
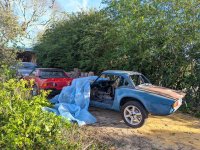
55400074580_3ec505b09d_b.jpg

Fit nice and snugly in the space vacated in the LH garage.

55399801553_099358f700_b.jpg

Of course, to move the Spitfire I needed to get the front wheels back on it, which went well until I realised I could only find one set of front bearings for the uprated stub axles it has. Not enough time to order another set, so I made this contraption:

55400074760_b56d69368b_b.jpg
55399683296_5afd98ef78_b.jpg

I would say this nearly worked, in that it did allow it to be gingerly coaxed onto and off the trailer with the help of a jack, but it also got caught on any tiny little bump and ended up pulling the screws off a couple of times and dropping the car on the floor. You can see the aftermath of one of those in the second picture where it's bent my brake heat shield. No major harm though. And of course, the wheel bearings turned up 2 days later (they were on top of the welder, because of course they were).

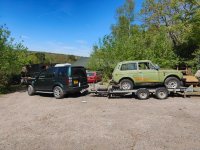
The rest were brought down by my brilliant mate in his Disco, which both put in some serious graft.
55430488992_0fc3f780df_b.jpg

Luckily, he lived with us for a good decade or so and managed to accrue a similar amount of stuff to me, and I could repay the favour by helping him clear his stuff out too.

Of course, the cars didn't come out easily. Because of course they didn't. The Lada was covered in brambles with seized brakes, but the Disco made short work of pulling that out and freeing them off.

The Alfa was surrounded by saplings (alright, 'lightly mature' saplings) and had a perished tyre valve that would only hold air if you got it into the perfect orientation.

55398740512_5a0e1ae241_b.jpg

Similar amount of tree surgery required to get the Citroen out, which at least started first flick with a new battery and pumped up its suspension (though the clutch cable is snapped so it couldn't move itself). Oh, and we discovered a leak on the fluid return so it dumps a load of LHM out as the suspension drops, but that's one of the least-worst places to spring a leak so I'm counting that as a win :D

55398740622_bc3c4f6acf_b.jpg
55399858229_a9230bd249_b.jpg

The old Alfa 156 V6 that has passed between me and my dad half a dozen or so times, and was my first cool car, was going begging so I ended up inheriting that. It's been off the road for a good few years now, but started first flick as well and drove itself onto the trailer. Brakes a bit sticky but otherwise absolutely fine. Picture of it in the foreground with me and kiddo waving from the roof!

55398734057_7d645ca4c5_b.jpg

Similarly, my dad's old Maserati 228 was going begging as well, so I ended up inheriting that. This might seem unusual given how rare these cars are (especially in RHD), but sadly it's probably fairly terminal. It's not actually that bad rust-wise for a Maserati (though it does have some), but the killer is that the windscreen is smashed. Considering they only ever made 400-odd of these and the windscreen isn't shared with any other car, the chances of finding one are slim-to-nil. Autoglass said they'd make us one, but only in a batch of 10 for £700 a pop over a decade ago. Still, either I'll sell it to someone who really, really wants a 228, or part it out to help keep other 228s on the road (and perhaps bankroll the purchase of a biturbo that's a little less work). Still, it means that after 20 years of my online handle being 'Biturbo228' I finally have a biturbo...

55399856349_147fe84ed3_b.jpg

Oh, and this one didn't come out easily either. It was resting on bricks on a slope, so whenever I jacked it high enough to get a wheel on it would teeter around worryingly. Lots of lumps of wood to give it something soft to land on that wasn't me if it did go, but I did manage to gingerly get it on its feet. I also had to make up a dummy strut as the front left's spring pan has completely disintegrated. Ended up making something out of some 50mm tube, a bit of 3mm plate and a 1/2" UJ to give it a bit of play on the orientation. Popped that in the knuckle loosely and it was enough to get it loaded onto the trailer.

Miraculously, amongst all of that I managed to get the little MGF to the point of being MoT'd and on the road, so I just drove that one back over :) though the brakes need a good bleed, I've got a set of actually refurbed suspension spheres (unlike the ones I bought from eBay), and some of the coolant hoses need new jubilees as they're looking a bit suspect.

55400077520_7049b9a8dd_b.jpg

Last over were the bikes, for which I bought two front wheel stands and bolted them to the car trailer. This worked brilliantly and kept them rock-solid when strapped up.

55431463061_4cb6158700_b.jpg
55431856195_122a9920aa_b.jpg

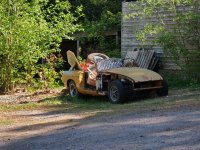
Oh, and the poor little 99p MGB got scrapped in the end. It was terminally rusty when I bought it, and has only got worse over the years. I pinched the non-sunroof roof skin which I've sold to someone, but that was the only panel on it that wasn't like a lace doily.
55431576353_481b9814a6_b.jpg

Also, in the midst of all of this our tumble dryer packed up and this is how far you have to dismantle the ****** thing to get to the temperature sensor. Nothing to do with the garage or moving, but it irritated me so much I thought I'd post it anyway! :D

55431867575_bf5211f73e_b.jpg

But still, all done! And with half a day to spare :D does that count as cutting it fine? I've no idea...

So if that was all up to April, what have you been doing since?

In case it hadn't come across well enough, I'd done quite a lot of work in a very short period of time! My knees hurt (which started with the roof tiling and I'd never given them enough time to recover), but broadly I was ok. I had planned to give myself a solid month off after all of this to recover, but a day or so after the move had finished I thought 'maybe I'll just get this pile of car batteries shifted down to the scrap man'. Loading them went fine, but while unloading them something went majorly ping in my lower back.

Now, I'd done this before and broadly know what to do. Get it seen to, rest, recuperate and then build up strength again gradually. Unfortunately, the way I was resting to help ease the strain on my lower back seemed to stress the newer old injury in my mid-back I'd done tiling in November. What then followed was a ****** stupid game of 'resting one part of my back injures the other' where I spent about two months flipping between my lower back or my mid back putting me out of action. As one part healed enough to stop hurting the other would cause issues, though after about the third iteration of this they started getting less worse whenever they'd get exacerbated again.

Something else I discovered is that a back injury can cause tight hamstrings which make your knees hurt, so as soon as the back started climbing out of its hole they started getting worse. Luckily the physio said there doesn't seem to be any meniscus or ligament damage, which is what I was concerned about as they take forever to heal (if they do). A lot of stretching out and they're on the mend too.

So here I am at the end of July, having only got back to light duties over the past week or two. Lesson well and truly learnt. If you know you need to rest, ****** do it! Probably something about stretching after exercise too...

On the positive side, some swallows had taken up residence in one of my garages and I got to watch them raise a brood while I was prevented from disturbing them too much. Must make sure they've got a good place to nest when they come back next summer!
 

Cris B

Well-known member
Joined
Mar 21, 2011
Messages
425
Location
Lancashire, UK
Great progress, new garage looks great. The hours of organising are always worth it, even if it does feel like a sliding puzzle game at times moving stuff from pillar to post as you organise different sections.

Have to say you’re a brave man taking on a thatched house, but if it’s recently been re-thatched it should be good for your lifetime. We used to live on a farm where all the old buildings had been converted. The old granary was thatched and the owners were always very nervous come fireworks night!
Was the inglenook capped or plated prior to you doing the chimney work and putting the wood burner in? That looks great BTW.
 
To avoid these ads, REGISTER NOW!
Top Bottom