welder4956
Well-known member
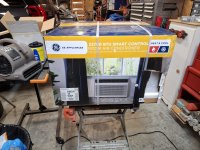
Started planning my next project. Pulled a sheet of OSB off the wall, relocated an outlet, took measurements, made a material list.


Cool, man!Started planning my next project. Pulled a sheet of OSB off the wall, relocated an outlet, took measurements, made a material list.
Yes, way cool!!Cool, man!
DIN breakout board?Spent most of the afternoon diagnosing and finally repairing the motor and control from my sister’s lift chair. After unsuccessfully poking and prodding with my VOM, I finally pulled the control apart enough to find the broken wire. Did a shoddy job of resoldering it. I was afraid of frying the board with too much heat. Put a wad of hot glue down to retain the wires, then had to sand a lot of it off to make the board fit back in the control. Reassembled rest of the mechanism, which I shouldn’t have messed with to begin with. I hadn’t taken any pictures, so I had to go online for a picture of the assembled unit, to get the mounting holes clocked correctly. I will get it back into the chair some time today.
So now I need some advice, how do you connect test leads to the tiny pins/sockets on a DIN plug. I wound up sticking short pieces of MIG wire in the holes, but never did find a way to contact the pins with less than four hands, which I don’t have.

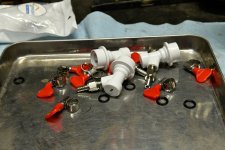
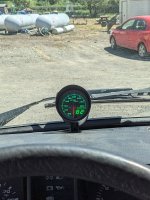
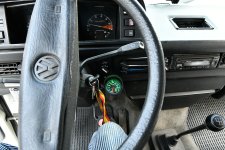
because it's too bright at the lowest setting and night mode to have constantly in my field of view. This should be much mo' betta', and doesn't interfere with anything.
Yeah, same here. Especially in the cabin--too many bright blue lights when I'm trying to sleep. I sometimes miss the days when LEDs were dim and red.I used black plastic tape yo cover 90% of the bright blue beacon my 1 to 3 hole Lighter plug adapter has. not sure what dimwit decided that was a great Idea but that tape went on at least 15 years back on the first night it was in use...
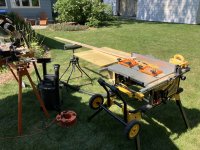
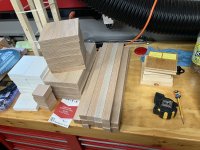
Your outfeed table came out real niceMade a bunch of sawdust, turned boards in to parts.

I hate my laptop touchpad, I use a logitech M330 wireless mouse. Just ordered my 2nd one last month, the original was needing multiple clicks to register.I have also landed on Logitech boards (and mice) as good adaptive equipment for arthritis and nerve damage. Personally, mice work better than touchpads for me.


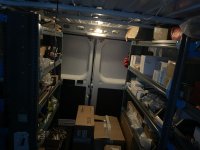

Where did you purchase the lights?Yesterday morning I upgraded the lighting in the back of my new work van. There was only the small light above the back doors wich does almost nothing. I picked up a string of 60 leds that are in groups of three. Strung them out and cut and spliced wires to place them where the light would be most useful. I'm still waiting on an on/off rocker switch to show up so I can use the lights regularly. The switch will go in the cage wall right by the sliding door. Conveninly there is a battery power source right at the B pillar on the passenger side.
Half the lights visable, the bundle is folded in half:
No lights on:
Dome light:
LED's
For now they are just stuck to the roof with the preinstalled double sided tape, I might have to add magnets or some hot glue to hold them, we'll see how long the tape holds up....
Plus it’s always fun to see Tom faint.you have to let people know you have a high tolerance for pain
 Finished cleaning up this old sprayer. Now it has a key fob for on and off.
I got them from eBay but have seen them on amazon as well.Where did you purchase the lights?
The new project is on hold till I can get materials tomorrow. Today was spent getting a lung biopsy and they told me not to drive for 24 hrs due to the sedative they gave me.Started planning my next project. Pulled a sheet of OSB off the wall, relocated an outlet, took measurements, made a material list.
Take care of yourself!The new project is on hold till I can get materials tomorrow. Today was spent getting a lung biopsy and they told me not to drive for 24 hrs due to the sedative they gave me.

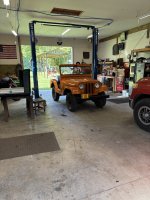
Report back on the Icon toolbox setup.Got tired of sorting through 7 different room around boxes to find what I wanted. I'm going to consolidate into this monster and be done. I figured it would come delivered and assembled. That to box really took a lot of planning to figure out how to get it up there. If I didn't have the car on the lift I would have used that. One more step to organization!
Nice! Looks like you got the Murphy bed option too!Got tired of sorting through 7 different room around boxes to find what I wanted. I'm going to consolidate into this monster and be done. I figured it would come delivered and assembled. That to box really took a lot of planning to figure out how to get it up there. If I didn't have the car on the lift I would have used that. One more step to organization!




It is early to say at this point. I thought that the box would have delivered pretty quickly but I had to wait a month to get it. Unfortunately I was not home when it was delivered so I don't know for sure if it came with instructions or not. Maybe they hauled them away with the trash. I do know that the assembly was not intuitive as I thought it would be. I ordered the stainless steel work surface option and there was no instruction on how the top connected. I did see holes in the top section but there were no corresponding holes in the stainless top. I ended up drilling and using some good size lag bolts to hold the top section on. I also got the side box option. It comes with an extra set of fixed wheels. When bolted to the main box this extra set of wheels made the box unable to steer when it was all bolted together. I made the call to remove that set of wheels. I also ended up with an extra bracket for something and have not found what it is used for or what it is supposed to do. I also ended up with like 6 more handles than I expected. It seemed that every piece comes with 2 handles. Honestly though it's not like I'm going to push this thing anyplace once it is full. I looked but didn't see where the drive engine is supposed to hook up on the thing. It will need that to move it anyplace. I went up another section higher than they suggested. I did this to store my rarely used items. I will still be able to line the top of the box with bulky storage. It is a bit hard to get up there but I have a small ladder that will work for that purpose. I'm glad I had a block and tackle to get the top box up there. They are a lot heavier than I expected, even when empty. So far the construction seems good and the drawers as they are getting loaded are operating smoothly. Time will tell.Report back on the Icon toolbox setup.
![20260729_181101[1].jpg](https://www.garagejournal.com/forum/data/attachments/2426/2426813-a88c0b366efc593ea580e03e1697ea70.jpg "20260729_181101[1].jpg")
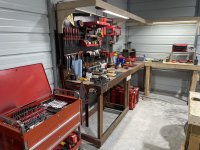
After 8 months of retirement i realized I wasn't really getting many projects done. And then it hit me, I didn't have a workbench!
$50 dollars later I had a Marketplace special sitting in the garage, and I was actually excited!
Yesterday I kinda fell into a craftsman stack from 1985 that needs some cleaning and painting. I'm thinking to myself, this will be a blast.
Sooo, after a few hours today sitting in the garage, fighting nasty black flies, sweltering temperatures, oppressive humidity, the ever present smell of rotting garbage, the faint hint of mouse urine in the background, a dvd player (it doesn't), that only gets 1 radio station (country, in Michigan??!!)and simple green that just smears grease around (AI says it can't be beat), I'm questioning what you all see in this.
Anywho, obligatory picture of new to me worktable that will probably only be used Wednesday nights (garbage day is Wednesday morning), in the fall (when temps drop), before winter (cause, too cold), and when its not raining (see humidity above).
any suggestions to improve these conditions are welcome!
(Ironically I just noticed the empty box "Oh, What fun it is..."
Adding insulation first is an even bigger game-changer.Adding A/C to the garage is a game changer.
It'll be nice if you can offload the preventive maintenance part on them. Good luck with it.....Usual chores. Got back to the tavern head rebuild project--then found that the brewers didn't feel it necessary to tell me we were out of beer nut gaskets. It takes three to swap out two heads and I just happened to have six stashed away. Ordered a hundred more. So I replaced two this AM and will do two more this afternoon--just waiting for them to come out of the USC.
We had three sous vide machines--I think about the cheapest money can buy--and I was notified that two were not working.
Well, there's your problem right there:
Scale from our lovely hard water. That one is toast as the elements are burned out due to being buried in the scale, an effective insulator. It appears that Inkbird (the maker of these) doesn't sell the elements and I'm not finding any other sources, so to the round file it goes.
This one was very close:
but it cleaned up nicely
and is now working fine--probably better than it has in a long time.
I got two out of three back up and running. I used the same sulfomic acid I use to descale our Rinnais, but I've asked the kitchen to run them in white vinegar for an hour each week. That should keep them scale-free.