To avoid these ads, REGISTER NOW!

Between 265 & 485 SQ/FT Basement Bike Cave and 3D Printing Workspace

Workspaces sized between 265 and 485 squarefeet.
To avoid these ads, REGISTER NOW!
OP
K

kppolich

Well-known member
Joined
Apr 7, 2020
Messages
357
Location
Eastern Iowa
Wired ethernet to the garage. A few drops of sweat were spilled this afternoon but overall a pretty simple job.

1.) find the wall chaise to the basement.
tempImagefKOrmw.jpg

2.) Stick a 15 ft fish stick down there where you see light
tempImage4MWVCm.jpg

3.) Pull it back up and cut the end leaving some slack in case you need to re-do anything.


tempImage4vVKK3.jpg
tempImagePAWDnA.jpg

4.) Re-do something
tempImageuUd14N.jpg

5.) Fix it -- yep I guessed right that I messed up the first RJ45 near the switch.
tempImageuaPdMB.jpg

6.) Tidy Up things
tempImagejvpCsx.jpg


7.) Voila
tempImagedokgvR.jpg
tempImageO3SiZM.jpg
 
OP
K

kppolich

Well-known member
Joined
Apr 7, 2020
Messages
357
Location
Eastern Iowa
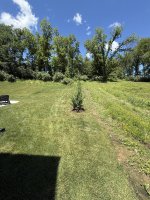
June house update, time for some tree's in the backyard. 7 Mountbatten Juniper's are what the wife liked, and we were in and out of the nursery in less than 30 minutes a week ago with an appointment to have them planted this week. Previously, we had some small dogwoods that didn't grow well at all in the area, hoping these more mature evergreens flourish for years to come.

2 young lads came and took care of business, planting the 7 trees in just under 90 minutes. Well worth the extra coin to not be out there myself arguing with the wife. Plus, if they install them the warranty on the tree is much better. 7 tree's 9.5ft apart as they will eventually be 12/15ft tall and 6/8ft wide.

All I had to do was put some flags in the ground where we wanted them to be planted and they took care of the rest. I helped them out by snapping a line with mason's string as well.

tempImageHllHRi.jpg
tempImagegKvZHT.jpg


Installed
tempImageg5poUV.jpg
tempImageACZEaM.jpg
tempImageimxJYb.jpg

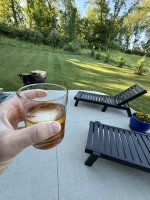
Then I put the Timemaster to work and cleaned the lawn up before firing up the Recteq and making a little Old Fashioned with some Blue Run Rye to ease the pain dropping 2 grand on some trees. Is this what getting old feels like?
tempImagekw0gLn.jpg
 

Attachments

  • tempImage8LJOM3.jpg
    tempImage8LJOM3.jpg
    2.1 MB · Views: 3
OP
K

kppolich

Well-known member
Joined
Apr 7, 2020
Messages
357
Location
Eastern Iowa
Tree's are in and doing good, but I want more control over watering them. Slower watering mostly and being able to water them all at once.

Irrigation Project queue'ing up!
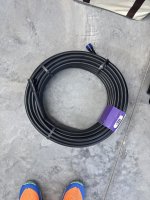
-Had to get 100ft of main line, but I'll only use ~65 ft.
-Had to get 10 of the 2 gallon per hour flags, but I'll only use 7 of them.

I think I'll dig a shallow trench and bury the main line ~3 or 4 inches under the ground and have it run 4 to 5 inches away from the trunk while coming up out of the mulch then going back down between trees.

I'll probably do something to hide where the hose will connect, so I can just hook it up 3 days a week and set a 2 to 3 hour timer.

YGQLEh9.jpeg

tAHfsWj.jpeg
 

Xti04

Well-known member
Joined
Nov 11, 2016
Messages
2,430
I did drip irrigation for my trees when they were all new. Helped get them established. I had bought distressed trees and between watering, holly tone and mulch they came out pretty well.
 
OP
K

kppolich

Well-known member
Joined
Apr 7, 2020
Messages
357
Location
Eastern Iowa
Well it finally rained here which helped soften the ground a bit. I then soaked the area a bit to help myself out digging the small trench for the 5/8 poly pipe. I still think I need a regulator, but its in and working great as far as I can tell.

Hose female end
tempImagedrxVxI.jpg


Laying the pipe out over the fresh trench. I then used the small hand shovel to widen things out as needed.
tempImageCPDJbQ.jpg


Poly in trench, then I stitched the two sides back to gather to cover things up and gave it a good soak too. I expect some damage here short term, but I'm OK with that.
tempImageOKO9Zs.jpg

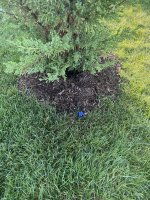
Poly pipe coming up to the surface, I parted the mulch and got it running by the tree stem/trunk then packed down the mulch/dirt around it.
tempImagedfhcte.jpg


Voila - 2 gallons per hour right where I want it.
tempImageGVukb9.jpg
 
To avoid these ads, REGISTER NOW!
OP
K

kppolich

Well-known member
Joined
Apr 7, 2020
Messages
357
Location
Eastern Iowa
Back to the 3D printing space today after work. I had a buddy wanting to use his Apple Watch as a cycling computer when pedaling around town and his wrist wasn't going to cut it.
I found a model or two, remixed them both to work with his Garmin out front mount vs the Wahoo mount it was originally designed for.

Both versions are---OK. One you have to screw together, the other is nicer and 1 piece but its a PITA to get that watch out of there which I guess isn't a bad thing.


Wahoo Original 44mm


Garmin Version for 44mm
MgeQlFL.jpeg

I also remixed it to account for 46mm Apple Watches vs the 44mm.
3cwFFFG.jpeg

KJaEetw.jpeg
Screw together Version, 44mm, Garmin


rMS8Ozb.jpeg
 
OP
K

kppolich

Well-known member
Joined
Apr 7, 2020
Messages
357
Location
Eastern Iowa
I got absolutely poured on last night, so let's share some pics and the process I use for re-waxing a Silca waxed chain. Usually get around 200-250 miles or so out of each chain and have 2 chains that I rotate on my road bike.

The process goes from left to right in this instance due to about 20 mins of road grime/down pour, etc

Chain gets wiped down with some degreaser on a microfiber to get the big stuff through the then goes into near boiling ultrasonic for 10mins or so to get the rest.
CL7MmC5.jpg

Chain is removed, wiped down with isopropyl using a different microfiber from our friends at Harbor Freight and then gets ready for wax. Menwhile, I removed the cassette and dropped it in the ultrasonic as it was still hot and ready.
wvTEc2M.jpg

Chain goes in at 125, swished around for a bit, sits for 5 mins, then I drop the temp to 100 for another 10 mins or so before dropping it to 75 and I remove it when the temp reaches 75 then I let it sit and drip dry for 15 mins or so.
nUb2DvU.jpg

Then I run it thought my 3D printed wax breaker pulley thing for a minute or two then reinstall it on the bike.
 

boyboi

Member
Joined
Dec 6, 2022
Messages
23
Location
MPLS
Are you doing the ultrasonic clean on the chain every time, or just when things are in particularly bad shape? which model do you have and do you think a mtb cassette could fit in it? looks like your red cassette might be maxing out the basket.

Are you racing core 4 this weekend? I am registered, but it looks like you're getting 5 days straight of rain so i might bail.
 
OP
K

kppolich

Well-known member
Joined
Apr 7, 2020
Messages
357
Location
Eastern Iowa
I only use the ultrasonic if the chain is in bad/shape/rained on.
Otherwise a dip in boiling water to melt off the old wax and wipe down with isopropyl does the trick for me.

The model I have is pretty small (JX-010S) ~2 Liter

Yeah, biggest cassette that goes in is my 10-28 usually but my 10-30 that is on the kickr also fits.

Otherwise I can fit the XPLR (10-44) stuff in sideways and flip it every 5 mins. I like the small form factor but a little larger like 4L wouldn't hurt as those usually have a drain on them as well.
 
Last edited:
OP
K

kppolich

Well-known member
Joined
Apr 7, 2020
Messages
357
Location
Eastern Iowa
Tonight I did some scientific beer pouring and in turn, beer drinking.

Its been little warm in the garage, 80-85 according to the smart thermostat out there and well, the first pour is always a little foamy and I suspected the temp in the tower was high as its an older model that doesn't have a fancy 'tower chiller'

So I started by measuring the tower temp, tap temp, and first pour beer temp.
Then I poured myself a second beer and measured all 3 again.

I have a tower cooler coming later this week. Basically a fan that lives inside the refrigerator cabinet and has a hose on it that you put into the tower so it helps pull cold air from down low up into the tower.

Also, pictured below is a neoprene tower cover. Insulation and such which I'll be installing as well. To do that, I need to remove the tap itself, which involves disconnecting the keg for a minute or two and thus, leaving the door open.

I started tonight with the baseline tests.
Beer pour #1 Beer itself came out at 50F, tower temp was 80F, after the pour, and Tap Temp was 60F after the pour.
Beer pour #2 Beer itself came out at a crisper 44F, tower temp was still 80F, and the Tap Temp dropped to 53F.


I'll likely need to drop the thermostat temp a bit to get the beer a little colder as it should be pouring around 40-42F for this Mango Cart, otherwise no suprises here -- the first pour is a little foamy usually and the second is much better, third is perfect as the temps keep dropping.

I did leave a glass of water inside of the cabinet itself to get to temp and will grab a reading on that before bed this evening.

Cheers!

tempImageiZpKfb.jpg
 
To avoid these ads, REGISTER NOW!
Top Bottom