To avoid these ads, REGISTER NOW!

Between 705 & 1200 SQ/FT New home and 3 car garage in Melbourne, Australia

Workspaces between 705 and 1200 squarefeet.

Coolabah

Well-known member
Joined
Jun 6, 2010
Messages
1,391
Location
2nd Floor, 3rd on the Right,Narooma, Australia
Yeah I know that trick. I over dramatised a bit in that post, just to emphasise that it was all a tight fit. While it was less straightforward than I expected, I'm quite pleased to have knocked this first step over.
Oh my Geoff- surely not a drama queen ? :)
Yep, appreciate the success of the first step ,
......................now you gotta err... queen up ??? and drill those holes !!!
 
To avoid these ads, REGISTER NOW!

hewey

Well-known member
Joined
Sep 5, 2014
Messages
1,690
Location
Blue Mountains, Australia
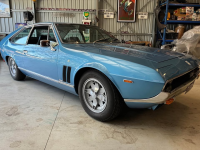
Saw this on marketplace, and thought I'd share it with some of the resident Aussie Ford Fans. Asking price is $125,000. Italian styling with an American muscle heart is such a great combo. I can see design elements of a Lambo Espada in the styling, but I think Iso did an even better job with theirs. And if you;re not familiar with Iso, check out their Griffo!

Iso Rivolta Lele and Iso Milano scooter collection for sale. The Lele is one of 50 factory RHD Leles produced from a total run of 285ish. Genuine low mileage at 19,851 miles. Factory fitted with Fords 351 Cobra Jet and C6 auto. Ownership history known from new, longest term owner being Norm Beechey. Complete with original sales brochures and recent receipts. Great car, much to like

1785805675773.png

1785805793404.png

1785805764349.png
 

kitdoctor

Well-known member
Joined
Oct 30, 2010
Messages
555
Location
Sunshine Coast, Australia
Saw this on marketplace, and thought I'd share it with some of the resident Aussie Ford Fans. Asking price is $125,000. Italian styling with an American muscle heart is such a great combo. I can see design elements of a Lambo Espada in the styling, but I think Iso did an even better job with theirs. And if you;re not familiar with Iso, check out their Griffo!
Saw that too. Only Italians could design wheels like that, very intricate.
 
To avoid these ads, REGISTER NOW!
OP
G

Geoff289

Well-known member
Joined
Nov 10, 2013
Messages
1,258
Location
Melbourne, Australia
I made a little bit more progress with the air con project today. That said, its going slower than I hoped both because I've had less time to devote to it than expected and it turning out to be trickier than I thought. With our upcoming overseas trip I now doubt I'll have it all done before the weather is such that I'll need it. Oh well!

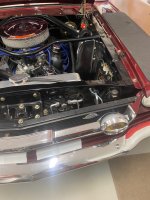
In finally getting the condensor and drier in place, the instructions then call for the relocation of the driver's side horn to share space with the passenger side one as it would be in the way of the hard lines through the radiator support in its original location. This, at least, was reasonably straightforward with just a small bit of wiring needed to extend over the other side.

HORNS.jpg

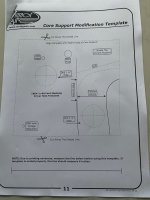
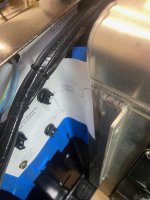
So the next step is to cut some holes in the radiator support for the hard lines to pass through. They provide this template to stick on the engine side so that the two 1 1/4 inch holes are in the right place.

TEMPLATE.jpg

Sounds simple but of course there are all sorts of bits and pieces in the way. First step was to remove the flash stainless steel coolant overflow tank but even this wasn't straightforward as the bolts holding it in place to a flange on the radiator itself were hard up against the plastic shroud around the electric fans and I couldn't get any sort of spanner on them. The fan shroud therefore had to be at least loosened at the top so it could be tilted out of the way enough. This was also pretty fiddly with tiny little allen headed screws holding it in place. Anyway, I got the overflow off. I think I'll probably have to modify how this is fitted to put it back as it'll interfere with the hard lines.

Before

OVERFLOW.jpg

and after

OVERFLOW 2.jpg

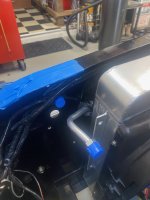
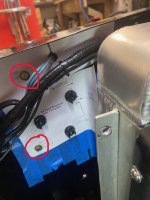
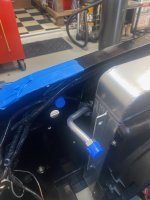
Then I removed the voltage regulator you can see in the "after" pic and, following Coolabah's earlier advice to the letter, applied masking tape to the drill site.

DRILL SITE.jpg

I may add another layer of tape before I hold my breath and start drilling. Before that, though, I have to find my right angle drill attachment as there's no space to do it without that. I bought it 12 years ago when I was rebuilding my previous Mustang, used it once for something to do with that, and put it somewhere safe, but that was at our previous house.
 
OP
G

Geoff289

Well-known member
Joined
Nov 10, 2013
Messages
1,258
Location
Melbourne, Australia
I found my right angle drill attachment but now find my step drill doesn't fit it as the attachment needs a hex on the drill shank so I'll be off to Total Tools in due course.

Pending that, I've got the paper template in place. The first couple of goes weren't successful as the paper was too flimsy and had zero structural strength. I then copied it on to some of my beloved's flash and expensive photo quality paper which is thicker and stiffer and much better. In the first pic below you'll see something not very common - how often do you see a piece of paper bolted to something? I found that to get it properly aligned and staying there some bolts and nuts through the OEM holes in the car that are marked on the template was effective. Then added a few magnets to hold it "flat" against the complex curve structure of the car.

TEMPLATE 2.jpg

TEMPLATE 3.jpg
 
OP
G

Geoff289

Well-known member
Joined
Nov 10, 2013
Messages
1,258
Location
Melbourne, Australia
I did most of this post somewhere over the Pacific on our way to Canada as i didn't get around to it before we left home. We are currently getting over jet lag in Vancouver.

So in the previous post I was pretty much all set to hold my breath and drill some big holes in my car as soon as I had the required equipment to hand. Like everything else so far, this proved to be more difficult than expected, specifically finding a large enough step drill - I needed a 32 mm hole - but with only a 1/4-inch hex shank to fit my right-angle drill adaptor. All the ones that were big enough seemed to have a 3/8 hex which wouldn't fit. Eventually Amazon came to the rescue, but it took quite a bit of poking around online to find what I needed.

The first hole, basically straight through the radiator support in line with the length of the car, went OK. However, the next problem arose with the second hole which is through a "return" in the radiator support and more or less in line with the width of the car. The pilot hole went OK but then it became apparent that the condensor itself was going to be in the way of the cone of the step drill before it got to the last step which is what I needed. A smarter man than me might have taken note that the instructions for drilling these holes has this as the very first step, i.e. before installing the condensor.

So, after all the hassle of getting it in, the condensor had to come out again. Then I was able to drill the second hole. I cleaned them both up with a small sandpaper roll on a pneumatic die grinder. Then I realised there wasn't enough room to safely use a spray can to touch up the bare metal on the circumference of the holes so had to go get a touch up paint pen, another delay.

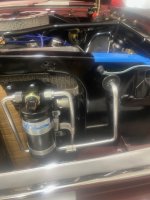
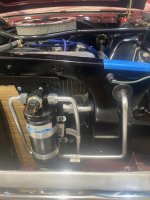
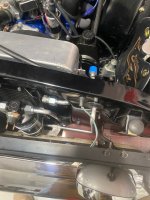
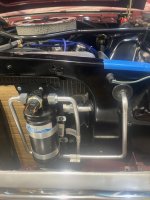
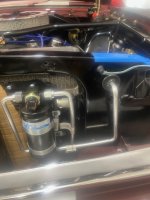
After all that, I wrestled the condensor back in, hooked up the hard lines and ran them through the new holes using the supplied grommets, and put the car back together.

rad supoort holes 1.jpg

rad supoort holes 2.jpg

Hard lines 1.jpg

Hard libes 2.jpg


Hard lines 3.jpg

Hard libes 4.jpg

Hard libes 5.jpg


You can see the flange on the side of the radiator that the overflow bottle bolts to and as I expected I am going to have to modify how this fits to clear the hard lines.

Anyway, I'm about to push the button to post this from our hotel in Vancouver so that'll be it on this project for five weeks.
 

Attachments

  • Hard lines 3.jpg
    Hard lines 3.jpg
    434 KB · Views: 1
  • Hard libes 2.jpg
    Hard libes 2.jpg
    511.7 KB · Views: 1
  • Hard lines 1.jpg
    Hard lines 1.jpg
    463.7 KB · Views: 1
Last edited:
To avoid these ads, REGISTER NOW!
Top Bottom